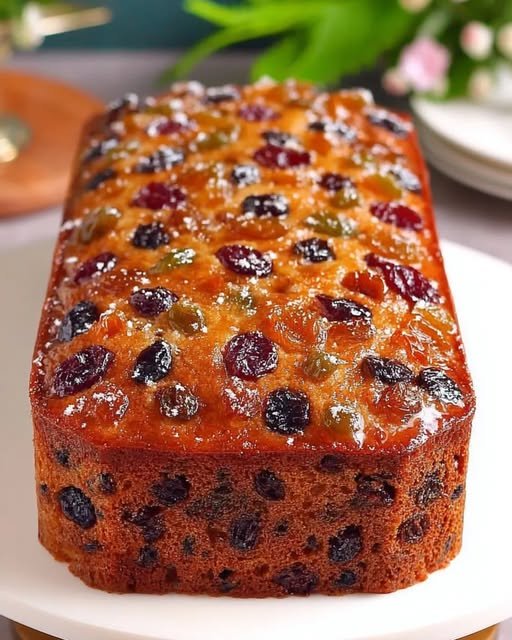
Eggless Buttermilk Fruit Cake

Eggless Buttermilk Fruit Cake

This moist and tender loaf is packed with warm spices and sweet dried fruits. It’s the perfect “quick bread” style fruit cake for when you want a holiday-worthy treat without the extra work.


Ingredients

  • 1 1/2 cups (200g) All-purpose flour

  • 3/4 cup (150g) Light brown sugar (firmly packed)

  • 2 cups (300g) Dried or candied fruits (raisins, currants, dates, figs, cranberries, apricots, or mixed peel)

  • 1 cup (240ml) Buttermilk (room temperature)

  • 1/2 cup (113g) Unsalted butter (melted and cooled)

  • 1 teaspoon Baking soda

  • 1/2 teaspoon Salt

  • 1/2 teaspoon Pure vanilla extract

  • Spices: 3/4 tsp cinnamon, 1/2 tsp nutmeg, 1/4 tsp ginger, 1/4 tsp cloves


Instructions

Step 1: Prep and Mix Dry Ingredients

  1. Preheat your oven to 175°C (350°F). Grease a 9×5 inch loaf pan and line it with parchment paper.

  2. In a large bowl, whisk together the flour, baking soda, salt, cinnamon, nutmeg, ginger, and cloves.

Step 2: Prepare the Fruit

  1. Add your 2 cups of dried/candied fruits to the flour mixture.

  2. Toss them gently so the fruit is coated in flour—this prevents the fruit from sinking to the bottom of the cake while baking.

Step 3: Mix Wet Ingredients

  1. In a separate bowl, whisk the melted butter and brown sugar until smooth.

  2. Stir in the buttermilk and vanilla extract.

Step 4: Combine and Bake

  1. Pour the wet ingredients into the dry fruit-and-flour mixture.

  2. Stir gently just until combined. Do not overmix, or the cake will be tough.

  3. Pour the batter into your prepared loaf pan and smooth the top.

  4. Bake for 55–65 minutes, or until a toothpick inserted into the center comes out clean.

Step 5: Cool

  1. Let the cake cool in the pan for about 10 minutes, then lift it out onto a wire rack to cool completely before slicing.
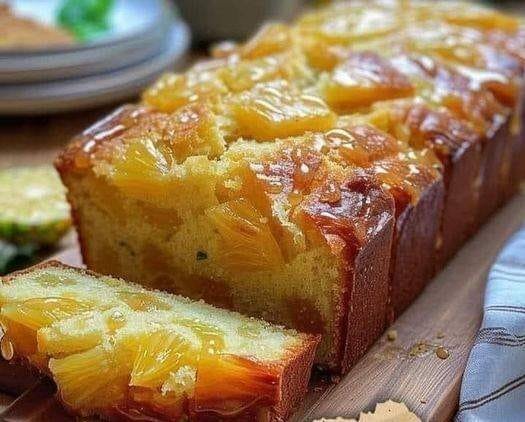
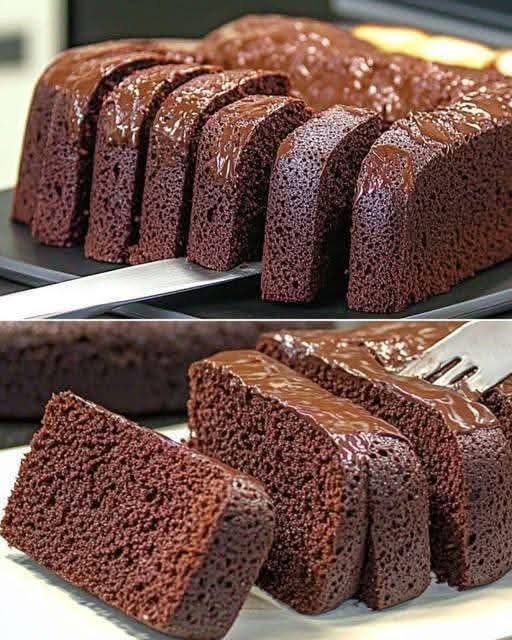
🍍 Glazed Pineapple Loaf Cake

🍍 Glazed Pineapple Loaf Cake

Prep time: 20 mins | Bake time: 50–60 mins | Servings: 1 loaf

Ingredients

For the Cake For the Pineapple Topping For the Glaze
1 ½ cups All-purpose flour 1 cup Pineapple chunks (fresh or canned) ½ cup Powdered sugar
1 tsp Baking powder 2 tbsp Brown sugar 1 tbsp Pineapple juice
½ tsp Salt 1 tbsp Butter (melted) ½ tsp Lime or lemon zest
½ cup Unsalted butter (softened)
1 cup Granulated sugar
2 Large eggs
½ cup Sour cream (or Greek yogurt)
1 tsp Vanilla extract

Instructions

1. Prepare the Pineapple

In a small bowl, toss your pineapple chunks with the melted butter and brown sugar. Set this aside; the sugar will draw out the juices to create a natural syrup.

2. Cream the Base

Preheat your oven to 350°F (175°C). Grease and line a 9×5 inch loaf pan with parchment paper. In a large bowl, cream the softened butter and granulated sugar until light and fluffy (about 3–4 minutes).

3. Mix the Wet & Dry

Beat in the eggs one at a time, then stir in the vanilla and sour cream. Gradually fold in the flour, baking powder, and salt. Do not overmix! Fold until just combined for a tender crumb.

4. The Layering Secret

  • Pour half the batter into the pan.

  • Scatter half of your prepared pineapple chunks over the batter.

  • Top with the remaining batter.

  • Press the rest of the pineapple chunks into the top (this creates that beautiful “sunken” look from the photo).

5. Bake

Bake for 50–60 minutes, or until a toothpick comes out clean. If the pineapple on top starts browning too fast, tent the pan loosely with foil for the last 15 minutes.

6. The Finishing Glaze

While the cake cools, whisk the powdered sugar, pineapple juice, and zest until smooth. Drizzle it generously over the cake while it is still slightly warm so it seeps into the nooks.


Pro Tip: For an extra “glistening” look like the image, brush the pineapple chunks with a little apricot jam or extra pineapple syrup right before serving!

Flourless Apple Chocolate Cake

Flourless Apple Chocolate Cake


Ingredients

  • 4 Medium Sweet apples (Red Delicious or Gala work best)

  • 4 Large Eggs

  • 5 tbsp Unsweetened cocoa powder

  • 1 tsp Baking powder

  • Olive oil (just a small amount for greasing the mold)


Instructions

  1. Prepare the Apples: Peel and core the apples, then cut them into small chunks. Steam or microwave the apple pieces until they are very soft.

  2. Blend the Base: Place the cooked apples into a blender or food processor. Blend until you have a completely smooth apple puree. Let it cool slightly so it doesn’t scramble the eggs.

  3. Mix the Batter: Add the 4 eggs, cocoa powder, and baking powder to the blender with the apple puree. Blend again until the mixture is well-combined and frothy.

  4. Prepare the Mold: Lightly grease a silicone mold or a small baking pan with a little olive oil. Pour the batter into the mold.

  5. Bake: Preheat your oven to 180°C (350°F). Bake for approximately 40 to 45 minutes, or until a toothpick inserted into the center comes out clean.

  6. Cool and Serve: Allow the cake to cool completely in the mold before flipping it onto a plate. This helps the structure set. You can top it with a little melted sugar-free chocolate or a dusting of cocoa powder if desired.


Q&A: Tips for Success

Q: Why did my cake sink in the middle after cooling? A: Because this recipe has no flour, it relies on the eggs for structure. It is normal for it to deflate slightly as it cools, similar to a souffle. Cooling it slowly helps minimize this.

Q: Can I make this in the microwave? A: Yes! You can “bake” it in a microwave-safe dish for about 8 to 10 minutes on high, checking every minute after the 7-minute mark until it is firm.

Q: Which apples are best to use? A: Since there is no added sugar, use the sweetest apples you can find, like Fuji, Gala, or Honeycrisp. Avoid tart apples like Granny Smith for this specific recipe.

Q: How should I store the leftovers? A: Since this cake is very moist due to the fruit, it should be kept in an airtight container in the refrigerator. it stays fresh for up to 3 days.

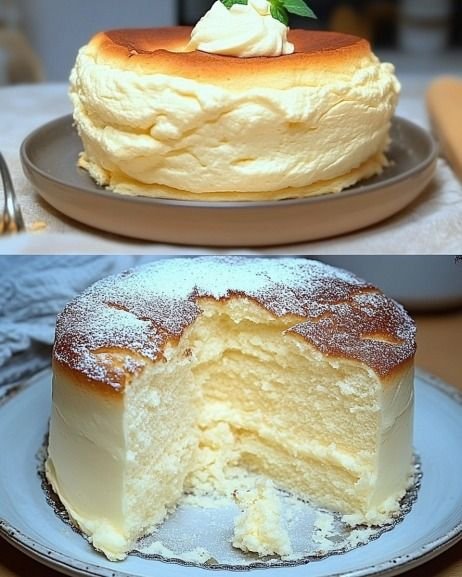
Keto cloud cake

Keto cloud cake

Ingredients

Dry Ingredients

  • Almond flour – ¼ cup (optional, for slight texture; can omit for ultra-light cake)
  • Baking powder – 1 teaspoon
  • Cream of tartar – ½ teaspoon (helps stabilize egg whites)
  • Salt – ¼ teaspoon

Wet Ingredients

  • Large eggs – 6, separated (room temperature for best volume)
  • Unsalted butter – ½ cup (melted) or coconut oil
  • Heavy cream – ¼ cup
  • Vanilla extract – 1 teaspoon
  • Keto-friendly powdered sweetener – ½ cup (erythritol, monk fruit blend, or allulose)

Optional Flavor Variations

  • Lemon zest – 1 teaspoon (for citrus version)
  • Cocoa powder – 1–2 tablespoons (for chocolate cloud cake)
  • Almond extract – ½ teaspoon

Equipment

  • Mixing bowls (large and medium)
  • Electric mixer or whisk
  • Spatula
  • 8-inch cake pan
  • Parchment paper
  • Cooling rack

Step-by-Step Instructions

Step 1: Preheat Oven and Prepare Pan

  • Preheat oven to 160°C (320°F).
  • Line an 8-inch cake pan with parchment paper.
  • Lightly grease the pan with butter or coconut oil.

Step 2: Separate Eggs

  • Carefully separate the egg yolks from the whites.
  • Place yolks in a medium bowl and whites in a large, clean, grease-free bowl.

Tip: Egg whites whip better at room temperature.


Step 3: Prepare Wet Mixture

  • To the egg yolks, add melted butter (or coconut oil), heavy cream, vanilla extract, and sweetener.
  • Whisk thoroughly until smooth and creamy.
  • Optional: Add almond flour or cocoa powder if using.

Step 4: Whip Egg Whites

  • Add cream of tartar and a pinch of salt to the egg whites.
  • Using an electric mixer, whip until stiff peaks form.
  • Peaks are stiff when the mixture holds shape but is still smooth.

Tip: Properly whipped egg whites are key to the cloud-like texture.


Step 5: Fold Wet and Whipped Whites

  • Add 1/3 of the whipped egg whites to the yolk mixture.
  • Gently fold using a spatula to lighten the batter.
  • Repeat with the remaining whites in two batches.
  • Use gentle folding to avoid deflating the egg whites.

Step 6: Pour into Pan

  • Pour batter into prepared cake pan.
  • Smooth the top with a spatula.

Step 7: Bake

  • Bake at 160°C (320°F) for 35–40 minutes.
  • Cake is done when lightly golden and a toothpick inserted comes out clean.
  • Avoid opening the oven during the first 25 minutes to prevent collapsing.

Step 8: Cool

  • Remove from oven and cool in pan for 10–15 minutes.
  • Gently remove from pan and transfer to a cooling rack.
  • Allow to cool completely before slicing or frosting.

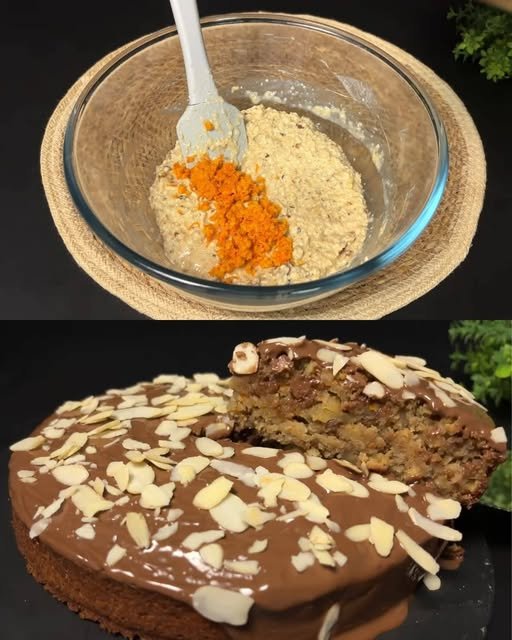
Orange Oatmeal Nut Cake

Orange Oatmeal Nut Cake

The texture appears beautifully moist, likely due to the orange juice soaking into the oats.

Core Ingredients:

  • 2 Oranges: Juiced and zested.

  • 1 cup Oatmeal: (90g) Use rolled oats for a chewier bite or quick oats for a softer texture.

  • 1/2 cup Nuts: (60g) Chopped almonds or walnuts for that essential crunch.

  • Topping: Melted dark chocolate and flaked almonds (as seen in the photo).


Quick Preparation Tip

  1. Hydrate the Oats: Mix the oatmeal with the orange juice and let it sit for about 10–15 minutes. This softens the oats and ensures the cake isn’t dry.

  2. Fold in the Zest: Add that bright orange zest and your chopped nuts into the batter last to keep the flavors and textures distinct.

  3. The Finish: Once baked and cooled, pour over melted dark chocolate and immediately sprinkle with flaked almonds so they stick to the glaze.

Note: Depending on your dietary preference, you might add a touch of sweetener (like honey or maple syrup) or a leavening agent (like a teaspoon of baking powder) if you want a fluffier rise.

Thank you for sharing this! It’s a fantastic example of a “healthier” dessert that doesn’t compromise on flavor.

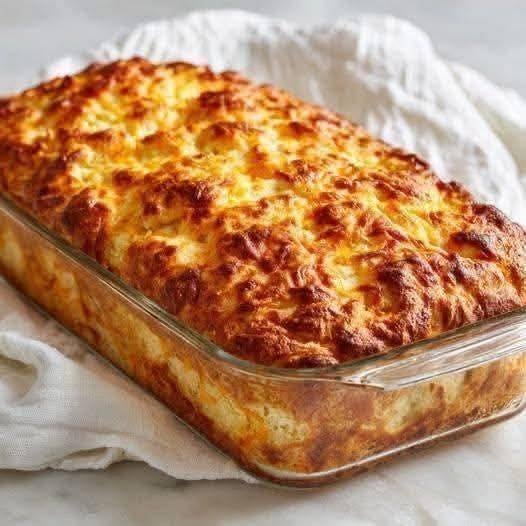
Cloud Bread (Zero-Carb Flourless Loaf)

Cloud Bread (Zero-Carb Flourless Loaf)

This “Cloud Bread” loaf is a fantastic option for anyone looking for a light, airy, and flourless alternative to traditional bread. It relies on the protein from eggs to create structure, making it a wonderful fit for low-carb or gluten-free lifestyles.

Dairy & Eggs

Ingredients

  • 3 Large eggs (separated into whites and yolks)

  • 3 tbsp Cream cheese   (softened to room temperature)

  • ¼ tsp Baking powder (or Cream of Tartar for stability)

  • 1 pinch Salt

  • Optional: Garlic powder, dried herbs, or a pinch of stevia for a sweet version.


Step-by-Step Instructions

  1. Preheat and Prep: Preheat your oven to 150°C. Lightly grease a small loaf pan or line it with parchment paper to ensure the bread releases easily after baking.

    Cheese
  2. Separate the Eggs: Carefully separate the egg whites from the yolks into two clean, dry bowls. Tip: Ensure there is no yolk in the whites, as even a small drop will prevent them from fluffing up.

  3. Mix the Yolks: In the bowl with the egg yolks, add the softened cream cheese and a pinch of salt. Whisk or blend until the mixture is completely smooth and no lumps of cream cheese remain.

  4. Whip the Whites: In the other bowl, add the baking powder (or cream of tartar) to the egg whites. Using a hand mixer or stand mixer, beat the whites on high speed until stiff peaks form. The whites should be thick and glossy, standing straight up when you lift the beaters.

  5. Fold Gently: Slowly and carefully fold the yolk mixture into the whipped egg whites using a spatula. Use a “light hand” to keep as much air in the mixture as possible—this is what gives the bread its height without using flour.

  6. Bake: Gently pour the batter into the prepared loaf pan. Bake for 25–30 minutes.

  7. Golden Finish: The bread is done when the top is a beautiful golden brown and it feels firm but springy to the touch.

    Dairy & Eggs
  8. Cool: Let the loaf cool in the pan for at least 10 minutes. As it cools, the texture will become more “bread-like” and easier to slice.


Why This Works

  • Zero Flour: By using whipped egg whites, you achieve a bubbly, airy texture that mimics a soft sponge  cake  or light bread without any grains.

  • High Protein: This recipe is almost entirely protein and healthy fats, making it very satisfying while staying within a low-point or low-carb budget.