Naturally Sweet Oatmeal, Apple & Carrot Bake

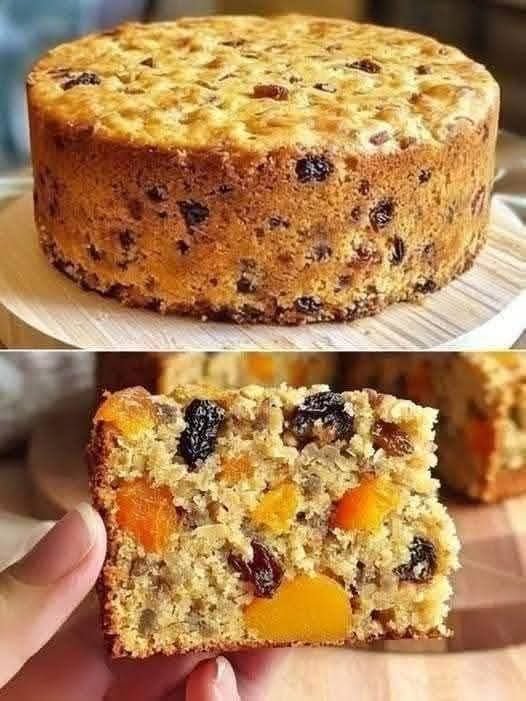
Naturally Sweet Oatmeal, Apple & Carrot Bake

This wholesome bake is a nourishing, flourless, and sugar-free treat. The sweetness is derived entirely from the natural sugars in the apples, carrots, apricots, and raisins, making it an excellent choice for a clean-eating lifestyle. It is soft, filling, and perfect for breakfast, snacks, or a healthy dessert.


Ingredients

Serves 6–8

  • 2 cups (200g) Rolled Oats (pulsed in a blender)

  • 1 tsp Baking Powder

  • 1 cup (240ml) Milk (unsweetened)

  • 1 large Carrot (finely grated)

  • 1 Apple (grated with peel for extra fiber)

  • 9 Dried Apricots (rinsed with hot water and chopped)

  • 4 tbsp Raisins (rinsed with hot water)

  • Optional: A pinch of cinnamon or a splash of vanilla extract (ensure they are sugar-free)


Step-by-Step Instructions

  1. Preparation: Preheat your oven to 180°C (350°F). Lightly grease a round baking tin or a rectangular baking dish with a small amount of oil or butter.

  2. Prepare the Oats: Place the rolled oats in a blender and pulse briefly until they reach a coarse, meal-like consistency. Do not blend them into a fine flour; keeping some texture is key for this bake.

  3. Mix Dry Ingredients: In a large mixing bowl, whisk together the pulsed oats and the baking powder until well combined.

  4. Add Wet & Fruit Ingredients: Stir in the milk, grated carrot, and grated apple. Add the chopped apricots and raisins.

  5. Combine: Mix all ingredients thoroughly. The batter should be thick, heavy, and moist.

  6. Bake: Pour the mixture into your prepared dish, smoothing the top with a spatula. Bake for 35–40 minutes, or until the bake is firm to the touch and the edges are lightly golden.

  7. Cool & Serve: Allow the bake to cool significantly before slicing. The texture improves and firms up as it cools, making it easier to serve.


Chef’s Notes for Best Results

  • The “Rinse” Secret: Rinsing the dried apricots and raisins in hot water before adding them to the batter softens the fruit and draws out their natural sweetness, which helps flavor the entire bake.

  • Texture: Ensure you grate the apple and carrot finely. This distributes moisture evenly so every bite is soft rather than chunky.

  • Storage: Store leftovers in an airtight container in the refrigerator to keep the bake moist. It can be enjoyed cold or gently reheated.


Health Benefits

  • Whole Oats: High in fiber to support digestion and heart health.

  • Carrots & Apples: Rich in vitamins and essential antioxidants.

  • No Added Sugar: A balanced option for those monitoring sugar intake or following specific nutritional programs.
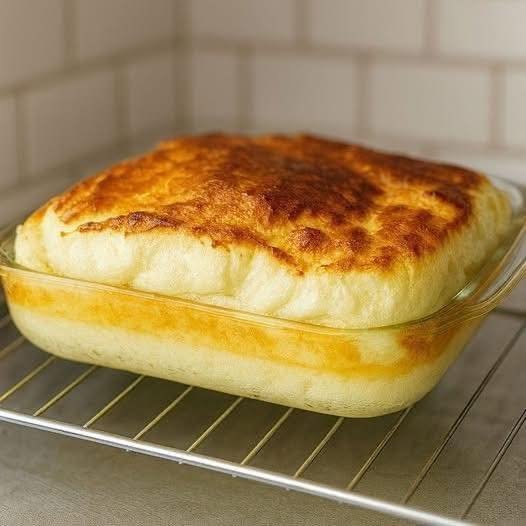

Fluffy 3-Ingredient Breakfast Soufflé Bake

Fluffy 3-Ingredient Breakfast Soufflé Bake

This high-protein, flourless breakfast uses the natural structure of eggs to create a tall, cloud-like texture that is both savory and satisfying.


Ingredients

  • 6 Large Eggs

  • 1 cup Greek Yogurt (Plain, full-fat or non-fat)

  • 1 cup Shredded Cheese (Cheddar, Mozzarella, or Gruyère)

  • Seasoning: A pinch of salt and black pepper


Step-by-Step Instructions

  1. Preparation: Preheat your oven to 375°F (190°C). Lightly grease a glass baking dish (approximately 8×8 inch or a similar small casserole dish) with a light coating of oil or butter.

  2. Separate and Whip: Carefully separate the egg whites from the yolks. Place the whites in a large, very clean glass or metal bowl. Use a hand mixer to beat the whites until they form stiff peaks. This aeration is the secret to achieving the impressive height seen in the photo.

  3. Mix the Base: In a separate bowl, whisk together the egg yolks, Greek yogurt, and half of the shredded cheese until the mixture is smooth. Stir in your salt and pepper.

  4. The Fold: Gently fold about a third of the whipped egg whites into the yolk mixture to lighten it. Then, using a spatula, very carefully fold in the remaining egg whites. Work slowly to avoid deflating the air bubbles that create the “poof.”

  5. Bake: Pour the mixture into your prepared dish and sprinkle the remaining half of the cheese over the top. Bake for 20–25 minutes until the top is a deep golden brown and the center has risen significantly.

  6. Serve: Like any soufflé-style dish, it is most impressive right out of the oven. Serve immediately while it is at its tallest and most fluffy.


Cooking Tips

  • The Yogurt: It provides a slight tang and a creamy density that keeps the eggs moist and prevents them from becoming rubbery.

  • The Cheese: Reserving half of the cheese for the top creates that beautiful, browned crust that seals in the heat.

Homemade Cheddar Quick Bread

Homemade Cheddar Quick Bread

Prep time: 10 mins | Bake time: 45 mins | Yields: 1 Loaf

Ingredients

The Dry Base:

  • 2 cups All-purpose flour

  • 1 tbsp Baking powder

  • ½ tsp Salt

  • 1 tsp Garlic powder (optional, but highly recommended)

  • 1 ½ cups Shredded sharp cheddar cheese (plus extra for the top)

The Wet Mix:

  • 1 cup Milk

  • 1 Large egg

  • ¼ cup Unsalted butter (melted)

  • 1 tbsp Honey or sugar

Optional Topping:

  • ¼ cup Extra shredded cheddar

  • 1 tbsp Fresh chopped parsley


Instructions

  1. Prep: Preheat your oven to 175°C (350°F). Grease a 9×5 inch loaf pan thoroughly with butter or non-stick spray.

  2. The Flour/Cheese Toss: In a large bowl, whisk together the flour, baking powder, salt, and garlic powder. Stir in the 1 ½ cups of shredded cheese.

    • Pro-Tip: Coating the cheese in the flour prevents the shreds from sinking to the bottom of the pan during baking.

  3. Wet Ingredients: In a separate medium bowl, whisk together the milk, egg, melted butter, and honey until smooth.

  4. Combine: Pour the wet mixture into the dry ingredients. Stir gently using a spatula until just combined.

    • Note: The batter will be thick and lumpy. Do not overmix, or the bread will become tough!

  5. Bake: Spread the batter evenly into the prepared loaf pan. Sprinkle the extra ¼ cup of cheese and the parsley over the top.

  6. Check for Doneness: Bake for 40–45 minutes. The bread is ready when the top is a deep golden brown and a toothpick inserted into the center comes out clean.

  7. Cool: Let the bread rest in the pan for 10 minutes before transferring it to a wire rack to cool completely.


✨ Customization Ideas

This bread is incredibly versatile. To make it a more substantial meal, try folding in:

  • Spicy Kick: ½ cup of diced jalapeños.

  • Savory Crunch: ¼ cup of cooked, crumbled bacon bits.

  • Herb Twist: Swapping parsley for fresh chives or rosemary.

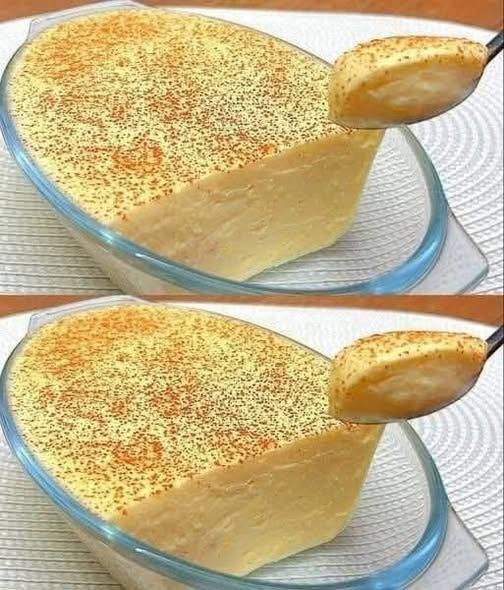
3-Ingredient Whipped Milk Mousse

3-Ingredient Whipped Milk Mousse

Ingredients

  • 2 cups Powdered Milk (Nido or similar full-cream milk powder works best)

  • 1 can (14 oz) Sweetened Condensed Milk (chilled for at least 2 hours)

  • 2 containers (approx. 14-16 oz total) Heavy Whipping Cream or “Media Crema” (must be very cold)

  • Optional: Cinnamon or cocoa powder for dusting the top.

Instructions

  1. Prep the Base: In a large chilled mixing bowl, combine the cold heavy cream and the cold condensed milk.

  2. Whip: Using an electric hand mixer or a stand mixer, beat the mixture on medium-high speed. As it starts to thicken, gradually add the powdered milk one cup at a time.

  3. Build Volume: Continue beating for about 3–5 minutes. You are looking for the mixture to double in volume and become thick enough to hold a soft peak (it should look like a dense, heavy whipped cream).

  4. Set: Pour the mixture into a glass dish. Smooth the top with a spatula.

  5. Chill: While it’s “ready” in 5 minutes, it tastes best if chilled in the freezer for 30 minutes or the fridge for 2 hours to get that “melt-in-your-mouth” consistency.

  6. Finish: Dust with cinnamon or extra powdered milk just before serving.


💡 Pro-Tips for Success

  • Temperature is Key: The secret to getting it thick without gelatin is having your cream and condensed milk ice cold.

  • The “Air” Factor: Don’t stop mixing until it looks fluffy. The air bubbles trapped by the milk powder are what give it that structure.

  • Flavor Twist: If you want to cut the sweetness, you can fold in some lime zest or a splash of vanilla extract at the very end.

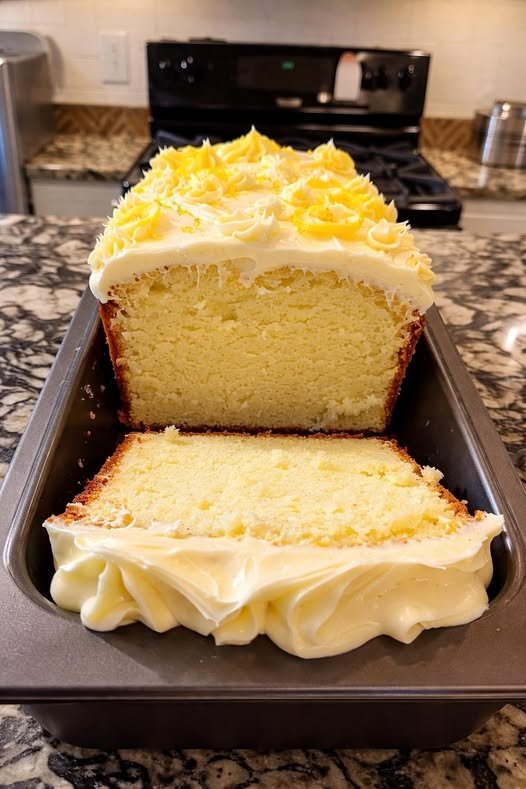
3-INGREDIENT WEIGHT WATCHERS LEMON CAKE

This guilt-free 3-Ingredient Weight Watchers Lemon Cake is the perfect sweet indulgence to enjoy without derailing your daily points count! Perfectly soft and moist, 3-Ingredient Weight Watchers Lemon Cake is the world’s easiest dessert! Ready in just 35 minutes, this sweet cake is perfect for satisfying any sweet tooth, with or without the optional vanilla glaze!

Ingredients

  • 15.25 ounces lemon cake mix (1 box)
  • 5.3 ounces lemon Greek yogurt
  • 1 cup water

Vanilla Glaze

  • 1 cup powdered sugar
  • 2 tablespoons milk
  • 2 tablespoons lemon juice
  • 1/4 teaspoon vanilla extract

Instructions

  • Preheat oven to 350 degrees F. Grease the inside of a Bundt pan. Set aside.
  • Mix all of the ingredients together in a mixing bowl until smooth. Pour into the prepared pan.
  • Bake for 30 minutes or until a toothpick inserted in the center comes out clean.
  • Remove from the oven and let cool to room temperature on a wire rack. Then turn the cake out onto a serving plate. Cut into 12 slices.
  • To make the glaze: Whisk all the ingredients together in a mixing bowl. Drizzle over the cooled cake.

Notes

  • WW 1 point per slice (without icing) based on 12 slices
  • Nutritional information is for the cake only. The glaze is not included.

Nutrition

Serving: 1 slice | Calories: kcal | Carbohydrates: 31g | Protein: 3 g | Fat: 2 g | Saturated Fat: 1 g | Cholesterol: 2 mg | Sodium: 274mg | Potassium: 16 mg | Sugar: 17g | Calcium: 84mg | Iron: 1 mg

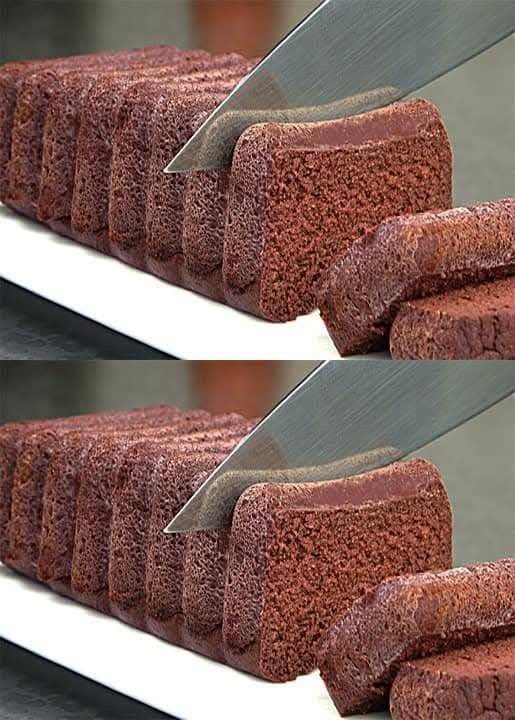
Two-Ingredient Apple Chocolate Cake

Two-Ingredient Apple Chocolate Cake

A dense, fudge-like dessert that relies on the natural pectin in apples to set. No flour, no eggs, and no added sugar needed!


Ingredients

  • 4 large Apples (sweet varieties like Fuji, Gala, or Honeycrisp work best)

  • 1/2 cup (50g) Unsweetened cocoa powder (high-quality cocoa will give the best flavor)

  • Optional: A pinch of cinnamon or 1/2 teaspoon vanilla extract for extra depth.


Instructions

Step 1: Prepare the Apples

  1. Peel and core the apples, then cut them into small, even chunks.

  2. Place the apple pieces in a saucepan with 2 tablespoons of water. Cover and cook over medium-low heat for about 10–12 minutes until they are very soft and can be easily mashed with a fork.

  3. Alternatively, you can steam the apples until tender.

Step 2: Blend until Smooth

  1. Transfer the hot, softened apples into a blender or food processor.

  2. Blend until you have a completely smooth apple puree. It is important to do this while the apples are still warm.

Step 3: Add the Cocoa

  1. Add the unsweetened cocoa powder (and optional cinnamon or vanilla) to the blender.

  2. Blend again until the cocoa is fully incorporated and the mixture looks like a thick chocolate ganache.

Step 4: Set the Cake

  1. Line a small loaf pan or a round 6-inch silicone mold with parchment paper (or lightly grease with a tiny bit of coconut oil).

  2. Pour the chocolate-apple mixture into the mold and smooth the top with a spatula.

  3. Let it cool to room temperature, then place it in the refrigerator for at least 4–6 hours (overnight is best) to allow the natural pectin to set the cake into a firm, sliceable texture.

Step 5: Serve

  1. Once firm, carefully lift the cake out of the mold.

  2. Slice into thick pieces. You can enjoy it plain or dust the top with a little extra cocoa powder or some fresh raspberries.


Helpful Tips

  • Sweetness: Since there is no added sugar, the sweetness depends entirely on your apples. If your apples are tart, you may want to stir in 1 tablespoon of honey or a few drops of stevia during the blending stage.

  • Texture: Ensure the apple puree is very smooth. Any lumps will affect the “fudge” consistency of the final cake.

  • Storage: Keep this cake in an airtight container in the refrigerator. It stays fresh and delicious for up to 4 days.