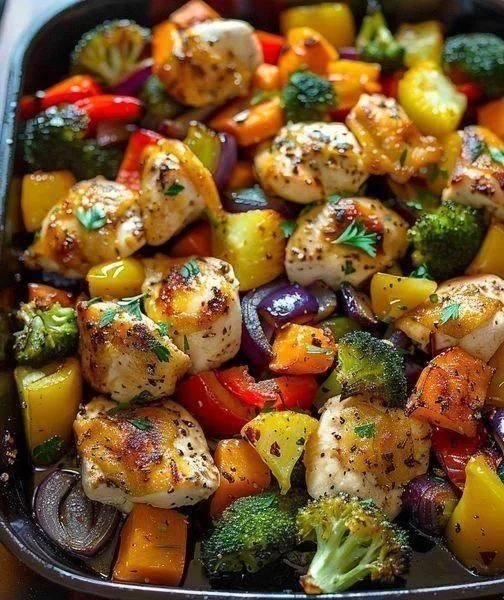
Healthy Roasted Chicken & Veggies

Recipe: Healthy Roasted Chicken & Veggies

Description: A vibrant, one-pan wonder featuring juicy chicken breast and a rainbow of caramelized vegetables. It’s seasoned with a Mediterranean-inspired herb blend that makes healthy eating feel like a cheat meal.

  • Prep time: 15 minutes

  • Cook time: 25–30 minutes

  • Servings: 4

  • WW Points: Approx. 0-3 Points (depending on your specific plan and the amount of oil used).

Ingredients

  • 1.5 lbs Boneless, skinless chicken breasts, cut into 1-inch cubes

  • 2 cups Broccoli florets

  • 1 large Zucchini, sliced into half-moons

  • 1 cup Bell peppers (any color), chopped

  • 1 cup Red onion, wedged

  • 1 cup Cherry tomatoes

  • 2 tbsp Extra virgin olive oil

  • 1 tsp Garlic powder

  • 1 tsp Dried oregano

  • 1 tsp Smoked paprika

  • Salt & Pepper to taste

  • Optional: Fresh lemon wedges and parsley for garnish

Instructions

  1. Preheat & Prep: Preheat your oven to 200°C (400°F). Line a large sheet pan with parchment paper or spray lightly with non-stick cooking spray.

  2. Season: In a large bowl, toss the chicken cubes and all vegetables with olive oil, garlic powder, oregano, paprika, salt, and pepper. Ensure everything is evenly coated.

  3. Spread: Spread the mixture in a single layer on the baking sheet. Tip: Don’t crowd the pan, or the veggies will steam instead of roast.

  4. Roast: Bake for 20–25 minutes, or until the chicken reaches an internal temperature of $74^{\circ}C$ ($165^{\circ}F$) and the vegetables are tender-crisp.

  5. Finish: Squeeze fresh lemon juice over the top before serving to brighten the flavors.

Nutritional Info (Per Serving)

Nutrient Amount
Calories 285 kcal
Protein 38g
Total Fat 9g
Carbohydrates 12g
Fiber 4g

Tips & Notes

  • Uniformity is Key: Cut the chicken and harder veggies (like onions) into similar sizes so they finish cooking at the same time.

  • The “Zero Point” Hack: If you are on a plan where chicken is 0 points, you can reduce the olive oil to 1 tbsp and use a pump of olive oil spray instead to bring the total points down further.

  • Meal Prep: This holds up beautifully in the fridge for up to 4 days. It’s excellent served cold over a bed of spinach the next day.

Benefits

  • High Volume: You can eat a very large portion for very few calories.

  • Anti-Inflammatory: The combination of cruciferous vegetables (broccoli) and healthy fats (olive oil) supports heart health and reduces inflammation.

  • Metabolic Boost: The high protein content helps maintain muscle mass and keeps you full longer.

Q&A

Q: Can I use chicken thighs instead?

A: Yes, but keep in mind that chicken thighs will increase the WW Point count and fat content. They are more forgiving and stay juicier, though!

Q: My vegetables are mushy. What happened?

A: You likely overcrowded the pan. If the ingredients are touching too much, the moisture escaping creates steam. Use two pans if necessary!

Q: Can I swap the vegetables?

A: Absolutely. Asparagus, green beans, or cauliflower work great. Just avoid starchy veggies like potatoes if you’re trying to keep the Points at a minimum.
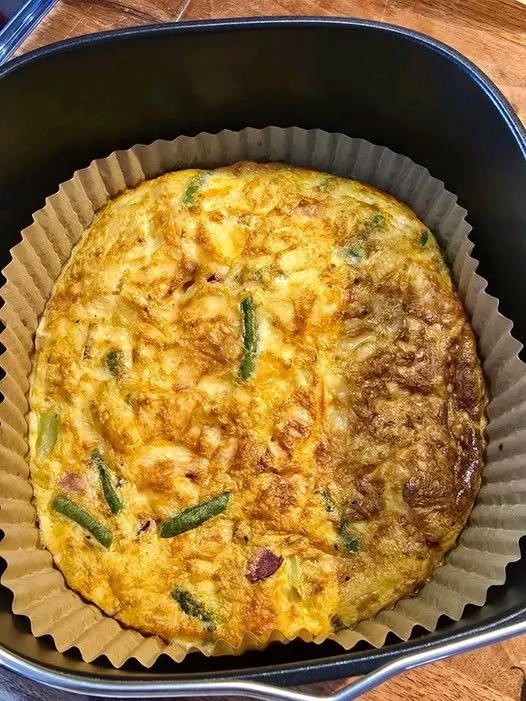
Fluffy Air Fryer Omelet

Fluffy Air Fryer Omelet

Ingredients

  • 2–3 large Eggs

  • 2 tbsp Milk or heavy cream (for extra fluffiness)

  • ¼ cup Shredded cheese (cheddar, mozzarella, or feta)

  • ¼ cup Finely chopped veggies (bell peppers, onions, or spinach)

  • Salt and pepper to taste

  • Optional: Diced ham, cooked bacon, or fresh herbs like chives.


Step-by-Step Instructions

1. Prep the Liner

Place a parchment paper liner or a small, greased air-fryer-safe silicone mold/pan into your air fryer basket.

Tip: Using a liner with raised sides helps contain the eggs and makes cleanup non-existent!

2. Whisk the Base

In a medium bowl, whisk together the eggs, milk, salt, and pepper until the mixture is well-combined and slightly frothy.

3. Add the Fillings

Stir in your chopped veggies, cheese, and any proteins. Ensure the ingredients are evenly distributed so every bite is flavorful.

4. Pour and Set

Pour the egg mixture into your prepared liner or pan. Make sure it’s sitting level in the air fryer basket.

5. Air Fry

Set your air fryer to 350°F (175°C). Cook for 8 to 12 minutes.

  • At 8 minutes: Check for doneness. The center should be set and no longer jiggly.

  • If needed: Add another 2 minutes if the top hasn’t turned a light golden brown yet.

6. Serve

Carefully lift the liner or pan out of the air fryer. Let it sit for 1 minute to firm up, then slide the omelet onto a plate.


Why This Works

This method is perfect for anyone following a high-protein or low-carb lifestyle. Since there’s no flipping involved, your omelet stays perfectly intact, and you can get other things done while it cooks!

Air Fryer Grilled Cheese Sandwiches

Air Fryer Grilled Cheese Sandwiches

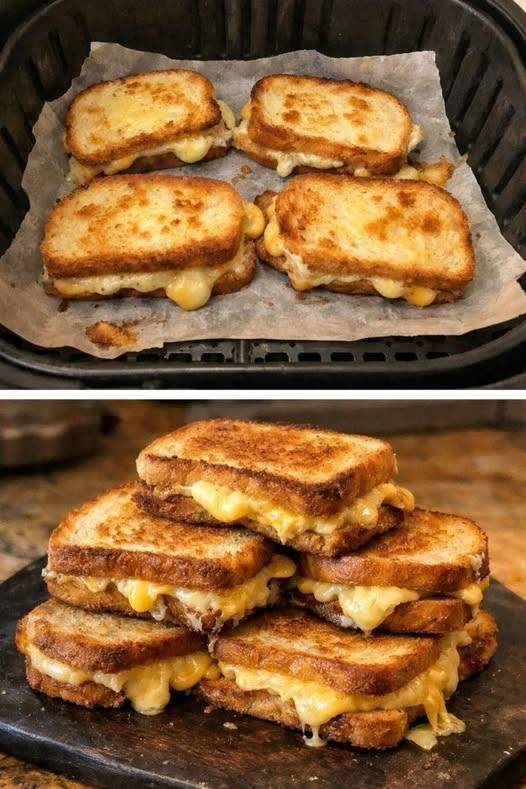
These sandwiches are a household favorite because they achieve a perfectly golden, crispy exterior with a gooey, melted center using the air fryer. With just three simple ingredients, they are quick to prepare and consistently delicious.

Ingredients

  • 8 Slices of bread (Whole grain or sourdough work well for a hearty crunch)

  • 8 Slices of low-fat sharp cheddar (or your favorite melting cheese)

  • Light butter or olive oil spray (for a golden finish)


Step-by-Step Instructions

  1. Prepare the Bread: Lay out your bread slices and lightly coat one side of each slice with butter or a quick spray of olive oil.

  2. Assemble the Sandwiches: Place two slices of cheese between two slices of bread, ensuring the buttered or oiled sides are facing outward.

  3. Set Up the Air Fryer: Line your air fryer basket with a piece of parchment paper to catch any stray drips of cheese and ensure easy cleanup.

  4. Arrange for Airflow: Place the sandwiches in the basket in a single layer, making sure they do not overlap. This allows the hot air to circulate evenly for maximum crispiness.

  5. Cook to Golden Perfection: Air fry at 180°C for about 3–4 minutes.

  6. The Flip: Carefully flip each sandwich over and cook for an additional 2–3 minutes. The sandwiches are done when the bread is toasted to a beautiful golden brown and the cheese is fully melted and bubbling.

  7. Serve Immediately: Remove from the basket and let them sit for one minute before slicing. This keeps the cheese from running out too quickly.


Variations

  • Protein Boost: Add a thin slice of lean turkey or ham inside before air frying.

  • Spice it Up: Sprinkle a tiny pinch of garlic powder or dried oregano on the buttered side for an aromatic twist.

These sandwiches are a household favorite because they achieve a perfectly golden, crispy exterior with a gooey, melted center using the air fryer. With just three simple ingredients, they are quick to prepare and consistently delicious.

Ingredients

  • 8 Slices of bread (Whole grain or sourdough work well for a hearty crunch)

  • 8 Slices of low-fat sharp cheddar (or your favorite melting cheese)

  • Light butter or olive oil spray (for a golden finish)


Step-by-Step Instructions

  1. Prepare the Bread: Lay out your bread slices and lightly coat one side of each slice with butter or a quick spray of olive oil.

  2. Assemble the Sandwiches: Place two slices of cheese between two slices of bread, ensuring the buttered or oiled sides are facing outward.

  3. Set Up the Air Fryer: Line your air fryer basket with a piece of parchment paper to catch any stray drips of cheese and ensure easy cleanup.

  4. Arrange for Airflow: Place the sandwiches in the basket in a single layer, making sure they do not overlap. This allows the hot air to circulate evenly for maximum crispiness.

  5. Cook to Golden Perfection: Air fry at 180°C for about 3–4 minutes.

  6. The Flip: Carefully flip each sandwich over and cook for an additional 2–3 minutes. The sandwiches are done when the bread is toasted to a beautiful golden brown and the cheese is fully melted and bubbling.

  7. Serve Immediately: Remove from the basket and let them sit for one minute before slicing. This keeps the cheese from running out too quickly.


Variations

  • Protein Boost: Add a thin slice of lean turkey or ham inside before air frying.

  • Spice it Up: Sprinkle a tiny pinch of garlic powder or dried oregano on the buttered side for an aromatic twist.

Cheesy Garlic Butter Mozzarella Stuffed Rolls 🍞🧀🧄

Cheesy Garlic Butter Mozzarella Stuffed Rolls 🍞🧀🧄

Soft, fluffy bread rolls filled with gooey mozzarella and brushed with rich garlic butter—perfect as a snack, side dish, or party appetizer. When you pull one apart, the melted cheese stretches beautifully for that irresistible “cinematic” cheese pull.


Ingredients

1. The Dough

  • 3½ cups all-purpose flour

  • 1 cup warm milk (about 38 °C / 100 °F)

  • 2¼ tsp instant yeast (1 packet)

  • 2 tbsp sugar

  • 1 tsp salt

  • 4 tbsp melted butter

  • 1 large egg


2. The Filling

  • 12–15 cubes low-moisture mozzarella cheese (about 1.5–2 cm cubes)


3. The Garlic Butter

  • 6 tbsp softened butter

  • 4 cloves garlic, finely minced

  • 2 tbsp fresh parsley, chopped

  • ½ tsp salt


4. The Topping

  • 1 cup shredded mozzarella & parmesan cheese mix

  • ½ tsp dried oregano


Step-by-Step Method

Step 1: Prepare the Dough

  1. In a large mixing bowl, combine the warm milk, sugar, and yeast.

  2. Stir gently and let the mixture sit for 5 minutes until it becomes foamy. This indicates the yeast is activated.

  3. Add the melted butter, egg, and salt to the mixture. Whisk until combined.

  4. Gradually add the flour while mixing until a soft dough forms.

Kneading

  • Transfer the dough to a lightly floured surface.

  • Knead for 8–10 minutes until the dough becomes smooth, soft, and elastic.

Pro Tip:
If the dough sticks too much to your hands, add flour 1 tablespoon at a time. Avoid adding too much—slightly sticky dough produces softer rolls.


Step 2: First Rise

  1. Lightly grease a bowl with oil or butter.

  2. Place the dough inside and turn it once to coat the surface.

  3. Cover with a damp cloth or plastic wrap.

  4. Let it rise in a warm place for about 1 hour, or until the dough doubles in size.


Step 3: Shape and Stuff

  1. Punch down the risen dough gently to release air.

  2. Divide the dough into 12–15 equal portions.

  3. Flatten each piece into a small circle.

  4. Place a cube of mozzarella in the center.

  5. Fold the edges over the cheese and pinch tightly to seal.

  6. Roll gently into a smooth ball.

Arrange

  • Place the dough balls seam-side down in a greased baking dish.

  • Arrange them so they are slightly touching—this helps create soft pull-apart rolls.


Step 4: Second Rise

  1. Cover the pan again with a cloth.

  2. Let the rolls rise for 30 minutes until puffy.

Prepare Garlic Butter

While waiting:

  1. In a small bowl combine

    • softened butter

    • minced garlic

    • chopped parsley

    • salt

  2. Mix until smooth.

Brush the Rolls

  • Brush half of the garlic butter over the tops of the risen rolls.


Step 5: Bake

  1. Preheat the oven to 190 °C (375 °F).

  2. Bake the rolls for 15 minutes.

Add Topping

  1. Remove the tray from the oven.

  2. Brush the remaining garlic butter over the rolls.

  3. Sprinkle the shredded mozzarella & parmesan mixture on top.

  4. Add a light sprinkle of dried oregano.

Final Bake

Return to the oven and bake for 8–10 minutes until:

  • the cheese melts

  • the tops become golden brown

  • the surface looks bubbly.

Tuna Crustless Quiche

Tuna Crustless Quiche

Table of Contents

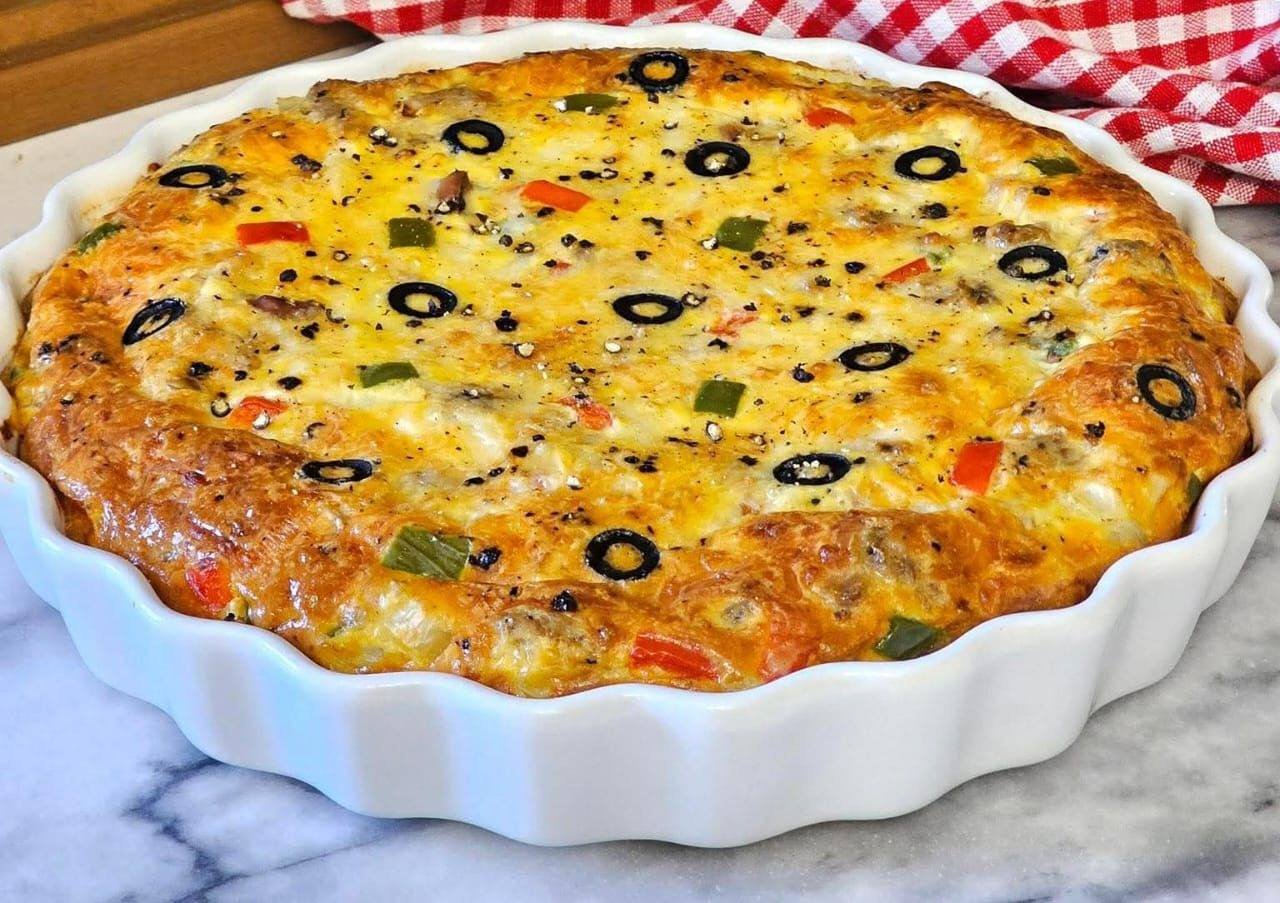
Tuna Crustless Quiche is a simple, protein packed dish that works beautifully for breakfast, brunch, lunch, or even a light dinner. Without a pastry crust, it is quicker to prepare and naturally lower in carbohydrates while still delivering a rich, creamy texture. Flaky tuna combines with eggs, cream, colorful bell peppers, and melted cheese to create a savory bake that is satisfying and easy to customize. This recipe is ideal for meal prep, family gatherings, or whenever you need something filling that can be served warm or at room temperature.

Prep Time: 15 minutes
Cook Time: 35 to 40 minutes
Cooling Time: 10 minutes
Total Time: about 1 hour
Servings: 6 slices

Ingredients

Main Ingredients

2 cans tuna (about 160 g each), drained

8 large eggs

¾ cup double cream (heavy cream)

Cheese

3.5 oz (100 g) shredded cheddar cheese

1.8 oz (50 g) shredded mozzarella cheese (for topping)

Vegetables

1 small red bell pepper, diced

1 small green bell pepper, diced

3 spring onions, sliced

Seasoning

½ tsp paprika

½ tsp ground cumin

Salt and black pepper to taste

Topping & Other

Sliced black olives for garnish

Butter or oil for greasing the baking dish

Instructions

Preheat your oven to 180°C (350°F). Lightly grease a medium baking dish or pie dish with butter or oil.

See also  Mediterranean Seared Scallops with Creamy Pesto Risotto

Drain the canned tuna thoroughly and break it into small flakes using a fork.

In a large mixing bowl, whisk together the eggs and heavy cream until smooth and well combined.

Add paprika, cumin, salt, and black pepper to the egg mixture and mix well.

Stir in the diced red and green bell peppers and sliced spring onions.

Fold in the shredded cheddar cheese and flaked tuna until evenly distributed.

Pour the mixture into the prepared baking dish and spread it evenly with a spatula.

Sprinkle shredded mozzarella cheese over the top and add sliced black olives as garnish.

Bake for 35 to 40 minutes or until the quiche is set in the center and lightly golden on top.

Remove from the oven and allow it to rest for about 10 minutes before slicing and serving.

Tips

Drain tuna well to prevent excess moisture that can make the quiche watery.

Use room temperature eggs and cream for smoother mixing and even baking.

Chop vegetables into small, uniform pieces so they cook evenly.

Lightly sauté bell peppers first if you prefer a softer texture.

Avoid overbaking. The center should be just set to keep the quiche creamy.

Place the baking dish on a tray to catch any potential spills during baking.

Let the quiche cool slightly before slicing so it holds its shape better.

Use full fat cream for the richest flavor and smoothest texture.

Taste a small portion of the mixture before baking to check seasoning.

Store leftovers in an airtight container and reheat gently to maintain moisture.

See also  Mediterranean Spinach and Cheese Stuffed Shells

Variations

Add spinach or kale for extra greens and color.

Replace cheddar with feta or goat cheese for a tangy twist.

Include chopped sun dried tomatoes for a Mediterranean flavor.

Use smoked tuna or smoked salmon for deeper flavor.

Add cooked mushrooms for an earthy note.

Mix in chili flakes or diced jalapeños for a spicy version.

Substitute cream with half and half or evaporated milk for a lighter texture.

Include herbs such as parsley, dill, or basil for freshness.

Add cooked potatoes or sweet potatoes for a heartier meal.

Turn the mixture into muffin tins to create mini quiche portions for snacks or meal prep.

Q&A

Can I make this quiche ahead of time?

Yes, bake it in advance and refrigerate. Reheat gently before serving.

Can I freeze tuna crustless quiche?

Yes, slice and freeze portions individually for up to two months.

How do I know it is fully cooked?

The center should be firm and not jiggle when gently shaken.

Can I use light cream instead of heavy cream?

Yes, though the texture may be slightly less rich.

Is this recipe gluten free?

Yes, since there is no crust or flour involved.

What sides go well with it?

Fresh salad, roasted vegetables, or toasted bread pair nicely.

Can I use fresh tuna?

Yes, cook and flake it before adding to the mixture.

How long does it keep in the fridge?

Up to three days when stored properly.

Can I make it dairy free?

Use plant based cream and dairy free cheese alternatives.

Why is my quiche watery?

Excess liquid from vegetables or tuna may be the cause. Ensure ingredients are well drained.

See also  Spinach and Cheese Puff Pastry Bites

Nutrition

(Approximate per Serving)

Calories: 320

Protein: 26 g

Fat: 22 g

Carbohydrates: 4 g

Fiber: 1 g

Sodium: 520 mg

Conclusion

Tuna Crustless Quiche is a versatile and practical dish that delivers both comfort and nutrition with minimal preparation. The combination of eggs, cream, cheese, and tuna creates a creamy, satisfying texture, while bell peppers and spring onions add freshness and color. Whether you serve it for brunch, pack it for lunch, or enjoy it as a quick dinner with a salad, this recipe offers reliable flavor and convenience. Its flexibility allows you to adapt ingredients based on preference or what you have on hand, making it a dependable addition to your everyday cooking rotation.

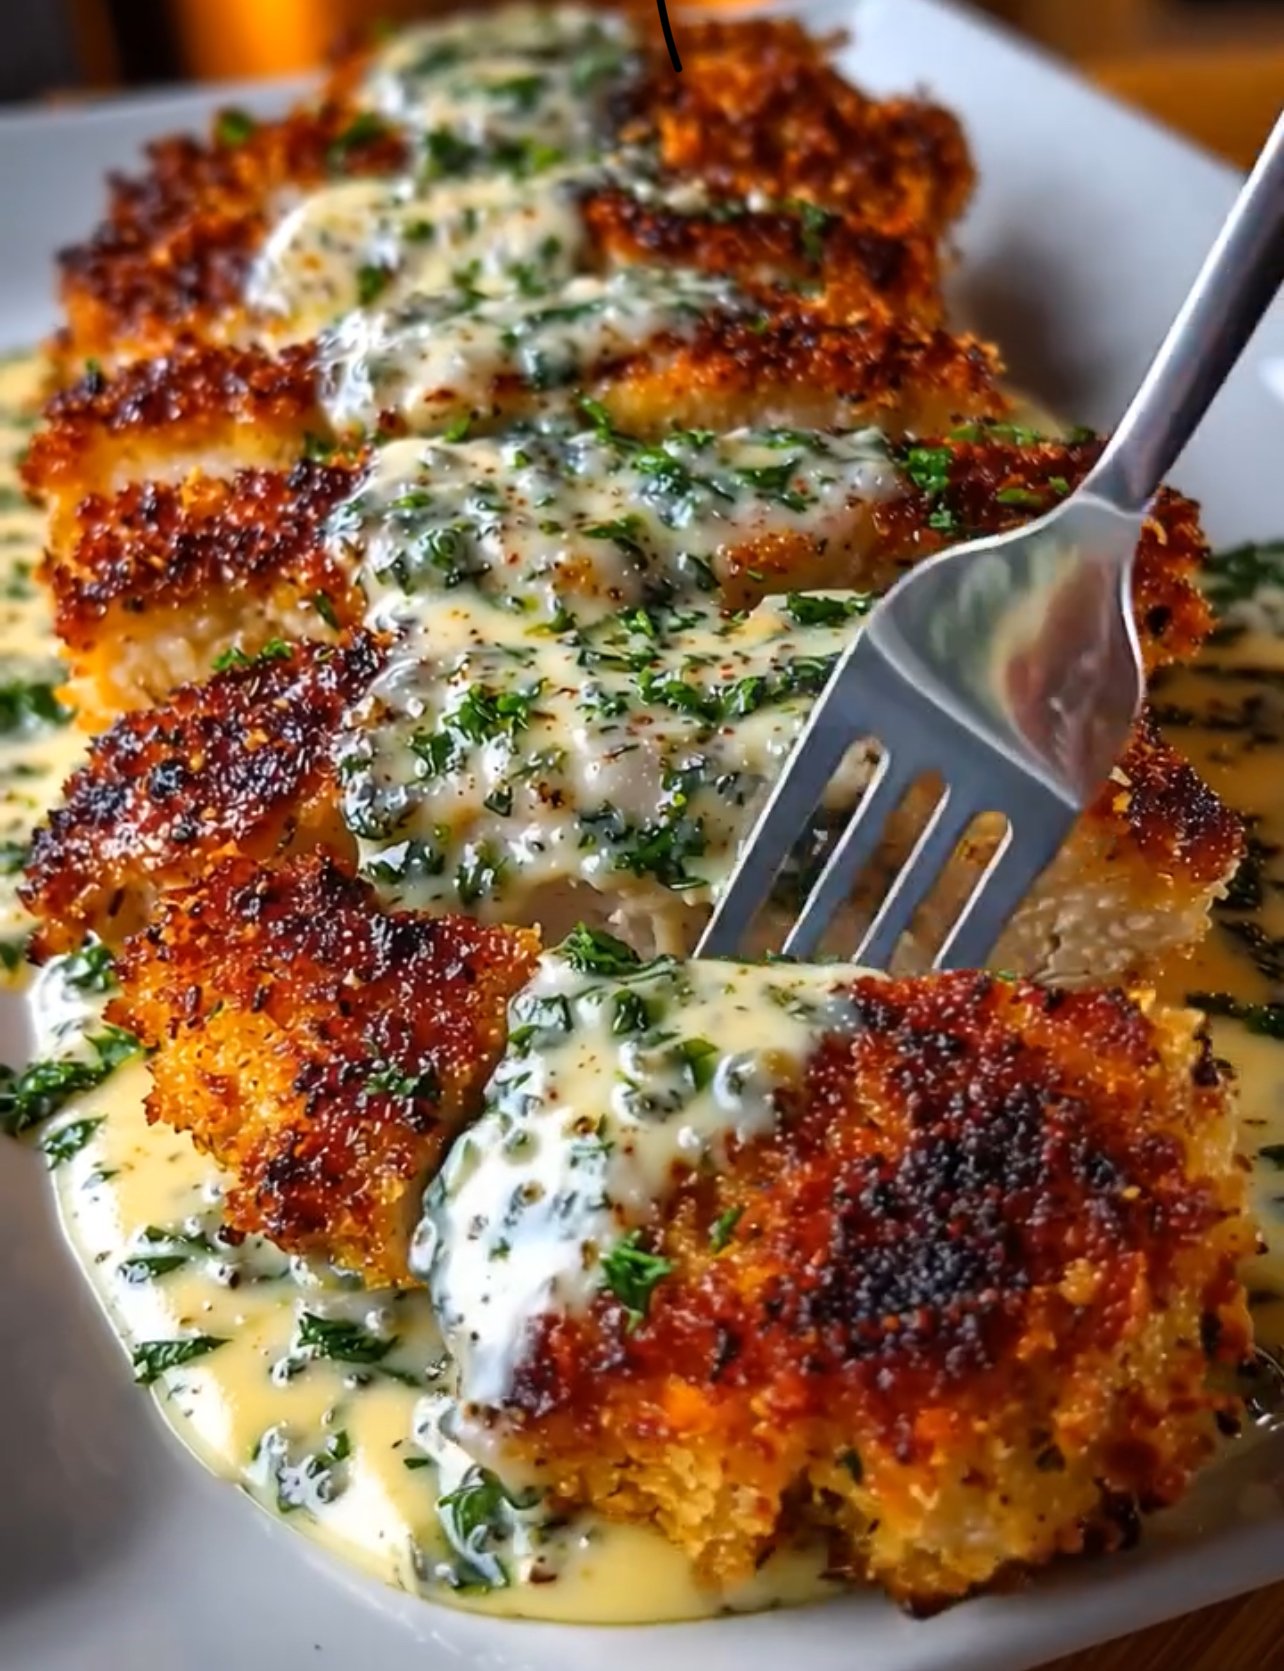
Crispy Parmesan Crusted Chicken with Creamy Garlic Sauce

Crispy Parmesan Crusted Chicken with Creamy Garlic Sauce

🛒 Ingredients (Serves 4)

For the Chicken:
• 2 large chicken breasts (cut in half lengthwise to make 4 fillets)
• 1 teaspoon salt
• ½ teaspoon black pepper
• ½ teaspoon paprika
• 1 cup all-purpose flour
• 2 eggs (beaten)
• 1 cup breadcrumbs (panko for extra crispiness)
• ½ cup grated Parmesan cheese
• ½ teaspoon garlic powder
• Oil for frying (about ½ cup)

⸻

For the Creamy Garlic Herb Sauce:
• 3 tablespoons butter
• 4 cloves garlic (minced)
• 1 cup fresh cream (or heavy cream)
• ¼ cup grated Parmesan cheese
• ½ teaspoon black pepper
• ¼ teaspoon salt
• 1 tablespoon chopped fresh parsley
• 1 teaspoon Italian seasoning (optional)

⸻

👩‍🍳 Step-by-Step Instructions

Step 1: Prepare the Chicken
1. Slice chicken breasts into thinner fillets.
2. Cover with plastic wrap and gently pound to even thickness.
3. Season both sides with salt, pepper, and paprika.

⸻

Step 2: Prepare Coating Stations

Set up 3 bowls:

1️⃣ Bowl 1: Flour
2️⃣ Bowl 2: Beaten eggs
3️⃣ Bowl 3: Breadcrumbs + Parmesan + garlic powder (mix well)

⸻

Step 3: Coat the Chicken
• Dip chicken in flour (shake off excess).
• Dip into egg mixture.
• Press into breadcrumb mixture firmly to coat well.

⸻

Step 4: Fry Until Golden
1. Heat oil in a pan over medium heat.
2. Fry chicken for about 4–5 minutes per side.
3. Cook until deep golden brown and fully cooked inside.
4. Remove and place on paper towel.

✨ Tip: Do not overcrowd the pan.

⸻

Step 5: Make the Creamy Garlic Sauce
1. In another pan, melt butter.
2. Add minced garlic and sauté 30 seconds.
3. Pour in cream and stir.
4. Add Parmesan, salt, and pepper.
5. Let simmer 3–4 minutes until slightly thick.
6. Add parsley and Italian seasoning.

⸻

Step 6: Assemble
• Place crispy chicken on a plate.
• Spoon creamy garlic sauce generously over the top.
• Sprinkle extra parsley.
• Serve hot.

⸻

🍽️ Serve With:
• Mashed potatoes
• Steamed vegetables
• Pasta
• Garlic rice