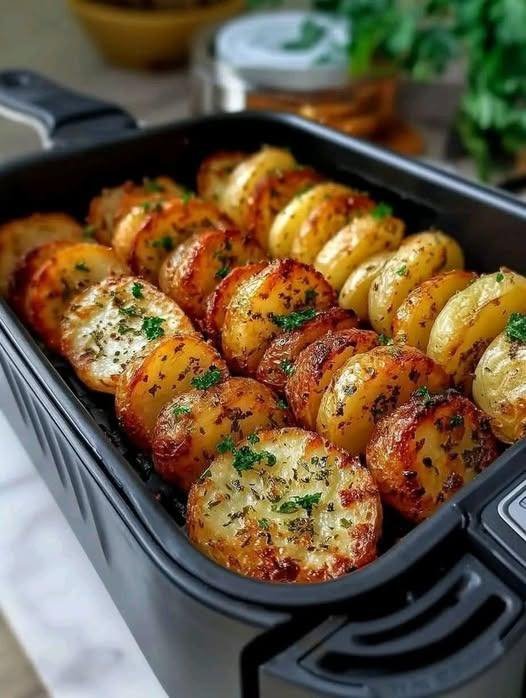
Crispy Garlic Parmesan Potatoes

Crispy Garlic Parmesan Potatoes

These crispy sliced potatoes are golden on the outside, soft inside, and packed with buttery garlic flavor. Perfect for air fryer or oven snacks! 😍

πŸ›’ Ingredients

  • 10–12 small potatoes
  • 3 tbsp butter (melted)
  • 3 garlic cloves (minced)
  • Β½ tsp salt
  • Β½ tsp black pepper
  • 1 tsp Italian seasoning
  • ΒΌ cup grated Parmesan cheese
  • Fresh parsley for garnish

πŸ‘©β€πŸ³ Instructions

πŸ₯” Step 1: Prepare the Potatoes

  • Wash the potatoes well.
  • Slice each potato halfway down into thin layers (don’t cut fully through).
  • This helps them become crispy and fan-like while cooking.

πŸ§„ Step 2: Make Garlic Butter

  • In a bowl, mix:
    • Melted butter
    • Garlic
    • Salt
    • Black pepper
    • Italian seasoning

✨ Step 3: Coat the Potatoes

  • Brush the garlic butter mixture all over the potatoes.
  • Try to get some butter between the slices too for extra flavor.

πŸ§€ Step 4: Add Parmesan

  • Sprinkle Parmesan cheese generously over the potatoes.

πŸ”₯ Step 5: Cook

Air Fryer:

  • Preheat to 180Β°C (350Β°F).
  • Cook for 18–22 minutes until crispy and golden.

Oven:

  • Bake at 200Β°C (400Β°F) for 30–35 minutes.

🌿 Step 6: Garnish & Serve

  • Sprinkle fresh parsley on top.
  • Serve hot with ketchup, garlic sauce, or sour cream. πŸ˜‹

πŸ’‘ Tips

  • Use baby potatoes for the best crispy texture.
  • Add chili flakes for a spicy version.
  • Don’t skip the Parmesan β€” it creates a crispy cheesy crust!

❓Q/A

❓Can I make these without Parmesan?

βœ… Yes, but Parmesan adds extra crispiness and flavor.

❓How do I keep them crispy?

βœ… Serve immediately after cooking while hot.

❓Can I store leftovers?

βœ… Yes, refrigerate and reheat in the air fryer for 3–4 minutes.

Air Fryer Grilled Cheese Sandwich

Air Fryer Grilled Cheese Sandwich

Golden, crispy bread with perfectly melted gooey cheese inside β€” this air fryer grilled cheese is the easiest way to make a classic comfort food in minutes! ✨πŸ₯ͺ

πŸ›’ Ingredients

  • 2 slices bread 🍞
  • 2 slices cheese (cheddar, mozzarella, American, or your favorite) πŸ§€
  • 1–2 tsp softened butter or mayonnaise
  • Optional: garlic powder, black pepper, Italian herbs 🌿

πŸ‘©β€πŸ³ Instructions

🍞 1. Prepare the Bread

Spread butter or mayonnaise evenly on one side of each bread slice.

➑️ Butter/mayo sides should face outward for a crispy golden crust.


πŸ§€ 2. Assemble the Sandwich

Place cheese slices between the unbuttered sides of the bread.

✨ Mix cheddar + mozzarella for extra flavor and stretchiness!


πŸ”₯ 3. Preheat the Air Fryer

Preheat air fryer to 180Β°C (350Β°F) for 2–3 minutes.


πŸ₯ͺ 4. Air Fry

Place sandwich in the air fryer basket in a single layer.

Cook for 5–7 minutes, flipping halfway through for even browning.

βœ”οΈ Bread should be crispy and golden
βœ”οΈ Cheese should be fully melted


βœ‚οΈ 5. Rest & Serve

Remove carefully and let rest for 1 minute before slicing.

Serve hot with soup, fries, or your favorite dipping sauce 😍


πŸ’‘ Tips for the Best Grilled Cheese

βœ… Use sourdough or thick bread for extra crunch
βœ… Shredded cheese melts faster
βœ… Don’t overfill or cheese may leak out
βœ… Mayo gives an extra crispy crust
βœ… Lower the temperature slightly if cheese isn’t melting properly


🌟 Delicious Variations

πŸ§„ Garlic Parmesan

Add garlic powder and sprinkle Parmesan on the outside.

🌢️ Spicy Melt

Add jalapeΓ±os or chili flakes for heat.

πŸ… Pizza Style

Add mozzarella + pepperoni + Italian seasoning.

πŸ₯“ Loaded Sandwich

Add cooked turkey bacon or caramelized onions.


πŸ“Š Approximate Nutrition (Per Sandwich)

  • Calories: 320–420 kcal
  • Protein: 12–18 g
  • Carbohydrates: 25–35 g
  • Fat: 18–25 g
  • Fiber: 1–3 g

❓FAQ

Can I use any bread?

Yes! White, whole wheat, brioche, and sourdough all work well.

Which cheese melts best?

Cheddar, mozzarella, American cheese, provolone, or a combination.

Why isn’t my sandwich crispy?

Try adding a little more butter/mayo or cook 1–2 minutes longer.

Can I make multiple sandwiches?

Absolutely! Just avoid overcrowding the basket.

Can I make it vegan?

Yes β€” use dairy-free cheese and vegan butter. 🌱

Spinach and Cheese Puff Pastry Triangles πŸ₯ŸπŸŒΏ

Spinach and Cheese Puff Pastry Triangles πŸ₯ŸπŸŒΏ

These golden, flaky triangles are a wonderful treat, featuring a buttery crust and a warm, gooey center. They are perfect for sharing at a gathering or enjoying as a wholesome snack!

  • Yields: 6–8 Large Triangles πŸ‘₯

  • Prep time: 15 minutes πŸ”ͺ

  • Cook time: 20 minutes ⏲️


Ingredients πŸ›’

  • 1 sheet Puff Pastry (thawed but cold) πŸ₯

  • 2 cups Fresh Spinach (chopped and sautΓ©ed) or 10oz frozen spinach (thawed and squeezed very dry) 🌿

  • 1 cup Shredded Cheese (Mozzarella, Feta, or a blend) πŸ§€

  • ΒΌ cup Cream cheese or Ricotta (for a smooth texture) πŸ₯£

  • 1 Egg (beaten, for the egg wash) πŸ₯š

  • 1 clove Garlic (minced) πŸ§„

  • Seasoning: Β½ tsp Onion powder, a pinch of salt, and black pepper. πŸ§‚

  • Topping: Sesame seeds or poppy seeds. πŸ₯―


Step-by-Step Instructions πŸ“

  1. Prepare the Filling ➑️ In a bowl, mix your dry spinach, shredded cheese, cream cheese, garlic, and seasonings. Stir until everything is well combined and creamy.

  2. Prep the Pastry ➑️ Preheat your oven to 200°C (400°F). Roll out the puff pastry sheet and cut it into equal-sized squares.

  3. Fill the Squares ➑️ Place a spoonful of the spinach and cheese mixture onto the center of each square.

  4. Fold and Seal ➑️ Fold one corner over to the opposite corner to form a triangle. ➑️ Use the tines of a fork to press the edges together firmly to seal the filling inside. 🍴

  5. The Final Glaze ➑️ Place the triangles on a baking sheet with parchment paper. Brush the tops with the beaten egg. ➑️ Sprinkle with sesame seeds.

  6. Bake ➑️ Bake for 18–22 minutes until the pastry is puffed up and has a gorgeous golden-brown color.

  7. Cool and Enjoy ➑️ Let them sit for a few minutes before serving so the cheese stays perfectly inside. πŸ˜‹


Common Questions & Answers ❓

Q: Can I use different fillings? A: Definitely! ➑️ You can add finely chopped mushrooms or bell peppers to the spinach for more variety.

Q: Why didn’t my pastry puff up? A: Make sure your oven is fully preheated before putting them in! ➑️ Also, try to keep the pastry dough as cold as possible until it’s time to bake.

Q: How do I reheat these? A: To keep them crispy, reheat them in an oven or air fryer at 180Β°C for 3–5 minutes. ♨️


Success Tips ✨

  • Dry the Spinach: The most important step is to make sure the spinach has no liquid left in itβ€”this prevents a soggy bottom! 🧺

  • Don’t Overfill: A little filling goes a long way. Leaving a border around the edges helps the pastry seal properly.

  • Golden Glow: The egg wash is what gives the triangles that beautiful shine, so don’t skip it! 🌟

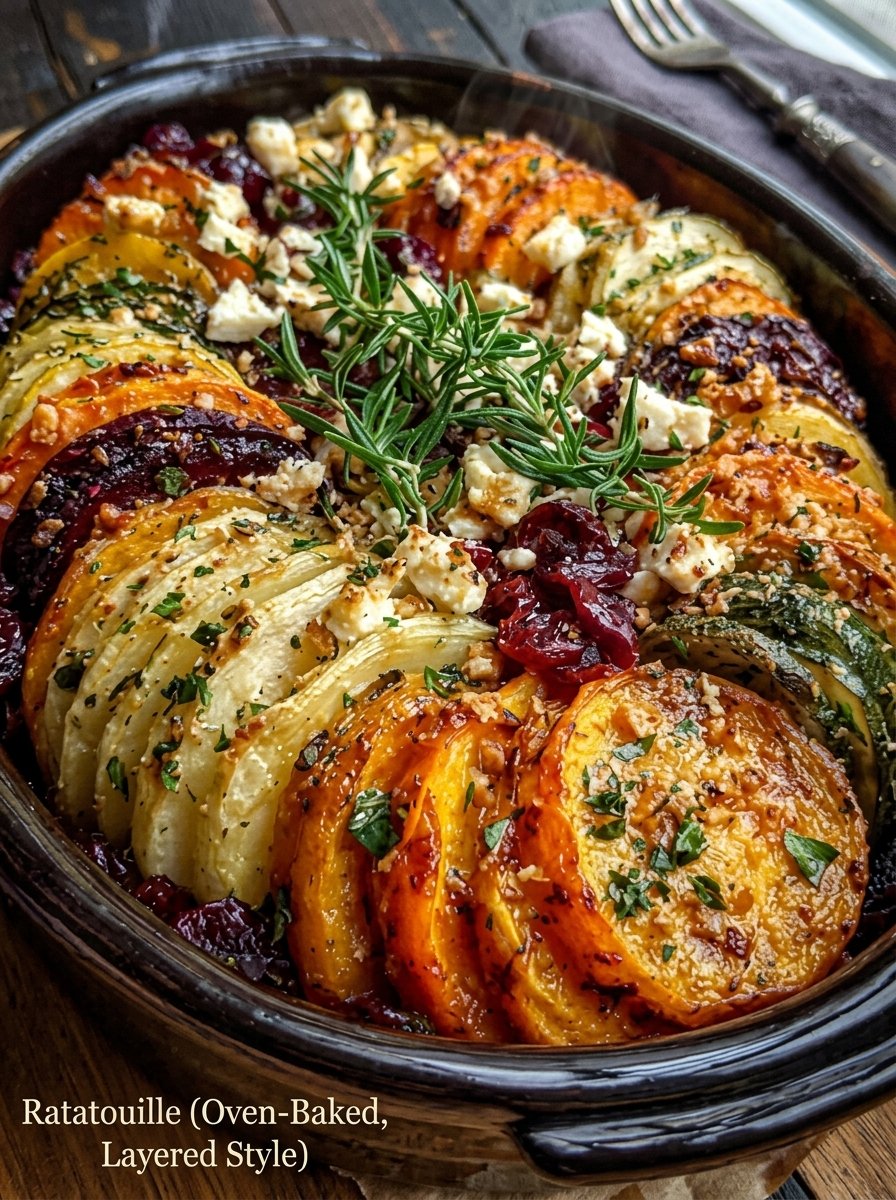
Oven-Baked Layered Ratatouille

Oven-Baked Layered Ratatouille (Colorful & Flavorful)

πŸ›’ Ingredients

  • Zucchini (thinly sliced)
  • Eggplant (thinly sliced)
  • Tomatoes (thinly sliced)
  • Yellow squash (thinly sliced)
  • Olive oil
  • Garlic (minced)

πŸ‘©β€πŸ³ Step-by-Step Instructions

  • πŸ”₯ Preheat & prepare the dish
    β†’ Preheat your oven to 180Β°C (350Β°F) so it’s evenly hot before baking
    β†’ Take a baking dish (round or rectangular) and grease it well with olive oil
    β†’ Make sure every corner is lightly coated to prevent sticking and enhance flavor
  • πŸ§„ Create a flavorful base layer
    β†’ In a small bowl, mix minced garlic with 2–3 tablespoons of olive oil
    β†’ Let it sit for 2–3 minutes so the garlic infuses into the oil
    β†’ Spread this mixture evenly across the bottom of your baking dish
    β†’ This layer will act as a rich, aromatic base for all the vegetables
  • πŸ”ͺ Prepare the vegetables carefully
    β†’ Wash all vegetables thoroughly
    β†’ Slice zucchini, eggplant, tomatoes, and yellow squash into thin, even rounds (about 2–3 mm thick)
    β†’ Try to keep all slices similar in size so they cook evenly
    β†’ If eggplant feels too watery, lightly pat slices dry with a paper towel
  • 🎨 Arrange the vegetables beautifully
    β†’ Start stacking the slices in a repeating pattern:
    zucchini β†’ eggplant β†’ tomato β†’ yellow squash
    β†’ Place them upright (slightly tilted) in the dish
    β†’ Pack them tightly together so they support each other and create that classic layered look
    β†’ You can arrange in straight rows or a spiral pattern for a more aesthetic presentation
  • πŸ«’ Season and add moisture
    β†’ Drizzle olive oil evenly over all the vegetables
    β†’ Make sure every slice gets a light coating so it doesn’t dry out
    β†’ Gently brush or spread oil if needed for even coverage
    β†’ The oil helps in roasting and brings out natural sweetness
  • πŸ«• Cover and start baking
    β†’ Cover the dish tightly with foil
    β†’ Bake in the preheated oven for 30–35 minutes
    β†’ This step helps soften the vegetables and allows flavors to blend together
  • πŸ”₯ Uncover for roasting finish
    β†’ Remove the foil carefully
    β†’ Continue baking for another 20–25 minutes
    β†’ Watch for lightly golden edges and tender texture
    β†’ The top should look slightly roasted but not burnt
  • ⏳ Rest before serving
    β†’ Remove from oven and let it sit for 5–10 minutes
    β†’ This helps the juices settle and enhances flavor
    β†’ It also makes serving easier without the layers collapsing
  • 🍽️ Serve and enjoy
    β†’ Serve warm as a main dish or side
    β†’ Scoop gently to keep the layered look intact
    β†’ Enjoy the soft, rich, and naturally sweet flavors

❓ Q&A

Q1: Why is my ratatouille watery?
βœ”οΈ This happens if vegetables release too much moisture. Slice thinly and avoid overcrowding with too much oil.

Q2: Can I make it ahead of time?
βœ”οΈ Yes! You can assemble it earlier and bake when needed, or reheat before serving.

Q3: Can I add herbs?
βœ”οΈ Absolutely! Herbs like thyme or basil can enhance the flavor beautifully.

Q4: How do I know it’s fully cooked?
βœ”οΈ The vegetables should be soft when pierced with a fork and slightly golden on top.

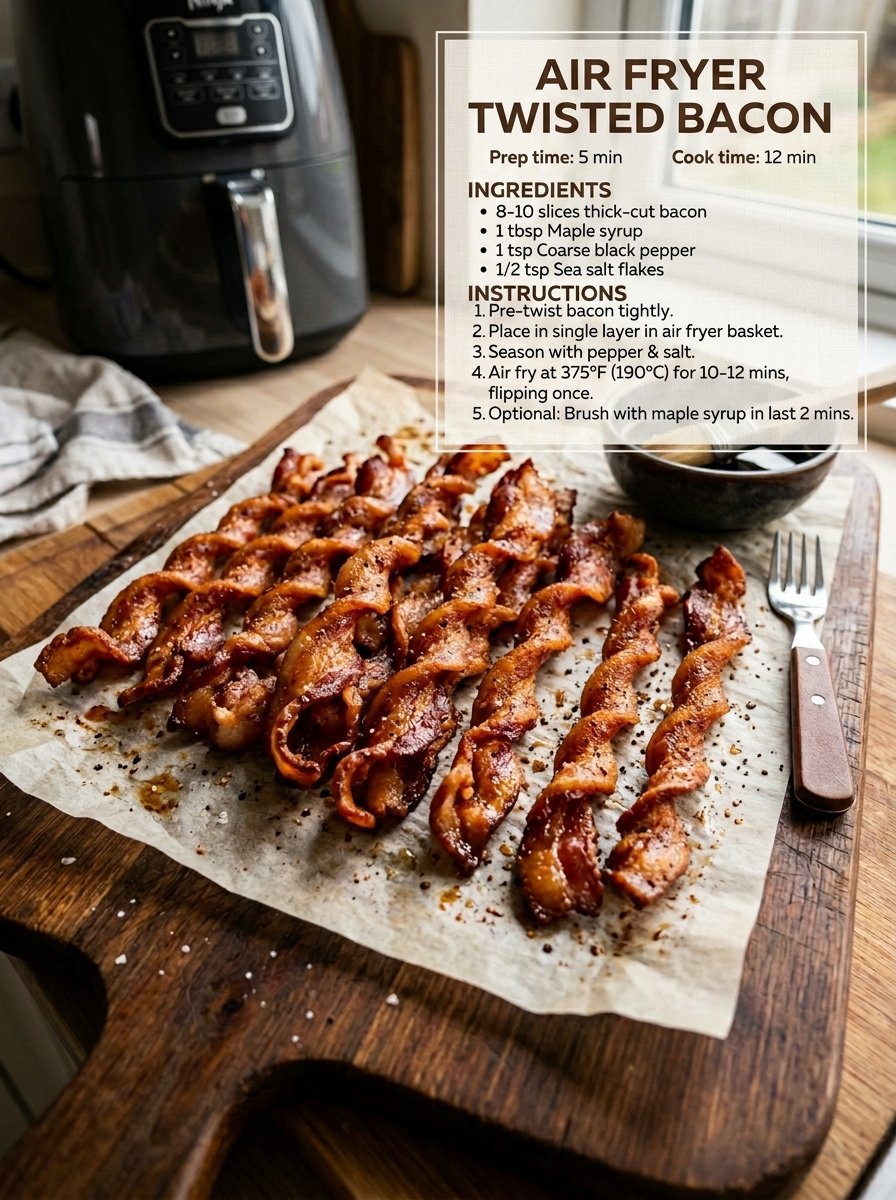
Air Fryer Twisted Bacon

Introduction

Air Fryer Twisted Bacon is crispy, fun, and packed with flavor! Twisting the bacon makes it extra crunchy on the outside while staying slightly juicy inside. Perfect for breakfast, snacks, or even party platters πŸ˜‹


🧾 Ingredients

  • 8–10 strips of bacon πŸ₯“
  • Optional: black pepper, brown sugar, or chili flakes

πŸ‘©β€πŸ³ Instructions

1️⃣ Twist the Bacon

➑️ Take each strip of bacon and twist it tightly from end to end
➑️ Place on a plate while you prepare the rest


2️⃣ Preheat Air Fryer

➑️ Set air fryer to 180Β°C (350Β°F) for 2–3 minutes


3️⃣ Arrange Bacon

➑️ Place twisted bacon in the air fryer basket
➑️ Do not overcrowd (leave space for air to circulate)


4️⃣ Cook

➑️ Air fry for 8–10 minutes
➑️ Flip halfway for even crispiness

πŸ”₯ Cook longer if you want it extra crispy


5️⃣ Serve

➑️ Remove and let cool for 2 minutes
➑️ Serve hot and crispy 😍


🍽️ Serving Ideas

🍳 With eggs for breakfast
πŸ₯ͺ In sandwiches or burgers
πŸ₯— Crumbled over salads
🍯 Drizzle with honey or maple syrup for sweet & savory


❓ Quick Q&A

Q1: Why twist the bacon?
πŸ‘‰ It makes it crispier and cooks more evenly.

Q2: Can I add flavor?
πŸ‘‰ Yes! Try brown sugar, pepper, or spices before cooking.

Q3: How do I store leftovers?
πŸ‘‰ Keep in fridge for 2–3 days and reheat in air fryer.


🌟 Tip

Place parchment paper or foil under the basket to catch grease for easy cleanup πŸ‘

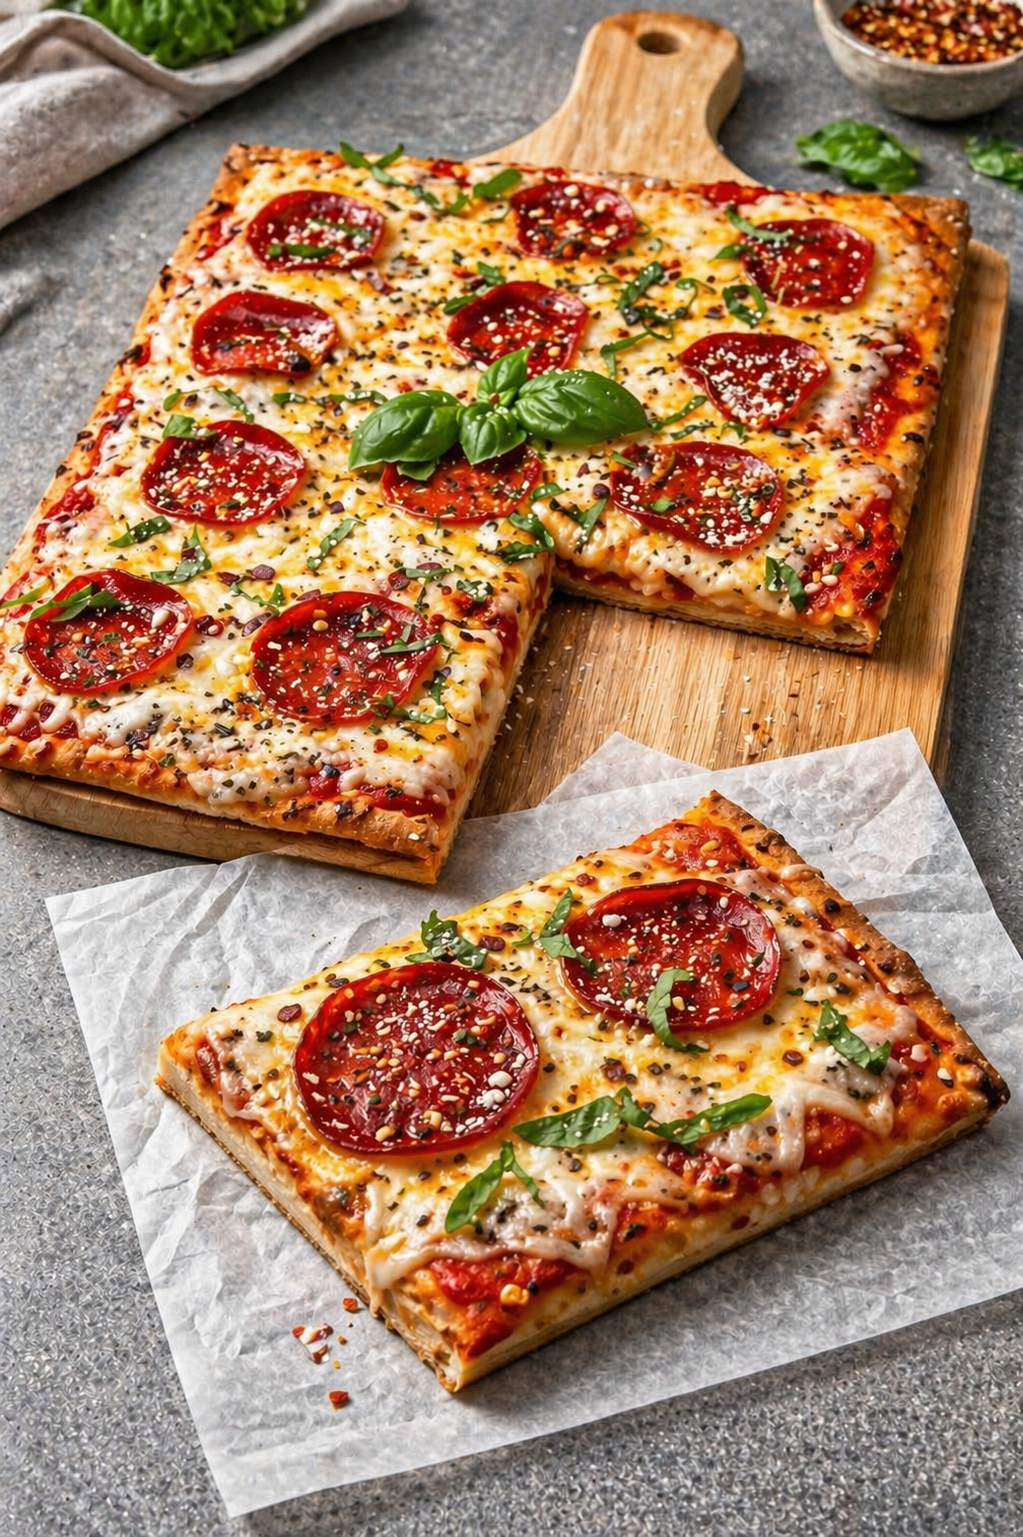
Homemade Sheet Pan Pepperoni Pizza

πŸ• Homemade Sheet Pan Pepperoni Pizza

πŸ›’ Ingredients

For the Dough:

  • 2 Β½ cups All-purpose flour or Bread flour

  • 1 cup Warm water (about 43Β°C)

  • 1 tsp Sugar

  • 1 packet (7g) Active dry yeast

  • 2 tbsp Olive oil

  • 1 tsp Salt

For the Toppings:

  • 1 cup Pizza sauce (rich tomato base)

  • 2 cups Shredded Mozzarella cheese

  • Β½ cup Grated Parmesan cheese

  • 15-20 slices Large Pepperoni

  • Fresh Basil (for garnish)

  • Dried Oregano & Red Pepper Flakes


πŸ‘¨β€πŸ³ Step-by-Step Instructions

  1. Activate the Yeast πŸ§ͺ

    • In a small bowl, combine warm water, sugar, and yeast.

    • Let it sit for about 5-10 minutes until it becomes foamy. ➑️ This means the yeast is alive and ready!

  2. Mix the Dough πŸ₯£

    • In a large bowl, whisk flour and salt.

    • Add the yeast mixture and olive oil.

    • Stir until a shaggy dough forms, then knead on a floured surface for 5 minutes until smooth and elastic.

  3. The First Rise πŸ“ˆ

    • Place dough in an oiled bowl and cover with a damp cloth.

    • Let it rise in a warm spot for 1 hour or until it has doubled in size.

  4. Shape the Pizza πŸ“

    • Preheat your oven to 220Β°C (425Β°F).

    • Generously oil a rectangular baking sheet.

    • Press the dough out into the corners of the pan. If it shrinks back, let it rest for 5 minutes and try again.

  5. Layer the Flavors πŸ…

    • Spread a thin layer of pizza sauce over the dough. ➑️ Leave a small border for the crust.

    • Sprinkle a heavy layer of Mozzarella and half of the Parmesan.

    • Lay the pepperoni slices evenly across the top.

  6. Bake to Perfection πŸ”₯

    • Bake for 15–20 minutes.

    • You are looking for a golden-brown crust and bubbling cheese. ➑️ The pepperoni should be slightly crisp at the edges!

  7. The Finishing Touch 🌿

    • Remove from the oven. Immediately sprinkle with the remaining Parmesan, dried oregano, red pepper flakes, and fresh basil leaves.

    • Slice into squares and enjoy!


πŸ€” Common Questions (Q&A)

Q: How do I get the bottom of the crust extra crispy? A: Use a dark metal baking sheet and don’t be afraid of the olive oil! The oil essentially “fries” the bottom of the dough in the oven, creating that crunch. πŸ₯–

Q: Can I use store-bought dough? A: Absolutely! Just make sure to let it come to room temperature for about 30 minutes before stretching it, or it will be too “snappy” to stay in the corners of the pan. πŸ›οΈ

Q: Why did my basil turn black? A: Heat causes fresh basil to oxidize and wilt. For the brightest color and best flavor, always add fresh basil after the pizza comes out of the oven. πŸƒ


Enjoy your meal! 🍽️✨