Air Fryer Easy Layered Chocolate Dessert

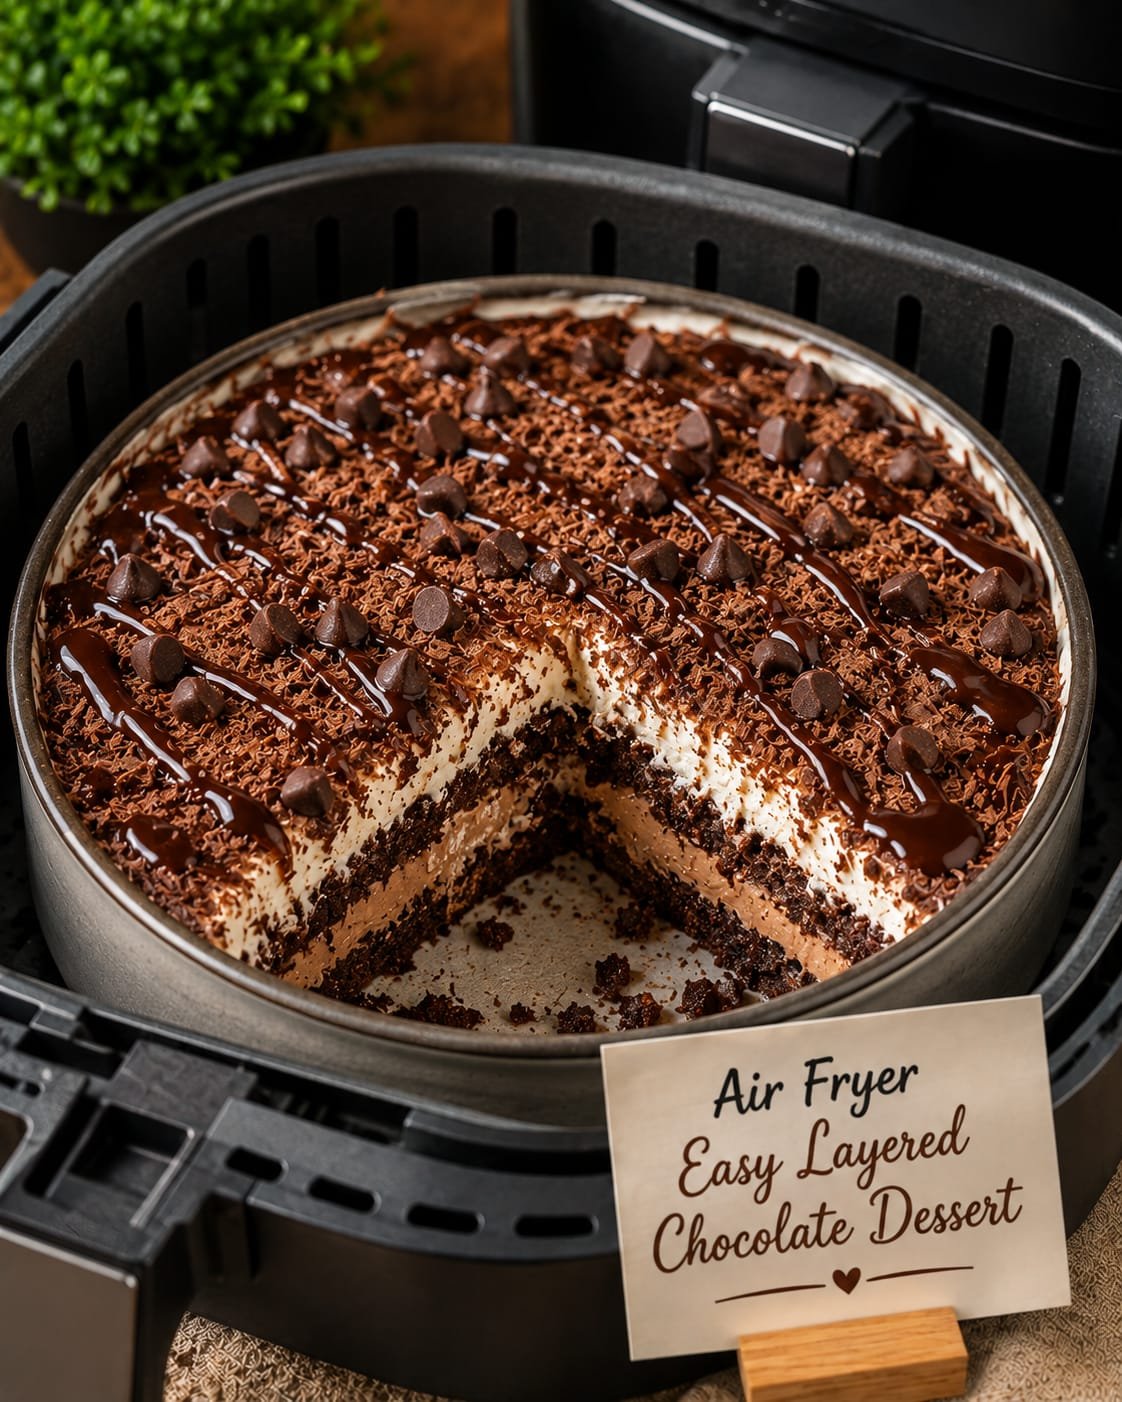
Air Fryer Easy Layered Chocolate Dessert

If you’re craving a rich and chocolatey dessert without spending hours in the kitchen, this Air Fryer Easy Layered Chocolate Dessert is the perfect treat. It combines a buttery chocolate biscuit base, creamy chocolate filling, and a smooth chocolate topping into an irresistible layered dessert that looks impressive but is surprisingly simple to make.The air fryer makes this dessert especially convenient because it bakes the base quickly and evenly without requiring a large oven. After the base cools, the creamy layers come together easily, making this a wonderful make-ahead dessert for family dinners, weekend treats, or special occasions.With its combination of crunchy, creamy, and silky textures, every spoonful feels indulgent. You can keep the recipe classic or add your favorite toppings, such as chocolate shavings, berries, chopped nuts, or a dusting of cocoa powder.

Prep Time: 20 minutes

Air Frying Time: 12–15 minutes

Chilling Time: 2–3 hours

Total Time: About 3 hours 35 minutes

Servings: 6–8

Air Fryer Temperature: 320°F (160°C)

Why You’ll Love This Recipe

Rich Chocolate Flavor

Chocolate cookies, cocoa, and melted chocolate create layers of deep chocolate flavor.

Easy Air Fryer Dessert

The base cooks quickly in the air fryer, making this a convenient alternative to traditional oven-baked desserts.

Creamy and Crunchy

The combination of a crisp chocolate base and smooth chocolate filling creates a delicious contrast in texture.

Make-Ahead Friendly

Prepare it several hours before serving and keep it chilled until dessert time.

Simple Ingredients

You don’t need complicated baking ingredients or special equipment.

Perfect for Entertaining

The layered appearance makes this dessert look elegant enough for guests while keeping the preparation simple.

Ingredients For Air Fryer Easy Layered Chocolate Dessert

For the Chocolate Base

1½ cups chocolate cookie crumbs

5 tablespoons unsalted butter, melted

1 tablespoon unsweetened cocoa powder

1 tablespoon granulated sugar, optional

Pinch of salt

For the Creamy Chocolate Layer

8 oz (225 g) cream cheese, softened

½ cup powdered sugar

1 teaspoon vanilla extract

¾ cup heavy whipping cream

2 tablespoons unsweetened cocoa powder

3 oz (85 g) semi-sweet chocolate, melted and slightly cooled

For the Chocolate Topping

½ cup heavy cream

3 oz (85 g) semi-sweet or dark chocolate, finely chopped

1 teaspoon butter, optional

Optional Garnishes

Chocolate shavings

Mini chocolate chips

Fresh strawberries or raspberries

Chopped nuts

Cocoa powder

Whipped cream

Instructions For Air Fryer Easy Layered Chocolate Dessert

Prepare the Air Fryer

Preheat your air fryer to 320°F (160°C) for about 3 minutes.

Choose a small oven-safe baking dish or 6-inch round cake pan that fits comfortably inside your air fryer basket.

Lightly grease the pan and line the bottom with parchment paper if desired.

 Make the Chocolate Base

Add the chocolate cookie crumbs, cocoa powder, salt, and optional sugar to a bowl.

Pour in the melted butter and mix until the crumbs are evenly moistened.

The mixture should resemble wet sand and hold together when pressed.

Transfer the mixture to the prepared pan.

Press it down firmly using the back of a spoon or the bottom of a glass. Make sure the surface is even and compact.

Air Fry the Base

Place the pan in the preheated air fryer.

Air fry at 320°F (160°C) for 12–15 minutes.

The base should look set and slightly crisp around the edges.

Remove it from the air fryer and allow it to cool completely.

Do not add the creamy layer while the base is hot because the heat can soften the filling.

Prepare the Chocolate Cream Layer

Place the softened cream cheese and powdered sugar in a mixing bowl.

Beat until smooth and creamy.

Add vanilla extract and cocoa powder and mix again.

Pour in the melted chocolate and beat until thoroughly incorporated.

In a separate bowl, whip the heavy cream until soft peaks form.

Gently fold the whipped cream into the chocolate cream cheese mixture.

The result should be thick, smooth, and fluffy.

Add the Creamy Layer

Once the chocolate base has cooled completely, spoon the chocolate cream mixture over the top.

Spread it evenly using a spatula.

Smooth the surface as much as possible.

Place the dessert in the refrigerator while you prepare the chocolate topping.

Make the Chocolate Topping

Heat the heavy cream in a small saucepan or microwave-safe bowl until hot but not boiling.

Pour the hot cream over the chopped chocolate.

Let it sit for about 2 minutes.

Stir slowly until the chocolate melts and the mixture becomes smooth and glossy.

Add the butter if using and stir until completely incorporated.

Allow the topping to cool for a few minutes so it is warm rather than hot.

Add the Chocolate Topping

Pour the chocolate topping over the chilled cream layer.

Spread it gently with a spatula to create an even layer.

Return the dessert to the refrigerator.

Chill

Refrigerate for at least 2–3 hours, or preferably overnight.

The longer chilling time allows the layers to firm up and makes slicing easier.

Before serving, garnish with chocolate shavings, berries, chopped nuts, or a small amount of whipped cream.

Tips for the Best Layered Chocolate Dessert

Use Room-Temperature Cream Cheese

Softened cream cheese blends much more easily and helps prevent lumps in the filling.

Don’t Overheat the Chocolate

Melt chocolate gently. Excessive heat can cause it to seize or become grainy.

Cool the Base Completely

This is essential. Adding the cream layer to a warm base can cause the filling to soften.

Chill Long Enough

For clean slices, refrigerate the dessert for at least 2–3 hours. Overnight chilling gives an even firmer texture.

Press the Base Firmly

A compact base holds together better when you cut and serve the dessert.

Use Good-Quality Chocolate

Since chocolate is the main flavor, using good-quality semi-sweet or dark chocolate makes a noticeable difference.

Slice With a Warm Knife

Dip a sharp knife in hot water, dry it, and then slice. Wipe the knife between cuts for neat layers.

Benefits For Air Fryer Easy Layered Chocolate Dessert

This dessert is certainly an indulgent treat, but making it at home gives you control over the ingredients and sweetness.

Dark chocolate and cocoa contain naturally occurring plant compounds, while dairy ingredients provide protein and calcium. Using an air fryer also means you don’t need to heat the entire oven for the baked portion.

For a lighter version, you can use reduced-fat cream cheese, slightly reduce the powdered sugar, and choose dark chocolate with a higher cocoa percentage.

Remember that this is still a dessert and is best enjoyed as part of a balanced diet.

Serving Suggestions For Air Fryer Easy Layered Chocolate Dessert

With Fresh Berries

Serve each slice with strawberries, raspberries, or blueberries. The fresh fruit provides a bright contrast to the rich chocolate.

With Whipped Cream

Add a small dollop of whipped cream for an extra creamy finish.

With Coffee

The rich chocolate flavor pairs beautifully with hot coffee or espresso.

With Vanilla Ice Cream

For an extra-indulgent dessert, serve a small slice alongside vanilla ice cream.

With Nuts

Sprinkle chopped toasted almonds, pecans, or hazelnuts over the top for crunch.

For Special Occasions

Decorate with chocolate curls and fresh berries for birthdays, dinner parties, or holiday gatherings.

Nutrition Facts For Air Fryer Easy Layered Chocolate Dessert

Approximate nutrition per serving, based on 8 servings:

Calories: 485

Protein: 6 g

Carbohydrates: 40 g

Fat: 34 g

Saturated Fat: 19 g

Fiber: 3 g

Sugar: 27 g

Sodium: 290 mg

Calcium: 75 mg

Iron: 3 mg

Nutrition information is an estimate and will vary depending on the specific cookies, chocolate, cream cheese, and other ingredients used.

Frequently Asked Questions

Can I make this dessert without an air fryer?

Yes. The chocolate base can be baked in a conventional oven at approximately 325°F (165°C) until set. The exact baking time may vary.

Can I use milk chocolate?

Yes. Milk chocolate creates a sweeter and creamier dessert. If using milk chocolate, you may want to slightly reduce the powdered sugar in the filling.

How long does this dessert last in the refrigerator?

Store it covered in the refrigerator for up to 4 days.

Can I freeze layered chocolate dessert?

Yes. Freeze it well covered for up to about 1 month. Thaw it overnight in the refrigerator before serving. The texture of the creamy layer may be slightly different after freezing.

Why is my chocolate topping too thick?

If the ganache becomes too thick, gently warm it and stir in a small amount of warm heavy cream until it reaches a smooth, spreadable consistency.

Why is my cream layer runny?

The heavy cream may not have been whipped enough, or the dessert may not have chilled long enough. Make sure the whipped cream reaches soft-to-medium peaks before folding it into the filling.

Can I make individual portions?

Absolutely. Prepare the dessert in small oven-safe ramekins or individual containers. Reduce the air-frying time for the base and monitor it carefully.

Can I add fruit between the layers?

Yes. Thinly sliced strawberries or raspberries work especially well. Make sure the fruit is dry before adding it so excess moisture doesn’t soften the layers.

Final Thoughts For Air Fryer Easy Layered Chocolate Dessert

This Air Fryer Easy Layered Chocolate Dessert is the perfect recipe when you want something rich, creamy, and impressive without complicated baking techniques. The crisp chocolate base, fluffy chocolate cream layer, and glossy chocolate topping create an irresistible combination of textures.The air fryer makes preparing the base quick and convenient, while the refrigerator does the rest of the work. For the best results, take your time with each layer and allow the dessert to chill thoroughly before slicing.Whether you’re making it for a family dinner, a weekend treat, or a special celebration, this chocolate dessert is guaranteed to satisfy a serious chocolate craving. Add fresh berries, chocolate curls, or toasted nuts on top, and you’ll have a beautiful homemade dessert that’s as delicious as it looks.
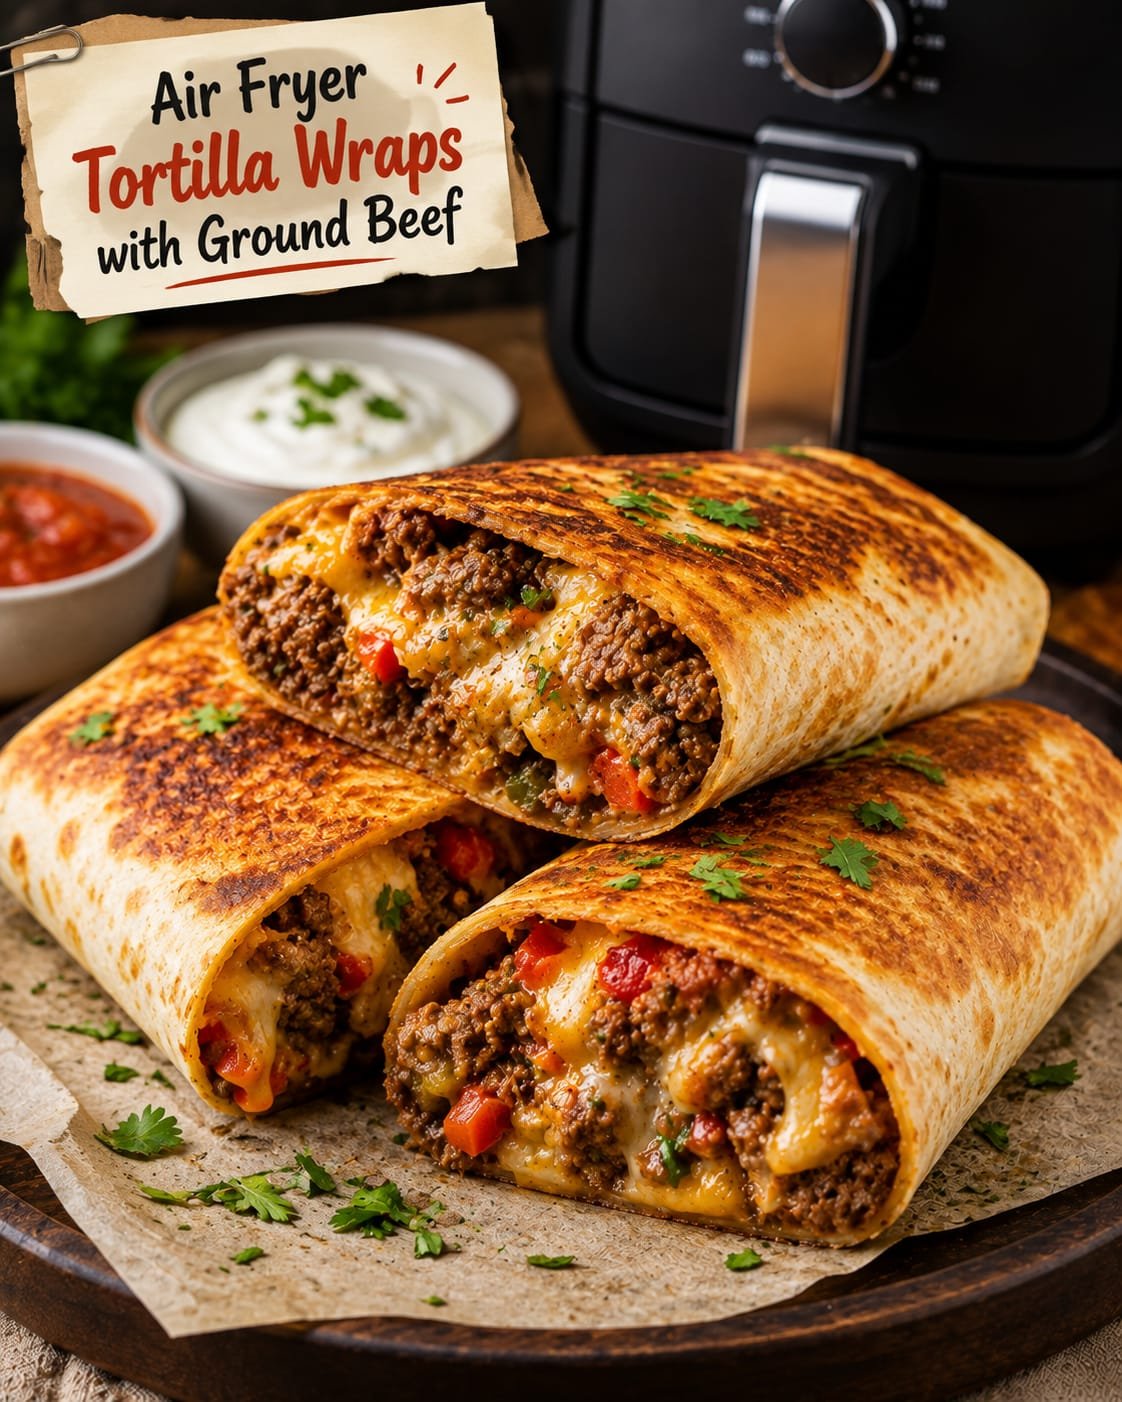
Air Fryer Tortilla Wraps with Ground Beef

Air Fryer Tortilla Wraps with Ground Beef

These Air Fryer Tortilla Wraps with Ground Beef are crispy, cheesy, flavorful, and incredibly easy to make. Seasoned ground beef is tucked inside a soft flour tortilla with melted cheese and fresh toppings, then cooked in the air fryer until the tortilla turns beautifully golden and crisp.If you love tacos, quesadillas, and crispy wraps, this recipe combines the best parts of all three. The filling is savory and juicy, the cheese melts perfectly, and the tortilla develops a delicious crunch around the edges while staying tender enough to bite into.The air fryer makes these wraps especially convenient because you can get that crispy texture without deep-frying. They make a fantastic quick dinner, lunch, game-day snack, or family-friendly meal. You can also customize the filling with vegetables, beans, different cheeses, or your favorite sauces.

Prep Time: 10 minutes

Cook Time: 8–10 minutes

Total Time: 18–20 minutes

Servings: 4 wraps

Air Fryer Temperature: 375°F (190°C)

Why You’ll Love This Recipe

Crispy and Cheesy

The air fryer gives the tortillas golden, crispy edges while the cheese melts into the seasoned beef.

Quick Weeknight Dinner

The filling cooks quickly, making this an excellent option when you need dinner on the table without spending hours in the kitchen.

Easy to Customize

You can add vegetables, beans, jalapeños, avocado, salsa, or any other favorite taco toppings.

Less Oil

Unlike deep-fried wraps, these are cooked with only a light coating of oil, making them a simpler alternative.

Family-Friendly

The filling can easily be adjusted for different tastes. Keep the seasoning mild for children and add extra chili or hot sauce to individual portions.

Great for Leftovers

Cooked ground beef can be prepared ahead of time, making these wraps even faster to assemble.

Ingredients For Air Fryer Tortilla Wraps with Ground Beef

For the Ground Beef Filling

1 pound (450 g) lean ground beef

1 tablespoon olive oil, if needed

½ small onion, finely diced

2 cloves garlic, minced

1 teaspoon chili powder

1 teaspoon ground cumin

smoked paprika ½ teaspoon

dried oregano ½ teaspoon

salt ½ teaspoon

black pepper ¼ teaspoon

red pepper flakes ¼ teaspoon , optional

2 tablespoons tomato paste

2 tablespoons water

For the Wraps

4 medium flour tortillas

1 cup shredded cheddar or Mexican-blend cheese

Diced tomatoes ½ cup

Finely chopped lettuce ¼ cup

Diced red onion ¼ cup

Chopped fresh cilantro ¼ cup

sliced jalapeños ¼ cup , optional

For Serving

Salsa

Sour cream or Greek yogurt

Guacamole

Lime wedges

Hot sauce

Instructions For Air Fryer Tortilla Wraps with Ground Beef

Cook the Ground Beef

Heat a large skillet over medium-high heat.

Add the ground beef and cook for about 5–7 minutes, breaking it apart with a wooden spoon as it cooks.

Once the beef is browned, drain excess grease if necessary.

Add the diced onion and cook for another 2–3 minutes, until softened.

Stir in the minced garlic and cook for about 30 seconds.

 Season the Filling

Add chili powder, cumin, smoked paprika, oregano, salt, black pepper, and optional red pepper flakes.

Stir well to coat the beef with the seasonings.

Add the tomato paste and water. Mix everything together and cook for another 1–2 minutes.

The filling should be flavorful and moist but not watery. If there is excess liquid, continue cooking briefly until it evaporates.

Remove the skillet from the heat and allow the beef to cool slightly.

Prepare the Tortillas

Place the tortillas on a clean work surface.

If your tortillas feel stiff, warm them in the microwave for about 10–15 seconds. This makes them easier to fold without cracking.

Divide the ground beef mixture evenly among the tortillas, placing it slightly below the center.

Don’t overfill the tortillas because they can become difficult to fold and may open during air frying.

Add Cheese and Toppings

Sprinkle shredded cheese over the ground beef.

Add a small amount of diced tomato, red onion, cilantro, and jalapeños if using.

Keep the toppings relatively modest so the wraps stay easy to fold and crisp properly.

Fold the Wraps

Bottom edge of the tortilla fold over the filling.

The sides inward fold, then roll the tortilla tightly toward the top, creating a compact wrap.

Place the wraps seam-side down while you prepare the remaining tortillas.

Preheat the Air Fryer

Preheat your air fryer to 375°F (190°C) for approximately 3 minutes.

Lightly spray the outside of each tortilla with cooking spray or brush it with a very small amount of olive oil.

Air Fry

Place the wraps seam-side down in the air fryer basket.

Make sure they are not overcrowded. Leave a little space between them so hot air can circulate.

Air fry at 375°F (190°C) for 4–5 minutes.

Carefully flip the wraps and continue cooking for another 3–5 minutes, or until the tortillas are golden brown and crispy and the cheese is completely melted.

If your air fryer is small, cook the wraps in batches.

Serve

Remove the wraps carefully from the air fryer and allow them to rest for 1–2 minutes.

Slice them diagonally and serve warm with salsa, guacamole, Greek yogurt or sour cream, lime wedges, and your favorite hot sauce.

Tips for Perfect Air Fryer Tortilla Wraps

Don’t Overfill

Too much filling makes the wraps difficult to close and can cause the tortillas to split during cooking.

Use Fresh Tortillas

Fresh, flexible tortillas are less likely to crack when folded.

Don’t Skip the Seam-Side-Down Step

Starting seam-side down helps the tortilla stay closed while it cooks.

Don’t Overcrowd the Basket

Air circulation is essential for crisping. Cook in batches if necessary.

Watch the Cheese

Cheese can melt and escape from the wrap if it is overfilled. Keep the cheese toward the center rather than right at the edges.

Adjust the Spice

For a mild version, skip the red pepper flakes and jalapeños. For extra heat, add cayenne, chipotle powder, or hot sauce.

Let the Beef Cool Slightly

Very hot filling can make the tortilla soft and difficult to roll. Letting the beef cool for a few minutes makes assembly easier.

Benefits For Air Fryer Tortilla Wraps with Ground Beef

These ground beef tortilla wraps can be part of a balanced meal when served with plenty of vegetables and a nutritious side.

Ground beef provides protein, iron, zinc, and vitamin B12. Choosing lean ground beef can help reduce the overall amount of saturated fat.

Adding tomatoes, lettuce, onions, cilantro, avocado, or other vegetables increases the variety of nutrients and adds freshness to the meal.

Air frying also requires considerably less oil than traditional deep-frying, while still creating a crispy exterior.

For a lighter meal, use lean ground beef, whole-wheat tortillas, reduced-fat cheese, and Greek yogurt instead of sour cream.

Serving Suggestions For Air Fryer Tortilla Wraps with Ground Beef

With Guacamole

Serve crispy wraps with homemade guacamole and fresh lime wedges.

With Salsa

A fresh tomato salsa adds acidity and freshness that balances the rich beef and cheese.

With a Salad

Pair the wraps with a simple lettuce, cucumber, tomato, and avocado salad for a complete meal.

With Mexican Rice

Serve alongside seasoned rice and black beans for a hearty dinner.

With Corn Salsa

A fresh corn and tomato salsa adds sweetness and crunch.

As a Party Appetizer

Make smaller wraps, air fry them until crispy, and cut them into bite-sized pieces. Serve with several dipping sauces.

Nutrition Facts For Air Fryer Tortilla Wraps with Ground Beef

Approximate nutrition per wrap:

Calories: 465

Protein: 28 g

Carbohydrates: 35 g

Fat: 23 g

Saturated Fat: 9 g

Fiber: 3 g

Sugar: 4 g

Sodium: 780 mg

Calcium: 230 mg

Iron: 4 mg

Nutrition information is an estimate and will vary depending on the type of ground beef, tortillas, cheese, and toppings used.

Frequently Asked Questions For Air Fryer Tortilla Wraps with Ground Beef

Can I use corn tortillas?

Yes, but corn tortillas are generally less flexible than flour tortillas. Warm them first to make them easier to fold, and consider making smaller, taco-style wraps rather than tightly rolled wraps.

Can I use ground turkey instead of beef?

Absolutely. Ground turkey works very well as a leaner alternative. You may want to add a little extra seasoning or salsa to keep the filling flavorful and moist.

Can I use leftover taco meat?

Yes. Leftover seasoned ground beef is perfect for this recipe. Simply reheat it before assembling the wraps.

Why did my tortilla wrap open in the air fryer?

The wrap may have been overfilled or not rolled tightly enough. Place it seam-side down in the basket and avoid excessive filling.

Can I make these wraps ahead of time?

You can prepare the beef filling ahead of time and refrigerate it for up to 3 days. Assemble the wraps just before air frying for the best crispy texture.

How do I reheat leftover wraps?

Reheat them in the air fryer at 350°F (175°C) for 3–5 minutes until warmed through and crisp again.

Can I freeze these wraps?

Yes. Assemble the wraps without fresh toppings such as lettuce or tomato, wrap them individually, and freeze. Thaw in the refrigerator before air frying for best results.

What cheese works best?

Cheddar, Monterey Jack, pepper Jack, Colby Jack, or a Mexican cheese blend all melt beautifully.

Final Thoughts For Air Fryer Tortilla Wraps with Ground Beef

These Air Fryer Tortilla Wraps with Ground Beef are an easy, crispy, cheesy meal that comes together quickly and can be customized in countless ways. The seasoned beef provides a savory filling, melted cheese adds richness, and the air fryer transforms ordinary tortillas into golden, crunchy wraps.For the best results, don’t overfill the tortillas, keep them tightly rolled, and place them seam-side down before cooking. A quick flip halfway through cooking helps both sides become beautifully crisp.Serve them with salsa, guacamole, Greek yogurt, fresh lime, or a colorful salad for a satisfying meal. Whether you’re making a quick weeknight dinner or a fun appetizer for guests, these crispy ground beef wraps are an easy recipe everyone will love.

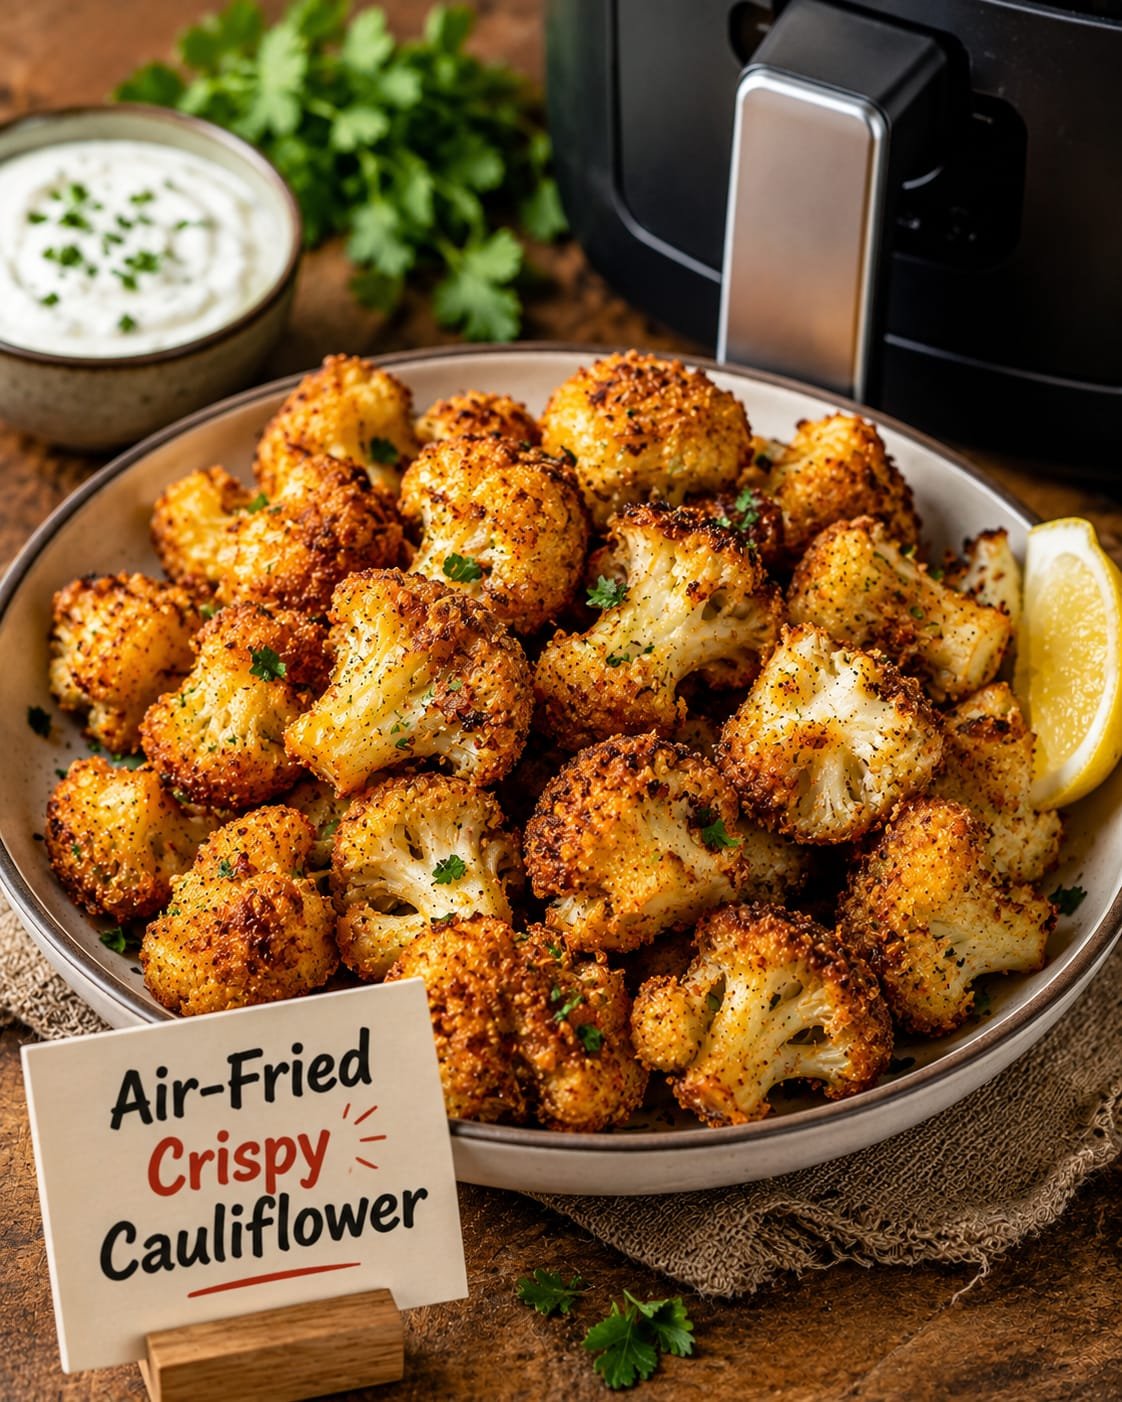
Air-Fried Crispy Cauliflower

 Air-Fried Crispy Cauliflower

If you’re looking for an easy way to turn humble cauliflower into something seriously delicious, this Air-Fried Crispy Cauliflower is the recipe to try. The cauliflower florets become golden and crispy on the outside while staying tender and flavorful inside. Best of all, the air fryer gives you that irresistible roasted texture with much less oil than traditional deep-frying.This recipe is quick enough for a busy weeknight and versatile enough to serve as a side dish, snack, appetizer, or healthy addition to bowls and salads. A simple blend of garlic, paprika, herbs, and Parmesan adds plenty of flavor, while the air fryer creates beautifully crisp edges.Whether you’re trying to eat more vegetables or simply want a delicious new way to enjoy cauliflower, this recipe is easy, satisfying, and family-friendly.

Prep Time: 10 minutes

Cook Time: 15–18 minutes

Total Time: 25–28 minutes

Servings: 4

Air Fryer Temperature: 400°F (200°C)

Why You’ll Love This Recipe

Crispy Without Deep-Frying

The air fryer creates beautifully browned, crispy cauliflower using only a small amount of oil.

Quick and Easy

From preparation to serving, this recipe takes less than 30 minutes.

Packed With Flavor

Garlic powder, smoked paprika, Italian seasoning, and Parmesan give the cauliflower a savory, irresistible flavor.

Versatile

Serve it as a side dish, snack, appetizer, salad topping, or addition to a grain bowl.

Naturally Low in Carbohydrates

Cauliflower is a naturally low-carb vegetable, making this recipe a great option for many lower-carb meal plans.

Easy to Customize

You can change the seasonings, add heat, or finish the cauliflower with your favorite sauce.

Ingredients For Air-Fried Crispy Cauliflower

1 large head cauliflower, cut into bite-sized florets

1½ tablespoons olive oil

½ teaspoon garlic powder

smoked paprika ½ teaspoon

½ teaspoon Italian seasoning

onion powder ¼ teaspoon

¼ teaspoon salt

black pepper ¼ teaspoon

¼ cup finely grated Parmesan cheese

2 tablespoons breadcrumbs, optional for extra crunch

1 tablespoon chopped fresh parsley, for garnish

Lemon wedges, for serving

Optional Flavor Additions

spicy version, add ¼ teaspoon of crushed red pepper flakes or a pinch of cayenne pepper.

cheesy version, add extra Parmesan after cooking.

Mediterranean twist, finish the cauliflower with lemon juice, parsley, and a little crumbled feta.

Instructions For Air-Fried Crispy Cauliflower

Prepare the Cauliflower

Wash the cauliflower thoroughly and dry it very well.

Cut the cauliflower into small, evenly sized florets. Try to keep the pieces relatively similar in size so they cook at the same rate.

Drying the cauliflower is important. Excess moisture can prevent the florets from becoming properly crispy.

Season the Cauliflower

Place the cauliflower florets in a large bowl.

Drizzle with olive oil and toss well to coat.

Add garlic powder, smoked paprika, Italian seasoning, onion powder, salt, and black pepper.

If using breadcrumbs, add them now.

Toss everything together until the cauliflower is evenly coated.

Finally, add the Parmesan cheese and gently mix again.

Preheat the Air Fryer

Preheat your air fryer to 400°F (200°C) for approximately 3 minutes.

Preheating helps the cauliflower begin roasting immediately and encourages better browning.

Arrange the Cauliflower

Place the seasoned cauliflower into the air fryer basket.

Spread the florets into a single layer as much as possible.

Avoid overcrowding the basket. If too many pieces are packed together, the cauliflower will steam rather than roast, which can result in softer florets.

If you have a smaller air fryer, cook in batches.

Air Fry

Air fry at 400°F (200°C) for 15–18 minutes.

Shake the basket after about 8 minutes to help the cauliflower brown evenly.

Continue cooking until the edges are deeply golden and crispy and the cauliflower is tender when pierced with a fork.

For extra-crispy cauliflower, cook for another 1–2 minutes, keeping a close eye on it so the Parmesan doesn’t burn.

Garnish and Serve

Carefully remove the cauliflower from the air fryer.

Transfer it to a serving bowl or plate.

Sprinkle with fresh parsley and serve with lemon wedges.

A squeeze of fresh lemon juice just before serving brightens the savory flavors beautifully.

Tips for Extra-Crispy Air-Fried Cauliflower

Dry the Cauliflower Thoroughly

Water is the enemy of crispiness. After washing the cauliflower, pat it completely dry with paper towels or a clean kitchen towel.

Cut Evenly Sized Florets

Similar-sized pieces cook more evenly. Smaller florets will become crispier, while very large pieces may remain firm inside.

Don’t Overcrowd the Basket

Air needs to circulate around each piece. A single layer will give you the best browning and crispiness.

Shake Halfway Through

Shaking the basket around the halfway point helps expose different sides of the cauliflower to the hot air.

Don’t Use Too Much Oil

A little olive oil is enough. Excess oil can make the coating greasy rather than crispy.

Adjust the Seasoning

Taste preferences vary, so feel free to increase the garlic, paprika, Parmesan, or chili flakes.

Watch the Final Minutes

The cauliflower can brown quickly near the end, particularly when Parmesan and breadcrumbs are included.

Benefits of Air-Fried Cauliflower

Cauliflower is a nutrient-rich cruciferous vegetable that provides fiber, vitamin C, vitamin K, folate, and other beneficial nutrients.

Using an air fryer allows you to create a roasted, crispy texture with significantly less oil than deep-frying. Cauliflower is also relatively low in calories and carbohydrates, making it an easy vegetable to incorporate into a variety of eating styles.

The olive oil used in this recipe provides unsaturated fat, while Parmesan contributes protein and calcium.

For the most balanced meal, serve the cauliflower alongside a protein source and other vegetables or whole grains.

Serving Suggestions For Air-Fried Crispy Cauliflower

As a Side Dish

Serve alongside grilled chicken, baked salmon, roasted turkey, or steak for an easy dinner.

With a Dipping Sauce

Pair crispy cauliflower with garlic yogurt sauce, ranch dressing, tahini sauce, or a spicy yogurt dip.

In a Grain Bowl

Add the cauliflower to a bowl with quinoa, brown rice, chickpeas, cucumber, tomatoes, avocado, and a lemon dressing.

Over a Salad

Use the crispy florets as a warm topping for green salads. The crunchy texture adds contrast to fresh vegetables.

In Wraps

Stuff crispy cauliflower into a tortilla or flatbread with lettuce, tomato, cucumber, hummus, and yogurt sauce.

As an Appetizer

Arrange the cauliflower on a platter with several dipping sauces for an easy party appetizer or game-day snack.

Mediterranean Style

Serve with hummus, olives, cucumber, tomatoes, feta, and a drizzle of tahini for a delicious Mediterranean-inspired plate.

Nutrition Facts For Air-Fried Crispy Cauliflower

Approximate nutrition per serving, based on 4 servings:

Calories: 145

Protein: 6 g

Fat: 9 g

Saturated Fat: 2.5 g

Carbohydrates: 10 g

Fiber: 4 g

Sugar: 3 g

Sodium: 300 mg

Calcium: 120 mg

Vitamin C: 70 mg

Nutrition information is an estimate and will vary depending on the exact ingredients and brands used.

Frequently Asked Questions

Can I make crispy cauliflower without breadcrumbs?

Yes. Breadcrumbs are completely optional. The cauliflower will still become crispy from the hot circulating air. Parmesan also helps create a delicious browned exterior.

Why is my air-fried cauliflower not crispy?

The most common reasons are excess moisture, overcrowding, or insufficient cooking time. Dry the cauliflower thoroughly, leave space between the florets, and cook until the edges are deeply golden.

Should I boil cauliflower before air frying?

No. There is no need to boil or steam the cauliflower first. Raw cauliflower works perfectly in the air fryer and is more likely to develop crispy edges.

Can I use frozen cauliflower?

Yes, but frozen cauliflower usually contains more moisture and may not become quite as crisp as fresh cauliflower. Cook it directly from frozen and avoid overcrowding the basket.

How do I reheat crispy cauliflower?

Reheat it in the air fryer at 375°F (190°C) for about 3–5 minutes. This helps restore some of the original crispiness better than microwaving.

Can I make this recipe dairy-free?

Absolutely. Simply omit the Parmesan or replace it with a dairy-free Parmesan-style alternative.

Can I make spicy crispy cauliflower?

Yes. Add crushed red pepper flakes, cayenne pepper, chili powder, or your favorite hot sauce for extra heat.

Can I prepare the cauliflower ahead of time?

You can wash, cut, and season the cauliflower several hours ahead. Keep it refrigerated until you’re ready to air fry. For the crispiest results, cook it shortly before serving.

Final Thoughts For Air-Fried Crispy Cauliflower

This Air-Fried Crispy Cauliflower is proof that vegetables don’t have to be boring. With simple seasonings, a little olive oil, and the power of the air fryer, ordinary cauliflower transforms into golden, crispy bites with tender centers and loads of savory flavor.The secret to getting the best results is simple: dry the cauliflower well, don’t overcrowd the basket, and shake it halfway through cooking. These small steps make a big difference.Serve it as a quick side dish with dinner, enjoy it as a healthy snack with your favorite dip, or add it to salads, wraps, and grain bowls. With its crispy edges, cheesy seasoning, and bright lemon finish, this easy cauliflower recipe is one you’ll want to make on repeat.

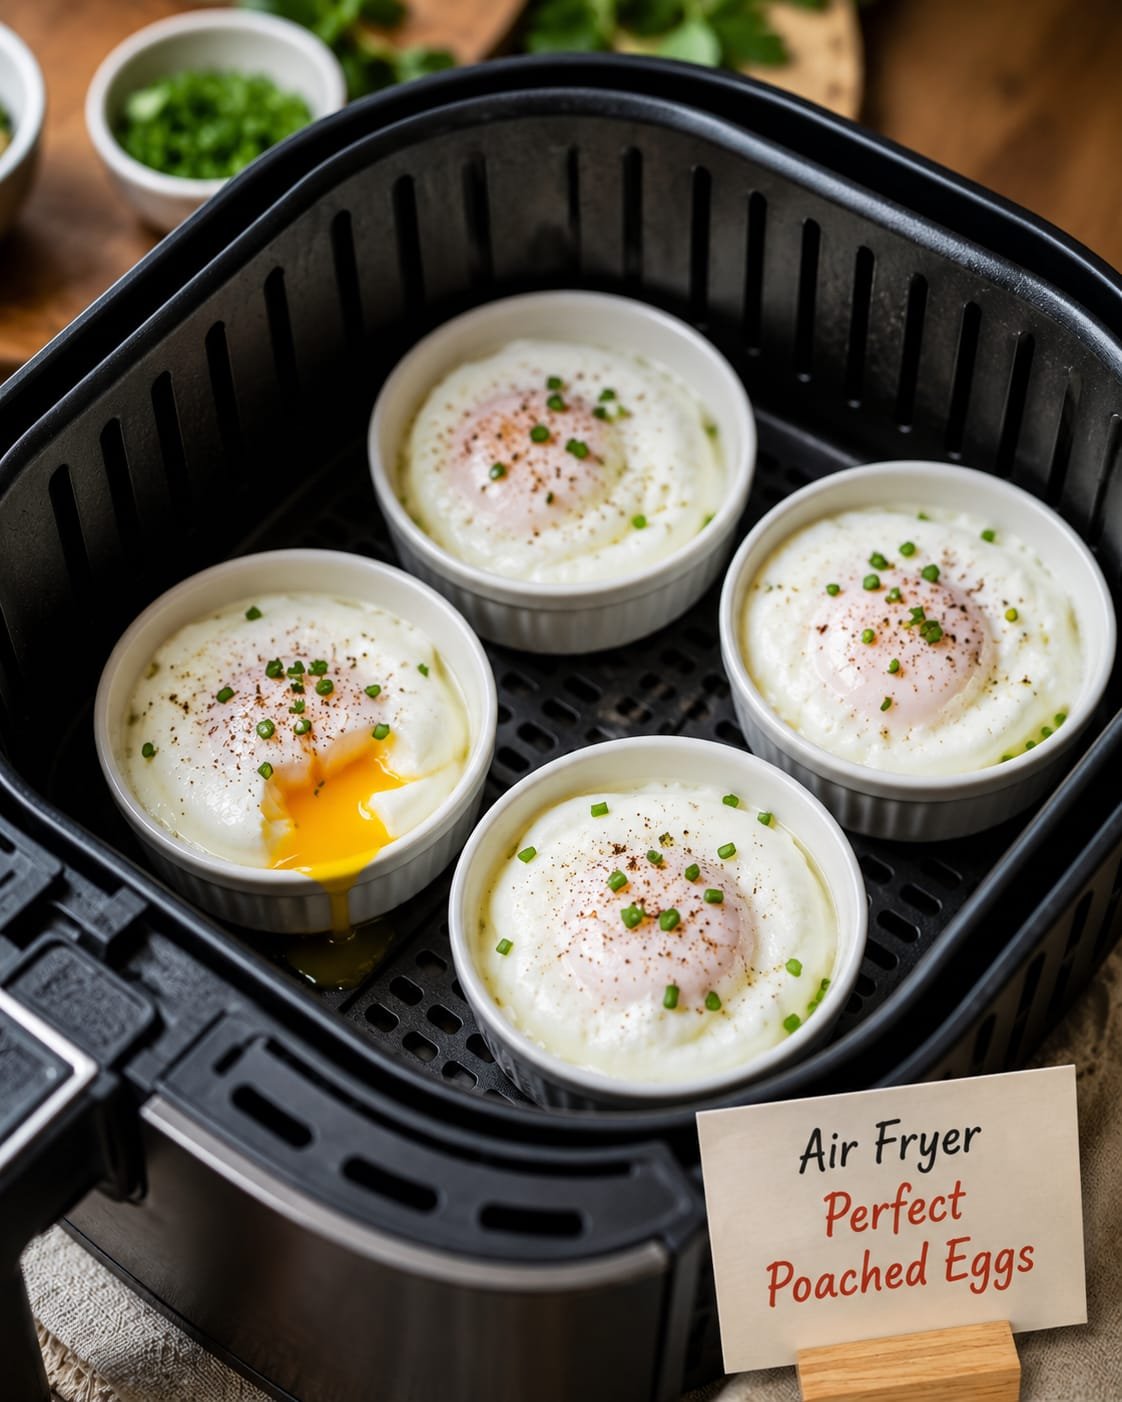
Air Fryer Perfect Poached Eggs  

Air Fryer Perfect Poached Eggs  

Looking for an easy way to make perfect poached eggs in an air fryer? This simple method produces tender egg whites and deliciously runny yolks with minimal effort. You don’t need a pot of simmering water, vinegar, or complicated swirling techniques. With a few basic ingredients and an air fryer, you can make a quick and satisfying breakfast in just minutes.Air fryer poached eggs are especially convenient for busy mornings. They can be served over avocado toast, English muffins, roasted vegetables, salads, or alongside crispy bacon and fresh fruit. Once you learn this method, you’ll have an easy breakfast option whenever you’re craving perfectly cooked eggs.

Prep Time: 2 minutes

Cook Time: 6–9 minutes

Total Time: 8–11 minutes

Servings: 2

Air Fryer Temperature: 300°F (150°C)

Why You’ll Love This Recipe

Easy and Convenient

There is no need to heat a large saucepan of water or carefully create a whirlpool. The air fryer does most of the work.

Minimal Ingredients

All you really need are eggs, water, and a little salt and pepper for serving.

Customizable

You can cook the eggs slightly longer for firmer yolks or reduce the cooking time for a very runny center.

Perfect for Breakfast

These eggs pair beautifully with toast, avocado, vegetables, smoked salmon, or your favorite breakfast sides.

Less Mess

Because the eggs are cooked individually in small ramekins, cleanup is simple and straightforward.

Ingredients For perfect poached eggs in an air fryer

2 large fresh eggs

2 tablespoons hot water

Cooking spray or a small amount of butter

Salt, to taste

Black pepper, to taste

Optional Serving Ingredients

Avocado

Whole-grain toast

English muffins

Cherry tomatoes

Fresh herbs

Smoked salmon

Spinach

Sautéed mushrooms

Crushed red pepper flakes

Grated Parmesan cheese

Equipment

Air fryer

2 small oven-safe ramekins

Small spoon or spatula

Cooking spray

Make sure your ramekins are oven-safe and air-fryer safe and fit comfortably inside your air fryer basket.

Instructions For perfect poached eggs in an air fryer

Preheat the Air Fryer

Preheat your air fryer to 300°F (150°C) for about 2–3 minutes.

Preheating helps the water and ramekins reach the proper temperature before the eggs are added.

Prepare the Ramekins

Lightly spray two small ramekins with cooking spray or grease them with a tiny amount of butter.

Add about 1 tablespoon of hot water to each ramekin.

The water creates a moist environment around the egg and helps mimic the gentle cooking conditions of traditional poaching.

Add the Eggs

Carefully crack one egg into each ramekin.

Try not to break the yolk.

For the best results, use fresh eggs. Fresh eggs generally have thicker whites, which helps them hold together better during cooking.

Place the Ramekins in the Air Fryer

Carefully place the ramekins into the air fryer basket.

Make sure they are sitting flat and aren’t touching the heating element.

Air Fry

Cook the eggs at 300°F (150°C) for approximately 6–9 minutes.

For a very runny yolk, start checking around 6 minutes.

For a slightly more set yolk, cook closer to 8–9 minutes.

Because air fryers vary, the first time you make these eggs, check them frequently near the end of the cooking time.

Remove Carefully

When the egg whites are set and the yolks have reached your preferred consistency, carefully remove the ramekins from the air fryer.

They will be hot, so use oven mitts or tongs.

Serve

Season the eggs with salt and freshly ground black pepper.

For a classic breakfast, place the poached egg over toasted bread or avocado toast.

Serve immediately while the yolk is warm and creamy.

Tips for Perfect Air Fryer Poached Eggs

Use Fresh Eggs

Fresh eggs are ideal because their whites are thicker and tend to hold their shape better.

Don’t Skip the Water

The small amount of water helps create steam and keeps the cooking environment moist. It also helps the egg whites cook gently.

Use Shallow Ramekins

Shallow ramekins usually give you better results because the egg cooks more evenly.

Don’t Overcook

The yolk can go from beautifully runny to firm surprisingly quickly. Start checking around 6 minutes until you know how your particular air fryer behaves.

Cook One First

If you’re trying this method for the first time, consider cooking one egg first. Once you know the exact timing for your air fryer, you can repeat it consistently.

Season After Cooking

Adding salt and pepper after cooking keeps the presentation clean and allows you to control the seasoning.

Benefits of Air Fryer Poached Eggs

Eggs are a convenient source of high-quality protein and contain several important nutrients.

A large egg provides protein along with nutrients such as vitamin B12, selenium, riboflavin, and choline. Eggs also contain fats that contribute to their satisfying texture and flavor.

Poaching is also a cooking method that doesn’t require a large amount of added oil or butter. Using the air fryer with water in the ramekin keeps the preparation simple.

For a more balanced meal, pair your poached eggs with vegetables, whole grains, avocado, or fresh fruit.

Serving Suggestions For perfect poached eggs in an air fryer

Avocado Toast

Spread mashed avocado over whole-grain toast and top with a perfectly poached egg. Finish with black pepper and chili flakes.

Eggs Benedict

Use the poached eggs to make a simple homemade Eggs Benedict with toasted English muffins, turkey or Canadian bacon, and hollandaise sauce.

Breakfast Bowl

Add the egg to a bowl filled with roasted sweet potatoes, spinach, avocado, tomatoes, and a sprinkle of feta.

Smoked Salmon Toast

Top toasted bread with cream cheese, smoked salmon, fresh dill, and your air fryer poached egg.

Mediterranean-Style Plate

Serve the egg with tomatoes, cucumber, olives, avocado, feta, and whole-grain toast for a fresh and satisfying breakfast.

Salad Topper

Place a warm poached egg over a green salad. When the yolk breaks, it creates a naturally creamy dressing for the greens.

Nutrition Facts For perfect poached eggs in an air fryer

Approximate nutrition per serving (1 poached egg):

Calories: 72

Protein: 6.3 g

Fat: 4.8 g

Saturated Fat: 1.6 g

Carbohydrates: 0.4 g

Fiber: 0 g

Sugar: 0.2 g

Cholesterol: 186 mg

Sodium: 71 mg

Nutrition values are approximate and can vary depending on egg size and the ingredients used for serving.

Frequently Asked Questions

Can you really poach eggs in an air fryer?

Yes. Cooking eggs in water inside small heat-safe ramekins allows the air fryer to create a moist cooking environment. The result can be similar to a traditionally poached egg, although the exact texture may vary between air fryer models.

What temperature is best for air fryer poached eggs?

A temperature around 300°F (150°C) works well for this method. Your particular air fryer may require slight adjustments.

How long do poached eggs take in an air fryer?

Most eggs take approximately 6–9 minutes at 300°F (150°C). Start checking around 6 minutes if you prefer a runny yolk.

Why are my egg whites still watery?

The eggs may need additional cooking time. Air fryer temperatures vary, and the amount or temperature of the water can also affect cooking.

Can I make more than two eggs?

Yes, provided your air fryer basket is large enough to hold additional ramekins safely without overcrowding. Keep the ramekins level and allow enough space for proper airflow.

Can I use cold water?

Hot water generally works better because it helps the egg begin cooking sooner. If you use cold water, you may need to increase the cooking time.

How do I get a firmer yolk?

Simply increase the cooking time by about 1–2 minutes, checking frequently until the yolk reaches your preferred consistency.

Can I make these eggs ahead of time?

Poached eggs are best served immediately for the freshest texture. If you need to prepare them ahead, they can be chilled and gently reheated, although the yolk texture may change.

Final Thoughts For perfect poached eggs in an air fryer

These perfect poached eggs in an air fryer are an easy alternative to traditional stovetop poaching. With just eggs, a little hot water, and small ramekins, you can create a delicious breakfast without standing over a pot of boiling water.The key is finding the right cooking time for your specific air fryer. Start checking around 6 minutes, then adjust the timing based on whether you prefer a very runny, creamy, or more set yolk.Serve your poached eggs over avocado toast, alongside roasted vegetables, on a breakfast bowl, or as a beautiful topping for a fresh salad. Once you find your perfect timing, this simple air fryer method can become one of your favorite ways to prepare eggs.

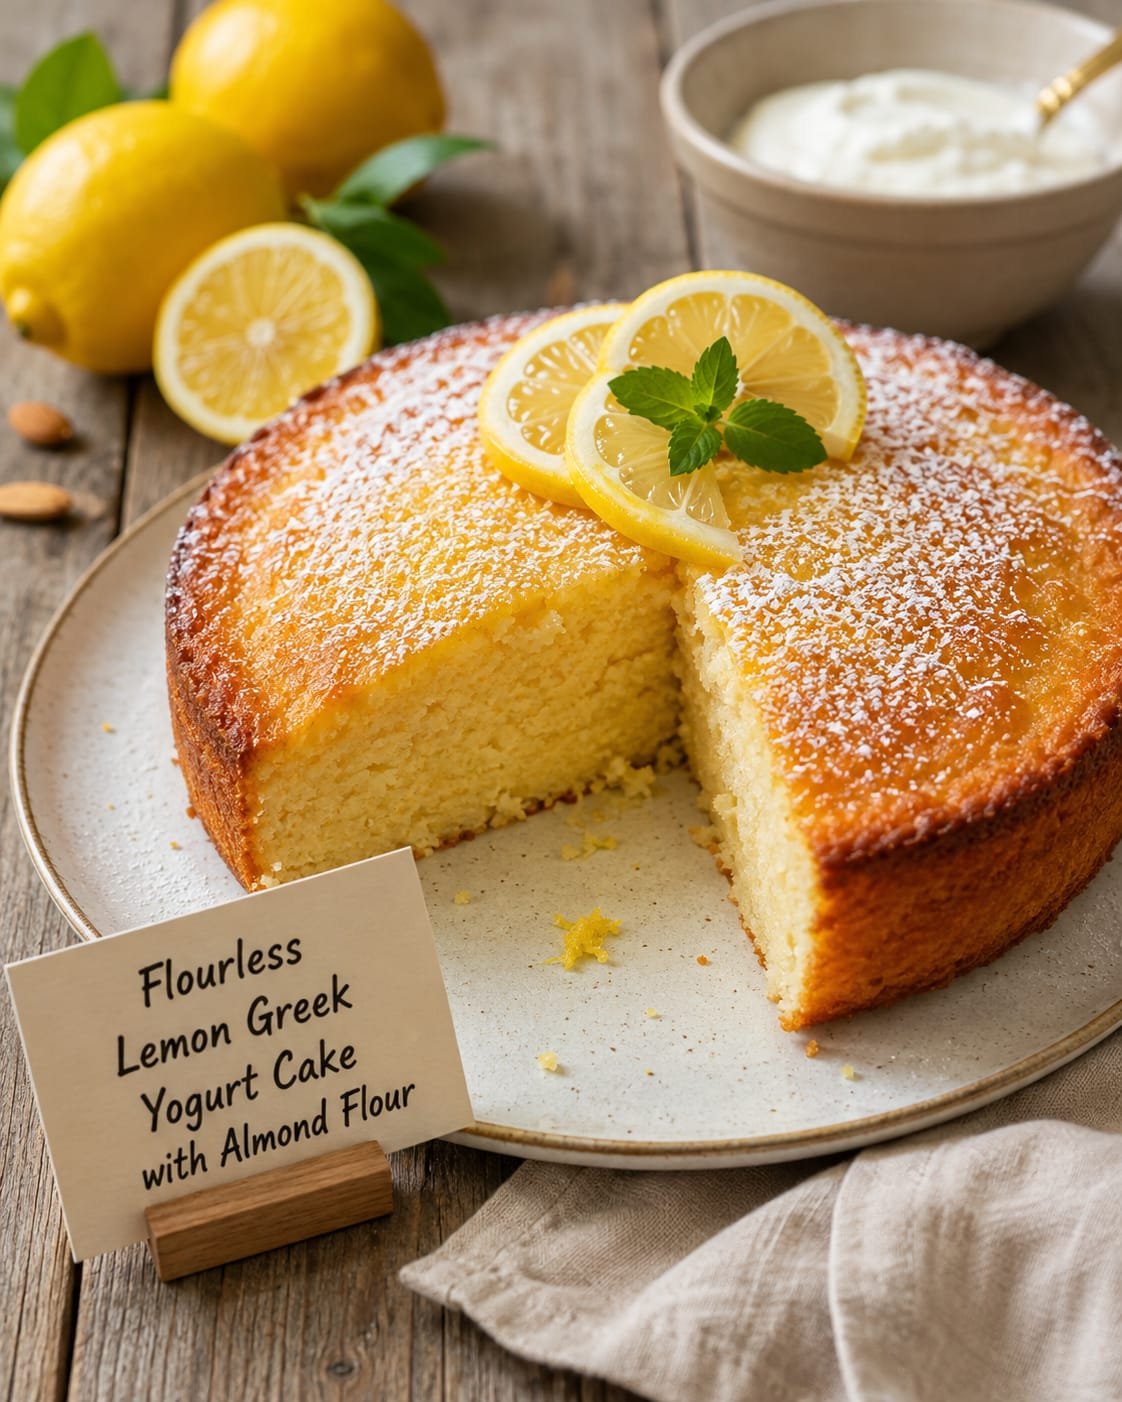
Air Fryer Flourless Lemon Greek Yogurt Cake with Almond Flour 

Air Fryer Flourless Lemon Greek Yogurt Cake with Almond Flour 

If you love light, moist desserts with a bright citrus flavor, this Flourless Lemon Greek Yogurt Cake with Almond Flour is a recipe you’ll want to make again and again. It has a soft, tender crumb, plenty of fresh lemon flavor, and a deliciously creamy texture from Greek yogurt.The best part? This cake is made without regular wheat flour and can be baked entirely in the air fryer. Almond flour gives the cake a naturally nutty flavor and delicate texture, while Greek yogurt keeps it wonderfully moist without making it heavy.It is perfect for breakfast, an afternoon treat with tea or coffee, or a simple dessert when you want something homemade without turning on the oven.

Prep Time: 10 minutes

Cook Time: 25–32 minutes

Cooling Time: 15–30 minutes

Total Time: About 55 minutes

Servings: 6–8 slices

Air Fryer Temperature: 320°F (160°C)

Why You’ll Love This Lemon Yogurt Cake

There are plenty of reasons to add this easy air fryer cake to your recipe collection.

Flourless: This recipe uses almond flour instead of traditional all-purpose flour.

Moist and tender: Greek yogurt helps create a soft texture that stays moist after baking.

Bright lemon flavor: Fresh lemon zest and juice give every bite a refreshing citrus taste.

Air fryer friendly: You can make this cake quickly without heating your entire kitchen.

Simple ingredients: Most of the ingredients are easy to find and may already be in your pantry.

Perfect for any occasion: Serve it for breakfast, brunch, afternoon tea, or dessert.

Ingredients For Flourless Lemon Greek Yogurt Cake

For the Cake

1 cup almond flour

½ cup plain Greek yogurt

2 large eggs

⅓ cup granulated sugar

2 tablespoons fresh lemon juice

1 tablespoon finely grated lemon zest

2 tablespoons melted butter or coconut oil

1 teaspoon vanilla extract

1 teaspoon baking powder

¼ teaspoon baking soda

⅛ teaspoon salt

Optional Lemon Glaze

½ cup powdered sugar

1–2 tablespoons fresh lemon juice

½ teaspoon lemon zest

Optional Toppings

Fresh lemon zest

Thin lemon slices

Fresh berries

Powdered sugar

A spoonful of Greek yogurt

Equipment For Flourless Lemon Greek Yogurt Cake

Air fryer

6-inch round cake pan that fits your air fryer

Mixing bowls

Whisk

Spatula

Parchment paper

Cooking spray or a little butter for greasing

How to Make Flourless Lemon Greek Yogurt Cake in the Air Fryer

Prepare the Cake Pan

Start by choosing a 6-inch round cake pan that fits comfortably inside your air fryer basket.

Lightly grease the bottom and sides of the pan with butter or cooking spray. Cut a round piece of parchment paper and place it on the bottom.

The parchment makes it much easier to remove the cake after baking.

Mix the Wet Ingredients

In a medium mixing bowl, add the eggs and sugar.

Whisk for about 1–2 minutes until the mixture looks slightly lighter and smooth. You don’t need to whip the eggs to a specific volume; just make sure the sugar is well incorporated.

Add the Greek yogurt, melted butter or coconut oil, fresh lemon juice, lemon zest, and vanilla extract.

Whisk until everything is smooth and evenly combined.

For the best lemon flavor, use fresh lemon zest and freshly squeezed lemon juice rather than bottled lemon juice.

Combine the Dry Ingredients

In a separate bowl, combine the almond flour, baking powder, baking soda, and salt.

Mix well so the leavening agents are distributed evenly throughout the almond flour.

Make the Batter

Gradually add the dry ingredients to the wet mixture.

Use a spatula or whisk to gently combine everything until you have a smooth, thick batter.

Avoid overmixing. Once the almond flour is incorporated and there are no obvious dry patches, stop mixing.

The batter should be thick but pourable.

Transfer to the Pan

Pour the batter into your prepared cake pan.

Gently tap the pan on the counter once or twice to remove large air bubbles.

Smooth the top with a spatula.

Air Fry the Cake

Preheat your air fryer to 320°F (160°C) for about 3 minutes.

Place the cake pan carefully into the air fryer basket.

Air fry at 320°F (160°C) for approximately 25–32 minutes.

Because air fryers vary significantly, begin checking the cake around the 25-minute mark.

Insert a toothpick into the center. If it comes out clean or with a few moist crumbs attached, the cake is ready.

If the top is browning too quickly while the center is still wet, loosely cover the cake with aluminum foil and continue cooking until done.

Cool Completely

Remove the cake pan from the air fryer and place it on a cooling rack.

Allow the cake to cool in the pan for about 10–15 minutes.

Then carefully run a knife around the edges and remove the cake from the pan.

Allow it to cool completely before adding the glaze.

This cooling time is important because almond flour cakes can be delicate when they are hot.

How to Make the Easy Lemon Glaze

If you want an extra burst of lemon flavor, make a simple glaze.

Add powdered sugar to a small bowl and gradually whisk in fresh lemon juice.

Start with 1 tablespoon of lemon juice and add more, a little at a time, until you reach your preferred consistency.

For a thicker glaze, use less lemon juice. For a thinner drizzle, add slightly more.

Once the cake has cooled completely, drizzle the glaze over the top.

Finish with a little freshly grated lemon zest.

Tips for the Best Air Fryer Almond Flour Cake

Use Finely Ground Almond Flour

For the smoothest texture, choose finely ground almond flour rather than coarse almond meal. Almond meal can make the cake heavier and more textured.

Don’t Overmix the Batter

Mix just until the ingredients are combined. Overmixing isn’t necessary and can affect the delicate texture of the finished cake.

Check Your Air Fryer Early

Every air fryer cooks differently. Some models circulate heat more aggressively than others, so your cake may finish sooner or require a few extra minutes.

Protect the Top if Necessary

If the top becomes golden brown before the center is fully cooked, loosely cover it with foil. This allows the inside to continue cooking without over-browning the surface.

Let It Cool

Don’t rush to slice the cake immediately after cooking. Letting it cool allows the crumb to set properly and makes slicing much easier.

Variations You Can Try

This lemon yogurt cake is delicious as written, but you can easily customize it.

blueberry lemon cake, gently fold ⅓ cup of fresh or frozen blueberries into the batter.

lemon coconut cake, add 2 tablespoons of unsweetened shredded coconut.

berry-topped cake, serve slices with strawberries, raspberries, or blueberries.

extra lemon flavor, add another teaspoon of lemon zest to the batter.

You can also skip the glaze and simply dust the cooled cake with a small amount of powdered sugar.

How to Store the Cake

Store leftover cake in an airtight container in the refrigerator for up to 4 days.

Because this cake contains Greek yogurt, refrigeration is recommended for longer storage.

Allow individual slices to sit at room temperature for a few minutes before serving, or enjoy them chilled.

You can also freeze individual slices. Wrap them tightly and place them in a freezer-safe container for up to about 2 months. Thaw in the refrigerator before serving.

How to Serve Lemon Greek Yogurt Cake

This cake is delicious on its own, but there are many ways to serve it.

Pair a slice with a cup of coffee or tea for an afternoon snack. For dessert, add fresh berries and a spoonful of Greek yogurt.

For a more elegant presentation, drizzle the lemon glaze over the top and decorate with thin lemon slices and fresh berries.

The combination of tangy lemon, creamy yogurt, and nutty almond flour makes this cake refreshing rather than overly rich.

Final Thoughts For Flourless Lemon Greek Yogurt Cake

This Flourless Lemon Greek Yogurt Cake with Almond Flour proves that you don’t need traditional flour or an oven to make a delicious homemade cake. The almond flour creates a delicate, slightly nutty base, while Greek yogurt gives every slice a soft and moist texture.Fresh lemon juice and zest bring a bright citrus flavor that balances the sweetness beautifully. And because it cooks in the air fryer, this cake is especially convenient when you’re craving a homemade dessert without spending a lot of time in the kitchen.Serve it simply with tea or coffee, or dress it up with lemon glaze and fresh berries. Either way, this easy air fryer cake is a delicious little treat that’s sure to disappear quickly!

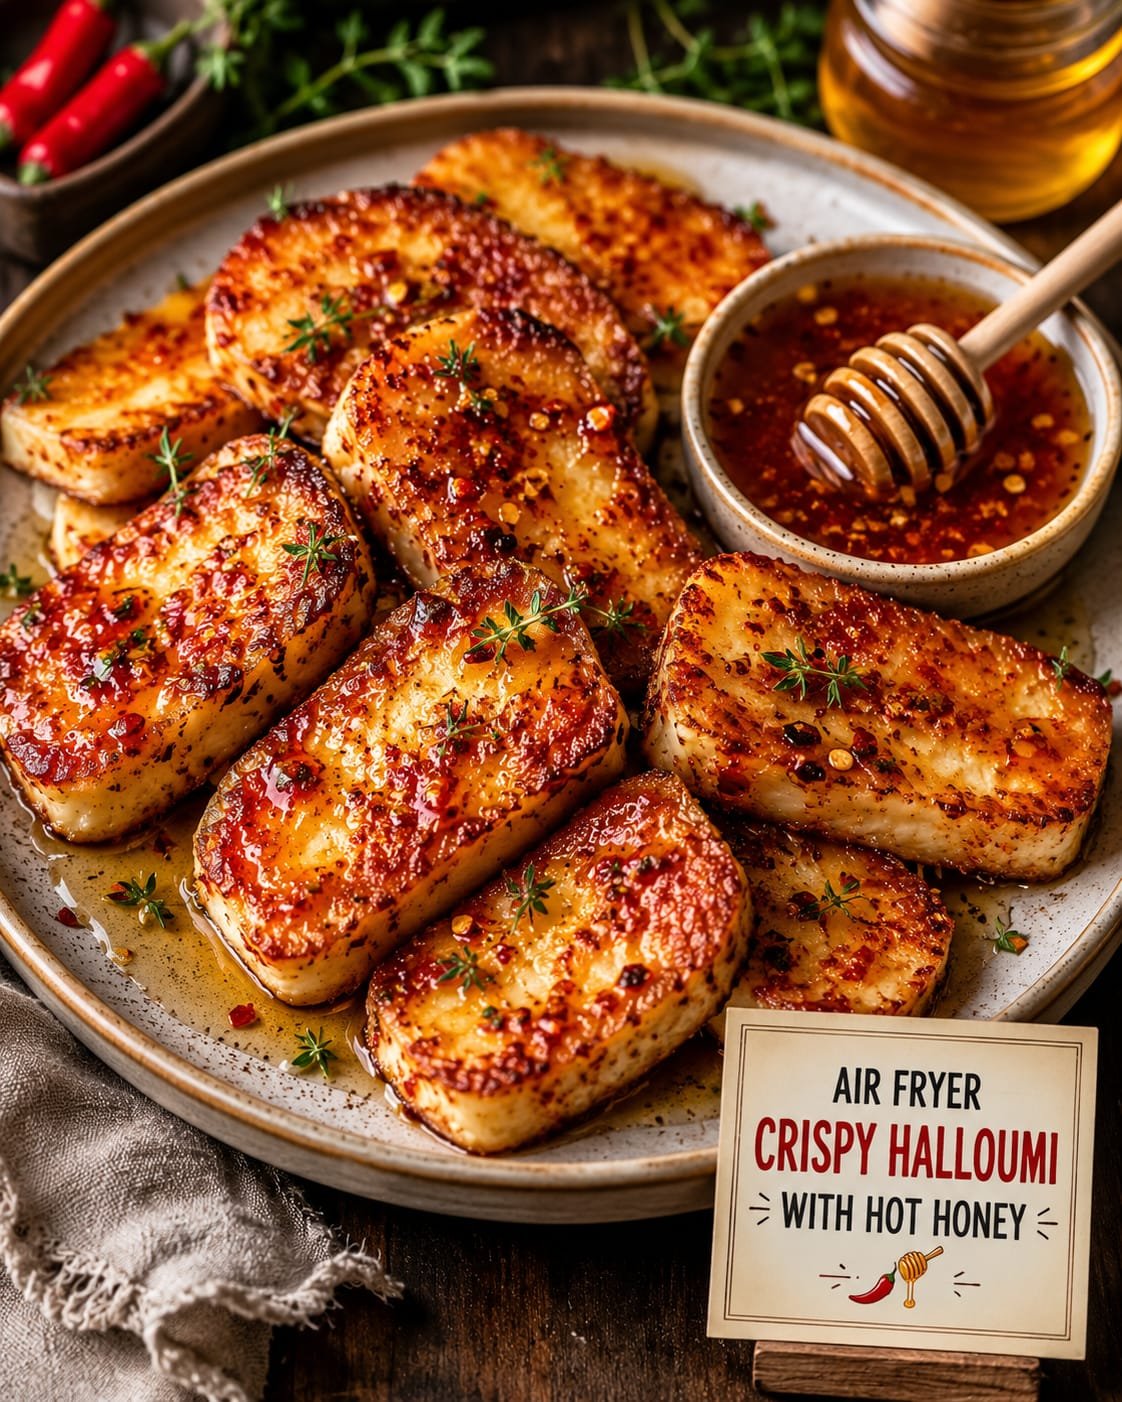
Air Fryer Crispy Halloumi with Hot Honey

Air Fryer Crispy Halloumi with Hot Honey

Golden, Crispy Halloumi Bites Drizzled with Sweet and Spicy Hot Honey

If you love the combination of salty, crispy cheese and sweet spicy flavors, this Air Fryer Crispy Halloumi with Hot Honey is a recipe you need to try. Halloumi cheese develops a beautifully golden crust in the air fryer while staying warm and pleasantly chewy in the center. A drizzle of hot honey adds the perfect balance of sweetness and heat.This easy recipe makes an excellent appetizer, party snack, side dish, or quick vegetarian treat. The air fryer eliminates the need for deep frying and gives the halloumi deliciously crisp edges with very little oil.The best part is how simple it is. Cut the halloumi into bite-sized pieces, coat them lightly, air fry until golden, and finish with hot honey. Serve immediately for the best texture.

Prep Time: 10 minutes

Cook Time: 8–10 minutes

Total Time: 20 minutes

Servings: 4

Cuisine: Mediterranean-Inspired

Difficulty: Easy

Why You’ll Love This Recipe

Crispy and golden outside

Warm, chewy halloumi center

Sweet and spicy hot honey

Quick air fryer recipe

Minimal oil

Vegetarian-friendly

Perfect appetizer

Great for parties

Ready in about 20 minutes

Easy to customize

Ingredients for Crispy Halloumi with Hot Honey

For the Crispy Halloumi

8 ounces (225 g) halloumi cheese

2 tablespoons cornstarch

1 teaspoon olive oil

For the Hot Honey

¼ cup honey

½–1 teaspoon red pepper flakes

½ teaspoon hot sauce, optional

1 teaspoon fresh lemon juice, optional

Optional Garnishes

Fresh parsley

Fresh mint

Sesame seeds

Lemon wedges

Black pepper

Chili flakes

What Is Halloumi?

Halloumi is a semi-firm cheese traditionally associated with Cyprus. It has a high melting point, which means it can be grilled, pan-fried, or air fried without completely melting away.

When cooked, halloumi develops a golden exterior while maintaining a deliciously chewy center.

Its naturally salty flavor pairs particularly well with sweet ingredients such as honey, watermelon, figs, and dates.

Equipment Needed for Crispy Halloumi with Hot Honey

Air fryer

Cutting board

Sharp knife

Mixing bowl

Small saucepan

Tongs

Paper towels

Pastry brush, optional

How to Make Air Fryer Crispy Halloumi

Prepare the Halloumi

Remove the halloumi from its packaging.

Pat it thoroughly dry using paper towels.

This is important because excess moisture can prevent the exterior from becoming properly crispy.

Cut the halloumi into bite-sized cubes or thick strips.

Try to keep the pieces approximately the same size so they cook evenly.

Coat the Halloumi

Place the halloumi pieces in a bowl.

Sprinkle the cornstarch over them.

Gently toss until each piece is lightly coated.

The cornstarch creates a thin coating that helps the halloumi develop a beautifully crisp exterior.

Avoid using too much cornstarch because a heavy coating can become powdery.

Prepare the Air Fryer

Preheat the air fryer to 390°F (200°C) for approximately 3 minutes.

Lightly brush or spray the basket with olive oil.

Place the halloumi pieces into the basket in a single layer.

Leave space between the pieces so hot air can circulate.

Air Fry the Halloumi

Lightly brush the halloumi with approximately 1 teaspoon olive oil.

Air fry at 390°F (200°C) for approximately 8–10 minutes.

Turn the pieces halfway through cooking.

The halloumi should become golden brown and crisp around the edges.

Keep a close eye on it during the final few minutes because cheese can brown quickly.

Make the Hot Honey

While the halloumi cooks, prepare the hot honey.

Add honey and red pepper flakes to a small saucepan.

Warm over low heat for 1–2 minutes.

Don’t boil the honey.

Remove from the heat and stir in hot sauce if using.

For a brighter flavor, add a small amount of fresh lemon juice.

Taste and adjust the heat according to your preference.

Drizzle With Hot Honey

Transfer the crispy halloumi to a serving plate.

Drizzle generously with warm hot honey.

Garnish with fresh parsley or mint.

Add a few chili flakes and a squeeze of lemon if desired.

Serve immediately.

Tips for Extra-Crispy Halloumi

Dry the cheese thoroughly

Moisture can prevent browning.

Use cornstarch

A light coating creates a crisp exterior.

Don’t overcrowd the basket

Air circulation is essential for even browning.

Cook at high heat

A temperature around 390°F helps the outside become golden quickly.

Serve immediately

Halloumi is best when it’s hot. It becomes firmer and chewier as it cools.

Don’t overcook

You want golden edges and a warm center, not dry cheese.

Hot Honey Flavor Variations

Extra-Spicy Hot Honey

Add more red pepper flakes and a few drops of your favorite hot sauce.

Lemon Hot Honey

Add fresh lemon juice and a little lemon zest.

Garlic Hot Honey

Warm the honey with one lightly crushed garlic clove, then remove the garlic before serving.

Smoked Hot Honey

Add a small pinch of smoked paprika or chipotle powder.

Herb Hot Honey

Add fresh thyme or rosemary while warming the honey.

Remove the herbs before drizzling.

Serving Ideas for Crispy Halloumi with Hot Honey

Air fryer crispy halloumi with hot honey can be served in many ways.

As an Appetizer

Arrange the halloumi on a platter with:

Lemon wedges

Olives

Cherry tomatoes

Cucumber

Warm pita bread

Hummus

As a Salad Topping

Add crispy halloumi to:

Greek salad

Mediterranean salad

Arugula salad

Tomato cucumber salad

Grain bowls

The salty cheese adds a delicious protein-rich element.

With Toast

Serve over toasted sourdough with avocado and hot honey.

With Flatbread

Add crispy halloumi to warm flatbread with cucumber, tomatoes, herbs, and yogurt sauce.

With Fruit

The salty halloumi works beautifully with:

Watermelon

Fresh figs

Pears

Peaches

Grapes

Dipping Sauce Ideas

Although hot honey is the star, you can serve additional sauces alongside the halloumi:

Garlic yogurt

Tzatziki

Ranch

Spicy mayo

Lemon yogurt

Tahini sauce

Marinara

Recipe Variations for Crispy Halloumi with Hot Honey

Crispy Halloumi Fries

Cut the cheese into long strips instead of cubes.

Coat lightly with cornstarch and air fry until golden.

Serve with hot honey as a dipping sauce.

Sesame Halloumi

Sprinkle sesame seeds over the halloumi immediately after air frying.

Mediterranean Halloumi

Finish with fresh mint, oregano, lemon zest, and olive oil.

Pomegranate Halloumi

Drizzle with hot honey and add pomegranate seeds for a sweet, tart contrast.

Storage Instructions

Halloumi is best served immediately because its texture changes as it cools.

If you have leftovers, allow them to cool and store them in an airtight container in the refrigerator for up to 3 days.

Keep the hot honey separate if possible.

Reheating Instructions

Reheat the halloumi in the air fryer at 350°F (175°C) for approximately 2–4 minutes.

Avoid microwaving because it can make the cheese rubbery.

Add fresh hot honey after reheating.

Can You Freeze Cooked Halloumi?

Freezing isn’t recommended for the best texture. Halloumi can become noticeably tougher after freezing and thawing.

For the best results, prepare only the amount you plan to eat.

Nutrition Information for Crispy Halloumi with Hot Honey

Approximate nutrition per serving:

Calories: 350 kcal

Protein: 17 g

Carbohydrates: 25 g

Fat: 21 g

Saturated Fat: 14 g

Cholesterol: 55 mg

Sodium: 850 mg

Fiber: 0.5 g

Sugar: 22 g

Nutrition information is estimated and will vary depending on the halloumi, honey, and amount of hot sauce used.

Frequently Asked Questions

Why isn’t my halloumi crispy?

Make sure the halloumi is thoroughly dried before coating it. Avoid overcrowding the air fryer and cook at a high enough temperature.

Does halloumi melt in the air fryer?

Halloumi has a high melting point, so it generally holds its shape when air fried. It becomes softer and golden on the outside rather than melting like mozzarella.

Can I make this without cornstarch?

Yes. You can air fry the halloumi without cornstarch, although the exterior may not become quite as crisp.

Is halloumi vegetarian?

Many halloumi products are vegetarian-friendly, but some traditional varieties use animal rennet. Check the package if vegetarian suitability is important to you.

Can I use maple syrup instead of honey?

Yes. Maple syrup can provide a delicious alternative, although it has a slightly different flavor and thinner consistency.

How spicy should hot honey be?

It’s completely customizable. Start with a small amount of chili flakes, taste, and add more until you reach your preferred level of heat.

Can I use pre-made hot honey?

Absolutely. Store-bought hot honey makes this recipe even faster. Simply drizzle it over the freshly cooked halloumi.

Final Thoughts for Crispy Halloumi with Hot Honey

This Air Fryer Crispy Halloumi with Hot Honey is an incredibly simple recipe that delivers an impressive combination of textures and flavors. The halloumi becomes golden and crisp around the edges while staying warm and pleasantly chewy inside. The sweet honey and spicy chili create the perfect contrast to the cheese’s naturally salty flavor.The air fryer makes the process quick and convenient, with no need for deep frying or a messy skillet. For the best results, dry the halloumi thoroughly, use a light coating of cornstarch, avoid overcrowding the basket, and serve the cheese immediately after cooking.Whether you’re preparing a party appetizer, adding something special to a salad, or simply looking for a quick vegetarian snack, this crispy halloumi is sure to impress.Golden, salty, crispy, sweet, and spicy—this easy air fryer halloumi is the kind of appetizer that disappears within minutes.