Crispy Smashed Potatoes

Crispy Smashed Potatoes

Ultra-Crispy Smashed Potatoes with Fluffy Centers

If you love potatoes with crispy golden edges and soft, fluffy centers, these Crispy Smashed Potatoes are a must-try. This easy potato recipe transforms simple baby potatoes into an irresistible side dish with plenty of crunch and savory flavor.The secret is simple: boil the potatoes until tender, gently smash them flat, coat them with olive oil and seasonings, and roast them at high heat until the edges become deeply golden and crispy. The rough, uneven surface created by smashing the potatoes gives them plenty of little edges that turn wonderfully crunchy during cooking.These potatoes are perfect for weeknight dinners, holiday meals, brunch, or as a snack with your favorite dipping sauce. They pair beautifully with chicken, steak, fish, burgers, eggs, and roasted vegetables.

Prep Time: 15 minutes

Cook Time: 35–40 minutes

Time: 50–55 minutes

Servings: 4–6

Cuisine: American

Difficulty: Easy

Why You’ll Love These Crispy Smashed Potatoes

Crispy and golden on the outside

Fluffy and tender inside

Easy ingredients

Simple preparation

Perfect side dish

Great for entertaining

Naturally vegetarian

Easy to customize

Delicious with dipping sauces

Works in the oven or air fryer

Ingredients for Crispy Smashed Potatoes

2 pounds (900 g) baby potatoes

3 tablespoons olive oil

1 teaspoon garlic powder

1 teaspoon paprika

½ teaspoon onion powder

1 teaspoon salt

½ teaspoon black pepper

2 tablespoons fresh parsley, chopped

Optional Additions

For extra flavor, you can also add:

Grated Parmesan

Fresh rosemary

Fresh thyme

Chili flakes

Lemon zest

Garlic butter

Chives

Flaky sea salt

Best Potatoes for Smashed Potatoes

Small baby potatoes are ideal because they cook quickly and are easy to smash.

You can use:

Baby Yukon Gold potatoes

Baby red potatoes

Fingerling potatoes

Small white potatoes

Mixed-color baby potatoes

Choose potatoes that are relatively similar in size so they finish cooking at approximately the same time.

Equipment Needed for Crispy Smashed Potatoes

Large pot

Baking sheet

Parchment paper

Potato masher or sturdy glass

Large bowl

Colander

Pastry brush, optional

How to Make Crispy Smashed Potatoes

Wash the Potatoes

Wash the baby potatoes thoroughly under cool running water.

If the potatoes are small and have thin skins, there’s no need to peel them.

The potato skins become deliciously crispy during cooking.

Boil the Potatoes

Place the potatoes into a large pot and cover them with cold water.

Add a generous pinch of salt.

Bring the water to a boil.

Once boiling, reduce the heat slightly and simmer the potatoes for approximately 15–20 minutes, depending on their size.

The potatoes should be fork-tender but not falling apart.

You want them soft enough to smash while still holding their shape.

Drain and Dry

Drain the potatoes thoroughly in a colander.

Allow them to sit for approximately 5 minutes so excess steam can escape.

This step is important because drier potatoes crisp much better.

Prepare the Baking Sheet

Preheat your oven to 425°F (220°C).

Line a large baking sheet with parchment paper.

Lightly brush or spray the parchment with olive oil.

Arrange the boiled potatoes on the baking sheet, leaving space between each one.

Smash the Potatoes

Using a potato masher, the bottom of a sturdy glass, or a flat spatula, gently press each potato until it is about ½-inch thick.

Don’t completely flatten them.

The uneven edges are what become beautifully crispy.

If a potato cracks slightly around the edges, that’s actually a good thing.

Those little cracks create extra crunchy pieces.

Season the Potatoes

Drizzle the olive oil over the potatoes.

Sprinkle with garlic powder, paprika, onion powder, salt, and black pepper.

Use a pastry brush to distribute the oil and seasoning evenly if desired.

Make sure the oil reaches the edges because those areas will become wonderfully crisp.

Roast Until Crispy

Place the baking sheet in the preheated oven.

Roast for approximately 25–35 minutes.

The exact cooking time depends on the thickness of the potatoes and your oven.

For maximum crispiness, avoid turning them too early.

Check after approximately 25 minutes.

The potatoes should have deeply golden edges and crisp surfaces.

If needed, roast for another 5–10 minutes.

Add Fresh Herbs

Remove the potatoes from the oven.

Sprinkle with freshly chopped parsley.

For extra flavor, add a little flaky sea salt, Parmesan, or lemon zest.

Serve immediately while they’re hot and crispy.

The Secret to Extra-Crispy Smashed Potatoes

Don’t undercook the potatoes

They need to be tender enough to flatten easily.

Let them steam-dry

After boiling, give the potatoes several minutes to release excess moisture.

Smash them thin

A thinner potato creates more surface area for crisping.

Don’t overcrowd the tray

Leave plenty of space around each potato.

Use enough oil

You don’t need to drench them, but enough oil helps create a crisp golden crust.

Roast at high heat

A hot oven is essential for getting those crunchy edges.

Don’t flip too early

Allow the bottom to develop a crust before moving the potatoes.

Parmesan Crispy Smashed Potatoes

For a cheesy variation, sprinkle finely grated Parmesan over the potatoes during the final 5–10 minutes of roasting.

The cheese becomes golden and crispy while adding a delicious savory flavor.

Garlic Butter Smashed Potatoes

Melt 2 tablespoons butter with minced garlic.

Brush it over the potatoes immediately after roasting.

Finish with fresh parsley and Parmesan.

Spicy Smashed Potatoes

Add:

Chili flakes

Cayenne pepper

Smoked paprika

Hot sauce

Serve with a cooling ranch or yogurt dip.

Lemon Herb Smashed Potatoes

After roasting, add:

Fresh lemon zest

Lemon juice

Parsley

Fresh thyme

The bright lemon flavor works particularly well with grilled fish and chicken.

Air Fryer Smashed Potatoes

You can easily adapt this recipe for the air fryer.

After boiling and smashing the potatoes, brush them with olive oil and season as directed.

Preheat the air fryer to 400°F (200°C).

Arrange the potatoes in a single layer.

Air fry for approximately 15–20 minutes, depending on thickness.

Turn them carefully halfway through if needed.

Cook until deeply golden and crispy.

You may need to work in batches to avoid overcrowding.

What to Serve With Crispy Smashed Potatoes

These potatoes work with almost any main course.

With Chicken

Serve alongside:

Roast chicken

Grilled chicken

Tenders chicken

Chicken breast

Thighs chicken

With Beef

They’re delicious with:

Steak

Burgers

Meatloaf

Roast beef

With Fish

Pair them with:

Baked salmon

Grilled fish

Garlic prawns

Crispy white fish

For Breakfast

Serve with:

Fried eggs

Scrambled eggs

Omelets

Breakfast sausage

Avocado

Best Dipping Sauces

Serve crispy smashed potatoes with:

Garlic aioli

Ranch dressing

Sour cream

Spicy mayo

Chipotle sauce

Tzatziki

Ketchup

BBQ sauce

Garlic yogurt

Cheese sauce

Storage Instructions

Allow leftover potatoes to cool completely.

Place them in an airtight container and refrigerate for up to 3–4 days.

For best texture, keep them uncovered until completely cool before sealing the container. This helps reduce trapped condensation.

Reheating Instructions

The oven or air fryer works best for restoring crispiness.

Air Fryer

Heat at 375°F (190°C) for approximately 4–7 minutes.

Oven

Place on a baking sheet and heat at 400°F (200°C) for approximately 8–12 minutes.

Avoid microwaving if possible because it will soften the crispy exterior.

Can You Freeze Smashed Potatoes?

Yes.

Allow the cooked potatoes to cool completely.

Arrange them in a single layer on a baking sheet and freeze until solid.

Transfer them to a freezer-safe container or bag.

Freeze for up to 2 months for best quality.

Reheat directly from frozen in an air fryer or hot oven until crisp and heated through.

Nutrition Information for Crispy Smashed Potatoes

Approximate nutrition per serving, based on 6 servings:

Calories: 235 kcal

Protein: 4 g

Carbohydrates: 32 g

Fat: 11 g

Saturated Fat: 1.5 g

Cholesterol: 0 mg

Sodium: 430 mg

Fiber: 4 g

Sugar: 2 g

Nutrition information is an estimate and will vary depending on potato size, oil, seasonings, and optional toppings.

Frequently Asked Questions

Why aren’t my smashed potatoes crispy?

The most common reasons are excess moisture, overcrowding, insufficient oil, or a cooking temperature that’s too low. Make sure the boiled potatoes are allowed to steam-dry before roasting.

How thin should I smash the potatoes?

Approximately ½-inch thick is a good starting point. Thinner potatoes generally become crispier, while thicker potatoes have a softer center.

Can I prepare smashed potatoes ahead of time?

Yes. Boil and smash the potatoes several hours ahead of time. Refrigerate them uncovered or loosely covered, then season and roast when ready.

Do I need to peel the potatoes?

No. Baby potato skins are thin and become deliciously crispy. Just wash them well before cooking.

Can I use large potatoes?

Yes, but cut them into smaller pieces before boiling. Baby potatoes are easier to smash and tend to produce better individual portions.

Can I use butter instead of olive oil?

Absolutely. Melted butter gives the potatoes a rich flavor. You can also combine butter and olive oil.

Can I add cheese?

Yes. Parmesan, cheddar, mozzarella, Gruyère, or feta can all work beautifully, depending on the flavor you’re looking for.

Final Thoughts for Crispy Smashed Potatoes

These Crispy Smashed Potatoes are everything you want in a potato side dish: golden, crunchy edges, fluffy centers, savory seasoning, and plenty of irresistible texture.The technique is simple but makes ordinary potatoes feel special. Boiling them first makes the centers tender, while smashing them creates lots of rough edges and surface area for the oven to crisp. A generous coating of olive oil and high heat finishes the job.For the crispiest results, don’t skip the steam-drying step, avoid overcrowding the baking sheet, and give the potatoes enough time to develop a deep golden crust.Serve them with steak, chicken, fish, burgers, eggs, or your favorite dipping sauce. Whether you’re preparing a simple weeknight dinner or a holiday feast, these crispy smashed potatoes are an easy side dish that’s guaranteed to disappear quickly.
Easy Air Fryer Vegetable Pizza

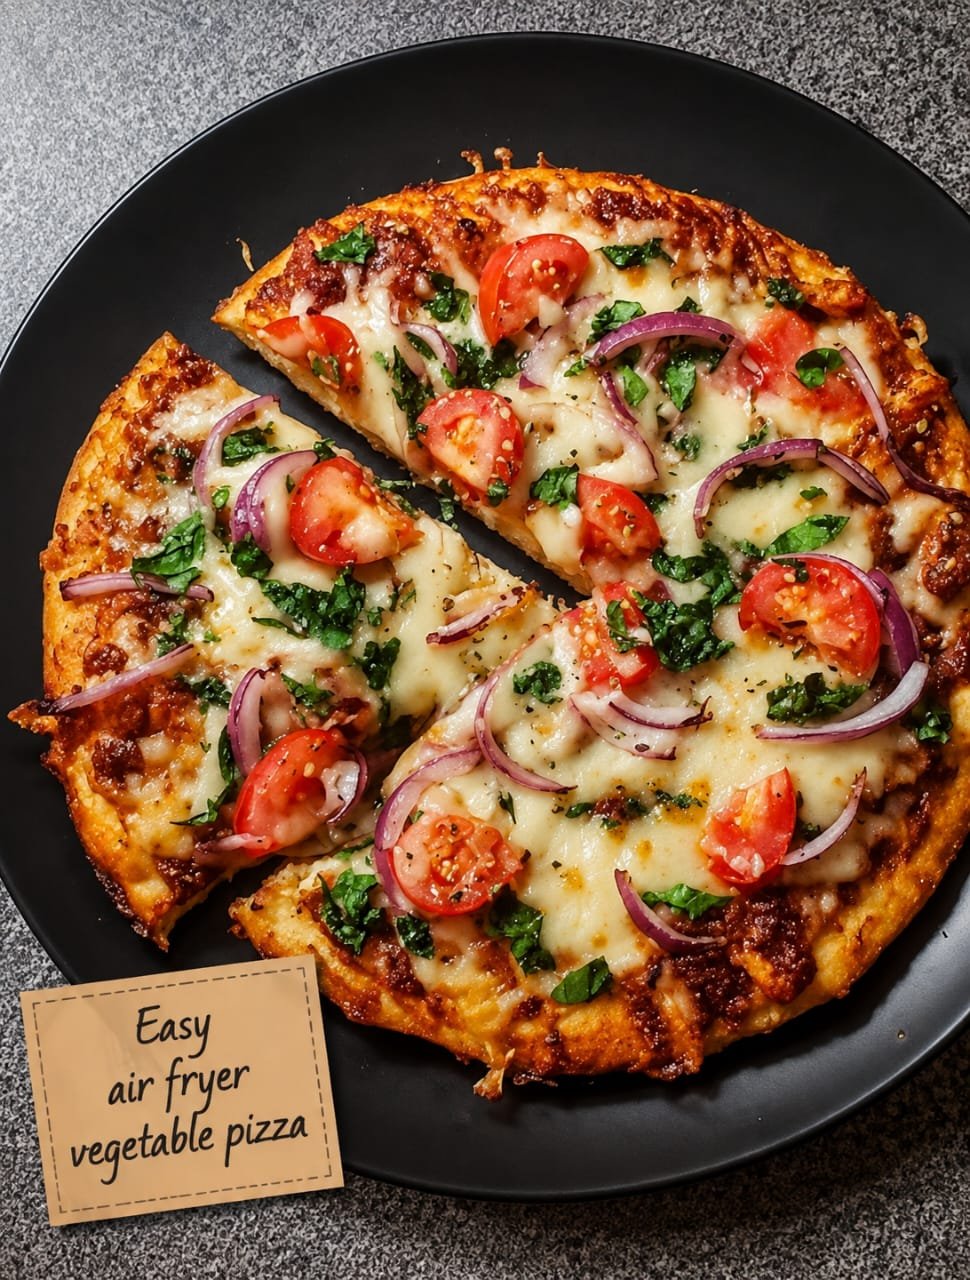
Easy Air Fryer Vegetable Pizza

Crispy, Cheesy, Loaded with Colorful Vegetables

If you love homemade pizza but don’t want to heat up the oven, this Air Fryer Vegetable Pizza is the perfect solution. It has a wonderfully crisp crust, bubbling melted cheese, savory tomato sauce, and plenty of colorful vegetables in every bite.The air fryer cooks pizza surprisingly well. The circulating hot air helps the crust become golden and crisp while melting the cheese beautifully. Best of all, this recipe is easy to customize with whatever vegetables you already have in your refrigerator.This vegetable pizza makes a delicious quick lunch, easy weeknight dinner, after-school snack, or casual weekend meal. It’s also a great way to add more vegetables to a classic comfort food.

Prep Time: 15 minutes

Cook Time: 8–12 minutes

Total Time: 25–30 minutes

Servings: 2–4

Cuisine: Italian-American

Difficulty: Easy

Why You’ll Love This Air Fryer Pizza

Crispy crust without a traditional oven

Loaded with fresh vegetables

Ready in about 30 minutes

Easy to customize

Perfect for small households

Great way to use leftover vegetables

Cheesy and flavorful

Minimal cleanup

Perfect for lunch, dinner, or snacks

Ingredients for Air Fryer Vegetable Pizza

For the Pizza

1 prepared pizza dough, approximately 8–10 ounces (225–285 g)

½ cup pizza or marinara sauce

1½ cups shredded mozzarella cheese

½ small bell pepper, thinly sliced

¼ red onion, thinly sliced

½ cup mushrooms, thinly sliced

½ cup cherry tomatoes, halved

¼ cup black olives, sliced

1 tablespoon olive oil

Optional Seasonings

½ teaspoon dried oregano

½ teaspoon Italian seasoning

¼ teaspoon garlic powder

Red pepper flakes

Fresh basil

Black pepper

Grated Parmesan

Best Vegetables for Air Fryer Pizza

You can use almost any vegetable, but vegetables that cook quickly work particularly well.

Great options include:

Bell peppers

Mushrooms

Red onion

Cherry tomatoes

Spinach

Zucchini

Broccoli

Olives

Corn

Jalapeños

Roasted red peppers

For vegetables with high moisture content, such as zucchini and mushrooms, use moderate amounts and slice them thinly. Too many watery toppings can make the crust soggy.

Equipment Needed for Air Fryer Vegetable Pizza

Air fryer

Rolling pin

Cutting board

Sharp knife

Small bowl

Parchment paper

Kitchen brush

Spatula or tongs

How to Make Air Fryer Vegetable Pizza

Prepare the Vegetables

Wash and dry all vegetables thoroughly.

Slice the bell pepper, red onion, and mushrooms thinly.

Cut the cherry tomatoes in half and slice the olives.

If using zucchini or another high-moisture vegetable, pat it dry with paper towels.

Keeping the vegetables relatively thin helps them cook properly during the short air-frying time.

Prepare the Pizza Dough

Place the pizza dough on a lightly floured work surface.

Roll or gently stretch it into a circle that fits comfortably inside your air fryer basket.

Don’t make the crust too thick because it may not cook through before the toppings are finished.

For a crispier crust, aim for approximately ¼-inch thickness.

Preheat the Air Fryer

Preheat the air fryer to 375°F (190°C) for approximately 3–5 minutes.

Preheating helps the crust start cooking immediately and promotes better browning.

Pre-Cook the Crust

Place the pizza dough carefully into the air fryer basket.

Cook the plain crust at 375°F (190°C) for approximately 3–4 minutes.

This quick pre-cooking step helps prevent the sauce and vegetables from making the center soggy.

If the dough begins to puff up, gently press it down with a spatula.

Add the Sauce

Remove the partially cooked crust from the air fryer.

Spread approximately ½ cup pizza sauce evenly over the surface.

Leave a small border around the edge for the crust.

Don’t use too much sauce because excess moisture can prevent the base from becoming crisp.

Add the Cheese

Sprinkle the shredded mozzarella evenly over the sauce.

Make sure the cheese reaches most of the pizza but doesn’t pile too heavily in the center.

Add the Vegetables

Arrange the sliced bell peppers, onions, mushrooms, tomatoes, and olives over the cheese.

Try not to overload the pizza.

A moderate amount of toppings allows the hot air to circulate and helps the crust stay crisp.

Drizzle lightly with olive oil.

Sprinkle with oregano or Italian seasoning if desired.

Air Fry the Pizza

Carefully return the assembled pizza to the air fryer.

Cook at 375°F (190°C) for approximately 5–8 minutes.

The pizza is ready when:

The cheese is melted and bubbling

The vegetables are tender

The crust is golden brown

The edges are crisp

Cooking time will vary depending on your air fryer and the thickness of your crust.

Finish and Serve

Carefully remove the pizza from the air fryer.

Allow it to cool for 2–3 minutes before slicing.

Finish with fresh basil, grated Parmesan, black pepper, or red pepper flakes if desired.

Slice and serve immediately.

Tips for the Crispiest Air Fryer Pizza

Don’t overload the toppings

Too many vegetables release moisture and can make the crust soft.

Slice vegetables thinly

Thin vegetables cook quickly and evenly.

Pre-cook the crust

A short pre-cooking step helps create a crisp base.

Don’t use too much sauce

A thin layer is enough.

Use low-moisture mozzarella

It melts beautifully without releasing excessive water.

Preheat your air fryer

A hot cooking environment helps the crust brown faster.

Leave space around the pizza

Good air circulation is essential for crispiness.

Recipe Variations

Mediterranean Vegetable Pizza

Use bell peppers, red onion, cherry tomatoes, black olives, spinach, and feta cheese.

Finish with fresh oregano and a drizzle of olive oil.

Spicy Vegetable Pizza

Add jalapeños, red pepper flakes, spicy peppers, and a little chili oil after cooking.

Mushroom Spinach Pizza

Use sautéed mushrooms, fresh spinach, mozzarella, and Parmesan.

Roasted Vegetable Pizza

Top the pizza with leftover roasted zucchini, peppers, onions, and eggplant.

White Vegetable Pizza

Skip the tomato sauce and use a thin layer of ricotta or garlic cream sauce instead.

Top with mozzarella, mushrooms, spinach, and roasted peppers.

What to Serve With Vegetable Pizza

Turn this pizza into a complete meal by serving it with:

Caesar salad

Greek salad

Tomato cucumber salad

Roasted vegetables

Garlic bread

Soup

Coleslaw

Fresh fruit

Bruschetta

For a light dinner, pair one or two slices with a large green salad.

Storage Instructions

Allow leftover pizza to cool completely.

Place slices in an airtight container and refrigerate for up to 3–4 days.

For best texture, place parchment between layers if stacking multiple slices.

Reheating Instructions

The air fryer is excellent for reheating pizza.

Preheat to 350°F (175°C).

Place the pizza slices in the basket in a single layer.

Heat for approximately 3–5 minutes, or until the cheese is melted and the crust is crisp again.

Avoid microwaving if possible because it can make the crust chewy and soft.

Freezing Instructions

You can freeze individual pizza slices.

Allow the pizza to cool completely.

Wrap each slice tightly in plastic wrap or foil, then place them in a freezer-safe container or bag.

Freeze for up to 2 months for best quality.

Reheat directly from frozen in the air fryer at 350°F (175°C) until hot and crisp.

Nutrition Information

Approximate nutrition per serving, assuming 4 servings:

Calories: 360 kcal

Protein: 17 g

Carbohydrates: 43 g

Fat: 14 g

Saturated Fat: 6 g

Cholesterol: 25 mg

Sodium: 720 mg

Fiber: 4 g

Sugar: 6 g

Nutrition information is an estimate and will vary depending on the dough, cheese, sauce, vegetables, and portion size.

Frequently Asked Questions

Can I use store-bought pizza dough?

Absolutely. Refrigerated or fresh store-bought pizza dough works perfectly and makes this recipe even easier.

Can I use naan or flatbread?

Yes. Naan, pita, or flatbread can be used for a quicker version. Since they are already cooked, you can skip the pre-cooking step and simply add toppings before air frying.

Why is my pizza crust soggy?

The most common causes are too much sauce, too many vegetables, or vegetables with high moisture content. Use a thin layer of sauce and avoid overcrowding the pizza.

Do I need to cook the vegetables first?

Not necessarily. Thinly sliced peppers, onions, mushrooms, and tomatoes can cook directly on the pizza. However, dense vegetables such as broccoli may benefit from brief pre-cooking.

Can I use cheddar cheese?

Yes. Cheddar, mozzarella, provolone, Monterey Jack, or a combination can be used.

Can I make this pizza without cheese?

Yes. Use a dairy-free mozzarella alternative or simply increase the vegetables and add a drizzle of olive oil.

What temperature is best for air fryer pizza?

Around 375°F (190°C) works well for fresh pizza dough. The exact cooking time depends on the thickness of the crust and your air fryer.

Final Thoughts

This Easy Air Fryer Vegetable Pizza is a simple, delicious way to enjoy homemade pizza without turning on a large oven. The crust becomes crisp and golden while the mozzarella melts around colorful vegetables, creating a satisfying meal that’s easy enough for any day of the week.The best part is how customizable this recipe is. Use whatever vegetables you have available, change the cheese, make it spicy, or turn it into a Mediterranean-style pizza with olives and feta.For the crispiest result, remember to pre-cook the crust, keep the sauce layer thin, use moderate amounts of vegetables, and avoid overcrowding the air fryer.Whether you’re making a quick lunch, family dinner, or weekend snack, this air fryer vegetable pizza is an easy homemade favorite that’s ready in minutes.

Air Fryer Cinnamon Apples

Air Fryer Cinnamon Apples

These Air Fryer Cinnamon Apples are a quick, cozy, and delicious dessert made with tender apple slices, warm cinnamon, brown sugar, and a touch of butter. They taste like homemade apple pie filling but require much less time and effort. The air fryer caramelizes the edges beautifully while keeping the apples soft and juicy inside.This easy recipe is perfect for a quick weeknight dessert, fall breakfast, afternoon snack, or sweet treat when you want something comforting without making an entire pie. Serve the apples warm on their own, spoon them over oatmeal or pancakes, or add a scoop of vanilla ice cream for an irresistible dessert.

Prep Time: 5 minutes

Cook Time: 10–14 minutes

Total Time: 15–19 minutes

Servings: 4

Course: Dessert, Breakfast, Snack

Cuisine: American

Cooking Method: Air Fryer

Why You’ll Love These Air Fryer Cinnamon Apples

There are plenty of reasons to keep this recipe in your regular rotation:

Quick and easy: Ready in about 15 minutes.

Simple ingredients: You only need a handful of everyday ingredients.

No oven required: The air fryer does all the work.

Perfectly caramelized: The cinnamon-sugar mixture creates delicious golden edges.

Versatile: Enjoy them as dessert, breakfast, or a snack.

Family-friendly: Kids and adults both love their sweet apple-pie flavor.

Ingredients for Air Fryer Cinnamon Apples

For approximately 4 servings, you’ll need:

3 medium apples

2 tablespoons melted butter

2 tablespoons brown sugar

1 teaspoon ground cinnamon

½ teaspoon vanilla extract

¼ teaspoon ground nutmeg

1 teaspoon lemon juice

Pinch of salt

Optional Toppings

You can make these cinnamon apples even more delicious with:

Vanilla ice cream

Whipped cream

Chopped pecans or walnuts

Caramel sauce

Greek yogurt

Granola

A sprinkle of powdered sugar

Extra cinnamon

Best Apples for Air Fryer Cinnamon Apples

The type of apple you choose can change the texture and flavor of the finished recipe.

Honeycrisp apples are an excellent choice because they are naturally sweet and hold their shape well.

Granny Smith apples are ideal if you prefer a slightly tart flavor. Their tartness balances beautifully with the brown sugar and cinnamon.

Gala and Fuji apples are sweeter options and work wonderfully when you want a naturally sweet dessert.

You can also combine two varieties. For example, using Granny Smith with Honeycrisp gives you a delicious combination of tartness and sweetness.

Avoid apples that become extremely soft during cooking if you prefer your slices to maintain some texture.

How to Make Air Fryer Cinnamon Apples

Prepare the Apples

Wash and dry the apples thoroughly. Peel them if you prefer a softer, more traditional apple-pie texture, although peeling is completely optional.

Remove the cores and seeds, then cut the apples into evenly sized slices or small wedges. Try to keep the pieces similar in thickness so they cook evenly.

Place the apple slices in a large mixing bowl.

Make the Cinnamon Mixture

In a small bowl, combine the melted butter, brown sugar, cinnamon, vanilla extract, nutmeg, lemon juice, and salt.

Mix everything until well combined.

The melted butter helps the cinnamon-sugar mixture coat the apples evenly while also helping them develop beautifully caramelized edges in the air fryer.

Coat the Apples

Pour the cinnamon mixture over the sliced apples.

Toss gently until every piece is coated.

Don’t skip this step. Evenly coated apples give you the best flavor and ensure that the cinnamon and sugar caramelize nicely during cooking.

Preheat the Air Fryer

Preheat your air fryer to 375°F (190°C) for approximately 3 minutes if your model requires preheating.

Preheating helps the apples begin cooking immediately and encourages better browning around the edges.

Air Fry

Lightly grease the air fryer basket if needed.

Arrange the apples in the basket in as close to a single layer as possible. Avoid packing the basket too tightly because overcrowding can cause the apples to steam instead of caramelize.

Air fry at 375°F (190°C) for 10–14 minutes.

Shake the basket or gently toss the apples halfway through cooking.

The apples are ready when they are tender, golden around the edges, and coated in a delicious cinnamon-butter glaze.

If you prefer very soft apples, cook them for another 2–3 minutes.

How to Know When the Apples Are Done

Cooking time can vary depending on the air fryer, apple variety, and thickness of the slices.

For softer apples, aim for approximately 13–16 minutes.

For apples that still have a little bite, start checking around 9–10 minutes.

A fork should easily pierce the apple, but the slices should not completely fall apart.

The edges should look lightly caramelized and golden.

Tips for Perfect Air Fryer Cinnamon Apples

Cut the Apples Evenly

Uniform slices cook at the same rate. If some pieces are very thin while others are thick, the thin pieces may become too soft before the thicker pieces are finished.

Don’t Overcrowd the Basket

For the best caramelization, arrange the apples in a single layer whenever possible. If you’re making a larger batch, cook in multiple batches.

Shake Halfway Through

Give the basket a gentle shake halfway through cooking. This helps distribute the butter, cinnamon, and sugar and promotes even cooking.

Adjust the Sweetness

The amount of sugar can easily be adjusted. Naturally sweet apples may only need a small amount of brown sugar, while tart Granny Smith apples can handle a little more.

Watch the Sugar

Because brown sugar can caramelize quickly, keep an eye on the apples toward the end of cooking. If your air fryer runs hot, they may finish sooner than expected.

Delicious Ways to Serve Cinnamon Apples

These apples are incredibly versatile.

With Vanilla Ice Cream

Spoon warm cinnamon apples over a scoop of vanilla ice cream. The contrast between the warm apples and cold ice cream makes this one of the easiest desserts you’ll ever make.

Over Oatmeal

Add a spoonful of warm apples to oatmeal with chopped nuts for a cozy breakfast.

With Pancakes

Use them as a topping for pancakes, waffles, or French toast instead of traditional syrup.

With Greek Yogurt

For a lighter option, serve warm cinnamon apples with plain or vanilla Greek yogurt and a sprinkle of granola.

As Apple Pie Filling

The cooked apples can also be used as a shortcut filling for desserts. Add them to puff pastry, crescent dough, or a simple crumble topping.

Variations

Maple Cinnamon Apples

Replace some or all of the brown sugar with pure maple syrup for a deeper, naturally sweet flavor.

Pecan Cinnamon Apples

Add chopped pecans during the final few minutes of cooking for extra crunch.

Apple Pie Spice

Replace the cinnamon and nutmeg with apple pie spice for an even more classic apple-pie flavor.

Honey Cinnamon Apples

Use honey instead of brown sugar for a slightly different sweetness.

Caramel Apples

Drizzle the finished apples with caramel sauce and serve them with vanilla ice cream for an indulgent dessert.

Storage and Reheating

Allow leftover cinnamon apples to cool before transferring them to an airtight container.

Store them in the refrigerator for up to 3–4 days.

To reheat, place them back in the air fryer at 350°F (175°C) for about 3–5 minutes, or until warmed through.

You can also microwave them, although the air fryer will help restore some of the caramelized texture.

Frequently Asked Questions

Can I make these apples without peeling them?

Absolutely. Apple skins are completely safe to leave on and can add texture and color. If you prefer softer, more traditional apple-pie-style apples, peel them first.

Can I use sliced apples instead of wedges?

Yes. Slices work perfectly. Just make sure they are cut into relatively similar sizes.

Can I reduce the sugar?

Yes. If you’re using naturally sweet apples, you can reduce the brown sugar according to your preference.

Can I make these ahead of time?

Yes. You can prepare the apples and cinnamon mixture a few hours ahead and refrigerate them until you’re ready to cook. For the freshest texture, air fry them shortly before serving.

Can I freeze cooked cinnamon apples?

You can freeze them, although the texture may become softer after thawing. For the best results, enjoy them fresh or refrigerated.

Final Thoughts

These Air Fryer Cinnamon Apples prove that you don’t need complicated ingredients or hours in the kitchen to make a delicious homemade dessert. With just a few simple ingredients and your air fryer, you can transform ordinary apples into warm, tender, cinnamon-coated bites with beautifully caramelized edges.They’re especially delicious when served warm with vanilla ice cream, but there are countless ways to enjoy them. Add them to oatmeal, pancakes, yogurt, waffles, or simply eat them straight from the bowl.If you’re looking for an easy dessert that delivers all the comforting flavors of apple pie without making an entire pie, this recipe is definitely worth trying.

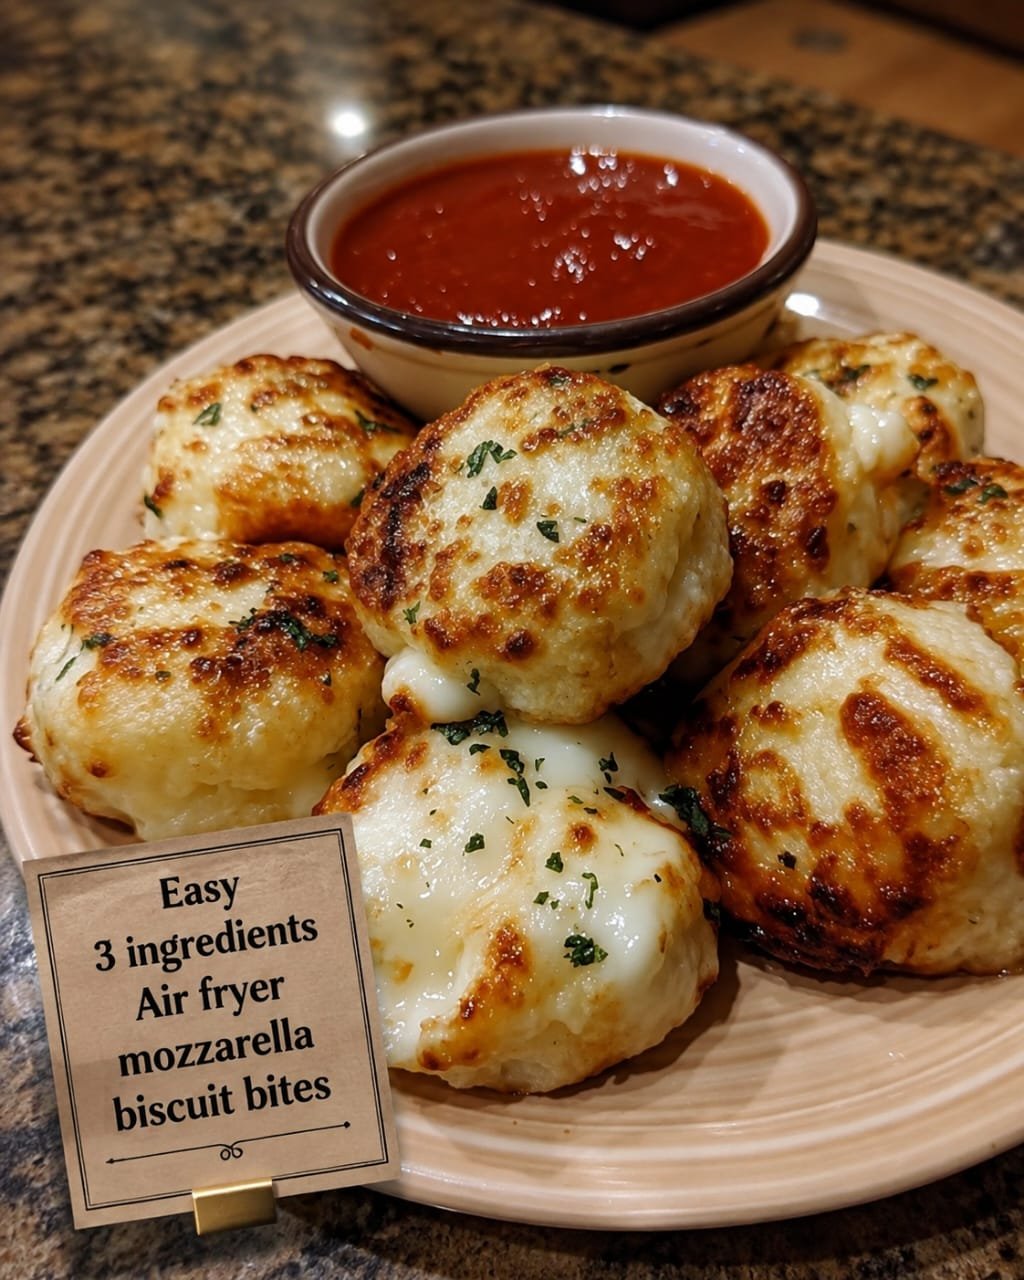
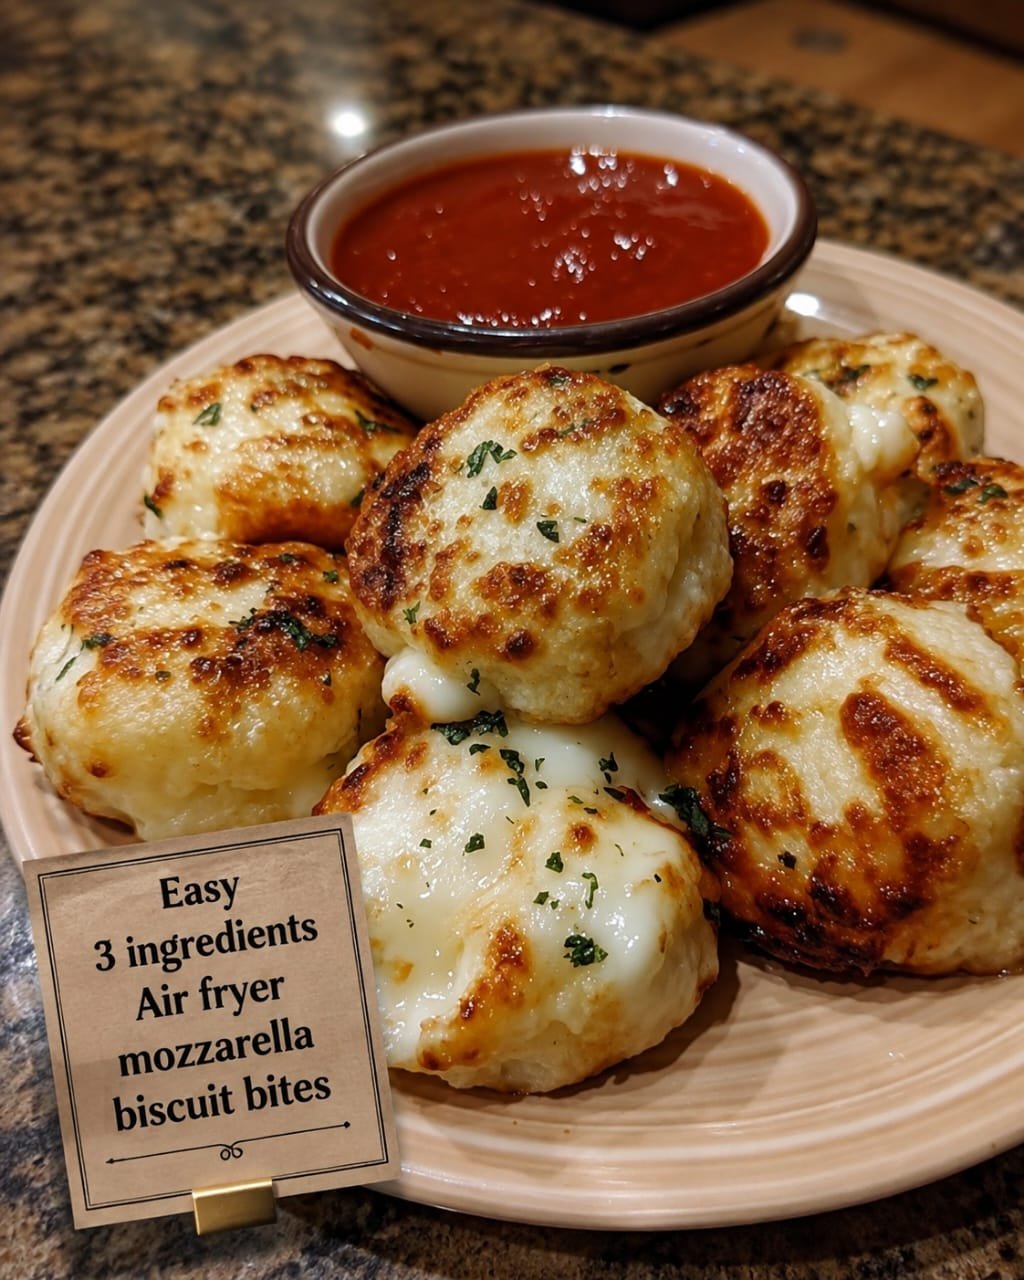
Easy 3-Ingredient Air Fryer Mozzarella Biscuit Bites

Easy 3-Ingredient Air Fryer Mozzarella Biscuit Bites

Crispy Golden Biscuit Bites with a Gooey Mozzarella Center

These Easy 3-Ingredient Air Fryer Mozzarella Biscuit Bites are the perfect quick snack when you want something warm, cheesy, crispy, and satisfying without spending hours in the kitchen. Soft biscuit dough is wrapped around gooey mozzarella cheese and air fried until beautifully golden on the outside.With only three main ingredients, this recipe is incredibly simple. There is no complicated dough-making, deep frying, or long list of seasonings. You simply cut the biscuit dough, add mozzarella, seal the edges, and let the air fryer create a delicious golden crust.These cheesy bites are perfect for parties, game days, after-school snacks, quick lunches, appetizers, or even as a fun side dish with soup, pasta, or salad. Serve them warm with marinara sauce, garlic butter, ranch dressing, or your favorite dipping sauce.

Prep Time: 10 minutes

Cook Time: 8–12 minutes

Total Time: 20–25 minutes

Servings: 16 biscuit bites

Cuisine: American

Difficulty: Easy

Why You’ll Love These Mozzarella Biscuit Bites

Only 3 main ingredients

Ready in about 20 minutes

Crispy outside

Gooey mozzarella center

No deep frying

Easy air fryer recipe

Perfect party appetizer

Kid-friendly

Great for dipping

Minimal cleanup

Ingredients of Air Fryer Mozzarella Biscuit 

The 3 Main Ingredients

1 can refrigerated biscuit dough, approximately 8 biscuits

4 ounces (115 g) mozzarella cheese, cut into small cubes

1 tablespoon melted butter

That’s all you need for the basic recipe.

Optional Additions

These are completely optional and don’t count toward the three main ingredients:

Garlic powder

Italian seasoning

Dried parsley

Red pepper flakes

Grated Parmesan

Black pepper

Marinara sauce for dipping

Ranch dressing for dipping

What Kind of Mozzarella Should You Use?

For the best gooey center, use a low-moisture mozzarella cheese.

You can use:

Mozzarella cheese sticks

Block mozzarella

Low-moisture mozzarella balls

Thick mozzarella slices

Cut the cheese into small cubes that fit comfortably inside the biscuit dough.

Avoid using very wet fresh mozzarella because excess moisture can make the biscuit dough harder to seal and may cause leaking during cooking.

Equipment Needed of Air Fryer Mozzarella Biscuit 

Air fryer

Cutting board

Small knife

Rolling pin, optional

Pastry brush

Tongs

Small bowl

Parchment paper, optional

How to Make Air Fryer Mozzarella Biscuit Bites

Prepare the Biscuit Dough

Open the refrigerated biscuit dough carefully.

Separate the biscuits and place them on a lightly floured cutting board or clean work surface.

If the biscuits are thick, gently flatten each one using your fingers or a rolling pin.

You want each piece large enough to wrap completely around a small cube of mozzarella.

Add the Mozzarella

Cut the mozzarella into approximately 16 small cubes.

Place one cheese cube in the center of each flattened biscuit piece.

Don’t use too much cheese because the mozzarella needs to have enough dough surrounding it to prevent excessive leaking.

Seal the Bites

Carefully pull the edges of the biscuit dough up around the mozzarella.

Pinch the edges together firmly.

Roll the dough gently between your palms to create a smooth ball.

Make sure there are no visible gaps or cracks.

A good seal is important because melted cheese can escape through even a small opening.

Repeat with the remaining biscuit dough and mozzarella.

Prepare the Air Fryer

Preheat your air fryer to 350°F (175°C) for approximately 3 minutes.

Lightly spray the basket with cooking spray if necessary.

You can also use perforated parchment designed specifically for air fryers.

Avoid covering the entire basket with solid parchment because proper airflow is important for even cooking.

Brush With Butter

Place the sealed biscuit bites in the air fryer basket.

Leave space between each piece.

Brush the tops lightly with melted butter.

For extra flavor, mix garlic powder or Italian seasoning into the melted butter.

Air Fry

Air fry at 350°F (175°C) for approximately 8–12 minutes.

Cook until the biscuit dough is puffed and golden brown.

Depending on your air fryer, you may want to turn the bites halfway through cooking for more even browning.

Start checking around the 8-minute mark because biscuit dough can brown quickly.

Finish and Serve

Carefully remove the mozzarella bites from the air fryer.

Allow them to cool for approximately 3–5 minutes before serving.

The melted cheese inside will be extremely hot immediately after cooking.

Serve warm with marinara sauce, ranch dressing, garlic butter, or another favorite dipping sauce.

Tips for Perfect Mozzarella Biscuit Bites

Don’t overfill the dough

Too much mozzarella can cause the cheese to burst through the dough.

Seal the edges well

Pinch the dough firmly around the cheese and check for cracks before cooking.

Use small cheese cubes

Small pieces melt beautifully while remaining easier to contain.

Don’t overcrowd the basket

Leave room between each bite so hot air can circulate.

Watch the cooking time

Different air fryers cook at different speeds. Check the bites early.

Let them cool slightly

The cheese stays extremely hot after cooking. A few minutes of cooling also makes them easier to eat.

Recipe Variations

Garlic Butter Mozzarella Bites

Mix garlic powder and dried parsley into the melted butter before brushing the biscuit bites.

Parmesan Mozzarella Bites

Sprinkle grated Parmesan over the buttered biscuit bites before air frying.

Pizza Biscuit Bites

Add a tiny amount of pizza sauce and mozzarella inside the biscuit dough.

Be careful not to overfill.

Spicy Cheese Bites

Add a small amount of crushed red pepper flakes or finely chopped jalapeño.

Cheddar Mozzarella Bites

Replace half the mozzarella with cheddar for a stronger cheesy flavor.

Everything Bagel Biscuit Bites

Brush the tops with butter and sprinkle with everything bagel seasoning before air frying.

Best Dipping Sauces

These cheesy biscuit bites are even better with a dipping sauce.

Try:

Warm marinara sauce

Pizza sauce

Garlic butter

Ranch dressing

Spicy marinara

Alfredo sauce

Creamy garlic dip

Honey mustard

Buffalo sauce

For a pizza-inspired appetizer, warm marinara is especially delicious.

What to Serve With Mozzarella Biscuit Bites

These bites work beautifully as an appetizer or side dish.

Serve them alongside:

Tomato soup

Creamy vegetable soup

Pasta

Spaghetti

Chicken wings

Grilled chicken

Fresh garden salad

Caesar salad

Roasted vegetables

Pizza

They also make a great addition to an appetizer platter with vegetables, dips, olives, and other finger foods.

Storage Instructions

Allow leftover biscuit bites to cool completely.

Place them in an airtight container and refrigerate for up to 3–4 days.

For the best texture, don’t leave cooked biscuit bites at room temperature for an extended period.

Reheating Instructions

The air fryer is the best way to reheat these bites.

Preheat the air fryer to 325°F (165°C).

Place the refrigerated mozzarella bites in the basket and heat for approximately 3–5 minutes.

Check the center carefully before eating because the cheese can become very hot.

Avoid microwaving if you want to maintain the crispy biscuit exterior.

Freezing Instructions

You can freeze the prepared bites before cooking.

Place the sealed biscuit bites on a parchment-lined tray and freeze until firm.

Transfer them to a freezer-safe bag or container.

They can be stored for approximately 1–2 months for best quality.

When ready to cook, place them directly into the air fryer from frozen and add several minutes to the cooking time. Make sure the biscuit dough is fully cooked before serving.

Nutrition Information of Air Fryer Mozzarella Biscuit 

Approximate nutrition per mozzarella biscuit bite:

Calories: 105 kcal

Protein: 4 g

Carbohydrates: 10 g

Fat: 5 g

Saturated Fat: 2.5 g

Cholesterol: 10 mg

Sodium: 260 mg

Fiber: 0.5 g

Sugar: 1 g

Nutrition information is estimated and will vary depending on the biscuit dough, mozzarella, and butter used.

Frequently Asked Questions

Can I use pizza dough instead of biscuit dough?

Yes. Pizza dough can be used, although the texture will be slightly chewier rather than soft and fluffy like biscuit dough.

Why is my cheese leaking out?

The most common reason is that the dough wasn’t sealed tightly enough or too much cheese was added. Use small mozzarella cubes and pinch the seams firmly.

Can I use shredded mozzarella?

Yes, but cubes or small pieces are easier to contain inside the dough.

Can I prepare these ahead of time?

Yes. Assemble the bites several hours ahead and refrigerate them until you’re ready to cook. You can also freeze them before cooking.

Can I make them without butter?

Yes. The butter helps with browning and flavor but isn’t essential. You can lightly spray the tops with olive oil instead.

What temperature should the air fryer be?

350°F (175°C) works well for refrigerated biscuit dough because it allows the dough to cook through while the exterior becomes golden.

How do I prevent the bottom from becoming soggy?

Avoid overcrowding the air fryer and make sure hot air can circulate around the bites. A properly preheated air fryer also helps.

Final Thoughts of Air Fryer Mozzarella Biscuit 

These Easy 3-Ingredient Air Fryer Mozzarella Biscuit Bites are a simple, cheesy treat that’s incredibly easy to make. With refrigerated biscuit dough, mozzarella, and butter, you can create golden, fluffy bites with a deliciously gooey cheese center in just minutes.The key to success is sealing the dough properly around the mozzarella and leaving enough room between the bites in the air fryer. Once cooked, let them cool for a few minutes before serving so the melted cheese isn’t dangerously hot.Serve them with warm marinara for a pizza-inspired appetizer, garlic butter for extra richness, or ranch for a classic dipping option. They’re perfect for parties, movie nights, family snacks, lunchboxes, or whenever you’re craving something warm and cheesy.Crispy on the outside, soft and buttery in the middle, and filled with gooey mozzarella—these little air fryer bites are guaranteed to disappear fast!

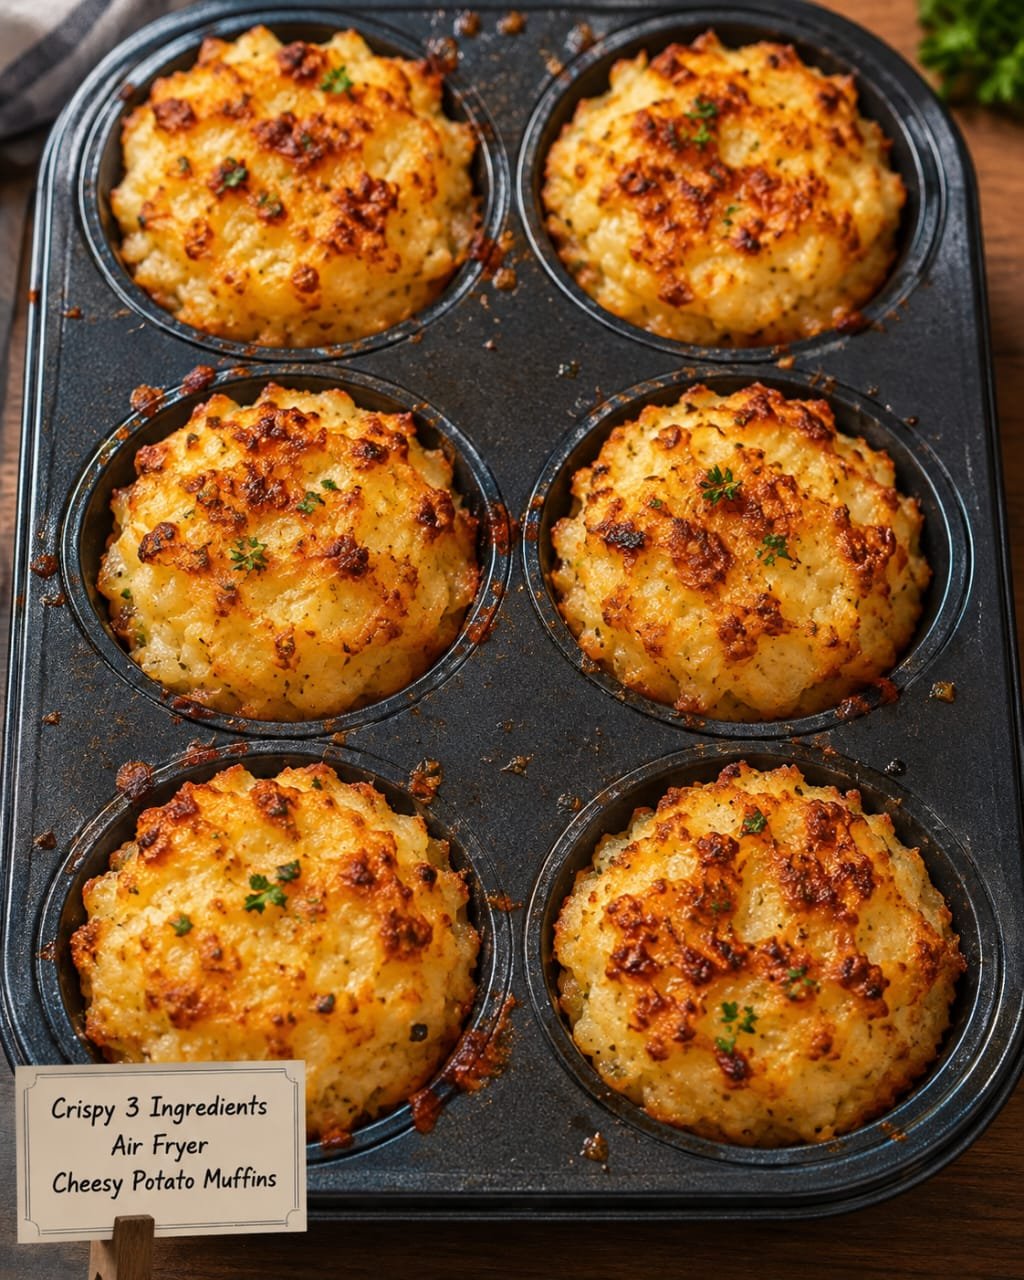
Crispy 3-Ingredient Air Fryer Cheesy Potato Muffins

Crispy 3-Ingredient Air Fryer Cheesy Potato Muffins

Golden, Crispy Potato Muffins with a Gooey Cheesy Center

These Crispy 3-Ingredient Air Fryer Cheesy Potato Muffins are an easy and delicious way to turn simple potatoes and cheese into a crispy, golden snack or side dish. The outside becomes beautifully crunchy in the air fryer while the inside stays soft, tender, and cheesy.With only three main ingredients, this recipe is perfect for busy mornings, quick lunches, easy dinners, snack time, or entertaining. There is no complicated batter, deep frying, or long preparation required. Simply grate the potatoes, combine them with cheese and egg, shape the mixture in muffin cups, and let the air fryer do the work.These little potato muffins are especially delicious when served hot, when the cheese is still melted and stretchy. They’re also incredibly versatile. You can serve them alongside eggs for breakfast, with grilled chicken for dinner, or with a dipping sauce as an afternoon snack.

Prep Time: 15 minutes

Cook Time: 15–20 minutes

Total Time: 35 minutes

Servings: 8 potato muffins

Cuisine: American-Inspired

Difficulty: Easy

Why You’ll Love These Potato Muffins

Only 3 main ingredients

Crispy outside

Soft and cheesy inside

Easy air fryer recipe

No deep frying

Perfect for breakfast or snacks

Great side dish

Kid-friendly

Easy to customize

Uses simple pantry ingredients

Ingredients of Air Fryer Cheesy Potato Muffins

The 3 Main Ingredients

3 medium potatoes, approximately 1½ pounds (680 g)

1 cup shredded cheddar cheese

1 large egg

Optional Seasonings

These aren’t necessary for the basic three-ingredient recipe, but you can add:

Salt

Black pepper

Garlic powder

Paprika

Italian seasoning

Dried parsley

Red pepper flakes

You can also lightly spray the muffin cups or air fryer basket with cooking spray to help prevent sticking.

Best Potatoes to Use

Russet potatoes are an excellent choice because they contain plenty of starch and become wonderfully crisp when cooked.

Yukon Gold potatoes also work well and provide a slightly creamier texture.

Avoid very waxy potatoes if you’re looking for maximum crispiness.

Equipment Needed of Air Fryer Cheesy Potato Muffins

Air fryer

Box grater

Large mixing bowl

Clean kitchen towel

Silicone muffin cups or air fryer-safe muffin molds

Spoon

Measuring cups

Tongs

How to Make Air Fryer Cheesy Potato Muffins

Prepare the Potatoes

Peel the potatoes if desired.

Using the large holes of a box grater, grate the potatoes.

Transfer the grated potatoes to a clean kitchen towel.

Remove Excess Moisture

This is one of the most important steps.

Gather the grated potatoes inside the towel and squeeze firmly to remove as much liquid as possible.

Potatoes contain a surprising amount of water. If you skip this step, the muffins can become soft instead of crispy.

For extra-crispy muffins, squeeze the potatoes twice.

Make the Potato Mixture

Place the drained grated potatoes into a large mixing bowl.

Add the shredded cheddar cheese and egg.

Mix thoroughly until everything is evenly combined.

Add salt and pepper if desired.

The mixture should be moist enough to hold together but shouldn’t be watery.

Prepare the Air Fryer

Preheat the air fryer to 375°F (190°C) for approximately 3–5 minutes.

Lightly spray silicone muffin cups with cooking spray if needed.

Silicone cups are particularly useful because they make removing the finished potato muffins much easier.

Fill the Muffin Cups

Divide the potato mixture evenly between approximately 8 air fryer-safe muffin cups.

Press the mixture firmly into each cup.

Don’t pack them too tightly, but make sure the mixture is compact enough to hold its shape.

For extra crispy edges, leave the tops slightly uneven rather than smoothing them completely.

Air Fry

Place the filled muffin cups into the air fryer basket.

Air fry at 375°F (190°C) for approximately 15–20 minutes.

Check the muffins after 12 minutes.

The tops should be golden brown, and the edges should look crisp.

If necessary, cook for another 3–5 minutes.

Make Them Extra Crispy

For an even crunchier exterior, increase the temperature to 400°F (200°C) during the final 2–3 minutes.

Keep a close eye on the cheese because it can brown quickly.

Cool Slightly

Remove the muffin cups from the air fryer carefully.

Allow the potato muffins to rest for approximately 3–5 minutes.

This allows the cheese to set slightly and makes the muffins easier to remove.

Gently lift each muffin from the silicone cup.

Tips for Extra-Crispy Potato Muffins

Squeeze the potatoes well

Excess water is the biggest enemy of crispy potato muffins.

Use freshly grated cheese

Freshly shredded cheddar melts beautifully and gives the muffins a rich cheesy texture.

Don’t overfill the cups

Keeping the muffins relatively shallow helps them cook evenly.

Preheat the air fryer

Starting with a hot air fryer improves browning.

Don’t overcrowd the basket

Leave room for hot air to circulate.

Use silicone cups

They make removal easier and help maintain the muffin shape.

Recipe Variations

Garlic Parmesan Potato Muffins

Replace some of the cheddar with Parmesan and add garlic powder.

Spicy Cheesy Potato Muffins

Add chopped jalapeños or red pepper flakes.

Herb Potato Muffins

Add dried oregano, thyme, parsley, or rosemary.

Mozzarella Potato Muffins

Replace cheddar with shredded mozzarella for an extra-stretchy cheese center.

Loaded Potato Muffins

Add chopped cooked bacon, green onions, and extra cheese.

What to Serve With Potato Muffins

These crispy potato muffins are extremely versatile.

For Breakfast

Serve with:

Fried eggs

Scrambled eggs

Turkey or chicken sausage

Fresh fruit

Avocado

Tomatoes

For Lunch

Pair with:

Green salad

Grilled chicken

Soup

Roasted vegetables

Tuna salad

For Dinner

Serve alongside:

Roast chicken

Steak

Air fryer fish

Grilled vegetables

Meatballs

Burgers

Dipping Sauce Ideas

These muffins are delicious with:

Sour cream

Garlic aioli

Ranch dressing

Spicy mayo

Ketchup

BBQ sauce

Salsa

Chipotle sauce

Cheese sauce

For a simple dip, combine sour cream with garlic powder, black pepper, and chopped fresh herbs.

Storage Instructions

Allow the potato muffins to cool completely.

Place them in an airtight container and refrigerate for up to 3–4 days.

Keep them refrigerated rather than leaving them at room temperature for an extended period.

Reheating Instructions

The air fryer is the best way to reheat these muffins while keeping their crispy texture.

Preheat the air fryer to 350°F (175°C).

Place the muffins into the basket and heat for approximately 4–6 minutes.

For extra crispiness, increase the temperature to 375°F during the final minute.

Avoid microwaving if possible because the potato exterior can become soft.

Freezing Instructions

These potato muffins can also be frozen.

Allow them to cool completely.

Place them on a parchment-lined tray and freeze until solid.

Transfer them to a freezer-safe bag or container.

Freeze for up to 2 months for best quality.

How to Reheat From Frozen

Place frozen potato muffins directly into the air fryer.

Cook at 350°F (175°C) for approximately 8–12 minutes, depending on their size.

Check that the center is hot before serving.

Nutrition Information of Air Fryer Cheesy Potato Muffins

Approximate nutrition per potato muffin:

Calories: 135 kcal

Protein: 6 g

Carbohydrates: 14 g

Fat: 6 g

Saturated Fat: 3 g

Cholesterol: 35 mg

Sodium: 180 mg

Fiber: 1.5 g

Sugar: 1 g

Nutrition information is estimated and will vary depending on potato size, cheese, egg, and optional ingredients.

Frequently Asked Questions

Can I use frozen shredded potatoes?

Yes. Frozen hash browns can work, but thaw them completely and squeeze out as much moisture as possible before mixing.

Why are my potato muffins not crispy?

The most common reason is excess moisture in the potatoes. Make sure you squeeze the grated potatoes extremely well before adding the other ingredients.

Can I use mozzarella instead of cheddar?

Absolutely. Mozzarella creates a mild flavor and wonderfully stretchy cheese texture.

Can I make these without eggs?

The egg helps bind the potato mixture. You can experiment with an egg substitute, but the texture may be more fragile.

Do I need to peel the potatoes?

No. If you wash and scrub them thoroughly, you can leave the skins on. The skins can also add extra texture.

Can I make these in a regular oven?

Yes. Place the potato mixture into greased muffin cups and bake at approximately 400°F (200°C) until golden and crisp, usually around 20–25 minutes.

Can I add meat?

Yes. Cooked bacon, diced chicken, ham, or turkey can be mixed into the potato mixture. Make sure any meat is fully cooked before adding it.

Final Thoughts of Air Fryer Cheesy Potato Muffins

These Crispy 3-Ingredient Air Fryer Cheesy Potato Muffins are an easy, budget-friendly recipe that transforms everyday ingredients into something seriously delicious. The combination of grated potato, melted cheddar, and egg creates golden little muffins with crispy edges and a soft, cheesy center.The key to getting the best texture is removing as much moisture as possible from the grated potatoes. Once they’re properly squeezed, the air fryer can work its magic, creating those irresistible crispy edges without deep frying.Serve them for breakfast with eggs, as a side dish with chicken or steak, or as a snack with your favorite dipping sauce. You can also customize them with herbs, spices, jalapeños, bacon, or different cheeses.They’re quick, easy, freezer-friendly, and perfect for making ahead. Once you try these crispy cheesy potato muffins, you’ll have a simple new way to turn basic potatoes into a family-favorite air fryer recipe.

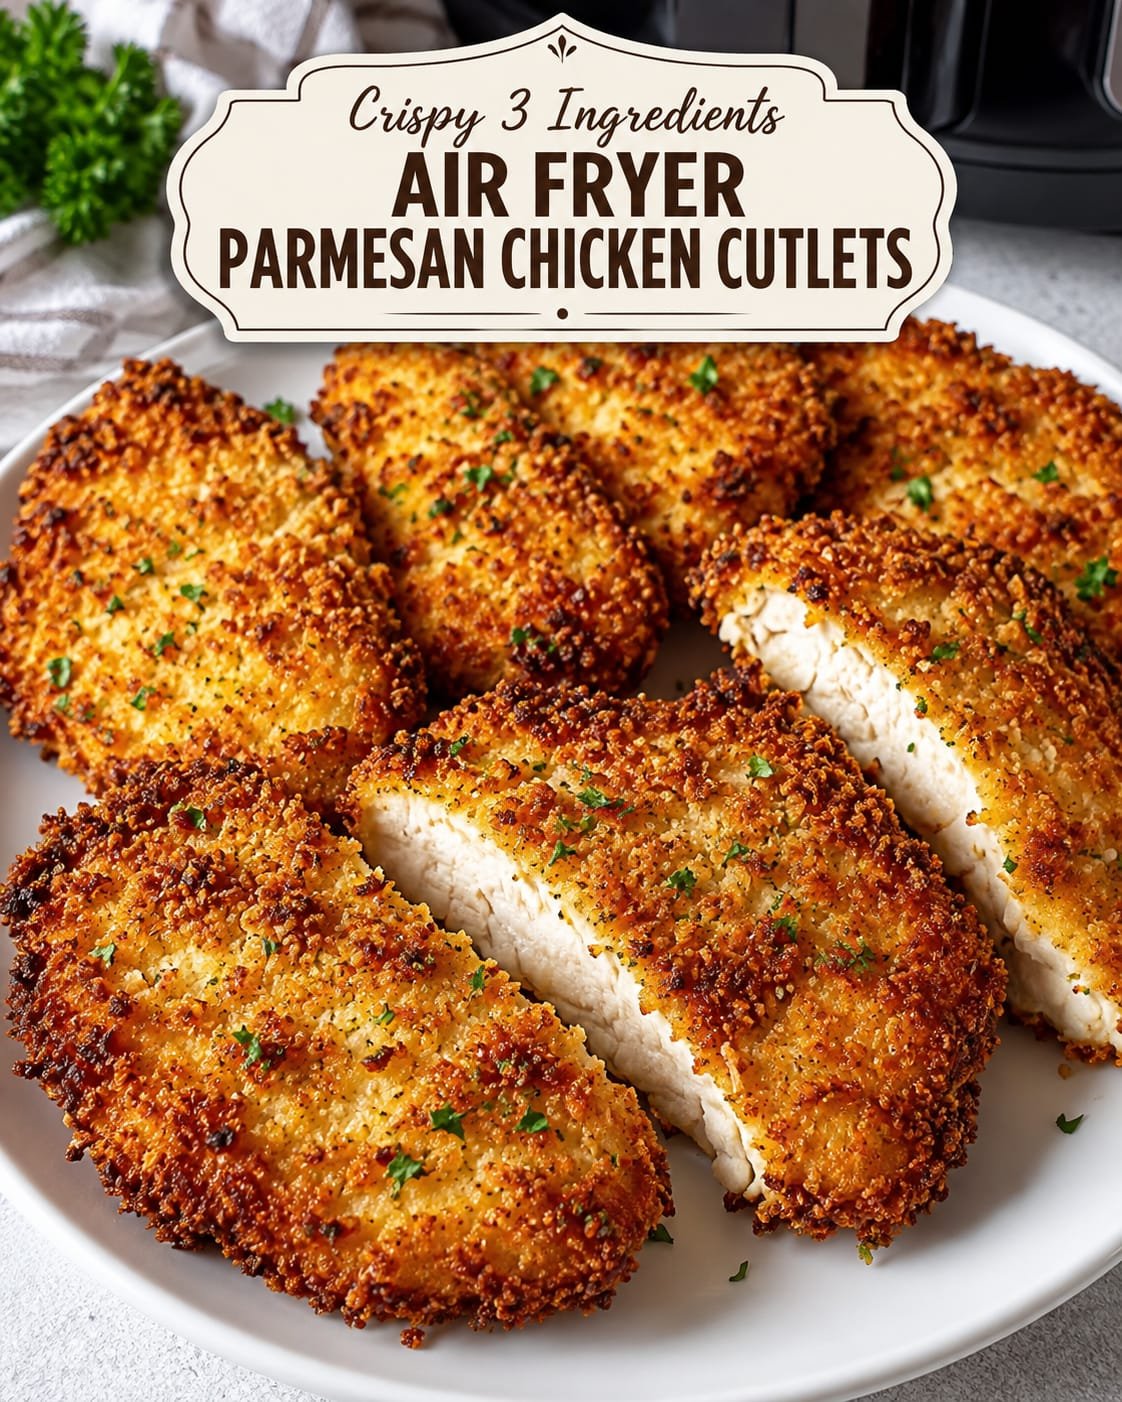
Crispy 3-Ingredient Air Fryer Parmesan Chicken Cutlets

Crispy 3-Ingredient Air Fryer Parmesan Chicken Cutlets

Golden, Crunchy, Juicy Chicken Cutlets Made with Just 3 Ingredients

If you’re looking for a quick dinner that’s crispy, cheesy, and incredibly easy to make, these Crispy 3-Ingredient Air Fryer Parmesan Chicken Cutlets are exactly what you need. Thin chicken cutlets are coated with savory Parmesan and a crispy breading, then cooked in the air fryer until golden brown on the outside and juicy on the inside.This recipe is perfect for busy weeknights because it requires minimal preparation and only three main ingredients. The air fryer gives the chicken a delicious crunchy coating without the need for deep frying or a large amount of oil.Serve these Parmesan chicken cutlets with a fresh salad, roasted vegetables, pasta, mashed potatoes, or your favorite dipping sauce. They can also be sliced and added to sandwiches, wraps, or salads for an easy lunch.

Prep Time: 10 minutes

Cook Time: 12–16 minutes

Total Time: 25 minutes

Servings: 4

Cuisine: American-Italian Inspired

Difficulty: Easy

Why You’ll Love This Recipe

Only 3 main ingredients

Crispy and golden exterior

Juicy chicken inside

Made in the air fryer

No deep frying required

Quick weeknight dinner

Kid-friendly

Easy to customize

Perfect for meal prep

Minimal cleanup

Ingredients of Air Fryer Crispy Parmesan Chicken Cutlets

The 3 Main Ingredients

4 boneless, skinless chicken breasts, thinly sliced or butterflied, about 1½ pounds (680 g)

1 cup finely grated Parmesan cheese

1 cup seasoned breadcrumbs

Optional Pantry Seasonings

These aren’t necessary, but you can add them for extra flavor:

Salt

Black pepper

Garlic powder

Italian seasoning

Paprika

Dried parsley

You can also lightly spray the chicken with olive oil before air frying for extra browning.

Equipment Needed of Air Fryer Crispy Parmesan Chicken Cutlets

Air fryer

Meat mallet

Parchment paper

Two shallow bowls

Tongs

Meat thermometer

Cutting board

How to Make Air Fryer Parmesan Chicken Cutlets

Prepare the Chicken

If using whole chicken breasts, carefully slice each breast horizontally into two thinner pieces.

Place each piece between two sheets of parchment paper or plastic wrap.

Using a meat mallet, gently pound the chicken until it is approximately ¼-inch thick.

Try to make the pieces as evenly thick as possible. This helps them cook quickly and evenly.

Pat the chicken dry with paper towels.

Prepare the Parmesan Coating

In a shallow bowl, combine the grated Parmesan cheese and seasoned breadcrumbs.

Mix thoroughly.

If desired, add a little garlic powder, black pepper, paprika, or Italian seasoning.

For the crispiest coating, use finely grated Parmesan rather than very large shreds.

Coat the Chicken

Press each chicken cutlet firmly into the Parmesan-breadcrumb mixture.

Turn it over and coat the other side.

Gently press the coating onto the chicken so it sticks well.

Make sure the entire surface is covered.

If you want an especially thick crust, press the chicken into the coating a second time.

Preheat the Air Fryer

Preheat your air fryer to 390°F (200°C) for approximately 3–5 minutes.

A hot air fryer helps the coating begin crisping immediately.

Arrange the Chicken

Place the coated chicken cutlets in the air fryer basket in a single layer.

Don’t overlap the pieces.

Leave some space between them so hot air can circulate around the chicken.

If necessary, cook the chicken in batches.

For easier cleanup, you can use perforated air fryer parchment designed to allow airflow.

Air Fry

Lightly spray the tops with olive oil if desired.

Air fry at 390°F (200°C) for approximately 6–8 minutes.

Carefully flip the cutlets.

Continue cooking for another 5–7 minutes, or until the coating is golden and the chicken reaches an internal temperature of 165°F (74°C).

Cooking time will depend on the thickness of the chicken.

Make the Coating Extra Crispy

If you want an even deeper golden crust, increase the air fryer temperature to 400°F (200°C) during the final 1–2 minutes.

Watch carefully because Parmesan can brown quickly.

Rest the Chicken

Remove the chicken cutlets from the air fryer.

Let them rest for approximately 3–5 minutes before serving.

This allows the juices to redistribute while the crispy coating remains intact.

Tips for Extra-Crispy Parmesan Chicken

Use thin cutlets

Thin chicken cooks quickly and gives you a better coating-to-chicken ratio.

Dry the chicken first

Excess moisture can prevent the breading from becoming crispy.

Use finely grated Parmesan

It blends beautifully with the breadcrumbs and creates an even crust.

Press the coating firmly

Gently pressing the mixture onto the chicken helps prevent it from falling off during cooking.

Don’t overcrowd the basket

Air circulation is essential for crispiness.

Flip carefully

Use tongs or a spatula to avoid disturbing the crust.

Don’t overcook

Chicken cutlets are thin and can become dry quickly. Use a meat thermometer to check for doneness.

Best Parmesan to Use

For the best flavor, freshly grated Parmesan works beautifully.

You can also use:

Parmigiano-Reggiano

Finely grated Parmesan

Pecorino Romano

A Parmesan-Romano blend

Pecorino Romano has a stronger and saltier flavor, so you may want to reduce additional salt if using it.

Recipe Variations

Garlic Parmesan Chicken

Add garlic powder and dried parsley to the breadcrumb mixture.

Italian Herb Chicken

Add Italian seasoning, oregano, and basil to the coating.

Spicy Parmesan Chicken

Add crushed red pepper flakes or cayenne pepper.

Lemon Parmesan Chicken

Serve the cooked chicken with fresh lemon wedges. The acidity beautifully balances the rich Parmesan coating.

Parmesan Mozzarella Chicken

Top the cooked cutlets with mozzarella and return them to the air fryer for 1–2 minutes until melted.

Parmesan Chicken Sandwich

Place the crispy cutlet inside a toasted bun with lettuce, tomato, and creamy sauce.

What to Serve With Parmesan Chicken Cutlets

These crispy chicken cutlets pair with almost anything.

Classic Sides

Air fryer French fries

Mashed potatoes

Roasted potatoes

Garlic bread

Coleslaw

Vegetable Sides

Roasted broccoli

Green beans

Asparagus

Zucchini

Roasted carrots

Fresh Sides

Caesar salad

Garden salad

Tomato cucumber salad

Arugula salad

Pasta

Serve the chicken over spaghetti with marinara sauce for an easy Parmesan-style dinner.

Serving Ideas

For a simple family dinner, serve one crispy cutlet with roasted vegetables and potatoes.

For lunch, slice the chicken and add it to a Caesar salad.

For sandwiches, place the cutlet inside a toasted roll with marinara and mozzarella.

For an appetizer, cut the chicken into strips and serve with marinara, ranch, or garlic aioli.

Storage Instructions

Allow leftover chicken to cool before placing it in an airtight container.

Refrigerate for up to 3–4 days.

For the best texture, keep the chicken separate from sauces and salads.

Reheating Instructions

The air fryer is the best way to restore the crispy coating.

Preheat the air fryer to 350°F (175°C).

Place the chicken cutlets in the basket and heat for approximately 3–5 minutes, turning once halfway through.

Avoid microwaving when possible because the Parmesan coating can become soft.

Freezing Instructions

You can freeze cooked Parmesan chicken cutlets.

Allow them to cool completely.

Place parchment between individual pieces and transfer them to a freezer-safe container or bag.

Freeze for up to 2 months for best quality.

Thaw in the refrigerator before reheating, or reheat from frozen at a moderate air fryer temperature until heated through.

Nutrition Information of Air Fryer Crispy Parmesan Chicken Cutlets

Approximate nutrition per serving:

Calories: 420 kcal

Protein: 52 g

Carbohydrates: 22 g

Fat: 14 g

Saturated Fat: 5 g

Cholesterol: 125 mg

Sodium: 820 mg

Fiber: 1 g

Sugar: 2 g

Nutrition information is estimated and will vary depending on the chicken size, Parmesan, breadcrumbs, and optional oil used.

Frequently Asked Questions

Can I use chicken thighs?

Yes. Boneless, skinless chicken thighs can be used, although they will require a different cooking time because they are generally thicker and contain more fat.

Can I make this recipe without breadcrumbs?

Yes, but the texture will be different. You can use crushed pork rinds or finely crushed crackers as an alternative.

Why is my Parmesan coating falling off?

Make sure the chicken is dry before coating it and press the Parmesan mixture firmly onto the surface. Avoid moving the chicken too much while it cooks.

Do I need to use oil?

No. The chicken can be cooked without additional oil. However, a light spray of olive oil can help the coating brown more evenly.

Can I use pre-shredded Parmesan?

Yes, but finely grated Parmesan generally produces a more even coating and better overall texture.

How do I know when the chicken is done?

The safest method is to use a meat thermometer. The thickest part of the chicken should reach 165°F (74°C).

Can I make these gluten-free?

Yes. Use gluten-free breadcrumbs and check that all other ingredients are certified gluten-free if needed.

Final Thoughts of Air Fryer Crispy Parmesan Chicken Cutlets

These Crispy 3-Ingredient Air Fryer Parmesan Chicken Cutlets are an easy way to turn simple chicken breasts into a golden, crunchy, flavor-packed dinner. The combination of Parmesan and breadcrumbs creates a delicious crust while the air fryer keeps the cooking process quick and convenient.The recipe is simple enough for a busy weeknight but versatile enough to serve in many different ways. Pair the cutlets with vegetables and potatoes for dinner, slice them over salad for lunch, or add marinara and mozzarella for a quick chicken Parmesan-inspired meal.For the best results, remember to keep the chicken thin, pat it dry, press the coating firmly onto the chicken, avoid overcrowding the air fryer, and cook until the center reaches 165°F (74°C).Once you try this easy air fryer method, these crispy Parmesan chicken cutlets are sure to become a regular on your dinner menu.