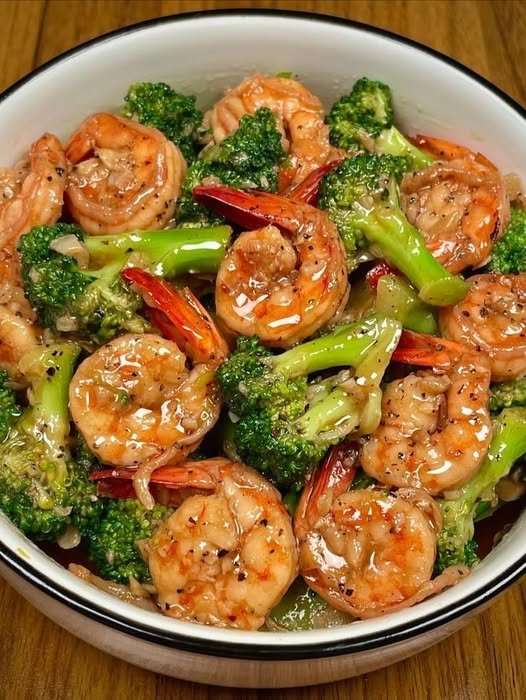
Garlic Pepper Shrimp & Broccoli Stir Fry 🍤🥦

Ingredients

  • 1 lb large shrimp, peeled & deveined
  • 3 cups broccoli florets
  • 1 tbsp avocado oil or olive oil

Sauce

  • 3 tbsp soy sauce or coconut aminos
  • 1 tbsp oyster sauce (optional)
  • 1 tbsp rice vinegar or lemon juice
  • 1 tbsp water
  • 2 tsp sesame oil
  • 1 tbsp fresh garlic, minced
  • 1 tsp fresh ginger, grated
  • 1 tsp cracked black pepper
  • ½ tsp brown sugar or allulose

Instructions

  1. In a small bowl, whisk together all sauce ingredients.
  2. Heat oil in a large skillet over medium-high heat.
  3. Add broccoli and cook for 3–4 minutes until slightly tender.
  4. Add shrimp and cook 2 minutes per side until pink.
  5. Pour in the sauce and toss everything together.
  6. Cook another 2 minutes until glossy and flavorful.
  7. Serve hot over rice, noodles, or cauliflower rice.

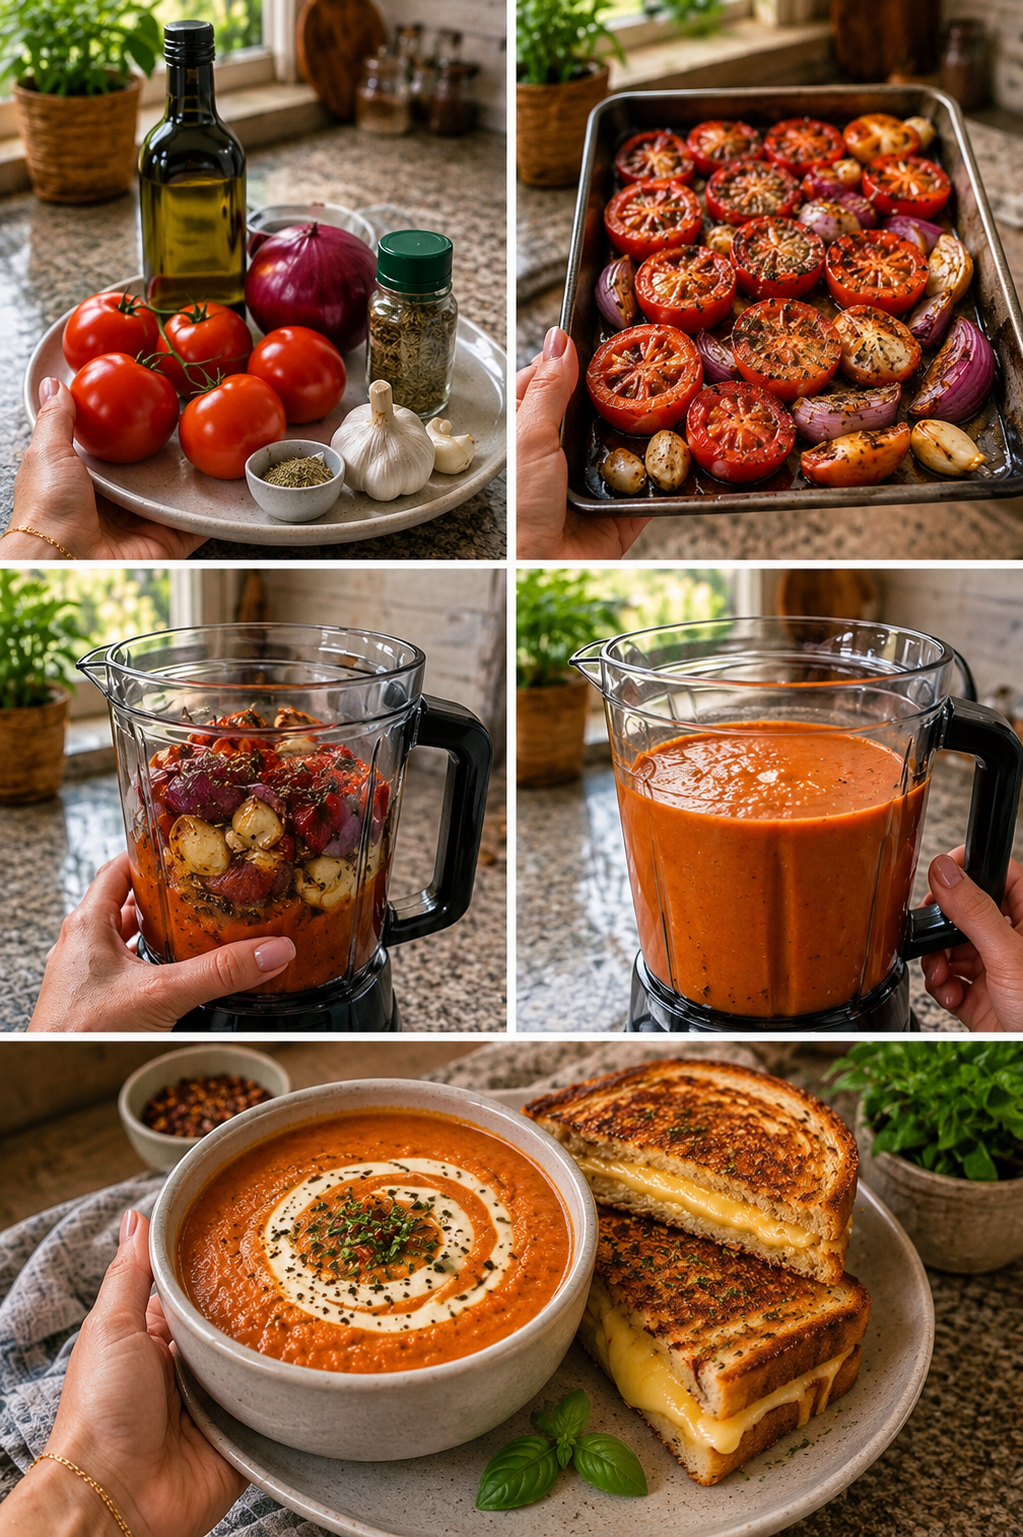
Homemade Roasted Tomato Soup with Grilled Cheese

Homemade Roasted Tomato Soup with Grilled Cheese
Description
Roasted tomato soup paired with a crispy grilled cheese sandwich is the ultimate comfort food combination. This homemade version features oven-roasted tomatoes, garlic, and purple onion blended into a rich, velvety soup bursting with fresh flavor. Roasting the vegetables enhances their natural sweetness and creates a deep, savory taste that canned soups simply cannot match. Served with buttery grilled cheese sandwiches, this cozy meal is perfect for chilly evenings, quick family dinners, or weekend lunches.

Ingredients
For the Roasted Tomato Soup
5–6 ripe tomatoes, halved
1 purple onion, quartered
1–2 heads garlic
3 tbsp olive oil
Salt and black pepper, to taste
2 cups vegetable broth or chicken broth
1 tsp Italian seasoning
½ tsp red pepper flakes (optional)
½ cup heavy cream or coconut milk (optional for creaminess)
Fresh basil for garnish (optional)
For the Grilled Cheese
4 slices bread
2 tbsp butter
4 slices cheddar, mozzarella, or American cheese
Instructions
Step 1: Roast the vegetables.
Preheat oven to 400°F (200°C).

Place tomatoes, onions, and garlic onto a baking sheet. Drizzle generously with olive oil and season with salt, pepper, and Italian seasoning.

Discover more
butter
Cheesy
Garlic
Roast for 35–45 minutes until the tomatoes are soft and slightly caramelized and the garlic becomes golden and fragrant.

Step 2: Blend the soup.
Allow vegetables to cool slightly. Squeeze roasted garlic cloves from their skins into a blender.

Add roasted tomatoes and onions along with broth. Blend until smooth and creamy.

For extra richness, add heavy cream or coconut milk and blend again.

Step 3: Simmer
Pour blended soup into a large pot and simmer for 10–15 minutes over medium-low heat. Taste and adjust seasoning if needed.

Step 4: Make the Grilled Cheese
Butter one side of each bread slice.

Place bread butter-side down in a skillet over medium heat. Add cheese and top with the second bread slice.

Cook for 3–4 minutes per side until golden brown and cheese is melted.

Step 5: Serve
Pour hot soup into bowls and garnish with cream, basil, black pepper, or herbs if desired.

Serve alongside crispy grilled cheese sandwiches.

Servings
Soup: 4 servings
Grilled Cheese: 2 sandwiches
Nutritional Information (Approx. Per Serving)
Tomato Soup
Calories: 220
Carbohydrates: 18g
Protein: 4g
Fat: 15g
Fiber: 4g
Sodium: 480mg
Grilled Cheese Sandwich
Calories: 380
Carbohydrates: 28g
Protein: 12g
Fat: 24g
Nutritional values vary depending on the cheese and cream used.

Benefits of Homemade Tomato Soup
Rich in Antioxidants
Tomatoes are packed with lycopene, a powerful antioxidant that may support heart health and help reduce inflammation.

Immune Support
Garlic and onions contain natural compounds that may help support the immune system.

Better Than Canned Soup
Homemade soup contains fewer preservatives and allows you to control sodium and ingredients.

Comforting and Filling
Paired with grilled cheese, this meal provides warmth, satisfaction, and classic comfort food flavor.

Customizable
You can make the soup creamy, spicy, dairy-free, or herb-packed depending on your preferences.

Tips for the Best Tomato Soup
Use ripe tomatoes for the sweetest flavor.
Roasting deepens flavor and reduces acidity.
For extra smoky flavor, roast vegetables slightly longer until edges are charred.
Blend carefully while hot, and vent the blender lid slightly.
Add fresh basil after blending for a bright, fresh finish.
If soup tastes too acidic, add a small pinch of sugar or a drizzle of honey.
Sourdough bread makes an excellent grilled cheese option.
Storage
Refrigerator
Store soup in an airtight container for up to 4 days.

Freezer
Freeze for up to 3 months. Thaw overnight before reheating.

Reheating
Warm on the stovetop over medium heat or microwave in short intervals.

Frequently Asked Questions
Can I use canned tomatoes?
Yes. Use whole peeled canned tomatoes if fresh tomatoes are unavailable.

What tomatoes work best?
Roma or vine-ripened tomatoes roast especially well because they are naturally sweet and less watery.

Can I make this dairy-free?
Absolutely. Use coconut milk instead of cream and dairy-free cheese for the sandwich.

Why roast the garlic?
Roasting garlic creates a sweeter, milder flavor compared to raw garlic.

Can I make it spicy?
Yes. Add red pepper flakes, cayenne pepper, or roasted jalapeños.

What cheese melts best for grilled cheese?
Cheddar, mozzarella, provolone, Monterey Jack, and American cheese melt beautifully.

Can I make the soup chunky instead of smooth?
Definitely. Blend only half the soup or pulse lightly for texture.

What goes well with tomato soup?
Salads, crackers, garlic bread, fresh basil, croutons, or grilled cheese all pair wonderfully.

This homemade roasted tomato soup and grilled cheese combination is cozy, flavorful, and easy enough for weeknight dinners while still tasting restaurant-quality.

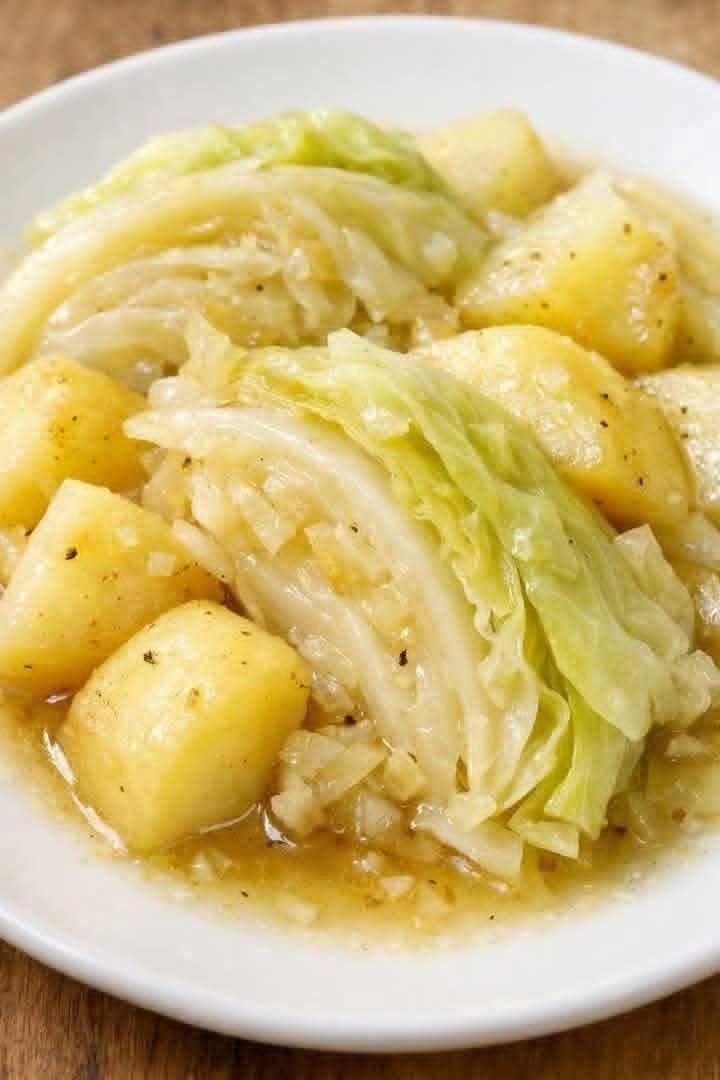
Slow Cooker Cabbage and Potatoes

Slow Cooker Cabbage and Potatoes

A warm, comforting, budget-friendly dish made with tender cabbage, soft potatoes, onions,  garlic, and savory seasonings slowly cooked until rich and flavorful. This recipe works as a hearty side dish or a simple  vegetarian main meal. The  slow cooker develops deep flavor with very little effort, making it perfect for busy weekdays or cozy family dinners.

Description

Slow Cooker Cabbage and Potatoes is a rustic comfort-food recipe popular in many home kitchens because it uses simple ingredients while delivering satisfying flavor. As the vegetables cook low and slow, the cabbage becomes buttery-soft and slightly sweet, while the potatoes absorb all the savory broth and seasoning.

This recipe is naturally vegetarian, easy to customize, and pairs wonderfully with grilled meats, sausages, beans, or crusty bread.

Ingredients

Main Ingredients

  • 1 medium green cabbage, chopped
  • 4 medium potatoes, peeled and cubed
  • 1 medium onion, sliced
  • 3 cloves garlic, minced
  • 3 tablespoons butter or olive oil
  • 2 cups vegetable broth
  • 1 teaspoon salt
  • 1/2 teaspoon black pepper
  • 1 teaspoon paprika
  • 1/2 teaspoon dried thyme
  • 1/2 teaspoon red chili flakes (optional)

Optional Add-Ins

  • 1 cup carrots, sliced
  • 1 cup smoked sausage, sliced
  • 1/2 cup bacon bits
  • 1 tablespoon parsley for garnish

Instructions

  1. Prepare the vegetables
    • Chop the cabbage into bite-sized pieces.
    • Peel and cube the potatoes.
    • Slice onions and mince garlic.
  2. Layer ingredients
    • Add potatoes to the bottom of the slow cooker.
    • Add onions, garlic, and cabbage on top.
  3. Season
    • Sprinkle salt, pepper, paprika, thyme, and chili flakes evenly.
  4. Add liquid
    • Pour vegetable broth over everything.
    • Dot butter across the top.
  5. Cook
    • Cover and cook:
      • LOW for 6–7 hours, or
      • HIGH for 3–4 hours
  6. Finish and serve
    • Stir gently before serving.
    • Garnish with parsley if desired.

Recipe Notes

  • Waxy potatoes hold their shape better than starchy potatoes.
  • Cabbage shrinks significantly while cooking.
  • Add sausage during the last 2 hours for best texture.
  • For richer flavor, use chicken broth instead of vegetable broth.
  • Butter gives a smoother, comforting taste, while olive oil keeps it lighter.

Helpful Tips

Best Potatoes to Use

  • Yukon Gold: creamy texture
  • Red potatoes: hold shape well
  • Russet potatoes: softer and fluffier

Prevent Mushy Vegetables

  • Cut potatoes into larger chunks.
  • Avoid overcooking on HIGH for too long.

Flavor Boosters

  • Add smoked paprika for depth.
  • A splash of apple cider vinegar brightens flavor.
  • Parmesan cheese on top adds richness.

Make It Heartier

Add:

  • Kielbasa sausage
  • White beans
  • Ham chunks
  • Ground beef

Servings

  • Makes: 6 servings

Nutritional Information (Approximate Per Serving)

Nutrient Amount
Calories 185
Carbohydrates 28g
Protein 4g
Fat 7g
Fiber 6g
Sugar 6g
Sodium 520mg

Health Benefits

Cabbage

  • Rich in vitamin C and vitamin K
  • Contains antioxidants that support immunity
  • High fiber supports digestion
  • Low in calories

Potato

  • Good source of potassium
  • Provides steady energy from complex carbs
  • Contains vitamin B6 and vitamin C

Garlic and Onion

  • May support heart health
  • Add natural anti-inflammatory compounds

Storage & Reheating

Refrigerator

  • Store in an airtight container for up to 4 days.

Freezer

  • Freeze for up to 2 months.
  • Texture of potatoes may soften after thawing.

Reheating

  • Microwave in 1-minute intervals.
  • Or warm on the stovetop with a splash of broth.

Variations

Vegan Version

  • Use olive oil instead of butter.
  • Use vegetable broth only.

Irish-Style

  • Add bacon and sausage.

Spicy Version

  • Increase chili flakes.
  • Add jalapeños or hot sauce.

Creamy Version

  • Stir in sour cream or cream cheese before serving.

Frequently Asked Questions

Can I put raw cabbage in the slow cooker?

Yes. Raw cabbage cooks perfectly in the slow cooker and becomes tender and flavorful.

Do I need to boil potatoes first?

No. The slow cooker cooks the potatoes completely.

Can I cook this overnight?

Yes, cooking on LOW overnight works well.

Why is my cabbage watery?

Cabbage naturally releases moisture while cooking. Use less broth if you prefer a thicker dish.

Can I add meat?

Absolutely.  Sausage, bacon, ham, or shredded chicken work very well.

What should I serve with it?

Great pairings include:

  • Roasted chicken
  • Sausage
  • Cornbread
  • Rye bread
  • Fried eggs

Serving Suggestions

Serve this dish:

  • As a cozy winter dinner
  • Alongside grilled  meats
  • With crusty bread
  • As part of a holiday comfort-food spread

Crispy Salmon Strips with Herb Tartar Dip

Crispy Salmon Strips with Herb Tartar Dip


🥗 Necessary Ingredients

For the Salmon:

  • 🐟 1 lb Fresh salmon fillet, sliced into even strips.

  • 🧂 1 tsp Garlic powder.

  • 🧂 1 tsp Onion powder.

  • 🧂 1/2 tsp Smoked paprika.

  • 🧂 1/4 tsp Black pepper.

  • 🥑 1 tbsp Avocado oil for searing.

For the Herb Tartar Dip:

  • 🥣 1/2 cup Greek yogurt (a high-protein, Mediterranean-friendly base).

  • 🥒 1 tbsp Finely minced pickles.

  • 🌿 1 tbsp Fresh chives or parsley, minced.

  • 🍋 1 tsp Fresh lemon juice (often used in the user’s preferred infusions).


👩‍🍳 Step-by-Step Instructions

  • 🔪 Prepare: Slice the salmon into strips approximately 1 inch wide.

  • ➡️ 🧂 Season: Mix the spices in a small bowl and coat each salmon strip thoroughly.

  • ➡️ 🔥 Heat: Place a large skillet over medium-high heat and add the avocado oil.

  • ➡️ 🍳 Sear: Place the strips in the pan and cook for 3–4 minutes per side until golden and crisp.

  • ➡️ 🥣 Whisk: While the salmon cooks, combine the dip ingredients in a small bowl.

  • ➡️ ✨ Finish: Remove the salmon from the heat and garnish with fresh herbs before serving.


❓ Q/A Section

Q: Can I prepare this in an air fryer? 🍟 A: Yes! Cook the seasoned strips at 200°C for 8–10 minutes, flipping them halfway through to ensure they are crisp on all sides.

Q: Is this recipe suitable for a sugar-free lifestyle?A: Yes, this recipe contains no added sugars or flour, making it ideal for those prioritizing healthy, sugar-free meals.

Q: How do I store the leftovers? 🧊 A: Store any remaining salmon strips in an airtight container in the refrigerator for up to 2 days. Reheat gently in a pan to maintain the crispy exterior.

Q: What is the best way to ensure the salmon is cooked? 🐟 A: The salmon is ready when it is opaque throughout and flakes easily with a fork, ensuring it remains moist on the inside.

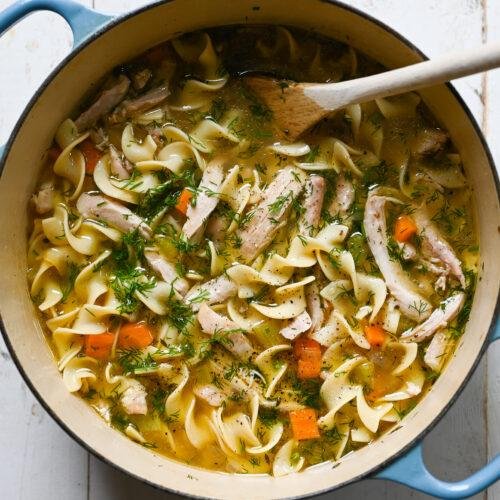
Classic Chicken Noodle Soup

Classic Chicken Noodle Soup

Prep time: 15 mins | Cook time: 40 mins | Servings: 6


Ingredients

The Base

  • 1 tbsp Olive oil or butter

  • 1 large Yellow onion, diced

  • 3 large Carrots, sliced into rounds

  • 3 stalks Celery, sliced

  • 3 cloves Garlic, minced

The Liquid & Protein

  • 8 cups High-quality chicken bone broth or stock

  • 1 lb Cooked chicken (rotisserie works great, or poached breasts/thighs), shredded or sliced

  • 2 Bay leaves

  • 1 tsp Dried thyme (or 3 sprigs fresh)

  • Salt and black pepper to taste

The Finish

  • 6 oz Wide egg noodles

  • 1/2 cup Fresh dill, chopped (essential for that look in IMG-20260512-WA0027.jpg)

  • 1 tbsp Lemon juice (optional, for brightness)


Instructions

  1. Sauté the Aromatics: In a large Dutch oven or pot, heat the oil over medium heat. Add the onion, carrots, and celery. Cook for 6–8 minutes until the onions are translucent and the carrots begin to soften. Stir in the garlic and cook for 1 minute more.

  2. Simmer the Broth: Pour in the chicken broth and add the bay leaves and thyme. Bring to a boil, then reduce heat and simmer for 15 minutes to let the flavors meld.

  3. Cook the Noodles: Add the wide egg noodles directly to the pot. Cook according to the package directions (usually 6–8 minutes) until al dente.

    Tip: If you plan on having leftovers, cook the noodles separately and add them to individual bowls so they don’t soak up all the broth overnight.

  4. Add Chicken: Stir in the shredded chicken and cook for 2–3 minutes just until heated through.

  5. The Final Touch: Remove from heat. Remove the bay leaves and thyme sprigs. Stir in the fresh dill and lemon juice. Season generously with cracked black pepper

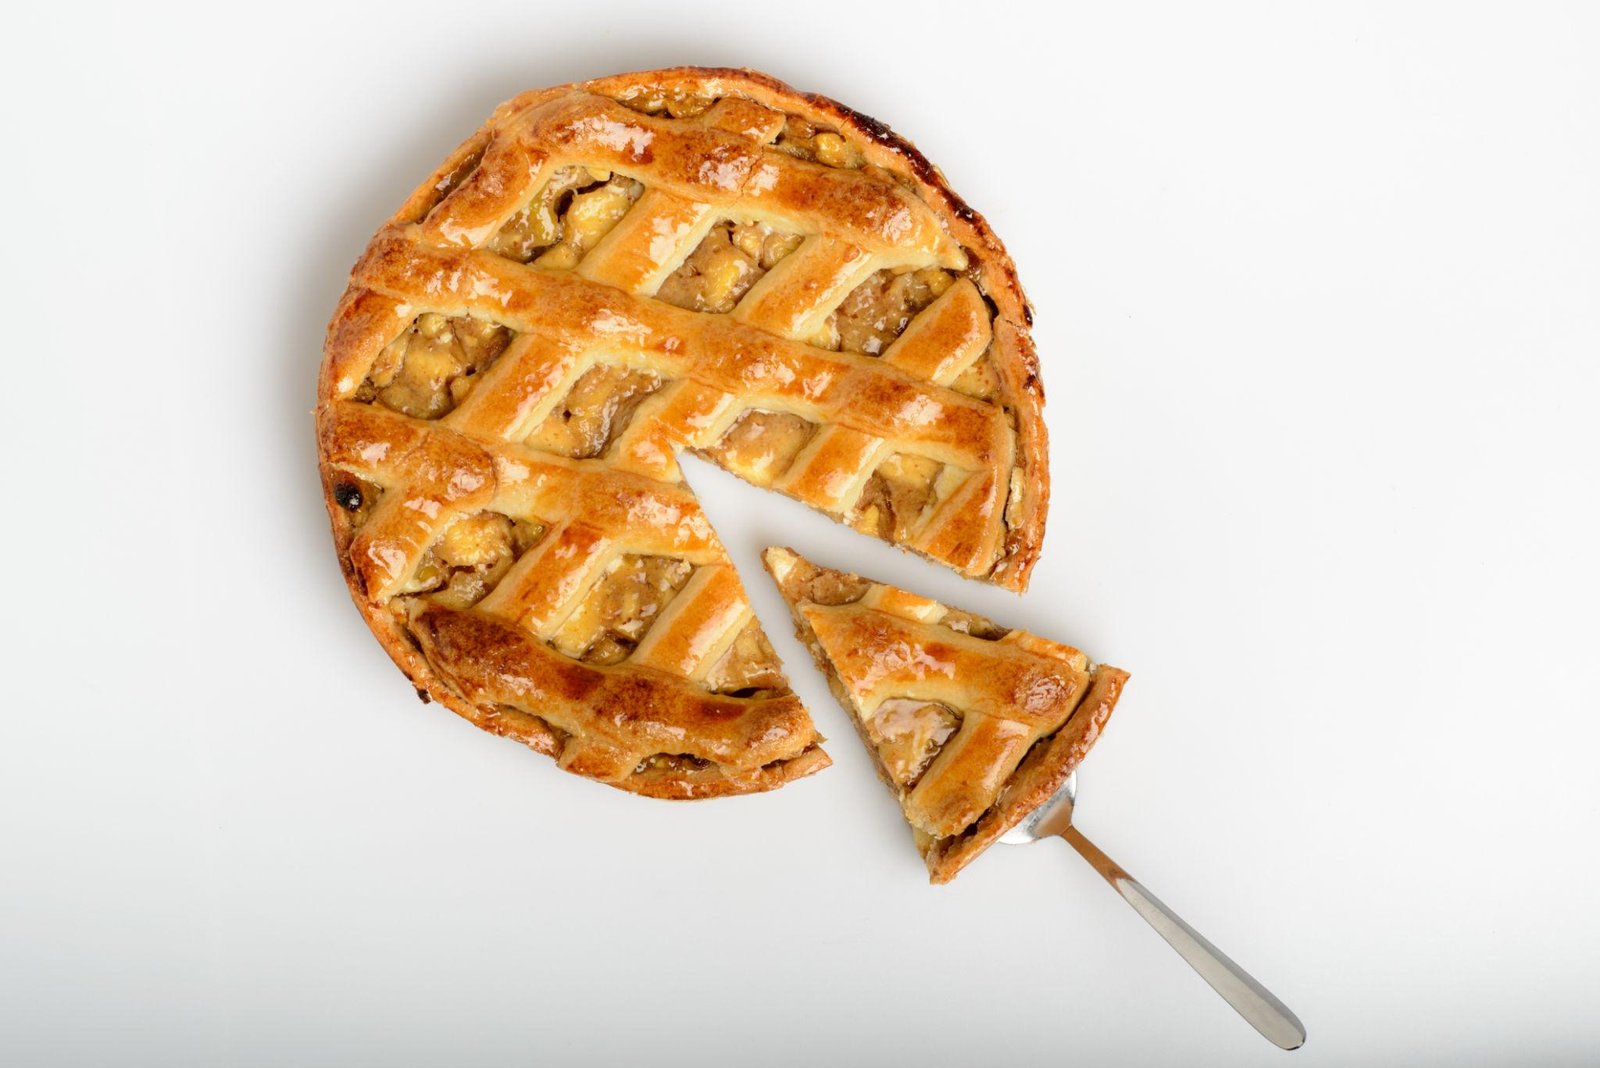
Homemade Apple Pie Recipe 🍎🥧

Homemade Apple Pie Recipe 🍎🥧

Ingredients

For the Pie Crust

  • 2½ cups all-purpose flour

  • 1 teaspoon salt

  • 1 tablespoon sugar

  • 1 cup cold unsalted butter, cubed

  • 6–8 tablespoons ice water

For the Apple Filling

  • 6 large apples, peeled and sliced

  • ¾ cup brown sugar

  • ¼ cup white sugar

  • 2 tablespoons all-purpose flour

  • 1 teaspoon cinnamon

  • ¼ teaspoon nutmeg

  • 1 tablespoon lemon juice

  • 1 teaspoon vanilla extract

  • 2 tablespoons butter

For the Top

  • 1 egg

  • 1 tablespoon milk

  • Extra sugar for sprinkling

Instructions

  1. In a large bowl, mix flour, salt, and sugar. Add the cold butter and blend until the mixture looks crumbly. Slowly add ice water, one tablespoon at a time, until the dough comes together. Divide into two discs, wrap, and chill for 30 minutes.

  2. Preheat the oven to 200°C (400°F).

  3. In another bowl, combine sliced apples, brown sugar, white sugar, flour, cinnamon, nutmeg, lemon juice, and vanilla. Toss well so the apples are evenly coated.

  4. Roll out one dough disc and place it into a 9-inch pie dish. Add the apple filling and dot the top with small pieces of butter.

  5. Roll out the second dough disc and place it over the apples. Seal and crimp the edges. Cut small slits on top for steam to escape, or create a lattice pattern for a classic look.

  6. Beat the egg with milk and brush over the crust. Sprinkle a little sugar on top for extra crunch and shine.

  7. Bake for 45–55 minutes, until the crust is golden brown and the filling is bubbling.

  8. Let the pie cool for at least 1 hour before slicing. Serve warm on its own or with vanilla ice cream.

Tips

  • Mixing sweet and tart apples gives the best flavor.

  • Keep the butter cold for a flaky crust.

  • If the crust browns too quickly, loosely cover the edges with foil while baking.

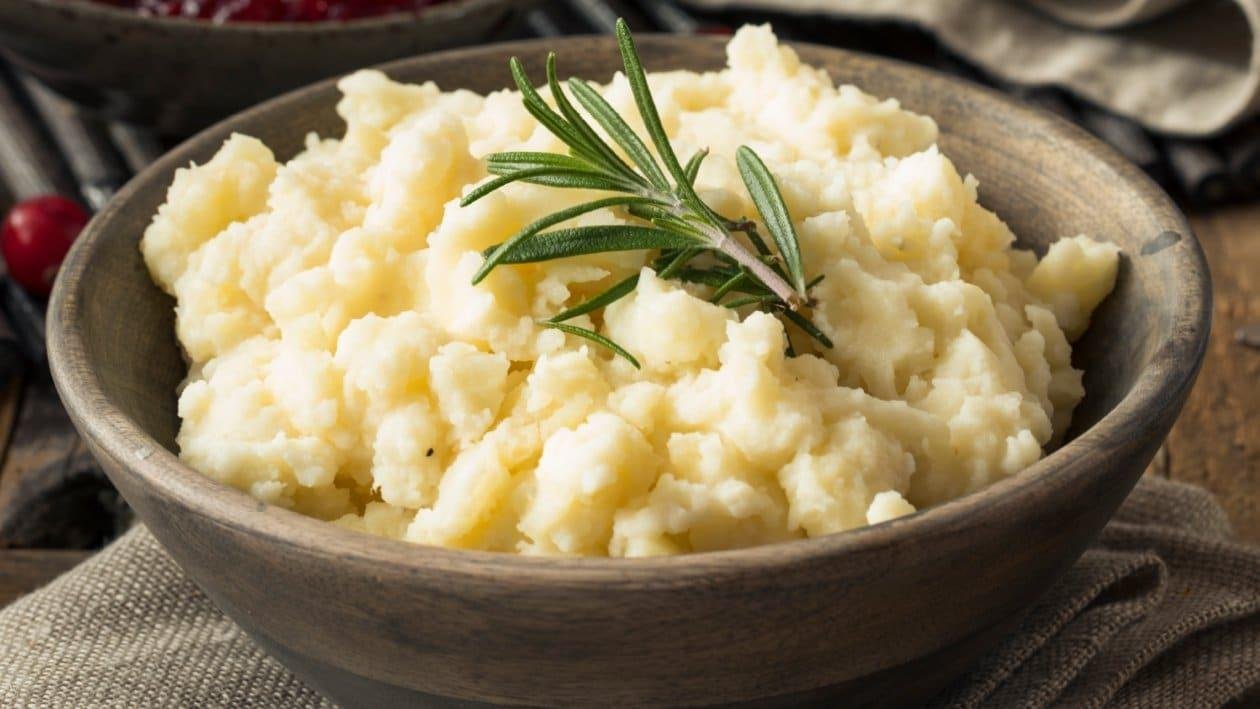
Creamy Mashed Potatoes Recipe 🥔✨

Creamy Mashed Potatoes Recipe 🥔✨
Ingredients
  • 2 pounds potatoes (Yukon Gold or Russet)

  • 4 tablespoons butter

  • ¾ cup warm milk

  • ¼ cup fresh cream

  • 3 garlic cloves, minced (optional)

  • 1 teaspoon salt

  • ½ teaspoon black pepper

  • 1 tablespoon chopped parsley or rosemary for garnish

Instructions

  1. Wash, peel, and cut the potatoes into medium chunks. Place them in a large pot and cover with cold water. Add a little salt to the water.

  2. Bring the pot to a boil over medium-high heat. Cook the potatoes for about 15–20 minutes, or until they become soft and tender when pierced with a fork.

  3. Drain the potatoes well and let them sit for 1–2 minutes so extra moisture can evaporate. This helps create a creamy texture.

  4. In a small pan, warm the milk, cream, butter, and garlic together over low heat. Do not let it boil.

  5. Mash the potatoes using a potato masher until smooth. Slowly pour in the warm milk mixture while mixing gently.

  6. Add salt and black pepper. Continue mixing until the potatoes become light, fluffy, and creamy. If you want softer mashed potatoes, add a little more warm milk.

  7. Transfer to a serving bowl and top with extra butter and fresh herbs like parsley or rosemary.

Serving Ideas 🍽️

These creamy mashed potatoes pair perfectly with roasted chicken, grilled vegetables, meatloaf, or baked fish. They are also wonderful as a comforting side dish for family dinners and holiday meals.

Tips

  • Use warm milk instead of cold milk for extra smooth potatoes.

  • Avoid overmixing, as it can make the potatoes sticky.

  • Yukon Gold potatoes give a naturally buttery flavor and creamy texture.

Enjoy your homemade creamy mashed potatoes! 🥔💛

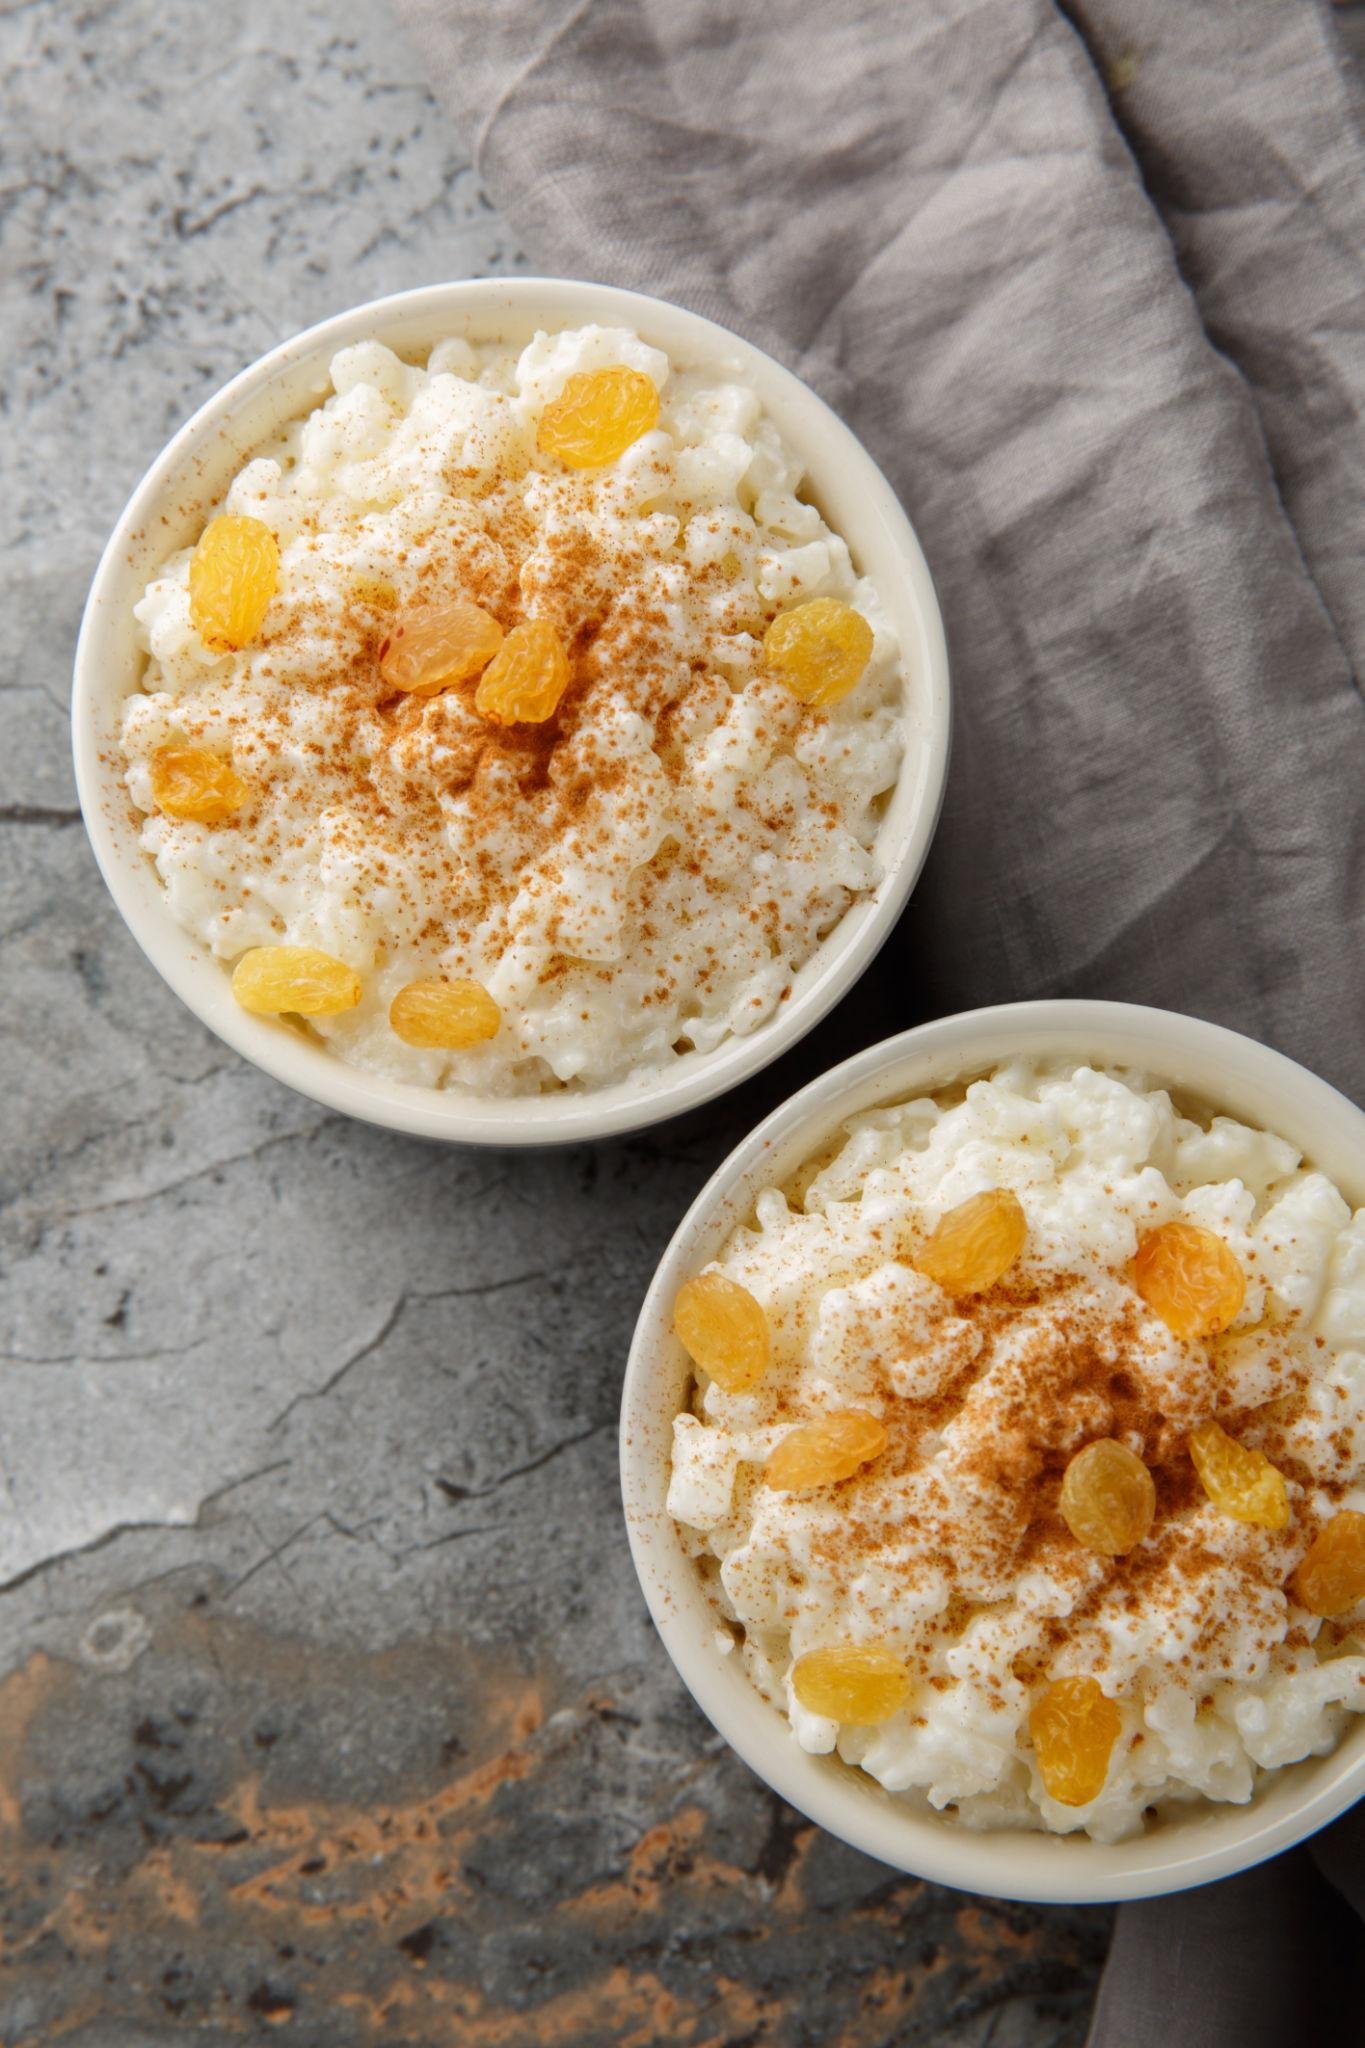
Old-Fashioned Rice Pudding Recipe

Ingredients
  • 3/4 cup white rice

  • 2 cups water

  • 4 cups whole milk

  • 1/2 cup sugar

  • 1/4 teaspoon salt

  • 2 large eggs

  • 1 teaspoon vanilla extract

  • 1/2 teaspoon ground cinnamon

  • 1/2 cup raisins

  • 1 tablespoon butter

Instructions

  1. Rinse the rice under cool water. In a medium saucepan, combine the rice and water. Bring to a gentle boil over medium heat. Reduce the heat, cover, and simmer for about 15 minutes until the water is absorbed.

  2. Add the milk, sugar, and salt to the cooked rice. Stir well and cook over low heat for 25–30 minutes. Stir often so the rice becomes creamy and smooth without sticking to the pan.

  3. In a small bowl, whisk the eggs. Slowly add a few spoonfuls of the hot rice mixture into the eggs while whisking. This helps warm the eggs gently.

  4. Pour the egg mixture back into the saucepan. Continue cooking on low heat for 3–5 minutes, stirring constantly until the pudding thickens.

  5. Remove from heat and stir in the vanilla extract, butter, and raisins.

  6. Spoon the pudding into serving bowls. Sprinkle cinnamon on top for extra flavor. Serve warm for a cozy dessert or chill in the refrigerator for a refreshing treat.

Tips

  • Use whole milk for the richest texture.

  • Add nutmeg or a little lemon zest for extra flavor.

  • The pudding thickens more as it cools. Stir in a splash of milk before serving if needed.

Creamy, comforting, and lightly sweet, this old-fashioned rice pudding is a timeless dessert perfect for family dinners or relaxing evenings.

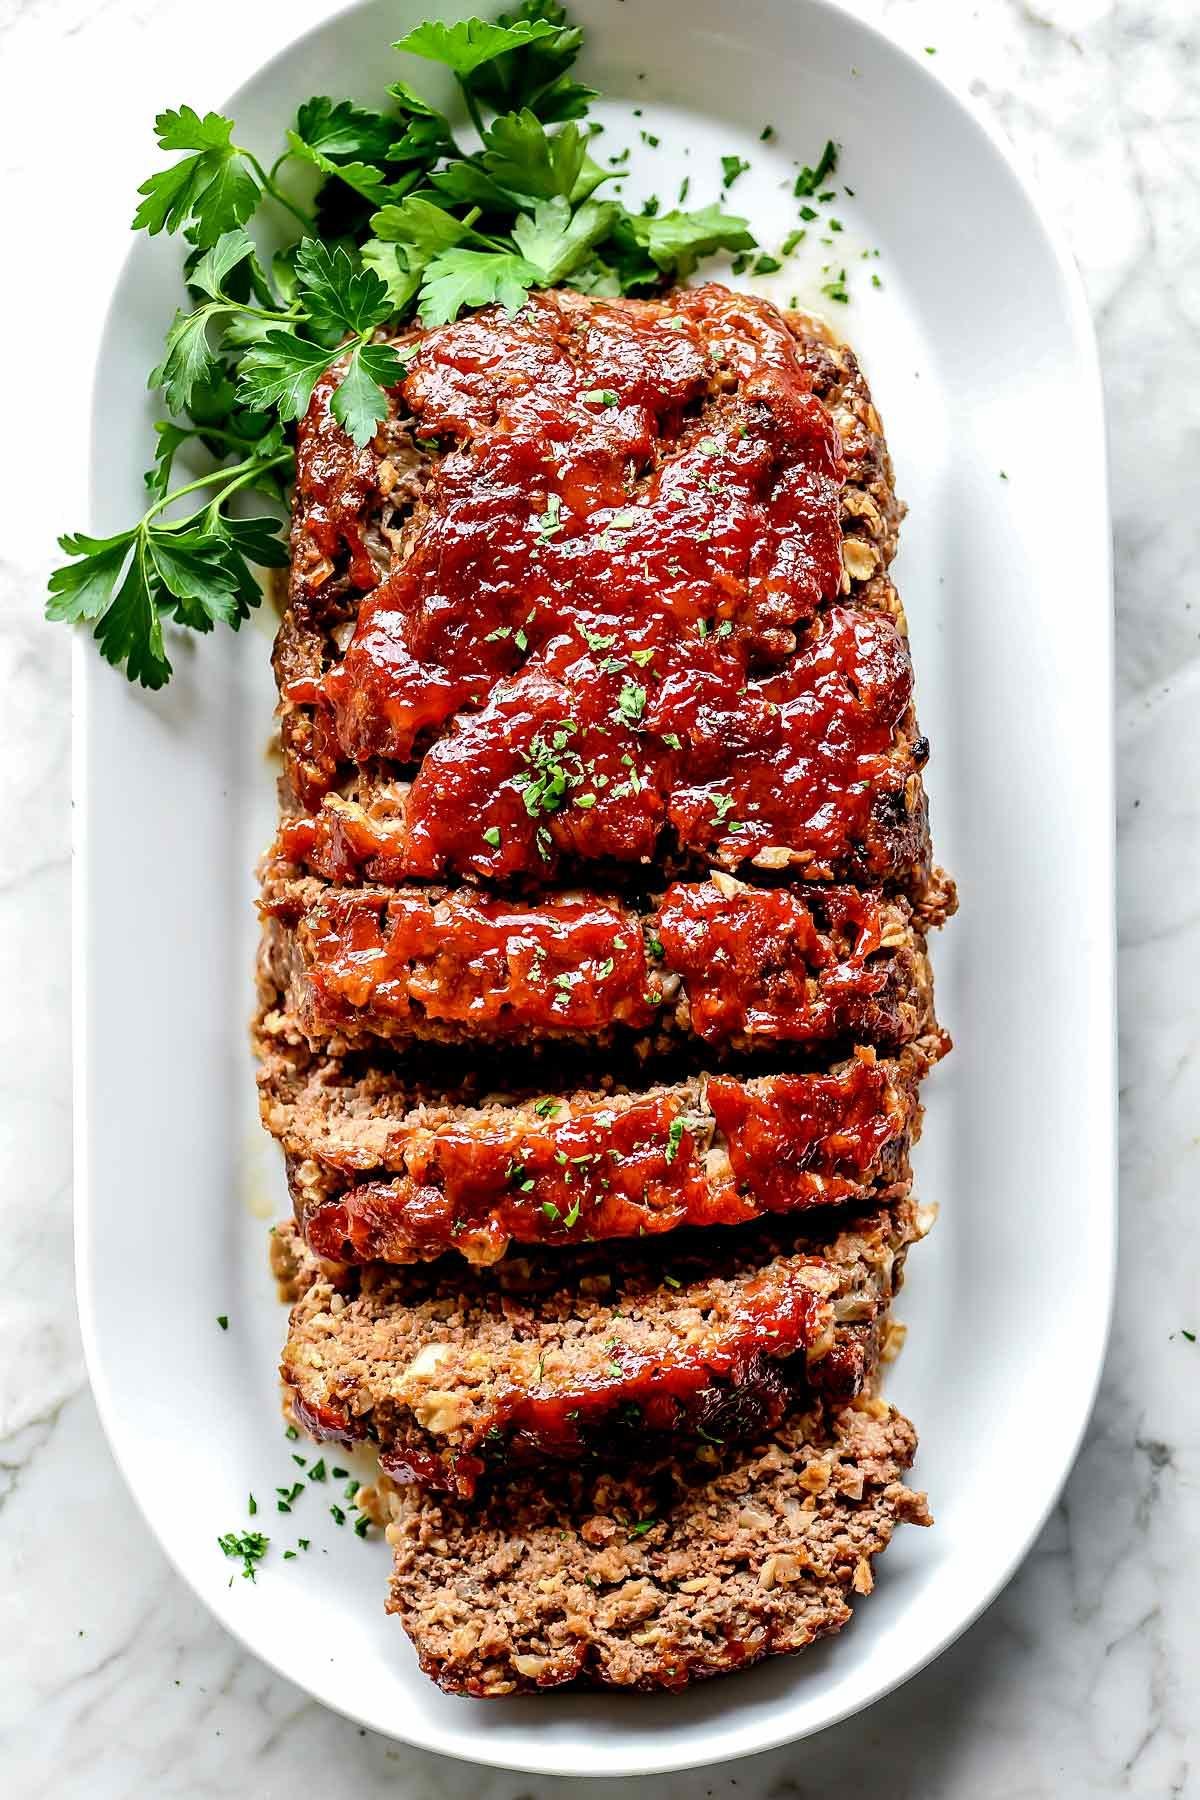
Old-Fashioned Meatloaf Recipe 🍽️

Ingredients

For the Meatloaf

  • 2 pounds ground beef

  • 1 cup breadcrumbs

  • 1 small onion, finely chopped

  • 2 eggs

  • 3/4 cup milk

  • 2 cloves garlic, minced

  • 2 tablespoons ketchup

  • 1 tablespoon Worcestershire sauce

  • 1 teaspoon salt

  • 1/2 teaspoon black pepper

  • 1 teaspoon dried parsley

  • 1/2 teaspoon paprika

For the Glaze

  • 1/2 cup ketchup

  • 2 tablespoons brown sugar

  • 1 tablespoon mustard


Instructions

  1. Preheat your oven to 350°F (175°C). Lightly grease a loaf pan or baking dish.

  2. In a large bowl, combine the breadcrumbs and milk. Let them sit for 2 minutes so the breadcrumbs soften.

  3. Add the ground beef, chopped onion, eggs, garlic, ketchup, Worcestershire sauce, salt, pepper, parsley, and paprika. Mix gently until everything is evenly combined. Avoid overmixing to keep the meatloaf tender.

  4. Shape the mixture into a loaf and place it in the prepared pan.

  5. In a small bowl, stir together the ketchup, brown sugar, and mustard to make the glaze.

  6. Spread half of the glaze over the top of the meatloaf.

  7. Bake for 45 minutes. Remove from the oven and spread the remaining glaze on top.

  8. Return the meatloaf to the oven and bake for another 15–20 minutes, or until fully cooked and juicy inside.

  9. Let the meatloaf rest for 10 minutes before slicing. This helps it stay moist and hold its shape.


Serving Ideas

Serve this classic old-fashioned meatloaf with:

  • Creamy mashed potatoes

  • Roasted vegetables

  • Buttered green beans

  • Fresh dinner rolls

Cheesy ground beef  quesadilla

 Cheesy ground beef  quesadilla

*. Looks like the good stuff with melty cheddar, seasoned beef, onions, and cilantro.

*- Makes 4 large quesadillas:*

*Beef Filling:*

– *Ground beef*: 1 lb, 80/20

– *Yellow onion*: ½ cup, diced

– *Garlic*: 2 cloves, minced

– *Seasoning*: 1 tbsp chili powder, 1 tsp cumin, 1 tsp smoked paprika, ½ tsp oregano, salt & pepper

– *Tomato paste*: 1 tbsp

– *Water*: ¼ cup

– *Cilantro*: 2 tbsp, chopped

*For Assembly:*

– *Large flour tortillas*: 8

– *Cheddar cheese*: 3 cups, shredded. Monterey Jack works too.

– *Butter or oil*: For the pan

*Instructions:*

1. *Cook beef*: Brown ground beef in a skillet over medium-high heat. Drain excess fat.

2. *Add flavor*: Add onion, cook 3 min. Add garlic, cook 30 sec. Stir in all seasonings + tomato paste. Add water and simmer 2-3 min until thick. Turn off heat and mix in cilantro.

3. *Build*: Heat a clean skillet on medium. Lightly butter one side of a tortilla. Place butter-side down in pan.

4. *Layer*: Add ½ cup cheese, ⅓ cup beef mixture, then another ½ cup cheese. Top with second tortilla, butter-side up.

5. *Cook*: Press down gently. Cook 2-3 min per side until golden brown and cheese is melted.

6. *Slice*: Let rest 1 min, then cut into wedges.

*Time*: 20 minutes

*Tip*: Use two cheeses for better melt. Don’t overfill or they get messy.

Want a dipping sauce to go with it? Sour cream + lime or chipotle mayo works great.


Grilled Chicken with Garlic Parmesan Cream Sauce* 

 *Grilled Chicken with Garlic Parmesan Cream Sauce* 

*For the Chicken:*

– *Chicken breast*: 2 large, butterflied

– *Olive oil*: 1 tbsp

– *Seasoning*: 1 tsp each garlic powder, paprika, salt, pepper

– Grill or pan-sear 6-7 min per side until charred and 165°F inside. Rest 5 min, then slice.

*For the Garlic Parmesan Cream Sauce:*

– *Butter*: 2 tbsp

– *Garlic*: 3 cloves, minced fine

– *Heavy cream*: 1 cup

– *Parmesan*: ½ cup, freshly grated

– *Italian seasoning*: 1 tsp

– *Black pepper*: ½ tsp

– Melt butter on medium heat. Add garlic 30 sec. Pour in cream, simmer 2-3 min. Whisk in parmesan + seasoning until smooth and thick.

*Bowl Assembly:*

1. *Base*: Cauliflower rice or white rice

2. *Veggies*: Steamed broccoli florets

3. *Top*: Sliced grilled chicken

4. *Finish*: Drizzle hot sauce over everything. Garnish with parsley if you want.

*Serves*: 2

*Time*: 25 min total

Want a low-calorie or dairy-free version of the sauce?


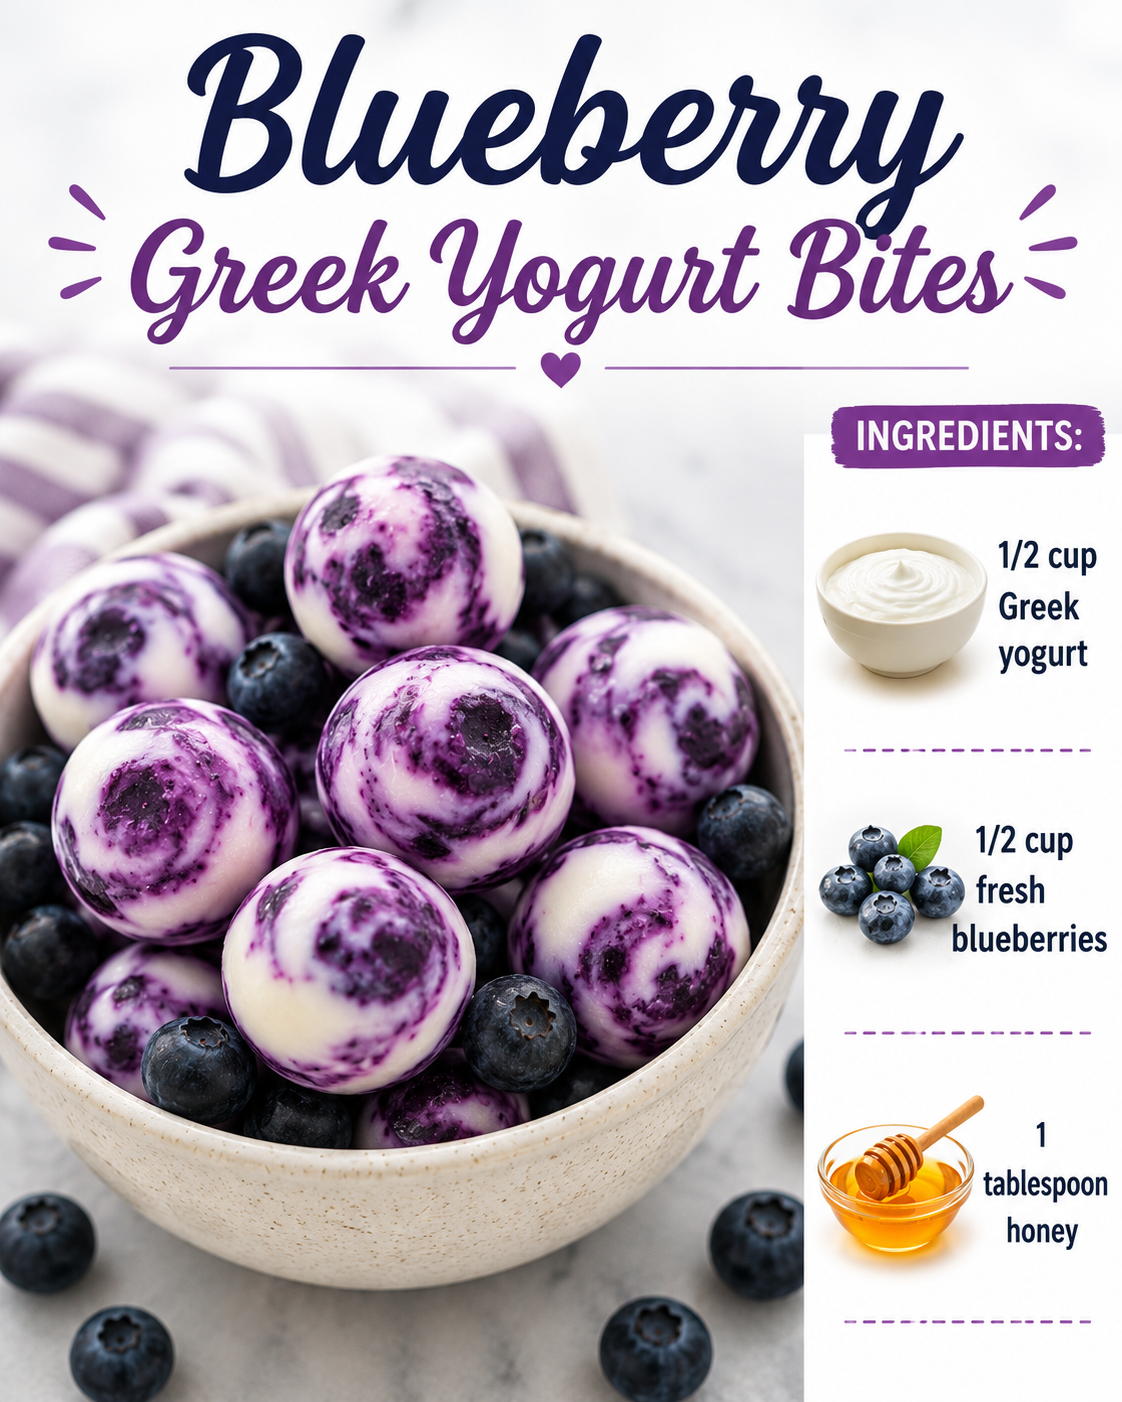
Blueberry Greek Yogurt Bites

Blueberry Greek Yogurt Bites

Description

Blueberry Greek Yogurt Bites are a refreshing, creamy, and healthy frozen snack made with protein-rich Greek yogurt and juicy blueberries. These bite-sized treats are perfect for hot days, quick breakfasts, lunchbox snacks, or guilt-free desserts. They’re naturally sweet, easy to make, and require only a few simple ingredients. The creamy yogurt paired with bursts of fresh blueberries creates a delicious frozen treat everyone will love.

Ingredients

  • 1 ½ cups Greek yogurt (plain or vanilla)
  • 1 cup fresh blueberries
  • 2 tablespoons honey or maple syrup
  • 1 teaspoon vanilla extract
  • 2 tablespoons granola (optional for crunch)
  • 1 tablespoon mini chocolate chips (optional)

Instructions

Step 1: Prepare the Yogurt Mixture

In a medium bowl, combine the Greek yogurt, honey, and vanilla extract. Stir until smooth and creamy.

Step 2: Add the Blueberries

Gently fold the blueberries into the yogurt mixture. Be careful not to crush them too much.

Step 3: Portion the Bites

Line a tray or plate with parchment paper. Spoon small dollops of the yogurt mixture onto the tray, creating bite-sized rounds.

Step 4: Add Toppings

Sprinkle granola or mini chocolate chips on top if desired for added flavor and texture.

Step 5: Freeze

Place the tray in the freezer for about 2–3 hours or until the bites are completely frozen.

Step 6: Serve

Enjoy straight from the freezer for a cool and creamy snack.

Tips for the Best Blueberry Greek Yogurt Bites

  • Use thick Greek yogurt for creamier bites.
  • Fresh blueberries work best, but frozen can also be used.
  • Add sliced strawberries or raspberries for variety.
  • Store in a freezer-safe container for up to 1 month.
  • Dip the frozen bites in melted dark chocolate for a dessert version.

Q&A

Q1: Can I use flavored yogurt?

Yes, vanilla or blueberry-flavored Greek yogurt works wonderfully in this recipe.

Q2: Are these bites healthy?

Yes! They are packed with protein, calcium, and antioxidants from the blueberries.

Q3: Can I make them dairy-free?

Absolutely. Use dairy-free Greek-style yogurt made from coconut, almond, or oat milk.

Q4: How long do they stay frozen?

They stay fresh in the freezer for up to one month when stored properly.

Q5: Can kids eat these as snacks?

Yes, they’re a great healthy snack option for kids and adults alike.

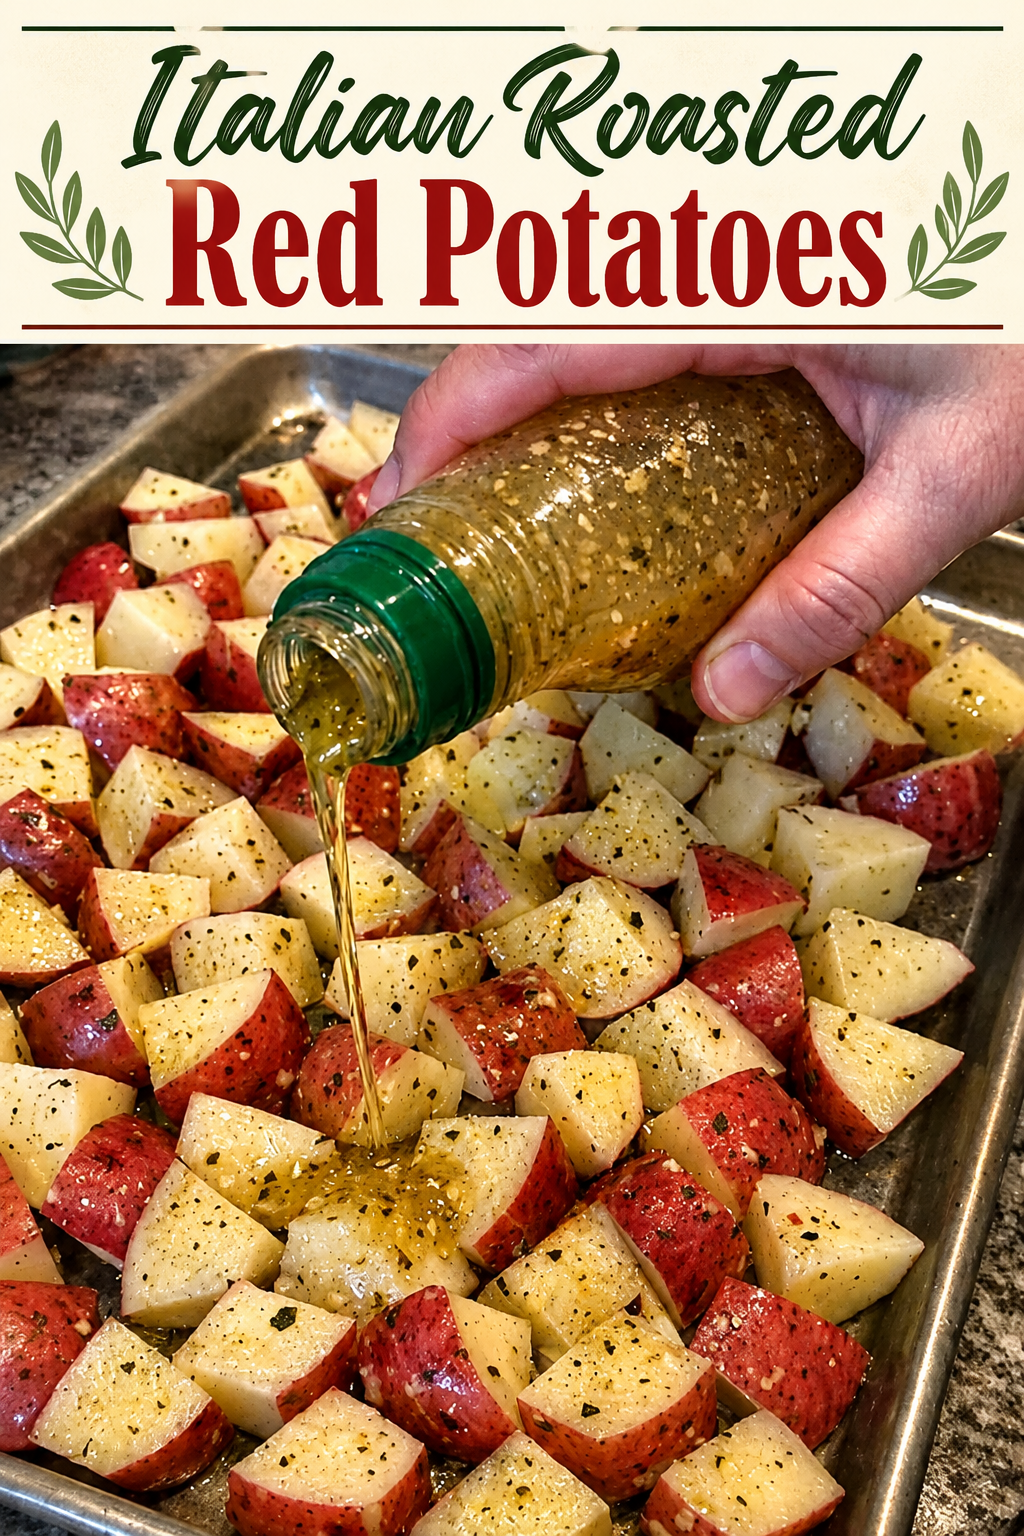
Italian Roasted Red Potatoes

Crispy on the outside, tender on the inside, and packed with garlic-herb flavor — these roasted red potatoes are the perfect side dish for any meal!

Ingredients

  • 2 pounds red potatoes, chopped into bite-sized cubes
  • 1/4 cup olive oil
  • 1 packet Italian dressing mix
    (or 1 tablespoon Italian seasoning)
  • 3 cloves garlic, minced
  • 1 teaspoon salt
  • 1/2 teaspoon black pepper
  • 1/2 teaspoon paprika
  • 2 tablespoons grated Parmesan cheese (optional)
  • Fresh parsley for garnish

Instructions

  1. Preheat oven to 425°F (220°C).
  2. Wash and cut the red potatoes into even cubes.
  3. In a large bowl, combine olive oil, Italian seasoning, garlic, salt, pepper, and paprika.
  4. Add potatoes and toss until fully coated.
  5. Spread potatoes evenly on a baking sheet in a single layer.
  6. Roast for 35–40 minutes, flipping halfway through, until golden and crispy.
  7. Sprinkle with Parmesan cheese and fresh parsley before serving.

Optional Add-Ins

  • Chopped onions
  • Bell peppers
  • Crushed red pepper flakes for heat
  • Bacon bits

Serving Ideas

Serve with:

  • Grilled chicken
  • Steak
  • Burgers
  • Eggs for breakfast

Enjoy these crispy Italian roasted red potatoes fresh from the oven! 🍽️

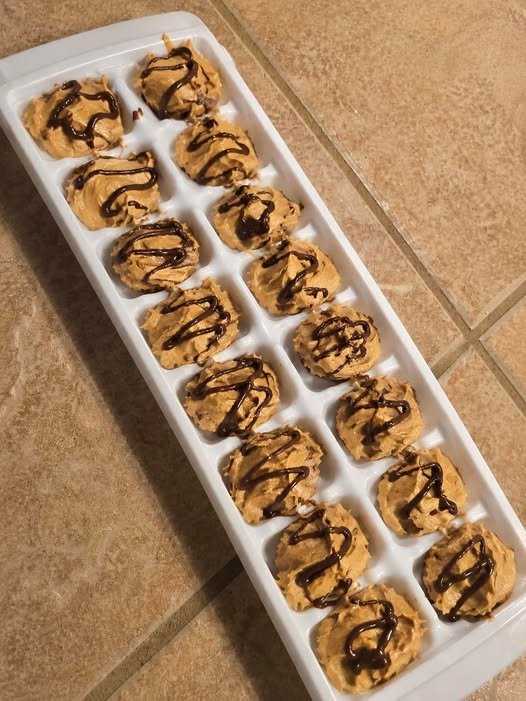
Frozen Peanut Butter Chocolate Bites 🍫🥜

These creamy frozen treats are super easy to make and perfect for a quick dessert or snack!

Ingredients

  • 1 cup creamy peanut butter
  • 1/4 cup honey or maple syrup
  • 1 teaspoon vanilla extract
  • 1 cup whipped topping or Greek yogurt
  • 1/4 cup mini chocolate chips
  • 1/4 cup melted chocolate (for drizzle)

Instructions

  1. In a mixing bowl, combine peanut butter, honey, and vanilla extract.
  2. Fold in whipped topping (or Greek yogurt) until smooth and creamy.
  3. Stir in mini chocolate chips.
  4. Spoon the mixture into an ice cube tray or silicone mold.
  5. Freeze for about 2–3 hours until firm.
  6. Drizzle melted chocolate over the top.
  7. Freeze again for 10 minutes before serving.

Optional Add-Ins

  • Crushed peanuts
  • Crushed Oreos
  • Coconut flakes
  • Protein powder for extra protein

Storage

Keep frozen in an airtight container for up to 2 weeks.

Enjoy these creamy peanut butter chocolate bites straight from the freezer!

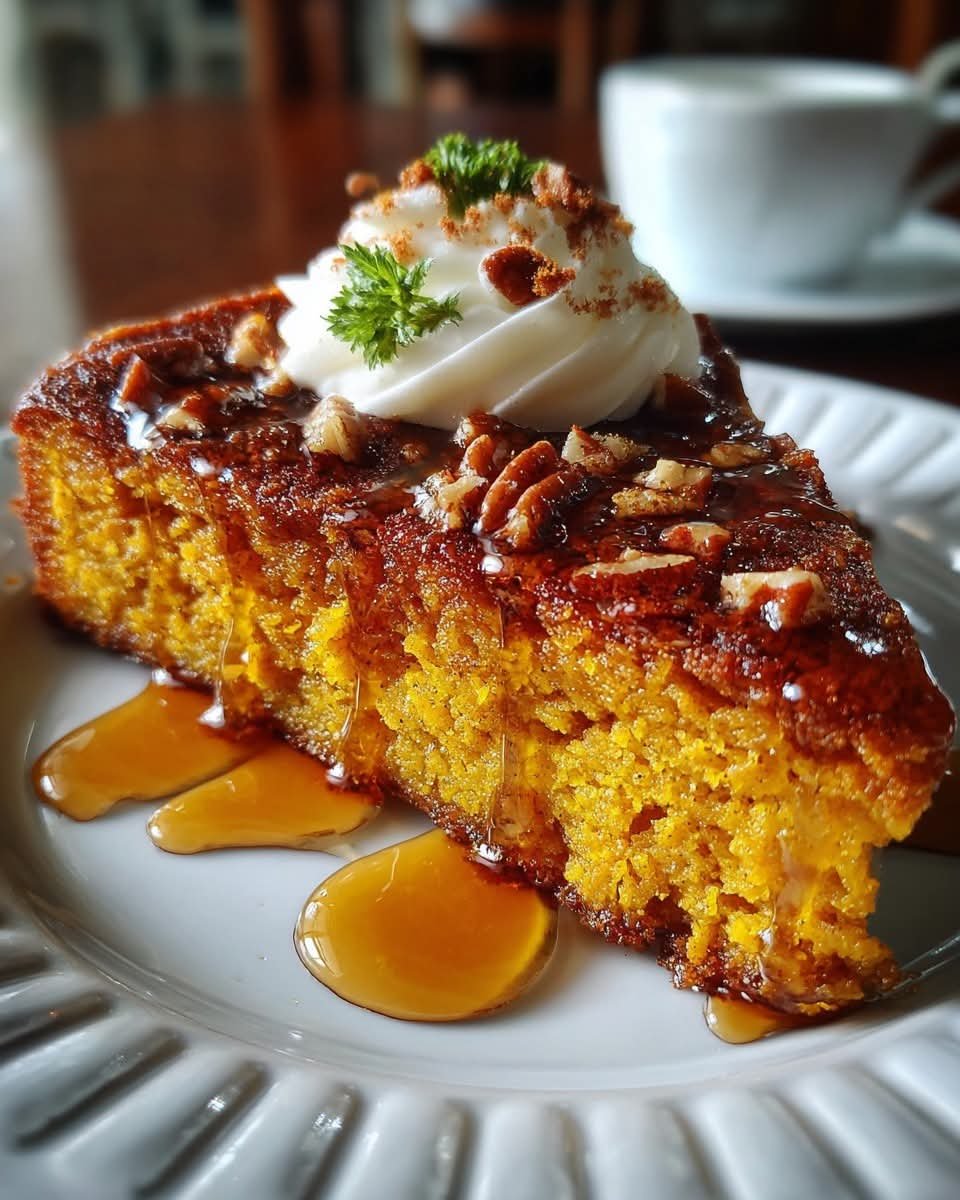
Southern Sweet Potato Pone

Southern Sweet Potato Pone

Ingredients

  • 3 large sweet potatoes, peeled and grated
  • 1/2 cup brown sugar
  • 1/4 cup granulated sugar
  • 1/2 cup melted butter
  • 2 eggs
  • 1 cup evaporated milk
  • 1 tsp vanilla extract
  • 1 tsp cinnamon
  • 1/2 tsp nutmeg
  • 1/2 tsp ginger
  • 1/2 tsp salt
  • 1/2 cup flour

Optional Toppings

  • Butter drizzle
  • Chopped pecans
  • Maple syrup

Directions

Preheat oven to 175°C (350°F).

Grease a baking dish or cast-iron skillet.

In a large bowl, combine grated sweet potatoes, brown sugar, granulated sugar, melted butter, eggs, evaporated milk, and vanilla extract.

Add cinnamon, nutmeg, ginger, salt, and flour. Mix until fully combined.

Pour mixture into the prepared baking dish and smooth the top.

Bake for 50–60 minutes until golden brown around the edges and set in the center.

Allow pone to cool slightly before slicing.

Serve warm with butter drizzle, chopped pecans, or maple syrup if desired.

Nutritional Info (per serving)

Calories: ~340 kcal

Protein: 5g

Carbohydrates: 48g

Fat: 15g

Fiber: 4g

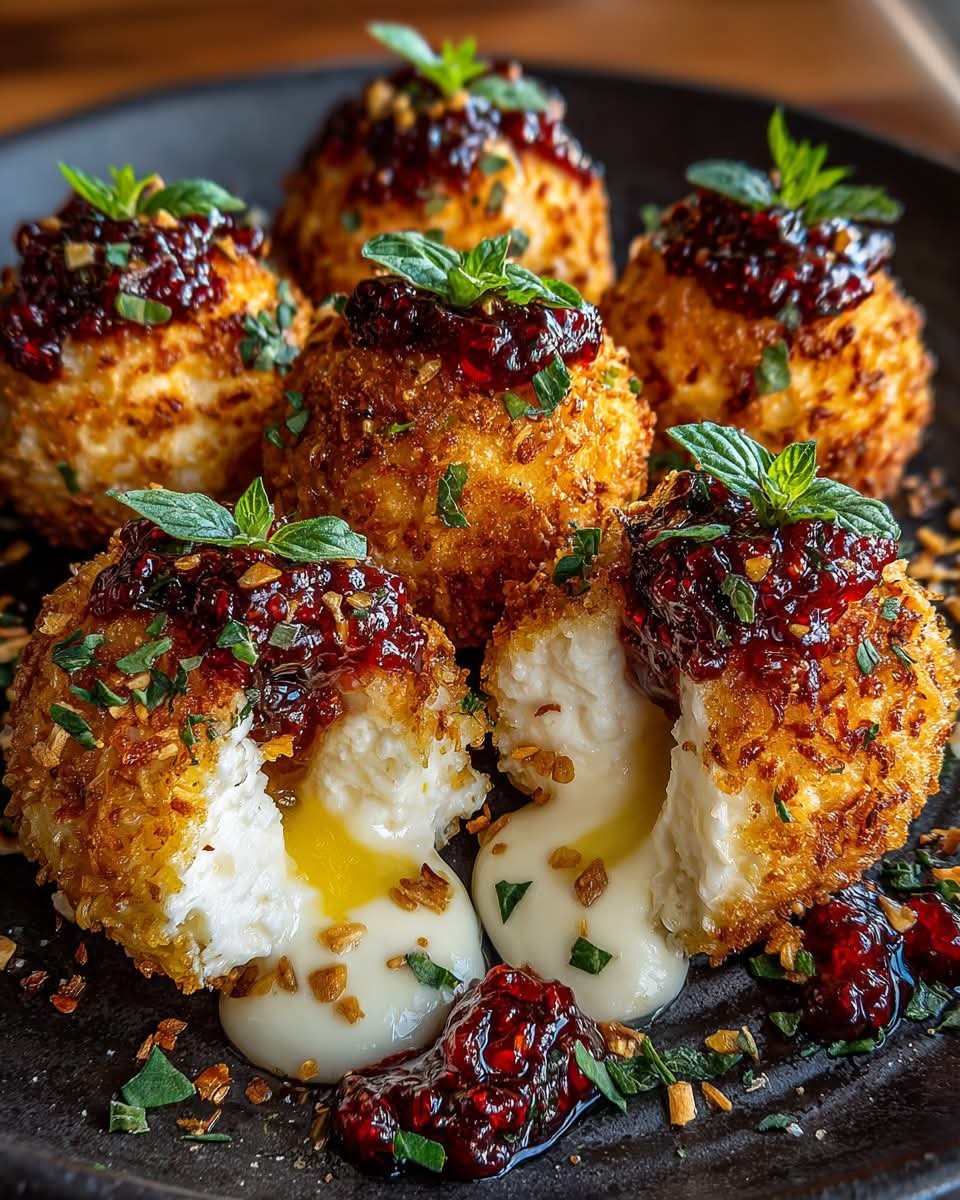
Dubai Crunch Burrata Bomb with Hot Tomato Jam

Dubai Crunch Burrata Bomb with Hot Tomato Jam

Ingredients

Burrata Bombs

  • 2 balls burrata cheese
  • 1 cup kataifi pastry, finely shredded
  • 2 tbsp butter, melted
  • 1/2 cup panko breadcrumbs
  • 1/4 cup parmesan cheese, grated
  • 1 tsp garlic powder
  • 1/2 tsp smoked paprika
  • Black pepper to taste
  • Vegetable oil for frying
  • Hot Tomato Jam
  • 1 cup cherry tomatoes, finely chopped
  • 2 tbsp honey
  • 1 tbsp chili flakes
  • 1 tbsp olive oil
  • 1 clove garlic, minced
  • 1 tsp balsamic vinegar
  • Salt to taste
  • Black pepper to taste

Garnish

  • Fresh basil leaves
  • Extra chili flakes
  • Honey drizzle

Directions

Preheat oven to 190°C (375°F).

Toss kataifi pastry with melted butter until lightly coated.

Mix panko breadcrumbs, parmesan cheese, garlic powder, smoked paprika, and black pepper in a bowl.

Carefully wrap burrata balls with kataifi pastry, then gently coat with the breadcrumb mixture.

Bake or air-fry for 12–15 minutes until crispy, golden, and crunchy outside while keeping the center creamy.

In a saucepan, heat olive oil and sauté garlic until fragrant.

Add chopped tomatoes, honey, chili flakes, balsamic vinegar, salt, and black pepper.

Cook for 8–10 minutes until thick, glossy, and jam-like.

Place crispy burrata bombs onto serving plates.

Spoon hot tomato jam over the top and garnish with basil, chili flakes, and a light honey drizzle.

Serve immediately while warm and crispy.

Nutritional Info (per serving)

Calories: ~520 kcal

Protein: 16g

Carbohydrates: 28g

Fat: 38g

Fiber: 2g

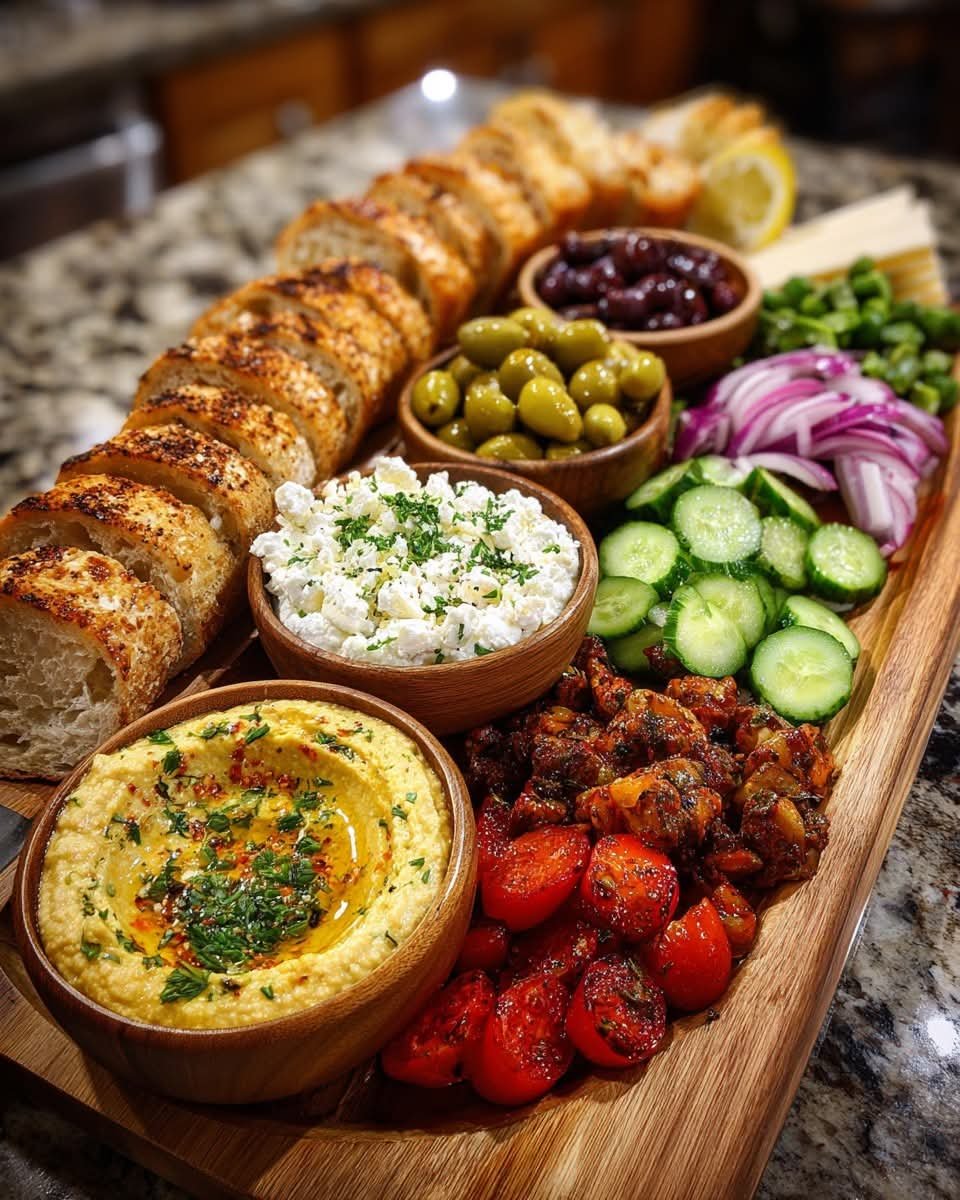
Mediterranean Mezze Tapas Platter

Mediterranean Mezze Tapas Platter

Ingredients

Mezze Board Items

  • 1 cup hummus
  • 1 cup tzatziki
  • 1/2 cup whipped feta di
  • 1 cup cherry tomatoes
  • 1 cucumber, sliced
  • 1/2 red onion, sliced
  • 1 cup kalamata olives
  • 1 cup green olives
  • 1/2 cup feta cheese cubes
  • 1 cup roasted red peppers
  • 1 cup stuffed grape leaves
  • 1 cup pita bread or flatbread, sliced
  • 1/2 cup roasted nuts (almonds or walnuts)

Hummus

  • 1 cup chickpeas, cooked
  • 2 tbsp tahini
  • 2 tbsp olive oil
  • 2 tbsp lemon juice
  • 1 clove garlic
  • 1/2 tsp cumin
  • Salt to taste

Tzatziki

  • 1 cup Greek yogurt
  • 1/2 cucumber, grated and drained
  • 2 cloves garlic, minced
  • 1 tbsp lemon juice
  • 1 tbsp olive oil
  • 1 tbsp fresh dill, chopped
  • Salt to taste
  • Black pepper to taste

Whipped Feta Dip

  • 1/2 cup feta cheese
  • 1/3 cup Greek yogurt
  • 1 tbsp olive oil
  • 1 tsp lemon juice
  • Black pepper to taste

Directions

Blend chickpeas, tahini, olive oil, lemon juice, garlic, cumin, and salt until smooth to make hummus.

Mix Greek yogurt, cucumber, garlic, lemon juice, olive oil, dill, salt, and black pepper to prepare tzatziki.

Blend feta cheese, Greek yogurt, olive oil, lemon juice, and black pepper until creamy for whipped feta dip.

Arrange hummus, tzatziki, and whipped feta in small serving bowls on a large platter.

Surround dips with cherry tomatoes, cucumber, red onion, olives, feta cubes, roasted red peppers, stuffed grape leaves, pita bread, and roasted nuts.

Serve immediately as a colorful Mediterranean-style tapas spread.

Nutritional Info (per serving)

Calories: ~520 kcal

Protein: 16g

Carbohydrates: 40g

Fat: 32g

Fiber: 6g

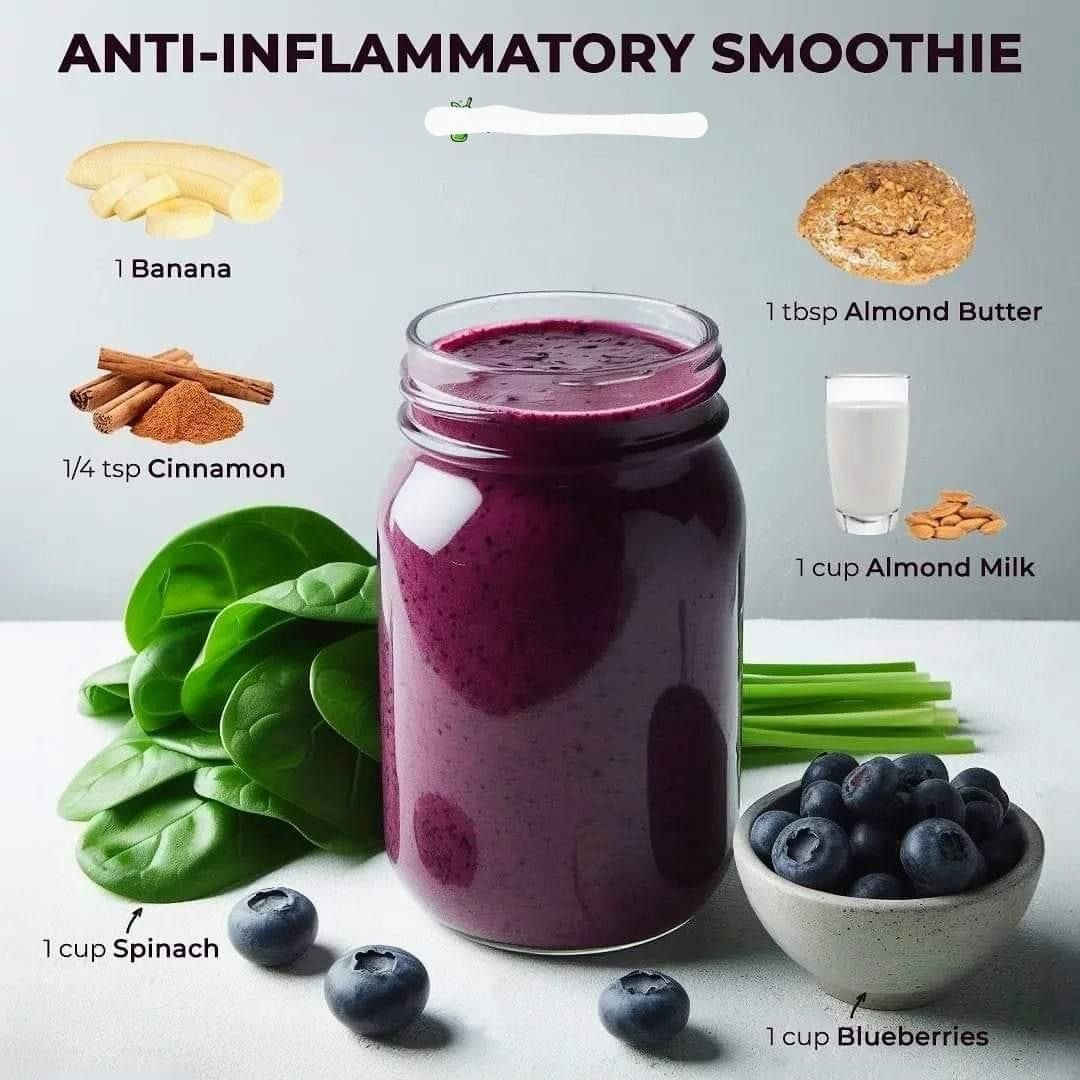
Anti-Inflammatory Smoothie

Anti-Inflammatory Smoothie 🫐🥬

Ingredients

  • 1 banana
  • 1 cup blueberries
  • 1 cup spinach
  • 1 cup almond milk
  • 1 tbsp almond butter
  • 1/4 tsp cinnamon
  • Optional: ice cubes for a colder smoothie

Instructions

  1. Add almond milk to the blender first.
  2. Add banana, blueberries, spinach, almond butter, and cinnamon.
  3. Blend until smooth and creamy.
  4. Add ice if desired and blend again.
  5. Pour into a glass and enjoy immediately.

Benefits

  • Blueberries: Rich in antioxidants
  • Spinach: Packed with vitamins and minerals
  • Cinnamon: May help reduce inflammation
  • Almond Butter: Healthy fats and protein
  • Banana: Natural sweetness and energy boost

Healthy, creamy, and perfect for breakfast or a refreshing snack!

Stuffed Flatbread

Stuffed Flatbread

Description

Stuffed Flatbread is a soft, golden, and flavorful homemade bread filled with delicious savory ingredients like cheese, herbs, vegetables, or seasoned meat. Crispy on the outside and warm and gooey inside, this versatile recipe is perfect for breakfast, lunch, snacks, or dinner. Easy to customize and pan-cooked until beautifully golden, stuffed flatbread is comforting, satisfying, and family-friendly.

Ingredients For the Dough

  • 2 cups all-purpose flour
  • 1 tsp salt
  • 1 tsp baking powder
  • ¾ cup plain yogurt
  • 2 tbsp olive oil
  • ¼–½ cup warm water (as needed)

For the Filling

  • 1 cup shredded mozzarella or cheddar cheese
  • ½ cup cooked spinach or herbs
  • ½ cup cooked ground beef or chicken (optional)
  • 1 garlic clove, minced
  • ½ tsp chili flakes or black pepper

For Cooking

  • 2 tbsp butter or olive oil

Instructions

Step 1: Make the Dough

In a bowl, combine flour, salt, and baking powder. Add yogurt and olive oil. Mix and gradually add warm water until a soft dough forms.

Step 2: Knead

Knead dough for 5 minutes until smooth. Cover and let rest for 20 minutes.

Step 3: Prepare Filling

Mix cheese, spinach, cooked meat (if using), garlic, and seasonings in a bowl.

Step 4: Shape Flatbreads

Divide dough into equal portions. Roll each into a circle, add filling in the center, then fold and seal edges. Gently flatten again.

Step 5: Cook

Heat a skillet over medium heat. Cook flatbreads for 3–4 minutes per side until golden brown and cooked through.

Step 6: Serve

Brush with butter or olive oil and serve warm.

Recipe Notes

  • Yogurt makes the dough soft and tender.
  • Cheese creates a creamy, melty filling.
  • Dough can be prepared ahead of time.
  • Great for using leftover vegetables or meat.

Tips for Best Results

  • Do not overfill the flatbread.
  • Seal edges tightly to prevent leaks.
  • Cook on medium heat for even browning.
  • Serve fresh for best texture and flavor.

Servings

Serves: 4–6

Nutritional Information (Approx. Per Serving)

  • Calories: 290
  • Protein: 10g
  • Carbohydrates: 32g
  • Fat: 13g
  • Fiber: 2g
  • Sodium: 340mg

(Nutritional values may vary depending on ingredients used.)

Health Benefits

  • Homemade flatbread contains fewer preservatives than store-bought options.
  • Provides protein and calcium from cheese and yogurt.
  • Can include vegetables for extra nutrients.
  • Filling and satisfying comfort food.
  • Easy customizable meal for balanced eating.

Q&A About Stuffed Flatbread

Q: Can I make the dough without yogurt?

Yes, substitute with milk or water, though yogurt gives softer texture.

Q: Can I bake instead of pan-frying?

Yes, bake at 400°F (200°C) for about 15–18 minutes.

Q: What fillings work best?

Cheese, spinach, potatoes, chicken, beef, or herbs all work wonderfully.

Q: Can I freeze stuffed flatbread?

Yes, freeze cooked flatbreads for up to 2 months.

Q: How do I reheat them?

Warm in a skillet, oven, or air fryer for best texture.

Q: Can I make them gluten-free?

Yes, use a gluten-free flour blend.

Q: What can I serve with stuffed flatbread?

Yogurt dip, salad, soup, or chutney pair perfectly.

Golden Cabbage & Veggie Bake

Golden Cabbage & Veggie Bake

Description

Golden Cabbage & Veggie Bake is a warm, wholesome casserole filled with tender cabbage, colorful vegetables, creamy cheese, and a perfectly golden baked topping. This comforting dish is packed with flavor, texture, and nourishing ingredients, making it perfect as a vegetarian main course or hearty side dish. With its crispy top and soft savory center, this easy bake is ideal for family dinners, meal prep, or cozy comfort meals.

Ingredients For the Vegetable Bake

  • 4 cups cabbage, chopped
  • 1 cup carrots, shredded
  • 1 zucchini, diced
  • 1 bell pepper, chopped
  • 1 small onion, diced
  • 2 garlic cloves, minced
  • 2 tbsp olive oil
  • 1 tsp Italian seasoning
  • ½ tsp paprika
  • Salt and black pepper to taste

For the Creamy Mixture

  • 2 eggs
  • ½ cup milk
  • 1 cup shredded cheddar cheese
  • ¼ cup grated Parmesan cheese

Optional Topping

  • ½ cup breadcrumbs
  • Fresh parsley

Instructions

Step 1: Preheat Oven

Preheat oven to 375°F (190°C). Grease a baking dish.

Step 2: Sauté Vegetables

Heat olive oil in a skillet over medium heat. Cook onion and garlic for 2 minutes. Add cabbage, carrots, zucchini, and bell pepper. Sauté for 5–7 minutes until slightly softened.

Step 3: Season

Stir in Italian seasoning, paprika, salt, and black pepper.

Step 4: Make Cream Mixture

In a bowl, whisk eggs and milk together. Stir in cheddar cheese and Parmesan cheese.

Step 5: Assemble

Transfer vegetables into the prepared baking dish. Pour cheese mixture evenly over the vegetables. Sprinkle breadcrumbs on top if using.

Step 6: Bake

Bake for 30–35 minutes until golden brown and set.

Step 7: Serve

Garnish with parsley and serve warm.

Recipe Notes

  • Cabbage becomes tender and naturally sweet after baking.
  • Cheese creates a rich and creamy texture.
  • Breadcrumbs add delicious crunch on top.
  • Fresh vegetables give the best flavor and texture.

Tips for Best Results

  • Do not overcook vegetables before baking.
  • Drain excess moisture from zucchini if needed.
  • Use freshly shredded cheese for smoother melting.
  • Let the casserole rest for 5 minutes before slicing.

Servings

Serves: 6

Nutritional Information (Approx. Per Serving)

  • Calories: 220
  • Protein: 10g
  • Carbohydrates: 14g
  • Fat: 14g
  • Fiber: 4g
  • Sodium: 340mg

(Nutritional values may vary depending on ingredients used.)

Health Benefits

  • Cabbage is rich in fiber, vitamin C, and antioxidants.
  • Mixed vegetables provide important vitamins and minerals.
  • Homemade veggie bakes are filling and nutrient-dense.
  • Great vegetarian option with balanced nutrients.
  • Supports healthy digestion thanks to fiber-rich vegetables.

Q&A About Golden Cabbage & Veggie Bake

Q: Can I make this recipe vegan?

Yes, use plant-based cheese, milk, and egg substitutes.

Q: Can I add protein?

Absolutely. Chicken, turkey, or beans work well.

Q: What cheese works best?

Cheddar, mozzarella, Monterey Jack, or feta are great options.

Q: Can I prepare this ahead of time?

Yes, assemble the bake ahead and refrigerate until ready to cook.

Q: How long do leftovers last?

Store in the refrigerator for up to 4 days.

Q: Can I freeze this casserole?

Yes, freeze tightly wrapped portions for up to 2 months.

Q: What can I serve with this dish?

Soup, salad, roasted meat, or crusty bread pair beautifully.

Eye-Health Nut & Seed Mix

Eye-Health Nut & Seed Mix 🫐🥜

Ingredients

  • 1/2 cup walnuts
  • 1/2 cup almonds
  • 1/4 cup pumpkin seeds
  • 1/4 cup sunflower seeds
  • 2 tbsp chia seeds
  • 2 tbsp flaxseeds
  • 1/4 cup dried blueberries or raisins
  • 1 tbsp honey (optional)
  • 1/2 tsp cinnamon

Instructions

  1. Add walnuts, almonds, pumpkin seeds, and sunflower seeds to a bowl.
  2. Stir in chia seeds, flaxseeds, and dried blueberries.
  3. Sprinkle cinnamon over the mixture and drizzle with honey if desired.
  4. Mix everything well until evenly coated.
  5. Store in an airtight jar.

How to Use

Take 1 spoonful before bed or enjoy as a healthy snack during the day.

Benefits

  • Rich in antioxidants
  • Supports eye health naturally
  • Packed with healthy fats and vitamins
  • Great for energy and overall wellness 👀✨

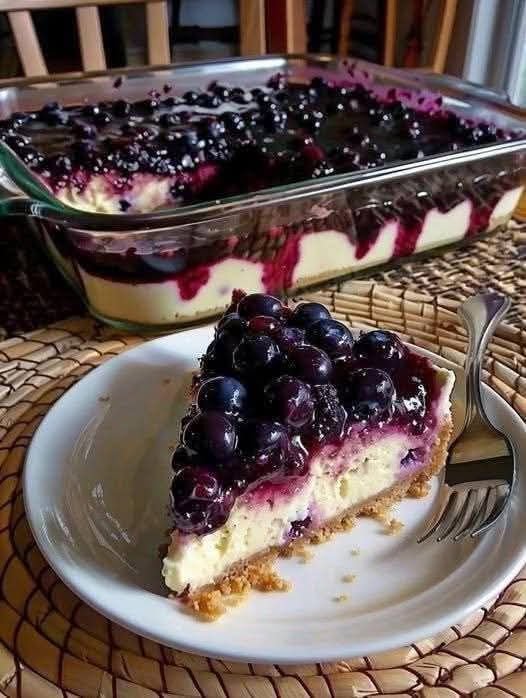
No-Bake Blueberry Cheesecake Dessert

Ingredients

Crust

  • 2 cups graham cracker crumbs
  • 1/2 cup melted butter
  • 2 tbsp sugar

Cheesecake Layer

  • 2 packages (8 oz each) cream cheese, softened
  • 1 cup powdered sugar
  • 1 tsp vanilla extract
  • 1 tub whipped topping (like Cool Whip), thawed

Blueberry Topping

  • 3 cups blueberries (fresh or frozen)
  • 1/3 cup sugar
  • 2 tbsp lemon juice
  • 2 tbsp cornstarch
  • 1/4 cup water

Instructions

  1. Prepare the Crust
    In a bowl, mix graham cracker crumbs, melted butter, and sugar until combined.
    Press firmly into the bottom of a 9×9-inch dish or pie pan. Chill in the refrigerator while preparing the filling.
  2. Make the Cheesecake Layer
    Beat softened cream cheese until smooth and creamy.
    Add powdered sugar and vanilla extract, mixing well.
    Fold in the whipped topping gently until fully combined.
    Spread evenly over the chilled crust.
  3. Cook the Blueberry Topping
    In a saucepan over medium heat, combine blueberries, sugar, lemon juice, cornstarch, and water.
    Stir constantly until the mixture thickens and becomes glossy, about 5–7 minutes.
    Remove from heat and let cool completely.
  4. Assemble the Dessert
    Spoon the cooled blueberry topping over the cheesecake layer and spread evenly.
  5. Chill & Serve
    Refrigerate for at least 4 hours, or overnight for best results.
    Slice and enjoy this creamy, fruity no-bake dessert! 😍

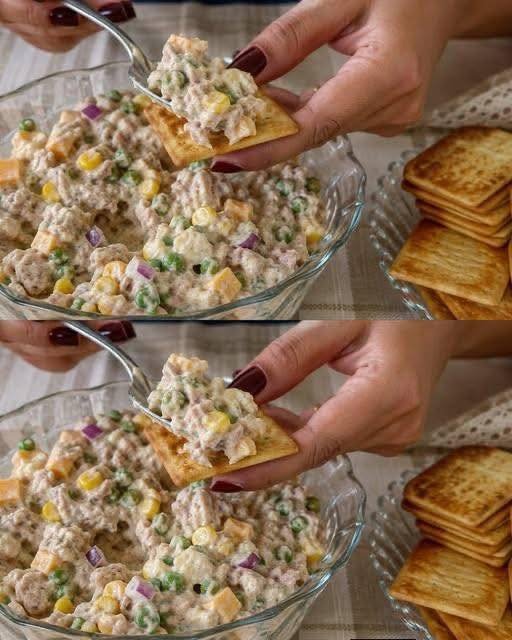
Classic Tuna Salad 

Classic Tuna Salad 🐟🥗
5 min | Serves 2
Ingredients
Tuna: 1 can / 5oz, drained — in water or olive oil
Mayo: 3 tbsp
Celery: 2 tbsp, finely diced
Red onion: 1 tbsp, minced
Dijon mustard: 1 tsp
Lemon juice: 1 tsp
Dill: 1 tsp, chopped — or dried, ¼ tsp
Salt + black pepper: Pinch each
Method
Mix: Flake tuna in bowl. Add all ingredients.
Stir: Combine until creamy. Taste, adjust salt/pepper.
Chill: 10 min if you have time. Flavors meld better.
Low-Carb Serving Ideas
Lettuce cups, cucumber slices, stuffed in avocado, or bell pepper halves.
Notes
Drain tuna well so salad isn’t watery.
For extra crunch: add 1 tbsp diced pickles.
For more protein: add 1 chopped hard-boiled egg.
Macros per serving: ∼220 cal, 20g protein, 1g net carbs, 15g fat

🍓 Creamy Mixed Berry Smoothie

🍓 Creamy Mixed Berry Smoothie

This recipe is packed with antioxidants and fiber to keep you energized.

Ingredients

  • 1 ½ cups Mixed Berries (frozen strawberries, raspberries, and blackberries work best for that thick texture)

  • 1 cup Milk of your choice (Dairy, Almond, or Oat milk)

  • ½ cup Greek Yogurt (Plain or Vanilla for extra creaminess and protein)

  • 1 small Banana (optional, for sweetness and thickness)

  • 1-2 tsp Honey or Maple Syrup (adjust based on your sweetness preference)

  • A splash of Vanilla Extract


Instructions

  1. Layer the Liquid: Add your milk and yogurt to the blender first. This helps the blades spin freely and prevents the frozen fruit from getting stuck at the bottom.

  2. Add the Fruit: Add your frozen berry mix and the banana.

  3. Sweeten It Up: Drizzle in your honey and vanilla extract.

  4. Blend: Start on a low speed and gradually increase to high. Blend for about 45-60 seconds until the mixture is completely smooth with no berry chunks left.

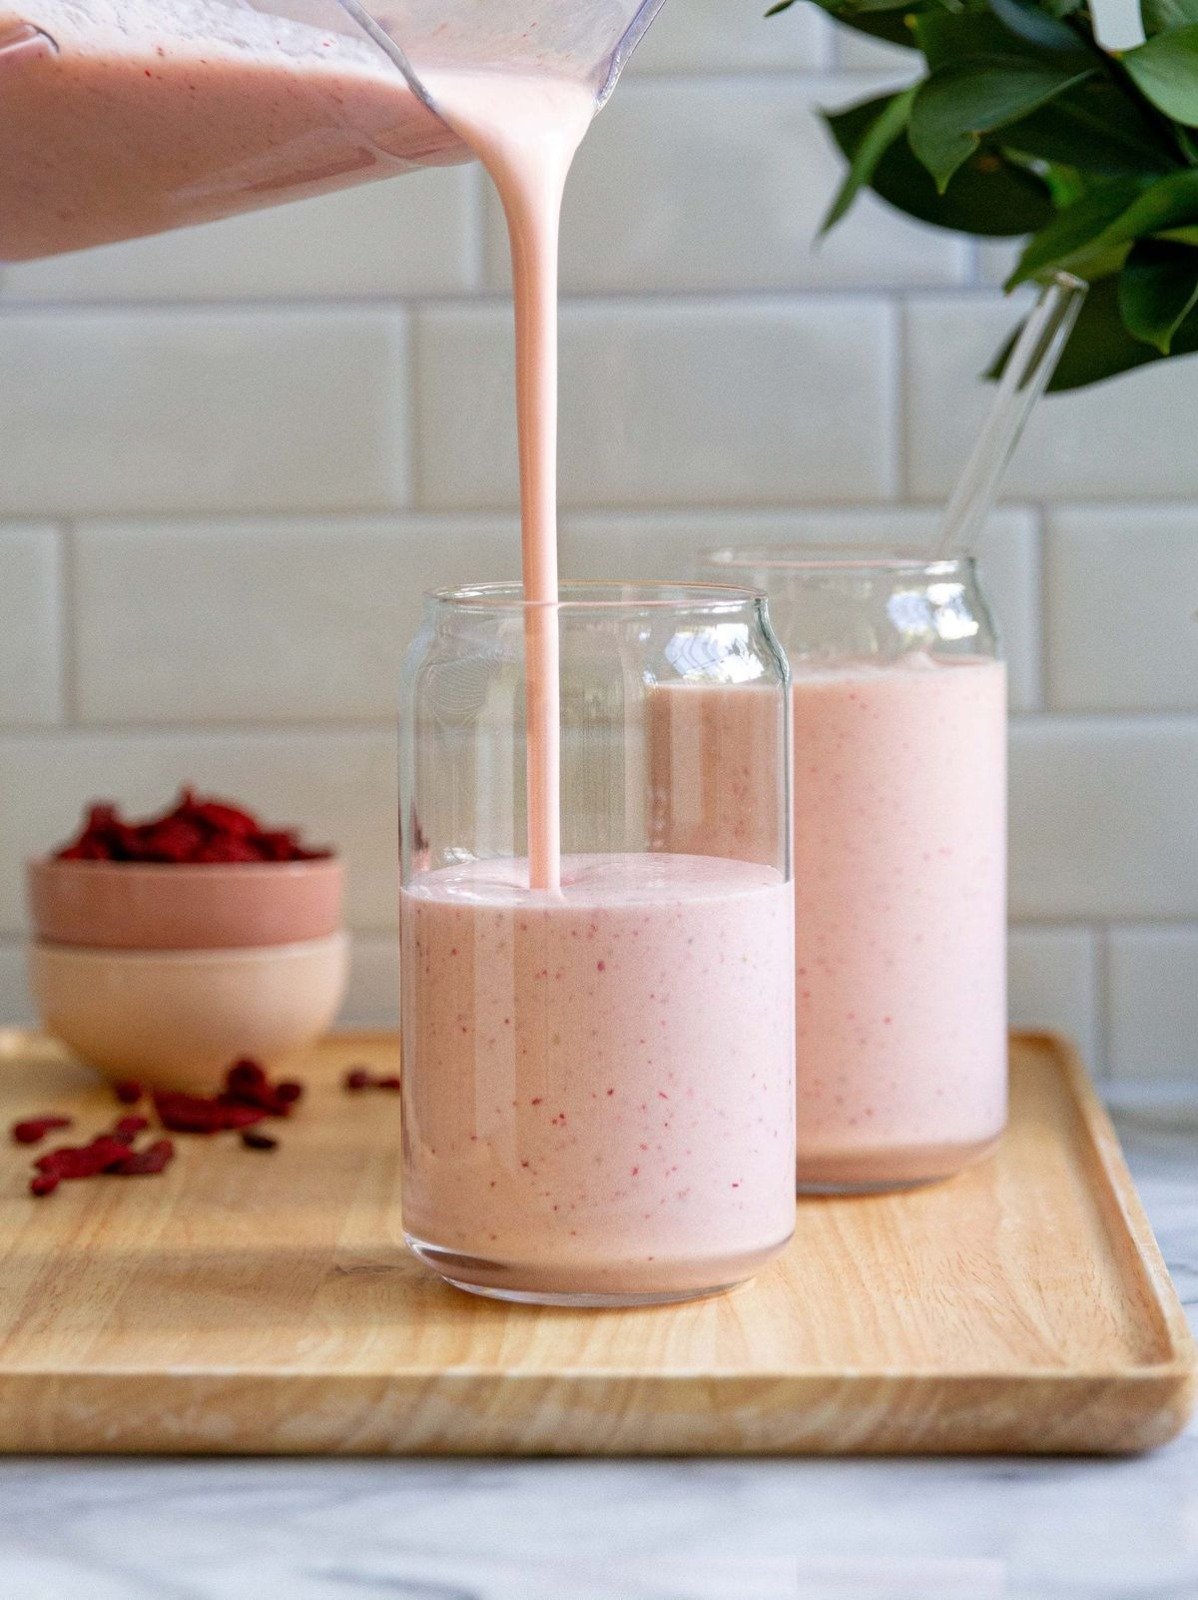
  5. Serve: Pour into a tall glass (like the “can-shaped” glasses in the video) and enjoy immediately!


Pro-Tips for the Perfect Smoothie

  • Consistency: If it’s too thick, add a splash more milk. If it’s too thin, add a few more frozen berries or a couple of ice cubes.

  • The “Glow” Factor: Add a tablespoon of chia seeds or flax seeds for a healthy boost of Omega-3s without changing the flavor.

  • Vibrant Color: To get that bright pink pop seen in the video, make sure your mix has plenty of raspberries and strawberries!

🍓 Creamy Mixed Berry Smoothie

This recipe is packed with antioxidants and fiber to keep you energized.

Ingredients

  • 1 ½ cups Mixed Berries (frozen strawberries, raspberries, and blackberries work best for that thick texture)

  • 1 cup Milk of your choice (Dairy, Almond, or Oat milk)

  • ½ cup Greek Yogurt (Plain or Vanilla for extra creaminess and protein)

  • 1 small Banana (optional, for sweetness and thickness)

  • 1-2 tsp Honey or Maple Syrup (adjust based on your sweetness preference)

  • A splash of Vanilla Extract


Instructions

  1. Layer the Liquid: Add your milk and yogurt to the blender first. This helps the blades spin freely and prevents the frozen fruit from getting stuck at the bottom.

  2. Add the Fruit: Add your frozen berry mix and the banana.

  3. Sweeten It Up: Drizzle in your honey and vanilla extract.

  4. Blend: Start on a low speed and gradually increase to high. Blend for about 45-60 seconds until the mixture is completely smooth with no berry chunks left.

  5. Serve: Pour into a tall glass (like the “can-shaped” glasses in the video) and enjoy immediately!


Pro-Tips for the Perfect Smoothie

  • Consistency: If it’s too thick, add a splash more milk. If it’s too thin, add a few more frozen berries or a couple of ice cubes.

  • The “Glow” Factor: Add a tablespoon of chia seeds or flax seeds for a healthy boost of Omega-3s without changing the flavor.

  • Vibrant Color: To get that bright pink pop seen in the video, make sure your mix has plenty of raspberries and strawberries!