Easy Mozzarella Sticks

Easy Mozzarella Sticks

Ingredients

  • Mozzarella: 12 low-moisture mozzarella string cheese sticks

  • Flour: 1/2 cup all-purpose flour

  • Eggs: 2 large eggs, beaten

  • Breadcrumbs: 1 cup Panko or Italian seasoned breadcrumbs

  • Seasonings: 1 teaspoon garlic powder and 1 teaspoon dried oregano (or Italian seasoning)

  • Oil: Vegetable oil for frying

  • Sauce: Marinara or pizza sauce for dipping

Instructions

  1. Prep the Cheese: Cut the string cheese sticks in half horizontally if you prefer shorter bites.

  2. Set Up Coating Station: Place the flour in one shallow bowl. In a second bowl, whisk the eggs. In a third bowl, mix the breadcrumbs with the garlic powder and dried oregano.

  3. Coat the Cheese: Dredge a cheese stick in the flour, shaking off the excess. Dip it into the egg, then roll it in the breadcrumbs until fully coated.

  4. Double Coat: Dip the stick back into the egg and into the breadcrumbs one more time. This double-coating prevents the cheese from leaking out while cooking. Repeat for all sticks.

  5. Freeze: Place the coated cheese sticks on a tray and freeze them for at least 1 to 2 hours. Do not skip this step, or the cheese will melt too quickly.

  6. Cook: Heat about 2 inches of vegetable oil in a deep skillet over medium-high heat. Fry the frozen sticks in small batches for about 1 to 2 minutes until they are golden brown.

  7. Serve: Drain on paper towels and serve warm with a side of heated marinara sauce.

Creamy Cucumber Salad

Creamy Cucumber Salad 🥒🌿

This refreshing cucumber salad is creamy, crunchy, and full of fresh flavor. Perfect as a side dish for lunch, BBQs, or summer dinners!

🛒 Ingredients

  • 2 large cucumbers, thinly sliced
  • ½ small red onion, sliced
  • 1 tbsp fresh dill, chopped
  • ½ cup sour cream or Greek yogurt
  • 1 tbsp mayonnaise
  • 1 tsp lemon juice
  • Salt & black pepper

👩‍🍳 Step-by-Step Instructions

1️⃣ Prepare the Cucumbers

  • Wash cucumbers well.
  • Slice them thinly using a knife or slicer.
  • Place slices in a bowl.

👉 For extra crunch, chill cucumbers before slicing.


2️⃣ Slice the Onion

  • Thinly slice red onion.
  • Add onion slices to the cucumbers.

🌿 The onion adds a fresh and slightly sweet flavor.


3️⃣ Make the Creamy Dressing

  • In a small bowl, mix:
    • Sour cream or Greek yogurt
    • Mayonnaise
    • Lemon juice
    • Dill
    • Salt & pepper
  • Stir until smooth and creamy.

4️⃣ Combine Everything

  • Pour dressing over cucumbers and onions.
  • Toss gently until fully coated.

👉 Make sure every cucumber slice gets creamy dressing!


5️⃣ Chill & Serve

  • Refrigerate for 15–20 minutes before serving.
  • Garnish with extra dill and black pepper.

❄️ Chilling makes the salad even more refreshing.


❓ Q/A

❓ Can I make it ahead of time?

✅ Yes! Best served within 24 hours for maximum freshness.

❓ Can I use yogurt instead of sour cream?

✅ Absolutely! Greek yogurt makes it lighter and creamy.

❓ How do I keep it from getting watery?

✅ Pat cucumber slices dry before mixing with dressing.


💡 Helpful Tips

  • Use fresh dill for the best flavor.
  • English cucumbers work great because they have fewer seeds.
  • Add garlic powder for extra flavor.

🍽️ Serving Ideas

  • BBQ side dish
  • Sandwich companion
  • Summer picnic salad
  • Light healthy lunch

💪 Nutritional Benefits

  • Cucumbers help keep you hydrated.
  • Dill adds antioxidants and freshness.
  • Greek yogurt provides protein and creaminess.

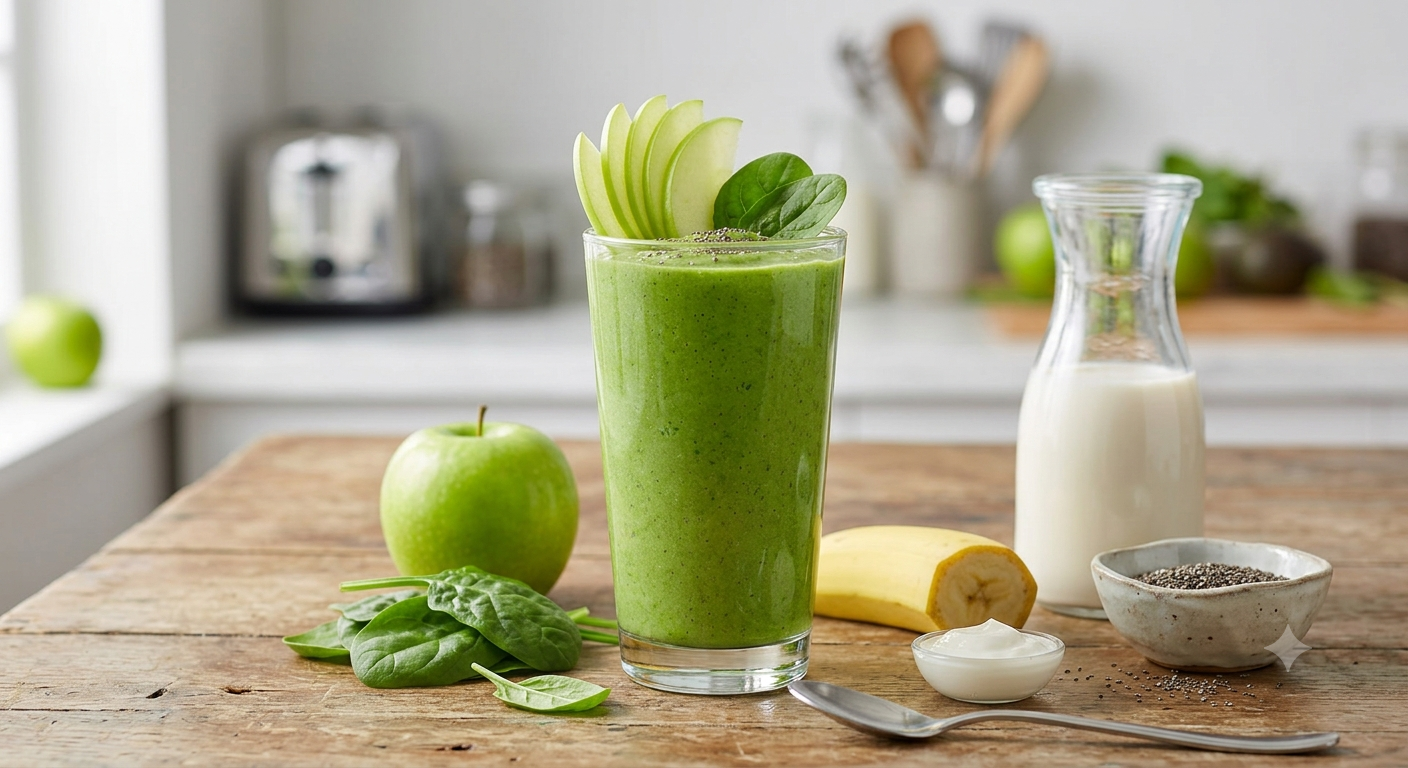
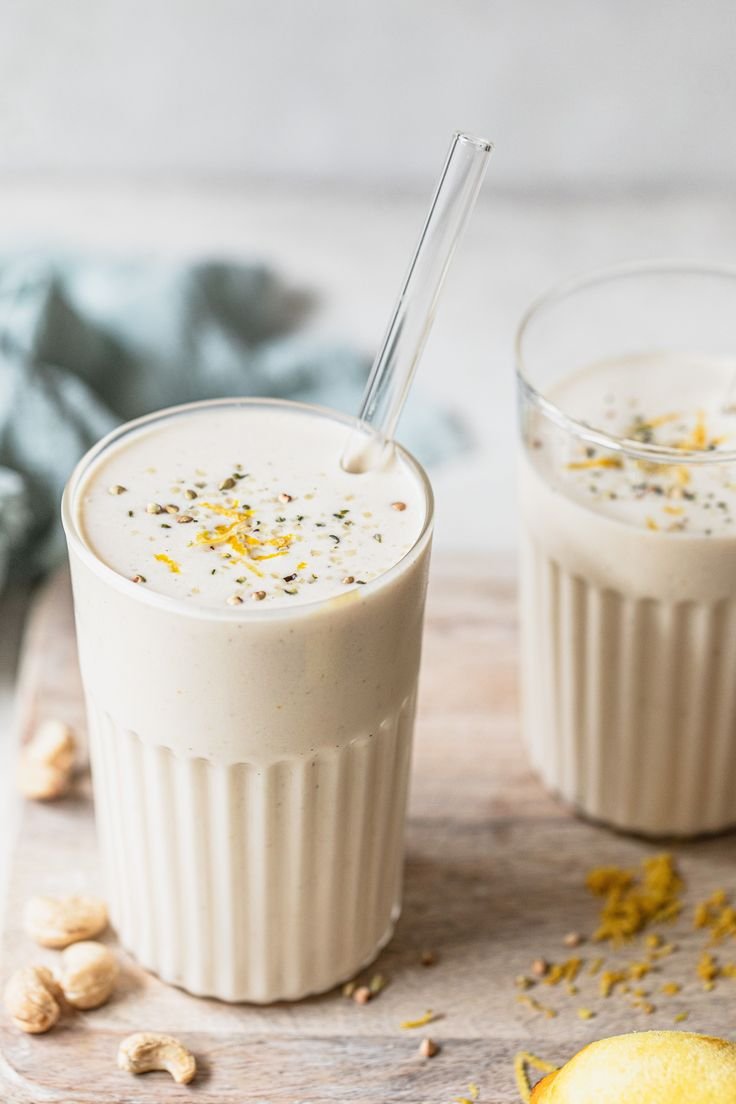
Blueberry Cashew Green Smoothie

Blueberry Cashew Green Smoothie

Ingredients

  • 1/2 cup raw cashews (soaked for 10 minutes in warm water for maximum creaminess)

  • 1 cup fresh or frozen blueberries

  • 1 cup fresh spinach leaves, packed

  • 1/2 ripe banana (sliced)

  • 1 cup milk of your choice (almond, oat, or dairy milk work wonderfully)

  • 1 tablespoon honey or maple syrup (optional, for extra sweetness)

  • 3-4 ice cubes (optional, if using fresh fruit)

Instructions

  1. Prep the Base: If you have a standard blender, rinse your soaked cashews and place them at the bottom. This helps them blend completely smooth.

  2. Layer the Greens and Fruit: Add the fresh spinach leaves, sliced banana, and blueberries into the blender cup.

  3. Pour the Liquid: Pour in your choice of milk and the optional sweetener. Starting with one cup of liquid keeps the smoothie thick, but you can add a splash more later if needed.

  4. Blend Until Smooth: Secure the lid and blend on high speed for about 60 to 90 seconds. You want to make sure the cashews and spinach are completely broken down into a silky, purple texture.

  5. Serve: Pour the smoothie into a tall glass and enjoy immediately while cold!

Tip: Using a frozen banana or frozen blueberries will give you a thicker, frostier milkshake-like consistency without needing to add extra ice.

Banana Walnut Bread.

Banana Walnut Bread.

Ingredients

  • 3 large ripe bananas, mashed (plus 1 extra for slicing on top)

  • ⅓ cup butter, melted

  • ¾ cup granulated sugar

  • 1 large egg, beaten

  • 1 tsp vanilla extract

  • 1 tsp baking soda

  • Pinch of salt

  • 1 ½ cups all-purpose flour

  • ½ cup walnuts, chopped (plus extra for topping)

Instructions

  1. Preheat & Prep: Preheat your oven to 350°F (175°C). Grease a standard 4×8-inch loaf pan with a little butter or line it with parchment paper.

  2. Mash & Mix Wet Ingredients: In a large mixing bowl, mash the ripe bananas with a fork until smooth. Stir the melted butter into the mashed bananas.

  3. Combine: Mix in the sugar, beaten egg, and vanilla extract until well combined.

  4. Add Dry Ingredients: Sprinkle the baking soda and salt over the mixture and stir. Gently fold in the flour until just combined—be careful not to overmix. Gently fold in the chopped walnuts.

  5. Pour & Decorate: Pour the batter into your prepared loaf pan. Top with thin slices of the extra banana and a handful of chopped walnuts for a beautiful finish.

  6. Bake: Bake for 50 to 60 minutes. Check readiness by inserting a toothpick into the center; it should come out clean.

  7. Cool & Serve: Let the bread cool in the pan for 10 minutes, then transfer it to a wire rack to cool completely before slicing. Enjoy it plain, or served with a drizzle of honey and a dollop of yogurt!

Cocoa Avocado Bliss smoothie.

Cocoa Avocado Bliss smoothie.

Ingredients

  • ½ ripe avocado (pitted and scooped)

  • 1 cup milk (dairy or your favorite plant-based alternative like almond or oat milk)

  • 1 teaspoon cocoa powder (unsweetened)

  • 1 teaspoon honey (or maple syrup for a vegan option)

  • Optional: A few ice cubes for a colder texture

Instructions

  1. Prep the Avocado: Cut a ripe avocado in half, remove the pit, and scoop out one half of the green flesh. Save the other half for later.

  2. Load the Blender: Place the avocado, milk, cocoa powder, and honey into a high-speed blender. If you prefer a chilled, thicker shake, toss in a few ice cubes at this stage.

  3. Blend Until Smooth: Secure the lid and blend on high speed for about 30 to 45 seconds. Ensure all the avocado is completely emulsified so the texture becomes velvety and smooth, without any green flecks.

  4. Adjust and Serve: Taste the smoothie. If you prefer it sweeter, add a tiny bit more honey and pulse briefly. Pour the creamy mixture into a large glass or mason jar.

  5. Garnish: Top with a tiny dusting of extra cocoa powder if desired, pop in a straw, and enjoy immediately!

Tip: This drink is best enjoyed fresh, as the healthy fats from the avocado give it an incredibly rich, milkshake-like texture right after blending.

Garlic & Herb Roasted Vegetables

Garlic & Herb Roasted Vegetables

Ingredients

  • 1 head Cauliflower (cut into bite-sized florets)

  • 1 head Broccoli (cut into bite-sized florets)

  • 1 Red Bell Pepper (chopped into large chunks)

  • 1 Yellow Bell Pepper (chopped into large chunks)

  • 2 medium Carrots (peeled and sliced into thick rounds)

  • 3 tablespoons Olive oil (or any cooking oil you prefer)

  • 2 teaspoons Garlic powder (or 3 cloves of minced fresh garlic)

  • 1 teaspoon Dried Italian seasoning (or dried oregano/thyme)

  • Salt and black pepper (to your taste)

  • Fresh parsley (finely chopped, for a beautiful garnish at the end)

Instructions

  1. Prep the Oven: Preheat your oven to 400°F (200°C).

  2. Mix the Vegetables: In a large mixing bowl, combine the cauliflower, broccoli, red bell pepper, yellow bell pepper, and carrots.

  3. Season: Drizzle the olive oil over the vegetables. Sprinkle the garlic powder, Italian seasoning, salt, and black pepper evenly over everything. Toss well so all the veggies are coated nicely in the oil and spices.

  4. Arrange: Spread the vegetables out in a single layer on a large baking sheet or baking dish (just like the one in your picture). Tip: Try not to crowd them too much so they get nice and crispy instead of steaming!

  5. Roast: Bake in the preheated oven for 20 to 25 minutes, stirring halfway through. You will know they are done when the edges are slightly charred and brown, and the carrots are tender when poked with a fork.

  6. Garnish and Serve: Remove from the oven, toss on the fresh chopped parsley for that bright pop of green, and serve warm.

Crispy Veggie Patties

These golden veggie patties are crispy outside, soft inside, and packed with fresh vegetables. Perfect for breakfast, snacks, or a light dinner!

🛒 Ingredients

  • 2 medium potatoes, grated
  • 1 carrot, grated
  • 1 zucchini or cucumber, grated & squeezed dry
  • 2 eggs
  • 3 green onions, chopped
  • ½ cup flour
  • ½ cup shredded cheese
  • Salt & black pepper
  • 2 tbsp oil for frying

👩‍🍳 Step-by-Step Instructions

1️⃣ Prepare the Vegetables

  • Grate potatoes, carrot, and zucchini.
  • Squeeze out extra water using a clean towel.

👉 This helps make the patties crispy instead of soggy.


2️⃣ Make the Mixture

  • Add vegetables to a large bowl.
  • Mix in:
    • Eggs
    • Green onions
    • Cheese
    • Flour
    • Salt & pepper
  • Stir well until everything is combined.

3️⃣ Shape the Patties

  • Take small portions of mixture.
  • Shape into oval or round patties with your hands.

👉 If mixture feels loose, add a little more flour.


4️⃣ Fry Until Golden

  • Heat oil in a pan over medium heat.
  • Place patties carefully into the pan.
  • Cook for 3–4 minutes per side until golden brown and crispy.

🔥 Flip gently so they stay together.


5️⃣ Serve

  • Place on paper towels to remove extra oil.
  • Serve warm with yogurt dip, ketchup, or garlic sauce. 😋

❓ Q/A

❓ Can I bake them instead of frying?

✅ Yes! Bake at 200°C (400°F) for about 20–25 minutes, flipping halfway.

❓ How do I keep them crispy?

✅ Remove excess water from vegetables before mixing.

❓ Can I add other veggies?

✅ Absolutely! Bell peppers, corn, or spinach work great.


💡 Helpful Tips

  • Use freshly grated cheese for better flavor.
  • Medium heat works best so patties cook evenly inside.
  • Add chili flakes for a spicy version. 🌶️

🍽️ Serving Ideas

  • Breakfast side
  • Lunch snack
  • Party appetizer
  • Healthy dinner with salad

💪 Nutritional Benefits

  • Carrots provide vitamin A.
  • Potatoes add energy and texture.
  • Green onions and zucchini add freshness and fiber.

Easy Blackberry Pantry Cake

This blackberry dump cake is one of those classic “pantry miracle” desserts that comes to the rescue when you need something sweet in a hurry. My Aunt Denise swears by it—just three simple shelf-stable ingredients turn into a treat that tastes like you spent hours baking.

A buttery, golden topping bakes over warm, juicy blackberry filling, and the dessert usually disappears before it even has a chance to cool. It’s perfect for weeknights, potlucks, or unexpected guests when you want a dessert with zero fuss.

Serve it warm straight from the casserole dish with a scoop of vanilla ice cream or a dollop of whipped cream melting into the berries. It’s just as delightful with coffee after dinner or tea on a chilly afternoon. For larger gatherings, place it on the table family-style and watch it vanish in no time.

Blackberry Dump Cake

📝 Ingredients

Ingredient Amount Notes
Blackberry pie filling 2 cans (21 oz each)
Yellow cake mix 1 box (15.25 oz) Dry, unprepared
Unsalted butter ½ cup (1 stick), melted
Nonstick spray or butter For greasing

👩‍🍳 Instructions

1. Preheat the oven
Set the oven to 350°F (175°C). Lightly grease a 9×13-inch glass casserole dish.

2. Layer the filling
Spread the blackberry pie filling evenly across the bottom of the dish.

Dairy & Eggs

3. Add the cake mix
Sprinkle the dry cake mix evenly over the berries.

4. Drizzle the butter
Pour the melted butter over the top, covering as much as you can. Small dry spots are okay—they create a slightly crumbly texture when baked.

5. Bake
Bake for 35–45 minutes, until the top is golden brown and the blackberry juices bubble at the edges.

6. Cool and serve
Let the cake rest 10–15 minutes so the filling thickens slightly. Scoop into bowls, making sure each serving has both berries and crust. Serve as is or with ice cream or whipped cream.

Orange fluff Recipe

Instructions

  1. Add ¾ cup boiling water to a medium-sized bowl. Pour in Jello powder and stir until fully dissolved.
  2. Make 1 cup of ice water by measuring out 1 cup of ice, and pouring water in until it fills the cup.
  3. Add ice water to the dissolved Jello and mix until ice melts and Jello thickens.
  4. Add Jello mixture and 1 cup yogurt to a blender and blend on high for 30 seconds
  5. Pour the Jello into serving glasses or a medium-sized bowl and chill for 2 hours.

NUTRITION

  • Serving Size: 1 cup
  • Calories: 35
  • Fat: 0
  • Carbohydrates: 2
  • Fiber: 0
  • Protein: 6

Shrimp & Spinach Pasta Rolls

Shrimp & Spinach Stuffed Pasta Rolls 🍤🌿

These creamy pasta rolls are filled with juicy shrimp and spinach, then covered in a rich roasted red pepper cream sauce. Perfect for a cozy dinner or special family meal!

🛒 Ingredients

  • 3 cannelloni pasta tubes
  • 120 g shrimp, peeled & deveined
  • 100 g fresh spinach
  • 120 ml roasted red pepper cream sauce
  • 2 garlic cloves, minced
  • 2 tbsp fresh parsley, chopped
  • 1 tsp red pepper flakes
  • 1 tbsp olive oil
  • Salt & black pepper

👩‍🍳 Step-by-Step Instructions

1️⃣ Cook the Shrimp

  • Heat olive oil in a skillet over medium heat.
  • Add garlic and cook for 30 seconds until fragrant.
  • Add shrimp and cook for 2–3 minutes per side until pink.
  • Remove shrimp and chop into small pieces.

2️⃣ Prepare the Spinach Filling

  • In the same skillet, add spinach.
  • Cook until wilted and soft.
  • Mix spinach with chopped shrimp.
  • Season lightly with salt and pepper.

3️⃣ Cook the Pasta

  • Boil cannelloni pasta in salted water until slightly tender.
  • Drain carefully and let cool slightly.

4️⃣ Stuff the Pasta

  • Spoon the shrimp-spinach mixture into each pasta tube.
  • Fill generously but gently so the pasta doesn’t tear.

5️⃣ Add the Sauce

  • Pour roasted red pepper cream sauce into a baking dish.
  • Arrange stuffed pasta rolls on top.
  • Spoon extra sauce over the pasta.
  • Sprinkle red pepper flakes evenly.

6️⃣ Bake

  • Preheat oven to 180°C (350°F).
  • Bake for 20 minutes until bubbly and hot.

7️⃣ Garnish & Serve

  • Top each roll with a whole cooked shrimp.
  • Sprinkle fresh parsley over the dish.
  • Serve warm and enjoy! 🍽️

❓ Q/A

❓ Can I use frozen shrimp?

✅ Yes! Just thaw and pat dry before cooking.

❓ Can I make this ahead?

✅ Yes, assemble the rolls and refrigerate before baking.

❓ What can I use instead of cannelloni?

✅ Lasagna sheets rolled up work great too.


🌟 Helpful Tips

  • Don’t overcook shrimp or they may become rubbery.
  • Use fresh spinach for the best flavor.
  • Add extra parsley for freshness and color.

💪 Nutritional Benefits

  • Shrimp provides lean protein.
  • Spinach adds iron and vitamins.
  • Roasted peppers give antioxidants and natural sweetness.

Cheesy Zucchini Bites

Cheesy Zucchini Bites

Ingredients:

  • 2 medium zucchinis, grated

  • 2 eggs

  • 1/2 cup breadcrumbs

  • 1/2 cup shredded cheese (parmesan or mozzarella)

  • Salt, pepper, and garlic powder to taste

Instructions:

  1. Prep Zucchini: Grate the zucchini, sprinkle with a pinch of salt, let sit for 10 minutes, and squeeze out all excess water using a cloth.

  2. Mix: In a bowl, combine the squeezed zucchini, eggs, breadcrumbs, cheese, and seasonings. Mix well.

  3. Shape & Bake: Roll the mixture into small balls. Place on a lined baking sheet and bake at 200°C (400°F) for 20 minutes until golden brown.

Strawberry Chocolate Chip Dessert Ball Recipe

Strawberry Chocolate Chip Dessert Ball Recipe
Ingredients
  • 2 packs cream cheese, softened

  • 1/2 cup unsalted butter, softened

  • 3/4 cup powdered sugar

  • 1 teaspoon vanilla extract

  • 1/2 cup mini chocolate chips

  • 1/2 cup finely chopped fresh strawberries

  • 1/3 cup crushed graham crackers

  • 2 tablespoons strawberry jam

For Serving

  • Pretzels

  • Graham crackers

  • Fresh strawberries

  • Cookies or vanilla wafers

Instructions

  1. In a large mixing bowl, beat the cream cheese and butter until smooth and fluffy.

  2. Add powdered sugar and vanilla extract. Mix until creamy.

  3. Stir in mini chocolate chips, chopped strawberries, crushed graham crackers, and strawberry jam.

  4. Place the mixture onto plastic wrap and shape it into a large ball.

  5. Refrigerate for 2–3 hours until firm.

  6. Before serving, sprinkle extra mini chocolate chips on top for decoration.

  7. Arrange pretzels, crackers, and fresh strawberries around the dessert ball on a serving tray.

Optional Tips

  • Chill the strawberries before mixing for extra freshness.

  • Add white chocolate chips for a sweeter flavor.

  • Serve cold for the best texture and taste.

This creamy strawberry chocolate chip dessert ball is perfect for parties, family gatherings, or a fun sweet snack.

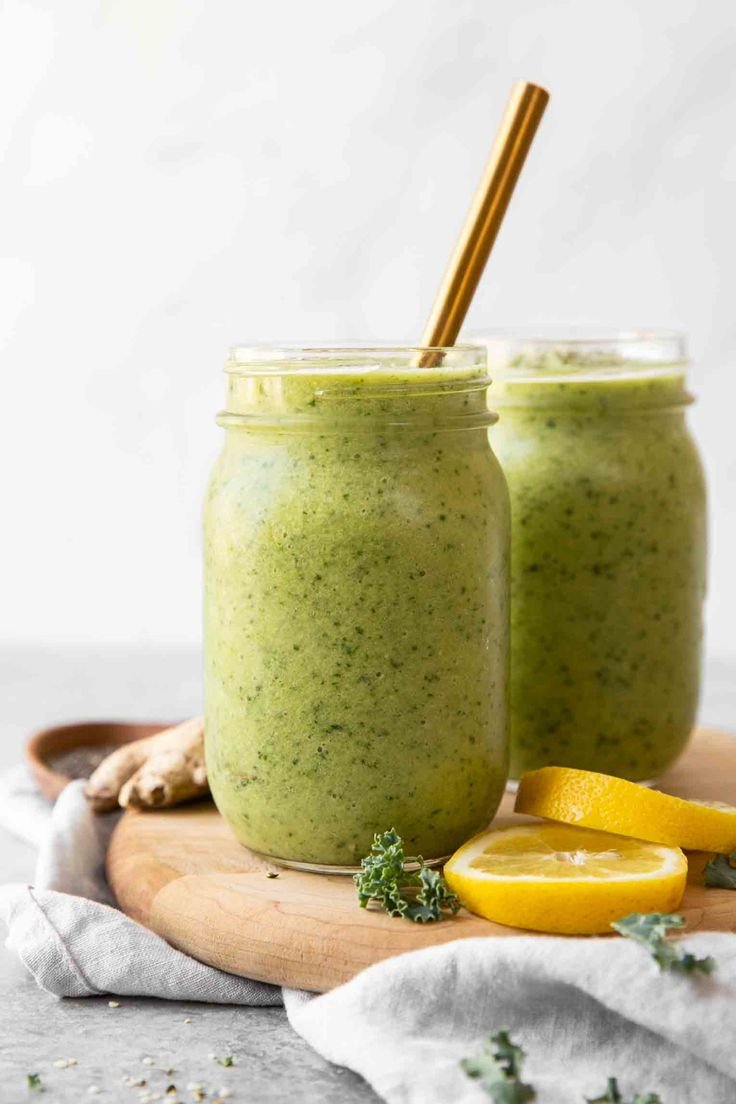
Smoothie for a Goddess

Smoothie for a Goddess

Ingredients

  • 1 banana

  • 1 cup almond milk

  • 1/2 cup frozen mango

  • 1 handful of fresh spinach

  • 1 small piece of ginger (peeled)

Instructions

  1. Prep the ingredients: Peel the banana and a small piece of fresh ginger.

  2. Load the blender: Add the almond milk first to help everything blend smoothly. Next, add the banana, frozen mango cubes, spinach, and ginger.

  3. Blend until smooth: Secure the lid and blend on high speed for about 45 to 60 seconds until the mixture is completely smooth, vibrant green, and free of leafy bits.

  4. Serve: Pour into a large glass or mason jar, grab a straw, and enjoy fresh!

Creamy Chicken Alfredo

Creamy Chicken Alfredo

Ingredients

  • 8 oz (225g) Fettuccine or your choice of pasta

  • 2 Boneless, skinless chicken breasts (sliced into bite-sized pieces)

  • 2 tbsp Olive oil

  • 2 tbsp Butter

  • 3 cloves Garlic, minced

  • 1 cup Heavy cream

  • 1 cup Parmesan cheese, freshly grated

  • Salt and black pepper to taste

  • Fresh parsley, chopped (for garnish)

Instructions

  1. Cook the Pasta: Bring a large pot of salted water to a boil. Add the pasta and cook according to the package instructions until al dente. Drain, reserving 1/2 cup of pasta water, and set aside.

  2. Sear the Chicken: Heat the olive oil in a large skillet over medium-high heat. Season the chicken pieces with a pinch of salt and pepper. Add them to the skillet and cook for about 5–7 minutes until golden brown and cooked through. Remove the chicken from the skillet and set aside on a plate.

  3. Make the Sauce: Turn the heat down to medium. In the same skillet, melt the butter. Add the minced garlic and sauté for about 1 minute until fragrant, being careful not to let it burn. Pour in the heavy cream and bring to a gentle simmer.

  4. Thicken with Cheese: Turn the heat to low and gradually stir in the grated Parmesan cheese. Whisk constantly until the cheese melts completely and the sauce becomes smooth and slightly thick.

  5. Toss and Serve: Add the cooked pasta and seared chicken back into the skillet. Toss everything together until well coated in the sauce. If the sauce feels too thick, splash in a little of the reserved pasta water. Season with extra salt and pepper to taste, garnish with fresh parsley, and serve hot.

Blueberry Custard Pudding Cake

Blueberry Custard Pudding Cake

  • Prep time: 10 minutes

  • Bake time: 35–40 minutes

  • Servings: 2–4 (depending on the size of your ramekins/baking dish)

Ingredients

  • 1 cup (approx. 150g) Fresh blueberries (plus a few extra for topping)

  • 2 large Eggs

  • ¼ cup (50g) Granulated sugar

  • ½ cup (120ml) Whole milk

  • ¼ cup (60ml) Heavy cream (Note: You can use all milk if you want it lighter, but cream makes it extra rich!)

  • 3 tablespoons All-purpose flour

  • 1 teaspoon Vanilla extract

  • 1 tablespoon Melted butter (for greasing the baking dish)

  • Optional: Powdered sugar for dusting on top

Instructions

1. Prep the Oven and Dish

  • Preheat your oven to 180°C (350°F).

  • Brush the inside of a medium baking dish (or 2–3 smaller glass ramekins, like the one in the photo) with the melted butter.

2. Arrange the Berries

  • Wash and thoroughly dry your blueberries.

  • Place a generous handful of blueberries at the bottom of your greased baking dish(es).

3. Mix the Custard Batter

  • In a mixing bowl, whisk the eggs and sugar together until smooth and slightly pale.

  • Whisk in the all-purpose flour until no lumps remain.

  • Slowly pour in the milk, heavy cream, and vanilla extract. Whisk gently until you have a smooth, thin batter (it will look like pancake batter but much thinner).

4. Pour and Bake

  • Carefully pour the liquid batter over the blueberries in the dish. The berries will naturally float to the top—that is exactly what you want!

  • Place the dish in the preheated oven and bake for 35 to 40 minutes.

  • How to tell it’s done: The edges should be golden brown and puffed up, and the center should be mostly set with just a slight, tiny jiggle when shaken.

5. Serve

  • Remove from the oven and let it cool slightly for 5–10 minutes (it will deflate a little as it cools, which is normal).

  • Dust the top with a little powdered sugar, spoon a few extra fresh blueberries on top, and enjoy it warm with a spoon!

Tip: If you want that extra gooey, stringy texture shown on the spoon in the photo, enjoy it right out of the oven while it’s still warm. If you prefer a firmer, more sliceable custard, let it cool completely and chill it in the fridge for an hour before serving.

Matthew McConaughey’s Viral Tuna Salad

Matthew McConaughey’s Viral Tuna Salad

🛒 Ingredients

  • 2 cans tuna, drained
  • ½ cup mayonnaise
  • ½ cup frozen peas
  • ½ cup cheddar cheese cubes
  • 2 tbsp red onion, chopped
  • 1 tbsp pickle relish
  • 1 tsp mustard
  • Salt & black pepper
  • Crackers for serving

👩‍🍳 Detailed Step-by-Step Recipe

🐟 1. Prepare the Tuna

➡️ Open the tuna cans and drain all the liquid well.
➡️ Add the tuna to a large mixing bowl.

💡 Break the tuna apart gently with a fork so it becomes flaky.


🧀 2. Add the Mix-Ins

➡️ Add:

  • Frozen peas
  • Cheddar cheese cubes
  • Chopped red onion
  • Pickle relish

➡️ Stir lightly so everything spreads evenly.


🥣 3. Make It Creamy

➡️ Add mayonnaise and mustard to the bowl.
➡️ Sprinkle a little salt and black pepper.

➡️ Mix slowly until the salad becomes creamy and fully combined.

💡 Don’t overmix — keeping some texture makes it extra delicious.


❄️ 4. Chill the Salad

➡️ Cover the bowl and refrigerate for at least 20 minutes.

➡️ This helps the flavors blend together beautifully.


🍽️ 5. Serve

➡️ Scoop onto crackers, toast, sandwiches, or lettuce cups.
➡️ Serve cold and enjoy!


💡 Tips

✅ Add chopped celery for extra crunch.
✅ A squeeze of lemon makes it brighter and fresher.
✅ Best served chilled.


❓Q&A

Q: Can I make it ahead of time?

➡️ Yes! It tastes even better after a few hours in the fridge.

Q: Can I use canned chicken instead?

➡️ Absolutely — the recipe works great with chicken too.

Q: How long does it last?

➡️ Store in the fridge for up to 3 days in an airtight container.

Cheesy Zucchini Egg Muffins

Cheesy Zucchini Egg Muffins

🛒 Ingredients

  • 2 small zucchinis, grated
  • 4 eggs
  • 1 cup shredded mozzarella cheese
  • 2 green onions, chopped
  • Salt & black pepper
  • 1 tbsp olive oil or butter

👩‍🍳 Detailed Step-by-Step Recipe

🔪 1. Prepare the Zucchini

➡️ Wash the zucchinis well.
➡️ Grate them using a box grater.

➡️ Place the grated zucchini in a clean towel or paper towel.
➡️ Squeeze out as much water as possible.

💡 This step is important so the muffins stay firm and not watery.


🥚 2. Make the Egg Mixture

➡️ Crack the eggs into a large bowl.
➡️ Add salt and black pepper.
➡️ Whisk until smooth.

➡️ Add:

  • Grated zucchini
  • Mozzarella cheese
  • Chopped green onions

➡️ Mix everything together well.


🧁 3. Prepare the Muffin Tray

➡️ Preheat oven to 375°F (190°C).
➡️ Grease a muffin tray lightly with olive oil or butter.

➡️ Spoon the mixture evenly into each muffin cup.

💡 Fill each cup almost to the top.


🔥 4. Bake

➡️ Bake for 20–25 minutes until:
✅ Golden on top
✅ Firm in the center
✅ Cheese becomes bubbly and slightly crispy

➡️ Let them cool for 5 minutes before removing from the tray.


🍽️ 5. Serve

➡️ Serve warm for breakfast, snacks, or meal prep.


💡 Tips

✅ Add cooked chicken or turkey for extra protein.
✅ Use cheddar cheese for a stronger flavor.
✅ Store leftovers in the fridge and reheat easily.


❓Q&A

Q: Can I freeze these muffins?

➡️ Yes! Freeze in an airtight container for up to 2 months.

Q: Why squeeze the zucchini?

➡️ Removing water helps the muffins bake properly and stay fluffy.

Q: Can I make them without cheese?

➡️ Yes, but the texture will be less creamy.

Banana, Carrot, and Papaya Smoothie: The Natural Remedy to Eliminate Constipation and Improve Digestion

If you’ve been struggling with constipation, a bloated belly, or slow intestinal transit, this tropical smoothie might be exactly what your body needs. Made with three powerful, fiber-rich ingredients — banana, carrot, and papaya — this natural drink can help cleanse your digestive system, remove stuck waste, and restore balance to your gut.🌿 Why Constipation HappensConstipation occurs when your digestive system slows down, making it difficult for waste to move through the intestines. Common causes include:Low fiber intakeDehydrationSedentary lifestyleStress or irregular eating habitsWhen waste stays in the colon for too long, it can lead to bloating, discomfort, and toxins buildup in your body. That’s where this smoothie comes in — to naturally activate your intestinal transit and soften stool without chemical laxatives.🍌 1. Banana – Gentle Fiber and Potassium SupportBananas are one of the best fruits for digestion. They contain soluble fiber (pectin), which helps soften stool and make bowel movements more regular.The natural sugars provide energy while being gentle on the stomach.Their potassium content helps maintain electrolyte balance, especially if dehydration has contributed to your constipation.Bananas also promote good gut bacteria, creating a healthier intestinal environment over time.🥕 2. Carrot – A Detox Hero for the GutCarrots are loaded with fiber, antioxidants, and beta-carotene, which support both digestion and detoxification.The fiber in carrots acts like a broom, sweeping out residue from your intestinal walls.They stimulate bile production, which helps your body break down fats and absorb nutrients better.Carrots also improve the texture and volume of your stool, helping you go more easily and regularly.Adding raw or lightly steamed carrots to smoothies gives your body that extra cleansing push.🍈 3. Papaya – The Enzyme PowerhousePapaya is nature’s digestion fruit. It contains papain, an enzyme that breaks down proteins and helps the body digest food more efficiently.It reduces bloating and gas, making your belly feel lighter.The combination of fiber and enzymes in papaya accelerates bowel movement naturally.It’s also rich in vitamin C and folate, which support overall digestive health and immunity.When blended together, papaya brings a creamy, tropical sweetness that perfectly complements carrot and banana.🧃 How to Make the Constipation-Relief SmoothieIngredients:1 ripe banana1 medium carrot (peeled and chopped)½ cup ripe papaya (diced)1 cup of water or coconut waterOptional: 1 teaspoon of chia seeds or flaxseeds for extra fiberInstructions:Add all ingredients to a blender.Blend until smooth and creamy.Drink immediately, preferably on an empty stomach in the morning.💧 Tips for Best ResultsDrink plenty of water throughout the day to keep your intestines hydrated.Combine this smoothie with a fiber-rich diet (vegetables, oats, seeds, fruits).Practice gentle exercise or stretching to stimulate natural bowel movement.Avoid processed foods and refined sugar, as they slow down digestion.🌞 Benefits Beyond DigestionRegularly drinking this smoothie can also:Reduce bloating and improve your belly’s appearance.Boost metabolism and natural detoxification.Increase energy thanks to better nutrient absorption.Enhance skin glow, as toxins are flushed out through proper elimination.⚠️ Note of CautionAlthough this smoothie is 100% natural, people with severe or chronic constipation should consult a healthcare provider. Natural remedies support your system, but persistent digestive problems may require professional care.✨ Final ThoughtsThis banana, carrot, and papaya smoothie is more than just a tasty tropical drink — it’s a gentle, natural detox that helps your body restore balance from the inside out. Whether you’re looking to eliminate constipation, reduce bloating, or simply feel lighter and cleaner, this recipe can easily become part of your daily wellness ritual.Drink it fresh each morning and feel the difference in your digestion, energy, and overall well-being!If you’ve been struggling with constipation, a bloated belly, or slow intestinal transit, this tropical smoothie might be exactly what your body needs. Made with three powerful, fiber-rich ingredients — banana, carrot, and papaya — this natural drink can help cleanse your digestive system, remove stuck waste, and restore balance to your gut.🌿 Why Constipation HappensConstipation occurs when your digestive system slows down, making it difficult for waste to move through the intestines. Common causes include:Low fiber intakeDehydrationSedentary lifestyleStress or irregular eating habitsWhen waste stays in the colon for too long, it can lead to bloating, discomfort, and toxins buildup in your body. That’s where this smoothie comes in — to naturally activate your intestinal transit and soften stool without chemical laxatives.🍌 1. Banana – Gentle Fiber and Potassium SupportBananas are one of the best fruits for digestion. They contain soluble fiber (pectin), which helps soften stool and make bowel movements more regular.The natural sugars provide energy while being gentle on the stomach.Their potassium content helps maintain electrolyte balance, especially if dehydration has contributed to your constipation.Bananas also promote good gut bacteria, creating a healthier intestinal environment over time.🥕 2. Carrot – A Detox Hero for the GutCarrots are loaded with fiber, antioxidants, and beta-carotene, which support both digestion and detoxification.The fiber in carrots acts like a broom, sweeping out residue from your intestinal walls.They stimulate bile production, which helps your body break down fats and absorb nutrients better.Carrots also improve the texture and volume of your stool, helping you go more easily and regularly.Adding raw or lightly steamed carrots to smoothies gives your body that extra cleansing push.🍈 3. Papaya – The Enzyme PowerhousePapaya is nature’s digestion fruit. It contains papain, an enzyme that breaks down proteins and helps the body digest food more efficiently.It reduces bloating and gas, making your belly feel lighter.The combination of fiber and enzymes in papaya accelerates bowel movement naturally.It’s also rich in vitamin C and folate, which support overall digestive health and immunity.When blended together, papaya brings a creamy, tropical sweetness that perfectly complements carrot and banana.🧃 How to Make the Constipation-Relief SmoothieIngredients:1 ripe banana1 medium carrot (peeled and chopped)½ cup ripe papaya (diced)1 cup of water or coconut waterOptional: 1 teaspoon of chia seeds or flaxseeds for extra fiberInstructions:Add all ingredients to a blender.Blend until smooth and creamy.Drink immediately, preferably on an empty stomach in the morning.💧 Tips for Best ResultsDrink plenty of water throughout the day to keep your intestines hydrated.Combine this smoothie with a fiber-rich diet (vegetables, oats, seeds, fruits).Practice gentle exercise or stretching to stimulate natural bowel movement.Avoid processed foods and refined sugar, as they slow down digestion.🌞 Benefits Beyond DigestionRegularly drinking this smoothie can also:Reduce bloating and improve your belly’s appearance.Boost metabolism and natural detoxification.Increase energy thanks to better nutrient absorption.Enhance skin glow, as toxins are flushed out through proper elimination.⚠️ Note of CautionAlthough this smoothie is 100% natural, people with severe or chronic constipation should consult a healthcare provider. Natural remedies support your system, but persistent digestive problems may require professional care.✨ Final ThoughtsThis banana, carrot, and papaya smoothie is more than just a tasty tropical drink — it’s a gentle, natural detox that helps your body restore balance from the inside out. Whether you’re looking to eliminate constipation, reduce bloating, or simply feel lighter and cleaner, this recipe can easily become part of your daily wellness ritual.Drink it fresh each morning and feel the difference in your digestion, energy, and overall well-being!

Keto Savoury Zucchini Cheese Muffins

Ingredients

  • 2 medium zucchinis, grated
  • 1 cup shredded cheddar cheese
  • 3 eggs
  • 1 cup almond flour
  • 1 tsp baking powder
  • 1 clove garlic, minced
  • Salt to taste
  • Black pepper to taste
  • 1 tbsp olive oil

👩‍🍳 Step-by-Step Instructions

➡️ Step 1: Prepare the Zucchini

🥒 Grate the zucchinis using a grater.
🧻 Place them in a clean towel and squeeze out as much water as possible.

👉 This helps the muffins stay fluffy and not soggy.


➡️ Step 2: Mix the Wet Ingredients

🥣 In a large bowl, add:

  • Eggs
  • Olive oil
  • Garlic

Whisk until well combined.


➡️ Step 3: Add Dry Ingredients

✨ Add:

  • Almond flour
  • Baking powder
  • Salt
  • Black pepper

Mix everything together.


➡️ Step 4: Add Zucchini & Cheese

🧀 Fold in:

  • Grated zucchini
  • Shredded cheddar cheese

Mix gently until evenly combined.


➡️ Step 5: Fill the Muffin Tray

🧁 Grease a muffin tray or use muffin liners.
Spoon the batter evenly into each cup.


➡️ Step 6: Bake

🔥 Bake at 180°C (350°F) for 20–25 minutes
until golden brown on top.


➡️ Step 7: Cool & Serve

❄️ Let the muffins cool for 5 minutes.

Serve warm and enjoy! 😋


🌟 Tips

  • Add chili flakes for a spicy kick 🌶️
  • Parmesan cheese gives extra flavor 🧀
  • Store in the fridge for quick keto snacks

❓Q/A

❓Can I freeze these muffins?

✅ Yes! Freeze for up to 1 month.

❓Can I use coconut flour?

✅ Yes, but use less because it absorbs more liquid.

❓Are these muffins low carb?

✅ Yes! They are keto-friendly and low in carbs.


💪 Nutritional Benefits

  • 🥒 Zucchini is low carb and rich in nutrients
  • 🧀 Cheese provides protein and calcium
  • 🥚 Eggs add healthy protein and texture
  • 🌰 Almond flour keeps the recipe keto-friendly

Vibrant Berry Smoothie Bowl

Vibrant Berry Smoothie Bowl

Ingredients

Base: 1 cup frozen berries, 1 ripe banana, ½ cup milk (or yogurt).


Toppings: Fresh blueberries, sliced kiwi, diced mango, sliced strawberries, pomegranate seeds, granola, and shredded coconut.

Instructions

Blend: Add the frozen berries, banana, and milk to a blender. Blend on high until completely smooth and thick.

Pour: Spoon the thick smoothie base into a serving bowl and smooth out the top.

Arrange: Neatly line up your toppings (blueberries, kiwi, mango, strawberries, granola, coconut, and pomegranate) in rows across the top.

Enjoy immediately with a spoon!

Spicy Chicken and Cabbage Stir-Fry

Spicy Chicken and Cabbage Stir-Fry

– fast, savory, and works great over rice or noodles.

Serves 3-4*

Ingredients:

For the chicken:

  • – Chicken breast: 1 lb, sliced thin against the grain
  • Soy sauce: 1 tbsp
  • Cornstarch: 1 tsp
  • Oil: 1 tsp
  • Salt & pepper: To taste

For the stir-fry:

Cabbage: 3 cups, roughly chopped

Red bell pepper: 1, sliced

Green bell pepper: 1, sliced

Carrot: 1 medium, julienned

Onion: 1 small, sliced

Garlic: 3 cloves, minced

Ginger: 1 tsp, grated

Chili flakes or chili crisp: 1-2 tsp, adjust for heat

Oil 2 tbsp, for frying

For the sauce:

Soy sauce: 3 tbsp

Oyster sauce: 1 tbsp

Rice vinegar: 1 tbsp

Honey: 1 tsp

Water: 2 tbsp

Instructions:

1. Marinate chicken: Toss sliced chicken with soy sauce, cornstarch, 1 tsp oil, salt, and pepper. Let sit 10 min.

2. Mix sauce: Whisk soy sauce, oyster sauce, rice vinegar, honey, and water in a small bowl. Set aside.

3. Stir-fry chicken: Heat 1 tbsp oil in a wok or large pan over high heat. Cook chicken 2-3 min until just cooked through and lightly golden. Remove to a plate.

4. Cook veggies: Add remaining oil. Toss in onion, garlic, and ginger for 30 sec until fragrant. Add cabbage, peppers, and carrot. Stir-fry 3-4 min until veggies are tender-crisp.

5. Combine: Return chicken to the pan. Add sauce and chili flakes. Toss 1-2 min until everything is coated and sauce thickens slightly.

6. Serve: Eat immediately over rice or noodles.

Tip: High heat and a hot pan are key for that slight char without making the veggies soggy. Don’t overcrowd the pan – cook in batches if needed.


Buttermilk Cornbread Recipe

Buttermilk Cornbread Recipe


Ingredients

• 2 cups cornmeal (300g)

• 1 cup all-purpose flour (125g)

• ½ cup granulated sugar (100g)

• 1 tbsp baking powder

• ½ tsp baking soda

• ½ tsp salt

• 2 large eggs

• 2 cups buttermilk (480ml)

• ½ cup melted butter (113g)

• 2 tbsp vegetable oil

Instructions

Preheat oven to 190°C (375°F).

Grease an 8-inch or 9-inch baking pan.

In a large bowl, combine cornmeal, flour, sugar, baking powder, baking soda, and salt.

In another bowl, whisk together eggs, buttermilk, melted butter, and vegetable oil.

Pour the wet ingredients into the dry ingredients and mix until just combined.

Do not overmix.

Pour batter into the prepared baking pan and smooth the top.

Bake for 25–30 minutes or until golden brown and a toothpick inserted in the center comes out clean.

Allow to cool slightly before slicing.

Serve warm with butter, honey, or jam.

Tuna Niçoise Bowl

Tuna Niçoise Bowl

Ingredients

1 can tuna, drained

2 hard-boiled eggs, halved

1 cup roasted baby potatoes

½ cup steamed green beans

½ cup cherry tomatoes & Kalamata olives

Fresh parsley, lemon juice, olive oil, salt, and pepper

Instructions

Prep Veggies: Toss potatoes with olive oil, salt, and pepper; roast until golden. Steam green beans until tender-crisp.

Assemble: Arrange the warm roasted potatoes, green beans, tomatoes, and olives in a large serving bowl.

Finish: Flake the tuna into the center and add the egg halves. Top generously with fresh parsley, a squeeze of lemon juice, and a drizzle of olive oil.

20 Top Lemon Remedies

🍋 20 Top Lemon Remedies

🍋 1. Lemon + Mint Drink

🌿 Benefits:

  • Refreshes the body
  • Helps digestion
  • Keeps you hydrated

🥤 How to Make:

  • 1 glass water
  • Juice of 1 lemon
  • Few mint leaves

Mix and drink cold.


🍋 2. Lemon Herbal Tea

🌿 Benefits:

  • Relaxing and soothing
  • Great for cold weather
  • Supports hydration

☕ How to Make:

Add lemon juice to warm herbal tea.


🍋 3. Lemon + Turmeric

🌿 Benefits:

  • Supports immunity
  • Good morning detox drink

🥄 How to Make:

Mix:

  • Warm water
  • Lemon juice
  • 1/2 tsp turmeric

🍋 4. Lemon + Banana Smoothie

🌿 Benefits:

  • Energy boosting
  • Great breakfast option

🥤 How to Make:

Blend:

  • 1 banana
  • Lemon juice
  • Milk or yogurt

🍋 5. Lemon + Ginger

🌿 Benefits:

  • Helps digestion
  • Warming and refreshing

🥤 How to Make:

Boil ginger in water and add lemon juice.


🍋 6. Lemon Zest Remedy

🌿 Benefits:

  • Adds fresh flavor
  • Rich aroma for meals

🍽️ Use:

Add lemon zest to salads or desserts.


🍋 7. Lemon + Oatmeal

🌿 Benefits:

  • Healthy breakfast
  • Rich in fiber

🥣 How to Make:

Add a little lemon zest and honey to oatmeal.


🍋 8. Lemon + Honey

🌿 Benefits:

  • Soothes throat
  • Comforting warm drink

🍯 How to Make:

Mix warm water, lemon juice, and honey.


🍋 9. Lemon + Cinnamon

🌿 Benefits:

  • Cozy flavored drink
  • Great winter beverage

☕ How to Make:

Add cinnamon stick to lemon tea.


🍋 10. Lemon + Avocado

🌿 Benefits:

  • Healthy fats
  • Fresh and creamy snack

🥑 How to Make:

Mash avocado with lemon juice and salt.


🍋 11. Lemon + Olive Oil

🌿 Benefits:

  • Simple salad dressing
  • Healthy fat source

🥗 How to Make:

Mix olive oil with lemon juice.


🍋 12. Lemon + Cloves

🌿 Benefits:

  • Warm aromatic drink
  • Comforting flavor

☕ How to Make:

Boil cloves in water and add lemon.


🍋 13. Lemon + Garlic

🌿 Benefits:

  • Flavorful natural mixture
  • Common home kitchen remedy

🥄 How to Make:

Mix crushed garlic with lemon juice.


🍋 14. Lemon + Milk

🌿 Benefits:

  • Creamy lemon drink
  • Can be used in smoothies

🥤 How to Make:

Blend milk, honey, and a little lemon zest.


🍋 15. Lemon + Apple Cider Vinegar

🌿 Benefits:

  • Tangy detox-style drink
  • Refreshing morning beverage

🥤 How to Make:

Mix:

  • Water
  • Lemon juice
  • 1 tsp apple cider vinegar

🍋 16. Lemon + Rosemary

🌿 Benefits:

  • Fresh herbal aroma
  • Great for infused drinks

🌿 How to Make:

Add rosemary and lemon slices to warm water.


❓Q/A

❓Can I drink lemon water daily?

✅ Yes, in moderate amounts.

❓Should lemon drinks be warm or cold?

✅ Both work depending on preference.

❓Can I add honey?

✅ Yes, honey pairs very well with lemon.


🌟 General Benefits of Lemon

  • Rich in vitamin C 🍋
  • Refreshing and hydrating 💧
  • Adds bright flavor to foods and drinks ✨

Fresh Marinated Tomato Salad

Ingredients

  • 4 large ripe tomatoes
  • 2 cloves garlic, minced
  • 2 green onions, finely chopped
  • 2 tbsp fresh parsley, chopped
  • 2 tbsp fresh cilantro, chopped
  • 3 tbsp olive oil
  • 2 tbsp lemon juice
  • 1 tsp red chili flakes
  • 1 tsp dried oregano
  • Salt to taste
  • Black pepper to taste

👩‍🍳 Step-by-Step Instructions

➡️ Step 1: Prepare the Tomatoes

🍅 Wash the tomatoes well.
🔪 Slice them into medium thick rounds or wedges.
👉 Arrange them neatly on a serving plate.


➡️ Step 2: Make the Marinade

🥣 In a bowl, add:

  • Minced garlic
  • Green onions
  • Parsley
  • Cilantro
  • Olive oil
  • Lemon juice
  • Chili flakes
  • Oregano
  • Salt & black pepper

✨ Mix everything together until well combined.


➡️ Step 3: Marinate the Tomatoes

🥄 Spoon the fresh herb mixture all over the tomatoes.
👉 Make sure every slice gets coated with the flavorful dressing.


➡️ Step 4: Rest the Salad

⏰ Let the salad sit for about 15–20 minutes.
This helps the tomatoes absorb all the delicious flavors.


➡️ Step 5: Serve

🍽️ Serve fresh with:

  • Grilled chicken
  • Bread
  • Rice dishes
  • BBQ meals

😋 Best enjoyed chilled or at room temperature.


🌟 Tips

  • Use ripe tomatoes for the best juicy flavor.
  • Add cucumber for extra freshness.
  • A little feta cheese on top tastes amazing.

❓Q/A

❓Can I make it ahead of time?

✅ Yes! Prepare it 1–2 hours earlier and keep refrigerated.

❓How long does it stay fresh?

✅ Best eaten within 1 day for maximum freshness.

❓Can I use dried herbs?

✅ Fresh herbs are best, but dried parsley can also work.


💪 Nutritional Benefits

  • 🍅 Tomatoes are rich in vitamins and antioxidants.
  • 🫒 Olive oil provides healthy fats.
  • 🌿 Fresh herbs add freshness and nutrients.
  • 🍋 Lemon juice gives vitamin C and bright flavor.