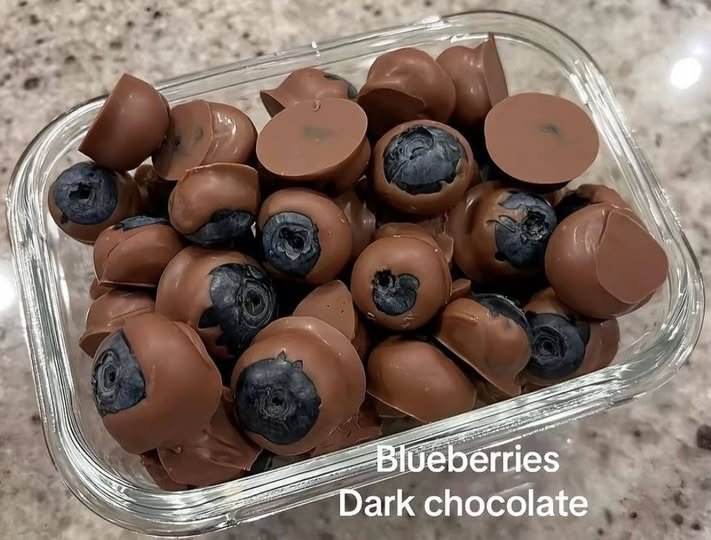
Dark Chocolate–Covered Blueberries (Sugar-Free & WW-Friendly)

Dark Chocolate Covered Blueberries

Simple, elegant, and perfectly portioned for a healthy lifestyle.

  • Prep time: 10 mins

  • Chill time: 20–30 mins

  • Yield: 1 cup (approx. 4 servings)

  • WW Points: 2–3 per serving (using sugar-free chocolate)

Ingredients

  • 1 cup Fresh blueberries (firm and ripe)

  • ½ cup Sugar-free dark chocolate (chopped or chips)

  • 1 tbsp Coconut oil (helps with shine and smooth coating)

  • Optional: A pinch of flaky sea salt for topping


Instructions

  1. Prep the Berries: Wash the blueberries thoroughly. Crucial Step: Pat them dry with paper towels and let them air-dry for another 10 minutes. If they are even slightly damp, the chocolate will “seize” and clump up.

  2. Melt the Chocolate: Create a double boiler by placing a heat-safe glass bowl over a pot of simmering water (ensure the bottom of the bowl doesn’t touch the water). Add the chocolate and coconut oil. Stir frequently until smooth and glossy.

  3. Coat: Drop the blueberries into the melted chocolate. Use a spoon to gently fold them until every berry is completely submerged.

  4. The Fork Lift: Using a fork, lift the berries out one or two at a time. Tap the fork against the side of the bowl to let excess chocolate drip through the tines.

  5. Set: Place the berries on a tray lined with parchment paper or a silicone mat. Ensure they aren’t touching so they don’t freeze into one giant clump.

    • Optional: Sprinkle a tiny bit of sea salt or crushed nuts over them now while the chocolate is wet.

  6. Chill: Refrigerate for 20–30 minutes until the shells are hard and matte.


Success Tips & Storage

  • The “Anti-Clump” Method: If you want individual berries, take the time to separate them on the parchment. If you’re in a hurry, you can drop small clusters (3–4 berries) together to make “blueberry clusters.”

  • Chocolate Choice: For the lowest WW points, use a stevia-sweetened brand like Lily’s.

  • Storage: Keep these in an airtight container in the refrigerator for up to 5 days. Do not store them at room temperature, as the coconut oil makes the chocolate melt faster than standard store-bought candy.


Quick Nutrition (Per Serving)

  • Calories: ~110

  • Net Carbs: ~5g

  • Fiber: 2g

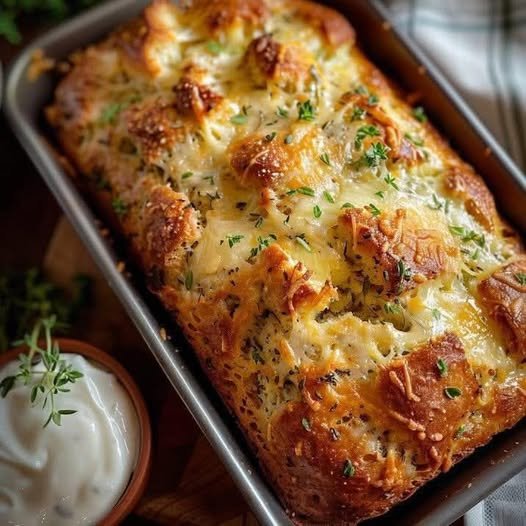
Herb & Cheese Quick Bread: A Savory Delight in Just One Hour

Introduction:

If you’re looking for a savory bread that’s easy to make and bursting with flavor, this Herb & Cheese Quick Bread is the perfect choice. Quick breads are ideal for when you want a homemade loaf without the hassle of yeast or extended rising times. This recipe is packed with fresh herbs like parsley and thyme, combined with a savory mix of cheeses to create a moist, tender loaf that’s delicious on its own or served alongside your favorite soups and salads. The best part? It comes together in about an hour, making it an excellent option for last-minute dinner additions or an afternoon snack. Whether you’re a beginner baker or a seasoned pro, this recipe is sure to become a go-to in your kitchen.

Ingredients:

Dry Ingredients:

  • 2 cups all-purpose flour
  • 1 tbsp baking powder
  • 1 tsp garlic powder
  • 1/2 tsp salt
  • 1/4 tsp black pepper

Wet Ingredients:

  • 1 cup whole milk
  • 2 large eggs
  • 1/4 cup olive oil

Add-ins:

  • 1 cup shredded cheddar cheese
  • 1/2 cup grated Parmesan cheese
  • 2 tbsp fresh parsley, chopped
  • 1 tbsp fresh thyme, chopped (or 1 tsp dried thyme)
  • 1 tbsp fresh chives, chopped

Optional Topping:

  • 2 tbsp melted butter for brushing the top

Directions:

Step 1: Preheat and Prepare

  1. Preheat the Oven: Preheat your oven to 350°F (175°C). Grease a 9×5-inch loaf pan or line it with parchment paper.
  2. Prepare the Ingredients: Shred the cheddar cheese and grate the Parmesan. Chop the fresh herbs and set them aside.

Step 2: Mix the Dry Ingredients

  1. Combine Dry Ingredients: In a large mixing bowl, whisk together the flour, baking powder, garlic powder, salt, and black pepper until well combined.

Step 3: Mix the Wet Ingredients

  1. Combine Wet Ingredients: In a separate bowl, whisk together the milk, eggs, and olive oil until smooth.

Step 4: Combine and Add the Cheese and Herbs

  1. Mix Everything Together: Pour the wet ingredients into the dry ingredients, stirring gently until just combined. Be careful not to overmix.
  2. Add the Cheese and Herbs: Fold in the shredded cheddar, grated Parmesan, parsley, thyme, and chives. The batter will be thick.

Step 5: Bake the Bread

  1. Transfer to the Pan: Spoon the batter into the prepared loaf pan and smooth the top.
  2. Bake: Bake for 45-50 minutes, or until a toothpick inserted into the center comes out clean and the top is golden brown.
  3. Cool: Let the bread cool in the pan for 10 minutes before transferring it to a wire rack to cool completely.

Step 6: Optional Topping

  1. Brush with Butter: If desired, brush the top of the warm bread with melted butter for extra richness.

How to Prepare:

  • Storage: Store any leftover bread wrapped tightly at room temperature for up to 2 days, or in the refrigerator for up to 5 days.
  • Serving Suggestion: Serve warm with butter or alongside soups, stews, or a fresh salad.

Preparation Time:

  • Prep Time: 15 minutes
  • Cook Time: 45-50 minutes
  • Total Time: 1 hour 5 minutes

Servings:

  • Yields: 8-10 slices

FAQs:

1. Can I use other types of cheese?

  • Yes! Feel free to swap out the cheddar and Parmesan for other cheeses like Gruyère, mozzarella, or even feta for a different flavor.

2. Can I make this bread gluten-free?

  • You can substitute all-purpose flour with a gluten-free baking mix. Make sure it includes a binder like xanthan gum for the best texture.

3. Can I use dried herbs instead of fresh?

  • Absolutely! If using dried herbs, reduce the quantity to about 1/3 of the fresh herbs called for in the recipe.

4. How can I make this bread more flavorful?

  • You can add more garlic powder or even include some sautéed onions or roasted garlic for a deeper flavor.

5. Can I freeze this bread?

  • Yes! Once the bread is fully cooled, wrap it tightly in plastic wrap and then in aluminum foil. It will stay fresh in the freezer for up to 3 months. Thaw at room temperature before serving.

Conclusion:

This Herb & Cheese Quick Bread is not only incredibly easy to make but also packed with flavor from the fresh herbs and a delicious mix of cheeses. It’s a versatile bread that pairs perfectly with hearty soups, stews, or even served on its own with a bit of butter. The best part is, you don’t need any yeast or long rising times—this quick bread is ready to enjoy in just about an hour. Whether you’re baking it for a special occasion or simply to enjoy a savory snack, this recipe is sure to be a hit with family and friends.

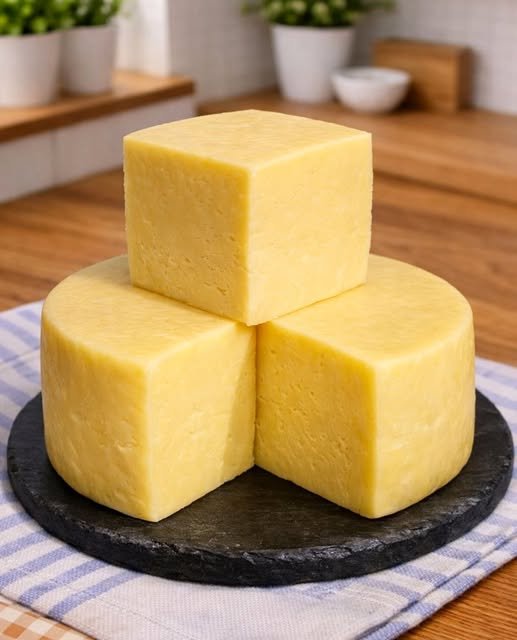
Luscious Homemade 4-Ingredient Cheese

This homemade vinegar cheese is a total game-changer. It’s essentially a cross between a creamy Ricotta and a soft Farmer’s Cheese, made decadent with that final addition of butter.

Per your request, here is the full, formatted recipe based on the guide you shared.


Luscious Homemade 4-Ingredient Cheese

Fresh, creamy, and ready in under 2 hours.

  • Prep time: 5 minutes

  • Cook/Wait time: 1.5 – 2 hours

  • Yield: Approx. 1 cup of fresh cheese

Ingredients

  • 1.5 Liters (6 1/3 cups) Whole Milk (Do not use UHT/Ultra-Pasteurized)

  • 2 tbsp (30 ml) Apple Cider Vinegar

  • 50g (1/4 cup) Unsalted Butter, melted

  • Salt, to taste


Instructions

  1. Heat the Milk: Pour the milk into a large, heavy-bottomed pot. Heat over medium, stirring occasionally to ensure the bottom doesn’t scorch. Bring it to a gentle simmer—do not let it reach a rolling boil.

  2. The “Magic” Split: Once simmering, remove the pot from the heat. Slowly pour in the apple cider vinegar and give it one gentle stir. Let it sit undisturbed for 5 minutes. You will see the cloudy yellow whey separate from the white curds.

  3. Strain: Line a colander with two layers of cheesecloth and place it over a large bowl (to catch the whey). Gently pour the mixture into the cloth.

  4. Drain and Hang: Gather the corners of the cheesecloth and tie them into a pouch. Hang the pouch over your sink or a bowl (you can tie it to a wooden spoon balanced over a deep pot).

    • For Spreadable Cheese: Drain for 30–60 minutes.

    • For Firmer Cheese: Drain for 1.5–2 hours.

  5. Enrich and Season: Transfer the drained curds to a mixing bowl. Pour in the melted butter and add your salt. Mix vigorously with a spoon until the cheese becomes creamy and uniform.

  6. Store: Use immediately while slightly warm, or transfer to an airtight container. It will firm up slightly more once chilled in the refrigerator.


The “Don’t Toss the Whey” Guide

You’ll be left with about a liter of yellowish liquid (whey). Here is how to use it:

  • Smoothie Boost: Use it as the liquid base for fruit smoothies for extra protein.

  • Superior Bread: Use it in place of water in pizza dough or bread recipes; the acidity makes the crumb extra tender.

  • Soups: Use it as a base for creamy vegetable soups.

  • Garden: Dilute it with water and use it to water acid-loving plants like tomatoes.

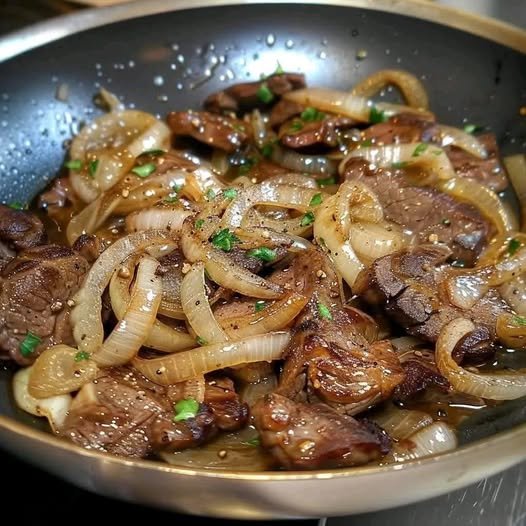
Beef Liver and Onions

A tender, savory dish with a rich white wine reduction.

  • Prep time: 15 minutes

  • Cook time: 20 minutes

  • Servings: 2–4

Ingredients

  • 1 lb Beef liver, sliced thin (approx. 1/2 inch)

  • 2 cups Onions, thinly sliced

  • ¼ cup All-purpose flour

  • ½ tsp Salt (plus more for seasoning)

  • ⅛ tsp Black pepper (plus more for seasoning)

  • ¼ – ½ cup Unsalted butter (divided)

  • 1–2 tbsp Extra virgin olive oil

  • 1–2 tbsp Fresh sage, minced

  • 1 tbsp Fresh Italian parsley, minced

  • ½ cup Beef stock

  • ¼ cup Dry white wine (Pinot Grigio or Sauvignon Blanc)


Instructions

  1. Dredge the Liver: In a large plastic bag or shallow bowl, combine the flour, salt, and pepper. Cut the liver into bite-sized strips or 1/2-inch thick pieces. Toss the liver in the flour mixture until evenly coated. Shake off any excess flour—you want a very thin coating.

  2. Caramelize the Onions: In a large skillet, heat 3 tbsp of butter and a splash of olive oil over medium-high heat. Add the sliced onions and sauté until they are soft, glossy, and beginning to turn a golden caramel color (about 8–10 minutes). Remove the onions from the skillet, place them in a dish, and season lightly with extra salt and pepper.

  3. Sear the Liver: In the same skillet, add 4 tbsp of butter and another dash of oil. Once the butter is foaming, add the liver pieces and the minced sage. Cook for about 2 minutes per side.

    • Critical Step: Do not exceed 5 minutes total! The liver should be browned on the outside but still pink and tender (medium-rare) on the inside.

  4. Combine: Return the onions to the skillet with the liver. Toss together for 30 seconds just to marry the flavors and ensure the onions are hot.

  5. Plate: Transfer the liver and onions to a warmed serving platter, leaving the juices in the pan.

  6. Create the Sauce: Pour the white wine and beef stock into the hot skillet. Turn the heat to high and scrape the bottom of the pan (deglazing) to loosen the browned bits. Let the liquid boil and reduce by half until it thickens into a glossy sauce.

  7. Finish & Serve: Pour the reduced sauce over the liver and onions. Garnish with fresh Italian parsley and serve immediately.


Chef’s Tips for Success

  • The Soak: For the mildest flavor, soak the liver in whole milk or lemon water for 30 minutes before patting dry and dredging in flour. This removes any metallic tang.

  • Don’t Crowd the Pan: If your skillet is small, sear the liver in two batches. If you crowd the pan, the liver will steam instead of browning, making it tough.

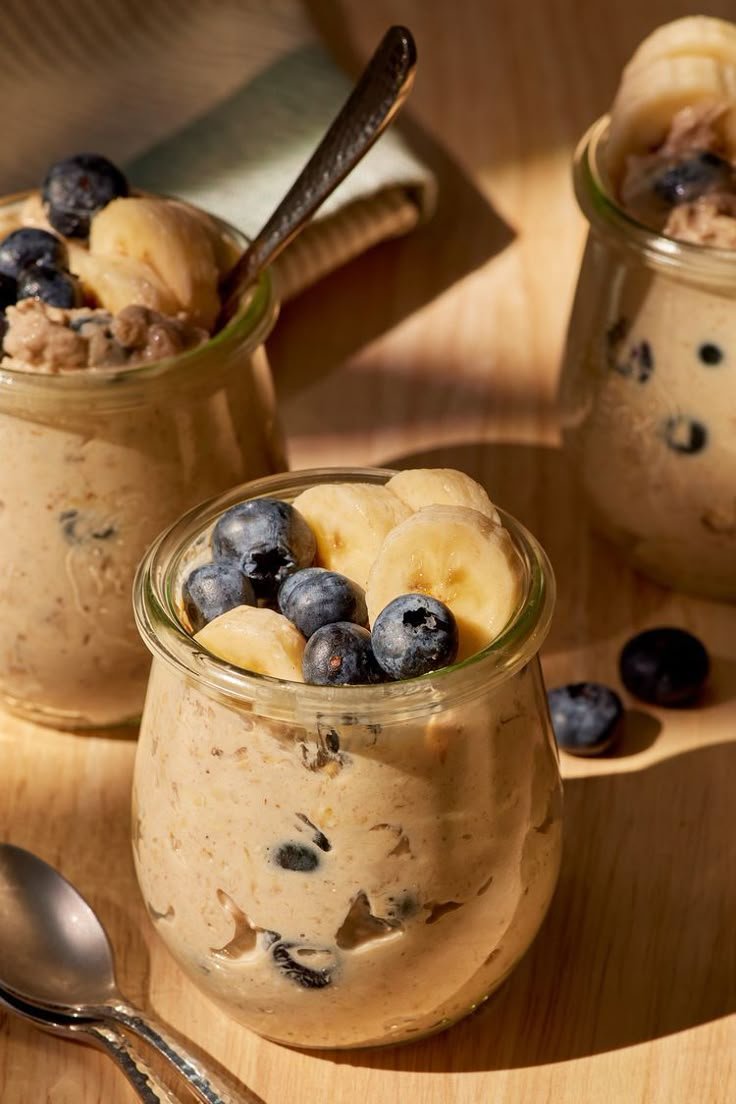
🍌 Blueberry Banana Overnight Oats


🍌 Blueberry Banana Overnight Oats

Prep time: 5 minutes | Chill time: 6+ hours | Servings: 1


Ingredients

Old Fashioned Rolled Oats: 1/2 cup (do not use instant oats, or they’ll get mushy!)


Milk of choice: 2/3 cup (dairy, almond, oat, or soy all work great)


Greek Yogurt: 1/4 cup (adds creaminess and protein)


Chia Seeds: 1 tablespoon (helps thicken the texture)


Maple Syrup or Honey: 1–2 teaspoons (adjust to your sweetness preference)


Vanilla Extract: 1/4 teaspoon


Fresh Blueberries: A handful


Banana: 1/2 sliced (save some for the topping!)


Instructions

Mix the Base: In a glass jar or airtight container, combine the oats, chia seeds, milk, yogurt, vanilla, and sweetener. Stir well until no clumps remain.


Add the Fruit: Gently fold in most of your blueberries and half of the sliced bananas.


The Wait: Seal the jar and place it in the refrigerator for at least 6 hours, though overnight is best for the creamiest texture.


Serve: In the morning, give it a quick stir. If it’s too thick, splash in a little extra milk. Top with the remaining fresh banana slices and blueberries right before eating.


Quick Tips for Success

Nut Butter: For extra richness, swirl in a tablespoon of almond or peanut butter before chilling.


Texture: If you prefer a “cake-like” texture, you can blend the oats into a flour first, though the standard rolled oats (as seen in your photo) provide a nice chew.


Storage: These stay fresh in the fridge for up to 4 days, making them perfect for meal prep.

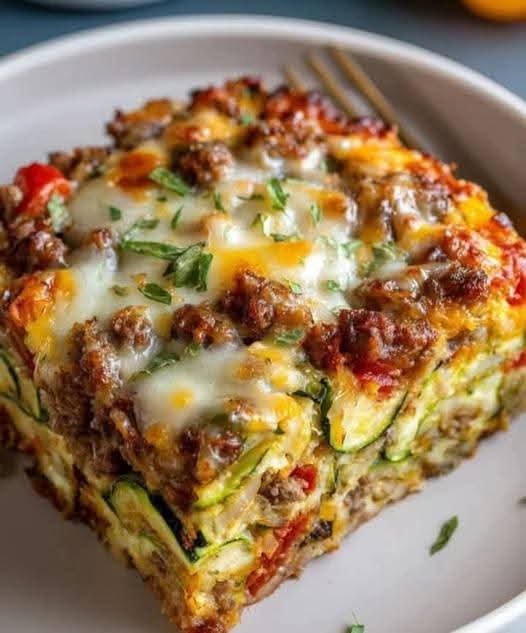
Anti-Inflammatory Zucchini Pizza Casserole

Full recipe>>> Ingredients


Vegetable Base


3 medium zucchinis, sliced into thin rounds


1 tbsp olive oil (extra-virgin preferred)


½ tsp sea salt


¼ tsp black pepper


Pizza Layer


1 cup no-sugar-added marinara or pizza sauce


1½ cups shredded mozzarella cheese (or dairy-free mozzarella)


¼ cup grated Parmesan cheese (optional)


1 tsp dried oregano


½ tsp dried basil


½ tsp garlic powder


Optional Toppings


½ cup sliced mushrooms


¼ cup sliced black olives


½ cup bell peppers, thinly sliced


¼ cup red onion, thinly sliced


Fresh basil leaves (for garnish)


👩‍🍳 Instructions


Preheat oven to 375°F (190°C). Lightly grease an 8×8-inch baking dish.


Prep zucchini: Toss zucchini slices with olive oil, salt, and pepper.


Pre-bake zucchini: Arrange in a single layer on a baking sheet and bake for 10–12 minutes to release moisture.

(This prevents a watery casserole.)


Assemble casserole:


Spread a thin layer of marinara sauce on the bottom of the baking dish.


Add a layer of zucchini.


Sprinkle mozzarella, Parmesan, herbs, and optional toppings.


Repeat layers, finishing with cheese on top.


Bake uncovered for 20–25 minutes until bubbly and lightly golden.


Rest & serve: Let cool for 5–10 minutes before slicing. Garnish with fresh basil if desired.


🍽 Servings


Serves: 4

Serving size: About 1½ cups