Strawberry Banana Pudding

Strawberry Banana Pudding

Ingredients

Yield: 10 servings

Pudding Base:

1 can (14 oz) sweetened condensed milk

1 ½ cups cold water

1 box (3.4 oz) instant vanilla or strawberry pudding mix

Whipped Cream:

3 cups heavy cream (must be very cold)

The Layers:

1 box (11-12 oz) Nilla Wafers

3 large bananas, sliced into rounds (firm, slightly green bananas work best)

3 cups sliced fresh strawberries

Instructions

1. Prepare the Pudding

In a large bowl, use an electric mixer on low speed to combine the sweetened condensed milk and cold water. Add the instant pudding mix and beat for 2 minutes until smooth. Cover with plastic wrap and refrigerate for at least 4 hours (or overnight) to firm up.

2. Make the Whipped Cream

In a separate chilled bowl, whip the cold heavy cream until stiff peaks form.

3. Fold the Mixture

Gently fold the whipped cream into the set pudding using a rubber spatula until no streaks remain. Be careful not to over-mix, as you want to keep the filling light and airy.

4. Assemble the Jars

Using 8-ounce mason jars, create layers in the following order:

Bottom: A few Nilla Wafers.

Fruit: A layer of banana slices and strawberry slices.

Cream: A generous dollop of the pudding mixture.

Repeat: Continue layering until the jar is full.

5. Chill & Garnish

Refrigerate the jars for 2–4 hours before serving. This allows the cookies to soften into a cake-like texture. Just before serving, top with an extra cookie and fresh fruit slices.

Crispy Parmesan Zucchini Potato Muffins

Introduction


Crispy Parmesan Zucchini Potato Muffins are a savory, oven-baked delight that combine the comforting heartiness of potatoes with the fresh lightness of zucchini. Enhanced with nutty Parmesan cheese and baked to golden perfection, these muffins are ideal as a snack, side dish, or grab-and-go breakfast. They’re easy to prepare, family-friendly, and a clever way to enjoy more vegetables without sacrificing flavor.

Ingredients & Quantities (Makes 10–12 muffins)


2 medium potatoes, peeled and grated


1 medium zucchini, grated


½ teaspoon salt (for draining vegetables)


2 large eggs

½ cup grated Parmesan cheese


⅓ cup all-purpose flour (or oat flour for a lighter option)


2 tablespoons olive oil or melted butter


1 teaspoon baking powder


½ teaspoon garlic powder


½ teaspoon black pepper

½ teaspoon dried oregano or Italian seasoning


Optional: 2 tablespoons chopped fresh parsley or chives


Instructions


1. Preheat oven to 375°F (190°C) and lightly grease a muffin tin or line with paper cups.

2. Place grated potatoes and zucchini in a bowl, sprinkle with salt, and let sit for 10 minutes.


3. Squeeze out as much moisture as possible using a clean kitchen towel.Kitchen supplies


4. In a large bowl, whisk eggs, olive oil, and seasonings.


5. Add the drained vegetables, Parmesan cheese, flour, and baking powder. Mix until well combined

6. Spoon mixture evenly into muffin cups, pressing gently.


7. Bake for 25–30 minutes, until golden brown and crispy on top.


8. Let cool for 5 minutes before removing. Serve warm.


Origin & Cultural Significance


Inspired by European vegetable fritters and savory muffins commonly found in Mediterranean and Alpine cuisines, this recipe reflects a tradition of transforming simple vegetables into satisfying baked dishes. Parmesan cheese adds an Italian influence, while the muffin format modernizes the dish for busy lifestyles

Description


These muffins are crispy on the outside and tender inside, with a rich, cheesy aroma and subtle herb notes. The zucchini keeps them moist, while the potatoes provide structure and a comforting texture. Each bite delivers a perfect balance of savory goodness and vegetable freshness

Shredded mozzarella or cheddar for extra cheesiness

Finely chopped onions or shallots

Crumbled cooked bacon or turkey bits chili flakes for a spicy kick

Swap parmesan with feta for a mediterranean twist

Tips for Success


Drain vegetables thoroughly to avoid soggy muffins


Use freshly grated Parmesan for better flavor and crispiness


Lightly spray muffin tops with oil for extra crunch


Let muffins rest briefly before removing to maintain shape

Nutritional Information (Per muffin – approx.)


Calories: 120–140 kcal


Protein: 6 g


Carbohydrates: 12 g


Fat: 6 g


Fiber: 2 g

Calcium & Vitamin A-rich


Conclusion


Crispy Parmesan Zucchini Potato Muffins are a delicious way to elevate everyday vegetables into something special. Easy to make and endlessly versatile, they fit perfectly into breakfast spreads, lunchboxes, or dinner tables.

Serve these muffins with sour cream, Greek yogurt, or a light garlic sauce. Pair them with a fresh salad or grilled chicken for a complete, balanced meal.


Embracing Healthful Indulgence


This recipe proves that comfort food can still be wholesome. By baking instead of frying and using nutrient-rich vegetables, these muffins allow you to indulge mindfully—enjoying rich flavor, satisfying texture, and nourishing ingredients all in one bite


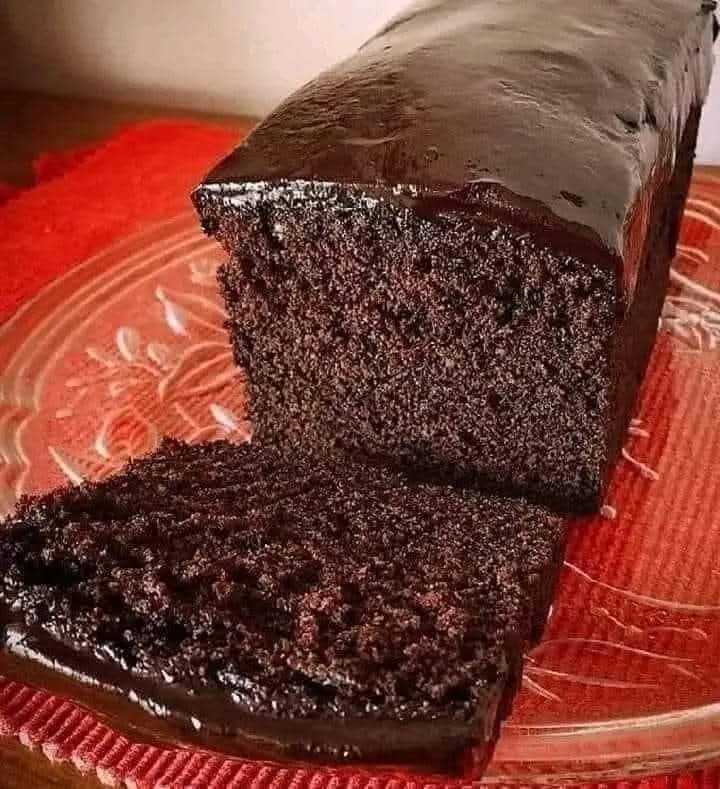
Dreamy Cream Cheese Chocolate Pound Cake

Dreamy Cream Cheese Chocolate Pound Cake


Ingredients:

For The Pound Cake:

  • 2 ounces dark chocolate, chopped
  • 3/4 cup (105 g) all purpose gluten free flour (I used Better Batter)
  • 1/2 teaspoon xanthan gum (omit if your blend already contains it)
  • 1/4 cup (36 g) cornstarch (or try arrowroot or potato starch)
  • 1 teaspoon kosher salt
  • 3/4 cup (60 g) Dutch-processed cocoa powder (if you use natural cocoa powder, add 1/8 teaspoon baking soda)
  • 16 tablespoons (224 grams) unsalted butter, at room temperature
  • 1 cup (200 g) granulated sugar, plus more for sprinkling
  • 9 ounces (252 g) eggs (from about 5 large eggs), at room temperature
  • 2 teaspoons pure vanilla extract
  • 1/4 cup (2 fl. oz.) brewed coffee (or milk—but really consider the coffee!), at room temperature

For The Chocolate Glaze:

  • 4 ounces dark chocolate, chopped
  • 1/4 cup (2 fluid ounces) heavy whipping cream
  • 1 tsp pure Vanilla

PREPARATION:

Preheat your broiler to 325°F. Oil or line with material paper a standard 9-inch x 5-inch portion skillet and put it away.

In a little intensity safe bowl, place the slashed chocolate and dissolve in 30-second rushes in the microwave at 60% power until liquefied and smooth (or over a twofold evaporator).

Put the bowl to the side to momentarily cool. Into a medium-sized bowl, filter together the flour, thickener, cornstarch, and cocoa powder, then add the salt and speed to join well. Put the bowl away.

In the bowl of a stand blender fitted with the oar connection (or an enormous bowl with a hand blender), beat the margarine and sugar until the combination tumbles from the mixer in a lace when the oar is lifted (around 3 minutes).

Add the eggs, each in turn, and the vanilla, and beat again until all around consolidated. Then, add the chocolate and the fermented espresso, beating to join after every option.

At long last, with the blender on low, add the flour and cocoa powder combination gradually. Beat momentarily until recently joined. The player ought to be smooth and thickly pourable.

Empty the hitter into the pre-arranged dish, and smooth the top with a wet spatula. Place in the focal point of the preheated broiler and prepare until a toothpick embedded in the middle emerges without any than a couple of clammy scraps connected (around 60 minutes). Eliminate from the broiler and permit to cool in the prospect minutes prior to turning out onto a wire rack to totally cool.

Make the coating. Place the hacked chocolate in a little, heat-safe bowl. Place the cream and vanilla in a little pot and bring to a stew over medium-low intensity. Pour the hot cream over the cleaved chocolate and permit to sit until the chocolate starts to dissolve (around 1 moment).

Blend until the chocolate is dissolved and smooth. Pour the frosting over the cooled pound cake and spread into an even layer with a little counterbalanced spatula or huge blade. Permit to sit at room temperature until the coating is set. Cut thickly and serve.

Idea and styling propelled by Donna Hay. Adjusted from my Gluten Free Starbucks-Style Chocolate Cinnamon Pound Cake recipe.

Enjoy!

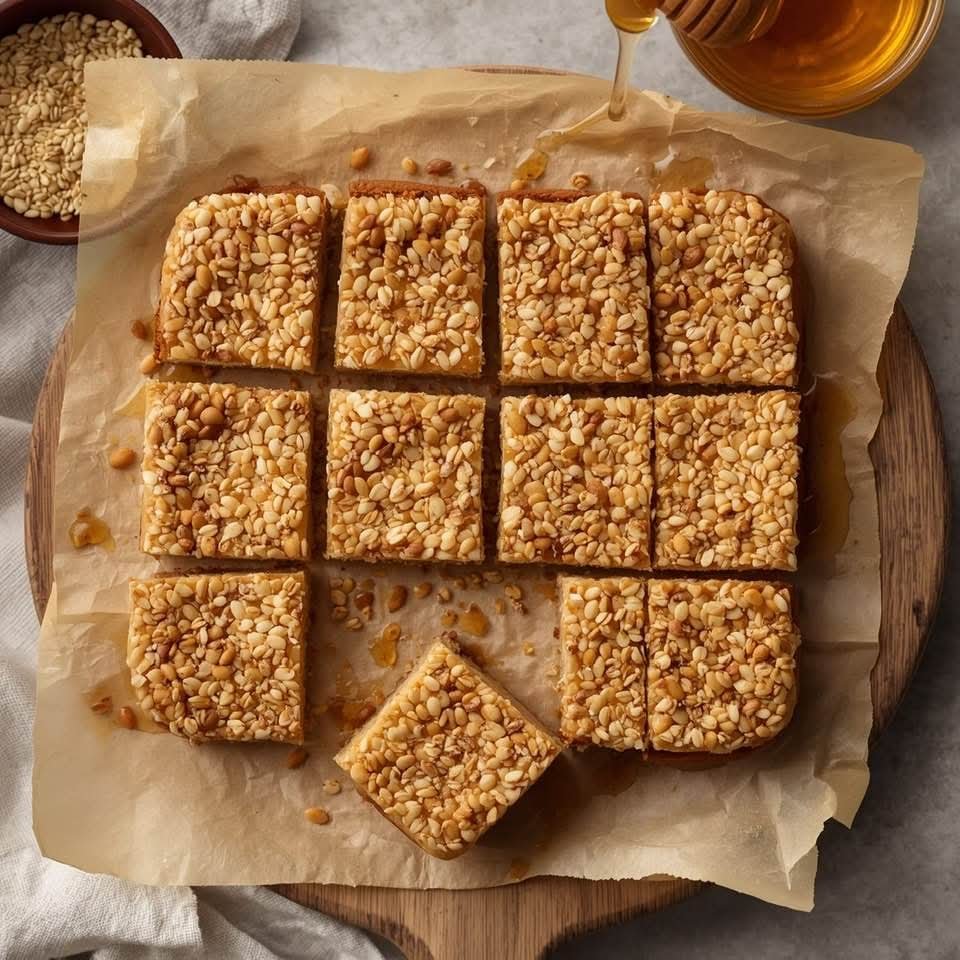
Sesame & Honey Bars

Sesame & Honey Bars

“Crunchy, wholesome, and naturally sweet — simple ingredients, powerful goodness.”

If you love snacks that are sweet but not sinful, crunchy but still nutritious, and made with ingredients your grandmother would recognize — then today’s recipe is for you!

These Sesame & Honey Bars are a classic treat enjoyed across cultures, and they perfectly fit our Palmarius Cakes & Pastries philosophy:

Delicious, wholesome, and inspired by natural African goodness. 🌿✨

Made with only a handful of ingredients — sesame seeds, honey, and a hint of natural flavor — this recipe delivers energy, sweetness, and nourishment in every bite.

🌿 Why Sesame & Honey Bars Are So Good for You

1. Rich in Healthy Fats (Good for Your Heart)

Sesame seeds contain natural oils that help support heart health, brain function, and long-lasting energy.

2. Packed With Minerals

Every bite is loaded with:

Calcium — supports strong bones

Iron — boosts energy and helps reduce tiredness

Zinc — supports immunity

Magnesium — helps with relaxation and muscle function

3. High in Natural Antioxidants

Both sesame seeds and honey contain antioxidants that support overall wellness and help the body handle stress.

4. Natural Sweetness (No Refined Sugar)

Honey gives the bars a delicious sweetness without the empty calories of processed sugar.

5. Great for Digestion

Sesame seeds are high in fiber, which helps keep your digestive system happy and balanced.

6. Quick Energy Boost

Perfect for:

✔️ Busy mornings

✔️ School snacks

✔️ Pre-workout energy

✔️ Healthy mid-day cravings

@everyone

No-Bake Peanut Butter Cheesecake Balls Recipe

No-Bake Peanut Butter Cheesecake Balls Recipe

🥜 Ingredients:

  • 8 oz cream cheese, softened
  • ½ cup creamy peanut butter
  • ¼ cup powdered sugar
  • 1 tsp vanilla extract
  • 1 cup crushed graham crackers (or crushed digestive biscuits)
  • 1 cup semi-sweet chocolate chips (for coating)
  • 1 tbsp coconut oil (optional, to thin chocolate)
  • Crushed peanuts or graham crumbs, for garnish

👩‍🍳 Directions:

Mix the cheesecake base:

In a mixing bowl, combine cream cheese, peanut butter, powdered sugar, and vanilla extract. Beat until smooth and creamy.

Add texture:

Stir in crushed graham crackers until the mixture thickens and can be rolled into balls. Chill for 15–20 minutes to firm up slightly.

Form balls:

Using your hands or a small cookie scoop, roll the mixture into bite-sized balls and place them on a parchment-lined tray. Freeze for 30 minutes to set.

Coat in chocolate:

Melt the chocolate chips with coconut oil (if using) until smooth. Dip each chilled ball into the chocolate, coating evenly. Return to the tray.

Add toppings & chill:

Sprinkle with crushed peanuts or graham crumbs before the chocolate sets. Refrigerate until firm, about 20 minutes.

Serve & store:

Enjoy chilled! Store leftovers in an airtight container in the refrigerator for up to 5 days or freeze for up to 1 month.

🍽️ Nutritional Info (per ball, makes ~16):

Calories: 145

Protein: 3g

Carbohydrates: 10g

Fat: 10g

Fiber: 1g

Sugar: 7g

Sodium: 85mg

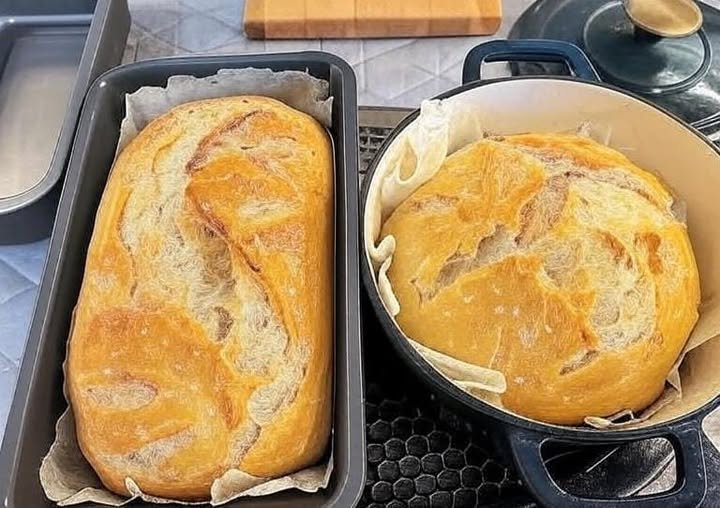
Unloaf Sourdough Bread: Rustic, Crusty, and Naturally Fermented

Sourdough baking doesn’t always have to be complicated. This Unloaf Sourdough Bread is a beginner-friendly, no-fuss recipe that skips the usual stretch-and-fold techniques but still delivers a beautiful, naturally leavened loaf with a satisfying crust and open crumb. Whether you’re new to sourdough or just want a simpler routine, this recipe is for you.

Made with just a handful of ingredients and no commercial yeast, this unloafed version keeps things rustic and straightforward. The dough is mixed and left to rise undisturbed—no kneading, no stretching, no folding. It’s proof that good bread doesn’t need to be high maintenance.

Perfect for everyday use, this sourdough loaf pairs well with soups, sandwiches, or simply toasted with butter. Its tangy flavor and airy structure make it a staple worth mastering.

🕒 Cooking Time and Serving

  • Prep Time: 15 minutes
  • Bulk Fermentation: 8–12 hours
  • Proofing Time: 1–2 hours
  • Bake Time: 45–50 minutes
  • Total Time: ~14–16 hours (mostly hands-off)
  • Servings: 1 large loaf (8–10 slices)

🧂 Ingredients

  • 500g bread flour (or a mix of 400g bread flour + 100g whole wheat flour)
  • 375g water (room temperature)
  • 100g active sourdough starter (fed and bubbly)
  • 10g salt

👨‍🍳 How to Make Unloaf Sourdough Bread

No stretch and folds, no fuss — just mix, rest, and bake.

1. Mix the Dough

In a large mixing bowl, combine:

  • 500g flour
  • 375g water
    Mix until no dry bits remain. It will be a shaggy dough. Cover and rest for 1 hour (this rest is called autolyse).

2. Add Starter and Salt

Add:

  • 100g active sourdough starter
  • 10g salt
    Mix thoroughly using your hands or a dough whisk until fully incorporated. The dough will be sticky and wet — that’s okay.

3. Bulk Fermentation (No Stretching!)

Cover the bowl with a damp towel or plastic wrap. Let it rise at room temperature for 8–12 hours, depending on room temperature. It should double in size and look bubbly on top.

4. Shape the Dough

Lightly flour a surface. Gently turn the dough out. Shape it into a rough round or oval using a bench scraper. Avoid deflating it too much.

Transfer the shaped dough to a proofing basket or bowl lined with a well-floured kitchen towel. Cover and proof for 1–2 hours at room temperature, or refrigerate overnight (8–12 hours) for extra flavor.

5. Bake the Bread

Preheat your oven to 450°F (230°C) with a Dutch oven inside.

Once hot, remove the Dutch oven, gently turn the dough onto parchment paper, score the top with a sharp blade, and transfer it into the pot. Cover with lid.

  • Bake covered for 25 minutes, then uncover and bake for 20–25 minutes more, until deep golden brown.

Let the bread cool for at least 1 hour before slicing.

📝 Notes

  • For a slightly lighter crumb, use all bread flour.
  • Your starter should be at peak activity: bubbly, doubling in size within 4–6 hours after feeding.
  • If your dough feels too wet to shape, lightly flour your hands and surface but avoid overdoing it.
  • No Dutch oven? Bake on a preheated baking sheet with a tray of hot water in the oven for steam.

❓FAQs

Q: Can I use all-purpose flour instead of bread flour?

Yes, but bread flour gives a chewier texture and better rise. All-purpose flour will result in a slightly denser loaf.

Q: Can I refrigerate the dough before baking?

Yes! After shaping, refrigerate the dough for up to 12 hours. Bake straight from the fridge.

Q: Why is there no kneading or folding?

This recipe relies on time and natural fermentation to develop gluten. It’s slower but still effective and beginner-friendly.

Q: My dough didn’t rise much. What went wrong?

Check your starter’s activity level. An underactive starter is usually the cause of poor fermentation.

🔢 Nutrition Information

Per Loaf (Whole Recipe)

Nutrient Amount
Calories ~1600 kcal
Carbohydrates ~320g
Protein ~50g
Fat ~5g
Fiber ~12g
Sodium ~2000mg

Per Slice (1/10 loaf)

Nutrient Amount
Calories ~160 kcal
Carbohydrates ~32g
Protein ~5g
Fat ~0.5g
Fiber ~1.2g
Sodium ~200mg

Values are approximate and vary based on ingredients and portion size.

⚠️ Disclaimer

Sourdough bread, while delicious and nutritious, should be enjoyed in moderation as part of a balanced diet. This recipe contains gluten and may not be suitable for those with celiac disease or gluten sensitivities. Always check with a healthcare professional if you have dietary restrictions or food allergies.