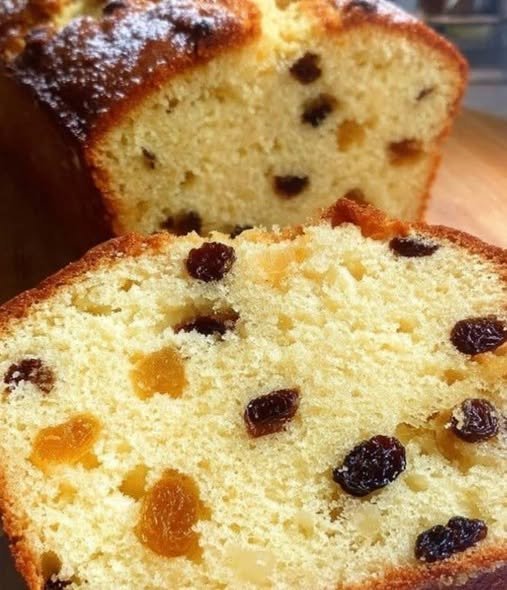
Vanilla Raisin Loaf Cake

Vanilla Raisin Loaf Cake

Prep Time: 15 minutes
Bake Time: 45–50 minutes
Servings: 8–10 slices

A soft, lightly sweet loaf cake flavored with vanilla and dotted with juicy raisins. Perfect for tea time or dessert.


🛒 Ingredients

  • 2 cups (250 g) all-purpose flour

  • 1½ teaspoons baking powder

  • ¼ teaspoon salt

  • ½ cup (115 g) unsalted butter, softened

  • ¾ cup (150 g) granulated sugar

  • 2 large eggs, at room temperature

  • 1 teaspoon vanilla extract

  • ½ cup (120 ml) milk

  • ½ cup (80 g) raisins
    (soaked in warm water for 10 minutes, then drained and patted dry)

Optional:

  • 1 tablespoon flour (for coating raisins)

  • Powdered sugar for dusting


👩‍🍳 Step-by-Step Instructions

1. Prepare the Pan

Preheat your oven to 180°C (350°F).

Grease a standard loaf pan (9×5 inch) with butter or oil and line with parchment paper for easy removal.


2. Mix Dry Ingredients

In a medium bowl, whisk together:

  • flour

  • baking powder

  • salt

Set aside.


3. Cream Butter and Sugar

In a large mixing bowl, beat:

  • softened butter

  • sugar

Mix until light and fluffy (about 2–3 minutes).

This step helps create a soft texture.


4. Add Eggs and Vanilla

Add eggs one at a time, mixing well after each addition.

Stir in vanilla extract.


5. Combine Wet and Dry

Add the flour mixture in two parts, alternating with milk:

  • Add half the flour → mix gently

  • Add milk → mix

  • Add remaining flour → mix just until combined

Do not overmix.


6. Add Raisins

Toss drained raisins with 1 tablespoon flour (optional, helps prevent sinking).

Fold raisins gently into the batter.


7. Bake

Pour batter into prepared pan and smooth the top.

Bake for 45–50 minutes, or until:

  • top is golden

  • a toothpick inserted in the center comes out clean


8. Cool

Let the loaf cool in the pan for 10 minutes, then transfer to a wire rack to cool completely.


🍽 Serving Ideas

  • Dust with powdered sugar

  • Serve plain or with butter

  • Pair with tea, coffee, or milk

  • Add sliced fruit on the side


💡 Helpful Tips

  • Soaking raisins keeps them soft and juicy.

  • Do not overmix the batter or the loaf may become dense.

  • You can replace raisins with chopped dates or dried apricots.

  • Store covered at room temperature for 2 days or refrigerate up to 5 days.

Cheesy Air Fryer Hasselback Potatoes

Cheesy Air Fryer Hasselback Potatoes

Prep time: 10 mins | Cook time: 45 mins | Servings: 2

Ingredients

  • 2 russet potatoes

  • 4 tbsp butter, melted

  • 1 tbsp garlic paste or minced garlic

  • 3 to 5 slices Colby Jack cheese (cut into fourths)

  • Kosher salt and black pepper to taste

  • Optional toppings: Sour cream and fresh chives


Instructions

  1. Prep the Potatoes: * Cut a thin slice from the bottom of each potato to create a flat, stable base.

    • Place the potato between two chopsticks. Use a sharp knife to cut 1/4-inch slices across the potato; the chopsticks will stop your knife from cutting all the way through.

  2. The “Lift” Trick: * Place the small slices you cut from the bottom into the air fryer basket.

    • Set the large sliced potatoes on top of these bottom slices. This helps the Hasselback layers fan open during cooking.

  3. Seasoning: * Mix the melted butter, garlic, salt, and pepper.

    • Gently fan out the potato slices and brush the garlic butter over the top, making sure it gets between the layers.

    • Sprinkle with a little extra salt and pepper.

  4. First Stage Air Fry: * Set your air fryer to 370°F and cook for 20 minutes.

  5. Second Stage Air Fry: * Brush any remaining garlic butter over the potatoes.

    • Cook for an additional 20 to 25 minutes at 370°F until the edges are crispy and golden.

  6. Add the Cheese: * Slide the small cheese pieces into the gaps between the potato slices (either every gap or every other gap depending on your preference).

    • Cook for 1 to 2 more minutes until the cheese is bubbling and melted.

  7. Serve: * Top with a dollop of sour cream and a sprinkle of fresh chives.


Pro Tips for the Best Hasselbacks

  • Butter is Key: Don’t be shy with the garlic butter; it’s what creates the “salty” and “cheesy” experience mentioned in your notes.

  • Potato Size: Try to choose russet potatoes of a similar size so they cook evenly at the same time.

Chocolate Silk Mousse (Creamy Cottage Cheese Dessert)

Chocolate Silk Mousse (Creamy Cottage Cheese Dessert)

Prep Time: 5 minutes
Chill Time (optional): 30 minutes
Servings: 1–2

A smooth, rich chocolate mousse made by blending cottage cheese with cocoa and vanilla until silky and glossy.


🛒 Ingredients

  • 1 cup cottage cheese
    (low-fat or full-fat both work; full-fat gives a creamier texture)

  • 2 to 3 tablespoons unsweetened cocoa powder

  • 2 to 3 tablespoons granulated sweetener or sugar
    (use according to taste)

  • 1 teaspoon vanilla extract

  • 1 small pinch sea salt

Optional toppings:

  • chopped nuts

  • chocolate chips

  • shaved dark chocolate

  • fresh berries


👩‍🍳 Step-by-Step Instructions

1. Add Ingredients to Blender

Place the following into a high-speed blender or food processor:

  • cottage cheese

  • cocoa powder

  • sweetener

  • vanilla extract

  • salt

Make sure the cocoa powder is evenly spread so it blends smoothly.


2. Blend Until Smooth

Blend on high speed for 1–2 minutes.

Stop and scrape down the sides if needed.

Continue blending until:

  • no cottage cheese curds remain

  • texture becomes completely smooth

  • mixture looks glossy and thick

This step is essential for achieving a mousse-like texture.


3. Adjust Texture (If Needed)

If the mixture is too thick:

  • add 1 tablespoon water or milk

  • blend again for 10–15 seconds

Repeat only if necessary until smooth and spoonable.


4. Taste and Adjust

Taste the mousse:

  • For deeper chocolate flavor → add more cocoa powder

  • For sweeter flavor → add more sweetener

Blend briefly after any adjustment.


5. Chill (Optional but Recommended)

Transfer the mousse to a serving bowl or jar.

Refrigerate for at least 30 minutes to allow:

  • flavor to deepen

  • texture to firm slightly


6. Garnish and Serve

Just before serving, top with:

  • chopped walnuts

  • chocolate chips

  • fresh berries

  • coconut flakes

Serve cold or slightly chilled.


💡 Helpful Tips

  • Use a powerful blender for the smoothest result.

  • Sift cocoa powder first to prevent clumps.

  • For a richer taste, add 1 teaspoon melted butter or cream.

  • Store covered in the refrigerator for up to 2 days.


🍮 Texture & Flavor

✔ Thick and creamy
✔ Deep chocolate taste
✔ Smooth pudding-like finish

How to Reduce Thigh, Arm, Back, Neck, and Belly Fat with Ginger Water

How to Reduce Thigh, Arm, Back, Neck, and Belly Fat with Ginger Water

When it comes to aiding weight loss and targeting stubborn fat in areas such as the abdomen, arms, back, and thighs, ginger water is a drink that is both natural and effective. The fact that it is abundant in antioxidants and anti-inflammatory chemicals, as well as the fact that it boosts metabolism and helps digestion, makes it an extremely beneficial supplement to your workout program. When paired with a healthy diet and consistent physical activity, ginger water has the potential to assist you in achieving your weight loss objectives while also enhancing your overall well-being overall.

Benefits of Drinking Ginger Water

Drinking this multipurpose beverage can help you lose weight in a number of different ways. Through the use of chemicals such as gingerol and shogaol, it stimulates the metabolism, so assisting the body in burning calories more effectively.

Ginger water has the ability to decrease appetite, which in turn reduces the need for excessive snacking.

Additionally, it helps improve digestion by minimizing bloating and gas. You will feel lighter and more invigorated as a result of its natural cleansing effects, which help drain out impurities and reduce inflammation.

A Guide to Making and Utilizing Ginger Water

Making ginger water is a straightforward process.

A tablespoon of grated or sliced fresh ginger should be added to four cups of water and brought to a boil.

Let it simmer for ten to fifteen minutes, and then strain it. Taste can be enhanced by the addition of honey or lemon juice.

Drink it first thing in the morning on an empty stomach to get your metabolism going, sip it before meals to control your hunger, or enjoy it throughout the day to stay hydrated and energized. These are the ideal ways to guarantee the best effects.

See also  The Lemon Water Diet: A Refreshing Approach to Slimming Down

Advice on How to Achieve the Best Possible Results

Ginger water, when combined with a healthy lifestyle, can provide the most effective benefits for fat loss. In addition to engaging in regular exercise, including both cardiovascular and strength training, you should prioritize a diet that is abundant in whole foods, lean proteins, and healthy fats.

The key to success is consistency; if you want to see obvious improvements, drink ginger water every day for a few weeks. You should, however, limit your consumption to two to three glasses per day and seek medical advice if you are pregnant or have any preexisting medical conditions.


Sugar-Free Apple Cocoa Cake

Sugar-Free Apple Cocoa Cake

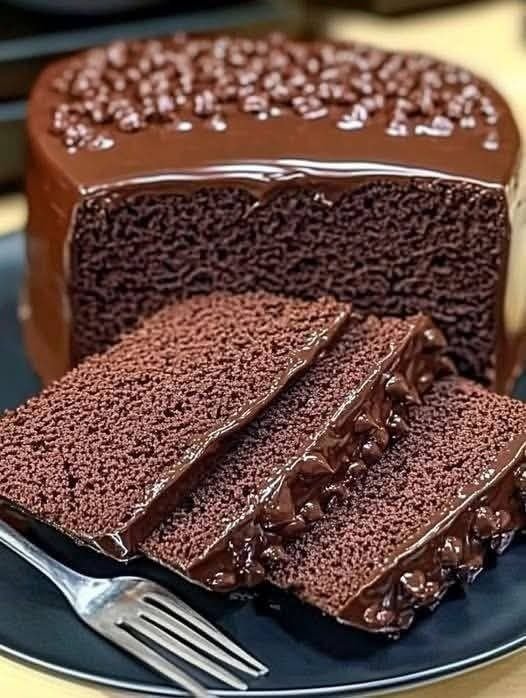
Just Apples & Cocoa!

If you’ve been searching for a guilt-free dessert that’s naturally sweet, rich in flavor, and supports your health goals, this recipe is a game-changer. With only a few wholesome ingredients — apples, eggs, and cocoa — you can make a moist, chocolaty cake without a single grain of sugar. Perfect for breakfast, snacks, or dessert!

Ingredients

  • 4 medium sweet apples (Fuji, Honeycrisp, Gala) – naturally sweet and juicy.

  • 4 large eggs – for structure and protein.

  • 5 tablespoons unsweetened cocoa powder – deep chocolate flavor without sugar.

  • 1 teaspoon baking powder – for a light rise.

  • Olive oil – for greasing the baking mold.

Instructions

  1. Prepare the apples
    Wash, peel, and core the apples. Cut them into chunks and blend into a smooth purée.

  2. Make the batter
    In a large mixing bowl, combine the apple purée, eggs, cocoa powder, and baking powder. Whisk or blend until the mixture is lump-free and silky.

  3. Get the pan ready
    Lightly grease a baking pan with olive oil. Pour in the batter and smooth the top.

  4. Bake
    Preheat the oven to 180°C (350°F). Bake for 35–40 minutes, or until a toothpick inserted in the center comes out clean.

  5. Cool & enjoy
    Let the cake cool completely before slicing. Serve plain, or with a sprinkle of extra cocoa powder.

Why it’s great for weight loss

This cake is naturally sweet from apples, high in fiber, rich in protein, and low in calories. Cocoa adds flavor and antioxidants without sugar.

See also  Cabbage with Carrots

 Q&A

Q: Can I use green apples?
A: Yes, but they’re tart — the cake will be less sweet.

Q: How long does it keep?
A: Store in an airtight container in the fridge for up to 4 days, or freeze for 1 month.

Q: Can I make it vegan?
A: Replace each egg with 1 tbsp ground flaxseed + 3 tbsp water.

Q: Is it sweet like regular cake?
A: No, it’s mildly sweet — think of it as a healthy chocolate loaf.

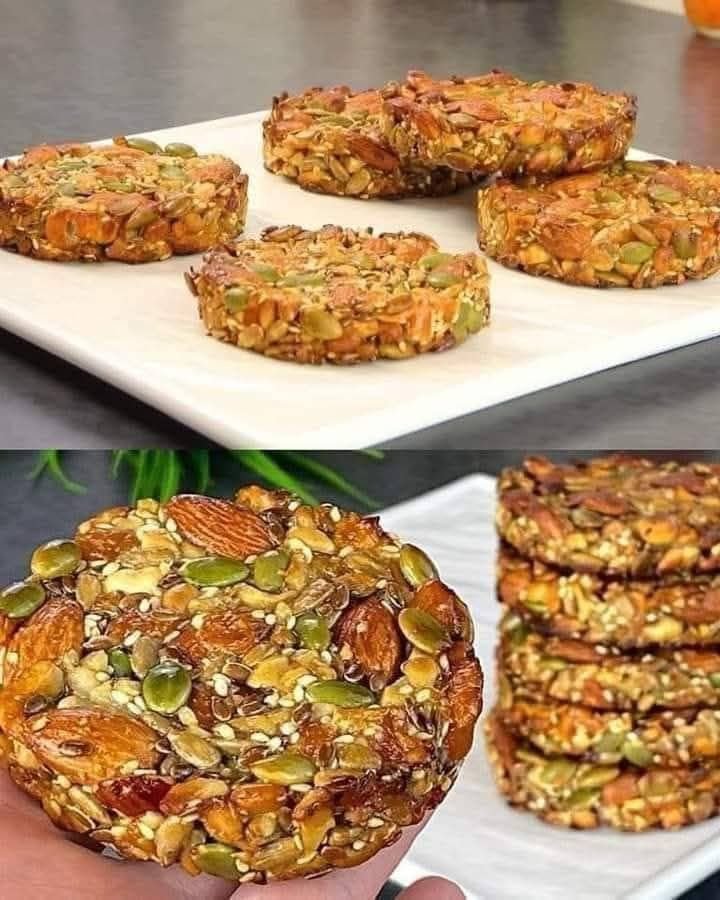
Healthy cookies without flour and sugar! Energy dessert recipe

Healthy cookies without flour and sugar! Energy dessert recipe

Are you looking for a delicious and healthy dessert option that’s free from flour and sugar? Look no further! Our energy dessert recipe uses natural ingredients like nuts, seeds, and dried fruits to create a tasty and satisfying treat that’s perfect for anyone with dietary restrictions or preferences.
Yields: 10-12 cookies
Prep time: 20 minutes
Bake time: 15-20 minutes

Ingredients:

70g (2.5 ounces) dried apricots

50g (1.8 ounces) walnuts

70g (2.5 ounces) hazelnuts

30g (1 ounce) pumpkin seeds

40g (1.4 ounces) sunflower seeds

20g (0.7 ounces) sesame seeds

20g (0.7 ounces) flaxseeds

* 60g (2 ounces) almonds

20g (0.7 ounces) pine nuts

40ml (1.4 ounces) natural honey

1 egg white

A pinch of salt

Instructions:

Prep the nuts and seeds:

Preheat oven to 350°F (175°C). Line a baking sheet with parchment paper. Roughly chop the walnuts, hazelnuts, and almonds.

Combine ingredients:

In a large bowl, combine all the nuts, seeds, and dried apricots. Add the honey, egg white, and salt. Mix well until everything is evenly coated.

Shape the cookies:

Use your hands to form the mixture into round cookies, about 1 inch thick. Place them on the prepared baking sheet.

Bake:

Bake for 15-20 minutes, or until golden brown.

 Cool:

Let the cookies cool on the baking sheet for a few minutes before transferring them to a wire rack to cool completely.

Tips and Variations

Use different types of nuts and seeds to change up the flavor and texture of the cookies.

See also  Mediterranean Homemade Creamy Tahini dressing

Add in dried fruits like cranberries or cherries for extra sweetness and flavor.

Use coconut oil or almond butter to add healthy fats and creaminess to the cookies.

Experiment with different spices like cinnamon or nutmeg to add extra flavor.

Make the cookies into bars or energy balls for a convenient and portable snack.

Q&A

Q: What can I use instead of sugar in the recipe?
A: You can use natural sweeteners like honey, maple syrup, or stevia to sweeten the cookies.

Q: Can I use gluten-free flour instead of nuts and seeds?
A: Yes, you can use gluten-free flour, but keep in mind that it may change the texture and flavor of the cookies.

Q: Are these cookies suitable for vegans?
A: Yes, these cookies are vegan-friendly, but make sure to use vegan-friendly ingredients like coconut oil and maple syrup.

Q: How long do the cookies last?
A: The cookies can last up to 5 days when stored in an airtight container in the fridge.

Nutrition Information (per cookie)

Calories: 120
Fat: 8g
Saturated fat: 1g
Omega-3 fatty acids: 0.5g
Carbohydrates: 10g
Fiber: 2g
Sugar: 5g
Protein: 2g
Sodium: 50mg
Cholesterol: 0mg