Potato-Crusted Chicken and Mushroom Stuffed Dish

Potato-Crusted Chicken and Mushroom Stuffed Dish

Introduction

This dish combines the heartiness of chicken with the earthy richness of mushrooms, all wrapped in a crispy, golden potato crust. The texture contrast between the crunchy outside and the juicy, creamy filling makes it a crowd-pleaser. It’s a great comfort meal that can be served with a fresh salad, roasted veggies, or a creamy dipping sauce.

Prep Time: 25 minutes

Cook Time: 45 minutes

Total Time: 1 hour 10 minutes

Servings: 4–6

Ingredients

For the Potato Crust:

3 large potatoes, grated

1 egg

¼ cup all-purpose flour or breadcrumbs

½ teaspoon salt

½ teaspoon black pepper

½ teaspoon garlic powder

¼ teaspoon paprika (optional)

2 tablespoons olive oil

For the Chicken and Mushroom Filling:

2 cups cooked and shredded chicken (or ground chicken)

1 cup mushrooms, finely chopped (button, cremini, or shiitake)

1 small onion, finely chopped

2 cloves garlic, minced

½ teaspoon salt

½ teaspoon black pepper

½ teaspoon thyme or oregano

½ teaspoon smoked paprika (optional)

½ cup shredded mozzarella or cheddar cheese (optional)

1 tablespoon olive oil

For Garnish (Optional):

Fresh parsley, chopped

Grated Parmesan cheese

Instructions

 Prepare the Potato Crust

Preheat the oven to 375°F (190°C).

Grate the potatoes and squeeze out excess moisture using a clean kitchen towel.

In a mixing bowl, combine the grated potatoes, egg, flour (or breadcrumbs), salt, black pepper, garlic powder, and paprika. Mix well.

Grease a baking dish or line a baking sheet with parchment paper.

Spread the potato mixture evenly in the dish to create a crust-like layer. Press it down firmly.

See also  Mediterranean Greek Halloumi Mezze Platter with Lemon Herb Dressing

Bake for 15–20 minutes or until the edges start turning golden brown.

 Prepare the Chicken and Mushroom Filling

Heat 1 tablespoon olive oil  in a pan over medium heat.

Sauté chopped onions and garlic until soft and fragrant.

Add the chopped mushrooms and cook for 5–7 minutes until they release their moisture and become golden brown.

Stir in the shredded or ground chicken, salt, black pepper, thyme, and smoked paprika. Mix well.

Remove from heat and let it cool slightly. If using, stir in the shredded cheese.

 Assemble and Bake

Take the pre-baked potato crust out of the oven and evenly spread the chicken and mushroom filling on top.

If desired, sprinkle extra cheese on top.

Return to the oven and bake for another 20–25 minutes until the edges are crispy and golden brown.

Let the dish cool for 5 minutes before slicing.

 Serve and Enjoy

Garnish with fresh parsley and grated Parmesan cheese.

Serve warm with a side of sour cream, garlic yogurt sauce, or a light salad.

Tips 

Remove Moisture from Potatoes:

Squeeze out as much water as possible to achieve a crispy crust.

Cheese Variation:

Use smoked gouda, feta, or Parmesan for a unique twist.

Extra Crispiness:

Brush the top of the potato crust with  olive oil before baking.

Make it Creamier:

Add a spoonful of cream cheese or ricotta to the filling.

Pairing Ideas:

Serve with a fresh green salad or roasted vegetables.

Nutrition Facts (Per Serving)

Calories: ~320 kcal

Protein: ~25g

Carbohydrates: ~35g

Fat: ~10g

Fiber: ~4g

Sodium: ~450mg
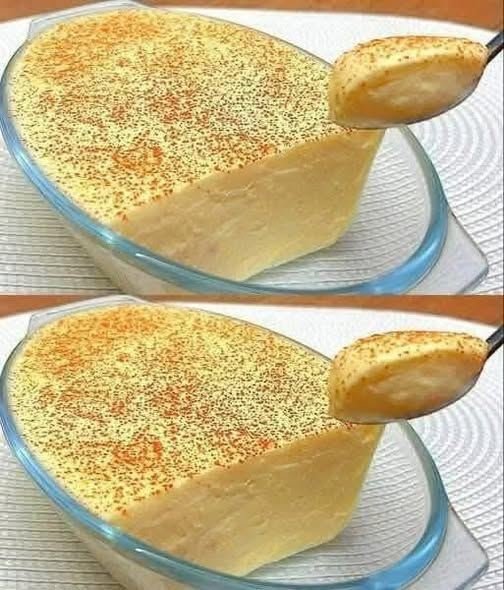
 

Golden Turmeric Custard (Creamy Spiced Pudding)

Golden Turmeric Custard (Creamy Spiced Pudding)

Prep Time: 5 minutes
Cook Time: 10 minutes
Chill Time (optional): 2 hours
Servings: 2

A warm, silky custard made with almond milk (or coconut milk), gently spiced with turmeric and ginger, and lightly sweetened for a cozy dessert or snack.


🛒 Ingredients

  • 2 cups almond milk
    (or full-fat coconut milk for a richer texture)

  • 2 tablespoons cornstarch
    (or arrowroot powder)

  • 1 tablespoon honey or maple syrup
    (adjust to taste)

  • ½ teaspoon ground turmeric

  • ¼ teaspoon ground ginger

  • 1 pinch black pepper

  • ½ teaspoon vanilla extract

  • Optional topping: ground cinnamon


👩‍🍳 Step-by-Step Instructions

1. Mix the Base

In a medium saucepan (while still cold), add:

  • almond milk

  • cornstarch

  • turmeric

  • ginger

  • black pepper

Whisk very well until the cornstarch is fully dissolved and the mixture is smooth with no visible lumps.

👉 This step is important to prevent clumping later.


2. Heat and Thicken

Place the saucepan over medium-low heat.

Stir constantly using a whisk or wooden spoon, making sure to scrape the bottom and sides of the pan.

After about 5–8 minutes, the mixture will:

  • become hot

  • thicken gradually

  • coat the back of a spoon

Once thick and smooth, remove from heat immediately.


3. Sweeten and Flavor

Stir in:

  • honey or maple syrup

  • vanilla extract

Mix until fully blended and smooth.

Taste and adjust sweetness if needed.


4. Portion and Set

Pour the custard into small bowls or ramekins.

You can enjoy it:

  • Warm for a soft pudding texture
    OR

  • Chilled by refrigerating for about 2 hours for a firmer custard


5. Finish and Serve

Before serving, lightly sprinkle:

  • cinnamon
    or

  • a tiny pinch of turmeric for color

Serve plain or with:

  • sliced bananas

  • berries

  • crushed nuts

  • coconut flakes


💡 Helpful Tips

  • If lumps appear, strain the hot custard through a fine mesh sieve before pouring into bowls.

  • For extra creaminess, use coconut milk instead of almond milk.

  • Stir constantly to prevent burning.

  • Do not boil hard—gentle heat gives the smoothest texture.


🍮 Texture & Flavor

✔ Smooth and creamy
✔ Lightly sweet
✔ Warm spice aroma
✔ Naturally golden in color

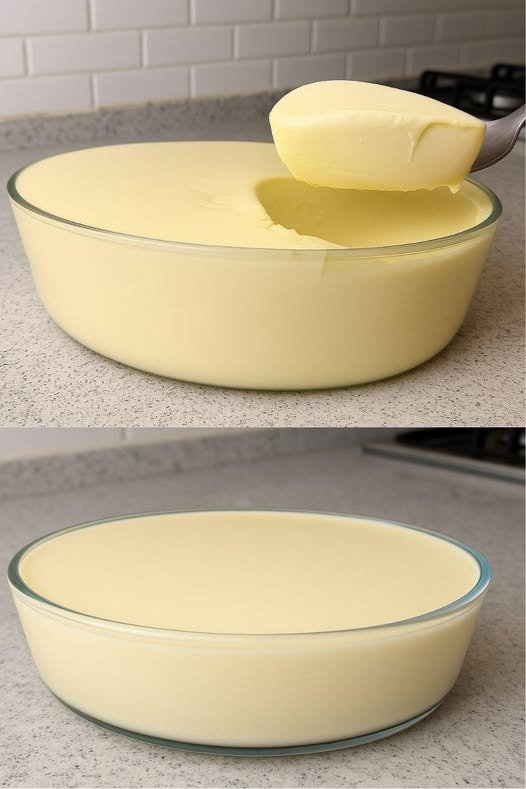
Pineapple Gelatin Dessert Recipe With 2 Ingredients, In 10 Minutes

Hi everyone, today we’re going to learn how to make Dessert Recipe using simple ingredients. So grab your pen and paper to jot down the ingredients, then follow the complete preparation method.


How to Make Dessert Recipe

Learn how to prepare for dessert without condensed milk and without milk with step-by-step recipes inspired by top online culinary schools. Whether you’re an aspiring chef or just love gourmet cooking at home, these professional recipe ideas are perfect for busy days and high-quality meals.

Recipe Ingredients:

  • 1 packet of pineapple-flavored gelatin (25 g / 0.9 oz)
  • 400 g (14 oz) heavy cream
  • 300 ml (10.1 oz) boiling water

Instructions:

Begin by gathering the three listed ingredients. In a bowl, combine the pineapple gelatin and boiling water. Stir until the gelatin is completely dissolved.

Transfer the dissolved gelatin to a blender, add the heavy cream, and blend until the mixture is smooth and well combined.

Pour the mixture into a serving glass dish and refrigerate for about 2-3 hours.

Once the dessert is set, serve and enjoy your quick and easy pineapple treat!

Extra Tip:

For variety, you can substitute the pineapple gelatin with any flavor of your choice to create a different dessert.

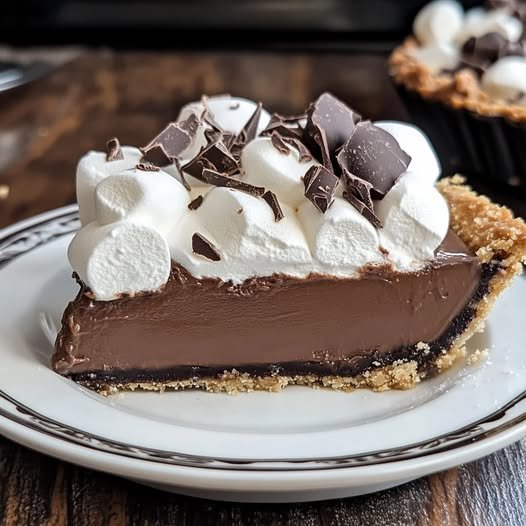
No-Bake Chocolate Marshmallow Pie

Why Is This Pie Called An “Easy” No-Bake Dessert?
This luscious chocolate pie comes together in just 30 minutes of active prep time. Aside from letting the filling chill for a few hours to set up, you’ll have this rich, dreamy dessert ready to dig into in no time. No need to turn on the oven during hot summer days or when you’re pressed for time around the holidays.

Whipping up the Oreo crust is a cinch in the food processor, while the silky chocolate-marshmallow filling beats together in just minutes. Before you know it, you’ll be topping buttery crisp crust and smooth mousse-like filling with fluffy sweet cream and pretty chocolate shavings. Simple ingredients come together for major decadence!

What Are The Key Ingredients That Make This Pie Ultra-Rich?
A trio of powerhouse ingredients gives this pie its ultra-rich flavor and luscious texture. High-quality dark chocolate lends deep, complex cocoa notes. Using a bar like Ghirardelli or Lindt makes a difference, so spring for the good stuff!

Sweet marshmallow crème intensifies the chocolate while making the filling light as air. And tangy cream cheese adds body and heightens the mouthwatering flavors. Using full-fat brick cream cheese instead of a tub leads to the best texture and taste.

And of course, Oreo cookies provide that signature flavor in the crust and give a fun nod with the crushed cookie garnish. This mighty trio of ingredients transforms simple pantry items into chocolate bliss!

How Do You Put Together This Showstopping Pie?
Crafting this beauty is surprisingly easy! Start by blitzing Oreos into fine crumbs for the crust. After pressing them into the springform pan and chilling, it’s time for the fun part.

Melt bittersweet chocolate bars until smooth for the filling. Then whip some cream to soft peaks before beating in cream cheese and marshmallow crème. Fold in the melted chocolate, followed by the airy sweet cream, until no streaks remain.

Pour this rich mixture over the Oreo crust, smoothing the top. Chill for at least 4 hours so flavors meld and it sets up. Finally, whip more cream and dollop it over the top of the pie. Finish off with crushed cookies or chocolate shavings if desired. Easy as (chocolate) pie!

How Can I Get The Perfect Sliceable Consistency?
The key to nailing that lush yet stable texture is in the whipped cream. Whip the heavy cream until it forms very stiff peaks with an airy, spreadable texture. This light and lofty whipped cream gives structure to the filling when folded together.

Using blocks of full-fat cream cheese instead of tubs also lends stability, tang, and richness. And be sure not to skip the long chill time to allow the filling to completely firm up. Follow those tips, and slicing beautiful wedges will be a breeze!

What Tips Help Streamline Prep?
I highly recommend using a springform pan here. Not only do the removable sides make serving a cinch, but you can also press the Oreo crust up the sides for a pretty presentation. Chilling that crust first gives it a head startdo on firming up too.

When melting chocolate, use 50% microwave power to prevent scorching. Check and stir every 30 seconds until smooth. And don’t forget to give yourself a few hours for the pie to chill and set—resisting sampling can be hard, but patience pays off in perfect slices!

How Should I Store Any Leftover Pie?
You likely won’t have to worry about leftovers with this vanishingly rich dessert! But if you do, it stores nicely covered in the fridge for 2-3 days. The crust retains its crunchy texture while the silky filling holds beautifully.

If making more than a day ahead, assemble the pie but wait to add the sweet whipped cream topping right before serving. A fresh, fluffy layer of sweet cream takes this treat over the top!

So now there’s no excuse not to dive into this easy yet elegant pie on your dessert table! In no time at all, you can be enjoying chocolate marshmallow decadence.

No-Bake Chocolate Marshmallow Pie Recipe
Ingredients:
Crust Components:
Oreos, 1 package (14 oz)—keep 2 aside for garnishing
Unsalted butter, 1/2 cup, melted
Mousse Filling:
Dark chocolate bars (your choice), Two 4 ounces (113g each)
Heavy whipping cream (cold), 1 cup (236 ml)
Cocoa powder, 3 tablespoons (15g)
Full-fat cream cheese (room temperature), 8 ounces (226g)
Granulated sugar, 2 tablespoons (24g)
Jet-Puffed Marshmallow Crème, 1 jar (7 oz)
Whipped Cream Topping:
Heavy whipping cream, 1 cup (236 ml)
Powdered sugar, 1/2 cup (65g)
Optional: Hot fudge sauce for drizzling
Optional: 2 crushed Oreos for garnish
Preparation Steps:
Crust Assembly:
Lightly grease a 9-inch springform pan with cooking spray, then wipe with a paper towel. Line with parchment paper.
Finely crush Oreos (using a food processor or blender).
Combine melted butter with crushed cookies until well mixed.
Press the mixture firmly into the pan’s bottom and sides. Chill while preparing the filling.
Mousse Filling:
Break one chocolate bar into pieces; melt in the microwave (60-90 seconds), stirring until smooth.
In a chilled metal bowl, beat cold whipping cream to stiff peaks. Gradually add cocoa powder; continue beating.
In a separate bowl, blend cream cheese and sugar until smooth. Add melted chocolate, then marshmallow crème. Mix well.
Fold whipped cream into the cream cheese mixture.
Chop the second chocolate bar; fold into filling.
Pour filling over crust. Refrigerate for 3-4 hours.
Whipped Cream Topping:
Beat heavy whipping cream in a chilled bowl to soft peaks. Gradually add powdered sugar; beat to stiff peaks.
Spread or pipe onto chilled pie. Garnish with crushed Oreos and hot fudge sauce (optional).
Storage Note: Keep pie covered in the refrigerator for 2-3 days for optimal freshness.

Enjoy this blissful, no-bake delight that’s perfect for any occasion!


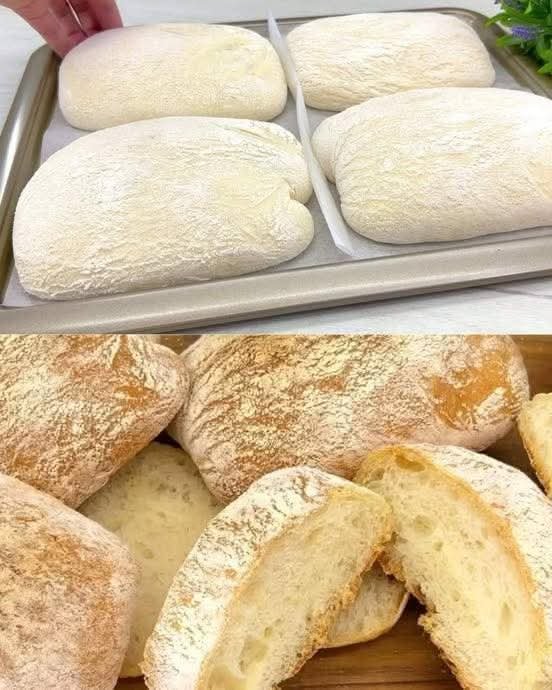
No-Knead Italian High-Hydration Bread

No-Knead Italian High-Hydration Bread

A rustic Italian-style bread with an open crumb and crisp, lightly floured crust


2 large loaves or 4–6 small loaves


Total Time

Approximately 60–70 minutes (excluding cooling)


Oven Temperature

220°C (430°F)


Ingredients

Yeast Starter

100 ml water, lukewarm


1 teaspoon granulated sugar


8 g dry yeast


3 tablespoons wheat flour (all-purpose or bread flour)


Main Dough

500 g wheat flour, sifted


1½ teaspoons salt


350 ml water, lukewarm


30 ml vegetable oil

1. Prepare the Yeast Starter

In a small bowl, combine the lukewarm water, sugar, and dry yeast.


Add the flour and whisk until a smooth mixture forms.


Cover the bowl and allow it to stand at room temperature for 10–15 minutes, until the mixture becomes foamy and visibly active.

2. Mix the Dough

Place the sifted flour and salt into a large mixing bowl and stir to distribute evenly.


Create a well in the center of the flour.


Pour in the prepared yeast starter, the remaining lukewarm water, and the vegetable oil.

Mix using a sturdy spoon or spatula until all ingredients are combined and a very soft, sticky dough forms.


The dough should be fluid and elastic rather than firm; this high moisture content is essential for an open internal structure.


Cover the bowl and allow the dough to rise in a warm, draft-free environment for 30–40 minutes, until it has doubled in volume and shows visible air bubbles on the surface.

3. Shape the Bread

Generously flour a clean work surface.


Carefully transfer the risen dough onto the floured surface, handling it gently to preserve the air inside.


Lightly dust the top of the dough with additional flour.


Using a dough scraper or lightly floured hands, divide the dough into 2 large portions or 4–6 smaller rectangular portions.

Place the shaped pieces onto a baking tray lined with parchment paper, leaving space between each loaf to allow for expansion.

4. Bake

Preheat the oven to 220°C (430°F).


Place the baking tray on the center rack of the oven.


Bake for 20–25 minutes, until the bread is evenly golden and the crust is firm.


Remove from the oven and transfer the loaves to a wire rack.


Allow the bread to cool for at least 15 minutes before slicing to allow the crumb to stabilize

Storage

Best consumed on the day of baking


Can be stored at room temperature for up to 24 hours


Freeze once fully cooled for longer storage

Pineapple, Strawberry & Mango Smoothie with Almond Milk

Pineapple, Strawberry & Mango Smoothie with Almond Milk

This bright and refreshing smoothie is a perfect blend of tropical fruits and creamy almond milk. It is naturally sweet, colorful, and full of fresh flavor, making it an excellent choice for breakfast, a midday refreshment, or a light evening treat. The combination of pineapple, strawberries, and mango creates a smooth balance of sweetness and gentle tang, while honey adds a soft natural sweetness. Ice cubes help give the drink a cool, thick, and satisfying texture.


Ingredients (Serves 1–2)

1 cup fresh pineapple chunks


1 cup ripe mango cubes


¾ cup fresh strawberries, washed and sliced


1½ cups unsweetened almond milk


1–2 teaspoons honey (adjust to taste)


5–6 ice cubes


Optional Toppings

A few chopped strawberries


Small mango cubes


Pineapple pieces


Instructions

Prepare the Fruits

Begin by washing all fruits thoroughly. Peel the pineapple and mango, then cut them into small, even chunks. Remove the green tops from the strawberries and slice them in half. Preparing the fruit evenly helps everything blend smoothly.


Layer the Ingredients

Add the pineapple chunks to the blender first, followed by mango and strawberries. Pour in the almond milk to help the blades move easily. Add honey for gentle sweetness, then place the ice cubes on top.


Blend Until Smooth

Secure the lid and blend on medium to high speed for 30–45 seconds, or until the mixture becomes creamy and smooth. Stop once or twice to scrape down the sides if needed.


Check Texture and Taste

If the smoothie feels too thick, add a little more almond milk and blend again. Taste and add a bit more honey if you prefer extra sweetness.


Serve and Garnish

Pour the smoothie into a tall glass. Top with a few fresh fruit pieces for a beautiful finish. Se

rve immediately with a straw.


Helpful Tips