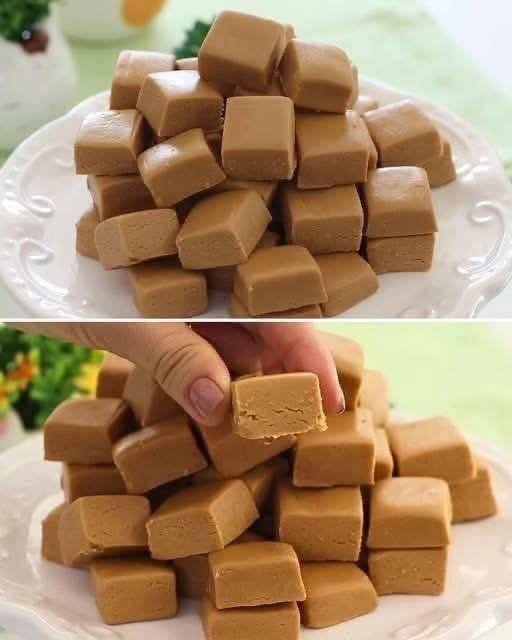
Sweet milk fudge squares

Total Time: 4 hours 15 minutes (15 minutes active, 4 hours chilling)
Difficulty: Easy
Yield: 16 rich, 2-inch squares

There’s a special kind of magic in a dessert that requires no oven, yet yields a result so creamy, sweet, and decadent it feels like a cherished secret. Sweet Milk Fudge Squares are exactly that—a timeless, no-bake confection that marries the deep caramelized flavor of cooked sweetened condensed milk with the satisfying crunch of a graham cracker crust. Unlike traditional fudge, these squares are velvety smooth and sliceably firm, offering a perfect balance of simplicity and indulgence. They’re the ideal treat for a potluck, a holiday platter, or a moment when you need a little sweet comfort.

Ingredients
For the Crust:
1 ½ cups (about 150g) graham cracker crumbs (from roughly 12 full sheets)

⅓ cup (75g) granulated sugar

6 tablespoons (85g) unsalted butter, melted

Pinch of salt

For the Fudge Filling:
1 can (14 oz or 397g) full-fat sweetened condensed milk

2 cups (about 340g) high-quality semi-sweet chocolate chips

2 tablespoons (28g) unsalted butter

1 teaspoon pure vanilla extract

¼ teaspoon fine sea salt

For Topping (Optional but Recommended):
A light sprinkle of flaky sea salt (like Maldon)

Or, a dusting of cocoa powder

Equipment Needed
8×8 inch square baking pan

Parchment paper

Medium mixing bowl

Medium saucepan

Whisk and spatula

Heatproof bowl (for double boiler method, if using)

Step-by-Step Instructions
Step 1: Prepare the Pan & Make the Crust
Time: 10 minutes | Intensity: Low

Line the Pan: Line your 8×8 inch pan with parchment paper, leaving an overhang on two opposite sides. This “sling” will make removing the fudge squares effortless. Lightly grease any exposed sides of the pan.

Mix Crust: In a medium bowl, combine the graham cracker crumbs, sugar, and a pinch of salt. Pour the melted butter over the mixture and stir with a fork until the crumbs are evenly moistened and resemble wet sand.

Press Firmly: Transfer the crumb mixture to the prepared pan. Using the bottom of a flat glass or measuring cup, press the crumbs firmly and evenly into the base of the pan to create a compact, solid crust. Set aside.

Step 2: Create the Luscious Fudge Filling
Time: 10-15 minutes | Intensity: Medium (requires focus)

Stovetop Method (Direct):

Combine & Melt: In a medium saucepan over low heat, combine the entire can of sweetened condensed milk, chocolate chips, and 2 tablespoons of butter.

Cook Gently: Stir constantly with a whisk or silicone spatula. The mixture will look separated at first but will gradually come together into a thick, glossy, homogeneous “pudding” as the chocolate melts. This should take about 5-7 minutes. Do not let it boil.

Finish: Once completely smooth and no streaks of condensed milk remain, remove from heat. Immediately stir in the vanilla extract and ¼ teaspoon of sea salt. The salt is crucial—it elevates the chocolate flavor and cuts the sweetness perfectly.

Alternative: Double Boiler Method
If you’re concerned about scorching, place a heatproof bowl over a pot of gently simmering water (ensure the bowl doesn’t touch the water). Combine all filling ingredients in the bowl and stir until melted and smooth.

Step 3: Assemble & Chill to Set
Time: 4 hours (mostly inactive) | Intensity: Low

Pour & Spread: Immediately pour the hot fudge filling over the prepared crust. Use an offset spatula or the back of a spoon to spread it into a perfectly smooth, even layer.

Top (Optional): If using, sprinkle a few flakes of sea salt evenly over the surface for a gorgeous, professional finish and a delightful salty contrast.

The Long Chill: This is the most important step for the perfect texture. Allow the pan to cool at room temperature for 15 minutes, then transfer to the refrigerator. Chill for at least 4 hours, or ideally overnight, until the fudge layer is completely firm and set.

Step 4: Slice & Serve
Time: 5 minutes | Intensity: Low

Remove from Pan: Using the parchment paper sling, gently lift the entire block of fudge out of the pan and onto a cutting board.

Slice Cleanly: For pristine squares, wipe a long, sharp knife with a hot, damp cloth and dry it between each cut. Cut the block into 4 rows by 4 rows to make 16 squares. For a cleaner cut, you can briefly warm the knife under hot water.

Serve & Store: Arrange the squares on a serving plate. Store any leftovers in a single layer in an airtight container in the refrigerator for up to 1 week.

Chef’s Notes & Tips for Success
Chocolate Choice Matters: The quality of your chocolate chips directly impacts the flavor. A good semi-sweet chip (around 50-60% cacao) provides the best balance. Milk chocolate can be used for a sweeter, milder fudge.

Patience is Key: Rushing the chilling process will result in messy, soft squares that won’t hold their shape. The overnight chill is truly worth it.

Customize It: Stir ½ cup of chopped toasted nuts (pecans, walnuts) or a handful of mini marshmallows into the fudge filling just before pouring. You can also substitute the graham crackers with digestive biscuits or vanilla wafers for a different crust flavor.

Gifting Idea: These squares stack beautifully in a small gift box lined with parchment, making them a wonderful homemade present.

Nutrition Information
(Per serving, 1 square, calculated without optional toppings)

Calories: ~280 kcal

Total Fat: 15g

Saturated Fat: 9g

Cholesterol: 25mg

Sodium: 115mg

Total Carbohydrates: 34g

Dietary Fiber: 1g

Sugars: 29g

Protein: 3g

Note: Nutritional information is an estimate calculated using a database and may vary based on specific brands and measurements used.

In Conclusion, these Sweet Milk Fudge Squares are a testament to the fact that the most beloved recipes are often the simplest. With minimal effort and a handful of pantry staples, you create a dessert of pure, nostalgic joy. The creamy, dense fudge paired with the buttery, crisp crust is a combination that never fails to delight. So, clear a space in your fridge, and get ready to make a treat that will have everyone asking for the recipe. Enjoy!
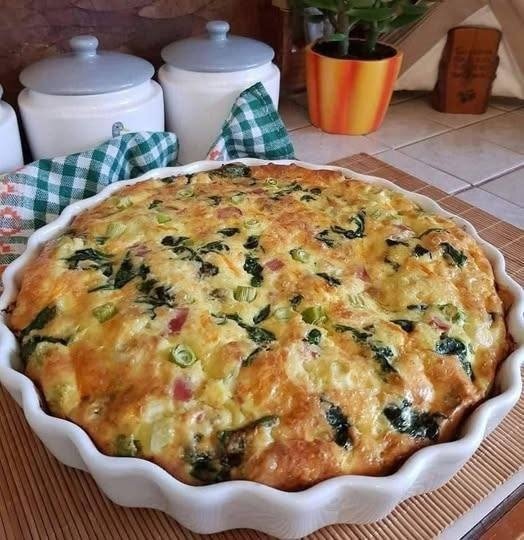
Mediterranean Spinach & Cheese Crustless Bake

A light, savory oven bake inspired by Greek flavors

This Mediterranean Spinach & Cheese Crustless Bake is a beautifully simple dish that sits somewhere between a crustless quiche and a spanakopita-style casserole. Made with eggs, creamy yogurt, tender spinach, and a blend of melty and tangy cheeses, it bakes up fluffy on the inside with a lightly golden top. Naturally gluten-free and low in carbs, it’s a wonderful option for breakfast, brunch, or a quick dinner served with a fresh salad.

The absence of a crust keeps this dish light while allowing the Mediterranean flavors to shine. Greek yogurt adds moisture and a gentle tang, while feta brings saltiness and depth. It’s an easy recipe to customize and holds up well for meal prep, making it a practical yet satisfying addition to your weekly menu.

Ingredients

  • 6 large eggs
  • 1 cup Greek yogurt (or plain yogurt)
  • 3 tbsp extra-virgin olive oil, divided
  • 1½ cups fresh spinach, chopped (or frozen spinach, well-drained)
  • 1 cup shredded mozzarella or kasseri cheese
  • ½ cup crumbled feta cheese
  • 1 small onion, finely chopped
  • ½ cup chopped green onions or leeks
  • 1 clove garlic, minced
  • ½ tsp dried oregano
  • ½ tsp black pepper
  • ¾ tsp salt (adjust to taste)

Optional Add-Ins

  • ¼ cup diced cooked turkey, chicken, or ham
  • ¼ cup chopped zucchini or bell pepper

Instructions

  1. Preheat the oven
    Preheat your oven to 375°F (190°C). Lightly grease a round or square baking dish with olive oil and set aside.
  2. Prepare the vegetables
    Heat 1 tablespoon of olive oil in a skillet over medium heat. Add the chopped onion and sauté for 3–4 minutes until soft and translucent. Stir in the garlic and cook for another 30 seconds until fragrant. Add the spinach and cook just until wilted. Remove from heat and let cool slightly.
  3. Mix the egg base
    In a large bowl, whisk together the eggs, Greek yogurt, remaining olive oil, salt, black pepper, and dried oregano until smooth and well combined.
  4. Combine everything
    Fold the cooled spinach mixture into the egg base. Gently stir in the shredded mozzarella, crumbled feta, and green onions. If using any optional add-ins like cooked meat or extra vegetables, fold them in at this stage.
  5. Bake
    Pour the mixture into the prepared baking dish and smooth the top. Bake uncovered for 35–40 minutes, or until the center is set and the top is lightly golden.
  6. Rest and serve
    Remove from the oven and allow the bake to rest for about 10 minutes before slicing. This helps it firm up and makes cleaner slices.
See also  Mediterranean Pepperoni Pizza Grilled Cheese

Serving Suggestions

  • Serve warm or at room temperature with a Greek cucumber-tomato salad
  • Add olives and extra feta on the side
  • Enjoy leftovers for breakfast or lunch throughout the week

Storage & Tips

This bake keeps well in the refrigerator for 3–4 days and reheats beautifully. It can also be sliced and frozen for up to 2 months. Simply thaw overnight and warm gently before serving.

Light, fluffy, and full of Mediterranean comfort, this crustless bake proves that simple ingredients can create something truly satisfying 🌿✨

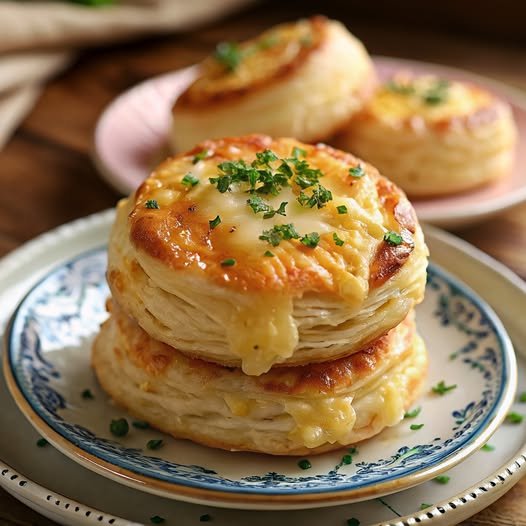
Ham and Cheese Butter Swim Biscuits

Ham and Cheese Butter Swim Biscuits

These biscuits are unique because they literally “swim” in melted butter while baking, creating a crispy, golden crust on the outside while staying incredibly moist on the inside.

  • Prep time: 15 minutes

  • Bake time: 25–30 minutes

  • Servings: 9 large biscuits


Ingredients

The Dry & Mix-ins:

  • 2 ½ cups All-purpose flour

  • 2 cups Small diced ham

  • 1 ½ cups Shredded cheddar cheese (sharp cheddar works best!)

  • 1 tbsp Granulated sugar

  • 1 tbsp Baking powder

  • 1 tsp Salt

The Wet:

  • 2 cups Cold buttermilk

  • 1 stick (½ cup) Unsalted butter, melted


Instructions

  1. Preheat and Prep: Preheat your oven to 450°F (230°C). Pour the melted butter into an 8×8 or 9×9 inch metal or glass baking pan, coating the bottom evenly.

  2. Mix Dry Ingredients: In a large bowl, whisk together the flour, sugar, baking powder, and salt. Stir in the diced ham and shredded cheese until they are well-coated in the flour mixture (this prevents them from sinking).

  3. Add Buttermilk: Gently pour the buttermilk into the dry mixture. Stir with a spatula just until a wet, shaggy dough forms. Do not overmix, or the biscuits will become tough!

  4. The “Swim”: Turn the dough out directly into the pan of melted butter. Use a spatula to gently spread the dough to the edges of the pan. It’s okay if butter splashes up over the top; that’s exactly what you want.

  5. Pre-cut: Using a knife or a bench scraper, cut the dough into a 3×3 grid (9 squares) while it is still raw in the pan. This helps the butter seep into the cracks.

  6. Bake: Bake for 25–30 minutes, or until the tops are deep golden brown and the butter has been fully absorbed.

  7. Serve: Let them rest for about 5 minutes before re-cutting along your lines and serving warm.


Pro-Tips for Extra Flavor

  • Herb Topping: As seen in your photo, a sprinkle of fresh chopped parsley or chives right after baking adds a beautiful pop of color and freshness.

  • Honey Glaze: If you like a sweet-and-salty vibe, drizzle a little honey over them while they are steaming hot.

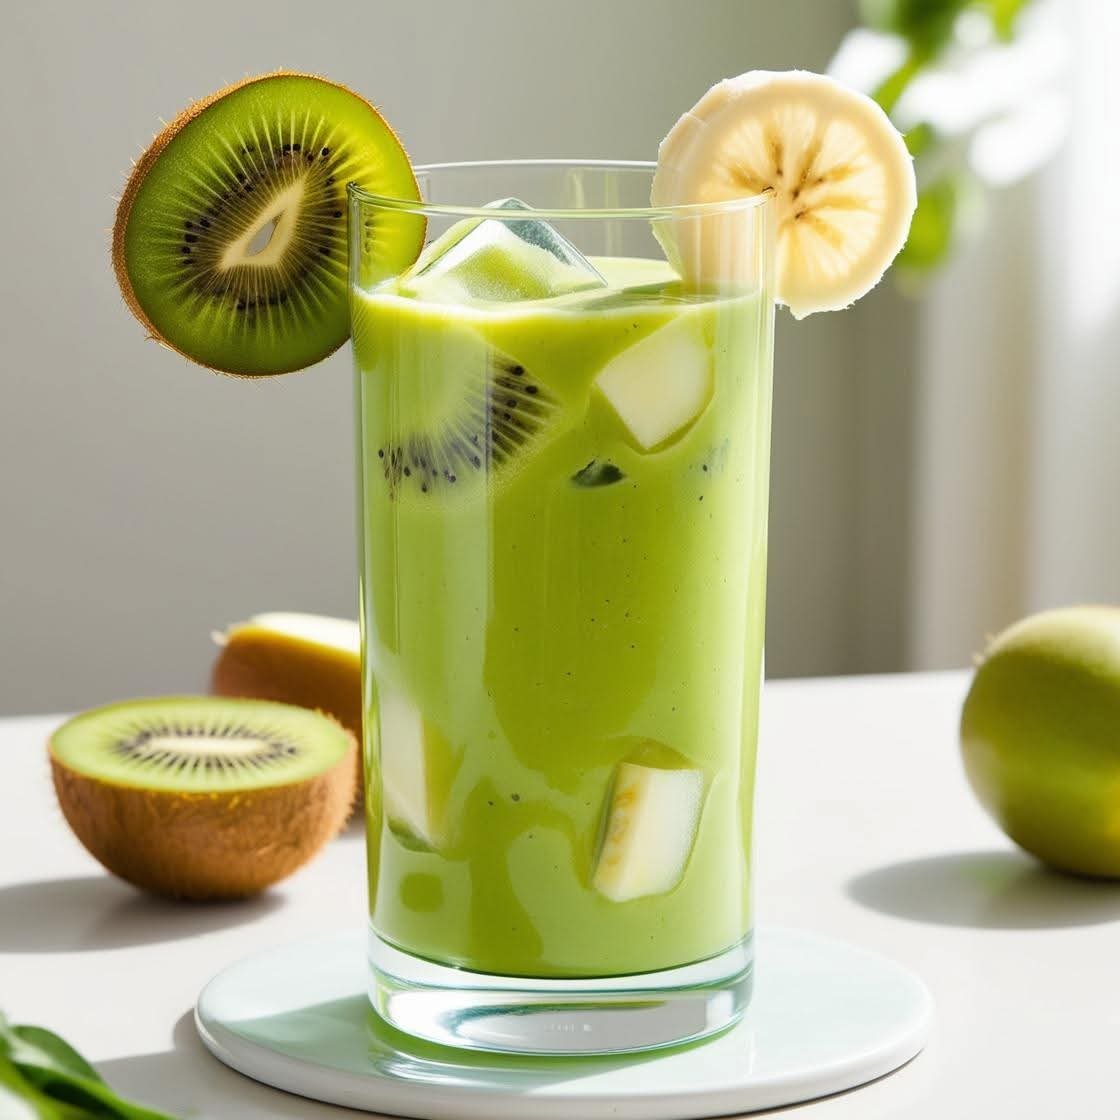
🥝 Creamy Kiwi-Banana Smoothie


🥝 Creamy Kiwi-Banana Smoothie

Prep time: 5 minutes | Servings: 1 large glass


Ingredients

2 ripe kiwis (peeled and sliced)


1 frozen banana (sliced; using a frozen banana gives it that thick, creamy texture)


1/2 cup Greek yogurt (plain or vanilla)


1/2 cup milk of choice (almond, oat, or dairy)


1 tsp honey or maple syrup (optional, depending on how sweet your fruit is)


Handful of ice cubes


Extra slices of kiwi and banana (for garnish)


Instructions

Prepare the Fruit: Peel your kiwis and banana. To get the look in the photo, set aside one round slice of each fruit to perch on the rim of the glass.


Blend: Place the kiwis, frozen banana, yogurt, milk, and sweetener into a high-speed blender.


Adjust Texture: Add the ice cubes and blend on high until the mixture is completely smooth and bright green. If it’s too thick, add a splash more milk; if too thin, add more ice.


Assemble: Pour into a tall glass. If you want the “fruit inside” look from the photo, drop a few small kiwi chunks into the glass before pouring.


Garnish: Slice a small notch into your reserved kiwi and banana rounds and slide them onto the rim of the glass.


💡 Pro-Tips for the Best Result

The Color: If you want an even more intense green without changing the flavor, toss in a small handful of fresh baby spinach. You won’t taste it, but it boosts the nutrients and the “wow” factor.


The Ripeness: Make sure your kiwis are slightly soft to the touch. Under-ripe kiwis can be quite tart and grainy.

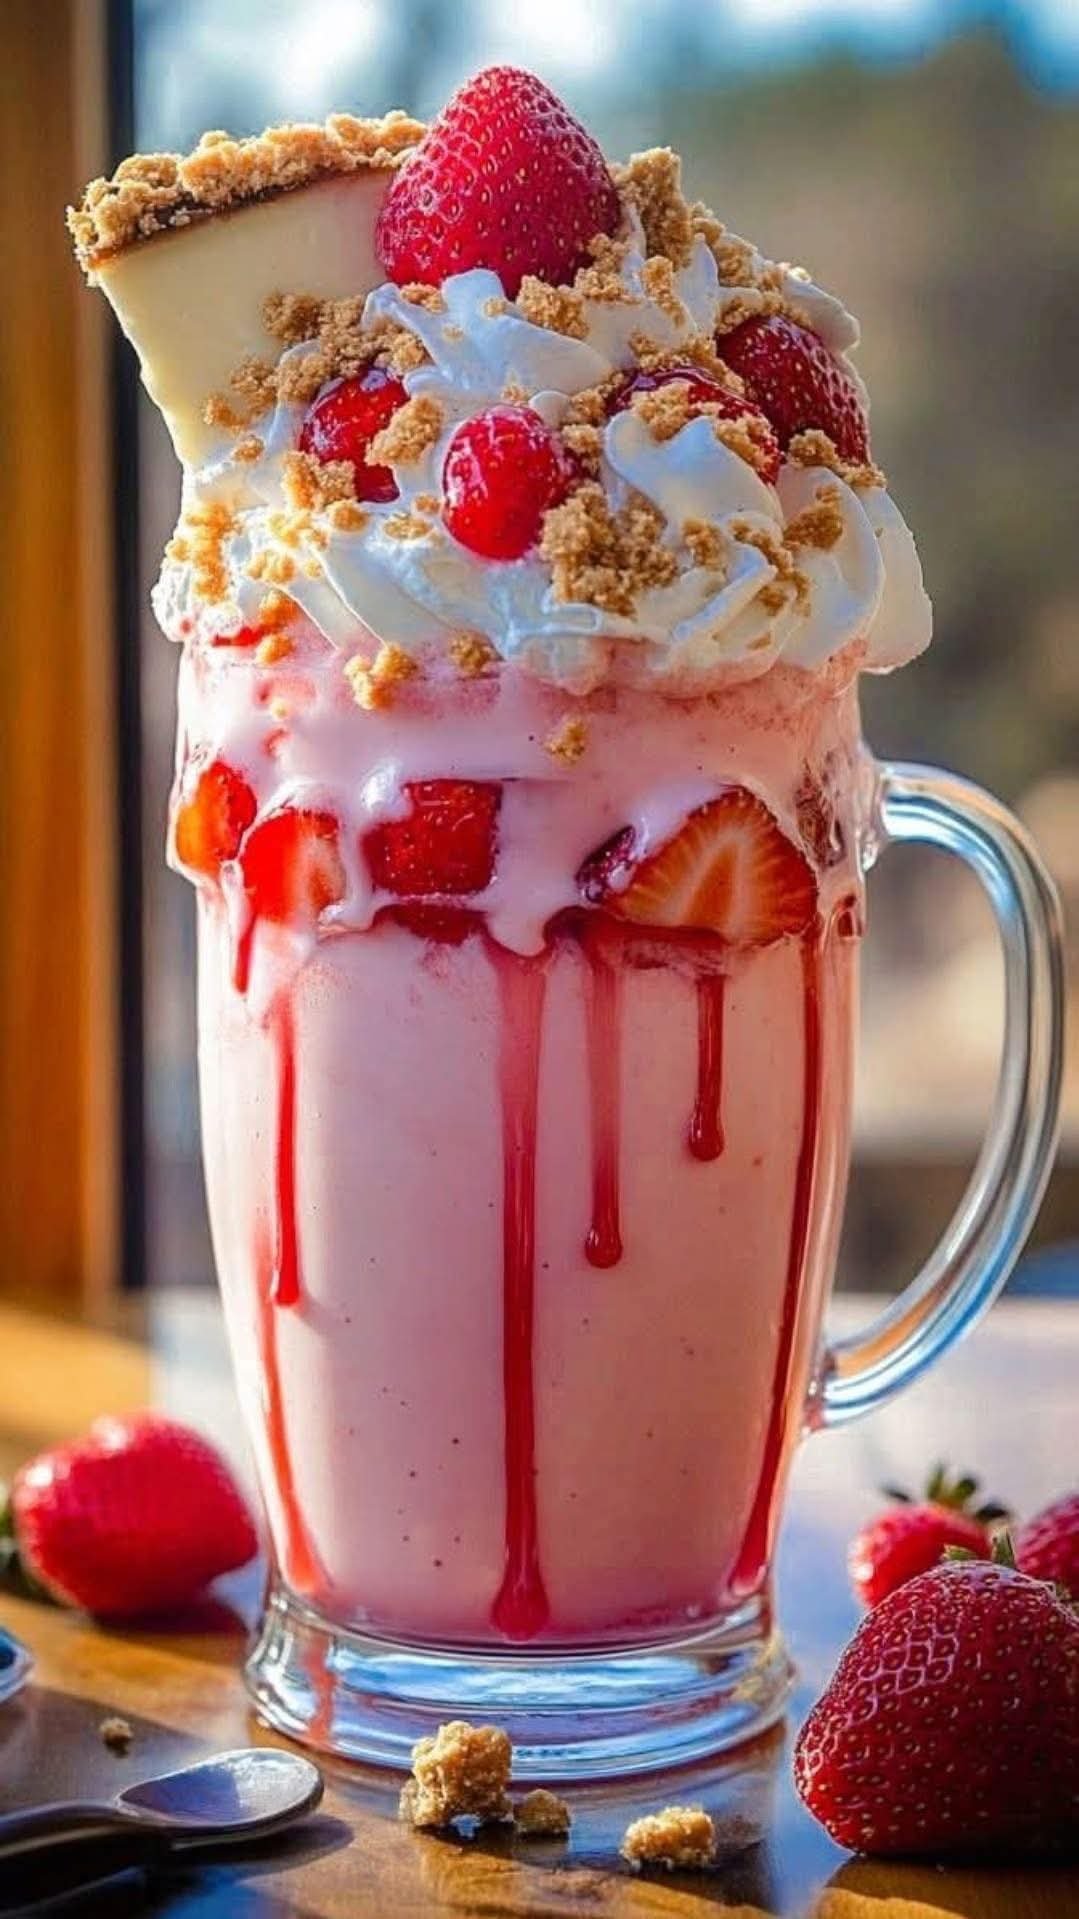
🍓 The Ultimate Strawberry Cheesecake Freakshake

🍓 The Ultimate Strawberry Cheesecake Freakshake

🛒 Ingredients

For the Milkshake Base:


3 large scoops Premium vanilla or strawberry ice cream


1/2 cup Fresh strawberries (hulled)


1/4 cup Whole milk (adjust for desired thickness)


1 tbsp Cream cheese (softened, for 그 cheesecake tang)


For the Assembly & Toppings:


Strawberry syrup: For the “drip” effect


Whipped cream: Heavy and stable


Graham crackers: Crushed into crumbs


Fresh strawberries: Whole and sliced


1 slice Classic New York Style Cheesecake (the star topping!)


👩‍🍳 Preparation Steps

Prep the Glass: Drizzle strawberry syrup along the inside walls of a large glass or mason jar. Let it drip down naturally. For an extra touch, smear a little frosting or honey around the outer rim and press crushed graham crackers into it.


Blend the Base: In a blender, combine the ice cream, fresh strawberries, milk, and softened cream cheese. Blend until smooth but still very thick.


The Pour: Carefully pour the milkshake into the prepared glass, leaving about an inch of space at the top.


The “Freak” Toppings:


Pipe a generous mountain of whipped cream on top.


Carefully rest a slice of cheesecake on the rim/whipped cream.


Nestle whole strawberries into the cream.


Generously sprinkle graham cracker crumbs over everything.


Final Flourish: Add one last drizzle of strawberry syrup over the cheesecake and whipped cream.


💡 Pro-Tips for Success

Chill your glass: Put the glass in the freezer for 15 minutes before starting. This keeps the shake thick and helps the syrup “sticks” to the sides better.


The Support System: If the cheesecake slice feels heavy, you can insert a thick straw or a wooden skewer through the shake to help anchor the cake slice in place.


Note: This is a very rich treat, so it’s perfect for sharing with a friend!

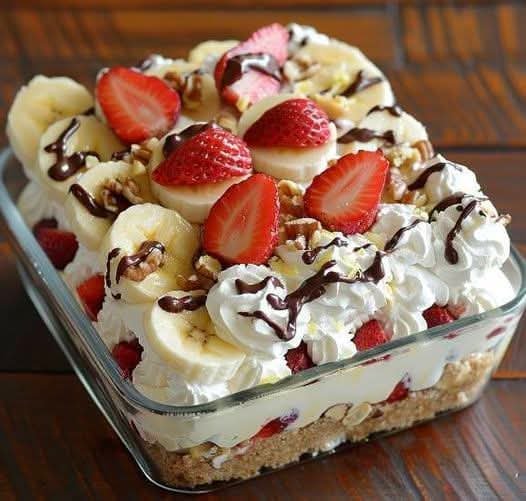
Banana Split Dessert Recipe

Banana Split Dessert Recipe

Yields: 12–15 servings | Prep time: 30 minutes | Chill time: 4 hours


The Ingredients

Layer Ingredients

Crust 2 cups Graham cracker crumbs, 1/2 cup melted butter, 1/4 cup sugar

Cream Layer 8 oz softened cream cheese, 1/2 cup softened butter, 2 cups powdered sugar

Fruit Layer 3-4 ripe bananas (sliced), 1 lb fresh strawberries (sliced)

Topping 8 oz Whipped topping (like Cool Whip), chopped walnuts or pecans

Garnish Chocolate syrup, extra fruit, and maraschino cherries (optional)

Preparation Steps

Prepare the Base: Combine the graham cracker crumbs, melted butter, and sugar. Press the mixture firmly into the bottom of a 9×13 inch glass baking dish. Chill in the freezer for 10 minutes to set.


Make the Cream Filling: In a large bowl, beat the softened cream cheese and 1/2 cup butter until smooth. Gradually add powdered sugar and beat for about 3–5 minutes until the mixture is light and fluffy. Spread this evenly over the crust.


Layer the Fruit: Place a single layer of sliced bananas over the cream mixture. Follow this with a layer of sliced strawberries.


Add the Whipped Topping: Spread the whipped topping (or homemade whipped cream) over the fruit, smoothing it out to the edges.


Decorate: As seen in your photo, use a piping bag to add extra swirls of whipped cream. Top with more banana slices, strawberry halves, and a generous sprinkle of chopped nuts.


The Finishing Touch: Drizzle chocolate syrup over the top in a zigzag pattern.


Chill: Cover and refrigerate for at least 4 hours (overnight is even better) to allow the layers to firm up so they can be sliced cleanly.


Pro-Tips for Success

Prevent Browning: To keep the bananas on top looking fresh, you can toss them in a little lemon juice before placing them on the dessert.


Crust Variation: If you want a saltier kick, swap the graham crackers for crushed pretzels!


Serving: Use a sharp knife dipped in warm water to get those perfect, clean layers when slicing.