Pomegranate & Ginger Glow Smoothie

Pomegranate & Ginger Glow Smoothie

This recipe balances the earthy sweetness of carrots with the tartness of pomegranate and a spicy kick of fresh ginger.


Ingredients

Category Ingredient Quantity

The Base Fresh Carrot Juice (or 2 chopped carrots) 1 cup

The Fruit Pomegranate Arils (seeds) ½ cup

The Kick Fresh Ginger 1-inch knob, peeled

Creaminess Greek Yogurt or Frozen Banana ½ cup

Liquid Coconut Water or Orange Juice ½ cup

Garnish Fresh Mint & Pomegranate Seeds For topping

Instructions

Prep the Veggies: If you don’t have a juicer, finely chop the carrots so they blend easily. Peel your ginger using the edge of a spoon.


Combine: Place the carrot juice, pomegranate seeds, ginger, and your choice of creaminess (banana or yogurt) into a high-speed blender.


Blend: Start on a low setting and gradually increase to high. Blend for about 60 seconds until completely smooth.


Note: If using whole pomegranate seeds, you may want to strain the mixture through a fine-mesh sieve if you prefer a silkier texture.


Adjust: If it’s too thick, add a splash more coconut water. If you want it colder, add a handful of ice.


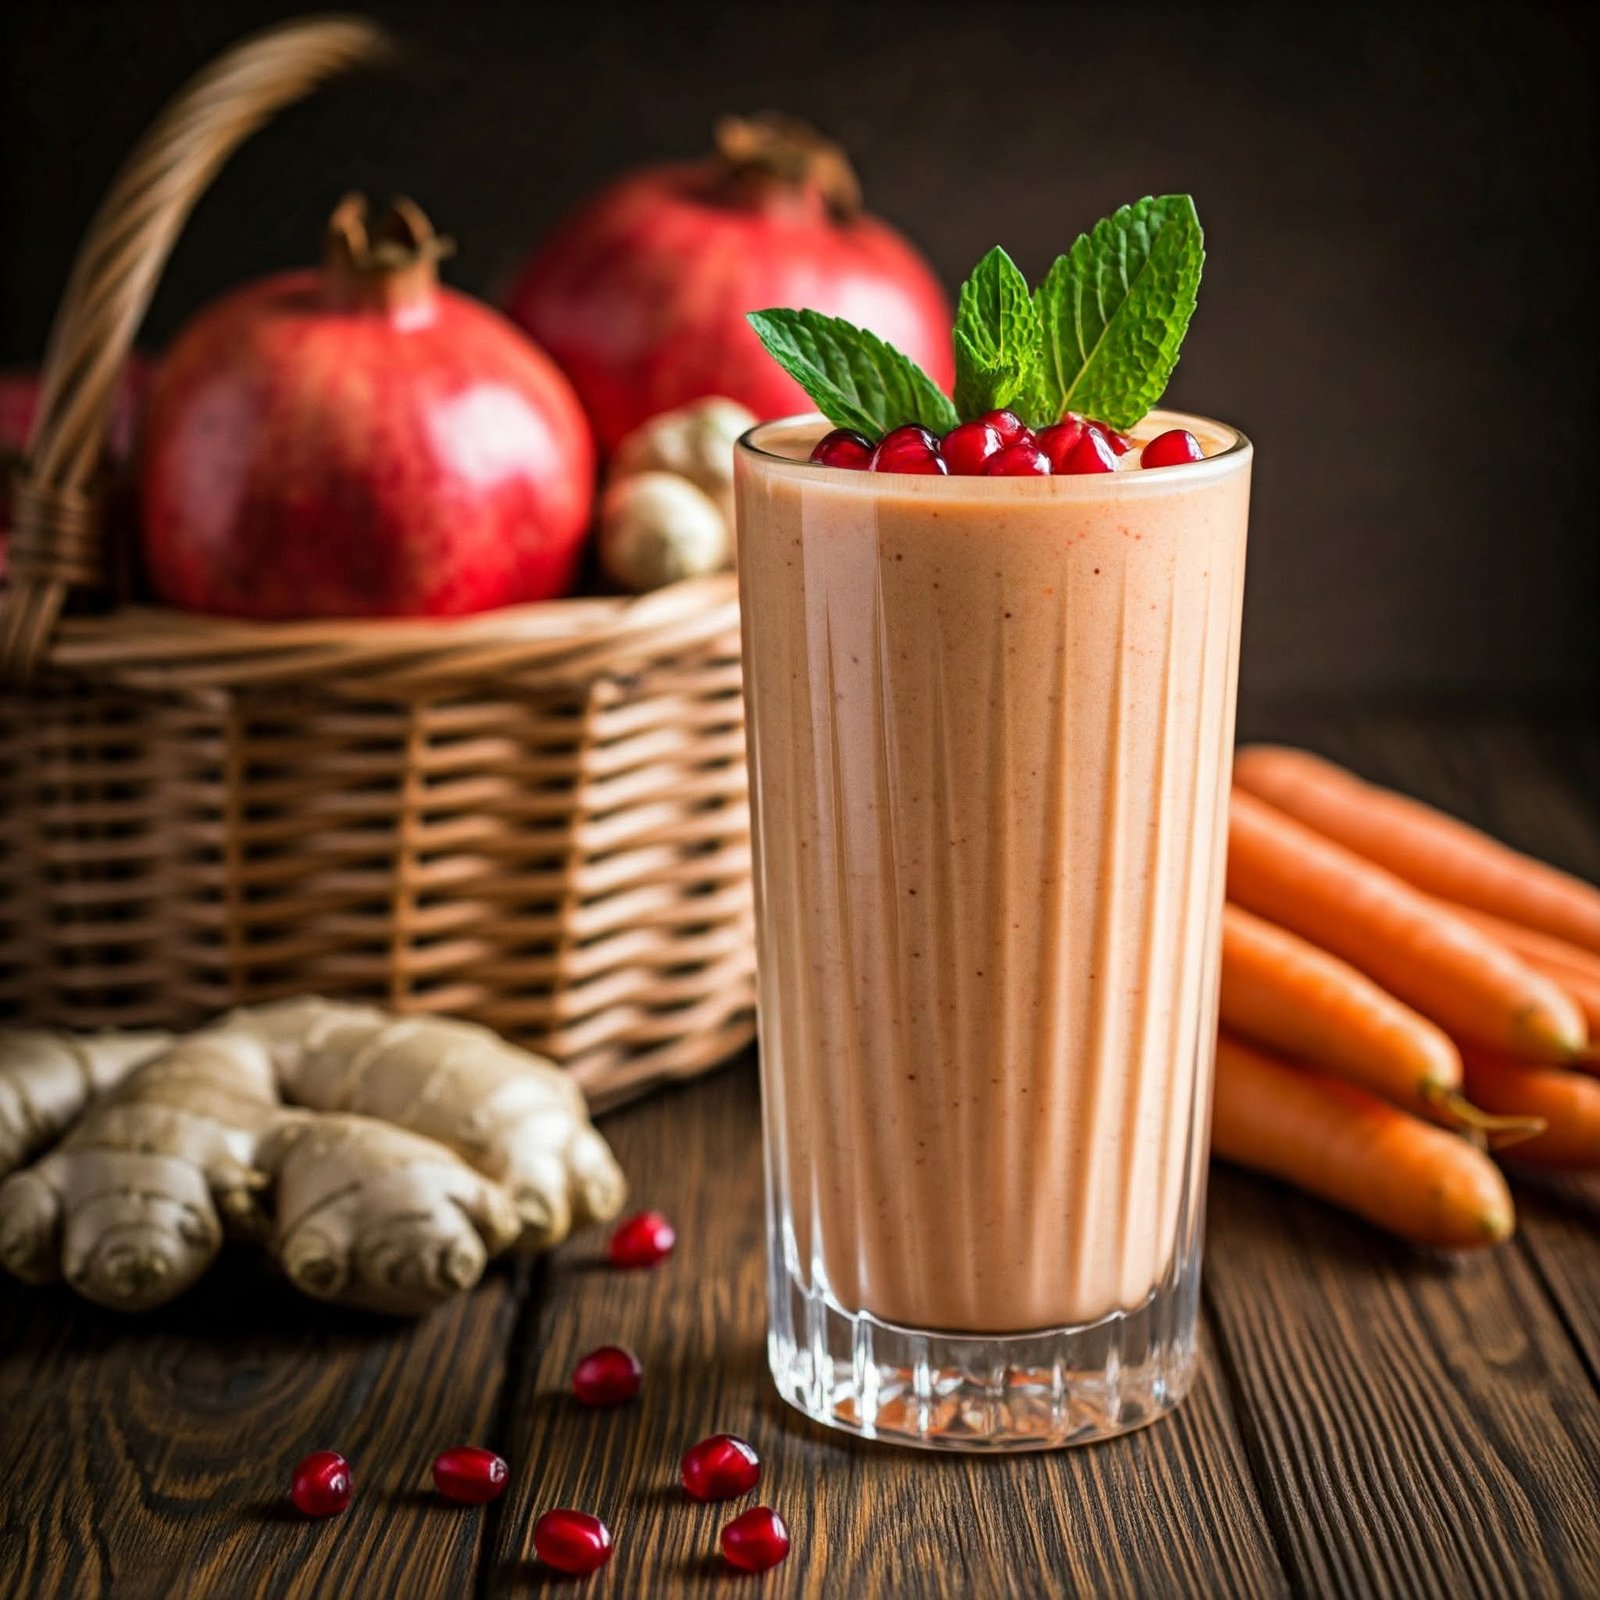
Serve: Pour into a tall glass and top with fresh mint leaves and a few extra pomegranate arils, just like in the photo!


Pro-Tip for Success

If you find the pomegranate seeds too “crunchy” for your blender, try using 100% pure pomegranate juice instead of the whole seeds for the liquid base. It keeps that deep flavor without the texture of the pits.


A depression era staple that kept families fed. Simple, filling, and more comforting than people expect.

 Ingredients

2 cups fresh or frozen peas

4 tablespoons butter

4 tablespoons all-purpose flour

2 cups milk (whole milk preferred)

1/2 teaspoon kosher salt, or to taste

1/4 teaspoon black pepper, or to taste

1/4 teaspoon sugar (optional, to round out the flavor)

1/8 teaspoon onion powder or a small pinch of finely minced onion (optional)

4–8 slices sturdy bread (white, wheat, or homemade), for toast

1–2 tablespoons butter, for buttering the toast

Chopped fresh parsley or a pinch of dried parsley for garnish (optional)

Directions

If using fresh peas, shell them and rinse under cool water. If using frozen peas, measure out 2 cups and set aside; no need to thaw completely.

In a medium saucepan, bring a small amount of water to a boil and add the peas. Simmer for 3–5 minutes, just until tender and bright green. Drain well and set aside. (If using very tender garden peas, they may need even less time.)

In the same saucepan or a clean one, melt 4 tablespoons of butter over medium heat. Once melted and just beginning to foam, sprinkle in the 4 tablespoons of flour.

Whisk the flour and butter together to form a smooth paste (a roux). Cook this mixture for 1–2 minutes, stirring constantly, to remove the raw flour taste. It should stay pale and smell slightly nutty, not browned.

Slowly pour in the milk, a little at a time, whisking constantly to keep the sauce smooth. At first it will look lumpy, but as you continue to add milk and whisk, it will come together into a silky sauce.

Season the sauce with salt, pepper, sugar if using, and onion powder or minced onion if desired. Continue to cook over medium heat, stirring often, until the sauce thickens enough to coat the back of a spoon, 3–5 minutes.

Gently stir the cooked, drained peas into the cream sauce. Reduce the heat to low and let the mixture simmer for another 2–3 minutes so the flavors can mingle. Taste and adjust the seasoning as needed.

While the peas are simmering, toast the bread slices until golden and crisp. Butter the hot toast lightly so it stays tender underneath the sauce.

To serve, place 1–2 slices of toast on each plate and spoon a generous amount of the creamed peas over the top. If you like, sprinkle with a little parsley for color.

Serve immediately while hot, with a fork and knife, and maybe a second slice of toast nearby in case you want to swipe up e

very last bit of sauce.

Polish Pickle Soup tastes like comfort with a zing

Full recipe>>>

Servings: 4–6


Prep time: 15 mins | Cook time: 30 mins


Ingredients

Category Item Quantity

The Base Chicken or Vegetable Broth 6 cups

Vegetables Potatoes (Gold/Yellow), cubed 3 medium

Carrots, sliced or grated 2 medium

Onion, finely diced 1 small

The Zing Dill Pickles (Fermented/Brined), grated 1.5 cups

Pickle Juice (from the jar) ½ to ¾ cup

Creamy Finish Sour Cream (full fat) ½ cup

All-purpose Flour (optional thickener) 1 tbsp

Herbs/Spice Fresh Dill, chopped ¼ cup

Butter 2 tbsp

Salt & Black Pepper to taste

Instructions

Sauté: Melt butter in a large pot. Add onions and carrots, sautéing for about 5 minutes until softened.


Simmer: Add the broth and cubed potatoes. Bring to a boil, then reduce heat and simmer until potatoes are fork-tender (about 12–15 minutes).


The Pickles: While the potatoes cook, sauté the grated pickles in a small pan with a teaspoon of butter for 3 minutes—this intensifies the flavor.


Combine: Add the pickles to the main pot. Important: Only add pickles after the potatoes are soft, or the acidity will keep the potatoes hard.


Temper & Cream: Whisk the sour cream and flour together in a small bowl. Ladle a bit of hot soup into the cream to “temper” it (so it doesn’t curdle), then pour the mixture back into the pot.


Season: Add the pickle juice, fresh dill, salt, and pepper. Simmer for another 5 minutes and serve.


Chef’s Tips & Notes

Pickle Choice: Use “Polskie Ogórki”—naturally fermented pickles in brine. Avoid “bread and butter” or sweet pickles; they will ruin the flavor profile.


The Grate Debate: Grating the pickles (rather than slicing) ensures you get a bit of tang in every single spoonful.


Leftovers: This soup actually tastes better the next day as the flavors meld.


Nutritional Info (Per Serving)

Calories: 210 kcal


Carbohydrates: 22g


Protein: 4g


Fat: 12g


Sodium: 980mg (High due to pickles—adjust broth salt accordingly!)

The Easiest No-Knead Crusty Bread

The Easiest No-Knead Crusty Bread

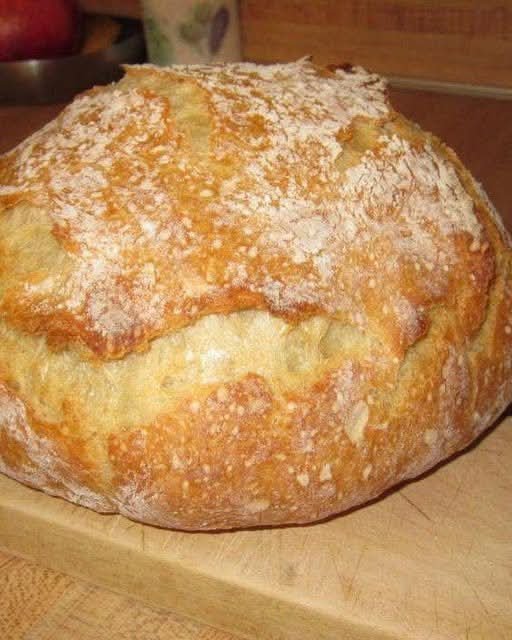
This bread features a thick, crackly crust and a soft, airy interior with those beautiful “crane” holes. By using a Dutch oven, you trap steam, which allows the bread to rise fully before the crust sets.

Prep time: 10 minutes (plus 12–18 hours rising)

Bake time: 45 minutes

Servings: 1 loaf (approx. 8–10 slices)

Ingredients

3 cups (390g) All-purpose flour or Bread flour (plus extra for dusting)

1 ½ cups (355ml) Lukewarm water

1 tsp Active dry yeast or Instant yeast

1 ½ tsp Salt

Instructions

Mix: In a large bowl, whisk the flour, salt, and yeast. Pour in the lukewarm water and stir with a wooden spoon or spatula until a shaggy, sticky ball forms. Do not overmix; you just want the flour hydrated.

The Long Nap: Cover the bowl tightly with plastic wrap or a beeswax wrap. Let it sit at room temperature (about 70°F or 21°C) for 12 to 18 hours. It’s ready when the surface is dotted with bubbles and it has more than doubled in size.

Prep for Heat: Place a 4-to-6 quart Dutch oven (with the lid) into your oven and preheat to 450°F (230°C). Let the pot get scorching hot for at least 30 minutes.

Shape: While the oven heats, scrape the dough onto a well-floured surface. Gently fold it over itself once or twice (don’t degas it too much!). Shape into a rough ball and let it rest on a piece of parchment paper for 30 minutes.

Bake: Carefully lift the parchment paper and dough and drop it into the hot Dutch oven.

Covered: Bake for 30 minutes.

Uncovered: Remove the lid and bake for another 12–15 minutes until the crust is deeply golden brown.

The Hardest Part: Let it cool on a wire rack for at least 1 hour before slicing. If you cut it too soon, the steam escapes and the inside can become gummy.

Pro Tips for Success

Sticky is Good: If the dough feels too wet to handle, don’t panic! Wetter dough leads to better steam and a loftier interior. Just use plenty of flour on your hands.

The “Ear”: For that professional look, use a sharp knife or razor to slash a 1/2-inch deep “X” or line across the top right before putting it in the pot.

No Dutch Oven? Use a heavy oven-safe pot with a tight lid, or bake on a preheated baking sheet and toss a few ice cubes into a separate tray on the bottom

rack to create steam.

Immune Boosting Soups to Power Your Body All Year Long

Full recipe>>> Prep time: 15 minutes


Cook time: 30 minutes


Servings: 4–6


Ingredients

1 cup Red or yellow lentils (rinsed)


2 tbsp Extra virgin olive oil or avocado oil


1 large Sweet potato, cubed


2 medium Carrots, sliced into rounds


2 stalks Celery, chopped


1 small Yellow onion, diced


3 cloves Garlic, minced


1 inch Fresh ginger, grated


1 tsp Ground turmeric (the star immune-booster)


½ tsp Black pepper (essential to activate the turmeric)


6 cups Vegetable or bone broth


2 cups Fresh spinach or kale, chopped


1 tbsp Fresh lemon juice (adds Vitamin C and brightens flavor)


Optional: Fresh parsley and crusty sourdough bread for serving.


Instructions

Sauté the Base: In a large pot, heat oil over medium heat. Add onion, carrots, and celery. Sauté for 5–7 minutes until softened.


Bloom the Spices: Add the garlic, ginger, and turmeric. Stir constantly for 1 minute until fragrant. This “blooms” the spices, releasing their essential oils.


Simmer: Stir in the lentils, sweet potatoes, and broth. Bring to a boil, then reduce heat to low. Cover and simmer for 20–25 minutes, or until lentils and potatoes are tender.


The Green Finish: Stir in the spinach (or kale) and lemon juice. Let the greens wilt for 2 minutes.


Season: Season with salt and extra black pepper to taste. Serve hot with a sprig of parsley.

Creamy Avocado & Banana Fuel Smoothie

Creamy Avocado & Banana Fuel Smoothie

Prep time: 5 minutes | Servings: 1


Ingredients

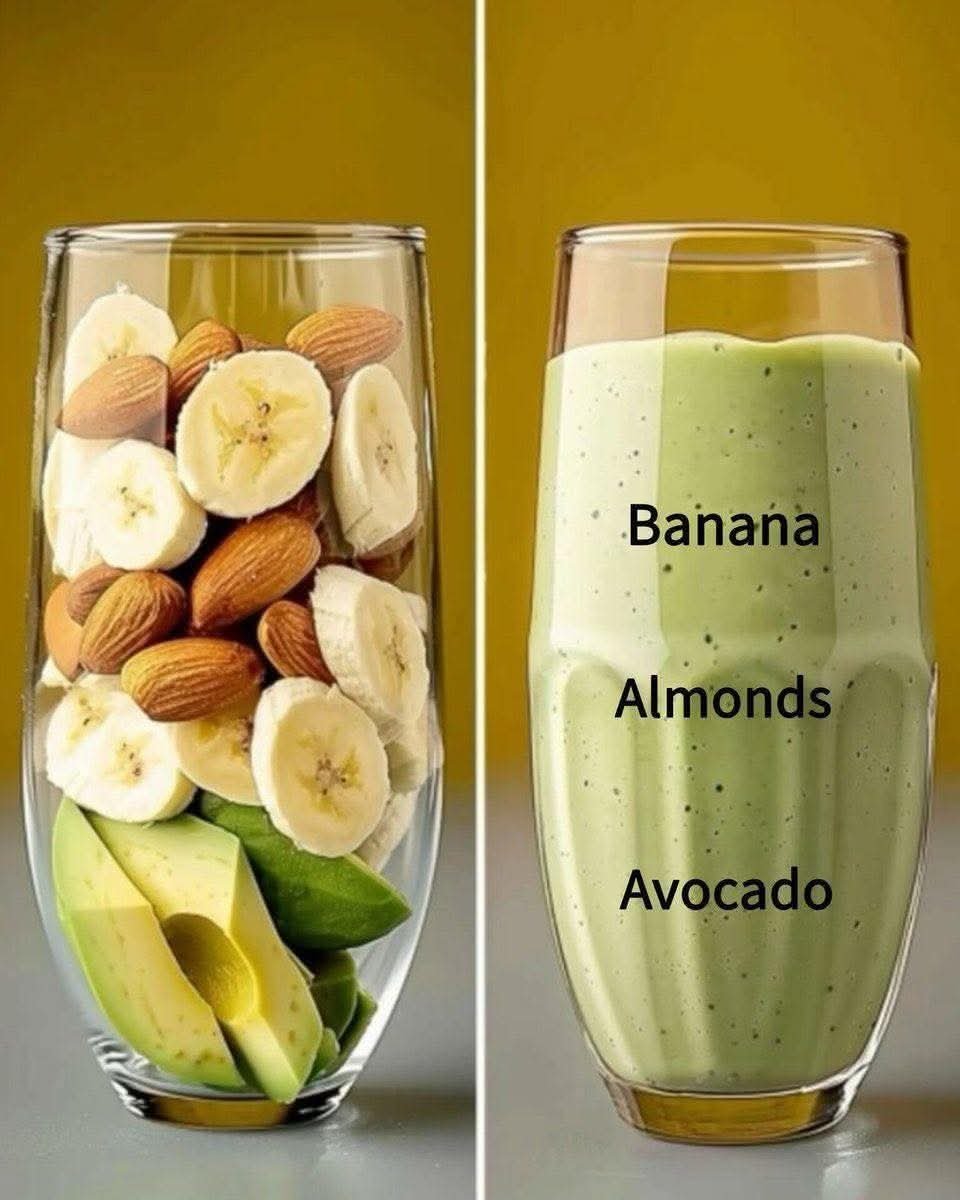
1/2 Medium Avocado: Ripe (should be soft to the touch).


1 Frozen Banana: Sliced (frozen gives it a colder, thicker texture).


2 tbsp Whole Almonds: Or 1 tbsp of almond butter for an even smoother finish.


1 cup Liquid: Unsweetened almond milk, oat milk, or coconut water work best.


Optional: A drizzle of honey or 1-2 pitted dates if you prefer it sweeter.

Instructions

Prep the Almonds: If you have a high-speed blender, you can toss the whole almonds right in. If your blender is less powerful, soak the almonds in water for 15 minutes beforehand or use almond butter to avoid “gritty” bits.


Layer the Blender: Add the liquid first, followed by the avocado and banana slices. This helps the blades spin freely and prevents stalling.


Blend: Start on a low speed to break up the frozen banana and nuts, then crank it up to high for 45–60 seconds until the mixture is completely velvety and pale green.


Adjust: If it’s too thick (more like a smoothie bowl), add an extra splash of liquid.


Quick Nutritional Tip


This smoothie is rich in monounsaturated fats (the heart-healthy kind) and potassium. Because it’s quite dense, it’s very satiating and works great as a meal replacement or a post-workout recovery drink.