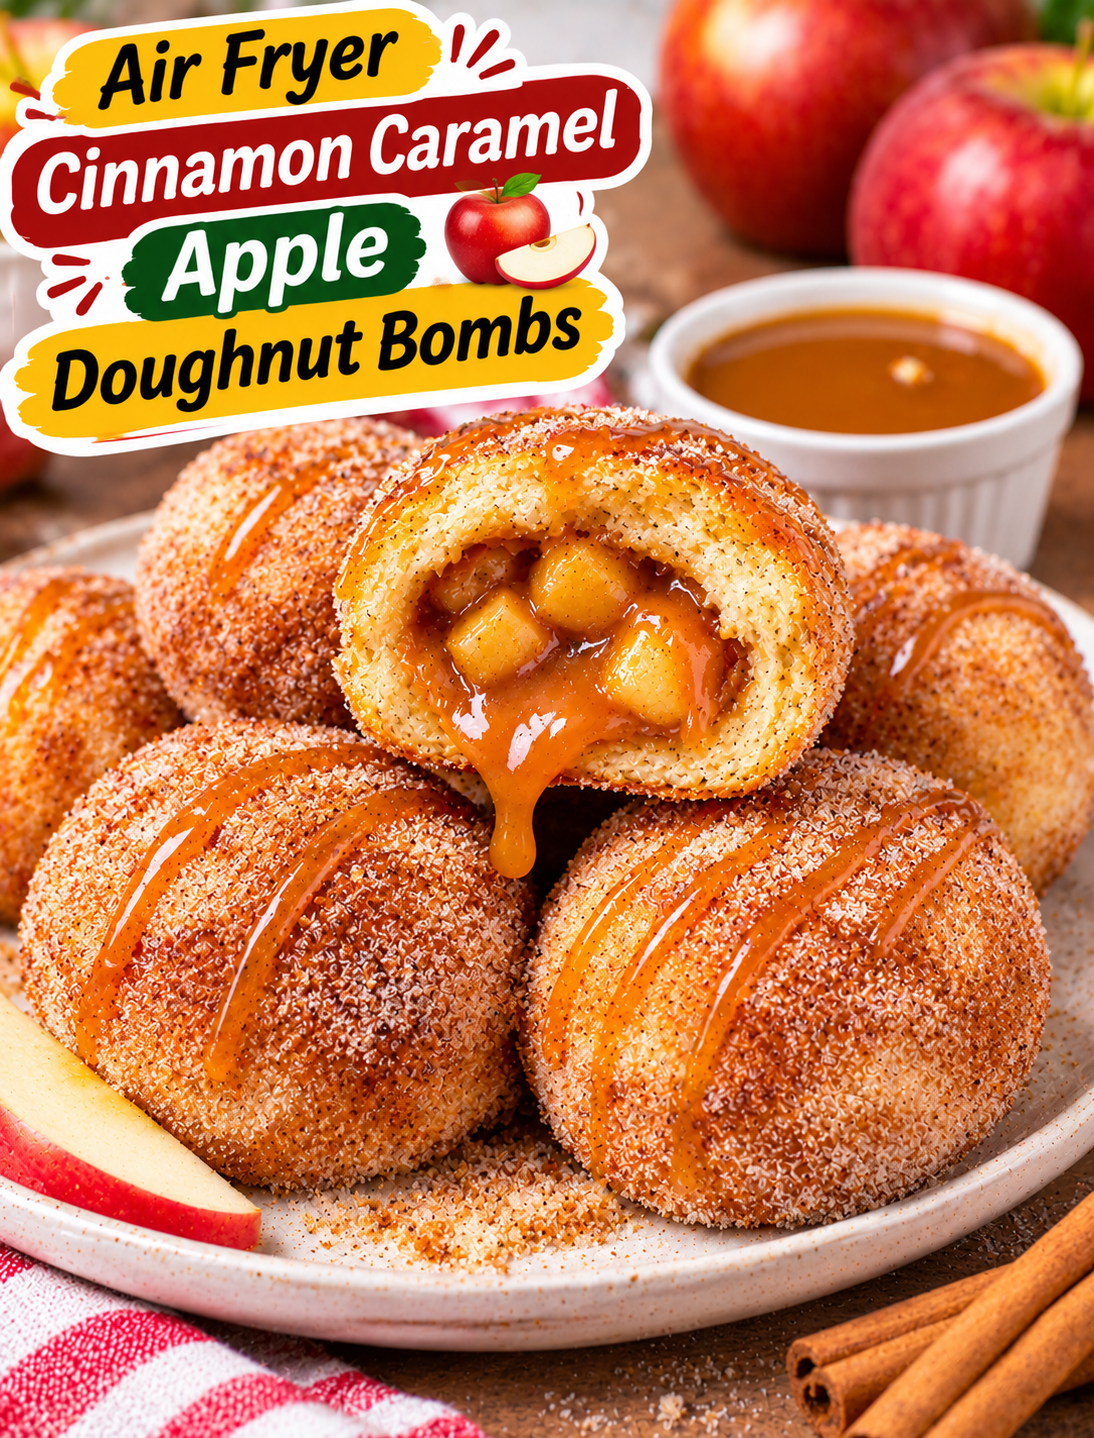
Air Fryer Cinnamon Caramel Apple Doughnut Bombs

Air Fryer Cinnamon Caramel Apple Doughnut Bombs
If you love warm apple desserts with a sweet cinnamon coating, these Air Fryer Cinnamon Caramel Apple Doughnut Bombs are worth making. Each bite has a soft, golden outside and a warm apple-caramel center that tastes like a mix of apple pie and a fresh doughnut.

This easy dessert uses refrigerated biscuit dough, tender cinnamon apples, and caramel sauce to create little stuffed treats without deep frying. The air fryer gives them a lightly crisp exterior while keeping the inside soft and fluffy.

They are perfect for fall gatherings, weekend breakfasts, holiday dessert tables, or an easy treat after dinner. Serve them warm with extra caramel sauce for dipping, and they may disappear faster than you expect!

Why You’ll Love These Apple Doughnut Bombs

  • Easy ingredients: Refrigerated biscuit dough keeps preparation simple and saves time.
  • Warm apple filling: Diced apples cook with cinnamon, brown sugar, and butter for a classic apple-pie flavor.
  • No deep frying: The air fryer cooks these treats with only a light coating of butter or cooking spray.
  • Caramel center: A little caramel sauce adds a rich, sweet surprise inside each doughnut bomb.
  • Great for sharing: Their small size makes them easy to serve at parties, family gatherings, and holiday celebrations.
  • Quick dessert: The apple filling can be prepared ahead, making assembly easier when you’re ready to cook.

Ingredients You’ll Need

Apple Filling

  • 1 medium apple: Use Honeycrisp, Granny Smith, or Gala. Peel, core, and dice it into small pieces.
  • 1 tablespoon unsalted butter: Helps soften the apples and adds a rich flavor.
  • 2 tablespoons brown sugar: Sweetens the filling and creates a light caramel-like taste.
  • ½ teaspoon ground cinnamon: Adds warm spice that pairs naturally with apples.
  • ¼ teaspoon vanilla extract: Gives the filling a smooth, bakery-style aroma.
  • 1 teaspoon lemon juice: Adds a little brightness and balances the sweetness.
  • 1 teaspoon cornstarch mixed with 1 tablespoon water: Thickens the apple mixture so it does not leak easily.

Doughnut Bombs

  • 1 can refrigerated biscuit dough: Use 8 large biscuits, preferably a flaky or homestyle variety.
  • ¼ cup thick caramel sauce: Choose a thick dessert caramel rather than a very thin caramel syrup.
  • Cooking spray or melted butter: Helps the dough turn golden in the air fryer.

Cinnamon Sugar Coating

  • ¼ cup granulated sugar: Creates a sweet coating.
  • 1 teaspoon ground cinnamon: Adds classic cinnamon-sugar flavor.
  • 2 tablespoons melted butter: Helps the cinnamon sugar stick to the warm doughnuts.

How to Make Air Fryer Cinnamon Caramel Apple Doughnut Bombs

Follow these steps to prepare the apple filling, assemble the dough balls, and cook them until golden.

Prepare the Apple Filling

  1. Peel and core one medium apple.
  2. Cut it into very small pieces so the filling fits neatly inside the dough.
  3. Melt the butter in a small saucepan over medium-low heat.
  4. Add the diced apple, brown sugar, cinnamon, vanilla extract, and lemon juice.
  5. Cook for about 4–6 minutes, stirring often, until the apples begin to soften.
  6. Stir in the cornstarch slurry and cook for another 30–60 seconds until the mixture thickens.
  7. Remove the pan from the heat and let the filling cool completely.

Important tip: Keep the apple pieces small and the filling thick. Large pieces or excess liquid can make the dough difficult to seal.

 Prepare the Biscuit Dough

  1. Open the refrigerated biscuit dough according to the package directions.
  2. Separate the biscuits and place them on a clean work surface.
  3. Gently flatten each biscuit into a round disc about 3–4 inches wide.
  4. Keep the center slightly thicker than the edges to help support the filling.
  5. Avoid stretching the dough too thin because it may tear during assembly.

Add the Apple and Caramel Filling

  1. Place about 1 tablespoon of cooled apple filling in the center of each dough disc.
  2. Add approximately ½ teaspoon of thick caramel sauce on top of the apples.
  3. Keep the filling away from the outer edges.
  4. Do not overfill the dough, as too much filling can cause the seams to open during cooking.
  5. If the caramel sauce is very runny, use a smaller amount or chill it briefly before assembling.

Seal the Doughnut Bombs

  1. Lift the edges of the dough and bring them together over the filling.
  2. Pinch the edges firmly to close the opening.
  3. Gently roll each filled biscuit between your palms to create a smooth ball.
  4. Check every ball for small gaps or thin spots.
  5. Place each ball seam-side down on a plate while you finish assembling the rest.

Helpful tip: Make sure the seams are completely closed. A well-sealed dough ball helps keep the warm apple and caramel filling inside.

Preheat the Air Fryer

  1. Preheat your air fryer to 350°F (175°C) for about 3 minutes if your model recommends preheating.
  2. Lightly spray the air fryer basket with cooking spray or use a suitable perforated parchment liner.
  3. Make sure any parchment is secured beneath the food and cannot lift into the heating element.
  4. Leave enough room between the dough balls for hot air to circulate.

Air Fry Until Golden

  1. Arrange the dough balls in a single layer in the basket.
  2. Keep space between each piece and cook in batches if necessary.
  3. Lightly brush or spray the tops with melted butter or cooking spray.
  4. Air fry at 350°F (175°C) for approximately 8–11 minutes.
  5. Check them around the 7-minute mark because air fryer models and biscuit dough brands can cook differently.
  6. Turn them carefully if your air fryer browns unevenly.
  7. Remove them when the dough is puffed, golden brown, and cooked through in the center.

Let one doughnut bomb rest briefly before checking the center. If the dough is still raw or gummy, return the batch to the air fryer for another 1–2 minutes and check again.

 Coat With Cinnamon Sugar

  1. Mix the granulated sugar and ground cinnamon in a small bowl.
  2. Let the cooked doughnut bombs rest for about 1–2 minutes.
  3. Brush each one lightly with melted butter.
  4. Roll them gently in the cinnamon-sugar mixture until coated.
  5. Place them on a serving plate while they are still warm.

For a lighter coating, sprinkle the cinnamon sugar over the tops instead of rolling the entire surface.

Add Extra Caramel and Serve

  1. Warm a little extra caramel sauce until it is easy to drizzle.
  2. Transfer the doughnut bombs to a serving platter.
  3. Drizzle the caramel over the top or serve it in a small dipping bowl.
  4. Allow the filling to cool slightly before taking a bite because the apple and caramel center can be very hot.

Serve them warm for the best soft texture and gooey filling.

Tips for the Best Results

  • Choose firm apples: Honeycrisp and Granny Smith hold their shape well during cooking.
  • Cool the filling: Hot filling can soften the biscuit dough and make sealing difficult.
  • Use thick caramel: Thick caramel is easier to contain than thin dessert syrup.
  • Avoid overfilling: A small amount of filling helps the dough seal properly.
  • Seal the seams: Pinch the dough firmly and check for gaps before air frying.
  • Do not overcrowd: Air needs space to circulate around each doughnut bomb.
  • Check early: Start checking at 7 minutes to prevent overbrowning.
  • Adjust for your air fryer: Cooking times vary by model, basket size, and dough thickness.

Variations You Can Try

Apple Pie Spice Version

Replace the ground cinnamon in the apple filling with apple pie spice. This adds a blend of warm spices that works especially well for fall desserts.

Pecan Caramel Version

Add 1 tablespoon of finely chopped toasted pecans to the cooled apple filling. The nuts provide a little crunch and pair nicely with caramel.

Cream Cheese Apple Version

Add a small piece of softened cream cheese with the apple filling. Keep the portion small so the dough can still close securely.

Extra Cinnamon Version

Add a pinch of cinnamon to the melted butter before brushing the cooked dough balls. Finish with the cinnamon-sugar coating for a stronger spice flavor.

Powdered Sugar Finish

Skip the cinnamon-sugar coating and dust the cooled doughnut bombs lightly with powdered sugar. Add caramel drizzle just before serving.

What to Serve With Apple Doughnut Bombs

These sweet bites pair well with simple drinks and other dessert favorites.

  • Hot coffee: Its slightly bitter flavor balances the sweet caramel filling.
  • Apple cider: A warm cup makes a cozy fall combination.
  • Vanilla ice cream: Serve one or two warm doughnut bombs alongside a scoop.
  • Whipped cream: Add a small spoonful for a light, creamy finish.
  • Caramel dipping sauce: Extra caramel makes each bite richer.
  • Fresh apple slices: Serve them on the side for a fresh contrast.

How to Store and Reheat

How to Store

Allow the doughnut bombs to cool completely before storing. Place them in an airtight container and refrigerate for up to 3–4 days because the filling contains cooked fruit and the finished pastry is perishable.

Avoid leaving them at room temperature for more than 2 hours.

How to Reheat

For the best texture, reheat refrigerated doughnut bombs in the air fryer at 300°F (150°C) for about 2–4 minutes. Check that the centers are heated through before serving.

You can also use a microwave for about 10–15 seconds per piece, but the outside will be softer rather than crisp.

Can You Freeze Them?

You can freeze the cooked doughnut bombs after they have cooled completely. Arrange them in a single layer until firm, then transfer them to a freezer-safe container. For best quality, use within 1–2 months.

Thaw them in the refrigerator and reheat in the air fryer. The coating may lose some of its original crispness after freezing.

Frequently Asked Questions

1. Can I use canned biscuit dough for apple doughnut bombs?

Yes. Refrigerated canned biscuit dough is convenient and creates a soft, fluffy outside. Choose large biscuits that are easy to flatten and seal.

2. Which apples work best for this recipe?

Honeycrisp, Granny Smith, and Gala are good choices. They provide a pleasant texture and balanced flavor after cooking.

3. Why are my doughnut bombs leaking?

They may be overfilled, poorly sealed, or made with filling that is too wet. Use a smaller amount of thick, completely cooled filling and pinch the seams firmly.

4. What temperature should I use in the air fryer?

Cook them at 350°F (175°C) for approximately 8–11 minutes. Check early because cooking times vary between air fryer models.

5. Can I prepare the apple filling ahead of time?

Yes. Prepare the filling up to 2 days ahead and refrigerate it in a covered container. Let it cool completely before assembling the doughnut bombs.

6. Can I make these without caramel sauce?

Yes. The cinnamon apple filling is delicious on its own. You can also add a small amount of cream cheese or leave the center as a simple apple filling.

7. How do I know when the doughnut bombs are fully cooked?

The outside should be golden and the biscuit dough should be cooked through, not gummy or raw in the center. Check one carefully before serving.

8. Can I make these in a conventional oven?

Yes. Arrange them on a parchment-lined baking sheet and bake at 350°F (175°C) until puffed and golden, usually about 12–16 minutes. Check the center before serving.

Final Thoughts

Air Fryer Cinnamon Caramel Apple Doughnut Bombs bring together everything people love about a cozy apple dessert: tender cinnamon apples, sweet caramel, fluffy dough, and a crunchy cinnamon-sugar finish. The simple biscuit-dough shortcut makes them easier to prepare than traditional homemade doughnuts, while the air fryer keeps the cooking process convenient.

Make a batch for a weekend treat, a fall celebration, or a family dessert night. Serve them warm with extra caramel sauce, and enjoy every sweet, cinnamon-filled bite!
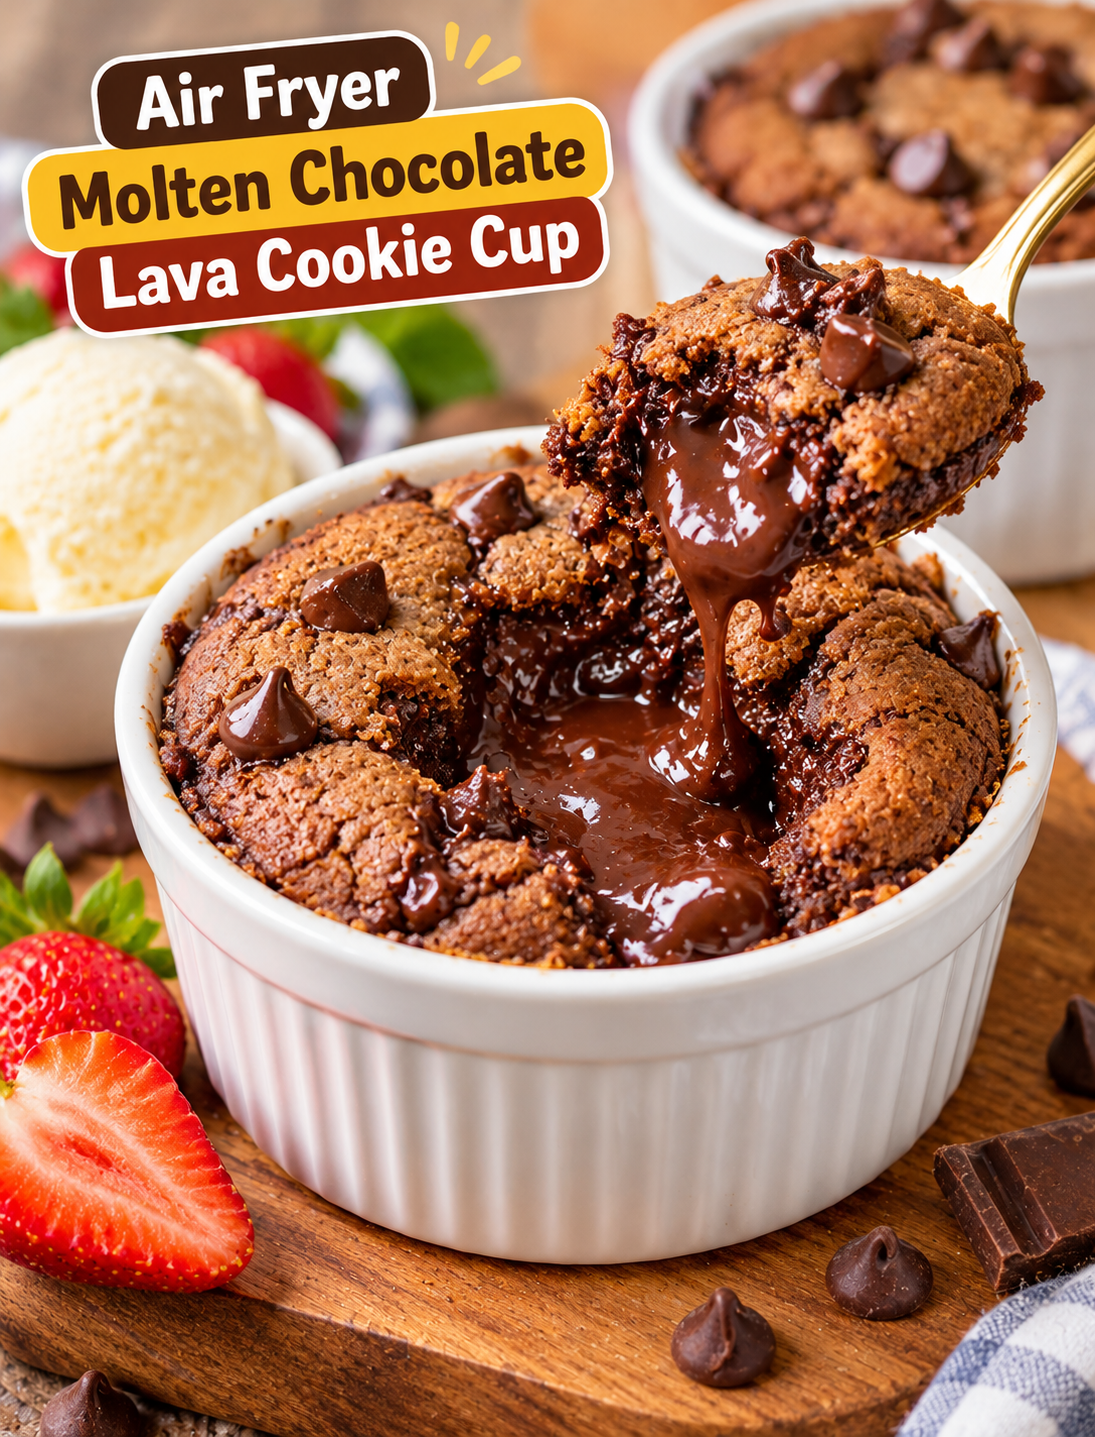
Air Fryer Molten Chocolate Lava Cookie Cup

Air Fryer Molten Chocolate Lava Cookie Cup

Air Fryer Molten Chocolate Lava Cookie Cup

Imagine breaking into a warm chocolate cookie and finding a soft, gooey center filled with melted chocolate. This Air Fryer Molten Chocolate Lava Cookie Cup delivers that rich dessert experience in an individual serving, without needing to heat up your entire oven.

The cookie has lightly crisp edges, a tender middle, and a warm chocolate center that pairs perfectly with vanilla ice cream. It uses simple baking ingredients and cooks in just a few minutes, making it a great choice for a weeknight treat, a date-night dessert, or a quick chocolate craving.

Unlike a traditional chocolate lava cake, this dessert has a cookie-style outside with a soft, molten middle. The air fryer helps the edges set while the center stays gooey when you use the right cooking time and portion size.

Why You Will Love This Recipe

  • Quick dessert: Prepare the cookie dough in minutes and let the air fryer do the cooking.
  • Rich chocolate flavor: Chocolate chips or a chocolate square create a warm, melty center.
  • Individual portions: Make one or two cookie cups without baking a full batch of cookies.
  • Simple ingredients: Use everyday baking staples such as butter, sugar, flour, and chocolate.
  • Perfect texture: The outside becomes lightly golden while the center stays soft and fudgy.
  • Easy to customize: Add chopped nuts, peanut butter, or a pinch of espresso powder for a different flavor.
  • Great for special occasions: Serve it warm for birthdays, movie nights, or an easy homemade dessert.

Ingredients You Need

This recipe makes 2 individual cookie cups. Use small, air-fryer-safe ramekins that fit comfortably inside your basket.

For the Cookie Dough

  • 4 tablespoons unsalted butter, softened
  • 3 tablespoons brown sugar
  • 1 tablespoon granulated sugar
  • 1 large egg yolk
  • 1/2 teaspoon vanilla extract
  • 1/2 cup all-purpose flour
  • 2 tablespoons unsweetened cocoa powder
  • 1/4 teaspoon baking powder
  • 1 small pinch of salt
  • 2 tablespoons chocolate chips

For the Molten Chocolate Center

  • 2 small squares of semisweet or dark chocolate, about 10–15 grams each

You can use milk chocolate for a sweeter center or dark chocolate for a deeper cocoa flavor.

Optional Toppings

  • Vanilla ice cream
  • Chocolate sauce
  • Powdered sugar
  • Fresh strawberries or raspberries
  • Chopped walnuts or pecans
  • A few extra chocolate chips

Equipment Needed

  • Air fryer
  • Two small, oven-safe ramekins
  • Mixing bowl
  • Whisk or spoon
  • Measuring cups and spoons
  • Small spatula
  • Heat-resistant oven mitts

Check your ramekin manufacturer’s instructions to confirm that the dishes are safe for the temperatures used in your air fryer.

How to Make Air Fryer Molten Chocolate Lava Cookie Cup

Follow these simple steps for a cookie dessert with a soft, chocolate-filled center.

Step 1: Prepare the Air Fryer

Preheat your air fryer to 320°F for about 3 minutes if your model recommends preheating.

Lightly grease the inside of two ramekins with butter or a small amount of cooking spray. This helps the cookie cups release more easily after cooking.

Place the ramekins on a stable surface while you prepare the dough.

Step 2: Cream the Butter and Sugars

Add the softened butter, brown sugar, and granulated sugar to a mixing bowl.

Stir until the mixture looks smooth and creamy. Brown sugar adds moisture and a slight caramel flavor, while granulated sugar helps the cookie edges develop a light crust.

Avoid using melted butter because it can make the dough too loose and affect the final texture.

Step 3: Add the Egg Yolk and Vanilla

Mix the egg yolk and vanilla extract into the butter mixture until fully combined.

The egg yolk adds richness and helps the cookie hold together. Using one yolk instead of a whole egg also keeps this small-batch dough from becoming too wet.

Scrape the sides of the bowl so the ingredients mix evenly.

Step 4: Combine the Dry Ingredients

In a separate bowl, stir together the flour, cocoa powder, baking powder, and salt.

Add the dry mixture to the butter mixture in two portions. Stir gently until a soft cookie dough forms.

Fold in the chocolate chips. Stop mixing as soon as the flour disappears to help keep the cookie tender.

If the dough feels unusually sticky, chill it for about 10 minutes before assembling the cups.

Step 5: Add the Cookie Dough to the Ramekins

Divide the dough evenly between the two prepared ramekins.

Press about half of the dough into the bottom of each ramekin, then push a small chocolate square into the center. Cover the chocolate with the remaining dough and gently seal the edges.

Keep the chocolate near the middle of each cup. This helps create a warm, melted center without exposing the chocolate directly to the hot air.

Do not fill the ramekins to the rim because the dough needs room to expand slightly.

Step 6: Air Fry the Cookie Cups

Place the ramekins carefully inside the air fryer basket, leaving a little space between them.

Cook at 320°F for approximately 7–10 minutes. Start checking at 7 minutes because air fryer models, ramekin sizes, and dough thickness can affect the cooking time.

Look for edges that appear set while the center remains soft. The top should no longer look like completely raw dough, but the middle should still have some softness.

Remember that a soft-looking center does not automatically mean the dessert is safe to eat. Because this recipe contains egg and flour, use pasteurized egg products where appropriate and follow safe food-handling practices. If you need a fully cooked dessert, cook until the center reaches a safe temperature; the molten texture may be reduced.

Step 7: Rest the Cookie Cups

Turn off the air fryer and carefully remove the ramekins with oven mitts.

Let the cookie cups rest for about 2–3 minutes. The ramekins will be hot, and the cookies will continue to set slightly as they cool.

Avoid handling the ramekins with bare hands, even after the air fryer has been switched off.

Step 8: Add Your Favorite Toppings

Serve the cookie cups directly in their ramekins for a warm, gooey dessert.

Add a small scoop of vanilla ice cream, a drizzle of chocolate sauce, or a light dusting of powdered sugar. Fresh berries can balance the richness with a bright, fruity flavor.

For extra chocolate flavor, sprinkle a few chocolate chips on top immediately after cooking.

Step 9: Serve While Warm

Enjoy the dessert shortly after cooking, when the chocolate center is at its softest.

Use a spoon to break into the middle and mix the melted chocolate with the tender cookie. If you prefer a more cake-like texture, let the cups rest for another minute before serving.

Tips for the Best Molten Chocolate Cookie Cups

  • Measure the flour carefully: Too much flour can create a dry, firm cookie instead of a soft center.
  • Use softened butter: Soft butter blends more evenly with sugar than cold or fully melted butter.
  • Choose good-quality chocolate: Semisweet chocolate creates a balanced center without making the dessert overly sweet.
  • Keep the chocolate in the middle: Surrounding it with dough helps keep the filling warm and melted.
  • Check early: Begin checking at the minimum cooking time because small ramekins can cook quickly.
  • Use similar ramekins: Matching sizes help both portions cook at roughly the same rate.
  • Do not overcrowd the basket: Leave room for hot air to circulate around the dishes.
  • Rest before serving: A short resting period makes the cookie easier to eat and reduces the risk of burns from hot chocolate.

Best Variations to Try

Peanut Butter Chocolate Lava Cookie Cup

Place 1 teaspoon of peanut butter in the center with the chocolate square. Use a thick peanut butter rather than a very runny variety to help the filling stay in place.

Double Chocolate Cookie Cup

Replace the semisweet chocolate square with dark chocolate and add an extra teaspoon of chocolate chips to the dough. This variation is ideal for people who prefer a deep cocoa flavor.

Salted Chocolate Cookie Cup

Sprinkle a tiny pinch of flaky sea salt over the cookie after cooking. The salt balances the sweetness and brings out the chocolate flavor.

Chocolate Hazelnut Cookie Cup

Add 1 teaspoon of chocolate-hazelnut spread to the center instead of the chocolate square. Freeze the filling briefly before assembling if it is too soft to handle.

Walnut Chocolate Cookie Cup

Fold 1 tablespoon of finely chopped walnuts into the dough. The nuts add crunch and a mild, earthy flavor that complements the chocolate.

What to Serve With This Dessert

This warm cookie cup tastes delicious on its own, but a few simple additions can make it feel more special.

  • Vanilla ice cream: The cold, creamy texture contrasts with the warm chocolate center.
  • Fresh strawberries: Their slight tartness balances the sweetness of the cookie.
  • Raspberries: Add a handful of fresh berries for a bright, fruity finish.
  • Whipped cream: A small spoonful creates a lighter topping than ice cream.
  • Coffee or espresso: The roasted flavor pairs well with dark chocolate.
  • Cold milk: A classic option that complements the rich cookie texture.

Make-Ahead Instructions

You can prepare the cookie dough ahead of time to make dessert easier on busy evenings.

  • Prepare the dough: Mix the dough, cover it tightly, and refrigerate for up to 24 hours.
  • Prepare the ramekins: Grease the dishes shortly before filling them.
  • Add the filling: Place the chocolate in the center just before cooking.
  • Adjust the timing: Chilled dough may need an additional 1–2 minutes, so check the texture as it cooks.
  • Serve fresh: The best molten texture develops when the cookie cups are served warm.

Do not leave dough containing raw egg at room temperature for extended periods. Keep it refrigerated until you are ready to cook.

How to Store Leftovers

Let leftover cookie cups cool, then cover and refrigerate them promptly. For food safety, refrigerate perishable leftovers within 2 hours and eat them within 3–4 days.

The center may firm up in the refrigerator, so the cookie will not have exactly the same molten texture after storage.

To reheat, warm an individual portion in the air fryer at 300°F for about 2–4 minutes, checking frequently. Make sure it is heated through, and avoid overheating because the cookie can dry out.

You can also microwave a portion in a microwave-safe dish in short intervals. The chocolate may become very hot, so let it stand briefly before taking a bite.

Common Mistakes to Avoid

  • Overcooking the cookie: Extra cooking time can turn the soft middle into a firm brownie-like texture.
  • Using oversized ramekins: A thin layer of dough can cook too quickly and lose its soft center.
  • Skipping the filling cover: Exposed chocolate can melt out instead of staying inside the cookie.
  • Adding too much flour: Excess flour makes the dough dense and dry.
  • Serving immediately without resting: The hot ramekin and melted chocolate can burn your mouth.
  • Assuming a molten center is always safe: A soft center does not confirm that egg and flour are fully cooked.

Frequently Asked Questions

1. How long does a lava cookie cup take in the air fryer?

It usually takes about 7–10 minutes at 320°F, depending on the ramekin size and air fryer model. Check early to avoid overcooking.

2. What chocolate is best for a molten cookie cup?

Semisweet or dark chocolate works well because it melts smoothly and balances the sweet cookie dough. Milk chocolate creates a sweeter filling.

3. Can I make this recipe without cocoa powder?

Yes, omit the cocoa powder and add about 2 tablespoons of flour to make a vanilla cookie base. Keep the chocolate center for the molten filling.

4. Can I use a whole egg instead of an egg yolk?

A whole egg adds extra moisture and may make this small batch too soft. The egg yolk gives the cookie a richer texture with less liquid.

5. Can I use a ceramic ramekin in an air fryer?

Yes, if the ramekin is labeled oven-safe and suitable for the cooking temperature. Avoid dishes with cracks or sudden temperature changes.

6. Why is my cookie cup dry in the middle?

It may have cooked too long or contained too much flour. Measure accurately and begin checking the cookie at the minimum cooking time.

7. Can I prepare the cookie cups ahead of time?

Yes, refrigerate the prepared dough for up to 24 hours and cook it when needed. For the best texture, serve the cookie cups warm after cooking.

8. Can I freeze molten chocolate cookie cups?

You can freeze fully cooked cookie cups in an airtight container for up to 2 months for best quality. Thaw safely and reheat before serving, noting that the center may be less molten.

Final Thoughts

Air Fryer Molten Chocolate Lava Cookie Cups are a simple way to enjoy a warm chocolate dessert without making a full cake or batch of cookies. Their soft cookie edges, rich chocolate filling, and individual portions make them a fun option for weeknight treats and special occasions.

For the best results, measure the ingredients carefully, use suitable ramekins, and check the cookies early. Serve them warm with vanilla ice cream or fresh berries for a dessert that feels special with very little preparation.