Southern Fried Shrimps

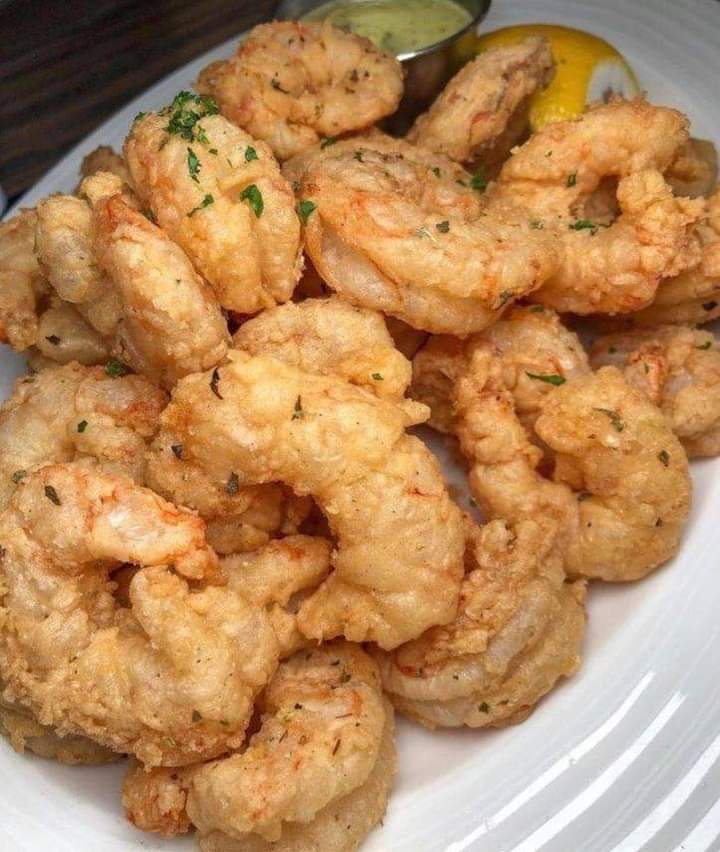
This Southern Fried Shrimp recipe is easy, delicious, super easy to make. Crunchy on the outside and bursting with flavor. In about 15 minutes, from start to finish, you’ll have a tasty meal of crispy seafood ready to go.

How to make Southern Fried Shrimps 

Soak the shrimp – In a large bowl, mix together the milk, ½ teaspoon salt, the black pepper, half the granulated garlic, half the paprika, and half of the oregano. Add in the shrimp and let soak for 10 minutes.

Coat the shrimp – Once the shrimp is finished soaking, shake free of excess milk. Mix together the remaining spices and flour on a plate and coat the shrimp well. Make sure you coat the shrimp really well with flour. Coat them several times with the seasoned flour. You should not be able to see the shrimp under the flour.

Fry the shrimp – Heat the oil to 375 degrees and fry each batch of shrimp for about 1-2 minutes or until it’s nice and crispy.

Serve – Allow the shrimp to cool a bit and serve!

RECIPE TIPS AND VARIATIONS

Serving sauces – If you enjoy dipping your shrimp in a sauce, you can serve these fried shrimp with honey mustard, tartar sauce, sriracha mayo, etc. I served it with honey mustard.

Use uncooked shrimp – In order for your shrimp to really soak up flavor, they need to be the uncooked kind you get from the store. If they’re already pink in the package, this means they’re cooked and won’t really soak up any flavor through the prepping process. If the shrimp are a grey color, then those are the kind you’re looking for. Be sure they’re deveined and peeled for your convenience.

Make it spicy – Add some cayenne pepper to the recipe for extra spice.

 ALREADY COOKED SHRIMP?

Of course, you can! Already cooked shrimp is, well, already cooked, so you don’t have to wonder if it’s already finished. However, for this recipe, it’s much better, flavor-wise, to use uncooked shrimp. It’s definitely up to you on whether or not you want to use cooked shrimp. I just like to use uncooked because it allows the flavors to soak into the shrimp more for a better flavor.

WHAT GOES GOOD WITH SOUTHERN FRIED SHRIMP?

Crispy shrimp go well with so many sides. However, there are certain sides that are more popular than others when it comes to shrimp. Some of these sides include Creamy Coleslaw (if you like spicy, try this Creamy Sriracha Coleslaw), Corn on the Cob, Creamed Corn, or even Cheesy Corn. Of course, you can’t forget the Hush Puppies, and while you’re at it, throw in some Cheese Garlic Biscuits, Deep Fried Mac n Cheese Balls, Honey Jalapeno Cheddar Cornbread, or a Tomato Avocado Salad. You can even use the shrimp to make another meal altogether. For example, you can use your shrimp to make a po’boy sandwich, shrimp salad, sliders, etc. So many ideas and ways to use shrimp – it’s crazy!
Prep Time: 10min

Cook Time: 4min

 Servings: 6 

Crunchy flavorful shrimp fried to perfection. Dip these in honey mustard or serve as a main entree.

INGREDIENTS:

  • 1 lb raw shrimp peeled and deveined
  • 1 cup all-purpose flour
  • 1 1/2 tsp salt or to taste
  • 1/2 tsp black pepper or to taste
  • 2 tsp granulated garlic
  • 2 tsp paprika
  • 2 tsp oregano
  • 1/2 cup whole milk
  • oil, for frying

INSTRUCTIONS:

  1. Add the milk, 1/2 tsp salt, 1 tsp oregano, 1 tsp paprika, 1 tsp granulated garlic, and shrimp to a large bowl and let it sit for 10 minutes.
  2. Season the all purpose flour with the remaining salt, paprika, oregano, granulated garlic, and black pepper.
  3. Remove the shrimp from the milk mixture and coat well with the seasoned flour.
  4. Make sure to coat the shrimp really well with lots of seasoned flour.
  5. You should not be able to see the shrimp under the flour.
  6. Fry the shrimp for 3-4 minutes or until crispy in oil. The oil should be about 375 degrees F.
  7. Remove the shrimp from the oil and place it on a plate with paper towel.
  8. Serve immediately and enjoy.

NUTRITIONAL INFO:

Calories: 171kcal | Carbohydrates: 18g | Protein: 19g | Fat: 2g | Saturated Fat: 1g | Cholesterol: 193mg | Sodium: 1179mg | Potassium: 139mg | Fiber: 1g | Sugar: 1g | Vitamin A: 411IU | Vitamin C: 3mg | Calcium: 143mg | Iron: 3mg

 

Smothered Pork Chops Recipe

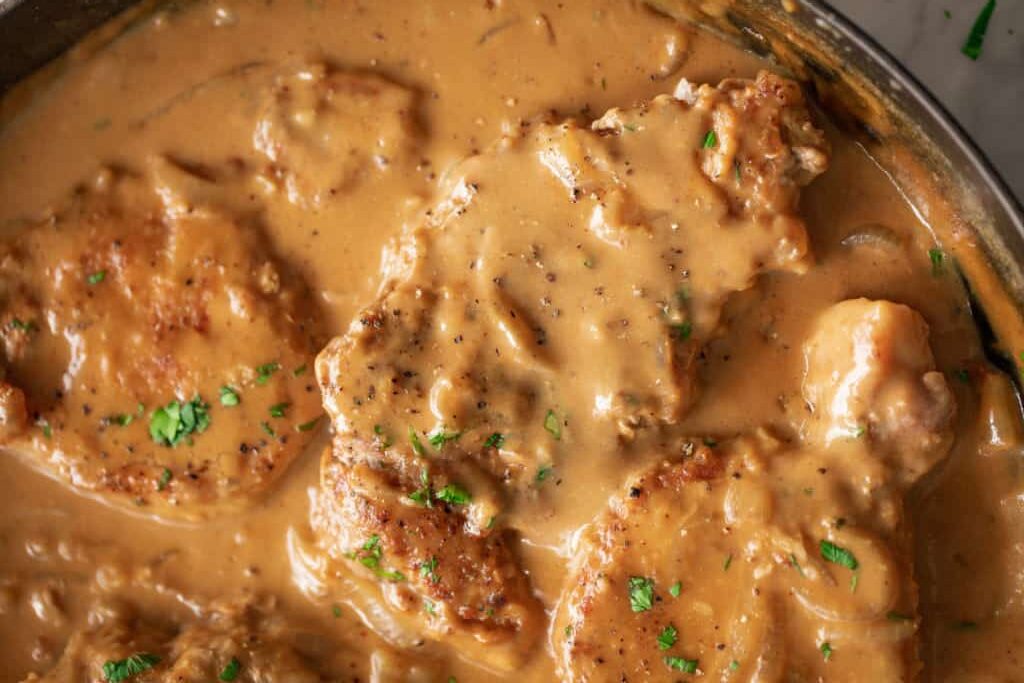
Creamy smothered pork chops seared and cooked in a rich onion gravy. a delicious and easy dinner recipe perfect for tonight!

Smothered Pork Chops 

A Southern classic comfort food, crispy coated pork chops smothered in a rich onion gravy makes this a feast you will keep coming back to! The BEST way to eat a chop is with sauce, and this recipe has PLENTY of gravy.

If you LOVE pork and you’re always on the hunt for a lip-smacking recipe, then THIS recipe is for you! Serve them over a pile of hot mashed potatoes, or even our buttery mashed cauliflower, maybe throw some sautéed green beans or snap peas on the side for some greens, and you’ve got yourself a complete dinner! Watch them ask you for seconds!

Smothered Pork Chops

Juicy Smothered Pork Chops seared and cooked in a rich onion gravy is delicious and easy dinner recipe perfect for any night of the week! Not for the faint hearted, you can serve them with anything… think mashed potatoes or white rice to soak up the delicious sauce… OR roasted veggies to make a complete meal!

Prep Time: 15mins

Cook Time: 25mins

Total Time: 40mins

 Servings: 4 serves 

Ingredients

PORK CHOPS:

  • 1 pound (500g) bone-in pork chops,* about 3/4-1 inch thick.
  • 1/2 tablespoon onion powder
  • 1/2 tablespoon garlic powder
  • 1/2 teaspoon cayenne
  • 1 teaspoon seasoning salt
  • 1/2 teaspoon fresh cracked black pepper
  • 2 teaspoons olive oil
  • 1/2 cup all-purpose flour
  • 2 tablespoons olive oil
  • 1 tablespoon unsalted butter

FOR GRAVY:

  • 1 tablespoon unsalted butter
  • 1 large onion, thinly sliced
  • pinch of salt
  • 4 cloves garlic, minced
  • 1 teaspoon fresh chopped thyme
  • 1/2 cup chicken broth, divided
  • 3/4 cup buttermilk or heavy cream
  • Chopped fresh flat-leaf parsley, for garnish

Instructions:

FOR PORK CHOPS

  1. Pat the pork chops dry with paper towels to remove any moisture. Season pork chops with garlic powder, onion powder, cayenne, seasoning salt, pepper and olive oil.
  2. Dredge each chop in the flour; shake off the excess and KEEP THE REMAINING FLOUR.
  3. Heat 2 tablespoons olive oil and 2 tablespoons of butter in a skillet or pan over medium heat. When hot, fry the pork chops in a single layer on each side until golden browned, about 3-4 minutes per side.
  4. Remove pork chops from the pan and keep warm.

FOR GRAVY

  1. In the same pan, heat 1 tablespoon of butter over medium heat.
  2. Add in sliced onions and add a pinch of salt. Cook while stirring occasionally, until soft and caramelized, about 10 minutes. (Add in 1 tablespoon of the chicken broth if the pan becomes too dry.)
  3. Add the garlic and thyme; cook until fragrant, about 30 seconds.
  4. Add 2 tablespoons of the remaining flour to the pan. Mix the flour into the onions and cook to dissolve, about 2 minutes.
  5. Pour in the chicken broth, scraping up the browned bits from the bottom of the pan. Let the liquid reduce and thicken slightly, about 2 minutes.
  6. Whisk in the buttermilk (or cream) and simmer for 1-2 minutes until thick and creamy.
  7. Return the pork chops to the pan. Coat them in the sauce and let simmer until the pork is completely cooked through, about 5 minutes (or until the pork is cooked to your desired doneness). (The sauce will continue to thicken due the coating on the pork. If too thick, add a little cream or broth to thin out until reaching your desired consistency.)
  8. Taste test and season with salt and pepper, if needed. Garnish with the chopped parsley before serving. Serve warm.

Notes

*FOR BONELESS PORK CHOPS

Reduce searing time to about 2 minutes per side and finish cooking them in the sauce. Be very careful not to overcook or dry out your pork chops as they become tough and chewy.

Nutritional Info:

Calories: 355kcal | Carbohydrates: 19g | Protein: 22g | Fat: 21g | Saturated Fat: 7g | Fiber: 2g | Sugar: 4g

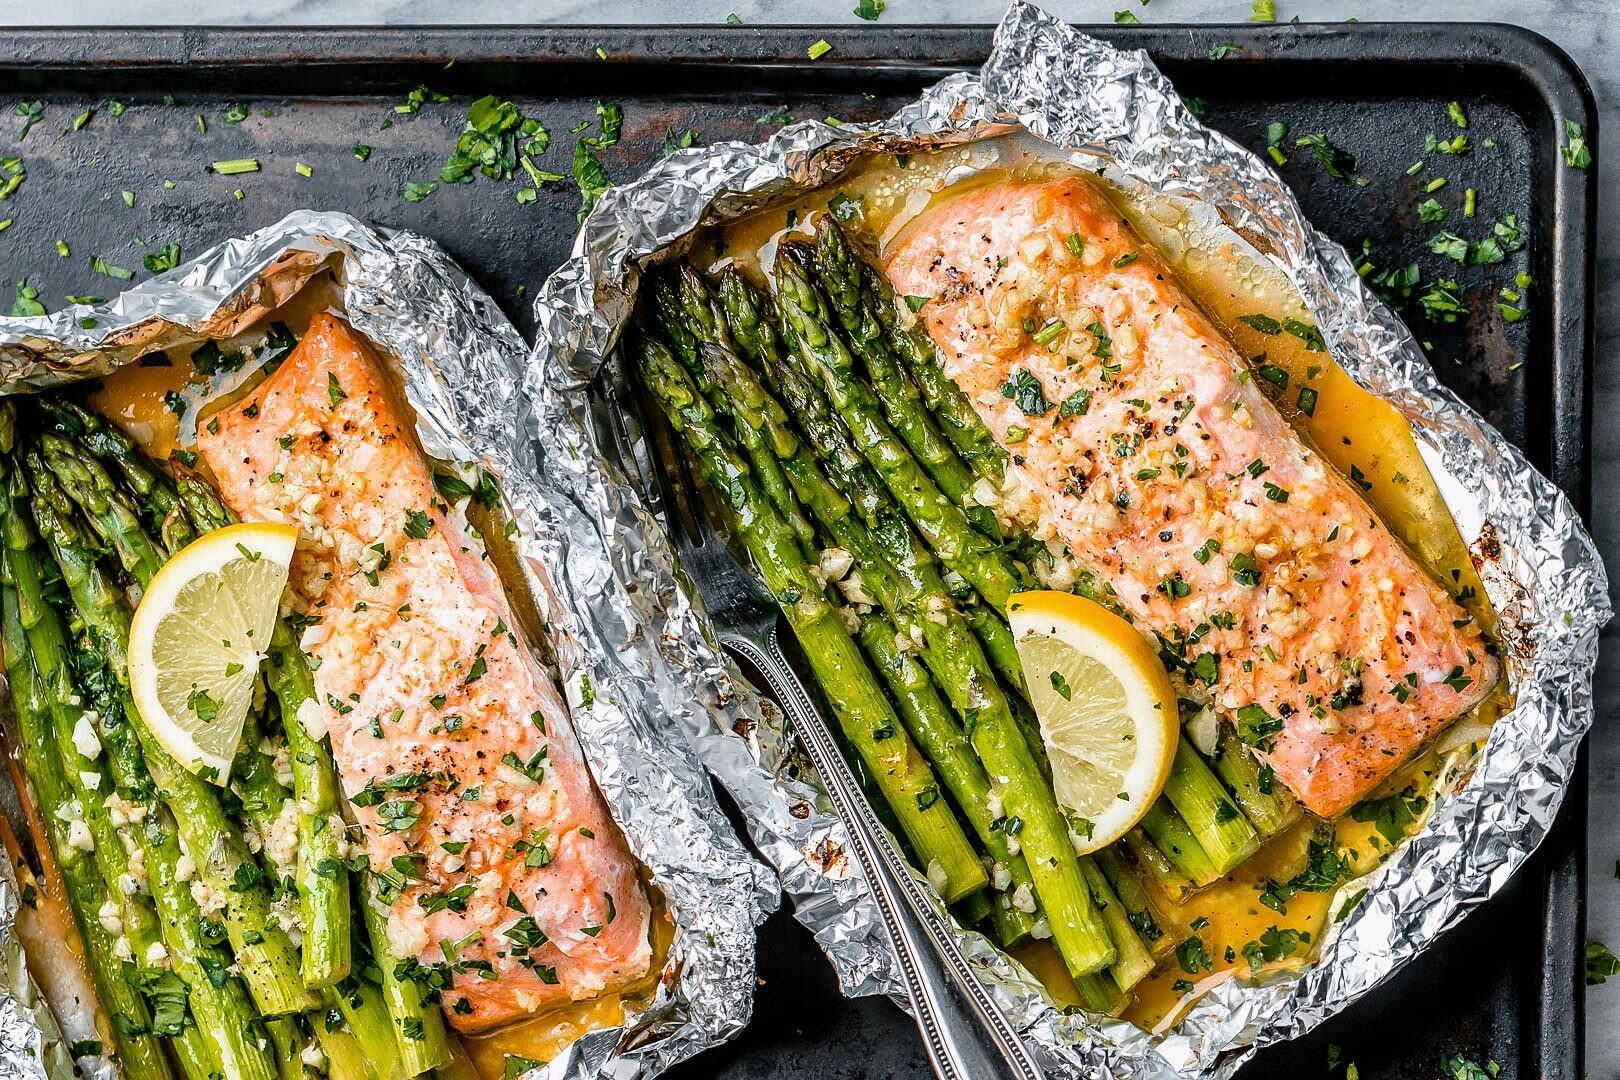
Baked Salmon in Foil with Asparagus and Lemon Garlic Butter Sauce

Baked Salmon in Foil Recipe – Whip up this quick and easy salmon recipe tonight! Salmon and asparagus are baked together with a rich buttery sauce in individual foil packs. The bright lemon flavors pair perfectly with butter, and garlic adds a pungent touch to this wonderful care-free dinner. This is THE baked salmon recipe of your dreams! Low-carb, paleo, gluten-free, and keto-friendly – Enjoy!

INGREDIENTS:
  • 1 pound (450g) salmon fillets, divided
  • 2 tablespoons vegetable broth or chicken broth
  • 1 1/2 tablespoon fresh lemon juice, or to taste
  • 1 tablespoon of your favorite hot sauce (we used Sriracha)
  • 4 teaspoons minced garlic (4 cloves)
  • Salt and fresh ground black pepper, to taste
  • 3-4 tablespoons butter, diced into small cubes (or ghee)
  • 2 tablespoons fresh chopped parsley or cilantro
  • 1 lb (450g) medium-thick asparagus, woody ends trimmed
INSTRUCTIONS:
  1.  To prepare the oven-baked salmon in foil packs: Preheat your oven to 425ºF (220ºC). Cut 2 sheets of 14 by 12-inch (35 x 30 cm) heavy-duty aluminum foil, then lay each piece separately on the countertop. Combine broth, lemon juice, and hot sauce in a small bowl.
  2.  Season both sides of the salmon fillets with salt and pepper and divide the salmon onto the aluminum foil near the center, then place trimmed asparagus on one side of the salmon, following the long direction of the foil.
  3. Adjust the salmon fillets’ seasoning with more salt and pepper, then sprinkle garlic on top. Drizzle the mixture of broth, lemon juice, and hot sauce generously over the salmon fillets and asparagus.
  4.  Divide butter pieces evenly among the foil packets, layering them over the salmon fillet and asparagus.
  5. Wrap salmon foil packets in and crimp edges together, then wrap ends up. Don’t wrap too tight – keep a little extra space inside for heat to circulate.
  6. Transfer the salmon foil packs to a baking sheet and bake salmon in the oven, sealed side upward, until salmon has cooked through, about 9 – 12 minutes.
  7.  Carefully unwrap the baked salmon in foil packets, drizzle with more lemon juice, garnish with fresh parsley or cilantro and a slice of lemon. Enjoy!

Baked Salmon in Foil with Asparagus and Lemon Garlic Butter Sauce

Tips for the baked salmon foil packs:

This is an incredibly easy baked salmon recipe: If you’re missing an ingredient, don’t worry! This salmon recipe is very versatile, use what you have in the pantry. No butter? Use olive oil, ghee, or any oil you have. Don’t like asparagus? Use zucchini or broccoli. Make it your own! Here are a few tips on how to bake salmon in foil:

How to bake salmon in foil

In general, it is better not to overcook salmon fillets. If you like salmon and asparagus a bit crispy, open the foil packs and broil the salmon in the oven for 2 minutes.

Asparagus can be thick and take longer to cook. You can blanch them first in boiling water for a few minutes before draining and baking in foil packs.

If aluminum foil is a concern, use parchment paper to make the salmon foil packets. Another way to do it is to line the foil with parchment paper, the foil will ensure the salmon packet is well sealed, and you can even throw it on the bbq!

For non-keto dieters, a teaspoon of honey over the salmon fillets before baking is a must!

You can double the number of salmon fillets for a family meal.

In step 1, if you like you can make the sauce with melted butter and minced garlic combined with broth, lemon juice, and hot sauce

How long does it take to bake the salmon foil packs?

Salmon only needs 9-12 minutes of cooking in a hot, preheated oven (425°F – 220°C). Baking the salmon at a high temperature quickly roasts the exterior and seals in the natural juiciness of the salmon, making it tender and moist. You can open the packets and broil/grill in the last 2 minutes of cook time to get those crispy, golden charred edges. Since salmon filets can vary in size, keep an eye on the salmon towards the end of cooking since a thinner salmon fillet will cook faster, and a thicker filet, such as a fattier farmed salmon or a thick wild salmon fillet, may take longer to cook.

The best types of salmon to make baked salmon in foil

Any of these types of salmon will work with this recipe: Atlantic Salmon, Chinook Salmon, Coho Salmon, Pink Salmon, Sockeye Salmon, or King Salmon. Overall, wild-caught salmon (not farmed) is always better if you have the choice.

What to serve with the baked salmon recipe?

If you’re extra hungry, add a side of cauliflower rice, or roasted vegetables. Of course, you can tuck a slice of tomato, some celery, or sliced carrot, in the foil packet to make it more consistent. If you’re not on a keto diet, a good slice of country bread will soak up the delicious cooking juices of this easy salmon recipe.

How to Store Cooked Salmon

Baked salmon will last up to 2-3 days in the refrigerator if stored properly. Discard the foil, store cooled salmon in an airtight container, seal, and refrigerate. To freeze, store cooled salmon in sealed airtight containers for up to 1 month.

Potato Fitters Recipe

Crispy on the outside, tender and creamy on the inside. These easy Potato Fritters with zucchini and cheddar cheese are the perfect comfort food addition to your day.

Why You’ll Love This Homemade Potato Fritters Recipe

Perfect Texture. Only crispy potatoes and zucchini will do! These potato fritters are delightfully crispy on the outside, tender on the inside, and have just the right amount of salt to make it hard to eat just one.

Healthy. While I like to treat myself once in a while when dining out, at home I like to try and keep things on the healthy side. Unlike restaurant potato fritters, these are cooked on the stovetop instead of in a deep fryer. And they have an extra heaping serving of nutritious zucchini hidden inside (like these Zucchini Enchiladas).

Versatile. These potato fritters are a delicious addition to a meal any time of day! Serve them as a side dish with dinner (I suggest Fish and Chips), beneath a poached egg for breakfast (like these Leftover Stuffing Cakes), or as a cozy snack


An easy recipe for potato fritters with zucchini and cheddar cheese. They’re perfectly crispy, perfectly cheesy, and ultra-delicious.

PREP:15mins

COOK:20mins

TOTAL:35mins

Ingredients:
  • 3 cups shredded zucchini about 13 ounces or 2 medium
  • 2 cups shredded Yukon gold potatoes about 12 ounces or 2 small/medium, scrubbed and peeled
  • 1/2 medium yellow onion shredded
  • 3 large eggs lightly beaten
  • 1/2 cup seasoned whole wheat breadcrumbs
  • 1/3 cup white whole wheat flour or substitute all-purpose flour
  • 1 teaspoon garlic powder
  • 1 teaspoon kosher salt plus additional to season
  • 1/2 teaspoon ground black pepper
  • 1 teaspoon baking soda
  • 1/2 cup freshly grated sharp cheddar cheese
  • 1-2 tablespoons olive oil for frying
  • Plain nonfat Greek Yogurt for serving
  • Chopped fresh chives for serving
Instructions:
  1. If you’d like to keep the fritters warm between batches, preheat your oven to 200°F.
  2. Spread the shredded zucchini, potatoes, and onion onto a clean kitchen towel and press out as much moisture as possible, changing the towel once or twice as needed.
  3. Place the shredded vegetables in a large bowl, then add the eggs, breadcrumbs, flour, garlic powder, salt, pepper, and baking soda.
  4. Mix until completely combined, using your fingers if needed to make sure all of the ingredients are evenly distributed. Fold in the shredded cheese.
  5. In a large nonstick skillet, heat 1 tablespoon of the olive oil over medium heat.
  6. Scoop a scant 1/4-cup portion of the fritter batter onto the frying pan and flatten into an even layer, using either the back of the measuring spoon or the bottom of a drinking glass.
  7. Cook for 3 to 4 minutes until golden on the first side, then flip and continue cooking until the second side is golden as well.
  8. Depending upon your skillet, you may need to adjust the heat as you go to ensure the pancakes cook all the way through but still get crisp on the outside.
  9. Repeat with the remaining pancakes, keeping batches warm in the oven as desired. If excess liquid collects in the bottom of the bowl, discard it. Serve warm, topped with Greek yogurt and fresh chives.
Notes

TIP:Be sure to measure the shredded zucchini and potatoes. If you use a different amount than called for in the recipe, the fritters may not hold together.

GLUTEN-FREE: I have not tried this recipe gluten free, but I believe you could swap oat flour for the whole wheat flour and gluten free bread crumbs, plus a pinch of extra salt and pepper for the seasoned breadcrumbs.

TO STORE: Keep leftovers in the refrigerator for up to three days.

TO REHEAT: Reheat gently on the stovetop with a bit of olive oil to crisp them back up and to prevent sticking.

TO FREEZE: Store cooked fritters flat and separated with sheets of parchment paper in the freezer for up to 3 months. Defrost overnight in the refrigerator and reheat as directed above.

Nutritional Info:

SERVING: 1(of 14), without toppings

CALORIES: 97kcalCARBOHYDRATES: 13gPROTEIN: 4gFAT: 4gSATURATED FAT: 1gPOLYUNSATURATED FAT: 1gMONOUNSATURATED FAT: 1gTRANS FAT: 1gCHOLESTEROL: 39mgPOTASSIUM: 304mgFIBER: 2gSUGAR: 2gVITAMIN A: 194IUVITAMIN C: 17mgCALCIUM: 50mgIRON: 1mg


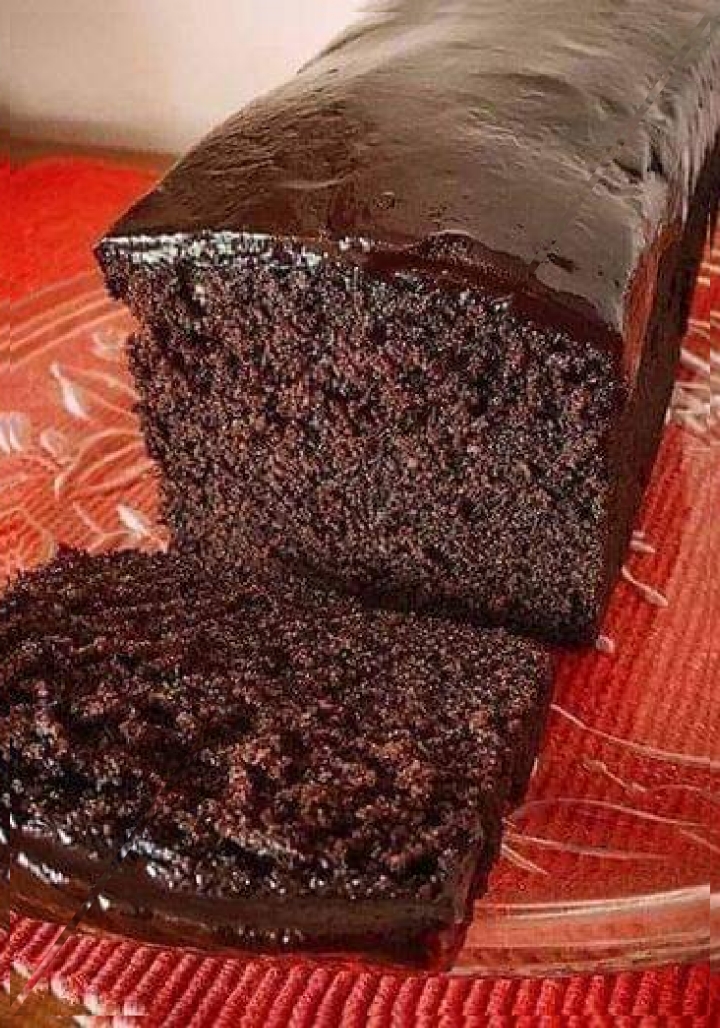
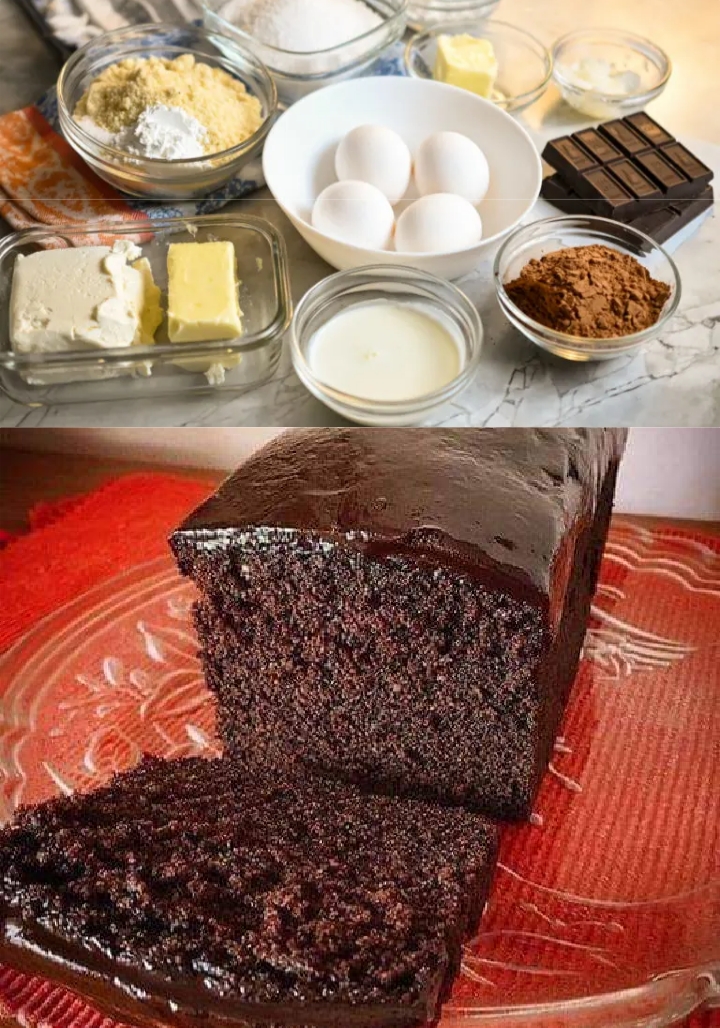
Dreamy Keto Cream Cheese Chocolate Pound Cake

This keto cream cheese chocolate pound cake recipe is rich, moist, and flat-out dreamy. It’s everything you love about a traditional cream cheese pound cake, except that it’s chocolate and keto-friendly.

It’s a decadent keto chocolate pound cake that is sure to satisfy your craving for a dark chocolate cake while on a ketogenic diet.

And because it’s cream cheese chocolate pound cake, the texture is moist and dense and, as a bonus, high in protein.

Whether you are looking for a recipe to silence the sweet tooth of a chocolate lover or for a special occasion, this keto chocolate cake is made easily in a loaf pan or two.

YIELD: 24

This delicious keto cream cheese chocolate pound cake is a rich, moist, decadent cake that features a chocolate ganache that takes it to a whole nother level. It’s the one recipe that is sure to silence your chocolate cravings while doing keto.


PREP TIME: 10 minutes

COOK TIME: 1 hour

ADDITIONAL TIME: 10 minutes

TOTAL TIME: 1 hour 20 minutes

Ingredients:

Keto Cream Cheese Chocolate Pound Cake

  • 2 1/2 cups of finely milled almond flour , measured and sifted
  • 1/2 cup cocoa powder
  • 2 teaspoons of instant coffee (optional for enhancing chocolate )
  • 3 teaspoons of baking powder
  • 1/2 teaspoon of sea salt
  • 2 1/4 cups of sugar substitute
  • 1/2 cup of unsalted butter, room temperature
  • 7 ounces of cream cheese, room temperature
  • 8 eggs, room temperature
  • 2 ounces of baking chocolate (melted)
Chocolate Ganache
  • ¼ cup of unsalted butter melted
  • 2 ounces of baking chocolate, melted
  • 3 tablespoons of confectioners sugar substitute
  • ¼ cup of heavy whipping cream
  • 2 tablespoons of coconut oil

Instructions:

  1. Preheat oven to 325 degrees.
  2. Grease and line with parchment paper two 8×4 inch loaf pans. Leave an overhang of parchment paper about 2 inches to lift the loaves out of the pans easily. (refer to notes if you only want one loaf or if you want to bake in a bundt pan).
  3. In a medium-sized bowl, combine the almond flour, cocoa powder, instant coffee, baking powder, and salt. Set aside.
  4. In a large mixing bowl, beat the softened butter and sugar substitute on high until light and fluffy.
  5. Add the cream cheese and combine well until fully incorporated.
  6. Add the eggs one at a time, making sure to mix well after each addition.
  7. Add all the dry ingredients mixing well until thoroughly combined.
  8. Lastly, add the melted baking chocolate in a stream and beat the mixture until fully mixed. Note that you can melt the baking chocolate over a double boiler or microwave in 15-second intervals.
  9. Pour the batter into your two prepared loaf pans and bake for 60-70 minutes or until done.
  10. Allow the cakes to cool for 15 minutes before taking them out of the mold, and then wait until the cake is thoroughly cooled before spreading the chocolate ganache.
Chocolate Ganache
  1. Combine the melted butter, baking chocolate, and powdered sugar substitute until well combined.
  2. Add the heavy whipping cream a couple of tablespoons at a time and mix till well incorporated.
  3. Lastly, stir in the coconut oil.

Notes:

Halfing The Recipe

This recipe makes two 8×4-inch loaves. The following are the ingredients for making just one 8×4-inch loaf.

Keto Chocolate Pound Cake (For One Loaf)

  • 1 1/4 cups of finely milled almond flour, measured and sifted
  • 1/4 cup cocoa powder
  • 1 teaspoon of instant coffee (optional for enhancing the chocolate flavor)
  • 1 1/2 teaspoons of baking powder
  • 1/4 teaspoon of sea salt
  • 1 cup of granulated sugar substitute
  • 1/4 cup of unsalted butter, room temperature
  • 3 1/2 ounces of softened cream cheese
  • 4 eggs, room temperature
  • 1 ounce of baking chocolate (melted)
  • Chocolate Ganache (For One Loaf)
  • Two tablespoons of unsalted butter melted
  • 1 ounce of baking chocolate, melted
  • 2 tablespoons of confectioners sugar substitute
  • 2-3 tablespoons heavy whipping cream
  • 1 tablespoon of coconut oil

Bundt Pan INSTRUCTIONS:

  1. Preheat the oven to 325 degrees.
  2. Butter well a 10-cup capacity bundt pan with softened butter.
  3. Add the batter to the pan and bake for 55-60 minutes.
  4. Allow the cake to cool in the bundt pan for 15 minutes before removing out from the pan. Ensure the cake is thoroughly cooled before adding the icing.

Nutritional Info:

YIELD: 22 SERVING SIZE: 1

Amount Per Serving: CALORIES: 187.2TOTAL FAT: 20.8gSATURATED FAT: 9.4gCHOLESTEROL: 89mgSODIUM: 99mgCARBOHYDRATES: 5.7gNET CARBOHYDRATES: 4.5gFIBER: 1.2gSUGAR: 3.2gPROTEIN: 6.1g

Did you make this recipe?


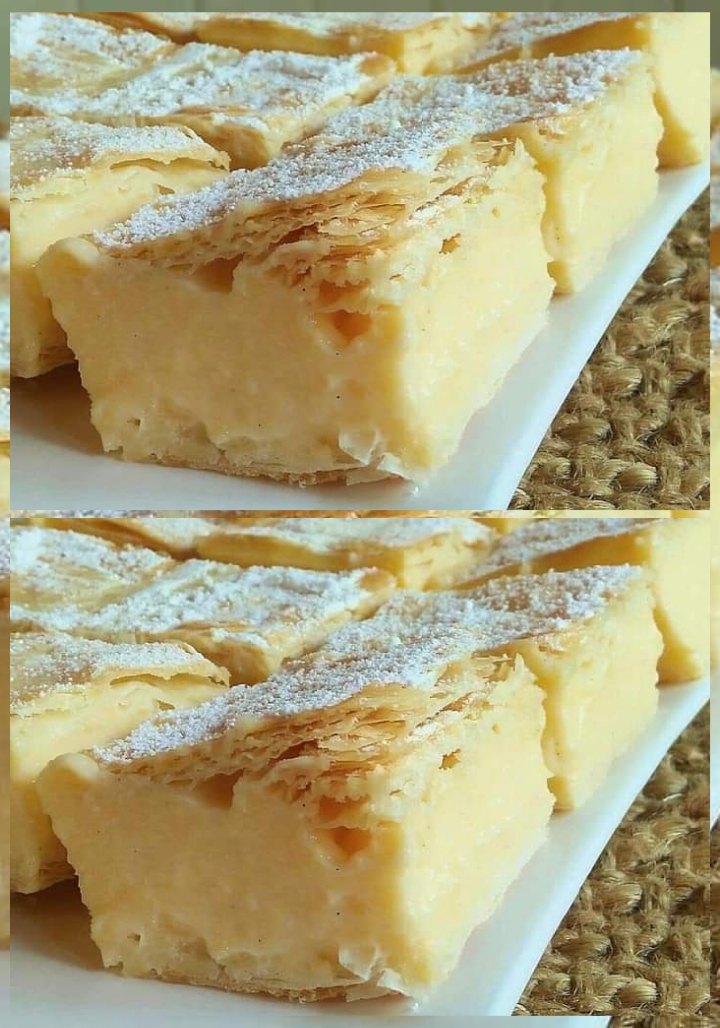
Classic Vanilla Custard Bars

Was custard a staple in your childhood? Our memories of childhood treats are replete with egg custard, and upon exploring similar meals, we concluded that what we called egg custard was actually more like what others called vanilla custard. The bottom line is that, regardless of the name, the custard is a divinely wonderful dessert that never fails to satisfy!

These bars are an incredibly silky, delectable dessert that could have come straight from a bakery. There is never a bad time for a vanilla custard slice, whether you’re whipping up a dish for yourself and your loved ones or preparing a treat to give as a gift (and believe us, they will be eternally grateful!).

This tastes just like the treat we used to enjoy as kids!

Prep Time: 15 minutes

Cook Time: 25 minutes

Total Time: 40 minutes

Yield: 12 

INGREDIENTS:

  • 1/4 c. (1/2 stick) unsalted butter, cubed
  • 1 (16 ounces) package of store-bought puff pastry, 2 sheets, thawed
  • 1/2 c. water
  • 1 1/2 c. whole milk
  • 1 1/2 c. heavy cream
  • 2/3 c. caster sugar, or superfine sugar
  • 1/3 c. all-purpose flour
  • powdered sugar, as needed
  • 6 egg yolks, beaten
  • 2 tsp vanilla extract

INSTRUCTIONS:

  1. Set the oven temperature to 350o and line two baking sheets and a 9×13-inch baking dish with parchment paper, leaving a 2-inch overhang on each side.
  2. Unroll puff pastry sheets and place them on baking sheets that have been lined with parchment paper. Prick the dough all over with a fork, but don’t poke the bottom.
  3. You can put parchment paper on top of each sheet of puff pastry and then put another baking sheet on top to act as a weight so the puff pastry doesn’t rise.
  4. Put the baking sheets in the oven and bake for 20 to 22 minutes, or until they are golden brown. Take it out of the oven and let cool down all the way.
  5. Use a knife with serrated edges to trim the puff pastry so it fits in a 9×13-inch baking dish if needed. Put one puff pastry sheet.
  6. Mix milk, cream, butter, vanilla, and sugar with a whisk in a medium saucepan over medium heat until small bubbles start to form around the edge of the pan, but before it comes to a boil.
  7. To make a slurry, mix flour and water together with a whisk. Then, whisk the slurry into the hot milk mixture and take the pan off the heat.
  8. Whisk a little of the hot milk mixture into the beaten egg yolks to warm them up. Then, whisk the egg yolks into the rest of the mixture while the saucepan is still off the heat.
  9. Put the pot back on the stove and bring it to a boil. Cook for 30 to 60 seconds, whisking constantly, or until the custard gets thick.
  10. Pour the thickened custard over the puff pastry in a 9×13-inch baking dish, then place the second puff pastry sheet on top. (Cut the sides to fit the dish.) Press down gently so the pastry sticks.
  11. Put the baking dish in the fridge until the custard is set. 3-4 hours.
  12. When you’re ready to serve, sprinkle powdered sugar on top, cut the cake, and serve.

NOTES

How To Make it Gluten free

  • Use gluten-free puff pastries such as Jus Rol or Schar.
  • You can find a ton of gluten-free flour blends at the store. Or use cornflour, instead.
  • If you are extremely sensitive to gluten, use only pure vanilla extract or the ones tested and labeled as gluten-free.

NUTRITIONAL INFO:

Serving Size: 1 bar Calories: 215Sugar: 18.5 g Sodium: 28.4 mg Fat: 12.5 g Carbohydrates: 22.7 g Protein: 3.4 g Cholesterol: 120 mg