Chess Pie Recipe

Chess Pie is a delicious classic that’s perfect for a celebration or holiday gathering. Its multi-layer decadence, luscious texture and sweet, rich flavor is simply sublime!

What is Chess Pie?

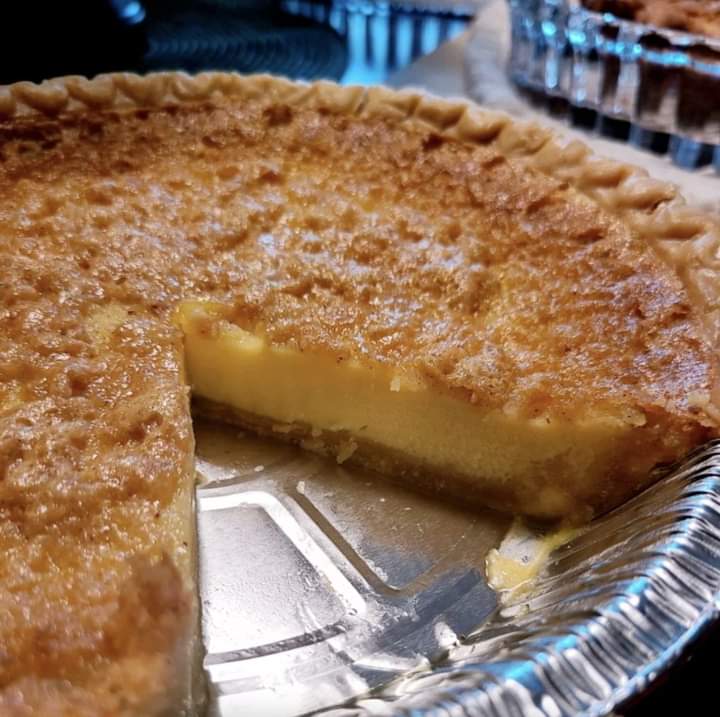
Chess pie is a popular dessert in the American South that originated from England. It is a custard style pie with a crisp browned topping.

It is generally made up of a traditional pie crust while the filling consists of eggs, milk or buttermilk, flour, sugar and often vinegar or lemon.

You’ll love this pie not only for it’s irresistible sweet flavor but also because it’s one of the easier pies to make.

No peeling and chopping loads of fruit or making a tricky curd or meringue. Rather here you just blend some standard baking ingredients and pour into a pie crust and bake.

Why is it called chess pie?

There are actually several beliefs as to where the name originally came from. You can read about three of them here.

What makes this the best chess pie?

I like this version best because of the browned butter. This secret ingredient is the ultimate upgrade to chess pie.

It adds a slightly caramel-like, even nutty flavor to the pie.

And once you try it this way I have the feeling it’s the only way you’ll make it from here on out!

Variations:

Lemon Chess Pie: Use 3 Tbsp lemon juice in place of vinegar. Add 2 Tbsp lemon zest along with liquids. Butter does not need to be browned.

Chocolate Chess Pie: These ratios are quite a bit different, follow a recipe like this one.

Coconut Chess Pie: After adding eggs stir in 1 1/2 cups shredded coconut and 1 tsp coconut extract. Browning butter is optional for this version.

Buttermilk Chess Pie: Replace milk with 1/2 cup buttermilk.

Honey Chess Pie: Replace 1 1/4 cups sugar with 1 cup honey.

Optional garnishing variation: Dust pie with a little cinnamon or powdered sugar.
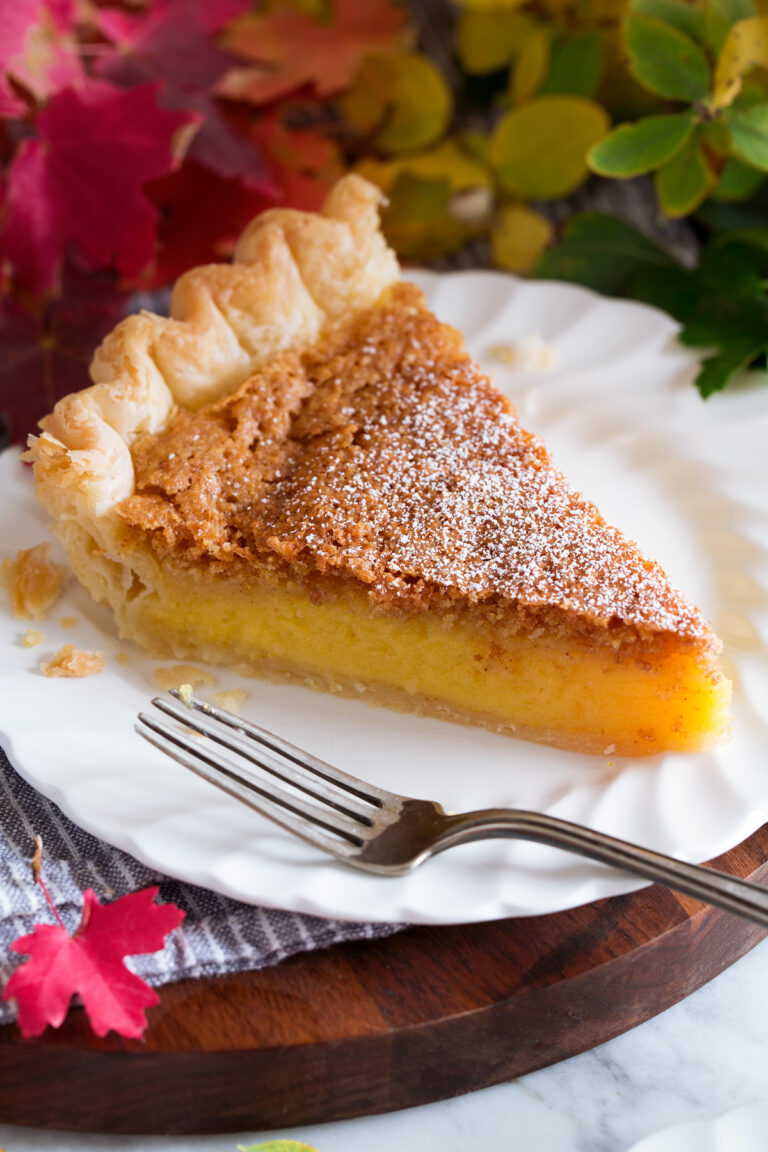
A rich, sweet and decadent Southern pie made with simple ingredients. This variation includes browning the butter to really upgrade the flavor of the pie.

Servings: 8

Prep Time: 30minutes

Cook Time: 50minutes

Rest Time: 1hour 50min

Ready in: 3hours 10min

Ingredients:
  • 1 prepared pie crust (homemade* or store-bought, unbaked)
  • 1/2 cup (113g) salted butter, diced into 1-Tbsp pieces
  • 1 1/4 cup (250g) granulated sugar
  • 2 Tbsp (22g) cornmeal
  • 1 Tbsp (10g) all-purpose flour
  • 1/4 tsp salt
  • 1/3 cup whole milk
  • 1 Tbsp white vinegar
  • 1 tsp vanilla extract
  • 4 large eggs
Instructions:
  1. Roll pie crust out about 12-inches then roll up around rolling pin and transfer to a standard pie plate.
  2. Unroll and shape into pie plate and decorate edges as desired.
  3. Chill until crust is firm, at least 1 hour.
  4. Melt butter in a medium, light-colored skillet. Let cook, stirring frequently until it has a nutty aroma and has browned (careful not to burn it, it should be an amber brown).
  5. Pour into a dish and let cool 1 hour.
  6. Place a baking sheet in oven and preheat oven to 350 degrees.
  7. In a mixing bowl beat eggs lightly to blend.
  8. In a separate mixing bowl whisk together granulated sugar, cornmeal, flour and salt.
  9. Pour in browned butter, milk, vinegar and vanilla to sugar mixture and blend.
  10. Add eggs and mix until well combined.
  11. Pour into prepared crust and bake on baking sheet in preheated oven until edges are set but center just wiggles slightly, about 45 – 55 minutes.
  12. Transfer to a wire rack to cool 30 minutes before slicing and serving. Store pie in refrigerator.
Notes:

*My favorite pie crust recipe is the one I’ve used here, omitting the sugar (since this pie is already plenty sweet). Prepare through step 2 as directed then follow recipe here as directed.

Nutritional Info:

Servings Per Recipe 8

Calories 460%Total Fat 22g28%Saturated Fat 10g 52%Cholesterol 126mg 42%Sodium 242mg 11%Total Carbohydrate 62g 23%Dietary Fiber 1g 3%Total Sugars 51gProtein 5gVitamin C 0mg 1%Calcium 40mg 3%Iron 1mg 6%Potassium 80mg 2%
Basbousa Recipe

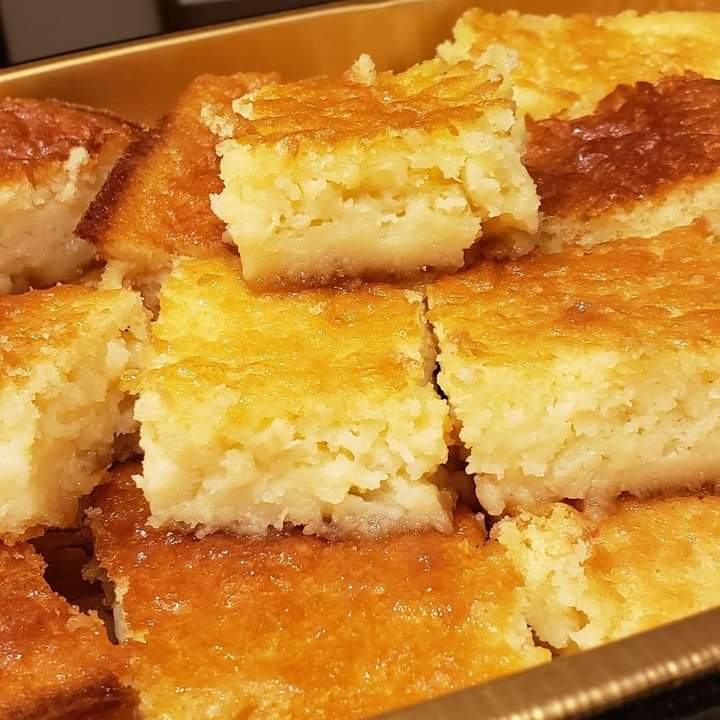
Basbousa is a dessert made from coarse sweet semolina, and translates as small kiss in Arabic.

Also known as Hareeseh, as well as Nammoura, it is a very easy dish to make.

WHAT IS BASBOUSA?

This cake is one of the most popular in the Middle East and North Africa, in some Balkan countries such as Greece, Bulgaria, Albania and Turkey or in Armenia, located in Western Asia. It can be found everywhere, in restaurants, in bakeries, and there will always be someone to offer a piece.

Semolina is the key ingredient of the basbousa recipe and, depending on the country, it can also contain almond or pistachio powder, as well as grated coconut.

In Egypt, for example, it can be found prepared with almond powder, and generously topped with hazelnuts on top; in Lebanon and Syria, with pistachio powder or crushed pistachios, with coconut or candied orange peel.

As soon as it comes out of the oven, basbousa is generously soaked with a cold sugar syrup, which can sometimes contain lemon or orange juice (or zest), or orange blossom water or rose water, as well as spices such as cloves or cinnamon.

WHAT IS THE ORIGIN OF BASBOUSA?

The origin of basbousa goes back to the revani of Turkish cuisine, a classic cake from the time of the Ottoman Empire.

Indeed, revani was baked for the first time by Ottoman pastry chefs to celebrate the conquest of Armenia in the sixteenth century. The battle of Revan, capital of the country, today called Yerevan, gave its name to this famous dessert.

As time passed, the revani started to delight many tables during the Ottoman period and its name was changed to revan-i meaning “precious” in the Ottoman language.

But the name of revani could also have been taken from the poet Revani who lived in Turkey between the fifteenth and sixteenth century.

Basbousa is a pastry typical of the Middle East, North Africa and the Balkans made from semolina and ground almonds, that is soaked in flavored syrup.

Prep Time: 20mins

Cook Time: 45mins

Total Time: 1hr 5mins

 Servings: 8 people

INGREDIENTS:
For the cake
  • 3 cups fine durum wheat semolina
  • 1 cup ground almonds
  • ⅓ cup caster sugar
  • ½ cup cooled oil (or melted butter)
  • 12 oz. plain yogurt
  • 2 tablespoons baking powder
  • 1 pinch salt
For the garnish
  • 4 oz. roasted and crushed pistachios
For the syrup
  • 1 cup caster sugar
  • 1 cup water
  • 2 tablespoons rose water (or orange blossom water)
  • 2 tablespoons freshly squeezed lemon juice
For the mold
  • 2 tablespoons butter
  • 1 tablespoon flour
INSTRUCTIONS:

Start by preparing the syrup as it will need to be completely chilled to soak the hot cake.

Syrup

Pour the water, sugar and lemon juice into a saucepan over high heat.

Bring to a boil.

Reduce the heat and cook the syrup over low to medium heat for up to 10 minutes.

When the syrup is completely cold, add rose water (or orange blossom water) and mix well.

Cake

In a large bowl, combine the semolina, ground almonds, caster sugar, salt and baking powder. Add oil, yogurt, and mix.

Grease a baking dish and dust with flour before pouring the preparation.

Pack the preparation well and smooth it out to the corners with a spatula. Using a knife, pre-cut 2-inch (5 cm) squares.

Allow the preparation to rest in the refrigerator for 15 minutes. Preheat the oven to 400 F (200°C ) while the dough is resting.

Bake for 25 to 30 minutes, until the cake is golden brown.

Soaking and garnishing

As soon as the cake comes out of the oven, pour the cooled syrup over it, leaving the cake inside the mold and spreading the syrup evenly.

Sprinkle generously with crushed pistachios. Allow to cool completely before cutting the pieces along the pre-cut marks.

NUTRITIONAL INFO:

Calories: 266kcal | Carbohydrates: 46g | Protein: 3g | Fat: 8g | Saturated Fat: 5g | Cholesterol: 17mg | Sodium: 139mg | Potassium: 80mg | Fiber: 1g | Sugar: 30g | Vitamin A: 192IU | Vitamin C: 1mg | Calcium: 25mg | Iron: 1mg

Philly Cheese Steak Egg Rolls Recipe

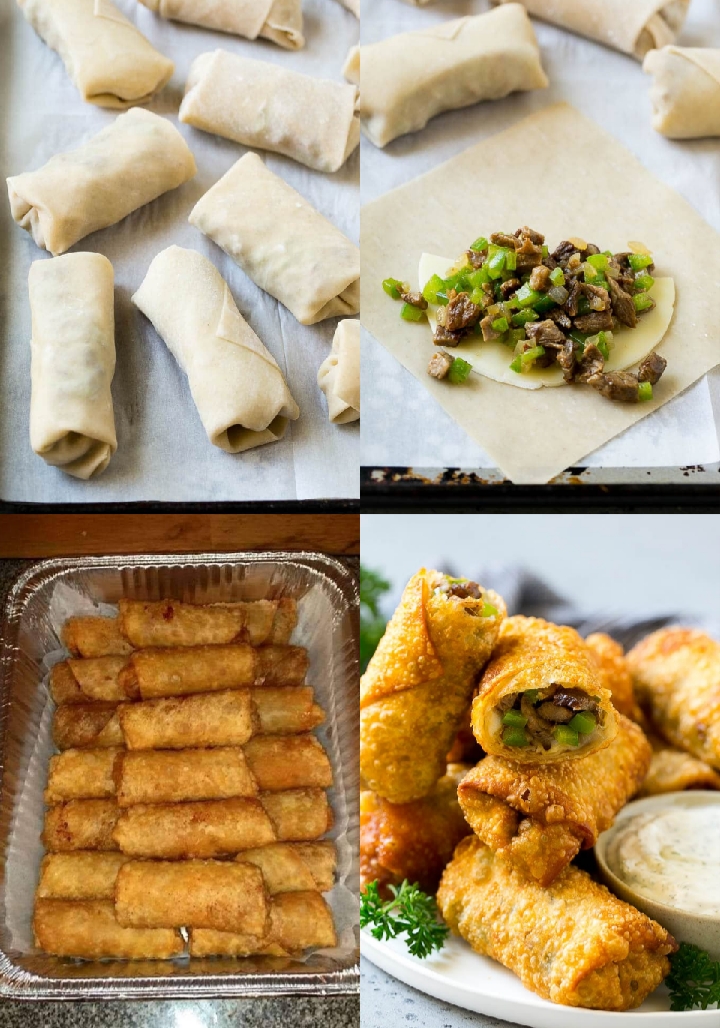
These Philly cheesesteak egg rolls are made with rib eye steak, onions, peppers and provolone cheese, all wrapped up and fried to crispy perfection. The ultimate appetizer or game day snack!

I love a good Philly cheesesteak sandwich, and these egg rolls have the same delicious and savory flavors inside a crispy wrapper.

Raise your hand if you love Philly cheesesteak! I just can’t get enough of that steak, pepper and cheese combination. These Philly cheesesteak egg rolls are a super fun appetizer, I always get so many compliments when I serve them at parties.

HOW DO YOU MAKE PHILLY CHEESESTEAK EGG ROLLS?

The first step is to cook up your filling. The filling for these egg rolls is died rib eye steak, green bell pepper and onion which are cooked in a little bit of butter.

You want to make sure your meat is diced fairly small to make it easier to bite into the egg rolls. You can also add some diced mushrooms if you’re a mushroom lover.

WHAT KIND OF MEAT DO YOU USE FOR PHILLY CHEESESTEAK?

Traditionally, thinly sliced rib eye is used for Philly cheesesteak sandwiches which is what we’re using in these egg rolls. If you don’t want to use rib eye, you could try sirloin or flank steak, or even ground beef for a different take on this dish.

The meat mixture is spooned into egg roll wrappers along with some provolone cheese. The egg rolls are then folded up and are ready to be fried.

HOW DO YOU BAKE EGG ROLLS?

You can bake these egg rolls, although you won’t get quite the same crispy crust as you would from frying. Simply coat the tops of your egg rolls with cooking spray and bake at 425 degrees F for 15-20 minutes, or until browned and crispy.

You can serve your egg rolls as is, or with a creamy dipping sauce such as ranch or a horseradish sauce. They’re great either way!

These Philly cheesesteak egg rolls will be the first snack to disappear at your next gathering. No one can resist that meat and cheese combo, and when you put it all into a crispy wrapper it tastes even better.

Prep Time: 20min

Cook Time: 15min

Total Time: 35min

SERVES: 12

INGREDIENTS:
  • 1 1/2 tablespoons butter
  • 1 green bell pepper chopped
  • 1/2 cup onion chopped
  • 1 pound boneless rib eye steak sliced or coarsely chopped
  • salt and pepper to taste
  • 6 slices provolone cheese
  • 12 egg roll wrappers
  • oil for frying
  • ranch for dipping optional
INSTRUCTIONS:
  1. Melt half of the butter in a large pan over medium high heat. Add the peppers and onion and cook 3-4 minutes or until softened.
  2. Remove the vegetables from the pan and cover to keep warm.
  3. Melt the other half of the butter and add the rib eye to the pan. Season with salt and pepper to taste.
  4. Cook the steak for 3-4 minutes or until browned and just cooked through.
  5. Place the peppers and onions back into the pan with the steak.
  6. Lay out an egg roll wrapper and place 1/2 of a slice of cheese in the center.
  7. Spoon approximately 2-3 tablespoons of steak filling onto each egg roll wrapper and fold according to package directions, using water to seal the edges of the wrappers as you go.
  8. Pour 2-3 inches of oil into a deep pan. Heat the oil to 350 degrees.
  9.  Fry 3-4 egg rolls at a time, turning occasionally, until browned all over, approximately 3-5 minutes.
  10. Drain on paper towels, then serve with dipping sauce of your choice.
NOTES:
If you prefer to bake your egg rolls, you can coat them with cooking spray and bake at 425 degrees F for 15-20 minutes or until browned and crispy.
NUTRITIONAL INFO:

Calories: 182kcal | Carbohydrates: 8g | Protein: 12g | Fat: 10g | Saturated Fat: 5g | Cholesterol: 37mg | Sodium: 229mg | Potassium: 158mg | Vitamin A: 210IU | Vitamin C: 8.5mg | Calcium: 117mg | Iron: 1.2mg

Grandma’s Country-Side White Bread Recipe

Bread, a food item that is served with many dishes, can be a meal by itself, will hold your favorite lunch meat or cheeses, and can even hold hot dogs, bratwurst, hamburgers and numerous other foods. Breads have become the scourge of the dietary world for many people. However, I am not one of them!

I love making homemade bread. I love the aroma of the house when bread is being made. It makes me feel warm inside.

Making bread is not as difficult as you think it is. After all, people have been making bread for many years. It is called Carb heaven due to the amount of carbohydrates in the bread. But, homemade bread should not count in that should It?

This bread recipe is perfect for those just beginning to make their own bread, and yet so simple that those with experience can put the ingredients together super fast and it will still be the perfect recipe for them too!

WHAT MAKES THIS A GREAT RECIPE?

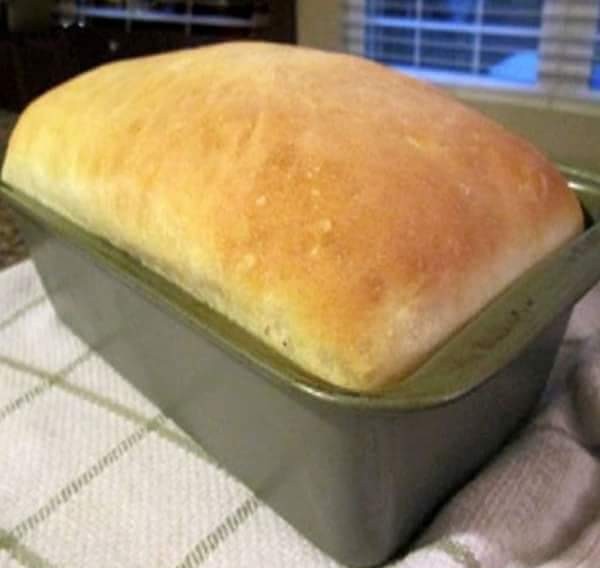
The bread comes out perfectly soft on the inside and slightly crusty on the outside. The recipe is super easy to follow and does not take a lot of ingredients or time.

WHAT TYPE OF YEAST DO I NEED TO USE?

There are a couple different types of yeast. Each yeast is best for different types of bakery goods. For this recipe, we want to use a quick rising yeast. Quick Rising yeast gives you the volume in a short amount of time.

YIELD: 8

PREP TIME: 10 min

COOK TIME: 30 min

TOTAL TIME: 40 min

Ingredients:
  • 1 cup warm water
  • 1 pkg Dry Active Yeast
  • 1 tsp Salt
  • 1 egg, large
  • ¼ cup Sugar
  • 3 tbsp Oil
  • 3 ½ to 4 cups Flour, all purpose is good to use
Instructions:
  1.  In a large bowl add the yeast to the warm water and allow it to sit for a 10 minutes
  2. After 10 minutes, add the egg, salt, sugar, oil and 2 cups of the flour to the bowl with the yeast mixture
  3.  Blend on high until well combined
  4. Add 1 more cup of flour and blend until the dough is smooth
  5. If needed, add more flour ¼ cup at a time, blending after each addition, Continue until the dough slips off the mixing handle easily
  6.  Grease a large bowl generously and place the ball of dough in the bowl
  7.  Turn the ball a few times so that it is covered and will not stick
  8. Cover lightly with a clean towel or cloth, and place in a warm area for one hour to rise. The dough should at least double in size.
  9. Punch the dough down and knead a few times with your hands and then place into a well greased loaf pan
  10.  Cover lightly with a cloth and place in a warm area to rise for one hour
  11. When the hour is done, Bake in a preheated oven at 375* for 25 to 30 minutes, until browned and cooked through.
Nutritional Info:

Yield: 8

Serving Size: 1

Amount Per Serving

Calories877TotalFat8gSaturatedFat1gTransFat0gUnsaturatedFat6gCholesterol23mgSodium305mgCarbohydrates173gFiber6gSugar7gProtein24g

The Very Best Banana Pudding Recipe

If you’re looking for THE Very Best Banana Pudding Ever, look no further! This truly is the greatest! Rich and creamy and surprisingly simple to make, it’s sure to become a family favorite and a huge crowd pleaser!

Sometimes I just make a recipe and it just does not work out. Other times I make a recipe and I knock it out of the park.

This is a knock-it-out-of-the-park kinda recipe!

I absolutely love banana pudding… and any banana dessert, really! Banana nut muffins, banana cake, banana pudding, banana bread, banana cream pie – I love it all and will never be able to resist any of them if presented the chance to eat something banana-y. But of all the banana things, pudding may have to be my number one fave!

There’s something so comforting about banana pudding – it just hits the spot every single time. And this banana pudding delivers in spades. It is totally delicious, light and fluffy but also creamy and decadent with amazing banana flavor, fresh whipped cream and lots of tender bananas and crunchy Nilla wafers. Like any self-respecting ‘nana pudding needs!

The Pudding:

The pudding consists of a few parts. First, to make it extra rich and creamy and to offset *some* of the sweetness, we’re going to use some cream cheese and whip it up until it is light and fluffy. To that, we’ll add some sweetened condensed milk – aka nectar of the gods – and combine the two. Then we’ll add in a large box of instant banana pudding mix, beat it in, followed by some milk – I used reduced fat but whole works too! Once it has all come together, we’ll fold in some freshly whipped whipped cream to make a super fluffy mixture. You could also use Cool Whip that’s been thawed, but when it comes to banana pudding, I really think because it is a simple dish it needs the flavors to shine, so I prefer fresh whipped cream.

The Layering:

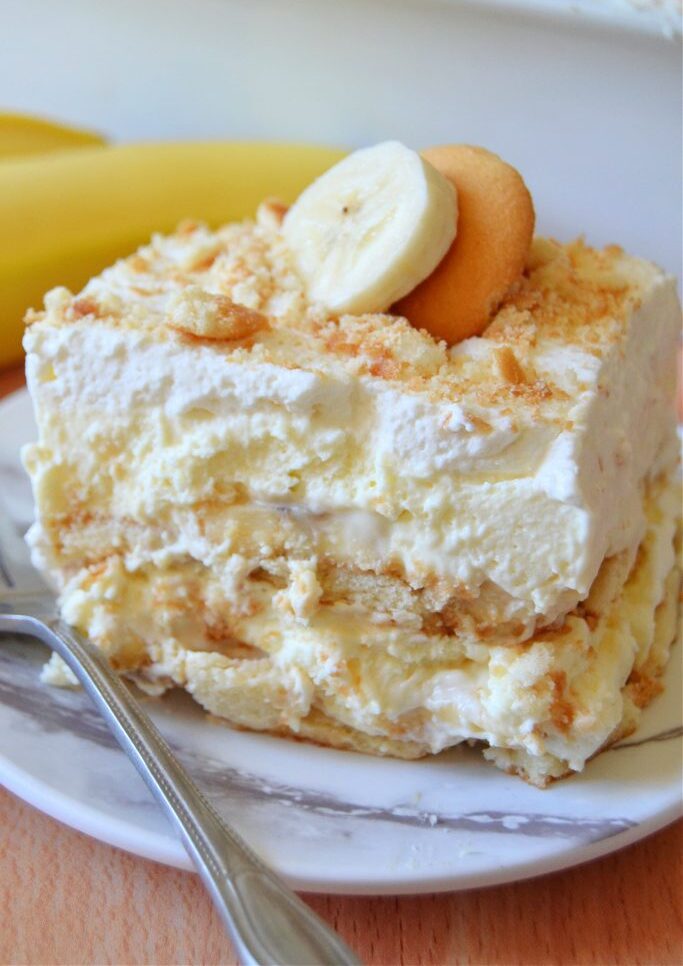
This particular pudding dish is layered in a pan which makes serving a breeze since you can cut it into squares as seen in the photos – super simple! You’ll just start by adding a layer of Nilla Wafers to a lightly greased baking dish, followed by a layer of sliced banana coins, then a layer of half of the pudding mixture. Repeat your layers and finish off with a layer of some saved whipped cream. Cover, and we’ll refrigerate overnight – the hardest part of this recipe is waiting! Once we’re ready to serve, we’ll garnish with additional Nilla Wafer crumbs. Additionally, if you don’t like Nilla Wafers or can’t find them, shortbread or Chessman cookies can be used.

This truly is the Very BEST Banana Pudding EVER! Rich and creamy yet light and fluffy and packed with amazing, fresh banana flavor in every mouthwatering bite! This is sure to become a crowd-pleaser and family fave!

Prep Time: 15 mins

Total Time: 8 hrs 15 mins

Servings: 12 servings

Ingredients:
  • 2½ cups heavy whipping cream
  • 3/4 cup confectioners’ sugar
  • 1 tsp vanilla extract
  • 8 oz (1 package) cream cheese, softened
  • 14 oz (1 small can) sweetened condensed milk
  • 5 oz (1 large box) instant banana pudding mix just the dry powder
  • 1 cup 2% or whole milk
  • 11 oz (1 box) Nilla Wafers
  • About 8 medium bananas, sliced make sure they’re barely ripe – too ripe/soft and they’ll brown faster
Instructions:
  1. Lightly grease a 9×13 baking dish with cooking spray; set aside.
  2. In the bowl of a stand mixer, add in the heavy whipping cream, confectioners’ sugar and vanilla extract and, using the whisk attachment, whip until stiff peaks form, about 5-7 minutes.
  3. Remove the whipped cream to a separate medium bowl and set aside.
  4. To the wiped out stand mixer bowl, add the cream cheese and, using the same whisk attachment, whip the cream cheese until fluffy, about 30 seconds.
  5. Add in the sweetened condensed milk and beat until smooth and no lumps of cream cheese remain, stopping to scrape the bottom and sides of the bowl as needed.
  6. Add in the dry pudding mix and mix well, then slowly stream in the milk and mix until fully combined.
  7. Add 2/3 of the whipped cream to the pudding mixture and fold it in gently until fully combined and no whipped cream streaks remain. Set aside.
  8. In your prepared pan, place an even layer of Nilla wafers and top with an even layer of sliced banana coins. Top with half of the pudding mixture and spread evenly.
  9. Repeat with another layer of Nilla wafers, followed by another layer of sliced banana coins, and the remaining pudding layer, spreading it evenly.
  10. Top with the remaining 1/3 of the whipped cream. Cover and refrigerate at least 8 hours or overnight.
  11. Just before serving, crush any remaining Nilla wafers and sprinkle over the top.
  12. Store leftovers covered in the fridge, maximum 2 days.
Notes:
  • Remember, this recipe needs at least 8 hours to chill, so it can be made in advance. But because of bananas and their tendency to brown, it has a maximum of 2 days before I would throw it out. You can not freeze this recipe as the pudding does not freeze well.
  • Cool Whip can be used to replace the whipped cream. If using Cool Whip, simply omit the heavy whipping cream, confectioners’ sugar and vanilla extract and replace with one 12-oz tub of thawed Cool Whip and proceed with the recipe as normal.
  • If you don’t like/can’t find Nilla Wafers, shortbread cookies or Chessman cookies can be used in their place.

Chadder Quick Bread Recipe

Soft and full of flavor, serve Cheddar Quick Bread warm with butter for a side dish that will quickly turn into a family favorite.

Quick Bread Tips:

Use freshly shredded cheddar cheese because pre-shredded has a flour/non-stick coating on it which prevents it from melting well in a loaf of bread like this.

Get creative! Add fresh or dried herbs, like parsley, or chives. Switch up cheeses, etc.

Quick breads are (almost) fool proof. Just watch that you don’t overdue the amount of liquids when adding flavors and ingredients.

How to Store Chadder Quick Bread 

Storing leftovers: You can store this bread on the counter or in the fridge, in a well-sealed ziploc bag or airtight container. It will last for up to 4 days. If you keep it on the counter, be sure to keep it cool and out of humidity.

To freeze cheese bread: Allow to cool completely before freezing. You can freeze either the entire loaf or slices so you can grab what you need at any time. Store tightly wrapped to avoid freezer burn and thaw on the counter.

Easy, Cheesy, Cheddar Quick Bread is a soft and delicious fool-proof recipe you need to keep on hand. This extra fast bread recipe is ready to bake in less than 15 minutes.

Servings: 12 Slices

PREP TIME: 5 mins

COOK TIME: 45 mins

CHILL/SET TIME: 10mins

TOTAL TIME: 1hr

INGREDIENTS:
  • 2 cups flour
  • 4 teaspoons baking powder
  • 1 Tablespoon sugar
  • 1½ teaspoons garlic powder
  • ½ teaspoon salt
  • 1½ cup whole milk
  • 1 large egg
  • 4 Tablespoons butter, melted
  • 2 cups freshly shredded cheddar cheese, from block
INSTRUCTIONS:
  1. Pre-heat oven to 350F.
  2. In a large mixing bowl whisk together the flour, baking powder, sugar, garlic, and salt.
  3. To the center of the dry ingredients add the milk, egg, and melted butter.
  4. Whisk quickly, but do not over whisk. The batter will thicken quickly.
  5. Add in the shredded cheese. Mix or fold in the cheese with a rubber spatula for ease.
  6. Pour batter into a greased bread pan. Bake for 45 minutes.
  7. Remove from oven and allow the loaft to cool for 10 minutes before removing andit from the pan and placing on a wire rack.
  8. Slice and serve with butter or chive cream cheese.
NOTES:
Helpful tips 
  • Use freshly shredded cheddar cheese as pre-shredded has a flour/non-stick coating on it that prevents it
  • From melting well in a loaf of bread like this.
Nutritional Info:

Calories: 271kcal | Carbohydrates: 17g | Protein: 10g | Fat: 18g | Saturated Fat: 11g | Polyunsaturated Fat: 1g | Monounsaturated Fat: 5g | Trans Fat: 1g | Cholesterol: 68mg | Sodium: 314mg | Potassium: 184mg | Fiber: 1g | Sugar: 2g | Vitamin A: 575IU | Vitamin C: 1mg | Calcium: 277mg | Iron: 1mg