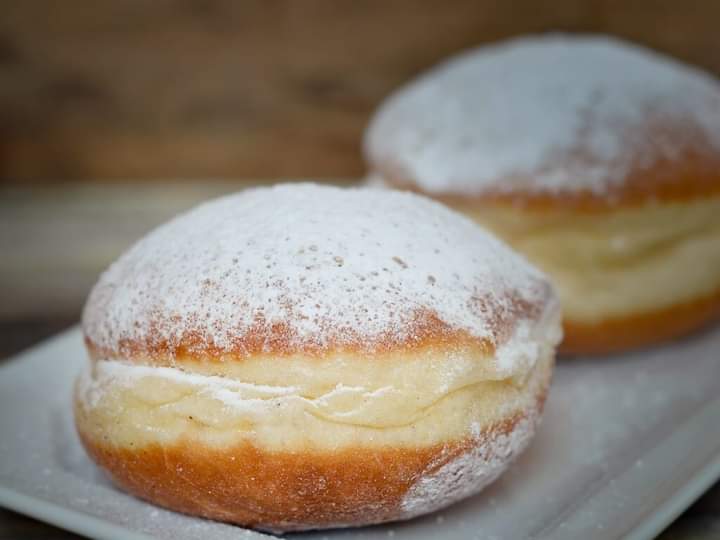
Syn Free Chicken Fajita Pasta Recipe

You can’t go wrong with fajitas for dinner, can you?

Well actually, sadly, you can.

One of those off-the-shelf kits can set you back up to 10 Syns per fajita when you’re following Slimming World, and I don’t know many self-respecting hungry people who would be happy to draw the line at just one.

But bear with me, because it’s not all doom and gloom here.

In fact, it’s quite the opposite.

After much faffing about with various ingredients, I came up with an alternative that ticks all the right boxes, will leave you feeling satisfied, and shakes things up just enough to keep you excited. Without sacrificing any of those gorgeous Mexican flavours.

This Slimming World chicken fajita pasta is Syn free, has a very reasonable 471 calories per portion, I hope you’ll love it as much as I do…
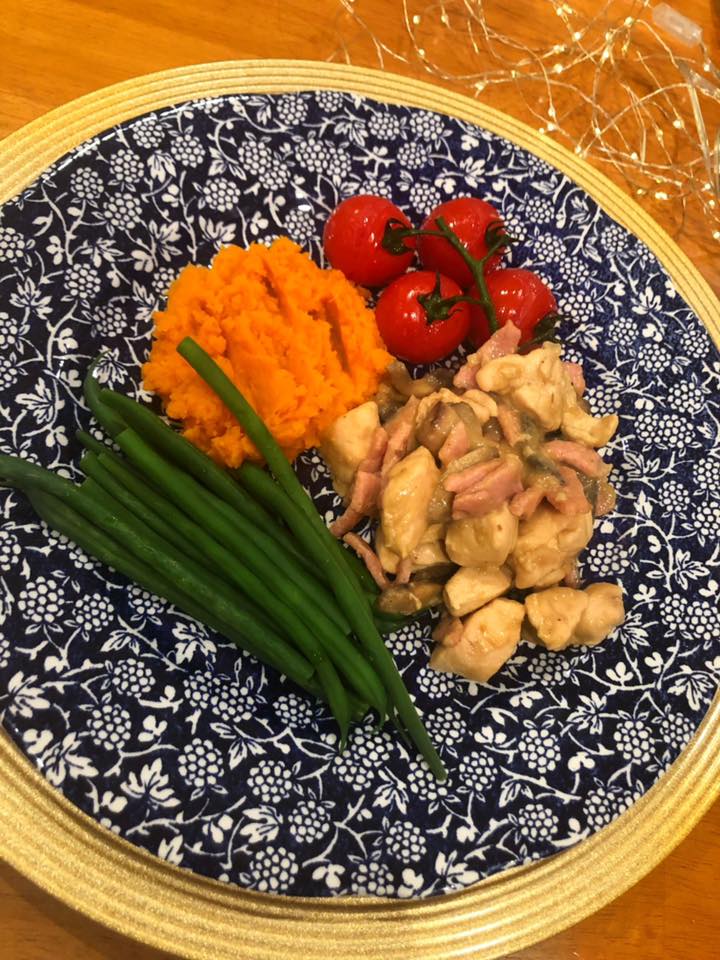
Slimming World chicken fajita pasta recipe

This creamy chicken fajita pasta is Syn free, and full of authentic Mexican flavour.

Prep Time: 5mins

Cook Time: 25mins

Course: Main Course

Cuisine: Mexican

Servings: 2

INGREDIENTS:

  • 2 large chicken breasts chopped into thin slices/chunks
  • 140 g dried pasta shapes I used farfalle, but feel free to use your favourite or whatever you have in the cupboard
  • 1 small onion sliced
  • 1 red pepper sliced
  • 1 red chilli sliced, optional
  • 100 g plain quark
  • 1 chicken stock cube made up with 100ml boiling water
  • 1 tbsp Schwartz Fajita Seasoning
  • Low calorie cooking spray

INSTRUCTIONS:

  • Heat a heavy based pan over a medium-high heat and spritz with low calorie cooking spray.
  • Add the chicken and stir fry for 5 minutes, or until sealed.
  • Add the onion and red chilli (if using) to the pan, and continue to fry for 2 minutes.
  • Add the red pepper, and fry for a further 5 minutes, or until the chicken is cooked through and the vegetables have softened but still retain their crunch.
  • Add the Schwartz Fajita Seasoning for the last minute.
  • Meanwhile, cook the pasta according to packet instructions. Drain and set to one side.
  • Add the chicken stock and quark to a jug, and mix thoroughly until a sauce is formed.
  • Continue to simmer for 10 minutes, or until a thick and creamy sauce is formed.
  • Add the pasta to the pan and stir well, ensuring that everything is piping hot.
  • Serve and enjoy!
HOW TO SERVE YOUR CHICKEN FAJITA PASTA
  • With pasta, chicken, and vegetables all included in the recipe, this is pretty much a complete meal in its own right.
  • To make sure that you’re getting enough Speed Foods though, add a big leafy green salad on the side.
  • I also love adding a few wedges of lime, a little guacamole, and a small scoop of quark, in place of sour cream.
  • If you are adding your own extras, just make sure that you account for the Syns or calories, in line with your diet plan.

Notes:

The nutritional and Syn values provided are carefully calculated and correct at time of publication but may not always be completely accurate.

If you’re serious about sticking rigidly to your plan, it’s always worth doing your own calculations for extra peace of mind – and remember, we may be using different brands or variations of ingredients which can significantly impact the nutritional and Syn values!

Nutritional Info:

Calories: 471kcal
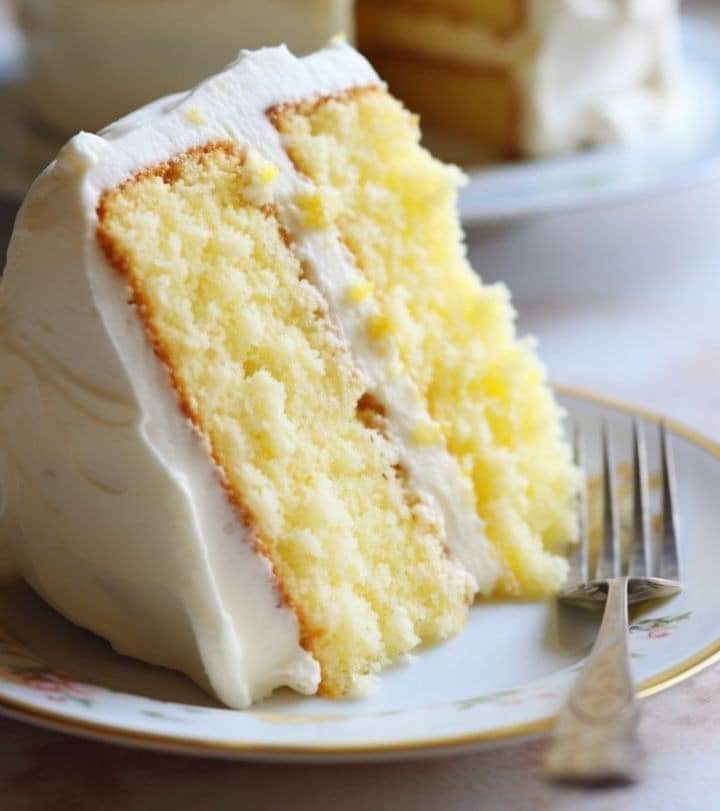
Yellow Cake Recipe

This is the BEST Basic Yellow Cake Recipe! It’s perfect for a layer cake, a sheet cake or cupcakes! This easy cake recipe is homemade – you’ll never need to buy a box cake mix again.

Prep Time: 30mins

Cook Time: 30 mins

Assembling Time: 30mins

Total Time: 1hr 30mins

Ingredients

For the Cake:

½ teaspoon salt

3 teaspoons baking powder

2 ½ cups (310g) all-purpose flour

1 cup (227g) unsalted butter, melted

1 ½ cups (297g) granulated sugar

4 large eggs

1 teaspoon (5 ml) vanilla extract

1 ¼ cups (296) ml buttermilk

For the frosting:

1 cup (227g) unsalted butter, softened

4 cups (452g) powdered sugar

½ teaspoon salt

1 teaspoon (5 ml) vanilla extract

2-3 tablespoons (30-45 ml) heavy whipping cream

Instructions:

For the cake:

Preheat oven to 350°F. Prepare cupcake pans with liners or grease and flour cake pan(s).

Whisk salt, baking powder, and flour in a medium sized bowl. Set aside.

Using a hand mixer, cream sugar into melted butter until smooth. Beat in eggs, one at a time, then mix in vanilla extract.

Add dry ingredients alternately with the buttermilk, starting and ending with the flour, mixing gently between each addition. Mix until just combined. Be sure to scrape the sides of the bowl.

Pour batter into prepared pans and bake as directed. Cool completely before removing and frosting.

Bake Time: 24 cupcakes: 14-17 minutes // Two 9-inch round pans: 24-27 minutes // Two 8-inch round pans: 25-33 minutes // 9×13-inch pan: 30-40 minutes

For the frosting:

Beat butter until smooth with a hand or a stand mixer. Note: if you’re using a hand mixer be sure to use a very large bowl to avoid wearing the powdered sugar.

Add powdered sugar, one cup at a time, and beat on medium speed until crumbly. Mix in salt and vanilla.

Add 1 tablespoon of heavy whipping cream at a time, mixing between each addition, until the frosting is smooth and the desirable consistency.

Frost cake or cupcakes as desired.

Notes

You can use a 9×13-inch pan, two 8-inch or 9-inch rounds, or make 24 cupcakes.

This is also great with chocolate frosting!

Store cake on counter for up to 3 days. Cake can be frozen (with or without frosting) for up to 2 months. Be sure to wrap it well in plastic wrap or an airtight container.

Nutritional Info.:

Serving: 1serving | Calories: 334kcal | Carbohydrates: 42g | Protein: 3g | Fat: 17g | Saturated Fat: 10g | Cholesterol: 74mg | Sodium: 175mg | Fiber: 1g | Sugar: 30g

Chicago Style Deep Dish Pizza Recipe

Here’s how to make authentic-tasting Chicago deep dish pizza. Complete with the buttery crust, slightly sweet tomato sauce, and a thick layer of cheese.

Prep Time: 4 hours

Cook Time: 30 minutes

Total Time: 4 hours, 30 minutes

Yield: 2 deep dish 9-inch pizzas

Ingredients:

PIZZA CRUST (MAKES 2)

3 and 1/4 cups (406g) all-purpose flour (spoon & leveled)

1/2 cup (60g) yellow cornmeal

1 and 1/4 teaspoons salt

1 Tablespoon (12g) granulated sugar

2 and 1/4 teaspoons (7g) Platinum Yeast from Red Star instant yeast (1 standard packet)*

1 and 1/4 cups (300ml) slightly warm water

1/2 cup (115g) unsalted butter, divided (1/4 cup melted, 1/4 cup softened to room temperature)

olive oil for coating

TOMATO SAUCE FOR BOTH PIZZAS

2 Tablespoons (30g) unsalted butter

1 small onion, grated (about 1/3 cup)*

3/4 teaspoon salt

1 teaspoon dried oregano

1/2 teaspoon crushed red pepper flakes (optional, but recommended)

3 garlic cloves, minced

one 28-ounce can (794g) crushed tomatoes*

1/4 teaspoon granulated sugar

TOPPINGS FOR BOTH PIZZAS

4 cups (about 16 oz) shredded mozzarella cheese*

1/2 cup (45g) grated parmesan cheese

optional: 1/2 cup sliced pepperoni

optional: 4 slices bacon, cooked and crumbled

Instructions:

Please use my step-by-step photos below this written out recipe as a guide to making the pizza. For best results and ease of mind, read through the recipe completely before beginning. You will need two deep dish 9×2 inch round cake pans if you are making both pizzas at the same time. You can also use 9 inch springform pans.

For the crust: Combine the flour, cornmeal, salt, sugar, and yeast in the bowl of your stand mixer fitted with a dough hook attachment. If you do not have a stand mixer, use your hand mixer and a very very large bowl. If you do not have any mixer, you will do this all by hand. Again, use a very large bowl. Give those ingredients a quick toss with your mixer on low or with a large wooden spoon. Add the warm water and 1/4 cup of melted butter. The warm water should be around 90°F (32°C). Make sure it is not very, very hot or it will kill the yeast. Likewise, make sure the butter isn’t boiling hot. If you melt it in the microwave, let it sit for 5 minutes before adding. On low speed, beat (or stir) the dough ingredients until everything begins to be moistened. Continuing on low speed (or remove from the bowl and knead by hand if you do not own a mixer), beat the dough until it is soft and supple and gently pulls away from the sides of the bowl and falls off of the dough hook- about 4-5 minutes. If the dough is too hard (it will be textured from the cornmeal), but if it feels too tough, beat in 1 teaspoon of warm water. Alternatively, if it feels too soft, beat in 1 Tablespoon of flour.

Remove the dough from the bowl and form into a ball. Lightly grease a large mixing bowl with olive oil and place the dough inside, turning it around so that all sides of the dough are coated in the oil. Cover the bowl tightly with aluminum foil and allow to rise in a warm environment for 1-2 hours or until double in size.

Once the dough is ready, lightly flour a large work surface. Remove dough from the bowl, set the bowl and aluminum foil aside (to use later). Gently punch down the dough to remove any air bubbles and roll the dough into a large 15×12 inch rectangle. Spread 1/4 cup of softened butter on top of the dough. Roll it up lengthwise per the photos below. Cut the dough log in half. Form the two pieces of dough into balls and place back into your greased bowl. Cover with aluminum foil and allow to rise in the refrigerator (not in a warm place) for 1 hour until they are puffy as you make the sauce.

For the sauce: Place butter in a medium saucepan over medium heat and allow it to melt. Once melted, add the grated onion, salt, oregano, and red pepper flakes. Once the onion has slightly browned after about 5 minutes, add the garlic, tomatoes, and sugar. Turn the heat down to low-medium and allow it to simmer until it’s hearty, fragrant, and thick- about 30 minutes. You’ll have about 2 and 1/2 cups of sauce at this point. If you have more than that, keep simmering until the amount has reduced. Remove from heat and set aside until ready to be used. You may store the sauce in a tightly covered container in the refrigerator for up to 2 days if planning to make the pizza another day. You may freeze this sauce for up to 2 months as well.

Preheat oven to 425°F (218°C).

Assemble the pizzas: After the dough balls have risen in the refrigerator, they should be puffy. Keep one ball of dough in the refrigerator as you work with the first one. Roll it out on a lightly floured work surface, working it into a 12-inch circle. Using your rolling pin as a guide (see photos below), place over a 9×2 inch deep dish cake pan. Using your fingers, press the dough into the cake pan. Make sure it is nice and tight fitting inside the pan. Trim any excess dough off the edges with a small knife. Repeat with 2nd dough. Brush the top edges of the dough with a little olive oil, which gives the crust a beautiful sheen. Fill each pizza with 1/2 of the cheese (about 2 cups/8 oz per pizza), then the pepperoni and bacon or your desired toppings. Pour about 1 and 1/4 cups (300ml) of sauce evenly on top of each. If you do not like that much sauce, you can reduce to 3/4 cup (180ml) per pizza and have leftover sauce. Sprinkle each with 1/4 cup (22g) of grated parmesan cheese.

Place the cake pans on top of a large baking sheet, which will catch anything potentially spilling over the sides of the pans. (Nothing usually does.) Bake for 20-28 minutes or until the crust is golden brown. Feel free to loosely cover the pizzas with aluminum foil after the 15 minute mark to prevent any heavy browning and uneven baking. Remove the pizzas from the oven and allow to cool in the pans placed on a wire rack for 10 minutes. After 10 minutes, slice, serve, and enjoy. Place any leftover pizza in an airtight container and refrigerate for up to 5 days. Reheat leftovers in a 300°F (149°C) oven for 15-20 minutes or until hot.

Notes:

Make Ahead & Freezing Instructions: Dough may be prepared through step 4. In the last part of this step, the dough needs to rise in the refrigerator for 1 hour. You may leave it in the refrigerator for up to 1 full day, making sure to punch it down to remove any air bubbles before rolling out as directed in step 7. You may freeze the pizza doughs after preparing them through step 4, and instead of allowing to rise in the refrigerator, simply freeze for up to 2 months. Then, allow the doughs to thaw overnight in the refrigerator and allow to rise at room temperature for 1 hour before continuing with step 7. Make-ahead and freezing instructions for the sauce are written in step 5.

Yeast: Platinum Yeast from Red Star is an instant yeast. You can use any quick rise or instant yeast in this recipe. You can also use active dry yeast in this recipe with zero changes. The rise time may be slightly longer if using active dry yeast.

Onion & Tomatoes: Please see notes below the recipe in the step-by-step photos for details about the grated onion and the can of crushed tomatoes.

Cheese: You can use sliced mozzarella or shredded mozzarella cheese.

Toppings: Feel free to swap the pepperoni and bacon with cooked and crumbled sausage, thinly sliced green peppers and/or onions, sliced mushrooms, etc. Add enough toppings to suit your tastes.

Nutritional Info:

Serving Size:1 of 8 servingsCalories848Total Fat 58g Saturated Fat 18g Carbohydrates 48 g Dietary Fiber 3g Sugar 4g Protein 32 g Cholesterol 104mg Sodium 1184mg

Strawberry Cheesecake Triffle

This Strawberry Cheesecake Trifle features layers of sweetened berries doused with Amaretto, angel food cake cubes and luscious cheesecake filling, lightened with whipped cream.

I was hosting brunch at my house, and that called for a lovely fruit-filled dessert recipe. Adding a homemade cheesecake twist to a strawberry trifle recipe was brilliant.

A fruit and cream dessert is perfect for a mid-day treat, especially when company is invited. I love sweets featuring berries, like this stunning Strawberry Shortcake Roulade, but sometimes it’s nice not to turn on the oven! Sliced berries were sweetened and then dosed with a bit of Amaretto. The cheesecake layer was composed of cream cheese and sour cream, then a billowy cloud of whipped cream was folded in. Not a classic English trifle by any means, but utterly delicious!

A store-bought angel food cake made quick work of the preparation. Since this is a no-bake trifle recipe, it’s perfect for hot summer days when you don’t want to turn on the oven as well as holidays when the oven is often filled with turkey and casseroles!

Not exactly health food, but this strawberry cheesecake trifle is definitely lighter fare than so many other dessert options! You know it’s a hit when the men at the table start inquiring about the ingredients. They do combine beautifully for a delicious party in your mouth with every bite.

INGREDIENTS:

  • 1 package (8 ounces) cream cheese, softened
  • 1 cup (8 ounces) sour cream
  • 1/2 cup cold milk
  • 1 package (3.4 ounces) instant vanilla pudding mix
  • 1 carton (12 ounces) frozen whipped topping, thawed
  • 1-1/2 cups crushed butter-flavored crackers (about 38 crackers)
  • 1/4 cup butter, melted
  • 2 cans (21 ounces each) strawberry pie filling

INSTRUCTIONS:

  1. In a large bowl, beat the cream cheese until smooth.
  2. Beat in the sour cream; mix well.
  3. In a small bowl, beat milk and pudding mix on low speed for 2 minutes.
  4. Stir into cream cheese mixture.
  5. Fold in whipped topping.
  6. In a small bowl, combine crackers and butter.
  7. In a 2-1/2-qt. trifle bowl, layer half of the cream cheese mixture, crumbs and pie filling.
  8. Repeat layers. Refrigerate until serving.

Yield: 12-16 servings.


Pastry Cream Filled Donuts Recipe

Super fluffy brioche donuts made extra large, rolled in vanilla sugar and filled with a super light vanilla Pastry cream filling. 

PREP TIME: 45 mins

COOK TIME: 30 mins

ADDITIONAL TIME: 4 hrs

TOTAL TIME: 5 hrs15mins

Ingredients

Brioche Donuts

4 1/2 cups (540g) all-purpose flour, spooned and leveled

2 1/4 tsp (7g) instant yeast

3 Tbsp (36g) granulated sugar

1 tsp salt

2 large eggs, room temperature

2 large egg yolks, room temperature

1/2 cup (113g) salted butter, softened

1 cup (8 oz) water

1 cup (200g) granulated sugar

1 tsp cinnamon and/or 1/2 tsp vanilla powder

48 oz canola, sunflower or vegetable oil

Custard

3 large egg yolks, room temperature

1/2 cup (100g) granulated sugar

⅛ tsp salt

3/4 cups (180 ml) whole milk

2 Tbsp (28g) salted butter, softened

Whipped Cream (OR 8oz Cool Whip)

1 1/3 cups (300 mL) heavy whipping cream, cold

1/4 cup (30g) powdered sugar, spooned and leveled

Instructions

Brioche Donuts

Place the flour, yeast, 3 tablespoons sugar, and salt in the bowl of a stand mixer fitted with the hook attachment. Turn the mixer to low speed, add in the eggs and egg yolks, followed by the softened butter and water.

Once they’re all combined, turn the mixer to medium-low speed and allow it to knead the dough for 10 to 15 minutes, or until the dough begins to peel itself away from the sides of the bowl and forms a ball around the hook attachment.

If this doesn’t happen within the kneading time, the dough is too sticky; add 1 to 2 tablespoons (7 to 14 g) of flour and continue to knead until the dough comes together.

Test the strength of the dough by stretching a piece of dough between your fingers. The dough should stretch thin enough to let light through before tearing.

Push the dough to one side of the bowl, grease the open side of the bowl, then repeat with the other side. Cover the bowl with plastic wrap.

Place the bowl in a warm environment, in the sunlight or on a stovetop warming zone, and allow it to proof until it’s doubled in size; this may take anywhere from 1 to 2 hours.

Line two baking sheets with 16-20 4×4” parchment paper squares, and lightly flour a work surface.

Once the dough has doubled in size and is really fluffy, punch it down and turn it over onto the prepared work surface,

Split the dough in half. Gently roll each half into a log, and cut each log into 8-10 chunks (you can weigh them to make sure they’re even if you want, I just cut the log in half, then each side in half and again in half).

Roll each chunk into a tight ball and place the chunks on the prepared baking sheets. Cover the baking sheets with plastic wrap, and place them in a warm environment to proof for 30ish minutes, until they puff up slightly more.

Prepare for frying the donuts by lining two cooling racks with paper towels and spreading the 1 cup of sugar and cinnamon and/or vanilla powder in a bowl.

Ten minutes before the donuts are done proofing, heat the oil in a large pot over high heat to about 360F (182C) on a candy thermometer*, then lower the heat to medium. Use the thermometer to keep the oil within 10 degrees of 360F (182C).

Depending on the size of your pot, place two to four donuts in the oil at a time, being sure to leave space around them. Fry the donuts on each side, turning the donuts with a slotted spoon, for 1 to 2 minutes, or until they are browned.

If it is taking longer than 2 minutes to brown one side of the donut, increase the heat just a little. Work quickly, and avoid having an empty pot, so the oil doesn’t burn.

Place the fried donuts on the prepared racks. While they’re still warm, toss the donuts in the sugar. Serve warm or let them cool completely to room temperature if filling the donuts.

Custard

In a small or medium saucepan, whisk together the egg yolks and sugar until they’re well combined. Add the salt and slowly pour in the milk while whisking.

When the mixture is smooth, cook it over medium-low heat while whisking continuously (but not super aggressively) for about 5 minutes, until it begins to thicken.

Once it begins to thicken, whisk aggressively for one more minute and then pour into a heat safe bowl. Stir in the butter until it’s well combined.

Cover the surface of the pastry cream with plastic wrap and allow it to cool to room temperature or refrigerate until it’s chilled.

Whipped Cream

Once the pastry cream has cooled, make the whipped cream.

Combine the cream and sugar in the bowl of a stand mixer, and use the whisk attachment to beat the mixture at medium speed until it thickens a bit, about 30 seconds.

Turn the speed up to medium-high, and whisk the cream until it reaches stiff peaks, about 1 minute.

Add the cooled custard to the whipped cream, and turn the mixer up to medium-high speed, beating just until the cream is fully combined.

Use a piping bag to pipe into the donuts and serve fresh.

Notes:

*you can replace the homemade whipped cream with an 8 ounces tub of full-fat Cool Whip. I recommend the brand name if you can find it as they’re not all made equally.

Nutrition Information:

YIELD: 18 SERVING SIZE: 1

Amount Per Serving: CALORIES: 396TOTAL FAT: 22gSATURATED FAT: 10gTRANS FAT: 1gUNSATURATED FAT: 11gCHOLESTEROL: 131mgSODIUM: 235mgCARBOHYDRATES: 43gFIBER: 1gSUGAR: 19gPROTEIN: 7g

Low-Carb Bacon Cheeseburger Casserole Recipe

This Keto Cheeseburger Casserole has all the flavors of a juicy burger without the carbs! Your whole family will love this low carb cheeseburger casserole and you’ll love how simple it is to make!

 This low carb cheeseburger casserole is a family and reader favorite. I’ve heard nothing but good reviews from everyone who’s tried this simple recipe. I think you’ll love it, too!

Course: Main Course

Cuisine: American

Keyword: low carb recipes

Prep Time: 30minutes 

Cook Time: 30minutes

Total Time: 1hour

Ingredients

1/2 pound bacon

1 pound ground beef

1/2 onion diced

1 clove garlic minced

4 tablespoons cream cheese

2 tablespoons no sugar added ketchup

1 tablespoon yellow mustard

1 tablespoon Worcestershire sauce

1 teaspoon seasoned salt

4 large eggs

1/4 cup heavy cream

1 teaspoon hot sauce

1 teaspoon ground pepper

8 ounces shredded cheddar

1 teaspoon fresh dill

INSTRUCTIONS

Dice the bacon into small pieces and place in a large skillet over medium heat. Cook, stirring often, until crisp. Remove bacon from pan and set aside on a paper towel lined plate. Drain grease from pan.

Add the ground beef, onion, and garlic to the skillet and cook until browned, crumbling as it cooks. Once beef is browned and cooked through, drain fat.

Add the cream cheese, ketchup, mustard, Worcestershire sauce, and seasoned salt to the skillet and cook over low heat, stirring constantly, until combined.

Spread the beef mixture into a greased 8×8 baking dish. Top with the cooked bacon.

Crack the eggs into a medium bowl and whisk together with the heavy cream, hot sauce, and pepper.

Pour the egg mixture over the beef and bacon.

Top with the cheddar cheese.

Bake at 350 degrees for 30-35 minutes or until set and golden on top. Let cool 15 minutes before sprinkling with dill and serving.

Notes

This recipe has been updated to make the instructions more clear. We also ran this through an updated nutrition calculator. This used to be calculated at 2 net carbs per serving, but we’re now seeing 3 net carbs per serving.

To reduce sodium, use lower sodium bacon and a salt-free seasoning in place of the seasoned salt.

Is ketchup keto friendly?

Most ketchup is loaded with sugar, so you’ll want to be sure to read the labels. We use Heinz No Sugar Added Ketchup. It’s low in carbs and uses sucralose as the sweetener.

Nutritional Info:

Calories: 631kcal | Carbohydrates: 4g | Protein: 32g | Fat: 53g | Saturated Fat: 23g | Polyunsaturated Fat: 4g | Monounsaturated Fat: 19g | Trans Fat: 1g | Cholesterol: 261mg | Sodium: 1165mg | Potassium: 424mg | Fiber: 1g | Sugar: 2g | Vitamin A: 857IU | Vitamin C: 2mg | Calcium: 327mg | Iron: 3mg