No-Bake Peanut Butter Oatmeal Bars Recipe

These no-bake peanut butter bars have a thick layer of sweet oatmeal and a rich and fudgy chocolate peanut butter center. They’re very similar to your favorite no-bake cookie recipe, but they’re in bar form.

Prep Time: 10minutes 

Cook Time: 5minutes 

Total Time: 15minutes 

Servings: 16 bars

INGREDIENTS:

  • 3/4 cup butter
  • 1/2 cup packed brown sugar
  • 1 teaspoon vanilla extract
  • 3 cups quick cooking oats
  • 1 cup semi-sweet chocolate chips
  • 1/2 cup peanut butter

INSTRUCTIONS:

  1. Melt butter in a large sauce pan over low heat.
  2. Stir in brown sugar, vanilla, and oats.
  3. Cook for 3 to 4 minutes. Press half of mixture in to the bottom of a buttered 8 x 8 dish.
  4. In a microwave safe bowl, microwave the chocolate and peanut butter, stirring every 30 seconds until melted and blended.
  5. Pour the chocolate peanut butter mixture over the crust.
  6. Sprinkle the remaining oat mixture over the chocolate and peanut butter, pressing gently to form a crust.
  7. Refrigerate for 3 hours before cutting and serving.

Nutritional Info:

Calories: 271kcal | Carbohydrates: 24g | Protein: 4g | Fat: 18g | Saturated Fat: 8g | Cholesterol: 23mg | Sodium: 116mg | Potassium: 181mg | Fiber: 2g | Sugar: 11g | Vitamin A: 270IU | Calcium: 26mg | Iron: 1.6mg

Loaded Deviled Eggs Recipe

Loaded deviled eggs are a tasty twist on a classic deviled eggs recipe and include savory egg yolk, creamy mayo, cheese, and a dash of hot sauce topped with salty bacon bits. Serve this mouthwatering appetizer at your next holiday gathering or potluck for the ultimate crowd-pleasing snack.

Why You’ll Love this Bacon Deviled Eggs Recipe:

EASY: This recipe is so easy, but looks fancy! Just hard-boil your eggs, mix up some ingredients, and they’ll be ready to serve.

LOADED WITH FLAVOR: These are loaded with bacon, cheese, sour cream, and chives for a tasty dish.

HOLIDAY APPETIZER: Deviled eggs make the best holiday appetizer. These are the perfect appetizer for Easter, Christmas, Thanksgiving, or New Year’s!

Prep Time: 15minutes

Cook Time: 12minutes

Total Time: 27minutes 

Servings: 12 deviled eggs

Course: Appetizer, Side Dish

Cuisine: American

INGREDIENTS:

  • 6 large eggs
  • 2½ tablespoons quality mayo, I use Hellman’s
  • 2 tablespoons sour cream
  • 1 teaspoon dijon
  • 1 heaping tablespoon chives, finely chopped
  • ¼ plus ⅛ teaspoon onion powder
  • ¼ teaspoon Crystal hot sauce
  • ⅛ teaspoon smoked paprika
  • Kosher salt and freshly cracked black pepper, to taste
  • 2 strips thick-cut bacon, diced
  • ⅓ cup sharp cheddar cheese, freshly grated using a microplane grater
Garnish
  • Chives, chopped
  • 1½ tablespoons sharp cheddar cheese, freshly grated using a microplane grater
  • Freshly Cracked Black pepper

INSTRUCTIONS:

  1. Cook cut bacon until crispy. Transfer to a paper towel-lined bowl and set aside.
  2. Carefully add eggs to a medium-sized pot. Add enough water so that there is 1 inch of water above the eggs. Cover the pot and bring the water to a rolling boil over medium-high heat. As soon as you hear the water begin to boil, turn off the heat and set a timer for 12 minutes. Meanwhile, prepare an ice bath for the eggs.
  3. When the timer goes off, carefully add hard boiled eggs to the ice bath. Set a timer for 10 minutes.
  4. Carefully peel eggs under light running water.
  5. You can slice eggs the traditional way (lengthwise) or if you want the eggs like what you see picture, remove a small end on both sides of the eggs (save the ends!). This will allow them to stand on an end. Next, halve eggs width-wise and scoop the yolk into a bowl. Place halved whites on a platter and small ends back into the cavity of each egg.
  6. Mash yolks with a fork, then and add mayonnaise, sour cream, dijon mustard, smoked paprika, onion powder, hot sauce, cheese, season to taste with kosher salt and black pepper. Add chives then fold until combined. Stir until smooth.
  7. Evenly distribute remaining grated cheese into each cavity. Place creamy filling into a sandwich-sized ziplock bag and trim a small end off. Pipe filling into each cavity of the eggs. Garnish with chives, bacon and freshly cracked black pepper. Enjoy!

Tips:

  • You can hard-boil eggs with any method you like for this recipe. I have instructions to boil or steam in the recipe card. You could also use this instant pot hardboiled eggs recipe!
  • Trim off a very tiny sliver from the bottom of each egg half so that they sit flat.
  • I love this no mayo deviled eggs recipe, but you can use mayo instead of sour cream if you prefer.
  • Mix in other ingredients as you please. The sky is the limit for toppings!


Did you make this recipe?

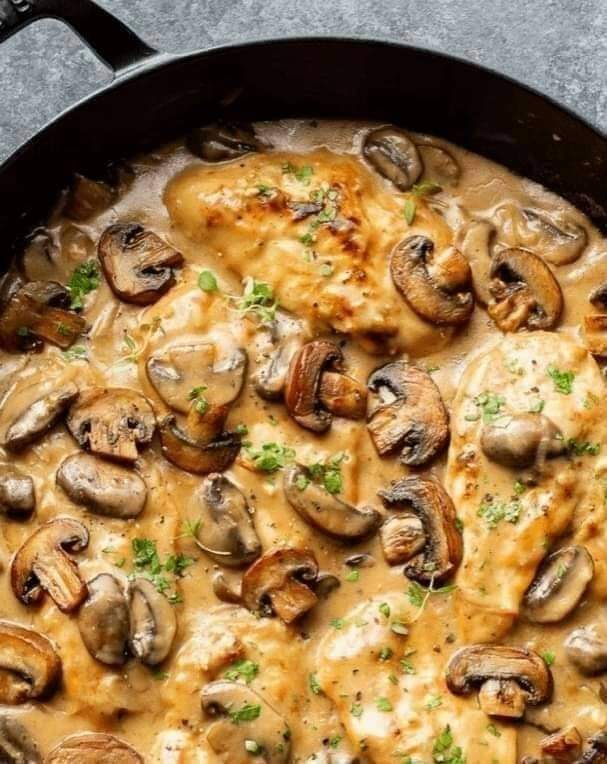
Chicken Marsala Recipe

This chicken marsala recipe is an Italian-American classic! It has juicy pan-fried chicken smothered in a creamy wine and mushroom sauce. It’s a 30-minute dish that’s simple to master in your own kitchen.

Why you’ll love it

Many restaurants have chicken marsala on their menu, but why not replicate it at home? It’s actually really effortless and quick, so it’s ideal for everything from a dinner party for easy entertaining to a weeknight meal when you’re craving something a little special.

What’s surprising to a lot of people is how few ingredients you need to make homemade chicken marsala. All it involves is a few pantry essentials along with a variety of wine that’s easy to get your hands on, and that’s it!

What is marsala?

Marsala is an Italian fortified wine, which means a spirit has been added to it, in this case brandy. It’s got a kind of nutty, caramelized flavor when used in sauces. I recommend using either semi-secco (semi-sweet) or secco (dry) marsala for this recipe. I used Cantine Pellegrino Fine I.P. Marsala here. Don’t use sweet!

This chicken marsala recipe is an Italian-American classic! It has juicy pan-fried chicken smothered in a creamy wine and mushroom sauce. It’s a 30-minute dish that’s simple to master in your own kitchen.

PREP TIME: 10mins

COOK TIME: 20mins

TOTAL TIME: 30mins

COURSE: Main Course

CUISINE: American

SERVINGS: 4

INGREDIENTS:

▢2 large chicken breasts

▢Salt & pepper to taste

▢1/4 teaspoon garlic powder

▢Flour for dredging

▢1 tablespoon olive oil

▢3 tablespoons butter divided

▢7 ounces cremini mushrooms sliced fairly thin

▢1 large clove garlic minced

▢3/4 cup marsala wine see note

▢1/2 cup heavy/whipping cream

INSTRUCTIONS:

  1. Cut the chicken breasts in half lengthwise and trim off any remaining fat.
  2. Season the chicken with the salt, pepper, and garlic powder. Coat each piece in flour.
  3. Heat the olive oil and 1 tablespoon of the butter in a skillet over medium-high heat.
  4. Once the pan is hot, add the chicken and sear it for 4-5 minutes/side or until golden.
  5. Take the chicken out of the pan and set aside (it’ll finish cooking in the sauce).
  6. Add the remaining butter and mushrooms to the skillet and cook them for 3-5 minutes, stirring occasionally, until browned.
  7. Add the minced garlic and marsala wine to the skillet and let it bubble for 2-3 minutes.
  8. Add the cream to the skillet, and then add the chicken back in.
  9. Cook for another 4-5 minutes until the chicken is cooked through and the sauce has thickened up a bit.
  10. Season with extra salt & pepper if needed. I added a little bit of chopped parsley to finish it off (optional).

NOTES:

If you have smaller chicken breasts, there’s no need to cut them in half lengthwise, but you will need to cook them a bit longer.

I recommend using either semi-sweet or dry marsala for this recipe. See blog post for more info.

Chicken is safe to eat when it’s reached an internal temperature of 165F. Use an instant read thermometer to test for doneness.

Leftovers and storage

This chicken will keep in the fridge for 3-4 days in an airtight container.

To reheat, place in a small saucepan over a low heat, stirring occasionally until it’s warmed through.

Tips for success

This particular version of chicken marsala is meant to be cooked at a fairly high temperature throughout. To get the nice sear on the chicken and to quickly brown the mushrooms, it’s necessary that the pan is nice and hot!

Only turn the heat down if it’s splattering like crazy or you’re using copper or cast iron cookware since they conduct heat much more than the regular stuff most of us use on a daily basis.

Be careful not to overcook it. If you’re in doubt, chicken is safe to eat at 165F as indicated by a meat thermometer.

chicken marsala on a plate with mashed potatoes and asparagus

What to serve with it

Chicken marsala is delicious served over pasta. Try my Quick & Easy Garlic Butter Noodles. Also, Garlic Mashed Potatoes or rice are equally tasty with the sauce.

Serving it with this easy asparagus recipe makes a great vegetable pairing.

A slice of crusty bread, garlic bread, or a side salad with this easy Italian dressing would be fantastic as well.

NUTRITIONAL INFO:

Calories: 428kcalCarbohydrates: 11gProtein: 26gFat: 26gSaturated Fat: 13gCholesterol: 136mgSodium: 225mgPotassium: 704mgFiber: 1gSugar: 4gVitamin A: 734IUVitamin C: 1mgCalcium: 40mgIron: 1mg


Low-Carb Keto Cream Cheese Pound Cake Recipe

It’s a recipe for low carb keto cream cheese pound cake. It’s uses with almond flour allowing it to stay low in carbs and keto-friendly. This recipe is favorite in the low carb keto community.

PREP TIME: 10 minutes

COOK TIME: 35 minutes

ADDITIONAL TIME: 5 minutes

TOTAL TIME: 50 minutes

INGREDIENTS:

  • 1 ¼ cups almond flour measured and sifted
  • 1 teaspoon of baking powder
  • ¼ teaspoon of salt
  • 4 tablespoons unsalted butter room temperature
  • ¾ cup of granulated sugar substitute
  • 3 ½ oz full-fat cream cheese room temperature
  • 1 teaspoon of vanilla extract
  • 4 eggs, room temperature

INSTRUCTIONS:

  1. Preheat oven to 350 degrees
  2. In a medium-sized bowl combine the almond flour, baking powder, salt. Set aside
  3. In a large bowl using an electric mixer blend on high the butter with the sugar substitute until the mixture is light and fluffy and well incorporated.
  4. Next, add the room temperature cream cheese and vanilla extract and mix well.
  5. Add the eggs one at a time making sure to mix well after each addition.
  6. Lastly, add the dry ingredients: the almond flour, baking powder, salt, and mix well until the batter is fully combined.
  7. In a well-greased 8-inch cake pan or 8-inch loaf pan bake 30 to 40 minutes until golden brown on top. The cake will be done once an inserted toothpick comes out clean.
  8. If making cupcakes bake for 20-25 minutes. This makes 12 cupcakes
Low-Carb Keto Pound Cake Recipe Tips
  • Before baking, I always recommend you take out your wet ingredients and allow them to come to room temperature; in this case, that would mean cream cheese, butter, and eggs. I also measure out all the dry ingredients to help speed up the process.
  • Although not required, lining the pan with parchment paper will make it easier to remove the cake and add it to a cooling rack.
  • You’ll want to use an electric mixer or stand mixer in order to fully incorporate your ingredients. Also, be sure to scrape the bowl several times in the process to make sure all the ingredients are mixed properly.
  • Your baking time will depend on the size pan you use and whether you have opted to double the recipe. For an 8-inch loaf, bake for approximately 35-40 minutes.
  • If you double the recipe, you will need to bake it for anywhere between 50-70 minutes, depending on your oven, and use at least a 10-inch loaf pan. This recipe also makes keto pound cake muffins. It makes 12 regular-sized cupcakes.
  • When making cupcakes, bake them for 20-25 minutes. And if you opt for a bundt pan, it will need to be a small one unless you are doubling the recipe.
  • For a small bundt cake (8 cup capacity), bake for 35-40 minutes, and for a large one (12 cup capacity), bake for 60-70 minutes. Be sure to check out my keto baking tips for more of my proven advice.

Nutritional Info:

YIELD: 12 SERVING SIZE: 1

Amount Per Serving: CALORIES: 102TOTAL FAT: 9.6gSATURATED FAT: 4.8gCHOLESTEROL: 74mgSODIUM: 124mgCARBOHYDRATES: 1.2gNET CARBOHYDRATES: .9gFIBER: 0.3gSUGAR: 0.3gPROTEIN: 3.1g

Did you make this recipe?

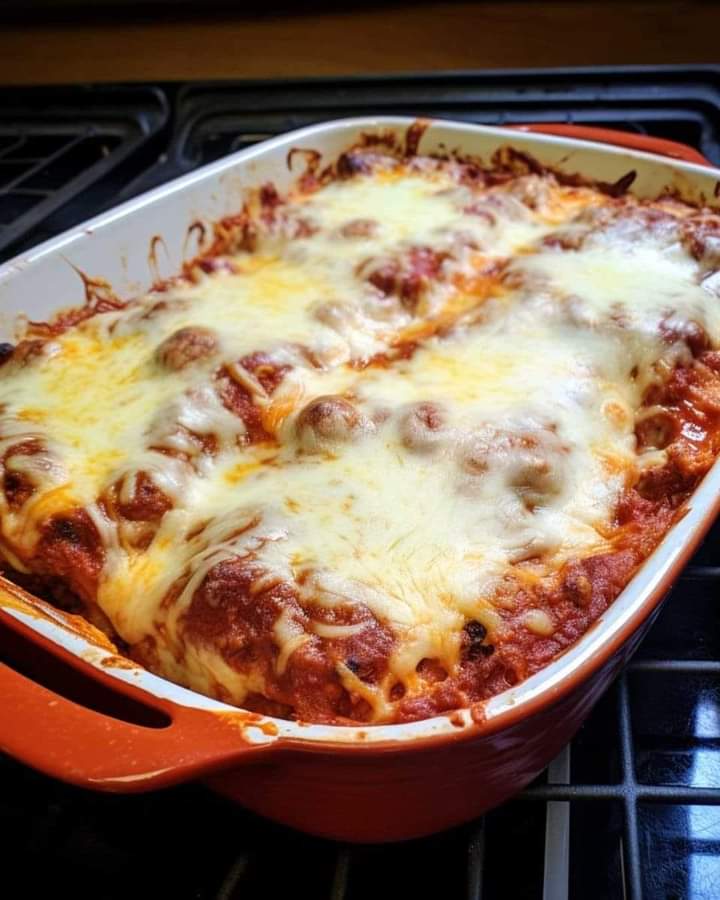
RAVIOLI LASAGNA Recipe

This easy lasagna is made with layers of frozen cheese ravioli in place of traditional lasagna noodles. You’re going to love how ooey gooey cheesy this ravioli lasagna bake is! 

Extra cheesy lasagna made with frozen ravioli instead of lasagna noodles!

PREP: 15minutes

COOK: 50minutes

COOLING TIME: 10minutes 

TOTAL: 1hour 5minutes

serves 9 servings

INGREDIENTS

▢1 pound ground beef

▢1 small onion diced

▢24 ounces marinara

▢3 cloves garlic minced

▢2 cups ricotta cheese

▢1 large egg

▢¼ cup parmesan cheese

▢¼ cup chopped parsley

▢1 teaspoon garlic powder

▢½ teaspoon onion powder

▢25 ounces frozen cheese ravioli

▢2 cups shredded mozzarella

▢minced parsley for garnish

INSTRUCTIONS:

  1. Preheat oven to 350 degrees. Spray a 13×9 baking dish with non-stick spray.
  2. Heat a large skillet over medium heat and add the ground beef and onion. Brown the beef, crumbling it as it cooks. Drain the grease from the pan.
  3. Add the marinara sauce and garlic and simmer for 5 minutes, stirring often, over low heat.
  4. While sauce is simmering, mix ricotta, egg, Parmesan, parsley, garlic powder, and onion powder in a small bowl.
  5. Spoon 1/3 of the meat mixture into the prepared baking dish and spread across the bottom.
  6. Top with a single layer of ravioli, ½ of the ricotta mixture, and 1/3 of the sauce. Repeat the layers, ending in marinara sauce.
  7. Sprinkle the top with the shredded mozzarella. Cover tightly with foil and bake for 40 minutes. Remove cover and bake for 10 minutes more.
  8. Remove from the oven and sprinkle with minced parsley.
  9. Let set for 10 minutes before cutting and serving.

TIPS & NOTES:

You may swap in cottage cheese for the ricotta if you prefer.

Use any variety of frozen ravioli that you like.

Nutritional Info:

Serving: 1slice| Calories: 604kcal (30%)| Carbohydrates: 40g (13%)| Protein: 34g (68%)| Fat: 33g (51%)| Saturated Fat: 15g (94%)| Cholesterol: 151mg (50%)| Sodium: 1172mg (51%)| Potassium: 499mg (14%)| Fiber: 3g (13%)| Sugar: 5g (6%)| Vitamin A: 935IU (19%)| Vitamin C: 8.4mg (10%)| Calcium: 316mg (32%)| Iron: 10.5mg (58%)


Slimming World Ham & Mushroom Pizza Calzone Recipe

As much as I love cooking, there are some nights when I absolutely just can’t be bothered.

For these kind of evenings, it’s always wise to have a couple of recipes up your sleeve that are fuss free, can be made from ingredients that you’ve probably already got in your fridge, and can be on the table in hardly any time at all.

IS THIS RECIPE REALLY SLIMMING FRIENDLY?!

Yes! Coming in at just 240 calories, this slimming friendly pizza calzone is also a great option if you’re a calorie counter.

MIXING AND MATCHING YOUR PIZZA CALZONE FILLINGS

Ham and mushroom is my favourite calzone filling, but you can get creative as you like. This kind of recipe is a great opportunity to get in some more speed foods, and use up anything that you might have in your fridge.

You could try peppers, pulled chicken, tuna, olives, fresh tomatoes, or anything else you might fancy.

You’ll notice that I’ve used light mozzarella cheese, and the main reason for this is that I find it’s less greasy when melted than some alternatives, so the wrap stays nice and crispy once cooked. Of course though, you can experiment with your favourite cheese if you’d prefer.

SERVING YOUR PIZZA CALZONE

This pizza calzone makes a filling meal, so you might find that it’s enough to serve it with a leafy salad.

If you’re really feeling hungry though, you could cook up some slimming chips as a side dish.

These calzones are quick, easy, and surprisingly filling. A great option after a long day at work!

Prep Time: 5mins

Cook Time: 20mins

Total Time: 25mins

Course: Main Course

Cuisine: Italian

Servings: 1 

INGREDIENTS:

  • 1 Weight Watchers wrap
  • 4 tbsp tinned tomatoes
  • 40 grams light mozzarella grated
  • 1 slice cooked ham chopped
  • 2 mushrooms sliced
  • 1 tbsp red onion finely sliced
  • 1 egg beaten
  • Low calorie cooking spray

INSTRUCTIONS:

  1. Preheat your oven to 200 degrees.
  2. Spritz a baking tray with low calorie cooking spray. Place the wrap on top, and spread the tinned tomatoes over one half, being careful not to get too close to the edge.
  3. wrap tomato sauce
  4. Add the mozzarella, ham, mushrooms, and onions. Brush the outer edges of the wrap with the beaten egg.
calzone filling
  1. Fold over the wrap to form the calzone, and use the back of a fork to crimp together.
  2. Brush the calzone with the beaten egg, and place in the oven for 10-15 minutes or until golden brown.
  3. Remove from the oven, turn over, brush the opposite side with the beaten egg, and place back in the over for 10-15 minutes or until golden brown.
  4. Serve and enjoy!

NOTES:

The nutritional values provided are carefully calculated and correct at time of publication but may not always be completely accurate.

If you’re serious about sticking rigidly to your plan, it’s always worth doing your own calculations for extra peace of mind – and remember, we may be using different brands or variations of ingredients which can significantly impact the nutritional values!

Nutritional Info:

Calories: 240kcal