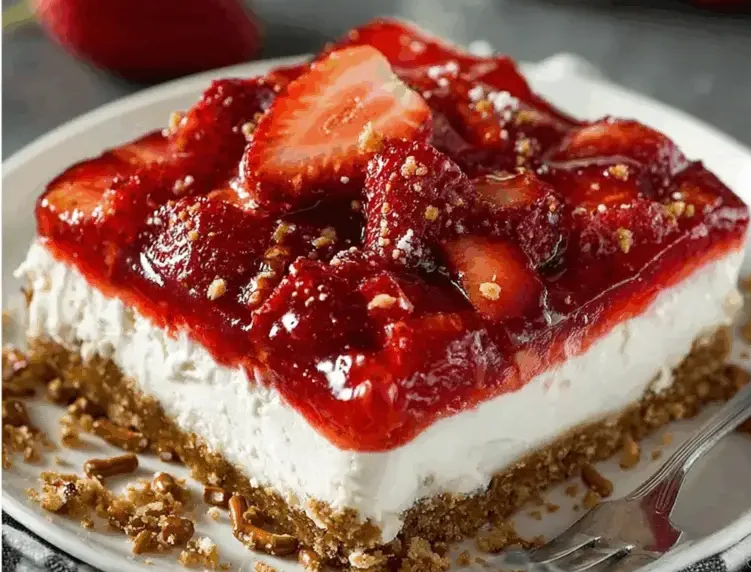
Strawberry Pretzel Salad

A classic layered dessert with a crunchy-salty pretzel crust, creamy cheesecake filling, and sweet strawberry gelatin topping — perfect for picnics, potlucks, and holidays.

Prep Time: 20 minutes
Cook Time: 10 minutes
Chill Time: 4–5 hours
Total Time: ~5 hours
Servings: 12–15
Dietary: Vegetarian (contains dairy)

Ingredients

For the crust:

  • Crushed pretzels (2 cups)

  • Melted butter (¾ cup)

  • Granulated sugar (3 tbsp)

For the filling:

  • Cream cheese (8 oz / 225 g), softened

  • Granulated sugar (¾ cup)

  • Whipped topping (1 tub / 8 oz, like Cool Whip), thawed

For the topping:

  • Boiling water (2 cups)

  • Strawberry gelatin (1 box / 6 oz)

  • Fresh strawberries (2 cups), sliced

Instructions

  1. Make the pretzel crust – Preheat oven to 350°F (175°C). Mix crushed pretzels, melted butter, and sugar. Press firmly into the bottom of a 9×13-inch baking dish. Bake for 10 minutes. Cool completely.

  2. Prepare the cream filling – Beat cream cheese and sugar until smooth. Gently fold in whipped topping. Spread evenly over the cooled crust, sealing all edges to prevent leaks. Refrigerate for 30 minutes.

  3. Make the gelatin layer – Dissolve gelatin in boiling water. Stir well until completely dissolved. Cool to room temperature.

  4. Add strawberries & assemble – Stir sliced strawberries into cooled gelatin. Carefully pour over the cream layer.

  5. Chill & serve – Refrigerate at least 4 hours (preferably overnight) until the gelatin is fully set. Slice and serve chilled.

Quick Notes & Pro Tips

  • Seal edges: Spread the cream layer fully to the edges to keep the gelatin from seeping through.

  • Pat berries dry: Remove excess moisture to avoid watery gelatin.

  • Cool the gelatin: Let it reach room temperature before pouring so it doesn’t melt the cream layer.

  • Crunchy crust: Press pretzels firmly and let them cool fully before adding the filling.

Why You’ll Love It

This Strawberry Pretzel Salad is a perfect mix of sweet, salty, creamy, and fruity. It’s refreshing, easy to assemble, and a nostalgic crowd-pleaser at summer BBQs, potlucks, or holiday dinners.

Step-by-Step Cooking Guide

1. Build the Pretzel Crust

  • Mix pretzels, butter, and sugar. Press into a 9×13 dish and bake. Cooling is key for a firm crust.

2. Add the Cream Layer

  • Blend cream cheese and sugar until smooth, then fold in whipped topping. Seal to the edges for a leak-proof layer.

3. Top with Gelatin & Berries

  • Dissolve gelatin, let it cool, and combine with sliced strawberries. Pour carefully over the cream layer.

Ingredient Details & Substitutions

  • Gelatin: Swap strawberry for raspberry or lime for fun flavor variations.

  • Crust: Replace pretzels with crushed graham crackers or vanilla wafers for a sweeter base.

  • Fruit: Use mixed berries or peaches for a creative twist.

Variations & Serving Suggestions

  • Festive version: Use different gelatin colors (red & green) for holiday gatherings.

  • Mini servings: Assemble in individual cups for parties.

  • Topping: Add a dollop of whipped cream before serving for extra indulgence.

Storage & Make-Ahead

  • Refrigerate: Cover tightly and store up to 3 days.

  • Make-ahead: Prepare crust and cream layer a day in advance; add gelatin layer the same day as serving.

  • Freezing: Not recommended (gelatin will lose texture).

FAQs

Q: Can I make this with frozen strawberries?
A: Yes — thaw and drain them well before adding to the gelatin.

Q: Can I use homemade whipped cream?
A: Yes, but stabilize it with a little powdered sugar or gelatin so it holds its shape.

Q: Why did my gelatin seep into the cream layer?
A: The cream layer wasn’t fully sealed to the crust or the gelatin was too warm when poured.

Personal Note

This is a family favorite at our summer barbecues — my grandmother’s go-to dessert that always disappears first. The salty pretzel crust with the creamy filling and bright berry topping is the perfect balance of flavors.

Your turn!
Tried this Strawberry Pretzel Salad? Leave a review or tag me on social media — I’d love to see your version!

Would you like me to create a “mini dessert cups” version (great for parties) or a no-bake version (for when you don’t want to turn on the oven)?

Ask ChatGPT

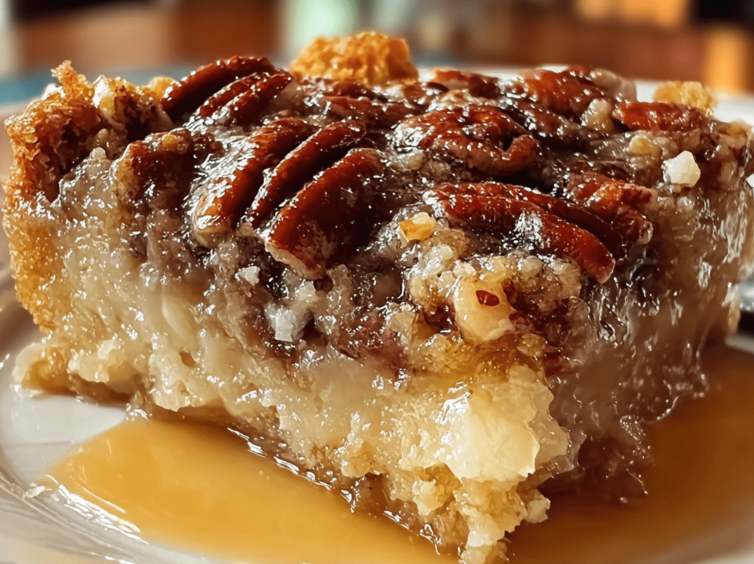
Pecan Praline Dump Cake

A rich, gooey, caramel-like pecan dessert layered with yellow cake mix and buttery praline flavor — this easy “dump-and-bake” cake is perfect for holidays or casual gatherings.

Prep Time: 10 minutes
Cook Time: 50–60 minutes
Total Time: ~1 hour 10 minutes
Servings: 12
Dietary: Kid-friendly, Make-ahead friendly

Ingredients

  • Chopped pecans (1 cup) – toasted for enhanced flavor

  • Sweetened condensed milk (1 can / 14 oz)

  • Light or dark corn syrup (1 cup)

  • Unsalted butter – melted (½ cup / 1 stick)

  • Pure vanilla extract (1 tsp)

  • Yellow cake mix (1 box / 15.25 oz) – dry, unprepared

  • Unsalted butter – cold, sliced thinly (½ cup / 1 stick)

  • Water (1 cup)

Instructions

  1. Preheat the oven: Set to 350°F (175°C). Grease a 9×13-inch baking dish.

  2. Layer pecans: Sprinkle chopped pecans evenly across the bottom of the dish.

  3. Pour wet ingredients: In order, pour condensed milk, corn syrup, melted butter, and vanilla evenly over the pecans. Do not stir.

  4. Add cake mix: Sprinkle dry cake mix evenly over the wet layer, gently spreading to cover. Do not stir.

  5. Dot with butter: Place cold butter slices evenly over the surface of the cake mix.

  6. Add water: Slowly and evenly pour 1 cup of water over the entire dish to help moisten the cake mix.

  7. Bake: Bake for 50–60 minutes, until the top is golden brown and bubbling around the edges.

  8. Cool & serve: Let cool for 10 minutes to set. Serve warm with vanilla ice cream or whipped cream.

Quick Notes & Pro Tips

  • Toasting pecans: Toast in a dry skillet for 3–5 minutes for a richer flavor.

  • Butter matters: Use real butter (not margarine) for best texture and taste.

  • Do not stir: Keeping layers distinct creates the gooey praline texture.

Why You’ll Love It

This cake gives you the best of both worlds: the rich, gooey texture of pecan pralines and the fluffy sweetness of yellow cake. Best of all, it comes together with almost no effort — no mixing bowls required!

Step-by-Step Cooking Guide

Layering the Base

  • Pecans first, then the “gooey” mix (condensed milk, corn syrup, melted butter, vanilla).

Adding the Cake Layer

  • Gently sprinkle cake mix to cover the top, then dot with butter slices to create a golden crust.

Baking to Perfection

  • Bake until golden brown and bubbling, letting the flavors meld into a praline-like filling.

Ingredient Details & Substitutions

  • Cake mix: Swap yellow cake for spice cake or butter pecan cake for seasonal flair.

  • Add-ins: Try chocolate chips, butterscotch chips, or sweetened coconut flakes for a flavor twist.

  • Corn syrup: Use dark for a deeper caramel flavor.

Variations & Serving Suggestions

  • Holiday twist: Add a pinch of cinnamon or nutmeg for a festive touch.

  • Serve it à la mode: Pair with vanilla ice cream or dollops of whipped cream.

  • Make it tropical: Add shredded coconut and a splash of rum extract to the wet layer.

Storage & Make-Ahead

  • Refrigerate: Store covered at room temperature for 2 days or refrigerate up to 5 days.

  • Make-ahead: Bake a day ahead; reheat in the oven at 300°F until warm.

  • Reheat: Microwave individual slices for 30–45 seconds for that fresh-from-the-oven feel.

FAQs

Q: Can I use a different nut?
A: Yes — walnuts or almonds work, though pecans give the most praline-like flavor.

Q: Can I make this without corn syrup?
A: Substitute with maple syrup or honey for a different flavor profile (texture may vary slightly).

Q: Can I halve the recipe?
A: Yes — use an 8×8-inch dish and reduce bake time by 10–15 minutes.

Personal Note

This is one of those “effortless showstopper” desserts I make for family gatherings — it feels like a praline cobbler meets cake, and it always disappears fast.

Your turn!
If you try this Pecan Praline Dump Cake, leave a review or tag me on social media — I’d love to see your creation!

Would you like me to make a “holiday version” (like a pecan pie + spice cake combo) or a “mini dessert version” (baked in ramekins for individual servings)?

Cilantro Lime Grilled Chicken

Juicy, zesty, and packed with fresh herb flavor — this cilantro lime chicken is perfect for grilling or pan-searing and works in tacos, salads, bowls, or on its own.

Prep Time: 10 minutes (plus 20 minutes–2 hours marinating)
Cook Time: 12–16 minutes
Total Time: 35–45 minutes
Servings: 4
Dietary: Gluten-Free, Dairy-Free, Low-Carb

Ingredients

  • Boneless, skinless chicken breasts or thighs (1 lb / 450 g) – cut into strips or left whole

  • Limes (2) – zested and juiced

  • Fresh cilantro leaves (½ cup) – chopped

  • Garlic (3 cloves) – minced

  • Olive oil (2 tbsp)

  • Ground cumin (1 tsp)

  • Smoked paprika (1 tsp)

  • Chili powder (½ tsp, optional for heat)

  • Salt & black pepper – to taste

Instructions

  1. Make the marinade: In a bowl, whisk together lime zest, lime juice, cilantro, garlic, olive oil, cumin, paprika, chili powder, salt, and pepper.

  2. Marinate chicken: Place chicken in a shallow dish or resealable bag. Pour marinade over, turning to coat. Refrigerate for at least 20 minutes, up to 2 hours.

  3. Cook chicken: Preheat grill or skillet over medium-high heat. Remove chicken from marinade, letting excess drip off. Cook until lightly charred and internal temperature reaches 165°F (74°C):

    • Breasts: 6–8 minutes per side

    • Thighs/strips: 4–6 minutes per side

  4. Rest & serve: Let chicken rest for 3–5 minutes. Slice if whole and garnish with extra cilantro and lime wedges.

Quick Notes & Pro Tips

  • Don’t over-marinate: More than 2 hours can cause the chicken to become mushy due to the lime juice.

  • Cast-iron for the win: Use a cast-iron skillet for the best sear and char.

  • Spice level: Adjust chili powder or add cayenne for extra heat.

  • Meal prep: Cook extra chicken for easy lunches — it’s great cold in salads or wraps.

Why You’ll Love It

This recipe delivers restaurant-quality flavor with simple ingredients. It’s bright, smoky, and endlessly versatile — a go-to for taco night, summer grilling, or a healthy weeknight dinner.

Step-by-Step Cooking Guide

1. Marinate the Chicken

  • Combine the zesty lime-cilantro marinade ingredients and toss the chicken to coat evenly.

  • Tip: Use a resealable bag for even coverage and easy cleanup.

2. Grill or Pan-Sear

  • Cook on a preheated grill or cast-iron skillet for deep flavor and caramelization.

3. Rest & Slice

  • Resting the chicken ensures juiciness before slicing or serving whole.

Ingredient Details & Substitutions

  • Protein: Substitute tofu, shrimp, or fish for a lighter variation.

  • Herbs: Swap cilantro for parsley or basil for a different flavor profile.

  • Spices: Add chipotle powder for a smoky-spicy kick or omit chili powder for a milder dish.

Variations & Serving Suggestions

  • Make it a meal: Serve with cilantro lime rice, avocado salad, or roasted vegetables.

  • Taco night: Slice and add to tortillas with slaw, avocado, and extra lime.

  • Bowl-style: Pair with quinoa or brown rice, beans, and fresh salsa for a balanced bowl.

Storage & Make-Ahead

  • Refrigerate: Store in an airtight container for up to 4 days.

  • Freeze: Wrap tightly and freeze for up to 3 months. Thaw overnight before reheating.

  • Reheat: Warm gently in a skillet or covered in the oven to retain moisture.

FAQs

Q: Can I bake this chicken instead of grilling?
A: Yes — bake at 400°F (200°C) for 20–25 minutes (depending on thickness) until cooked through.

Q: Can I use bottled lime juice?
A: Fresh lime juice is best for flavor, but bottled works in a pinch.

Q: How do I keep chicken breasts from drying out?
A: Pound them to an even thickness and avoid overcooking. Use a thermometer to check doneness.

Personal Note

This cilantro lime chicken became a weeknight favorite in my kitchen after I first made it for tacos. The citrusy marinade transforms simple chicken into something bright and flavorful — and cleanup is minimal.

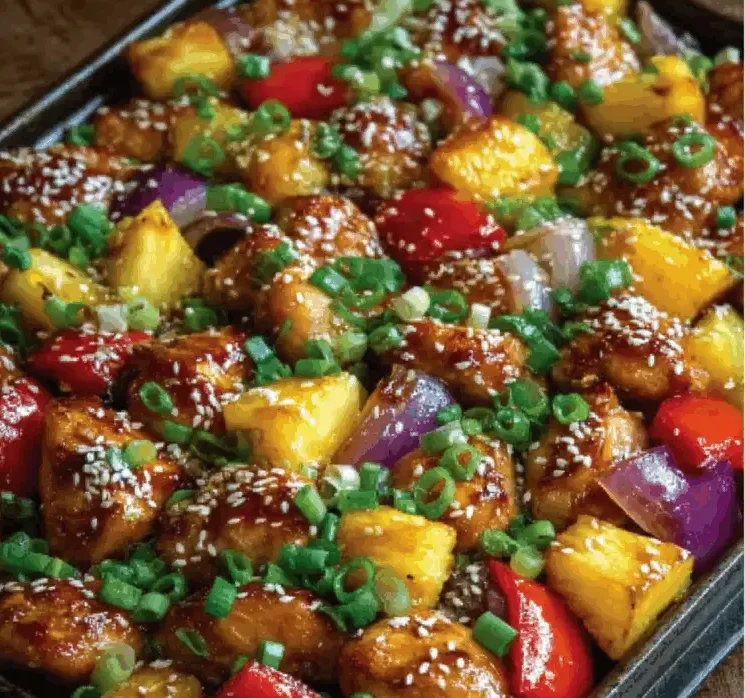
Sheet Pan Pineapple Chicken with Peppers & Onions

Juicy chicken thighs, sweet pineapple, and colorful bell peppers roasted together in a tangy-sweet soy glaze — a quick, vibrant weeknight dinner made on one pan.

Prep Time: 15 minutes
Cook Time: 20–25 minutes
Total Time: 35–40 minutes
Servings: 4
Dietary: Gluten-free adaptable, Dairy-free

Ingredients

  • Boneless, skinless chicken thighs (1½ lbs / 680 g), trimmed

  • Salt (1 tsp)

  • Black pepper (½ tsp)

  • Garlic powder (1 tsp)

  • Olive oil (1 tbsp)

  • Fresh pineapple chunks (2 cups) – or canned, drained

  • Red bell pepper (1), sliced into strips

  • Yellow bell pepper (1), sliced into strips

  • Small red onion (1), cut into wedges

  • Low-sodium soy sauce (2 tbsp)

  • Honey (2 tbsp)

  • Rice vinegar (1 tbsp)

  • Freshly grated ginger (1 tsp) – or ½ tsp ground

  • Garlic (2 cloves), minced

  • Fresh cilantro or green onions (2 tbsp), chopped, for garnish

  • Lime wedges, for serving

Instructions

  1. Prep the oven & pan – Preheat to 425°F (220°C). Line a large rimmed sheet pan with foil or parchment.

  2. Season chicken – In a bowl, toss chicken thighs with salt, pepper, garlic powder, and olive oil. Spread in the center of the sheet pan.

  3. Make the glaze & coat veggies – In the same bowl, whisk soy sauce, honey, rice vinegar, ginger, and garlic. Add pineapple, bell peppers, and onion; toss to coat.

  4. Arrange & drizzle – Spread veggies and pineapple around the chicken on the pan. Drizzle any remaining glaze over the top.

  5. Roast – Bake for 20–25 minutes, until chicken reaches 165°F (74°C) internally and veggies are tender.

  6. Optional char – For extra caramelization, broil on high for 2–3 minutes, watching carefully.

  7. Garnish & serve – Sprinkle with cilantro or green onions. Serve with lime wedges.

Quick Notes & Pro Tips

  • Marinate ahead: Let chicken sit in the sauce for 30 minutes (up to 2 hours) for deeper flavor.

  • Fresh vs canned pineapple: Fresh provides a brighter flavor and natural enzymes; canned works well if well-drained.

  • Spice it up: Add red pepper flakes or Sriracha to the glaze.

  • Cleanup tip: Use a rimmed sheet pan to prevent drips.

Why You’ll Love It

This sheet pan meal is colorful, fresh, and bold in flavor with minimal cleanup. It’s perfect for a weeknight dinner, yet beautiful enough for entertaining.

Step-by-Step Cooking Guide

Seasoning the Chicken

  • Toss thighs with olive oil and simple spices — this ensures even browning and juicy meat.

Making the Glaze

  • A blend of soy, honey, rice vinegar, ginger, and garlic creates a sweet-savory coating for the pineapple and veggies.

Roasting to Perfection

  • Bake until chicken is cooked through and veggies are caramelized.

  • Tip: Broiling at the end adds a charred, restaurant-style finish.

Ingredient Details & Substitutions

  • Chicken: Swap thighs for breasts (reduce bake time to 18–20 minutes).

  • Soy sauce: Use tamari or coconut aminos for a gluten-free version.

  • Vegetables: Try adding zucchini or snap peas for extra crunch.

  • Sweetener: Maple syrup works in place of honey.

Variations & Serving Suggestions

  • Make it spicy: Add chili flakes, cayenne, or diced jalapeños.

  • Serve it over: Steamed jasmine rice, quinoa, or cauliflower rice for a low-carb option.

  • Turn it into wraps: Slice the chicken and veggies and stuff into tortillas with a drizzle of the pan sauce.

Storage & Make-Ahead

  • Refrigerate: Store in an airtight container for up to 3 days.

  • Freeze: Freeze cooked chicken and veggies for up to 1 month. Thaw in the fridge before reheating.

  • Reheating: Warm in a 350°F oven or skillet over medium heat to keep the chicken juicy.

FAQs

Q: Can I use chicken breasts instead of thighs?
A: Yes — reduce the cooking time by a few minutes and check for doneness early.

Q: How can I make this vegetarian?
A: Replace chicken with firm tofu or chickpeas for a plant-based sheet pan meal.

Q: Can I prep it ahead?
A: Yes — chop veggies and marinate chicken up to 24 hours ahead for a faster assembly.

Personal Note

This recipe was inspired by my love for sweet-and-savory stir-fries but simplified for a single sheet pan. It’s a vibrant, hands-off dinner that delivers big flavor with little effort.

Your turn!
Tried this Sheet Pan Pineapple Chicken? Leave a comment or tag me on social media — I’d love to see how you serve it!

Would you like me to add a “meal prep version” (pre-portioned bowls with rice or quinoa for lunches)?
Or make it a “grilled version” for summer cooking?

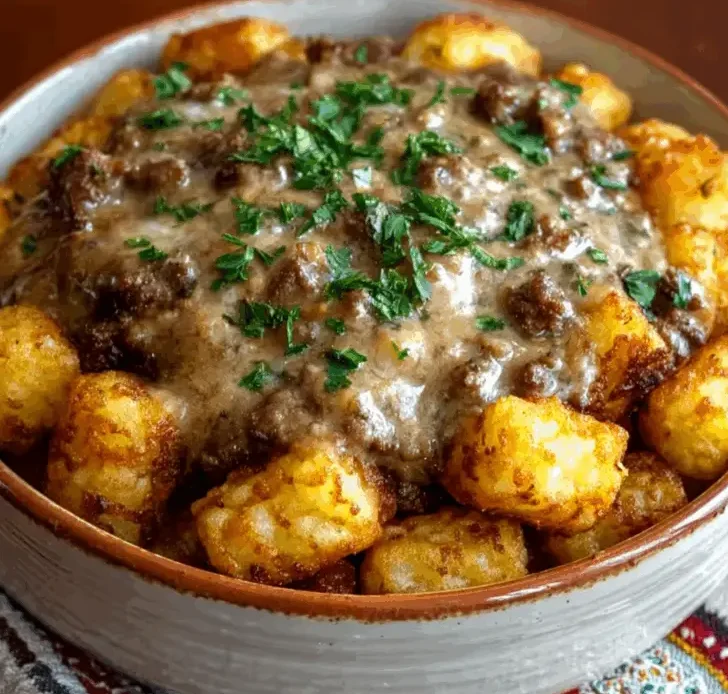
Loaded Tater Tot Breakfast Bowls

Golden, crispy tater tots loaded with savory sausage gravy, melty cheddar, and perfectly cooked eggs — a hearty, diner-style breakfast you can make at home.

Prep Time: 15 minutes
Cook Time: 25–30 minutes
Total Time: ~45 minutes
Servings: 4
Dietary: Comfort food, Make-ahead friendly

Ingredients

  • Frozen tater tots (32 oz / 900 g) – baked until golden and crispy

  • Beef breakfast sausage (1 lb / 450 g) – casings removed, crumbled

  • Unsalted butter (2 tbsp) – for the gravy base

  • All-purpose flour (2 tbsp) – for thickening

  • Whole milk (2 cups / 480 ml) – preferably warmed

  • Salt & freshly ground black pepper – to taste

  • Large eggs (4) – cooked your way (scrambled, fried, or poached)

  • Shredded sharp cheddar cheese (1 cup / 100 g) – for melty, cheesy goodness

  • Fresh chives (2 tbsp) – chopped, for garnish

Instructions

  1. Bake the tots – Preheat oven and cook frozen tater tots per package directions until golden and crisp. For extra crunch, use convection or broil settings for the last few minutes.

  2. Brown the sausage – In a large skillet over medium heat, cook crumbled sausage until no pink remains. Transfer to a plate, leaving the rendered fat in the pan.

  3. Make the roux – Melt butter in the same skillet, stir in flour, and cook for 1–2 minutes until lightly golden.

  4. Make the gravy – Gradually whisk in warm milk, scraping up any browned bits. Cook 3–5 minutes until thickened. Return sausage to the skillet, season with salt and pepper, and keep warm on low.

  5. Cook the eggs – In a separate pan, cook eggs to your liking (scrambled, fried, or poached). Season lightly.

  6. Assemble bowls – Divide crispy tater tots among 4 bowls. Top with eggs, ladle sausage gravy over, sprinkle with cheddar, and finish with chives. Serve hot.

Quick Notes & Pro Tips

  • Make ahead: Cook the gravy and sausage up to 2 days in advance. Reheat gently over low heat.

  • Milk tip: Warm milk before whisking into the roux to avoid lumps.

  • Eggs: For poached eggs, add a splash of vinegar to the water for perfectly set whites.

  • Extra crispy tots: Broil for 1–2 minutes after baking.

  • Assembly: Keep components separate until serving to maintain the best textures.

Why You’ll Love It

This dish is diner comfort food done right: crunchy tots, creamy sausage gravy, cheesy goodness, and eggs made just how you like them. It’s indulgent enough for weekend brunch but simple enough for a make-ahead weekday breakfast bowl.

Step-by-Step Cooking Guide

1. Baking the Tots

  • Bake until deep golden brown — a crispy base is key for holding up the gravy.

2. Making the Sausage Gravy

  • Cook sausage until browned. Use its drippings for the roux for maximum flavor.

  • Gradually whisk in warmed milk to create a smooth, thick gravy.

3. Eggs Your Way

  • Scrambled for easy eating, fried for a runny yolk, or poached for elegance.

4. Building the Bowl

  • Tots first, then eggs, a generous ladle of gravy, and a cheesy-chive finish.

Ingredient Details & Substitutions

  • Sausage: Use pork sausage for classic flavor or turkey for a lighter bowl.

  • Cheese: Swap cheddar for pepper jack for a little heat.

  • Eggs: Try soft-boiled eggs for a runny, jammy yolk.

  • Milk: Substitute with half-and-half for an extra rich gravy.

Variations & Serving Suggestions

  • Spicy kick: Add hot sauce, jalapeños, or Cajun seasoning to the gravy.

  • Veggie boost: Mix in sautéed mushrooms, bell peppers, or spinach.

  • Brunch spread: Serve with fresh fruit or a simple side salad for balance.

  • Crowd-style: Make it in a casserole dish with layers of tots, gravy, and cheese.

Storage & Make-Ahead

  • Refrigeration: Store components separately for up to 3 days.

  • Freezing: Freeze gravy and sausage mixture for up to 2 months; thaw overnight in the fridge.

  • Reheating: Warm gravy on the stovetop; bake tots in the oven for crispness.

FAQs

Q: Can I make this vegetarian?
A: Yes — use plant-based sausage and veggie gravy.

Q: How can I make this for a crowd?
A: Double the recipe and serve “buffet style” with toppings on the side.

Q: Can I use hash browns instead of tater tots?
A: Absolutely! Shredded or diced hash browns work well.

Personal Note

This bowl is my go-to for weekends when I crave a hearty breakfast that feels like a treat. It’s also one of my favorite “brunch-for-dinner” recipes — it never fails to hit the spot.

Your turn!
If you try these Loaded Tater Tot Breakfast Bowls, leave a review or share your creation — I’d love to see how you make it your own!

Do you want me to add a “crowd-sized casserole version” (for serving at brunch parties)?
Or keep it as individual bowls for a customizable breakfast setup?

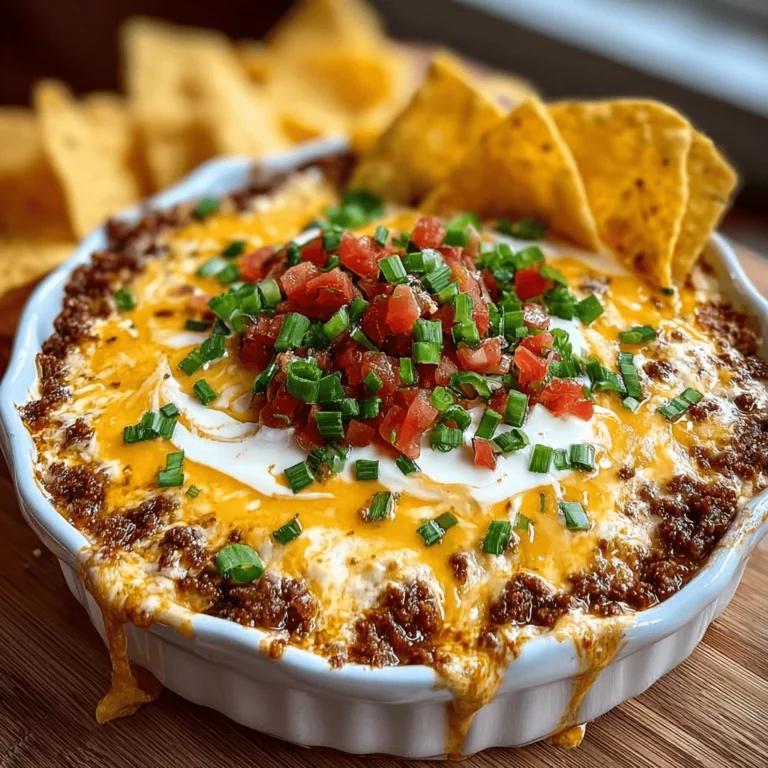
Cheesy Taco Bean Dip

A warm, creamy, and cheesy dip layered with seasoned beef, beans, salsa, and melty cheese — perfect for game days, parties, or an easy weeknight snack!

Prep Time: 15 minutes
Cook Time: 25 minutes
Total Time: ~40 minutes
Servings: 8–10
Dietary: Gluten-Free (when served with GF chips), Make-Ahead Friendly

Ingredients

  • Ground beef – or use turkey sausage for a lighter option

  • Taco seasoning – one packet (or homemade)

  • Water – to help the seasoning blend

  • Refried beans – one can (vegetarian works too)

  • Cream cheese – softened for smooth mixing

  • Sour cream – for tang and creaminess

  • Salsa – chunky style preferred

  • Garlic powder – for extra flavor

  • Shredded Mexican cheese blend – cheddar, Monterey Jack, or a combo

  • Chopped green onions or jalapeños – for garnish

  • Tortilla chips – for serving

Instructions

  1. Preheat oven – Set to 350°F (175°C). Grease a 9×13-inch baking dish.

  2. Cook the meat – Brown ground beef (or sausage) in a skillet over medium heat. Drain fat, add taco seasoning + water, and simmer for 2–3 minutes.

  3. Make the creamy base – In a large bowl, mix softened cream cheese, sour cream, refried beans, salsa, and garlic powder until smooth.

  4. Combine – Fold the cooked meat into the bean-cheese mixture.

  5. Assemble – Spread evenly into the prepared dish. Top with shredded cheese.

  6. Bake – Bake uncovered for 20–25 minutes, until bubbly and slightly golden.

  7. Serve – Garnish with green onions or jalapeños. Serve warm with tortilla chips, veggies, or pita chips.

Quick Notes & Pro Tips

  • Cream cheese tip: Fully soften before mixing for a lump-free base.

  • Make-ahead: Assemble up to 24 hours ahead; refrigerate, then bake before serving.

  • Slow cooker method: Combine ingredients (minus toppings) and heat on LOW for 2–3 hours.

  • Adjust spice: Use mild or spicy salsa and add jalapeños or hot sauce for a kick.

Why You’ll Love It

This dip is hearty enough to double as a burrito filling and crowd-pleasing enough to disappear fast at parties. It’s a creamy, cheesy, taco-inspired dish with customizable heat levels and plenty of texture.

Step-by-Step Cooking Guide

Seasoning & Meat

  • Brown beef or sausage, season with taco mix, and simmer to enhance flavor.

  • Tip: Drain excess fat well to avoid a greasy dip.

Mixing the Base

  • Blend softened cream cheese, sour cream, beans, salsa, and garlic.

  • Tip: Use a hand mixer for a super smooth, creamy consistency.

Assembling & Baking

  • Spread in the dish, top with shredded cheese, and bake until bubbly.

  • Troubleshooting: If the top cheese browns too quickly, cover loosely with foil for the last 5 minutes.

Ingredient Details & Substitutions

  • Meat: Swap ground beef with turkey, chorizo, or plant-based crumbles.

  • Beans: Replace refried beans with black beans or pinto beans for texture.

  • Cheese: Use pepper jack for a spicier kick or extra cheddar for more tang.

  • Salsa: Try corn salsa or verde salsa for a flavor twist.

Variations & Serving Suggestions

  • Party version: Make mini individual dips in ramekins for easy serving.

  • Buffet style: Keep warm in a slow cooker during parties.

  • Repurpose it: Use leftovers as a burrito, quesadilla, or nacho topping.

Storage & Make-Ahead

  • Refrigeration: Store leftovers in an airtight container for up to 4 days.

  • Freezing: Not ideal (dairy may separate), but works for up to 1 month if tightly wrapped.

  • Reheating: Warm in the oven at 325°F until heated through or microwave in short bursts.

FAQs

Q: Can I make this vegetarian?
A: Yes — replace the meat with black beans, lentils, or plant-based crumbles.

Q: Can I use homemade taco seasoning?
A: Definitely. Mix 1 tbsp chili powder, 1 tsp paprika, ½ tsp cumin, ½ tsp garlic powder, ½ tsp onion powder, ½ tsp oregano, and a pinch of cayenne.

Q: Can I make this spicier?
A: Use hot salsa, add diced jalapeños, or sprinkle with crushed red pepper.

Personal Note

This recipe came together for a last-minute game-day snack — and it’s been a go-to for parties ever since. It’s hearty, versatile, and the kind of dip everyone hovers over until it’s gone.

Your turn!
If you try this Cheesy Taco Bean Dip, leave a comment or tag me on social media — I’d love to see your version!

Would you like me to add a quick “homemade taco seasoning” recipe card for readers who want to skip the packet?
Also, should I make a “party platter version” (baked in a cast-iron or served in a skillet for presentation)?