Steak Bites Recipe

These Garlic Butter Steak Bites are quick and easy to make – and they vanish fast! Serve them as finger food on appetizer night, as part of your game day spread or as part of a fun family dinner date.

Steak bites are especially fun for the kids. I know it’s a recipe mostly served as an appetizer (Super Bowl! or any Game Day party!) , but we don’t mind them as a regular meal at all.

They are quick and easy to whip up, and turn out so tender.

Ingredients

  • ▢ 2 pounds steak cut into bites
  • ▢ salt and ground black pepper to taste (season on the generous side)
  • ▢ 1 tablespoon oil
  • ▢ 4 tablespoons butter
  • ▢ 2 cloves garlic or more to taste
  • ▢ 2 tablespoons chopped parsleyoptional for serving

Instructions

  • Prep steak: Remove steak from fridge 30 minutes before cooking. Unwrap, cut into cubes (see notes at bottom of recipe for size recommendation) and season with salt and pepper. Let sit on plate on counter for 30 minutes. (For best results, do not skip this step.)2 pounds steak, salt and ground black pepper
  • Sear steak: Once ready, heat a large skillet (preferably cast iron) over high heat. Add oil, then sear steak for around 2 minutes per side, until a nice, browned crust forms but middle stays tender. Work in batches if needed, do not overcrowd pan! Set seared steak bites aside on a plate and tent with foil.1 tablespoon oil
  • Make garlic butter: Once steak is done and set aside on a plate, reduce heat to medium. Add butter and garlic to empty skillet. Heat about 2 minutes, until garlic is fragrant. Take off the heat.4 tablespoons butter, 2 cloves garlic
  • Finish: Add steak to skillet with garlic butter. Toss to coat. Serve immediately with chopped parsley, if desired.2 tablespoons chopped parsley

Notes

Steak: Use any tender, boneless cut of steak, cut into cubes. Sirloin steak, strip steak or ribeye all work. You can use beef tenderloin/fillet if you want them extra-tender and special.

Parsley: Totally optional, but highly recommended by my entire family, save the picky 5 year old who thinks the green bits are a waste of space ?

Bite size: You can really cut these as large or as bite-sized as you like. Smaller bites cook more quickly and are more done, larger “bites” stay more tender and have a more medium middle.

I cut mine just under 1 inch, and cooked them for around 2 minutes per side, plus some extra tossing around for 30 seconds to get the edges charred.

Searing time: 4 minutes yielded just under 1-inch bites with a medium-done middle. If you want yours more rare, stick to 1-inch cubes and go with a short and blazing hot sear.

For more done bites, sear them a little longer on medium-high heat instead; and/or cut them smaller. Just make sure you don’t overcook them, or they may turn out chewy.
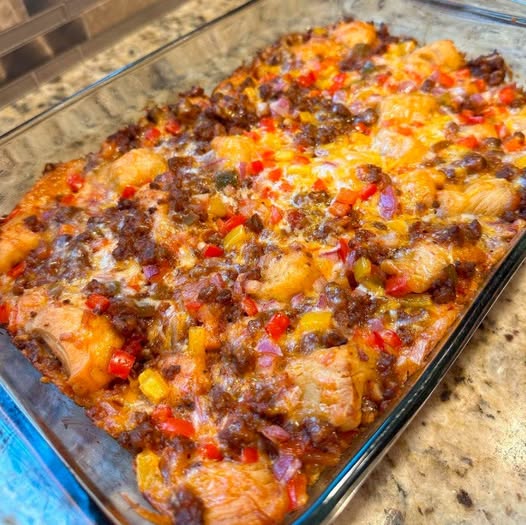
Taco fiesta bubble up casserole

Taco fiesta bubble up casserole
8 points, 7sp or 6pp/serving (same on freestyle 7sp) 7SP on blue, green or purple
PREP TIME20 mins
COOK TIME50 mins
TOTAL TIME1 hr 10 mins
COURSEMain meals
SERVINGS6
INGREDIENTS
1 lb cooked extra lean ground beef
1 7.5 oz package pillsbury biscuits (10 biscuits to the pack, the ones In the 4 value pack, if you can’t find that size you can buy the bigger size and weigh it out)
1 package Taco seasoning, 30g
1 1/3 cup salsa
2 cup diced peppers I used red, orange and yellow
1 cup diced onion I used red onion
1 cup reduced fat shredded cheese I use a 3 cheese blend
Green onion
Fat free sour cream for topping optional
INSTRUCTIONS
Cook the ground beef in a pan on the stove, add the taco seasoning and simmer for a few minutes.
Preheat oven to 350F, spray a 9×13 casserole dish and set aside.
Mix the ground beef and salsa together in a bowl.
Cut up the peppers & onion, and then cut the biscuits into 6 pieces each.
Place half of the biscuit pieces in the bottom of the casserole dish, top with half of the meat mixture, half of the peppers and onions and half of the cheese. Repeat layers and finish with the chopped green onion on top.
Loosely cover with foil and bake in oven for 35 minutes, remove foil and continue baking for 15 minutes.Let cool for 5 minutes then cut into 6 servings. 8 personal points per serving, 7sp or 6 points plus. Top with a spoon of fat free sour cream (optional)
NOTES
Points- 8
Personal Points- 8
Smart Points- Blue/Green/Purple- 7
Points Plus- 6

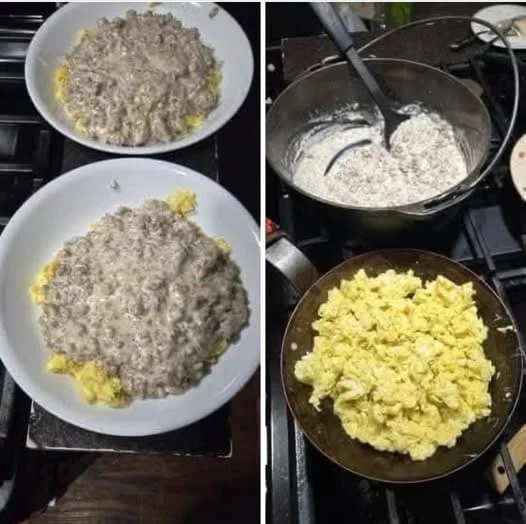
Carnivore Sausage Gravy

Ingredients:

  • 1 pound (450g) ground pork sausage (choose a fattier sausage for best flavor)

  • 4 ounces (½ block) cream cheese, cut into cubes

  • 1 cup heavy whipping cream

  • Salt and black pepper to taste (optional — sausage often has enough salt)


Instructions:

  1. Cook the sausage:

    • Heat a large skillet over medium heat.

    • Add the sausage and cook, breaking it apart with a spatula, until fully browned and cooked through (about 7-10 minutes).

    • Drain excess grease if desired, but leaving some fat will add flavor.

  2. Add cream cheese:

    • Reduce heat to low.

    • Add the cream cheese cubes directly into the skillet with the sausage.

    • Stir gently and continuously to soften and melt the cream cheese, combining it fully with the sausage.

  3. Add heavy cream:

    • Pour in 1 cup of heavy whipping cream.

    • Stir well to combine everything into a creamy mixture.

  4. Simmer and thicken:

    • Keep the heat low and cook, stirring occasionally, until the gravy thickens to your desired consistency (about 5-8 minutes).

    • If it gets too thick, you can add a little more cream or water to loosen it.

  5. Season:

    • Taste the gravy and add salt and pepper if needed (usually the sausage has enough salt).

  6. Serve:

    • Serve hot over cooked eggs, steak, or as a dipping sauce for carnivore bread or pork rinds.


Tips:

  • For extra flavor, you can use breakfast sausage with herbs and spices, or keep it plain for a pure carnivore experience.

  • Keep the heat low after adding cream cheese and cream to avoid curdling.

  • This gravy is great for meal prep and stores well in the fridge for 3-4 days.


Would you like me to suggest a full carnivore meal plan using this gravy? Or ideas on what to pair it with?

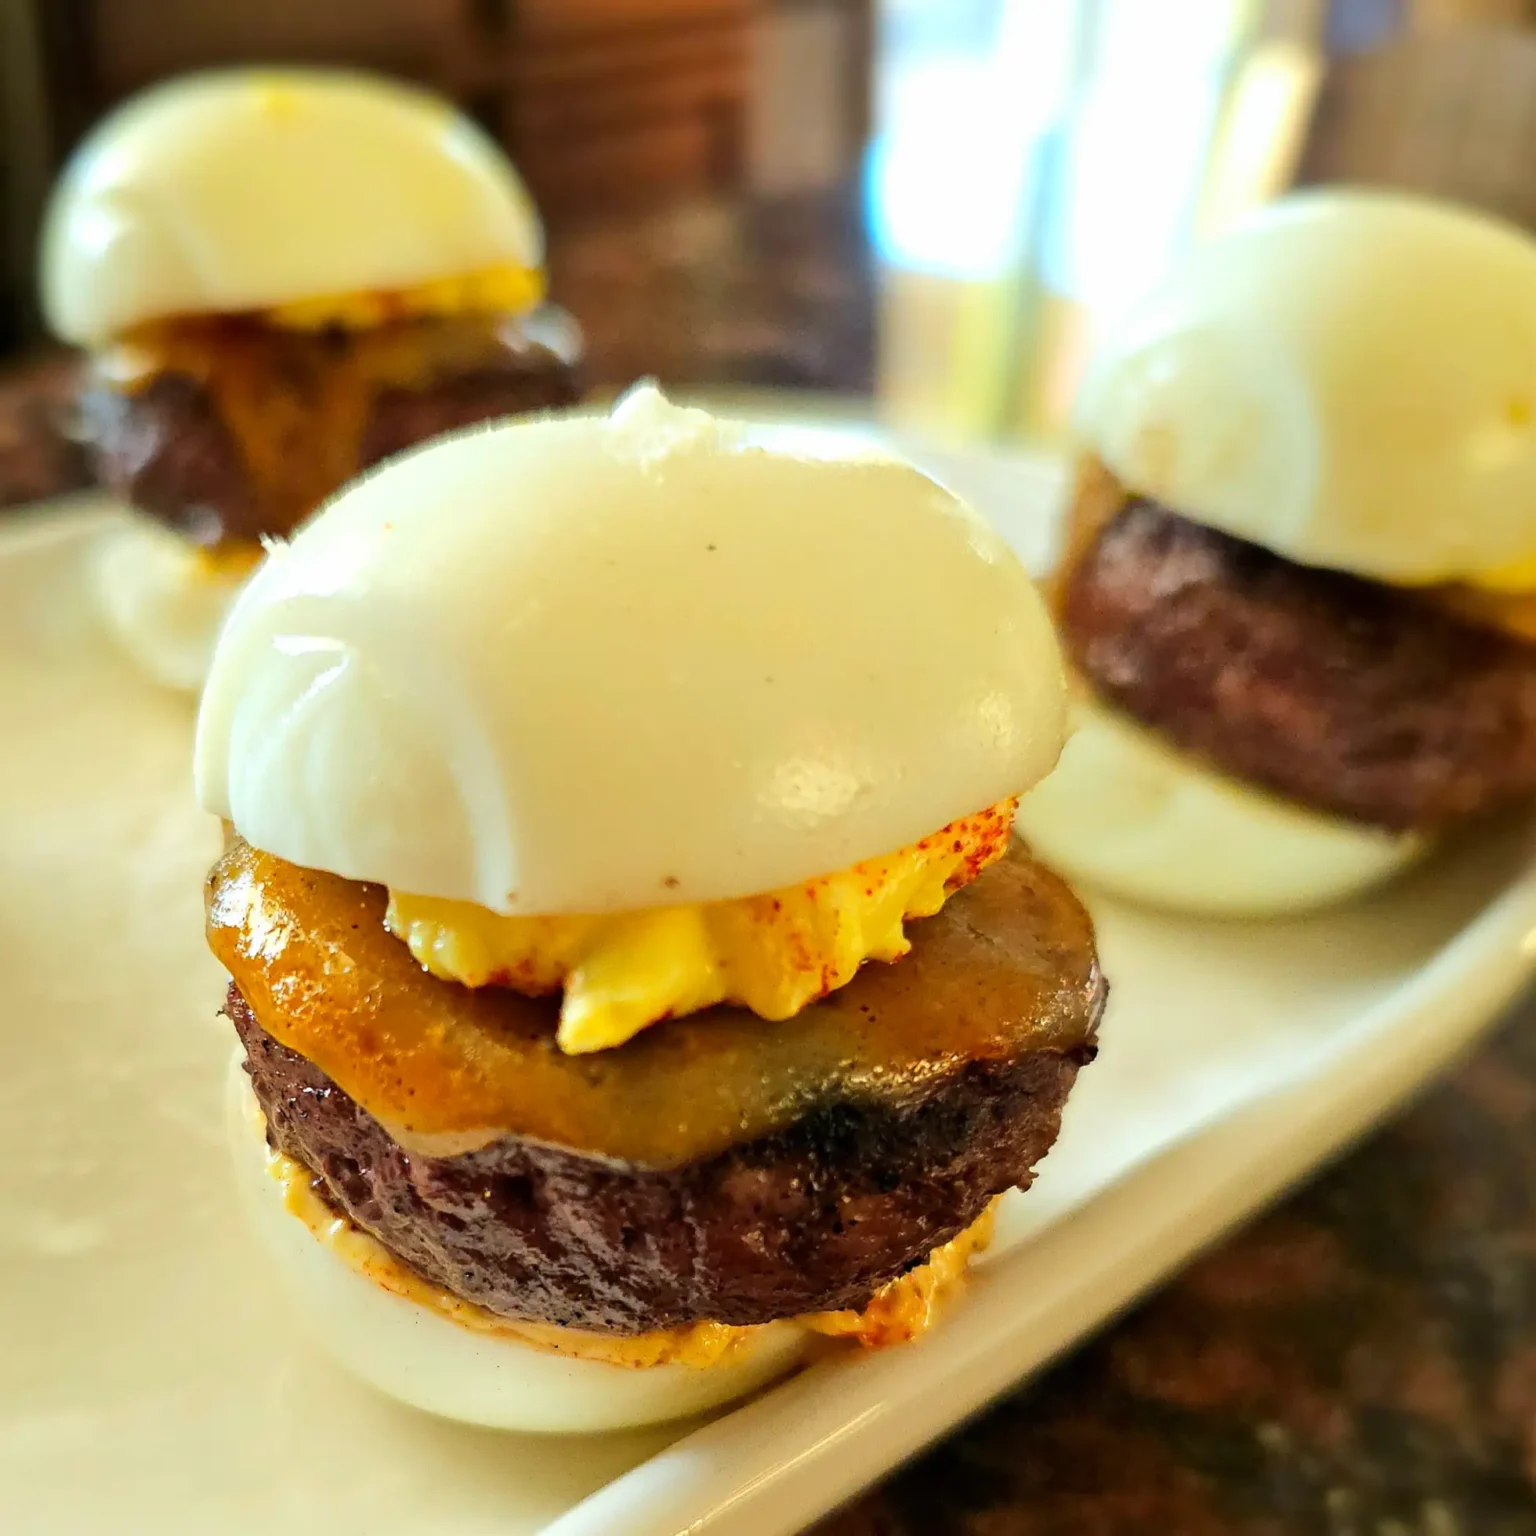
Deviled Egg Hamburgers Recipe (Carnivore-Friendly and Flavorful)

These Deviled Egg Hamburgers are a fun, protein-packed twist on the classic burger. Combining the rich flavors of a juicy hamburger patty with the creamy goodness of deviled eggs, this recipe is perfect for carnivore enthusiasts looking to enjoy a flavorful, low-carb, high-fat meal. Whether you’re hosting a gathering or just craving something hearty and delicious, these deviled egg hamburgers will not disappoint.

Ingredients:

  • 4 large eggs (hard-boiled)
  • 1 lb ground beef (80/20 fat ratio, for juicy burgers)
  • 2 tbsp butter (grass-fed, for cooking)
  • 1/4 cup mayonnaise (preferably sugar-free and made with animal fats)
  • 1 tbsp Dijon mustard (optional, check ingredients for no carbs or sugar)
  • Salt and freshly cracked black pepper, to taste
  • 2 tbsp fresh chopped chives or parsley (optional, for garnish)
  • 4 small pieces of crispy bacon (optional, for topping)
  • 2 tbsp beef bone broth (optional, for extra flavor in patties)

Instructions:

  1. Prepare the Deviled Eggs: Boil the eggs by placing them in a pot of cold water. Bring to a boil, then reduce to a simmer for 10 minutes. Afterward, transfer the eggs to an ice bath to cool. Once cooled, peel the eggs, slice them in half, and carefully remove the yolks. Place the yolks in a bowl and mash them.
  2. Make the Deviled Egg Filling: To the mashed yolks, add the mayonnaise, Dijon mustard (if using), and a pinch of salt and pepper. Stir until smooth and creamy. Set aside.
  3. Form the Patties: In a bowl, season the ground beef with salt, pepper, and optional beef bone broth. Mix well and form 4 burger patties, about 1/2 inch thick.
  4. Cook the Patties: Heat a skillet over medium-high heat and melt 1 tablespoon of butter. Cook the patties for about 3-4 minutes per side, or until they reach your desired doneness.
  5. Assemble the Deviled Egg Hamburgers: Place a cooked burger patty on a plate. Spoon a generous amount of the deviled egg filling on top. Optionally, add crispy bacon and garnish with fresh herbs like chives or parsley for extra flavor.
  6. Serve: Enjoy your deviled egg hamburgers hot! These are perfect as a carnivore-friendly burger option without the bun, packed with protein and rich flavor.

This unique and delicious recipe will be your new favorite way to enjoy a burger with a creamy, indulgent twist!

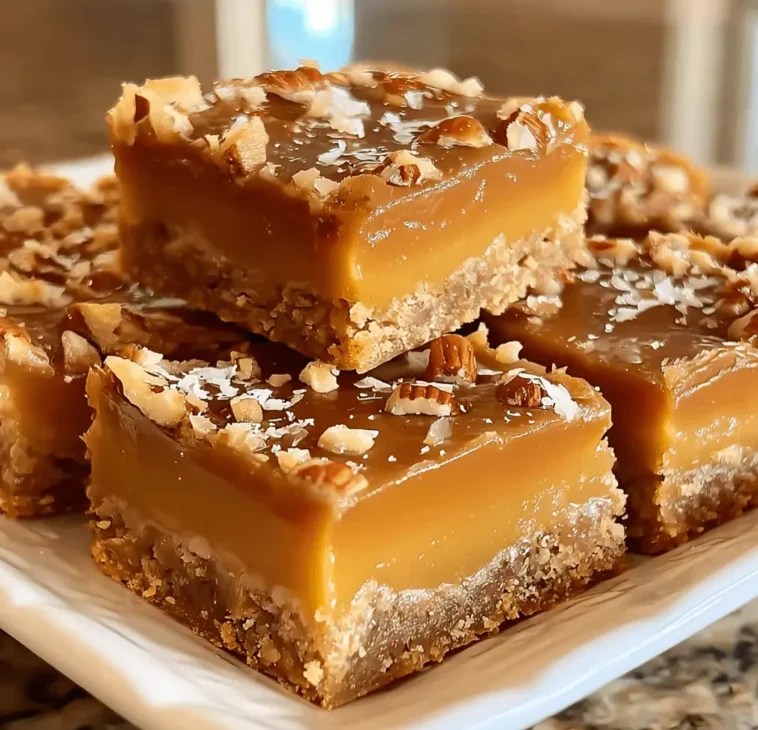
Butterscotch Blondies

Soft, chewy, and full of butterscotch flavor — these easy blondies are a one-bowl dessert with rich caramel notes, a hint of vanilla, and optional crunchy pecans.

Prep Time: 10 minutes
Cook Time: 20–25 minutes
Total Time: 35 minutes
Servings: 12 bars
Dietary: Freezer-friendly, Nut-free adaptable

Ingredients

  • Unsalted butter – melted (½ cup / 1 stick)

  • Light brown sugar – packed (1 cup)

  • Large egg (1)

  • Vanilla extract (1 tsp)

  • All-purpose flour (1 cup)

  • Baking powder (½ tsp)

  • Salt (½ tsp)

  • Butterscotch chips (½ cup)

  • Chopped pecans – optional (½ cup)

Instructions

  1. Prep the pan: Preheat oven to 350°F (175°C). Grease an 8×8-inch baking dish or line with parchment.

  2. Mix wet ingredients: In a large bowl, stir melted butter and brown sugar until smooth. Add egg and vanilla; mix until creamy.

  3. Add dry ingredients: In another bowl, whisk flour, baking powder, and salt. Slowly add to the wet mixture, stirring just until combined.

  4. Fold in extras: Gently fold in butterscotch chips and pecans (if using).

  5. Bake: Spread batter evenly into the dish. Bake 20–25 minutes, until edges are golden and a toothpick comes out clean.

  6. Cool & slice: Cool completely in the pan. Cut into 12 bars.

Quick Notes & Pro Tips

  • Chewier bars: Pull from the oven as soon as the center sets.

  • Nut-free version: Simply skip the pecans.

  • Flavor swaps: Try chocolate chips, white chocolate, or toffee bits for variety.

  • Make ahead: These freeze beautifully — wrap tightly and store for up to 2 months.

  • Gluten-free: Substitute a 1:1 gluten-free flour blend.

Why You’ll Love It

These blondies are gooey, sweet, and buttery with that irresistible caramel-like butterscotch flavor. They’re perfect for bake sales, quick desserts, or pairing with coffee for an afternoon treat.

Step-by-Step Cooking Guide

1. Make the Base

  • Stir melted butter and brown sugar for a smooth, caramel-flavored base.

2. Add Dry Ingredients

  • Fold in flour mixture gently to avoid overmixing (which makes them dense).

3. Add Mix-Ins & Bake

  • Butterscotch chips bring richness; pecans add crunch. Bake until edges are golden.

Ingredient Details & Substitutions

  • Butterscotch chips: Swap for chocolate, peanut butter, or white chocolate chips.

  • Nuts: Pecans add texture, but walnuts or almonds work too.

  • Brown sugar: Use dark brown sugar for a deeper molasses flavor.

Variations & Serving Suggestions

  • Salted caramel: Sprinkle with flaky sea salt right after baking.

  • Dessert plate: Serve warm with vanilla ice cream for an indulgent treat.

  • Holiday twist: Add a pinch of cinnamon or nutmeg for cozy seasonal flavor.

Storage & Make-Ahead

  • Room temp: Store in an airtight container for up to 4 days.

  • Freezer: Wrap individual bars and freeze for up to 2 months.

  • Reheating: Microwave for 10–15 seconds for a fresh-from-the-oven feel.

FAQs

Q: Can I double this recipe?
A: Yes — bake in a 9×13-inch dish for about 25–28 minutes.

Q: Can I use dark brown sugar?
A: Absolutely — it adds deeper flavor and a bit more chewiness.

Q: How do I make them extra gooey?
A: Slightly underbake (around 20 minutes) and let cool in the pan.

Personal Note

These blondies are my go-to when I need a fast dessert that still feels special. Butterscotch brings a nostalgic, caramel-like sweetness that pairs perfectly with a cup of coffee or a scoop of ice cream.


Your turn!
If you try these Butterscotch Blondies, leave a comment or tag me on social media — I’d love to see your batch!

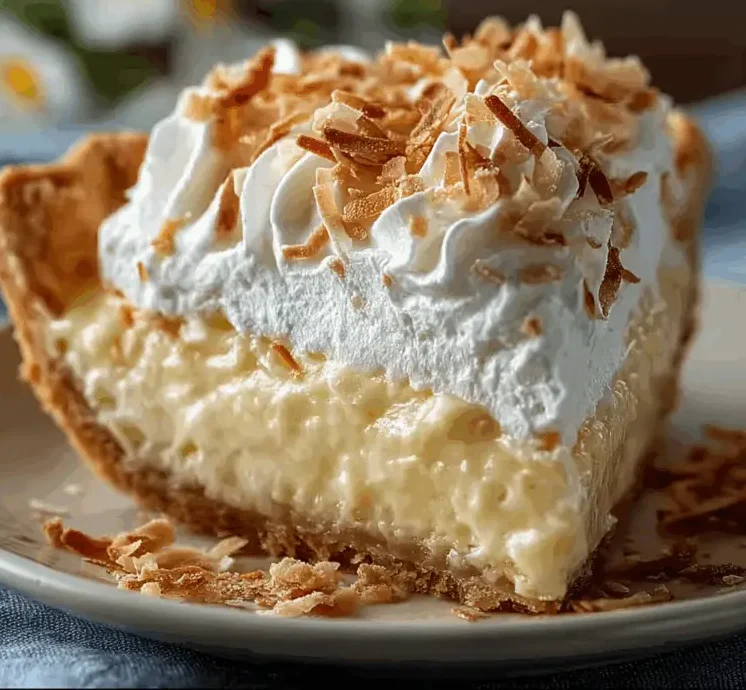
Coconut Cream Pie

A silky coconut custard filling in a buttery graham cracker crust, topped with fluffy whipped cream and toasted coconut — a tropical classic that’s creamy, light, and irresistible.

Prep Time: 25 minutes
Cook Time: 15 minutes
Chill Time: 4–6 hours
Total Time: ~5–6 hours
Servings: 8
Dietary: Vegetarian

Ingredients

For the crust:

  • Graham cracker crumbs (1 ½ cups)

  • Melted butter (⅓ cup)

  • Granulated sugar (¼ cup)

For the filling:

  • Whole milk (1 cup)

  • Coconut milk (1 cup)

  • Granulated sugar (⅔ cup)

  • Cornstarch (¼ cup)

  • Salt (¼ tsp)

  • Egg yolks (4 large)

  • Butter (1 tbsp)

  • Vanilla extract (1 tsp)

  • Sweetened shredded coconut (1 ½ cups)

For the topping:

  • Heavy whipping cream (1 cup)

  • Powdered sugar (2 tbsp)

  • Vanilla extract (½ tsp)

  • Toasted coconut (¼ cup)

Instructions

  1. Bake the crust: Preheat oven to 350°F (175°C). Combine graham cracker crumbs, melted butter, and sugar. Press evenly into a 9-inch pie plate. Bake for 10 minutes. Let cool completely.

  2. Make the custard: In a saucepan over medium heat, whisk together milk, coconut milk, sugar, cornstarch, and salt. In a separate bowl, lightly beat the egg yolks.

  3. Temper the yolks: Slowly pour ½ cup of the hot milk mixture into the yolks while whisking constantly. Return the yolk mixture to the saucepan.

  4. Cook & thicken: Continue whisking over medium heat until thickened and bubbling. Remove from heat and stir in butter, vanilla, and shredded coconut.

  5. Fill the crust: Pour custard into the cooled crust and smooth the surface. Cover with plastic wrap (press against the custard to prevent skin). Chill at least 4 hours, preferably overnight.

  6. Whip the topping: Beat heavy cream, powdered sugar, and vanilla until stiff peaks form. Spread over the chilled pie.

  7. Finish & serve: Sprinkle with toasted coconut. Slice and serve cold.

Quick Notes & Pro Tips

  • Extra coconut flavor: Replace more whole milk with coconut milk or coconut cream.

  • Firm crust: Press crumbs firmly and evenly into the pan for a solid base.

  • Yolk safety: Temper yolks slowly to prevent curdling.

  • Best texture: Chill overnight for perfect slicing and flavor melding.

Why You’ll Love It

This pie combines buttery crunch, creamy coconut custard, and airy whipped topping — it’s indulgent yet refreshing. The contrast of textures makes every bite feel like a treat.

Step-by-Step Cooking Guide

1. Graham Cracker Crust

  • Combine crumbs, butter, and sugar. Bake to set and let cool.

2. Coconut Custard Filling

  • Whisk, temper, thicken, then fold in shredded coconut for texture and flavor.

3. Whipped Topping

  • Beat cream until stiff peaks form and spread generously over the set custard.

Ingredient Details & Substitutions

  • Coconut milk: Use full-fat for richer custard.

  • Crust options: Swap graham crackers for shortbread cookies or a baked pastry crust.

  • Topping: Stabilize whipped cream with gelatin if making ahead for events.

Variations & Serving Suggestions

  • Tropical twist: Add crushed pineapple to the filling for a piña colada pie.

  • Chocolate lovers: Drizzle melted chocolate over the whipped cream for a decadent touch.

  • Mini pies: Prepare in individual tart shells for easy entertaining.

Storage & Make-Ahead

  • Refrigerate: Cover and store for up to 3 days.

  • Crust tip: If storing longer, bake the crust an extra 5 minutes for extra crispness.

  • Reheating crust: Pop individual slices into a 300°F (150°C) oven for 3 minutes to re-crisp the crust.

FAQs

Q: Can I make this ahead?
A: Yes — prepare the crust and filling a day ahead, then whip and add topping just before serving.

Q: Can I use a store-bought crust?
A: Absolutely — a pre-made graham cracker or pastry crust works.

Q: How do I keep whipped cream stable?
A: Add 1 tsp cornstarch or use stabilized whipped cream for longer-lasting topping.

Personal Note

This coconut cream pie is one of my go-to holiday desserts. It’s tropical yet cozy, light yet rich — a beautiful balance of flavors that makes it a showstopper at any gathering.

Your turn!
Tried this Coconut Cream Pie? Leave a review or tag me on social media — I’d love to see your creation!