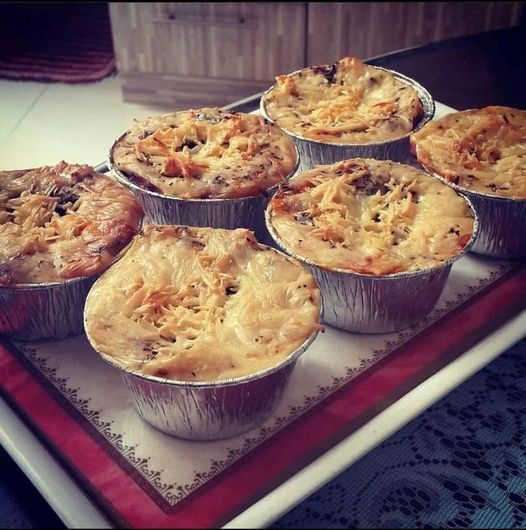
Lasagna Cups, 3 SmartPoints
WW Lasagna Cups are the perfect way to indulge in the classic comfort food of lasagna without derailing your Weight Watchers points. These individual servings are packed with flavor, from the lean ground turkey or chicken to the rich tomato sauce and melty cheeses. By using whole wheat lasagna noodles and part-skim cheese, these cups keep the calories and SmartPoints low, making them an ideal choice for anyone following a healthy eating plan. Each cup is only 3 SmartPoints, allowing you to enjoy the taste of lasagna in a way that’s both satisfying and guilt-free.
What makes these WW Lasagna Cups so appealing is how easily they can be customized to suit different tastes and dietary needs. If you prefer a vegetarian version, you can substitute the ground meat with lentils, mushrooms, or even tofu. You can also add extra vegetables like spinach or zucchini to the sauce to increase the fiber and nutritional value. The layers of cheese—ricotta, mozzarella, and Parmesan—create that signature lasagna flavor while still keeping the dish lighter than the traditional version. The individual serving sizes are perfect for portion control, ensuring you get a filling meal without overeating.
These lasagna cups are also incredibly convenient for meal prep. You can make a batch at the start of the week, store them in the fridge for a few days, or even freeze them for later use. When you need a quick, satisfying meal, you can simply pop one in the microwave or oven, and it’s ready to go. The fact that they hold up well in the fridge or freezer makes them a great choice for busy individuals or families looking for easy, nutritious meals that are ready when you are. Plus, they’re a hit with kids and adults alike, so you can feel good serving them to the whole family.
Not only do these WW Lasagna Cups offer a healthier alternative to traditional lasagna, but they also deliver on taste and texture. The combination of tender whole wheat noodles, savory meat sauce, and creamy cheese creates a comforting, satisfying meal that will leave you feeling full without overindulging. Whether you’re craving comfort food or need a quick, delicious dinner for the week, these lasagna cups are the perfect solution. Plus, with only 3 SmartPoints per cup, they’re an easy and tasty way to stick to your WW goals without feeling deprived.
WW Lasagna Cups Recipe
Ingredients:
- 8 whole wheat lasagna noodles (cooked and cut into halves or thirds)
- 1 lb lean ground turkey or chicken
- 1 small onion, chopped
- 2 cloves garlic, minced
- 1 (14.5 oz) can crushed tomatoes (low-sodium, if preferred)
- 1/2 tsp dried oregano
- 1/2 tsp dried basil
- 1/4 tsp red pepper flakes (optional for a little heat)
- 1/2 cup low-fat ricotta cheese
- 1/2 cup shredded part-skim mozzarella cheese
- 1/4 cup grated Parmesan cheese
- Salt and pepper to taste
- Fresh basil or parsley for garnish (optional)
Instructions:
- Preheat Oven and Prepare Muffin Tin: Preheat your oven to 375°F (190°C). Spray a muffin tin with non-stick cooking spray or use silicone muffin cups for easy removal. This recipe makes 12 individual lasagna cups.
- Cook the Noodles: Boil the lasagna noodles according to the package instructions. Once cooked, drain and set aside to cool slightly. Once they’re cool enough to handle, cut them into halves or thirds to fit into the muffin tin.
- Make the Meat Sauce: In a large skillet, cook the ground turkey or chicken over medium heat, breaking it apart as it cooks. Add the chopped onion and garlic and sauté for about 3-4 minutes until the onion is soft. Stir in the crushed tomatoes, oregano, basil, red pepper flakes (if using), and salt and pepper to taste. Simmer the sauce for about 10 minutes to let the flavors meld together.
- Assemble the Lasagna Cups: Layer each muffin tin with a piece of the cooked lasagna noodle. Then spoon a small amount of the meat sauce over the noodle. Add a dollop of ricotta cheese, a sprinkle of mozzarella, and a little Parmesan on top. Repeat this layering process until all the muffin cups are filled, ending with a sprinkle of mozzarella and Parmesan on top.
- Bake: Place the muffin tin in the preheated oven and bake for 20-25 minutes or until the cheese is melted and bubbly. The lasagna cups should be lightly browned on top.
- Garnish and Serve: Let the lasagna cups cool slightly before removing them from the muffin tin. Garnish with fresh basil or parsley, if desired, and serve hot.
Nutrition Information (per serving – makes 12 cups):
- Calories: 150
- Fat: 7g
- Saturated Fat: 3g
- Carbohydrates: 12g
- Fiber: 2g
- Net Carbs: 10g
- Protein: 12g
- WW Points: 3 SmartPoints per cup
Why These WW Lasagna Cups Work:
- Low in SmartPoints: At just 3 SmartPoints per cup, these lasagna cups are a fantastic way to enjoy a hearty and comforting meal without using up too many points. The combination of lean turkey, whole wheat noodles, and part-skim cheese makes these cups filling and flavorful, without being heavy on calories or points.
- High in Protein: With the lean turkey or chicken and cheese, each lasagna cup provides a good amount of protein to keep you full. Protein also helps to support muscle recovery and helps curb cravings, making these a satisfying and nutritious meal option.
- Customizable: These lasagna cups are highly customizable. You can swap the ground turkey or chicken for lean beef or even go meatless by using a vegetarian substitute like lentils or tofu. You can also add extra veggies, such as spinach, mushrooms, or zucchini, to the sauce for more fiber and nutrients.
- Perfect for Meal Prep: These individual servings are easy to make ahead and store for later. You can prep a batch of WW Lasagna Cups at the beginning of the week and keep them in the fridge for up to 3 days or freeze them for longer storage. This makes them an excellent option for meal prepping, ensuring you have a healthy, filling meal ready to go when you need it.
- Satisfies Lasagna Cravings: If you’ve been missing the comfort of traditional lasagna, these WW Lasagna Cups are a great alternative. They pack all the flavors of the classic dish—rich tomato sauce, creamy cheese, and hearty noodles—into a portion-controlled, lighter format that still feels indulgent.
Tips for Success:
- Make Ahead: These lasagna cups are perfect for meal prep. Simply assemble them in advance, cover them, and refrigerate for up to 3 days. They can also be frozen and reheated, making them an excellent option for busy weeks.
- Veggie Add-Ins: For more fiber and added nutrition, try sneaking in some finely chopped vegetables, like spinach, zucchini, or mushrooms, into the meat sauce. They’ll blend right in with the flavors and add more texture to the cups.
- Freezer-Friendly: If you want to make a larger batch, these cups freeze beautifully. After baking, let them cool completely, then wrap each cup individually in plastic wrap or foil and store them in a freezer-safe container. When you’re ready to eat, simply reheat them in the microwave or oven.
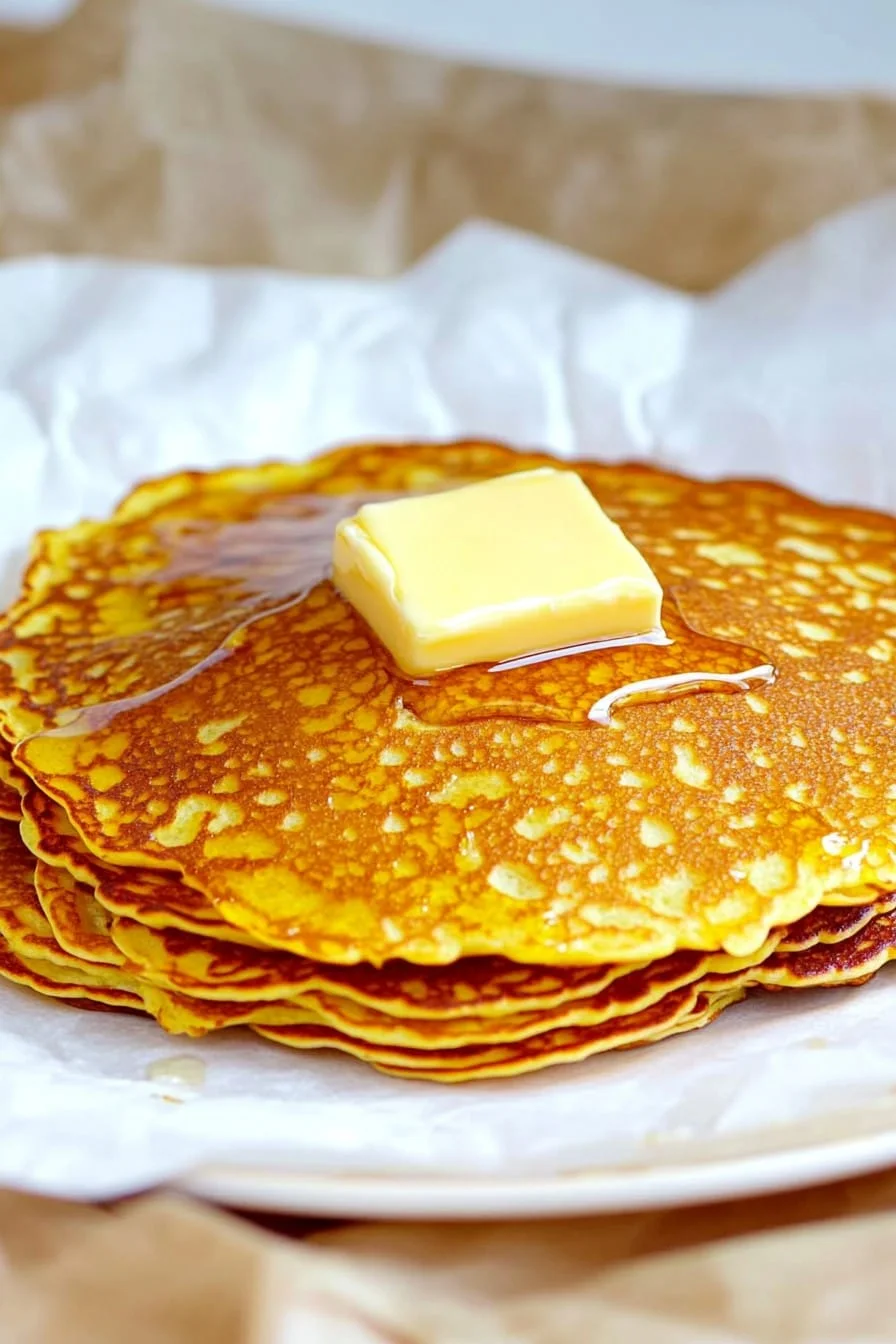
Carnivore Zero Carb Pancakes Recipe
These Carnivore Zero Carb Pancakes are a perfect breakfast option for anyone on a strict carnivore diet. Made with animal-based ingredients only, these pancakes are fluffy, rich, and packed with protein, while containing zero carbs. They’re ideal for those who want to indulge in a breakfast classic without breaking their diet.
Table of Contents
Ingredients:
- 4 large eggs (pasture-raised if possible)
- 2 oz cream cheese (softened)
- 1/4 cup heavy cream (for a creamier texture)
- 2 tbsp beef tallow or butter (for cooking)
- 1/4 tsp salt
- 1/4 tsp vanilla extract (optional, for flavor)
- 1/2 tsp baking powder (optional, for fluffiness)
- 1 tbsp collagen peptides (optional, for added protein and texture)
- 2 tbsp shredded mozzarella cheese (optional, for extra fluffiness and richness)
Instructions:
- Prepare the Pancake Batter:
- In a medium bowl, crack the eggs and whisk them together until fully combined.
- Add the softened cream cheese to the eggs and mix until smooth. If the cream cheese is too firm, you can microwave it for a few seconds to soften it up.
- Stir in the heavy cream and vanilla extract (if using) to add moisture and flavor. Add the salt and mix everything well.
- If you want fluffier pancakes, add the baking powder. You can also add the collagen peptides for extra protein and a smooth texture. Lastly, mix in the shredded mozzarella cheese if using for added fluffiness and richness.
- Heat the Pan:
- Place a skillet or griddle on medium heat and add the beef tallow or butter. Let it melt and coat the bottom of the pan evenly. You want a non-stick surface, so make sure the fat is spread out.
- Cook the Pancakes:
- Pour a small amount of the pancake batter (about 1/4 cup) into the hot skillet. Use a spoon or spatula to gently spread the batter into a round shape.
- Cook the pancakes for about 2-3 minutes on the first side until bubbles form on top and the edges start to set. Flip the pancakes gently using a spatula and cook for another 2-3 minutes on the other side, until golden brown and cooked through.
- Serve:
- Once the pancakes are cooked, transfer them to a plate. You can stack them up and serve them as is, or drizzle with more melted butter if you like.
- For a savory twist, top with crispy bacon or a dollop of whipped cream cheese.
Optional Toppings and Variations:
- If you tolerate dairy, you can top your pancakes with a little extra cheese or serve them with cooked bacon for a more filling breakfast.
- For a slight sweetness (if you follow a less strict carnivore approach), consider adding a few drops of stevia or erythritol to the batter, though this is optional.
These Carnivore Zero Carb Pancakes are easy to make, rich in flavor, and will keep you satisfied without straying from your carnivore lifestyle. Enjoy them as a protein-packed breakfast or even a quick meal during the day!
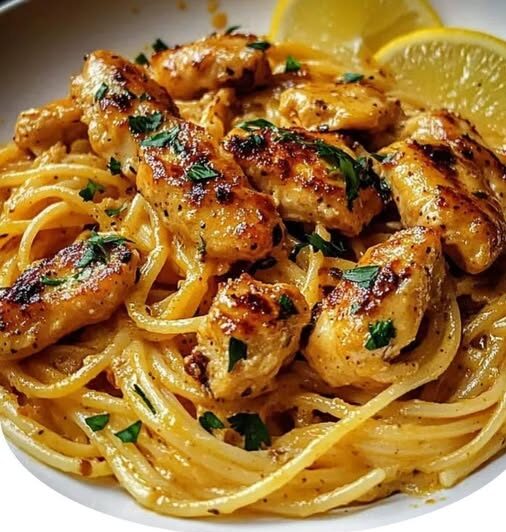
🍋 Creamy Garlic Butter Chicken Linguine
This creamy, buttery chicken linguine is bursting with flavor from fresh parsley, zesty lemon, and Parmesan cheese — all tied together with a rich, velvety sauce. A quick and satisfying one-pan meal!
🕒 Time & Servings
-
Prep Time: 10 minutes
-
Cook Time: 20 minutes
-
Total Time: 30 minutes
-
Servings: 4
🛒 Ingredients
🔹 Main Ingredients
-
2 boneless, skinless chicken breasts, cubed
-
8 oz linguine pasta
-
1 tbsp olive oil
-
1 tbsp butter
🔹 Seasonings
-
1 tsp garlic powder
-
1 tsp onion powder
-
½ tsp smoked paprika
-
¼ tsp cayenne pepper (optional)
-
½ tsp crushed red pepper flakes (optional)
-
Salt and black pepper, to taste
🔹 Sauce Ingredients
-
½ cup unsalted butter (softened)
-
2 tbsp fresh parsley, chopped
-
1 tbsp lemon juice
-
¼ cup grated Parmesan cheese
-
¼ cup chicken broth
-
¼ cup heavy cream
-
1 tbsp Dijon mustard
👩🍳 Instructions
1. Cook the Pasta
Bring a large pot of salted water to a boil. Cook the linguine until al dente according to package instructions.
Reserve ¼ cup of the pasta water, then drain and set aside.
2. Cook the Chicken
Season the cubed chicken with:
→ Garlic powder, onion powder, paprika, cayenne (if using), salt, and pepper.
In a large skillet over medium heat, heat 1 tbsp olive oil and 1 tbsp butter.
Add chicken and sauté until golden brown and fully cooked through (about 6–8 minutes).
Remove from skillet and set aside.
3. Make the Sauce
In the same skillet, melt the ½ cup butter over medium heat.
Stir in:
→ Garlic, chicken broth, heavy cream, Dijon mustard, and red pepper flakes (if using).
Let the sauce simmer for 3–4 minutes until slightly thickened.
4. Combine Everything
Add the cooked chicken and linguine to the skillet.
Toss everything together until well coated in sauce.
Mix in the Parmesan, parsley, and lemon juice.
If the sauce is too thick, add a splash of the reserved pasta water to loosen it.
5. Serve & Garnish
Garnish with extra parsley and grated Parmesan.
Serve warm and enjoy your restaurant-quality pasta at home! 🍝
💡 Tips & Variations
-
For extra flavor, use grilled chicken or shrimp instead.
-
Lemon zest can add an even brighter citrus note.
-
Add veggies like spinach or sun-dried tomatoes for a more colorful plate.
-
Want it spicier? Crank up the cayenne or add hot sauce to taste.
🍑 Fresh Peach Fritters with Vanilla Glaze
Golden, crispy on the outside, fluffy and peach-packed on the inside — these fresh peach fritters are the ultimate summer treat.
Prep Time: 15 minutes
Cook Time: 15 minutes
Total Time: 30 minutes
Yield: 12 fritters
Calories: ~210 per fritter
🛒 Ingredients
Fritter Batter:
-
1½ cups all-purpose flour
-
¼ cup granulated sugar
-
2 tsp baking powder
-
½ tsp salt
-
½ tsp ground cinnamon
-
⅔ cup milk
-
2 large eggs
-
1 tsp vanilla extract
-
2 tbsp melted butter
-
1½ cups fresh peaches, peeled and diced
-
Vegetable oil for frying
Vanilla Glaze:
-
1 cup powdered sugar
-
2 tbsp milk
-
½ tsp vanilla extract
👩🍳 Instructions
1. Mix Dry Ingredients
In a large bowl, whisk together the flour, sugar, baking powder, salt, and cinnamon. Set aside.
2. Mix Wet Ingredients
In a separate bowl, beat together the milk, eggs, vanilla extract, and melted butter until well combined.
3. Combine Wet & Dry
Add the wet mixture to the dry ingredients. Stir until just combined — don’t overmix to keep the fritters light and airy.
4. Fold in Peaches
Gently fold in the diced fresh peaches. The batter will be thick and chunky.
5. Heat Oil for Frying
In a deep skillet or pot, heat oil to 350°F (175°C). Use a thermometer for accuracy.
6. Fry the Fritters
Using a large spoon or cookie scoop, drop dollops of batter into the hot oil, a few at a time. Avoid overcrowding the pan. Fry each side for 2–3 minutes or until golden brown and cooked through.
7. Drain and Cool
Remove fritters with a slotted spoon and place on a paper towel-lined plate to drain.
8. Make the Glaze
Whisk together powdered sugar, milk, and vanilla until smooth. Adjust the milk for desired consistency.
9. Glaze and Serve
Drizzle glaze over warm fritters or dip them directly into the glaze. Let sit briefly to allow the glaze to set.
💡 Tips for Perfect Fritters
-
Use firm-ripe peaches for best texture — overly soft ones can make the batter too wet.
-
Don’t overcrowd the frying pan. Too many fritters at once will lower the oil temperature and affect crispiness.
-
If you prefer less sweetness, dust with powdered sugar instead of glazing.
-
Add a dash of nutmeg or cardamom for a spiced twist!
📦 Storage & Reheating
-
Store: Keep in an airtight container at room temp for 1 day or refrigerate for up to 3 days.
-
Reheat: Warm in a 300°F oven for 5–7 minutes or air fry briefly for that fresh-out-of-the-fryer crisp.
🌟 Make It Your Own
-
Swap peaches for nectarines, apples, or blueberries depending on the season.
-
Add chopped pecans or walnuts to the batter for extra crunch.
-
Serve with whipped cream or a scoop of vanilla ice cream for an indulgent dessert.