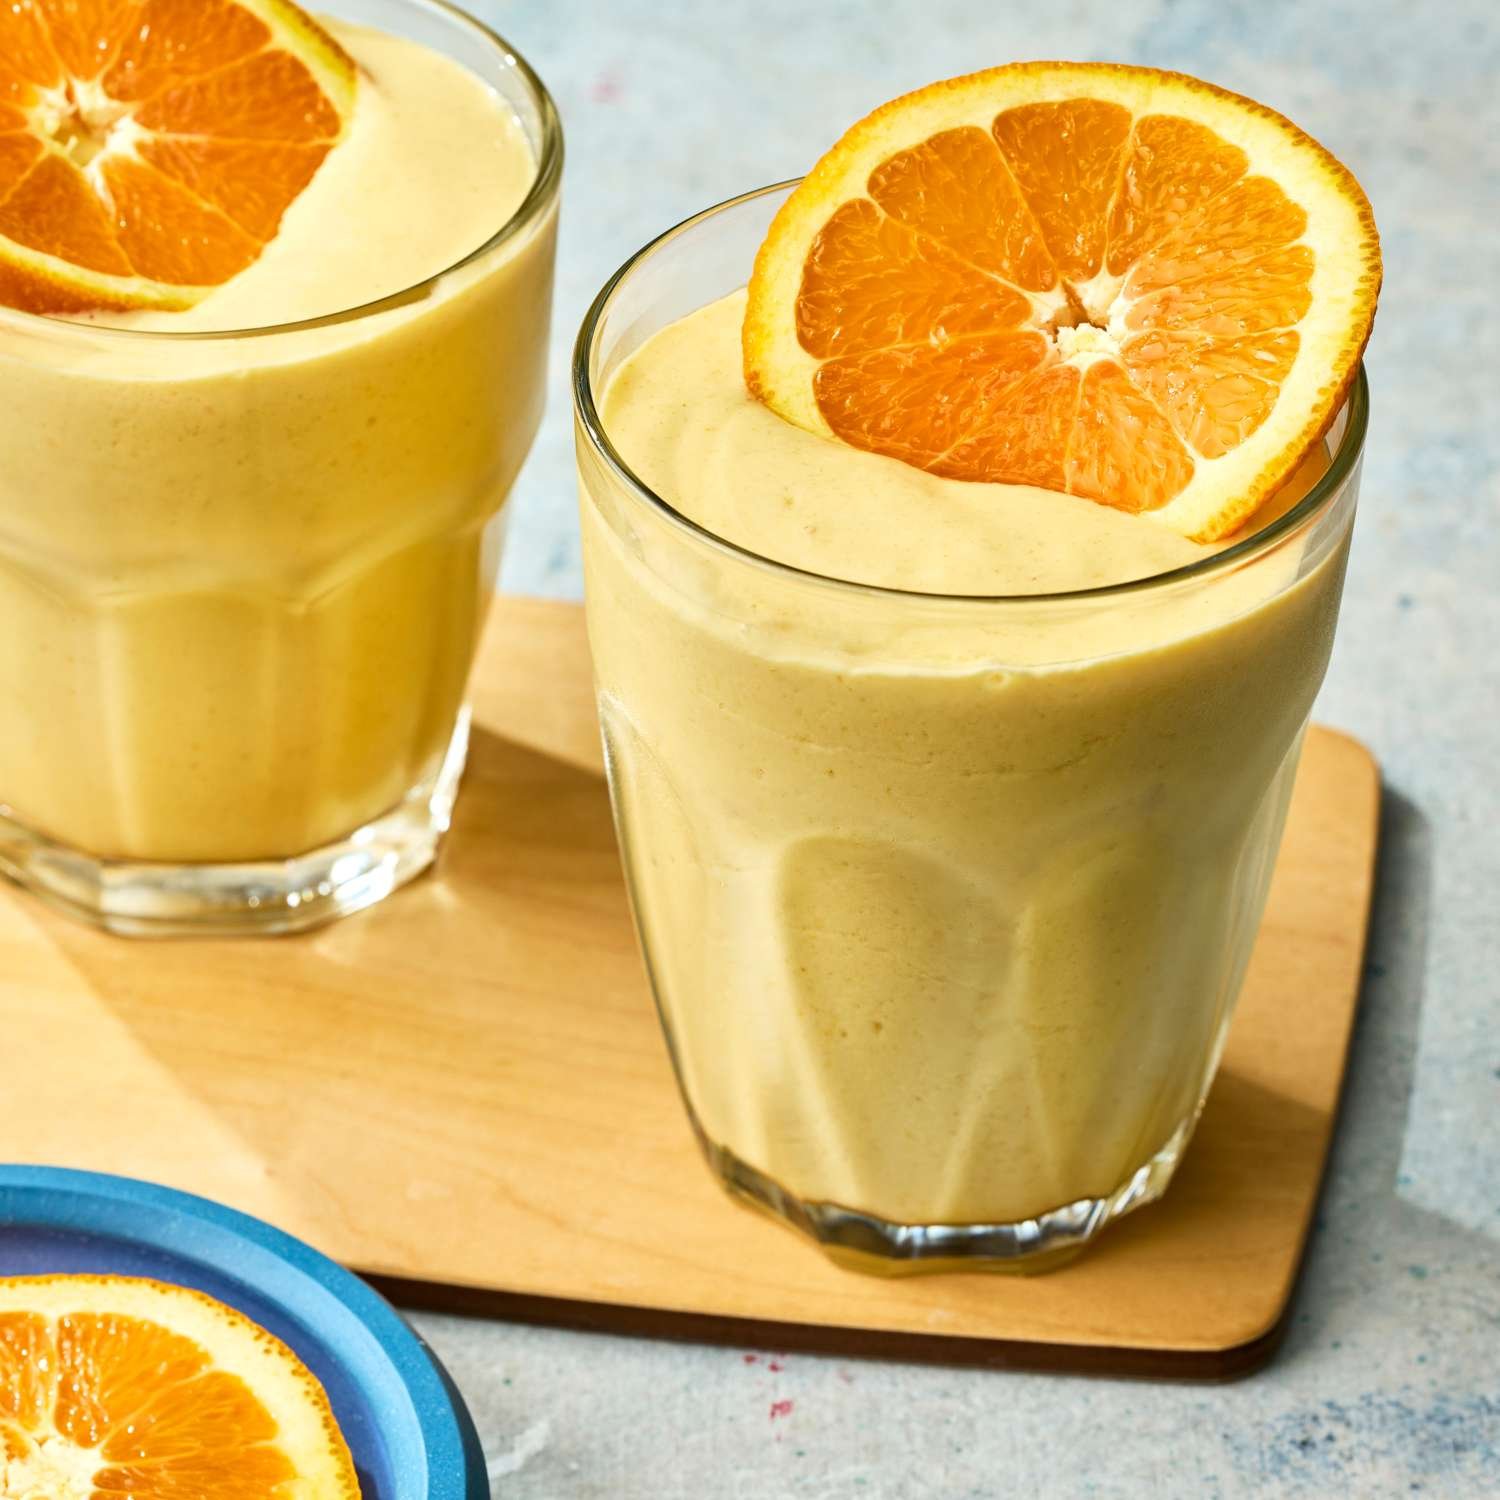
To achieve that bright color and thick, frothy consistency, you will need:
Ingredient
Amount
Notes
Oranges
2 large
Peeled and deseeded (Navel or Valencia work best).
Frozen Banana
1 medium
Essential for the thick, creamy texture shown.
Greek Yogurt
$1/2$ cup
Use Plain or Vanilla for added creaminess and protein.
Milk of Choice
$1/2$ cup
Almond milk, coconut milk, or dairy milk.
Vanilla Extract
1 tsp
This provides the “creamsicle” flavor.
Honey or Maple Syrup
1 tbsp
Optional, depending on the sweetness of your oranges.
Ice
$1/2$ cup
Optional, for a frostier finish.
Instructions
Prepare the Fruit: Peel the oranges and remove as much of the white pith as possible to avoid bitterness. Ensure your banana is pre-frozen for the best results.
Combine: Add the liquid ingredients (milk, yogurt, vanilla, and sweetener) to the blender first.
Layer: Add the orange segments and frozen banana on top.
Blend: Start on a low setting and gradually increase to high. Blend for 60 seconds until the mixture is perfectly smooth and no orange fibers remain.
Garnish: Slice an extra orange into thin rounds. Cut a small slit in each slice and place them on the rim of the glasses as shown in the image.
Tips for Success
The “Cream” Factor: For an even richer taste, replace the milk with a splash of heavy cream or full-fat coconut milk.
Boost the Color: If your oranges are pale, add a tiny pinch of turmeric. It won’t change the flavor but will make the orange color pop.
High Fiber: If you prefer a lighter texture, you can use $1/2$ cup of fresh orange juice instead of whole oranges, though you’ll lose the beneficial fiber.
This dessert is perfect for those who want a guilt-free, naturally sweet treat without any added sugar. It’s made with just three wholesome ingredients and is packed with fiber and natural sweetness. You can enjoy it as a quick snack, post-workout treat, or a light dessert.
Prep Time: 5 minutes
Chill Time: 30 minutes (optional)
Total Time: 35 minutes
Servings: 2
Ingredients
2 ripe bananas (or 1 cup mashed ripe banana)
¼ cup unsweetened cocoa powder
2 tablespoons peanut butter (or almond butter for variation)
(Optional toppings: crushed nuts, unsweetened coconut flakes, or dark chocolate shavings (sugar-free))
Instructions
Mash the Bananas
In a bowl, mash the bananas until smooth. The riper the bananas, the sweeter the dessert.
Add Cocoa Powder and Peanut Butter
Mix in the unsweetened cocoa powder and peanut butter, stirring until well combined and creamy.
Chill or Serve
You can enjoy it immediately or refrigerate for 30 minutes for a thicker, mousse-like texture.
Optional Toppings
Garnish with chopped nuts, coconut flakes, or dark chocolate shavings if desired.
Tips for the Best Low-Calorie Dessert
Sweeter Taste:
Use extra ripe bananas for natural sweetness.
Nut-Free Option:
Swap peanut butter for Greek yogurt or sunflower seed butter.
Chilled Mousse:
Let it sit in the fridge for a thicker, mousse-like consistency.
Chocolate Intensity:
Adjust cocoa powder based on how rich you want it.
Make it a Popsicle:
Freeze the mixture in popsicle molds for a frozen treat!
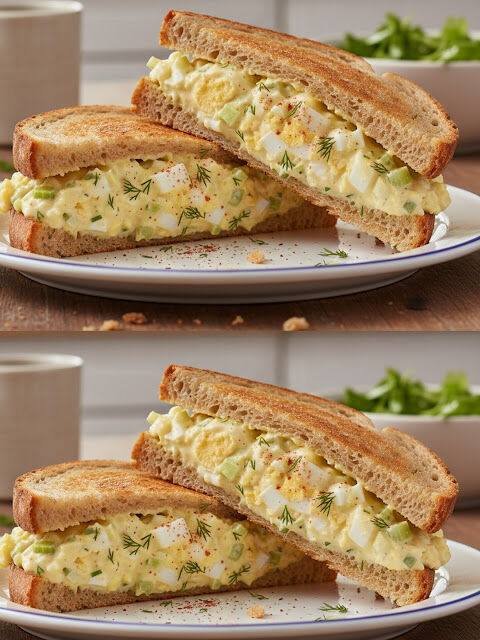
Egg salad may seem simple, but any seasoned chef will tell you: the difference between an ordinary bowl and an unforgettable one comes down to technique. This humble dish relies on a balance of texture, seasoning, and method. When done right, egg salad becomes silky, rich, and luxurious—the kind you want to eat straight from the bowl.
Here’s how chefs elevate this classic comfort food into something exceptional.
1. Start With Perfectly Cooked Eggs
The foundation of a creamy egg salad is a tender, velvety egg—never rubbery whites, never chalky yolks.
Chef’s Technique:
Place eggs in a pot.
Cover with cold water by at least one inch.
Bring to a boil slowly over medium heat.
Once the water reaches a full boil, turn off the heat, cover, and let the eggs sit for 10–11 minutes.
Immediately transfer to an ice bath for 5 minutes.
This prevents that gray ring around the yolk and ensures they peel beautifully.
2. Grate, Don’t Chop
Most home cooks roughly chop their eggs. Chefs often use a different method:
Use the small side of a grater or press eggs through a mesh cooling rack.
This technique creates:
An ultra-fine texture
Even distribution of yolk richness
That signature restaurant-level creaminess
This is the trick that transforms good egg salad into silky egg salad.
3. Build a Balanced, Creamy Base
The classic mistake is adding too much mayonnaise in an attempt to make the salad creamy. True creaminess comes from combining:
Mayonnaise for richness
Mustard for acidity
A touch of sour cream or Greek yogurt for extra silkiness
A tiny splash of pickle brine or lemon juice for brightness
This creates a layered flavor profile and prevents the salad from tasting flat.
4. Season Like a Chef
Eggs crave seasoning. Without it, even the best technique falls flat.
Chefs add:
A generous pinch of Kosher salt
Fresh black pepper
Smoked paprika or regular paprika for depth
Fresh dill or chives for fresh, aromatic notes
Optional but chef-approved:
A small spoon of finely minced shallot
Celery for crisp texture
A little Dijon for tang
5. Let It Rest
Texture and flavor improve dramatically after 20–30 minutes in the refrigerator.
Resting time allows:
Flavors to meld
Excess moisture to absorb
The salad thickens naturally
This is why restaurant egg salad always tastes “more put together.”
Restaurant-Quality Creamy Egg Salad Recipe
Ingredients (Serves 4)
For the eggs:
8 large eggs
Creamy base:
1/3 cup mayonnaise
1 tbsp Dijon mustard
1 tbsp sour cream or Greek yogurt
1–2 tsp pickle brine or lemon juice
Mix-ins & seasoning:
1/4 cup finely diced celery
1 tbsp minced shallot (optional)
1 tbsp chopped fresh dill or chives
1/2 tsp salt
1/4 tsp black pepper
Pinch of smoked or regular paprika
Instructions
1. Cook the Eggs
Place eggs in a pot and cover with cold water.
Heat over medium until the water comes to a full boil.
Turn off heat, cover, and let sit for 10–11 minutes.
Transfer eggs to an ice bath for 5 minutes.
Peel once cool.
2. Prepare the Eggs
Grate the eggs using the small side of a box grater, OR press them through a metal rack for fluffy, even pieces.
3. Make the Creamy Dressing
In a large bowl, whisk together:
Mayonnaise
Dijon
Sour cream/Greek yogurt
Pickle brine or lemon juice
Salt, pepper, and paprika
4. Combine
Fold in the grated eggs, celery, and shallot.
Finish with fresh herbs.
Mix gently to keep the mixture airy.
5. Chill and Serve
Refrigerate for 20–30 minutes to enhance creaminess.
Serve on toasted bread, crackers, croissants, or in lettuce cups.
Final Thoughts
The secret to extraordinary egg salad isn’t a long list of ingredients—it’s professional technique. Perfectly cooked eggs, grated texture, balanced acidity, and a short resting time transform a simple, everyday recipe into something luxurious and memorable.
Master these steps, and you’ll never go back to ordinary egg salad again.
Servings: 2 Total Time: 10 minutes Difficulty: Easy Calories per Serving: ~180 kcal Macros per Serving (approx.): Protein 18g / Carbs 8 g / Fat 7 g / Fiber 3 g
Get updates on the latest posts and more from tacosbellmenu. us straight to your inbox.
Why You’ll Love This Blueberry Yogurt Parfait
Looking for a quick, nutrient-packed breakfast or snack that’s as delicious as it is healthy? This Blueberry Yogurt Parfait combines creamy yogurt, fresh blueberries, and crunchy low-carb toppings for a satisfying, energizing treat.
Perfect for keto, low-carb, high-protein, and low-calorie diets, it’s a versatile dish that can be prepped in minutes and enjoyed anytime. Each spoonful offers a balance of protein, healthy fats, and antioxidants, keeping you full and focused without the sugar spike.
Whether you’re meal prepping for the week or enjoying a last-minute breakfast, this parfait is refreshing, guilt-free, and completely diet-friendly.
What Makes This Parfait So Special
Sensory Appeal: Creamy yogurt, juicy blueberries, and a crunchy nut topping create a perfect textural contrast.
Flavor Highlight: Sweet and tangy berries pair beautifully with the richness of Greek yogurt.
Diet Benefits: Low in carbs, high in protein, keto-approved, and portion-controlled for WW and low-calorie diets.
Subscribe to tacosbellmenu.us!
Get updates on the latest posts and more from tacosbellmenu. us straight to your inbox.
Ingredients Needed
Base Layer:
1 cup Greek yogurt (full-fat for Keto, non-fat for low-cal/WW)
1 tsp vanilla extract
1–2 tsp low-carb sweetener (erythritol, stevia, or monk fruit, optional)
Fruit Layer:
½ cup fresh blueberries (or frozen, thawed and drained)
Crunchy Topping:
2 tbsp chopped almonds or walnuts (toasted for extra flavor)
1 tsp chia seeds (optional for added fiber and texture)
How to Make Our Blueberry Yogurt Parfait
Prepare the yogurt: In a small bowl, mix Greek yogurt with vanilla extract and your sweetener of choice until smooth.
Layer the parfait: In serving glasses or jars, start with a layer of yogurt, followed by a layer of fresh blueberries. Repeat to create two layers.
Add the crunch: Sprinkle chopped nuts and chia seeds over the top for texture and extra nutrition.
Serve immediately or refrigerate for up to 1 hour to chill. Perfect for on-the-go breakfasts or quick snacks.
Storage & Serving Suggestions
Storing: Keep refrigerated in a covered container or jar for up to 24 hours. Best enjoyed fresh.
Freezing: Not recommended, as yogurt may separate when thawed.
Serving Pairings: Pair with a cup of green tea or black coffee for a complete, balanced breakfast.
Tips & FAQs
Q: Can I use other berries?
A: Yes! Strawberries, raspberries, or blackberries work well and keep it low-carb.
Q: Can I make it vegan?
A: Substitute Greek yogurt with unsweetened coconut yogurt for a vegan-friendly option.
Subscribe to tacosbellmenu.us!
Get updates on the latest posts and more from tacosbellmenu. us straight to your inbox.
Q: How can I increase protein further?
A: Add a scoop of vanilla protein powder to the yogurt before layering.
Q: Can I prepare this ahead of time?
A: Yes! Assemble in jars the night before for an easy grab-and-go breakfast.
Q: Is it suitable for keto?
A: Absolutely! Use full-fat Greek yogurt, low-carb sweetener, and nuts for a keto-friendly parfait.
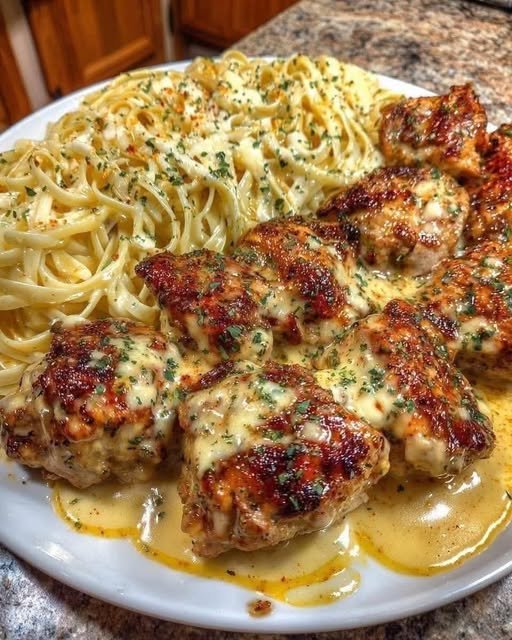
For the Chicken Bites:
1 lb boneless, skinless chicken
breasts, cut into bite-sized pieces
2 tablespoons olive oil
4 tablespoons unsalted butter
4 cloves garlic, minced
Salt and pepper to taste
1 teaspoon Italian seasoning
Fresh parsley, chopped (for garnish)
For the Creamy Parmesan Pasta:
12 oz fettuccine or pasta of your
choice
2 tablespoons butter
2 cloves garlic, minced
1 cup heavy cream
1 cup grated Parmesan cheese
1/2 cup chicken broth
Salt and pepper to taste
Extra garlic butter (optional, for
drizzling))
Instructions:
Cook the Pasta: Boil a large pot of
salted water and cook the pasta
according to package instructions
until al dente. Drain and set aside.
Cook the Chicken Bites: In a large
skillet, heat olive oil over medium-
high heat. Add the chicken bites,
seasoning with salt, pepper, and
Italian seasoning. Cook until golden
brown and cooked through, about 6- 8 minutes. Remove the chicken from the skillet and set aside.
Make the Garlic Butter Sauce: In the
same skillet, reduce the heat to
medium and add the butter. Once
melted, add the minced garlic and
sauté for about 30 seconds until
fragrant. Return the cooked chicken
to the skillet and toss to coat in the
garlic butter sauce.
Prepare the Creamy Parmesan
Sauce: In a separate skillet, melt 2
tablespoons of butter over medium
heat. Add the minced garlic and
sauté for another 30 seconds. Stir in
the heavy cream and chicken broth,
bringing the mixture to a gentle
simmer. Gradually whisk in the
grated Parmesan cheese until
smooth, and season with salt and pepper to taste.
Combine Pasta and Sauce: Toss the
cooked pasta in the creamy
Parmesan sauce, ensuring it’s well
coated.
Serve: Plate the creamy Parmesan
pasta and top with the garlic butter
chicken bites. Drizzle with extra
garlic butter if desired and garnish
with fresh parsley
 Ingredients
 Instructions
 Tips for Success

 Ingredients