Old-Fashioned Apple Fritters
Crispy, Soft & Glazed!
If you love warm, crispy donuts from a bakery, you are going to be obsessed with these.
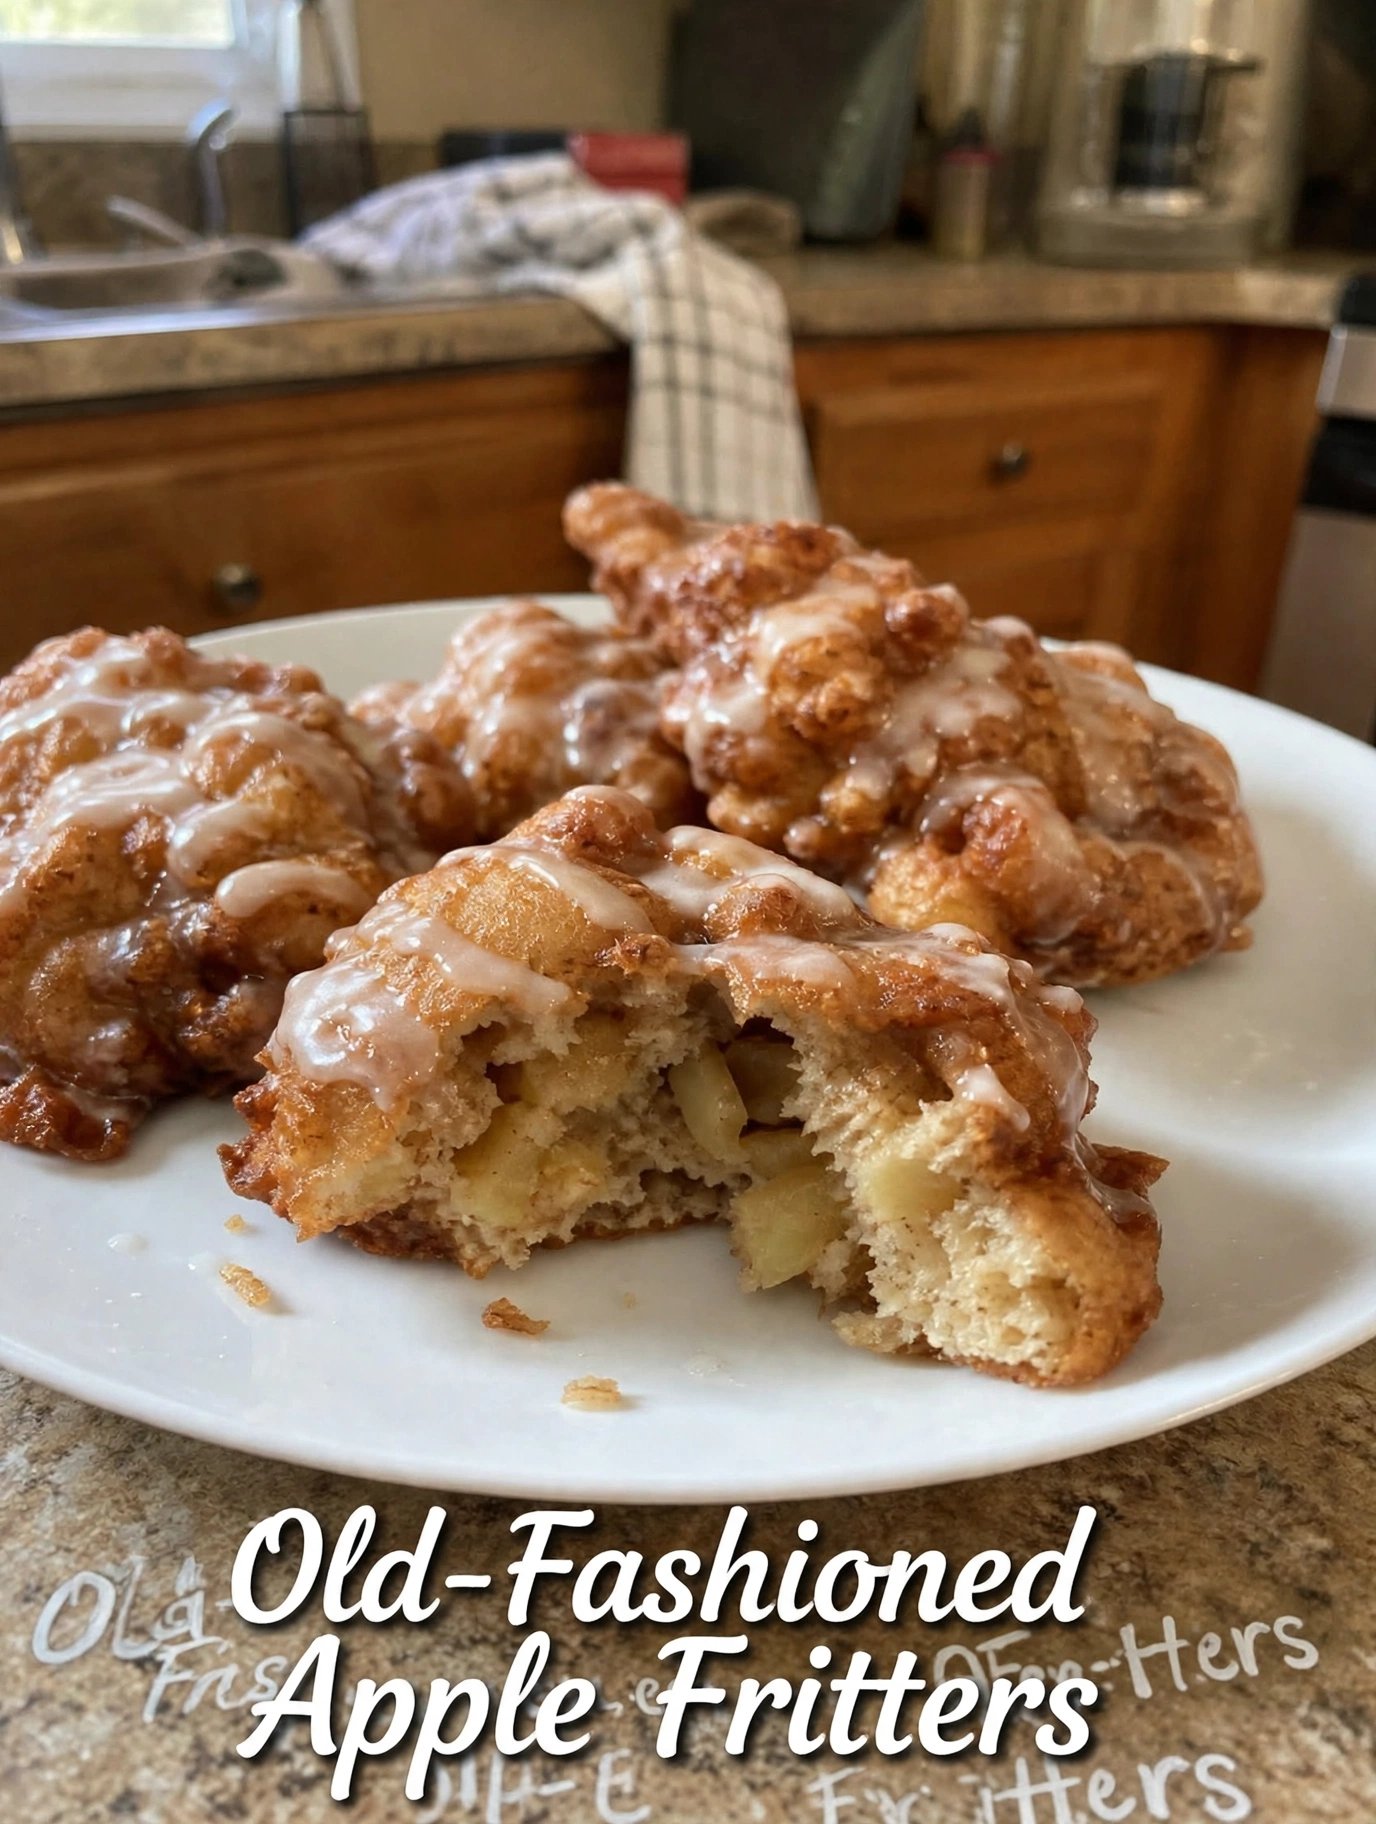
These *Old-Fashioned Apple Fritters* are exactly what you see in the photo — golden brown and crispy on the outside, soft and fluffy on the inside, packed with juicy apple chunks, warm cinnamon, and drizzled with a sweet vanilla glaze that melts right in. When you bite into one, you get that perfect crunch, then soft dough, then sweet apple. It is pure fall comfort!
They are perfect for breakfast, brunch, a cozy weekend treat, or a dessert with coffee. They take just *30 minutes*, use simple pantry ingredients, and taste 100x better than store-bought.
In this post, I will show you exactly how to make them, how to keep them crispy and not greasy, how to make the perfect glaze, and all the best variations — including a lighter and baked version for my @anti_inflammatory_recipess followers.
*Prep Time:* 15 minutes
*Cook Time:* 15 minutes
*Total Time:* 30 minutes
*Servings:* 10 fritters
*Calories:* 285 kcal per fritter
*Cuisine:* American
*Course:* Breakfast / Brunch / Dessert / Snack
Why You Will Love These Apple Fritters
This is not just another donut recipe. Here is why this one goes viral every time:
*1. They Are Crispy Outside, Soft Inside*
The secret is the batter and hot oil. They fry up with those beautiful craggy, crispy edges you see in the photo — the crunchy bits are the best part! Inside, they stay soft, fluffy, and full of apples.
*2. They Are Loaded With Real Apples*
We use 2 big apples, diced small, so every bite has apple. Not apple flavoring, real apple chunks that get soft and sweet as they fry.
*3. They Are Ready In 30 Minutes*
No yeast, no rising, no waiting for hours. This is a quick batter, drop and fry. You can have warm fritters on the table in half an hour.
*4. The Glaze Is Perfect*
A simple 3-ingredient vanilla glaze that soaks in just a little, gets shiny, and adds that bakery look. It is sweet but not too sweet.
*5. They Taste Like Fall*
Cinnamon, nutmeg, apples, vanilla — it smells like a cozy apple orchard in your kitchen.
Ingredients You Will Need
For The Fritters:
– *2 large apples*, peeled and diced into 1/2-inch cubes — Granny Smith is best because it is tart and holds its shape. Honeycrisp or Gala also work and are sweeter. In the photo, you can see big, soft apple chunks inside.
– *1 1/2 cups all-purpose flour*
– *1/4 cup granulated sugar*
– *2 teaspoons baking powder*
– *1 teaspoon ground cinnamon*
– *1/4 teaspoon ground nutmeg*
– *1/4 teaspoon salt*
– *2 large eggs*
– *1/2 cup whole milk* — Or buttermilk for extra tang and fluffiness.
– *1 teaspoon vanilla extract*
– *2 tablespoons melted butter* — Or vegetable oil.
– *1 tablespoon lemon juice* — To toss with apples so they don’t brown.
– *Vegetable oil for frying* — About 3 cups.
For The Vanilla Glaze:
– *1 1/2 cups powdered sugar*
– *3-4 tablespoons milk*
– *1/2 teaspoon vanilla extract*
– *Pinch of salt*
How To Make Old-Fashioned Apple Fritters – Step By Step
Step 1: Prep The Apples
Peel apples, remove core, and dice into small 1/2-inch cubes. Toss with lemon juice in a small bowl. This stops them from browning and adds a little brightness.
Don’t cut them too big — big chunks will fall out and won’t cook through. Small cubes get soft and melt into the batter.
Step 2: Make The Batter
In a large bowl, whisk together flour, sugar, baking powder, cinnamon, nutmeg, and salt.
In a separate bowl, whisk eggs, milk, vanilla, and melted butter until smooth.
Pour wet ingredients into dry ingredients. Stir gently until just combined. Don’t overmix — a few lumps are okay. Overmixing makes fritters tough.
Fold in diced apples. The batter will be thick and chunky — that’s perfect. It should be thick enough to hold its shape when you scoop it, not runny like pancake batter.
Let batter rest for 5 minutes. This helps baking powder activate and makes fritters fluffier.
Step 3: Heat The Oil
Pour oil into a heavy pot or deep skillet until it is about 2 inches deep. Heat to *350°F (175°C)*.
This temperature is critical. If oil is too cold, fritters will soak up oil and get greasy. If too hot, they will burn outside and stay raw inside. Use a thermometer if you have one.
Line a plate with paper towels.
Step 4: Fry Until Golden And Crispy
Use a large spoon or ice cream scoop to drop about 1/3 cup of batter into hot oil. Don’t crowd the pot — fry 3 fritters at a time.
Fry for 2-3 minutes per side, flipping once, until deep golden brown and crispy with those craggy edges you see in the photo. They will puff up and get those beautiful rough, crunchy bits.
Remove with a slotted spoon and drain on paper towels for 1 minute. Repeat with remaining batter.
You will smell cinnamon and apples everywhere — your kitchen will smell like a bakery!
Step 5: Glaze While Warm
While fritters are still warm, whisk together powdered sugar, milk, vanilla, and salt until smooth. It should be thick but pourable.
You have two options:
*Dip Method:* Dip each fritter in glaze, flip, and let excess drip off.
*Drizzle Method:* Use a spoon to drizzle .
I love the drizzle method for that rustic, homemade bakery look. The glaze will melt slightly into the warm fritter and get shiny.
Place glazed fritters on a wire rack for 5 minutes so glaze sets.
Step 6: Serve Warm
Serve immediately while they are still warm and crispy. Break one open — you should see exactly .soft fluffy dough, juicy apple chunks, cinnamon, and glaze dripping down.
They are best fresh, but still delicious later!
Pro Tips For The Best Apple Fritters Ever
*1. Oil Temperature Is Everything:* Keep it at 350°F. If it drops, wait a minute before adding more fritters. If it gets too hot, lower heat.
*2. Don’t Overmix Batter:* Stir until just combined. Lumpy is good. Overmixing = tough, dense fritters.
*3. Keep Apples Small:* 1/2-inch cubes are perfect. Bigger pieces won’t cook through.
*4. Don’t Crowd The Pan:* Frying too many at once drops oil temperature and makes them greasy. 3 at a time is perfect.
*5. Drain Well:* Let them drain 1 minute on paper towels before glazing. This removes excess oil and keeps them crispy.
*6. Glaze While Warm, Not Hot:* If you glaze right out of oil, glaze will melt off completely. Wait 1-2 minutes so it sticks but still melts in a little.
*7. Use A Heavy Pot:* A cast iron pot or Dutch oven holds heat best and keeps oil temperature stable.
Delicious Variations To Try
*1. Caramel Apple Fritters:* Drizzle with caramel sauce instead of glaze. Add a pinch of sea salt on top. So decadent!
*2. Apple Cider Fritters:* Replace milk with apple cider. It makes them extra apple-y and perfect for fall.
*3. Baked Apple Fritters (Healthier):* Scoop batter onto a parchment-lined baking sheet. Spray with oil. Bake at 375°F for 15-18 minutes until golden. They won’t be as crispy, but still delicious and much lighter.
*4. Air Fryer Apple Fritters:* Scoop batter onto parchment rounds. Spray with oil. Air fry at 350°F for 8-10 minutes, flipping halfway. Crispy and easy!
*5. Maple Glaze Fritters:* Replace vanilla glaze with maple glaze — 1 1/2 cups powdered sugar, 3 tbsp milk, 2 tbsp maple syrup. Amazing for fall brunch.
*6. Stuffed With Cream Cheese:* Add a small cube of cream cheese in the center of each fritter before frying. It melts into a creamy surprise.
*7. Anti-Inflammatory / Lighter Version:* For my @anti_inflammatory_recipess family, use 1 cup whole wheat flour + 1/2 cup almond flour, use coconut sugar instead of white sugar, use oat milk, add 1/2 teaspoon turmeric + extra cinnamon, bake or air fry instead of deep frying, and use a light glaze with less sugar or a drizzle of raw honey. You still get warm, cozy apple flavor with ingredients that love your body.
What To Serve With Apple Fritters
These are amazing on their own, but here are my favorites:
– *Coffee or Chai Latte:* The perfect cozy pairing.
– *Vanilla Ice Cream:* Warm fritter + cold ice cream = heaven.
– *Apple Cider:* For a full fall experience.
– *Whipped Cream:* A dollop on the side for brunch.
– *Caramel Sauce:* For dipping.
For brunch, I serve a platter of fritters with coffee, fresh fruit, and scrambled eggs. For dessert, I serve them warm with ice cream and caramel.
How To Store And Reheat
*At Room Temperature:* Store in an airtight container for up to 2 days. Glaze will soften slightly, but they are still good.
*In The Fridge:* Store for up to 4 days. Reheat before serving.
*In The Freezer:* Let them cool completely, do NOT glaze. Freeze on a baking sheet for 1 hour, then transfer to a freezer bag. Freeze for up to 3 months. Thaw, reheat, then glaze fresh.
*How To Reheat And Keep Crispy:* Do NOT microwave — they will go soggy. Reheat in air fryer at 350°F for 3-4 minutes or in oven at 350°F for 6-8 minutes. They will be crispy again like fresh.
*Make-Ahead Tip:* You can make the batter the night before and keep in fridge. Stir in apples in the morning and fry fresh. Add 1 extra minute to fry time since batter is cold.
Frequently Asked Questions
*Why are my fritters greasy?*
Oil was too cold. Keep it at 350°F and don’t crowd the pan. Also drain well on paper towels.
*Why are my fritters raw inside?*
Oil was too hot, or fritters were too big. Make them 1/3 cup max and fry 2-3 minutes per side.
*Can I use different apples?*
Yes! Granny Smith is tart and holds shape best. Honeycrisp is sweet and crunchy. Gala is soft and sweet. Use what you have — just don’t use Red Delicious, they get mushy.
*Can I make these without frying?*
Yes, baked and air fryer methods above work great and are much lighter.
*Can I make the batter ahead?*
Yes, up to 24 hours in fridge. The apples may release a little juice, so stir gently before frying.
*How do I get those craggy edges?*
Don’t make them smooth! Drop batter roughly with a spoon, let it be messy. Those rough edges fry up into the crispy bits everyone loves.
Nutrition Information (Per Fritter)
Calories: 285 | Protein: 4g | Carbohydrates: 42g | Fat: 11g | Fiber: 2g | Sugar: 22g | Sodium: 180mg
_Nutrition is estimated and may vary based on oil and glaze._
Final Thoughts
These Old-Fashioned Apple Fritters are the ultimate cozy treat — crispy, soft, sweet, warm, and full of real apples. They are easy enough for a weekday breakfast, impressive enough for a brunch party, and comforting enough that you will want to make them every fall weekend.
If you try this recipe, please leave a comment below and tell me how it turned out. Did you try the caramel version or the baked version? I love hearing from you!
Don’t forget to save this recipe on Pinterest and share it with a friend who loves donuts and apples. And follow @anti_inflammatory_recipess for more healthy, delicious, anti-inflammatory recipes every day!
*Happy Cooking!*