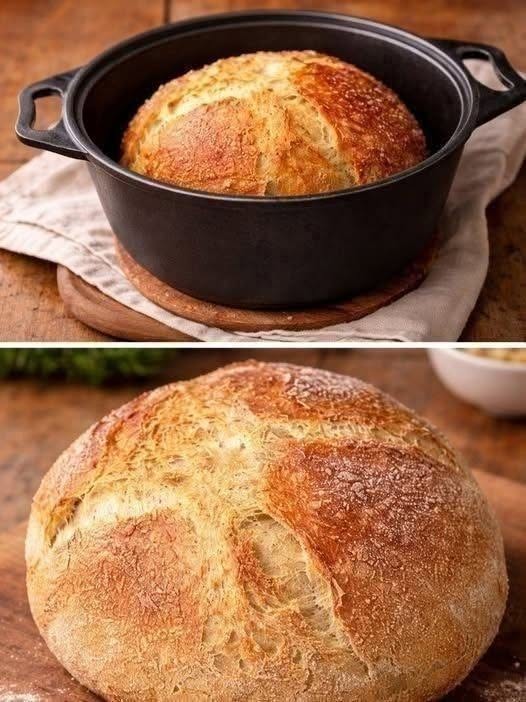
No-Knead Dutch Oven Crusty Artisan Bread
Description
No-Knead Dutch Oven Crusty Artisan Bread is one of the easiest ways to make bakery-style bread at home. With just a handful of basic ingredients and almost no hands-on kneading, you can create a beautifully rustic loaf with a deeply golden, crunchy crust and a soft, airy interior.
The secret is the long fermentation and the Dutch oven. During the slow rise, the dough develops flavor while the Dutch oven traps steam, helping the bread form its signature crisp crust. The result is a gorgeous artisan-style loaf with a chewy texture and delicious homemade flavor.
This bread is perfect for breakfast, sandwiches, soups, salads, pasta dinners, or simply serving warm with butter and olive oil. Once you try this method, you may never feel the need to buy bakery bread again.
Servings and Timing
Makes: 1 large loaf
Prep Time: 10–15 minutes
Rise Time: 12–18 hours
Bake Time: 45–50 minutes
Total Time: About 13–19 hours
Ingredients
- 3 cups (375g) all-purpose flour or bread flour
- 1½ teaspoons salt
- ½ teaspoon instant yeast
- 1½ cups (360ml) lukewarm water
- 1 teaspoon honey or sugar, optional
- Extra flour, for shaping
Instructions
1. Mix the Dough
In a large mixing bowl, combine the flour, salt, and instant yeast.
If using honey or sugar, add it to the lukewarm water and stir briefly.
Pour the water into the flour mixture. Using a wooden spoon, spatula, or your hands, mix until all the flour is moistened and a rough, sticky dough forms.
Do not knead the dough. It should look shaggy and slightly messy. Make sure there are no large pockets of dry flour remaining.
Cover the bowl tightly with plastic wrap or a clean kitchen towel.
2. Let the Dough Rise
Leave the covered dough at room temperature for 12–18 hours.
The long fermentation is what gives this bread its wonderful flavor and airy texture. A cooler room may require closer to 18 hours, while a warmer kitchen may need less time.
The dough is ready when it has visibly expanded, looks bubbly, and has a soft, slightly wobbly appearance.
Avoid letting it rise for too long, especially in a very warm kitchen, because over-fermented dough can become weak and difficult to shape.
3. Shape the Dough
Generously flour your work surface.
Scrape the dough out of the bowl using a dough scraper or lightly floured hands. The dough will be sticky, which is completely normal.
Sprinkle a little flour over the top and gently fold the dough toward the center several times. Avoid aggressively kneading it because you want to preserve the air bubbles created during fermentation.
Shape it into a rough round loaf.
Place the dough seam-side down on a piece of parchment paper or onto a generously floured kitchen towel.
Cover loosely and allow it to rest for approximately 30–45 minutes.
4. Preheat the Dutch Oven
While the dough rests, place a Dutch oven with its lid inside your oven.
Preheat the oven to 450°F (230°C).
Allow the Dutch oven to heat for at least 30 minutes. Preheating the pot is important because it helps the dough immediately begin baking and creates better oven spring.
Use caution when handling the hot Dutch oven. Always use thick oven mitts.
5. Prepare the Loaf
Carefully transfer the dough onto a sheet of parchment paper if it is not already there.
Using a sharp knife or bread lame, make one or two shallow cuts across the top of the loaf. This gives the expanding dough a controlled place to open during baking.
You can keep the design simple or create decorative scoring patterns.
6. Bake the Bread
Carefully remove the hot Dutch oven from the oven.
Using the parchment paper as a sling, lower the dough into the Dutch oven.
Cover immediately with the lid.
Bake covered for 30 minutes. The trapped steam helps create the crisp, blistered crust that makes artisan bread so delicious.
After 30 minutes, carefully remove the lid.
Continue baking uncovered for another 15–20 minutes, or until the loaf is deeply golden brown.
For an extra-crispy crust, you can bake it for a few additional minutes, keeping a close eye on the color.
7. Cool Completely
Remove the finished bread from the Dutch oven and place it on a wire rack.
Allow the loaf to cool for at least 1 hour before slicing.
Although it can be tempting to cut into the bread immediately, cooling allows the interior crumb to finish setting. Cutting too early can result in a gummy texture.
Once cooled, slice with a serrated bread knife.
Notes and Tips
Measure the Flour Correctly
For the most consistent results, use a kitchen scale and measure flour by weight. If using measuring cups, spoon the flour into the cup and level it rather than packing it down.
Don’t Add Too Much Flour
The dough should be sticky. Adding excessive flour during shaping can make the finished bread dense.
Use just enough flour to make handling manageable.
Use Bread Flour for More Chew
All-purpose flour works very well, but bread flour can provide a slightly chewier texture and stronger structure.
Check Your Yeast
Use fresh instant or active dry yeast. If your yeast is old or inactive, the dough may not rise properly.
Adjust for Your Kitchen Temperature
The dough rises faster in a warm kitchen and slower in a cool kitchen. Watch the dough rather than relying only on the clock.
Look for a dough that has expanded significantly and developed bubbles across the surface.
Flavor Variations
This basic artisan bread recipe is easy to customize.
Garlic Herb Bread
Add 1 teaspoon garlic powder and 1–2 tablespoons chopped fresh rosemary or thyme to the flour.
Rosemary Parmesan Bread
Add ½ cup grated Parmesan and 1 tablespoon chopped fresh rosemary to the dough.
Olive Bread
Fold in ½ cup chopped Kalamata or green olives after mixing.
Jalapeño Cheddar Bread
Add ½ cup shredded cheddar cheese and 1–2 finely chopped jalapeños for a flavorful savory loaf.
Cinnamon Raisin Bread
For a sweet version, add raisins, cinnamon, and a little extra honey.
Serving Suggestions
Fresh artisan bread is delicious served warm with salted butter, extra-virgin olive oil, or your favorite spread.
Serve slices alongside:
- Creamy tomato soup
- Lentil soup
- Mediterranean bean soup
- Pasta dishes
- Roasted chicken
- Fresh salads
- Scrambled eggs
- Cheese and charcuterie boards
It also makes excellent toast. Slice the cooled bread and toast it until golden, then top with avocado, eggs, tomatoes, feta, or ricotta.
Storage
Store the cooled bread at room temperature in a paper bag or bread box for up to 2–3 days.
Avoid storing crusty bread in a sealed plastic bag at room temperature because trapped moisture can soften the crust.
For longer storage, slice the bread and freeze it in an airtight freezer-safe bag for up to approximately 3 months. Toast individual slices directly from frozen.
Nutritional Information
Approximate nutrition per slice will depend on the size of the loaf and how it is divided:
- Calories: 150–170
- Protein: 5g
- Carbohydrates: 31–34g
- Fat: 1g
- Fiber: 1–2g
- Sugar: Less than 1g
- Sodium: 250–300mg
Values are estimates and will vary depending on the flour and exact ingredients used.
Frequently Asked Questions
Can I make this bread without a Dutch oven?
Yes. A Dutch oven provides an ideal steaming environment, but you can bake the loaf on a preheated baking stone or heavy baking sheet and place a heatproof pan of hot water in the oven to create steam.
Why is my dough so sticky?
This is normal for a no-knead dough. Resist the temptation to add large amounts of flour. Lightly flour your hands and work surface instead.
Can I let the dough rise for more than 18 hours?
It depends on the room temperature and yeast quantity. In a cool environment, a longer rise may work, but in a warm kitchen the dough can over-ferment. Watch for visual signs of readiness.
How do I know when the bread is fully baked?
The loaf should have a deep golden-brown crust and feel firm. If using a thermometer, the center should generally be around 200–210°F (93–99°C).