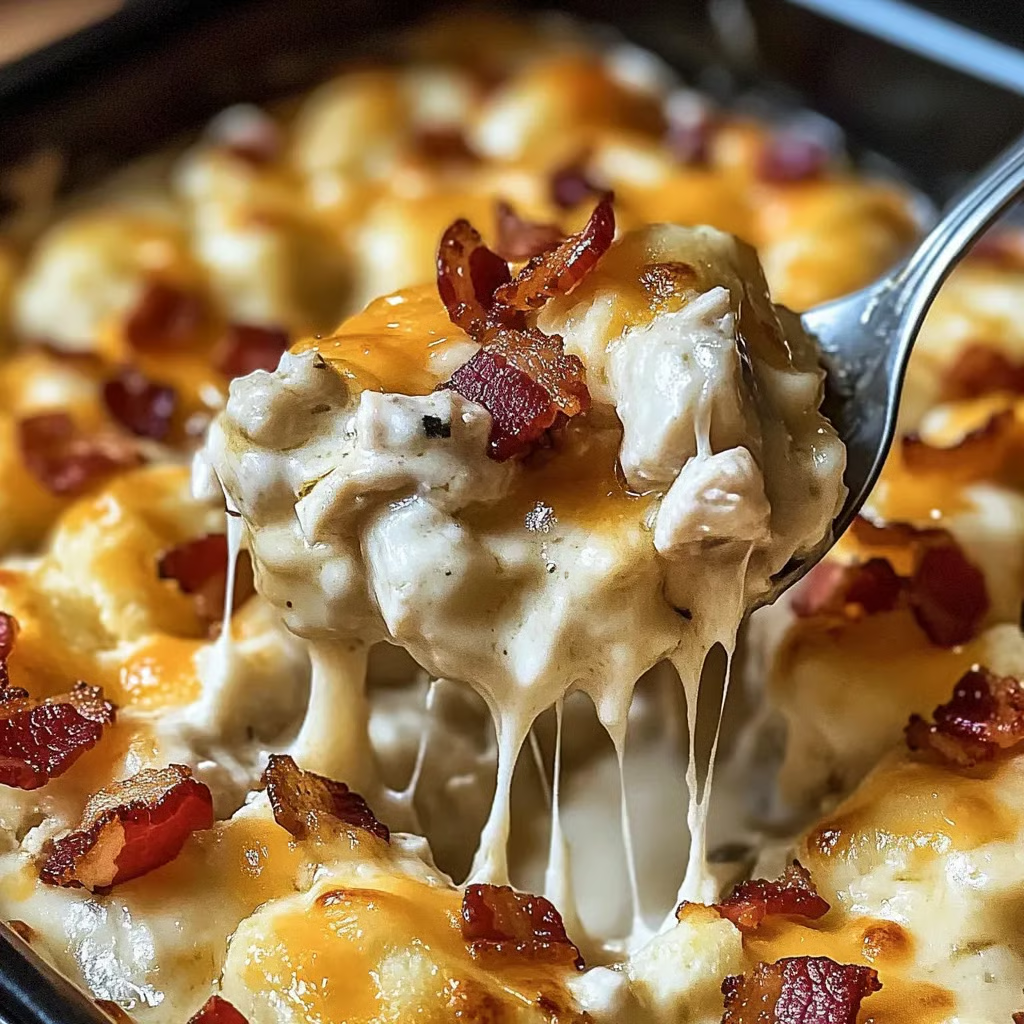
Chicken Bacon Crunch Casserole

All the flavors of a loaded baked potato in one creamy, cheesy, crunchy casserole — packed with chicken, bacon, ranch, and topped with crispy tater tots.

Prep Time: 15 minutes
Cook Time: 40 minutes
Total Time: ~55 minutes
Servings: 8–10
Dietary: Comfort food, Make-ahead friendly

Ingredients

For the casserole:

  • Frozen tater tots – 32 oz bag

  • Sharp cheddar cheese – shredded (2 cups)

  • Ranch seasoning mix – 1 packet

  • Cream of chicken soup – 1 can

  • Sour cream – 16 oz

  • Bacon – 1 lb, cooked & crumbled (reserve 2 tbsp for topping)

  • Cooked chicken – 1 lb, chopped or shredded

For garnish:

  • Green onions – sliced (2 tbsp)

  • Reserved crumbled bacon – 2 tbsp

Instructions

  1. Preheat oven: Set to 400°F (200°C). Grease a 9×13-inch baking dish.

  2. Make the filling: In a large bowl, combine cooked chicken, most of the crumbled bacon (reserve 2 tbsp for topping), sour cream, cream of chicken soup, ranch seasoning, and shredded cheddar. Mix well.

  3. Assemble: Spread the mixture evenly into the prepared baking dish. Arrange tater tots in a single layer over the top.

  4. Bake: Cook for 40 minutes, until tater tots are golden and crispy and the casserole is bubbling.

  5. Garnish & serve: Sprinkle with reserved bacon and sliced green onions. Serve hot.

Quick Notes & Pro Tips

  • Rotisserie chicken: A store-bought rotisserie chicken saves time and adds great flavor.

  • Make-ahead: Assemble up to 24 hours in advance and refrigerate until baking.

  • Freezer-friendly: Wrap tightly and freeze for up to 3 months. Thaw overnight before baking.

  • Extra crunch: Broil for 1–2 minutes at the end for extra crispy tater tots.

Why You’ll Love It

This dish combines creamy ranch chicken, smoky bacon, gooey cheddar, and perfectly crispy tater tots for a casserole that’s basically comfort food heaven. It’s easy, hearty, and always a hit with the whole family.

Ingredient Details & Substitutions

  • Cheese: Swap sharp cheddar for a cheese blend or pepper jack for a spicy twist.

  • Soup base: Use cream of mushroom or cream of celery if preferred.

  • Bacon: Turkey bacon or pancetta works as a lighter option.

Variations & Serving Suggestions

  • Veggie boost: Add frozen peas, broccoli, or corn to the filling.

  • Buffalo style: Stir ¼ cup buffalo sauce into the chicken mixture for a spicy kick.

  • Serve with: A crisp green salad or steamed vegetables to balance the richness.

Storage & Make-Ahead

  • Refrigerate: Store leftovers in an airtight container for up to 4 days.

  • Freeze: Assemble unbaked casserole, wrap tightly, and freeze for up to 3 months.

  • Reheat: Warm in the oven at 350°F until heated through for best texture.

FAQs

Q: Can I use fresh potatoes instead of tater tots?
A: Yes — par-cook diced potatoes first for similar crispiness.

Q: Can I use ranch dressing instead of seasoning?
A: Use ¼ cup ranch dressing in place of the packet and slightly reduce sour cream.

Q: How do I keep the tater tots crispy?
A: Bake uncovered and broil briefly at the end for extra crunch.

Personal Note

This casserole has become one of my favorite “crowd-pleaser” dishes — it’s like a fully loaded baked potato and a hearty chicken casserole combined. Perfect for potlucks, game nights, or just a cozy family dinner.

Your turn!
Tried this Chicken Bacon Crunch Casserole? Leave a comment or tag me on social media — I’d love to see your version!

Would you like me to make a “Buffalo Ranch version” (for spice lovers) or a “sheet-pan version” that bakes without layering?
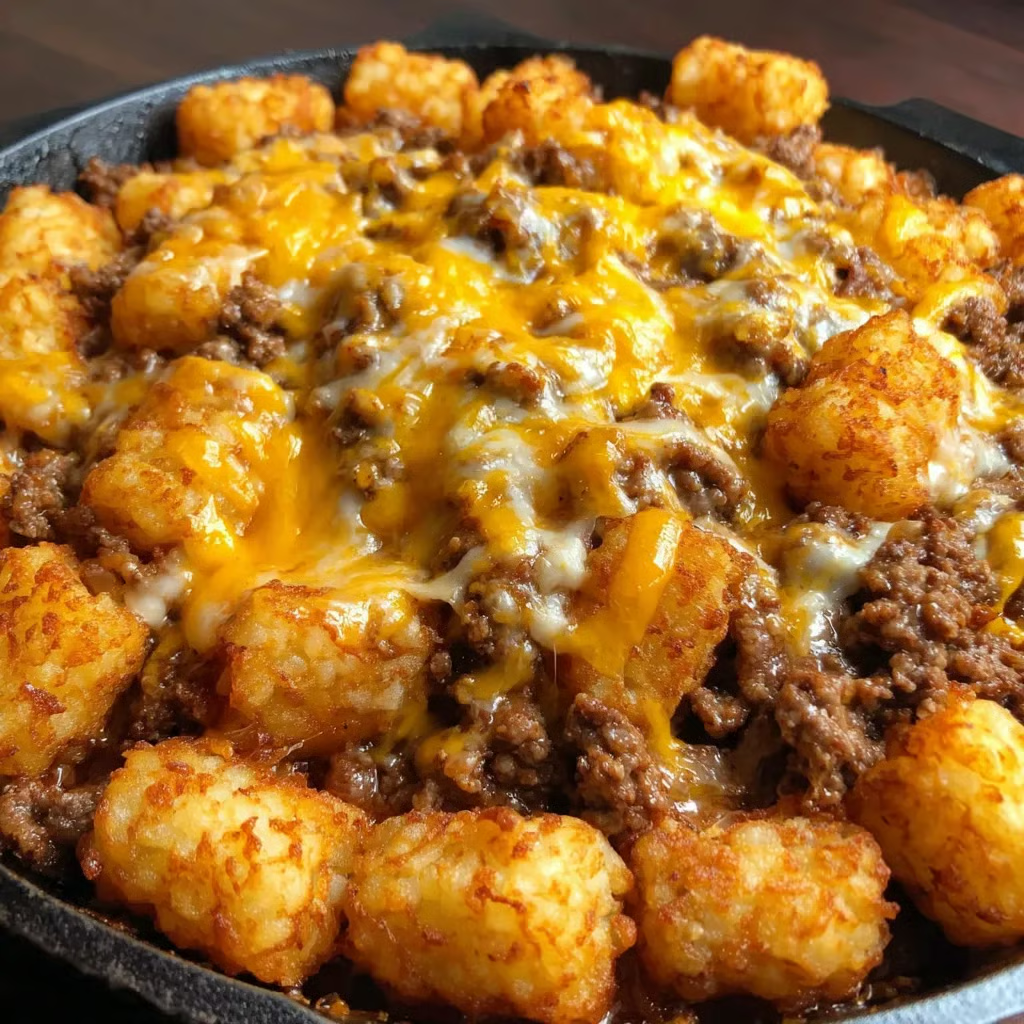

Cheesy BBQ Beef & Tater Tot Skillet

A hearty, one-pan dinner with seasoned ground beef, tangy BBQ sauce, crispy tater tots, and melty cheddar cheese — perfect for a quick family-friendly meal.

Prep Time: 10 minutes
Cook Time: 20–25 minutes
Total Time: ~35 minutes
Servings: 6
Dietary: Kid-friendly, One-pan meal

Ingredients

  • Ground beef – 1 lb

  • Frozen tater tots – 1 bag (32 oz)

  • Cheddar cheese – shredded (1 cup)

  • Onion – chopped (1 medium)

  • Olive oil – 2 tbsp

  • Tomato sauce – 1 can (8 oz)

  • Ketchup – ¼ cup

  • BBQ sauce – 2 tbsp

  • Mustard – 1 tbsp

  • Worcestershire sauce – 1–2 tbsp

  • Garlic – minced (1 tbsp)

  • Salt – ½ tsp

  • Black pepper – ½ tsp

  • Onion powder – 1 tsp

  • Paprika – 1 tsp

Instructions

  1. Cook the tater tots: Bake according to package directions until golden and crispy.

  2. Cook the beef: Heat olive oil in an oven-safe skillet over medium heat. Add ground beef and chopped onion. Cook for 6–8 minutes, breaking up the beef, until browned.

  3. Season: Stir in garlic, salt, black pepper, onion powder, and paprika. Cook for 1 minute until fragrant.

  4. Make the sauce: Mix in tomato sauce, ketchup, BBQ sauce, mustard, and Worcestershire sauce. Simmer for 5 minutes to blend flavors.

  5. Assemble: Arrange crispy tater tots in a single layer over the beef mixture.

  6. Add cheese & broil: Sprinkle cheddar cheese evenly on top. Broil for 1–2 minutes until the cheese melts and bubbles.

  7. Serve: Remove from the oven and serve hot straight from the skillet.

Quick Notes & Pro Tips

  • Crispier tots: Bake them until fully golden before adding to the skillet.

  • Customize the flavor: Use smoky BBQ sauce for depth or add a pinch of cayenne for heat.

  • Make it a meal: Serve with a side salad or steamed veggies.

Why You’ll Love It

This dish combines everything you want in comfort food — flavorful beef, tangy-sweet BBQ sauce, crispy tots, and melty cheese — all made in one skillet for easy prep and cleanup.

Ingredient Details & Substitutions

  • Beef: Swap with ground turkey or chicken for a lighter version.

  • Cheese: Try pepper jack or mozzarella for a different flavor profile.

  • BBQ sauce: Go with a spicy or honey BBQ to change up the taste.

Variations & Serving Suggestions

  • Tex-Mex twist: Add diced green chilies, taco seasoning, and top with sour cream.

  • Loaded version: Garnish with green onions, bacon bits, or jalapeño slices.

  • Serve it with: Cornbread or garlic bread for a fuller meal.

Storage & Make-Ahead

  • Refrigerate: Store leftovers in an airtight container for up to 3 days.

  • Reheat: Warm in the oven at 350°F for 10–15 minutes or in a skillet until heated through.

  • Make-ahead: Cook beef mixture ahead of time and assemble with tots and cheese before baking.

FAQs

Q: Can I make this without broiling?
A: Yes — bake at 375°F for 5–7 minutes to melt the cheese if you prefer not to broil.

Q: Can I use fresh potatoes instead of tater tots?
A: Yes — par-cook or roast diced potatoes first for similar crispiness.

Q: Can I make it spicier?
A: Add hot sauce, cayenne, or use a spicy BBQ sauce for a kick.

Personal Note

This recipe came together on a busy weeknight when I wanted something hearty but fuss-free. The BBQ and ketchup combo gives the beef a sloppy-joe vibe, and the cheesy tots on top make it irresistible!

Crispy Baked Parmesan Crusted Chicken

Juicy chicken breasts coated in a golden, garlicky Parmesan-breadcrumb crust and topped with a gooey blend of mozzarella and Parmesan — a comforting, restaurant-quality dinner made at home.

Prep Time: 20 minutes
Cook Time: 20–25 minutes
Total Time: ~45 minutes
Servings: 4
Dietary: Kid-friendly, Crowd-pleaser

Ingredients

For the chicken:

  • 4 boneless, skinless chicken breasts

For the breading & coating:

  • Bread crumbs – 1 cup

  • Parmesan cheese – grated (½ cup)

  • Dried Italian seasoning – ½ tsp

  • Salt – ½ tsp

  • Black pepper – ¼ tsp

  • All-purpose flour – ½ cup

  • Eggs – 2 large

  • Milk – ¼ cup

For the cheese topping:

  • Parmesan cheese – grated (½ cup)

  • Mozzarella cheese – shredded (1 cup)

  • Garlic – minced (2 cloves)

For cooking:

  • Olive oil – 2 tbsp

Instructions

  1. Preheat oven: Set to 375°F (190°C). Lightly grease a baking dish with olive oil.

  2. Prepare breading: In a shallow dish, combine bread crumbs, ½ cup Parmesan, Italian seasoning, salt, and black pepper.

  3. Prepare wet & dry dips: In one dish, whisk eggs and milk. In another, add flour for dredging.

  4. Bread the chicken: Dredge each chicken breast in flour, then dip in egg mixture, and coat with bread crumbs.

  5. Pan-sear: Heat olive oil in a skillet over medium-high. Cook chicken for 3–4 minutes per side until golden brown.

  6. Assemble: Transfer seared chicken to the baking dish. In a bowl, mix remaining ½ cup Parmesan, mozzarella, and garlic. Sprinkle over chicken.

  7. Bake: Cook for 20–25 minutes until chicken reaches an internal temperature of 165°F (74°C) and cheese is melted and bubbly.

  8. Serve: Let rest briefly, then serve hot with mashed potatoes, pasta, or vegetables.

Quick Notes & Pro Tips

  • Thin chicken cooks faster: Pound chicken breasts to an even thickness for consistent cooking.

  • Crispier finish: Broil for 1–2 minutes after baking for a golden cheese crust.

  • Use fresh Parmesan: It melts and flavors better than pre-grated.

Why You’ll Love It

This dish delivers crispy, juicy chicken with a flavorful cheesy topping — the perfect balance between a weeknight dinner and a dish that feels special.

Ingredient Details & Substitutions

  • Breadcrumbs: Use panko for extra crunch.

  • Cheese: Try provolone or fontina in place of mozzarella for a melty twist.

  • Herbs: Add fresh basil or parsley to the cheese topping for brightness.

Variations & Serving Suggestions

  • Turn it into Chicken Parmesan: Add marinara sauce before baking.

  • Low-carb option: Use crushed pork rinds or almond flour instead of breadcrumbs.

  • Pair it with: Garlic mashed potatoes, buttered noodles, or a crisp Caesar salad.

Storage & Make-Ahead

  • Refrigerate: Store leftovers in an airtight container for up to 3 days.

  • Freeze: Wrap cooked chicken tightly and freeze for up to 2 months.

  • Reheat: Warm in the oven at 350°F to keep the coating crisp.

FAQs

Q: Can I use chicken thighs instead?
A: Yes — boneless, skinless thighs work great (adjust cook time slightly).

Q: Can I make this ahead?
A: Yes — bread the chicken up to 1 day in advance. Pan-sear and bake when ready.

Q: How do I keep the breading from falling off?
A: Pat chicken dry before breading and press crumbs firmly to adhere.

Personal Note

This recipe is my go-to when I want a quick but impressive dinner. The golden, cheesy crust is always a hit with kids and adults alike, and it pairs beautifully with almost any side.

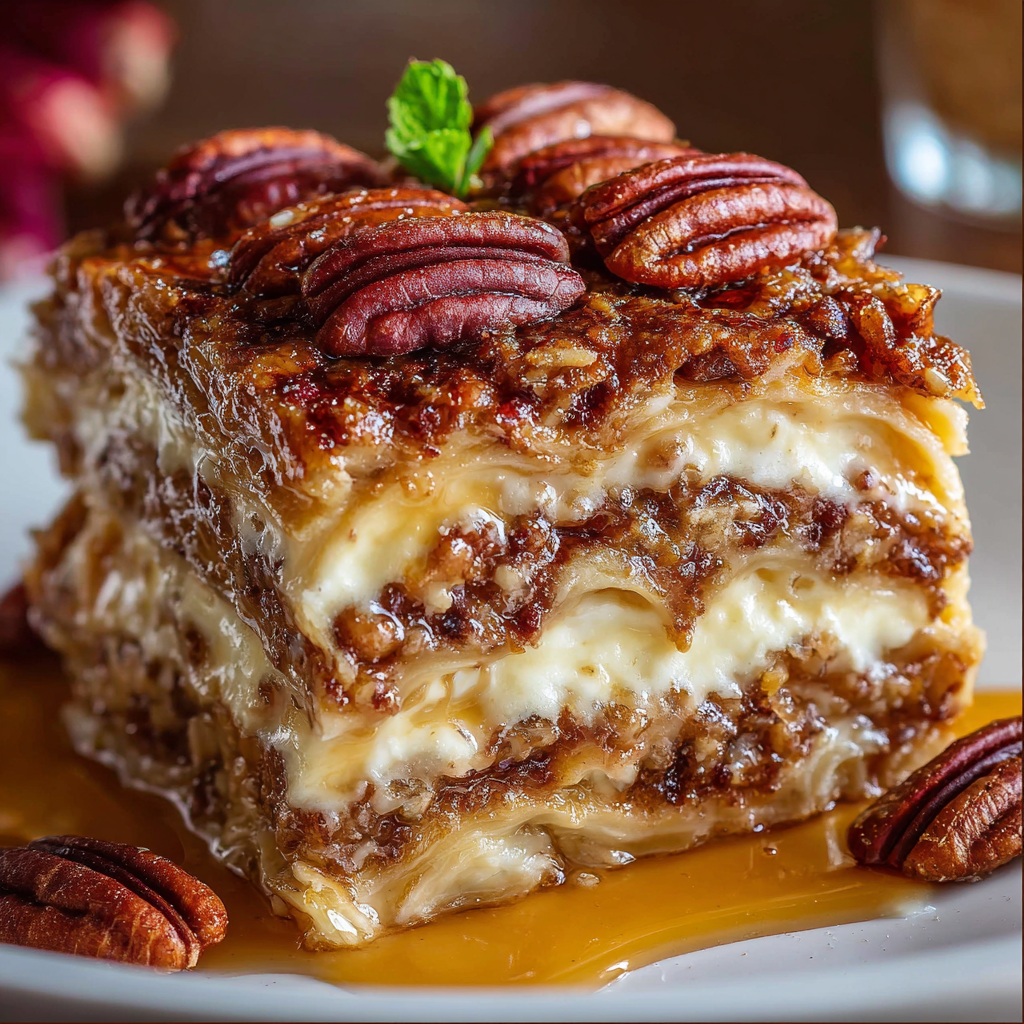
No-Bake Pecan Pie Layered Dessert

A creamy, crunchy layered dessert featuring a buttery graham cracker crust, fluffy cream cheese filling, gooey pecan pie topping, and whipped cream — no oven needed!

Prep Time: 20 minutes
Chill Time: 2+ hours
Total Time: ~2½ hours
Servings: 12–15
Dietary: No-bake, Make-ahead friendly

Ingredients

  • Butter – melted (1 cup)

  • Powdered sugar – 1 cup

  • Brown sugar – packed (1 cup)

  • Graham crackers – crushed (1 pkg / 9 oz)

  • Cream cheese – softened (1 pkg / 8 oz)

  • Whipped topping – divided (1 tub / 8 oz)

  • Pecan pie filling – (1 jar / 12 oz)

  • Pecans – toasted & chopped (1 cup)

Instructions

  1. Make the crust: Mix crushed graham crackers with melted butter and brown sugar. Press into a 9×13-inch dish.

  2. Prepare the filling: Beat softened cream cheese with powdered sugar until smooth. Fold in half the whipped topping. Spread evenly over the crust.

  3. Add the pecan layer: Spread pecan pie filling evenly over the cream cheese layer.

  4. Top & garnish: Spread the remaining whipped topping on top. Sprinkle with toasted pecans.

  5. Chill: Refrigerate for at least 2 hours (or overnight) before serving.

Quick Notes & Pro Tips

  • Soft cream cheese: Let it come to room temp for a silky-smooth filling.

  • Crust firmness: Press crust firmly to prevent crumbling when slicing.

  • Make ahead: Chill overnight for the best set and flavor.

Why You’ll Love It

This dessert is creamy, crunchy, and indulgently sweet — a no-bake treat perfect for holidays, potlucks, or anytime you want the flavors of pecan pie without turning on the oven.

Ingredient Details & Substitutions

  • Crust: Swap graham crackers for vanilla wafers or crushed shortbread cookies.

  • Filling: Add a splash of vanilla extract for extra flavor depth.

  • Topping: Drizzle with caramel sauce or sprinkle mini chocolate chips for added indulgence.

Variations & Serving Suggestions

  • Mini cups: Assemble in individual dessert cups for parties.

  • Chocolate twist: Add a layer of chocolate pudding between the cream cheese and pecan filling.

  • Holiday flair: Top with a drizzle of cinnamon glaze or crushed toffee bits.

Storage & Make-Ahead

  • Refrigerate: Store covered in the fridge for up to 4 days.

  • Freeze: Freeze (without whipped topping) for up to 1 month; thaw and top before serving.

FAQs

Q: Can I use homemade pecan filling?
A: Absolutely — homemade filling gives a richer, more customized flavor.

Q: Can I make this gluten-free?
A: Use gluten-free graham crackers or cookies for the crust.

Q: Can I double the whipped topping?
A: Yes — for an extra fluffy, creamy top layer.

Personal Note

This recipe is one of my favorite no-bake desserts for the holidays — it’s decadent, easy to assemble, and always a hit at gatherings.

Your turn!
Tried this No-Bake Pecan Pie Layered Dessert? Leave a comment or tag me on social media — I’d love to see your version!

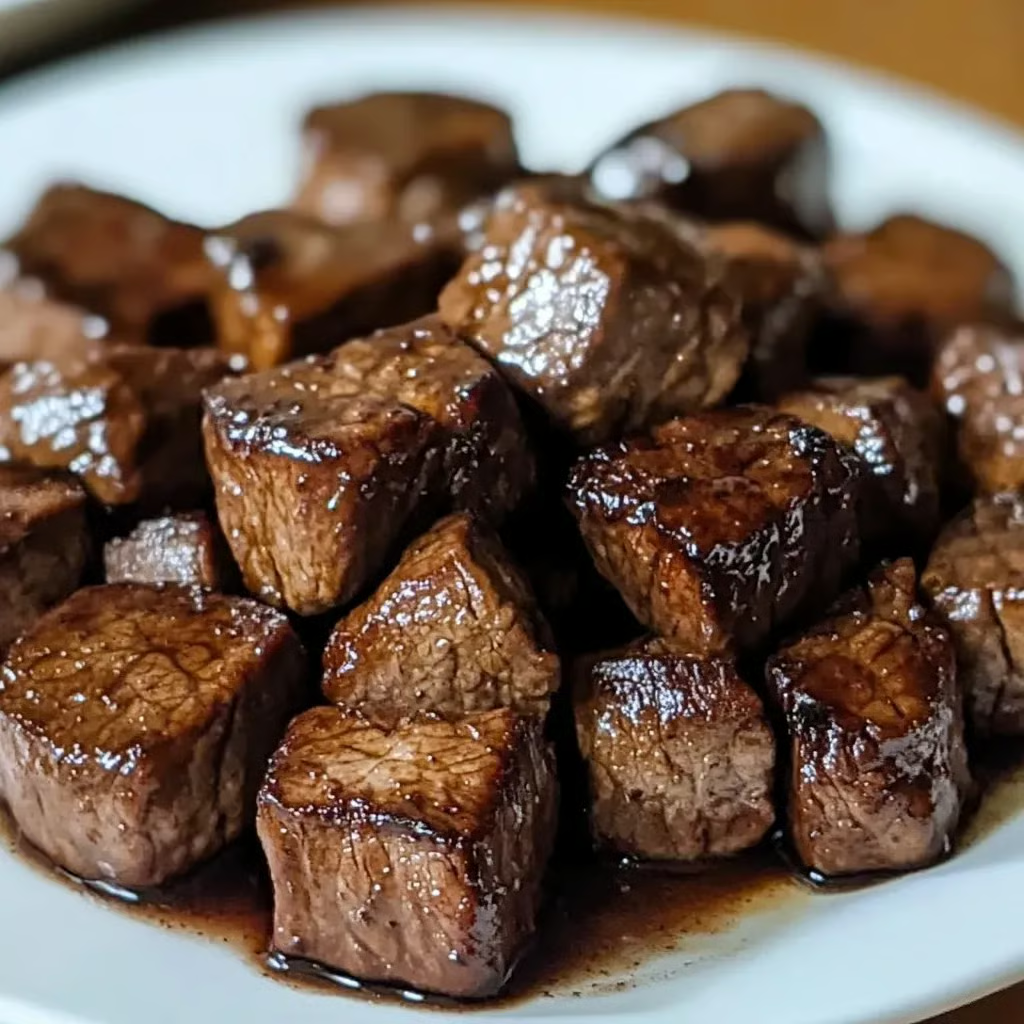
Slow Cooker Beef Tips in Savory Gravy

Fork-tender chunks of beef simmered in a rich, savory sauce with optional hearty vegetables — a comforting, set-it-and-forget-it slow cooker meal.

Prep Time: 15 minutes
Cook Time: 6–8 hours (low) or 3–4 hours (high)
Total Time: ~6–8 hours
Servings: 6–8
Dietary: Gluten-free adaptable

Ingredients

For the beef:

  • Beef sirloin, chuck roast, or stew meat – 2 lbs, cut into bite-sized chunks

  • Salt – 1 tsp

  • Black pepper – 1 tsp

  • Olive oil – 1–2 tbsp (for browning, optional)

For the sauce:

  • Beef broth – 1 cup (low-sodium preferred)

  • Soy sauce – ¼ cup

  • Worcestershire sauce – ¼ cup

  • Brown sugar – 3 tbsp

  • Tomato paste – 2 tbsp

  • Garlic – 3 cloves, minced

  • Smoked paprika – 1 tsp

  • Onion powder – ½ tsp

  • Red pepper flakes – ¼ tsp (optional)

Optional add-ins:

  • Baby potatoes – 1 lb, halved

  • Baby carrots – 1 cup

  • Mushrooms – 1 cup, sliced

  • Onion – 1 medium, roughly chopped

  • Cornstarch slurry – 1–2 tbsp cornstarch + 2 tbsp cold water (for thickening)

Instructions

  1. Prep the beef: Pat beef chunks dry with paper towels. Season evenly with salt and pepper.

  2. Brown the beef (optional): Heat olive oil in a skillet over medium-high. Sear beef in batches until browned on all sides. (Skip if short on time.)

  3. Make the sauce: In a bowl, whisk together beef broth, soy sauce, Worcestershire, brown sugar, tomato paste, garlic, paprika, onion powder, and red pepper flakes.

  4. Assemble in slow cooker: Place beef in slow cooker. Add optional vegetables around and on top. Pour sauce over everything, coating the beef well.

  5. Cook: Cover and cook on low for 6–8 hours or high for 3–4 hours, until beef is fork-tender.

  6. Thicken (optional): About 20 minutes before serving, mix cornstarch with cold water. Stir into the slow cooker, cover, and cook on high until the sauce thickens.

  7. Serve: Spoon beef and sauce over mashed potatoes, rice, or egg noodles. Garnish with fresh parsley if desired.

Quick Notes & Pro Tips

  • Choose the right cut: Chuck roast is budget-friendly and melts beautifully after slow cooking.

  • Brown for flavor: While optional, searing the beef adds a deeper, richer taste.

  • Thicker sauce: Adjust cornstarch to reach your preferred gravy consistency.

Why You’ll Love It

This dish is hearty, versatile, and family-friendly. With minimal prep, you get beef that’s melt-in-your-mouth tender and swimming in a savory, well-balanced gravy — comfort food made easy.

Ingredient Details & Substitutions

  • Beef: Swap for pork shoulder or even chicken thighs for a different twist.

  • Vegetables: Add parsnips, celery, or sweet potatoes for variety.

  • Soy sauce: Use tamari for a gluten-free version.

Variations & Serving Suggestions

  • Make it creamy: Stir in ¼ cup heavy cream or sour cream at the end for a silky sauce.

  • Serve it with: Mashed potatoes, egg noodles, or crusty bread to soak up the gravy.

  • Add wine: Replace ¼ cup broth with red wine for a deeper, richer flavor.

Storage & Make-Ahead

  • Refrigerate: Store in an airtight container for up to 4 days.

  • Freeze: Cool completely and freeze for up to 2 months.

  • Reheat: Warm gently on the stovetop or in the microwave until heated through.

FAQs

Q: Can I make this in the oven instead?
A: Yes — bake in a covered Dutch oven at 160°C (325°F) for 2½–3 hours.

Q: How do I make it less sweet?
A: Reduce brown sugar to 1–2 tbsp or skip entirely for a more savory profile.

Q: Can I prep this the night before?
A: Absolutely — assemble all ingredients in the slow cooker insert, cover, and refrigerate overnight.

Personal Note

This recipe is my go-to when I want a hearty dinner with little hands-on time. The soy-Worcestershire-tomato combo builds a flavorful gravy that tastes like it’s been simmering all day (because it has!).

Garlic Parmesan Chicken Meatloaf

A juicy, flavor-packed chicken meatloaf topped with a buttery garlic-Parmesan glaze — comfort food with a delicious Italian twist.

Prep Time: 15 minutes
Cook Time: 45–50 minutes
Total Time: ~1 hour
Servings: 6–8
Dietary: High-protein, Comfort food

Ingredients

For the meatloaf:

  • Ground chicken – 900 g

  • Grated Parmesan cheese – 100 g

  • Panko breadcrumbs – 60 g

  • Large eggs – 2

  • Garlic – 4 cloves, minced

  • Garlic powder – 1 tsp

  • Onion powder – 1 tsp

  • Dried basil – ½ tsp

  • Dried parsley – ½ tsp

  • Fine salt – ½ tsp

  • Ground black pepper – ½ tsp

  • Whole milk – 60 ml

For the garlic-Parmesan glaze:

  • Unsalted butter – 45 g

  • Garlic – 2 cloves, minced

  • Grated Parmesan cheese – 25 g

  • Fresh parsley – 1 tbsp, finely chopped

  • Fine salt – pinch

Instructions

  1. Prep the oven: Preheat to 190°C (375°F). Line a baking sheet with parchment or lightly grease a loaf pan.

  2. Make the meatloaf mixture: In a large bowl, mix ground chicken, Parmesan, panko, eggs, garlic, garlic powder, onion powder, basil, parsley, salt, pepper, and milk until combined. Do not overmix.

  3. Shape & bake: Form into a loaf shape on the baking sheet or press into the loaf pan. Bake for 40–45 minutes, or until the internal temperature reaches 74°C (165°F).

  4. Make the glaze: While the meatloaf bakes, melt butter in a small saucepan over medium heat. Add garlic and sauté 1–2 minutes. Stir in Parmesan and parsley; cook 1–2 minutes until slightly thickened. Add a pinch of salt.

  5. Glaze & finish: Brush the glaze over the meatloaf and return to the oven for 5–7 minutes.

  6. Rest & serve: Let rest for 5 minutes before slicing. Garnish with extra parsley.

Quick Notes & Pro Tips

  • Don’t overmix: This keeps the meatloaf tender and juicy.

  • Check temp: Use a meat thermometer — chicken must reach 74°C (165°F).

  • Extra moisture: Swap some chicken for ground turkey thigh if you prefer a richer texture.

Why You’ll Love It

This isn’t your average meatloaf — it’s moist, flavorful, and topped with a buttery garlic-Parmesan glaze that adds an irresistible savory finish. Perfect for weeknight dinners or meal prep.

Ingredient Details & Substitutions

  • Breadcrumbs: Use regular or Italian-style breadcrumbs for a different flavor.

  • Cheese: Try Asiago or Pecorino Romano for a sharper taste.

  • Milk: Substitute with cream for extra richness.

Variations & Serving Suggestions

  • Make it spicy: Add ¼ tsp red pepper flakes to the glaze.

  • Serve it with: Garlic mashed potatoes, roasted vegetables, or a simple Caesar salad.

  • Mini loaves: Form into smaller loaves or muffin tins for quicker cooking and meal prep.

Storage & Make-Ahead

  • Refrigerate: Store in an airtight container for up to 3 days.

  • Freeze: Wrap slices individually and freeze for up to 2 months.

  • Reheat: Warm in a 175°C (350°F) oven until heated through.

FAQs

Q: Can I use ground turkey instead of chicken?
A: Absolutely — or use a blend for extra flavor.

Q: How do I keep chicken meatloaf from drying out?
A: Don’t overbake, and let it rest before slicing. The glaze also adds moisture.

Q: Can I make this ahead?
A: Yes — assemble and refrigerate up to 24 hours before baking.

Personal Note

This meatloaf came from my love for Italian-style chicken dishes — the garlic-Parmesan combo makes it feel special while staying family-friendly and easy to make.