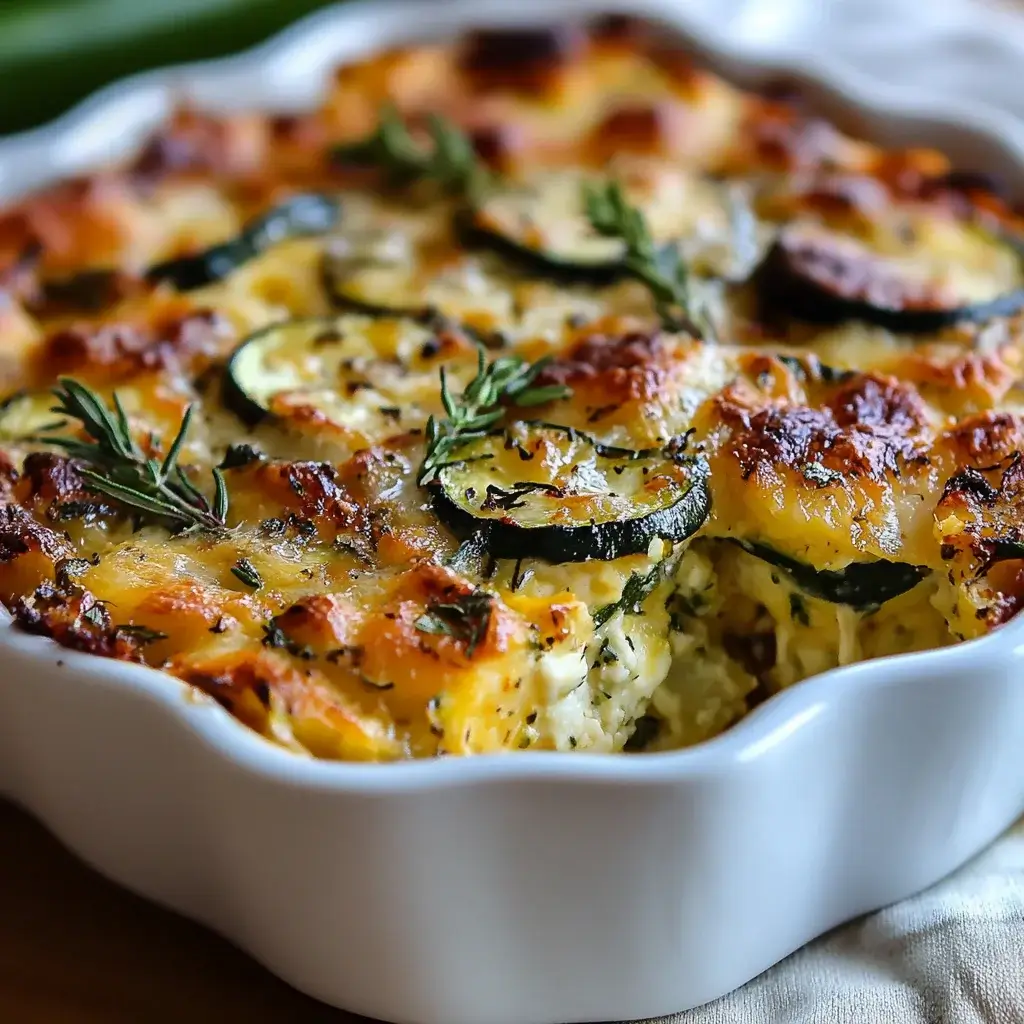
Garden Zucchini Casserole

A hearty, cheesy casserole loaded with fresh zucchini, spinach, bell peppers, and a creamy ricotta base — topped with a golden, crispy breadcrumb-Parmesan crust.

Prep Time: 20 minutes
Cook Time: 25–30 minutes
Total Time: ~50 minutes
Servings: 6–8
Dietary: Vegetarian, Comfort food

Ingredients

Vegetables:

  • Zucchini – 2 medium, sliced (about 4 cups)

  • Onion – 1 medium, chopped

  • Red bell pepper – 1, chopped

  • Fresh spinach – 2 cups, chopped

  • Garlic – 2 cloves, minced

Cheese & creamy base:

  • Mozzarella cheese – 1 cup, shredded

  • Ricotta cheese – 1 cup

  • Egg – 1 large

Seasoning:

  • Italian seasoning – 1 tsp

  • Salt – ½ tsp

  • Black pepper – ¼ tsp

Topping:

  • Breadcrumbs – 1 cup

  • Olive oil – 2 tbsp

  • Parmesan cheese – ½ cup, grated

Instructions

  1. Preheat oven: Set to 375°F (190°C). Grease a 9×13-inch baking dish with olive oil or cooking spray.

  2. Cook vegetables: In a skillet over medium heat, warm olive oil. Sauté onion and bell pepper for 5 minutes. Add garlic and cook for 1 minute. Stir in zucchini and spinach. Cook 5–7 minutes until zucchini is tender. Remove from heat and let cool slightly.

  3. Prepare ricotta mixture: In a bowl, combine ricotta, egg, Italian seasoning, salt, and pepper. Mix well.

  4. Assemble casserole: Stir the sautéed vegetables into the ricotta mixture. Pour into the prepared baking dish. Top with shredded mozzarella.

  5. Add breadcrumb topping: In a small bowl, mix breadcrumbs with Parmesan. Sprinkle evenly over the casserole.

  6. Bake: Bake uncovered for 25–30 minutes until the top is golden brown and bubbly.

  7. Rest & serve: Let cool for 5–10 minutes before slicing and serving.

Quick Notes & Pro Tips

  • Dry the zucchini: If your zucchini releases a lot of water, lightly salt and pat dry before cooking to avoid a watery casserole.

  • Make it ahead: Assemble up to 1 day in advance and refrigerate. Bake just before serving.

  • Crispier topping: Broil for 1–2 minutes at the end for a deeper golden crust.

Why You’ll Love It

This casserole is the perfect way to enjoy an abundance of fresh garden veggies — creamy, cheesy, and layered with texture from the crispy topping. It’s family-friendly, versatile, and makes a great side or main dish.

Ingredient Details & Substitutions

  • Cheese: Swap ricotta for cottage cheese or use fontina in place of mozzarella.

  • Breadcrumbs: Use panko for extra crunch or gluten-free breadcrumbs if needed.

  • Veggies: Add mushrooms or yellow squash for extra variety.

Variations & Serving Suggestions

  • Protein boost: Add cooked chicken or ground turkey for a heartier meal.

  • Spicy twist: Sprinkle red pepper flakes into the ricotta mixture.

  • Pair with: A crisp green salad and crusty bread for a complete dinner.

Storage & Make-Ahead

  • Refrigerate: Store leftovers in an airtight container for up to 4 days.

  • Freeze: Wrap tightly and freeze for up to 2 months. Thaw overnight before reheating.

  • Reheat: Warm in a 350°F oven until heated through to maintain crispness.

FAQs

Q: Can I use frozen spinach?
A: Yes — thaw and squeeze out excess water before adding.

Q: How do I keep the casserole from getting soggy?
A: Salt and pat the zucchini dry, and don’t overcook the veggies in the skillet.

Q: Can I make this dairy-free?
A: Substitute ricotta with dairy-free alternatives and use vegan cheese shreds.

Personal Note

This is one of my favorite ways to make a summer veggie harvest feel indulgent. The creamy ricotta base balances the fresh vegetables perfectly, and the crispy breadcrumb-Parmesan topping adds the ultimate finishing touch.

Your turn!
Tried this Garden Zucchini Casserole? Leave a comment or tag me on social media — I’d love to see your version!

Would you like me to make a “low-carb version” (no breadcrumbs, extra cheese) or a “Mediterranean version” with feta and sun-dried tomatoes?
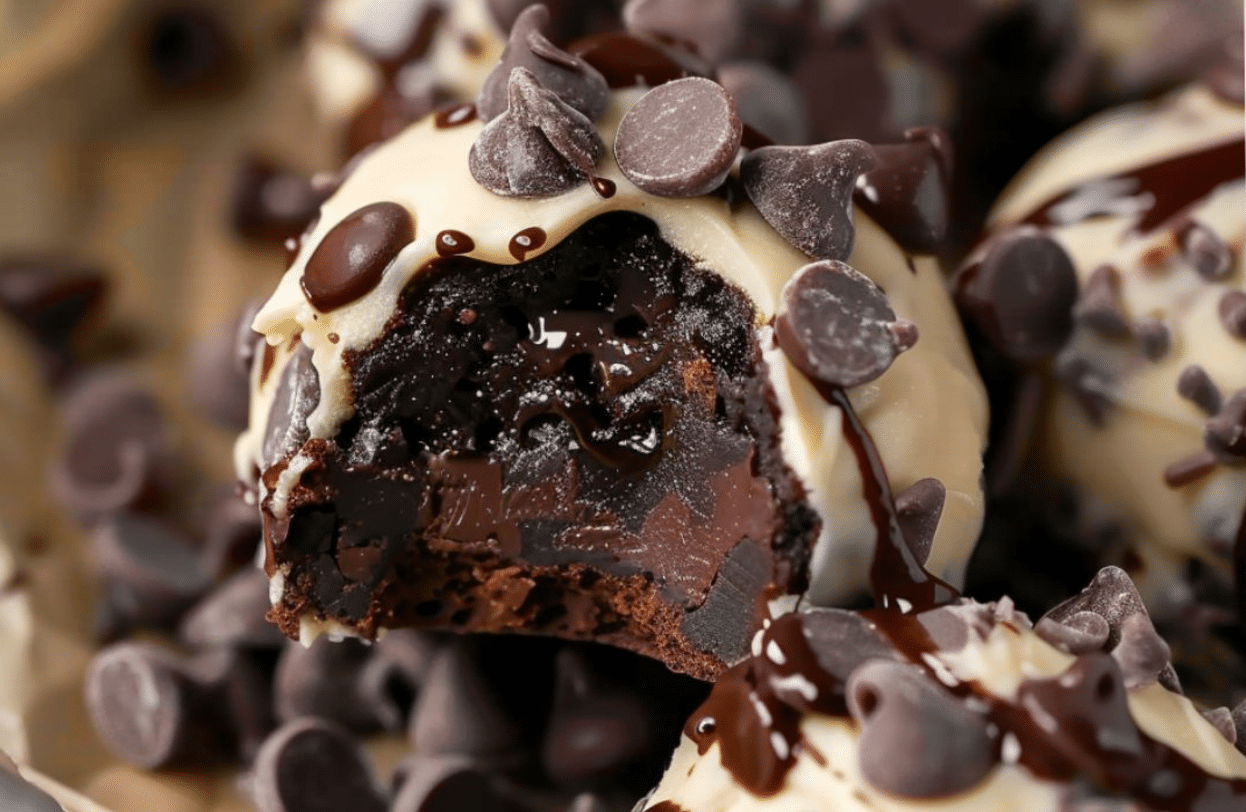
Chocolate Chip Cookie Dough Brownie Bombs

Rich fudge brownies wrapped around edible chocolate chip cookie dough and coated in smooth melted chocolate — a triple-layered treat that’s pure dessert bliss!

Prep Time: 30 minutes (plus chilling)
Cook Time: 0 minutes
Chill Time: ~1½ hours
Total Time: ~2 hours
Servings: 20–24 bombs
Dietary: Decadent dessert, No-bake cookie dough

Ingredients

For the edible cookie dough:

  • Unsalted butter – ½ cup, softened

  • Brown sugar – ½ cup

  • White sugar – ¼ cup

  • Whole milk – 2 tbsp

  • Vanilla extract – 1 tsp

  • All-purpose flour – 1 cup (toast for safety if desired)

  • Salt – ¼ tsp

  • Mini chocolate chips – 1 cup

For the brownie layer:

  • Fudge brownies – 1 batch, cooled and cut into 1-inch squares

For the coating:

  • Candiquik or chocolate almond bark – 16 oz, melted

  • Mini chocolate chips – 1 cup (for topping)

Instructions

  1. Make the cookie dough: Beat butter, brown sugar, and white sugar together until light and fluffy. Mix in milk and vanilla. Gradually stir in flour and salt until combined. Fold in 1 cup mini chocolate chips.

  2. Form & freeze: Scoop tablespoon-sized dough balls, place on a foil-lined sheet, and freeze for at least 1 hour.

  3. Wrap with brownies: Cut cooled brownies into 1-inch squares. Flatten a brownie piece in your hand, place a cookie dough ball in the center, and wrap the brownie around it to seal. Repeat for all balls. Freeze again for 30 minutes.

  4. Coat in chocolate: Melt Candiquik or almond bark according to package directions. Dip each brownie bomb in the melted chocolate, allowing excess to drip off. Place on wax paper.

  5. Decorate & set: Immediately sprinkle with remaining mini chocolate chips. Chill until the coating is fully set.

Quick Notes & Pro Tips

  • Toast the flour: Bake at 350°F for 5 minutes to make it safe to eat raw.

  • Chill in stages: Freezing between steps makes the bombs easier to handle and dip.

  • Use a fork for dipping: It helps excess chocolate drip off cleanly.

Why You’ll Love It

Three desserts in one: soft cookie dough, chewy brownie, and a crisp chocolate shell. Perfect for parties, holidays, or anytime you need an indulgent bite-sized treat.

Ingredient Details & Substitutions

  • Brownies: Use homemade or a boxed mix for convenience.

  • Coating: Swap almond bark for dark, milk, or white chocolate.

  • Mix-ins: Add sprinkles, crushed cookies, or toffee bits inside or on top.

Variations & Serving Suggestions

  • Holiday twist: Decorate with colored sprinkles or drizzle with white chocolate.

  • Peanut butter lovers: Add 2 tbsp peanut butter to the cookie dough.

  • Party platter: Serve in mini cupcake liners for an easy grab-and-go dessert.

Storage & Make-Ahead

  • Refrigerate: Store in an airtight container for up to 1 week.

  • Freeze: Freeze for up to 2 months. Thaw in the fridge before serving.

FAQs

Q: Can I make these without the brownie layer?
A: Absolutely — just dip the cookie dough balls directly in chocolate for a simpler treat.

Q: Can I use pre-made cookie dough?
A: Yes, but make sure it’s labeled safe-to-eat raw (no eggs and heat-treated flour).

Q: How do I keep the chocolate coating smooth?
A: Melt chocolate slowly and stir often to prevent seizing.

Personal Note

These bombs are a personal favorite for when I can’t choose between brownies, cookies, or chocolate. They’re rich, decadent, and always the first thing gone at parties!

Your turn!
Tried these Chocolate Chip Cookie Dough Brownie Bombs? Leave a comment or tag me on social media — I’d love to see your creations!

Would you like me to make a “peanut butter cup version” (with peanut butter cookie dough and chocolate drizzle) or a “holiday version” decorated with festive colors?

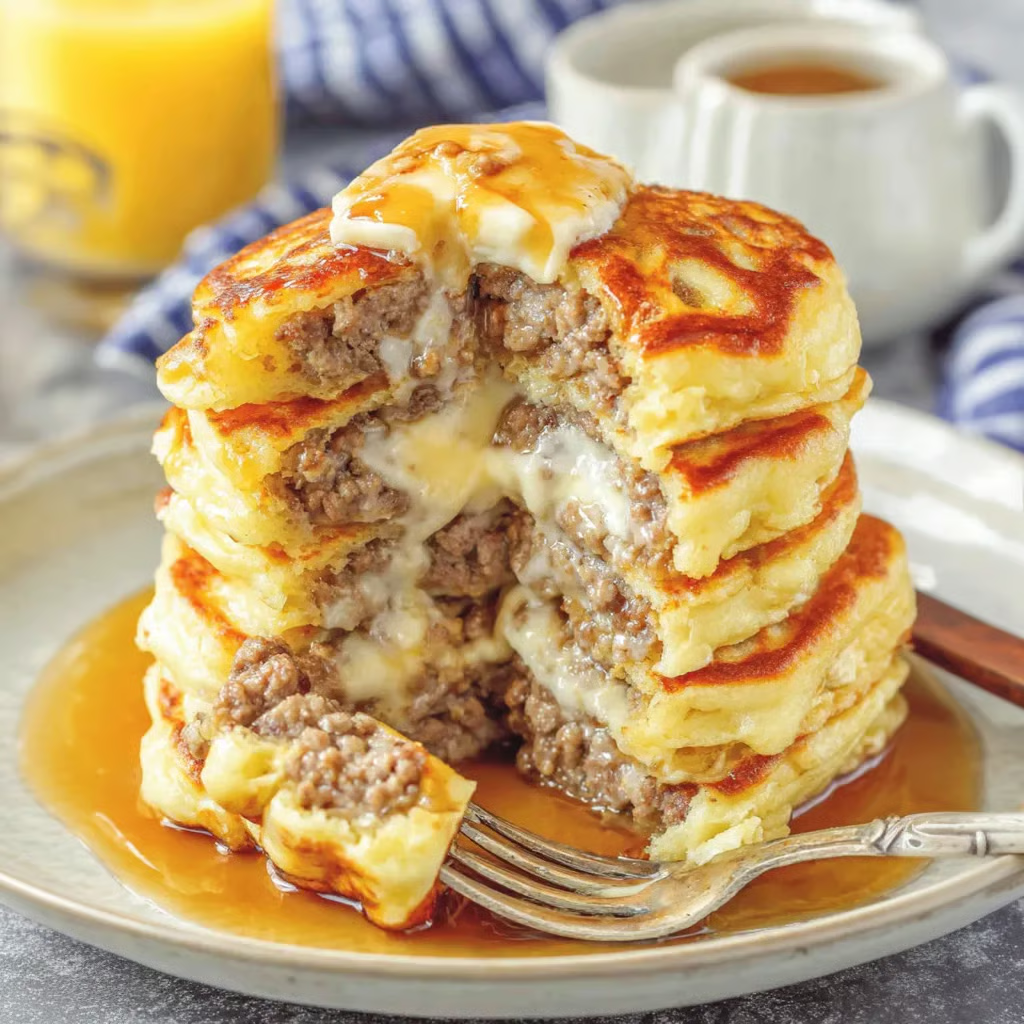
Sausage Dipped Pancakes Delight

Savory breakfast sausages wrapped in fluffy, golden pancake batter — a handheld, sweet-and-savory breakfast treat that’s perfect for dipping in maple syrup.

Prep Time: 15 minutes
Cook Time: 15–20 minutes
Total Time: ~35 minutes
Servings: 16 pieces
Dietary: Breakfast, Kid-friendly

Ingredients

Dry ingredients:

  • All-purpose flour – 1½ cups

  • Baking powder – 3½ tsp

  • Salt – 1 tsp

  • Sugar – 1 tbsp

Wet ingredients:

  • Milk – 1¼ cups

  • Large egg – 1

  • Vanilla extract – 1 tsp

  • Unsalted butter – melted (3 tbsp)

  • Maple syrup – 1 tbsp

Protein:

  • Breakfast sausage patties – 16

Instructions

  1. Cook the sausage: In a large skillet, cook sausage patties over medium-high heat until fully cooked. Drain on a paper towel-lined plate. Set aside.

  2. Mix dry ingredients: In a large bowl, sift together flour, baking powder, salt, and sugar.

  3. Mix wet ingredients: In a separate bowl, whisk milk, egg, vanilla, melted butter, and maple syrup until smooth.

  4. Make the batter: Create a well in the dry ingredients and pour in the wet mixture. Stir until smooth and lump-free.

  5. Coat the sausages: Preheat a griddle or large skillet over medium-high heat and lightly grease with cooking spray. Dip each cooked sausage patty into the pancake batter until fully coated.

  6. Cook: Place battered sausages on the hot griddle. Cook until bubbles form on the surface, then flip and cook the other side until golden brown. Repeat with remaining patties.

  7. Serve: Enjoy warm with butter and extra maple syrup for dipping.

Quick Notes & Pro Tips

  • Even coating: Use a fork or tongs to dip the sausages for an even pancake layer.

  • Keep warm: Place finished pancakes in a 200°F oven while cooking the rest.

  • Thicker batter = better coating: If batter feels too runny, add 1–2 tbsp more flour.

Why You’ll Love It

It’s like a portable pancake breakfast — soft, fluffy pancakes hugging savory sausage with a hint of maple sweetness. Perfect for busy mornings or a fun weekend brunch!

Ingredient Details & Substitutions

  • Sausage: Use turkey or chicken sausage for a lighter option.

  • Flavor boost: Add a pinch of cinnamon or nutmeg to the batter for warmth.

  • Gluten-free: Use a 1:1 gluten-free flour blend.

Variations & Serving Suggestions

  • Cheesy twist: Add a thin slice of cheddar or Swiss between the sausage and batter.

  • On-a-stick: Skewer the patties before dipping for a fun, fair-style breakfast.

  • Pair with: Scrambled eggs and fruit for a full meal.

Storage & Make-Ahead

  • Refrigerate: Store leftovers in an airtight container for up to 3 days.

  • Freeze: Wrap individually and freeze for up to 1 month. Reheat in the oven or air fryer.

  • Reheat: Warm on a skillet or in a 350°F oven for best texture.

FAQs

Q: Can I use links instead of patties?
A: Absolutely — just cook them first and ensure they’re well-coated in batter.

Q: Can I make the batter ahead of time?
A: Yes, mix the batter up to 12 hours ahead and refrigerate. Stir well before using.

Q: How do I get the coating to stay on?
A: Pat sausages dry before dipping, and ensure the batter is slightly thick.

Personal Note

This recipe started as a fun weekend experiment — and now it’s a go-to for breakfast-for-dinner nights. They disappear fast at the table, especially with extra syrup for dipping!

Your turn!
Tried this Sausage Dipped Pancakes Delight? Leave a comment or tag me on social media — I’d love to see your version!

Would you like me to make a “corn dog-style” version (skewered and deep-fried) or a “mini pancake bite” version for party platters?

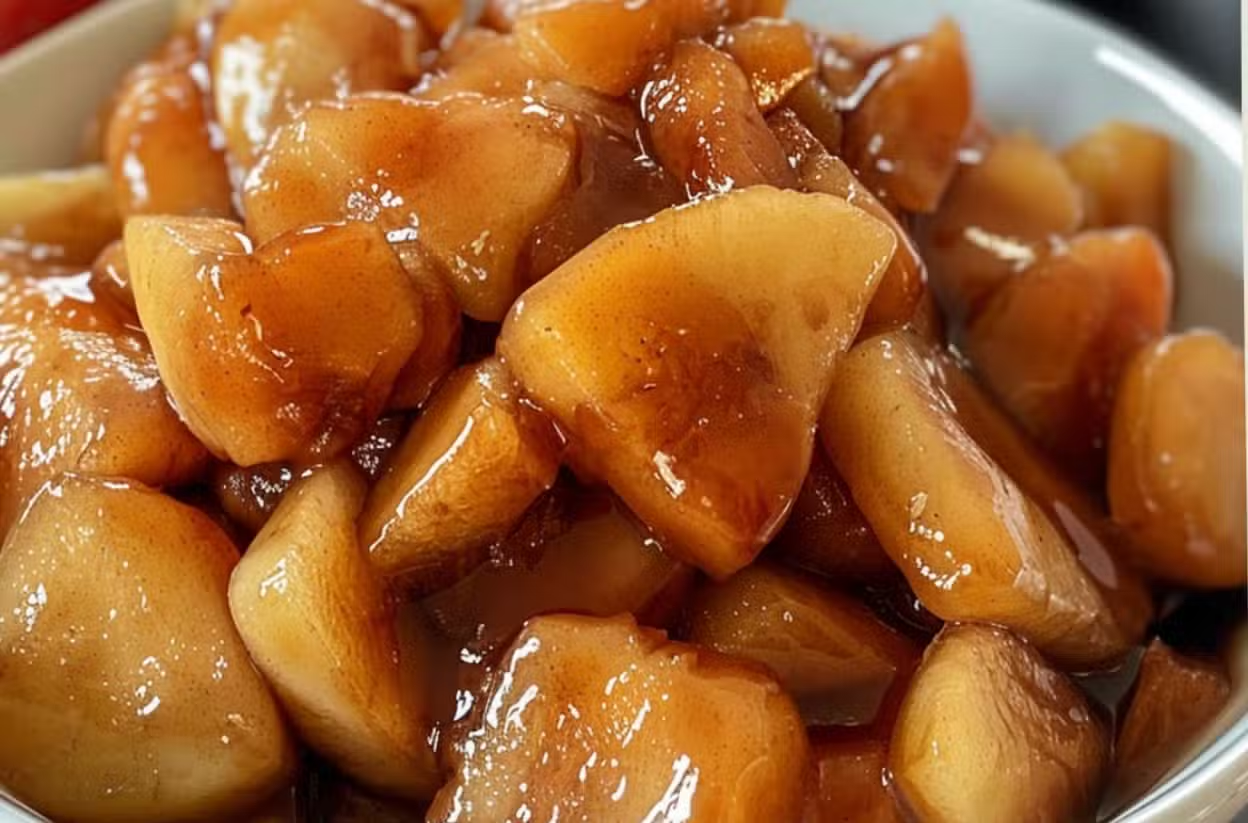
Slow Cooker Cracker Barrel Fried Apples

A warm, cinnamon-sweet apple dish inspired by the classic Cracker Barrel side — made easy in the slow cooker with buttery brown sugar glaze.

Prep Time: 15 minutes
Cook Time: 2 hours (high)
Total Time: ~2 hours 15 minutes
Servings: 6–8
Dietary: Vegetarian, Gluten-free

Ingredients

  • Firm apples (Granny Smith or Golden Delicious) – 6–8, peeled, cored, and sliced

  • Cornstarch – 2 tbsp

  • Brown sugar – ½ cup

  • Granulated sugar – ¼ cup

  • Ground cinnamon – 1½ tsp

  • Butter – ¼ cup, melted

  • Lemon juice – 1 tbsp

  • Vanilla extract – 1 tsp

Instructions

  1. Prep the apples: Peel, core, and slice apples into uniform wedges.

  2. Coat with cornstarch: Place apple slices in the slow cooker and sprinkle with cornstarch. Stir to coat evenly.

  3. Add sweetness & spice: Stir in brown sugar, granulated sugar, and cinnamon. Mix gently.

  4. Add liquids: Pour in melted butter, lemon juice, and vanilla. Stir to combine.

  5. Cook: Cover and cook on high for 2 hours, stirring once halfway through.

  6. Serve: Once apples are fork-tender and coated in a thick glaze, serve warm.

Quick Notes & Pro Tips

  • Best apples: Use firm, tart apples like Granny Smith or Golden Delicious — they hold up to slow cooking.

  • Thicker glaze: For extra thickness, stir in 1 additional teaspoon of cornstarch dissolved in water at the end and cook 5 more minutes.

  • Add a pinch of nutmeg: It enhances the cinnamon flavor for a deeper, spiced profile.

Why You’ll Love It

This set-it-and-forget-it version of Cracker Barrel’s fried apples gives you the same cozy, caramelized cinnamon flavor with no stovetop babysitting — perfect as a side, topping, or dessert.

Ingredient Details & Substitutions

  • Apples: Honeycrisp or Fuji add a sweeter flavor if you prefer less tartness.

  • Butter: Swap for coconut oil or vegan butter for a dairy-free version.

  • Sweeteners: Use maple syrup or honey instead of granulated sugar for a richer taste.

Variations & Serving Suggestions

  • As a side: Pair with pork chops, roasted chicken, or ham for a homestyle dinner.

  • As dessert: Top with vanilla ice cream or whipped cream.

  • As a filling: Use in pies, turnovers, or over pancakes and waffles.

Storage & Make-Ahead

  • Refrigerate: Store in an airtight container for up to 5 days.

  • Freeze: Freeze for up to 3 months; thaw in the fridge overnight before reheating.

  • Reheat: Warm in the microwave or on the stovetop over low heat.

FAQs

Q: Can I cook these on low instead of high?
A: Yes — cook on low for 3–4 hours.

Q: Can I leave the peels on?
A: Absolutely. Keeping the peels adds texture (and nutrients), though the sauce will be slightly less smooth.

Q: Can I double this recipe?
A: Yes — double the ingredients and add an extra 30–45 minutes of cooking time.

Personal Note

I love making this for holiday dinners — it’s one of those dishes that makes the whole house smell like cinnamon and butter. It also doubles as a perfect topping for pancakes or French toast the next morning.

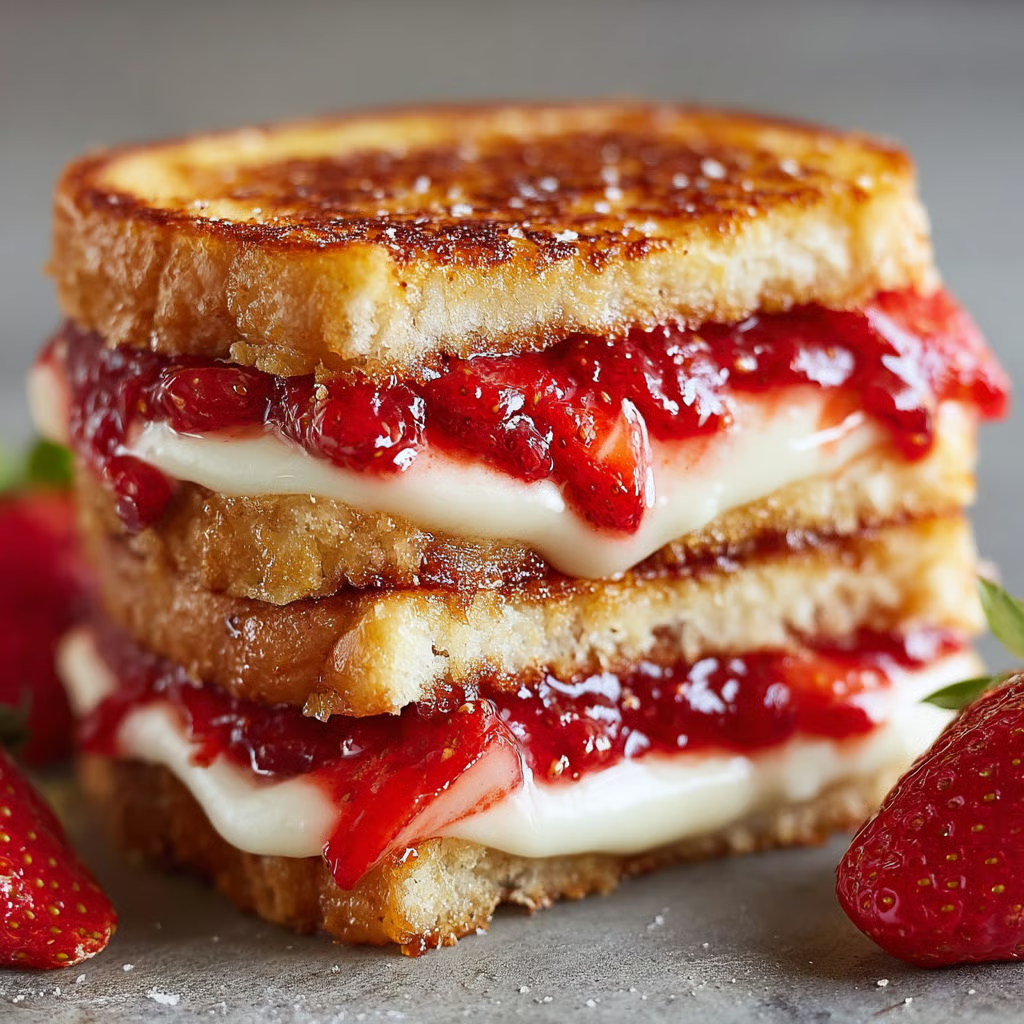
Fried Strawberry Cheesecake Sandwiches

Golden, buttery brioche sandwiches stuffed with creamy cheesecake filling, fresh strawberries, and sweet preserves — a decadent treat that tastes like dessert and breakfast combined.

Prep Time: 10 minutes
Cook Time: 5–6 minutes
Total Time: ~15 minutes
Servings: 4 sandwiches
Dietary: Dessert, Indulgent brunch

Ingredients

For the sandwiches:

  • Brioche or challah bread – 8 slices

  • Butter – 2 tbsp (for frying)

For the creamy filling:

  • Cream cheese – 4 oz, softened

  • Powdered sugar – 2 tbsp

  • Fresh strawberries – ½ cup, sliced thin

  • Strawberry preserves or jam – ¼ cup

For the egg coating:

  • Large eggs – 2

  • Whole milk – 3 tbsp

For serving:

  • Powdered sugar – for dusting

Instructions

  1. Make the filling: Beat cream cheese and powdered sugar together until smooth and fluffy.

  2. Assemble sandwiches: Spread the cream cheese mixture on 4 slices of bread, leaving a small border. Layer with strawberries and a spoonful of preserves. Top with remaining bread slices, pressing gently to seal.

  3. Prepare egg coating: Whisk eggs and milk together in a shallow dish until blended.

  4. Dip sandwiches: Carefully dip each sandwich in the egg mixture, coating both sides.

  5. Fry: Melt butter in a skillet over medium heat. Fry sandwiches for 2–3 minutes per side until golden brown and crisp. Drain briefly on paper towels.

  6. Serve: Dust with powdered sugar, cut diagonally, and enjoy warm.

Quick Notes & Pro Tips

  • Bread choice: Use brioche or challah for a rich, fluffy texture.

  • Don’t overfill: Too much filling may cause leakage while frying.

  • Work in batches: Don’t overcrowd the pan for even browning.

Why You’ll Love It

It’s like cheesecake and French toast had a baby — creamy, fruity, buttery, and crisp on the outside. Perfect for brunch, dessert, or a sweet treat any time of day.

Ingredient Details & Substitutions

  • Jam options: Try raspberry or mixed berry preserves for variety.

  • Cream cheese: Use mascarpone for a silkier filling.

  • Fruit: Swap strawberries for blueberries, peaches, or sliced bananas.

Variations & Serving Suggestions

  • Make it extra indulgent: Drizzle with chocolate or caramel sauce.

  • Add crunch: Sprinkle crushed graham crackers inside for a cheesecake crust effect.

  • Serve with: Whipped cream or a scoop of vanilla ice cream for a full dessert.

Storage & Make-Ahead

  • Best served fresh: These are crispiest when eaten right after frying.

  • Make-ahead: Assemble sandwiches and store (unfried) in the fridge for up to 1 day. Dip and fry before serving.

FAQs

Q: Can I bake instead of frying?
A: Yes — bake at 375°F for 8–10 minutes per side on a buttered sheet, flipping halfway through.

Q: Can I make them savory instead?
A: Absolutely! Replace jam with ham or bacon and use a savory filling like herbed cream cheese.

Personal Note

This is one of my favorite brunch “desserts.” It’s ridiculously easy but feels like something from a café menu — perfect for impressing guests or treating yourself on a weekend morning.

Your turn!
Tried these Fried Strawberry Cheesecake Sandwiches? Leave a comment or tag me on social media — I’d love to see your creations!

Would you like me to create a “Nutella-stuffed version” or a “baked casserole version” (like a cheesecake-stuffed French toast bake)?

Ask ChatGPT

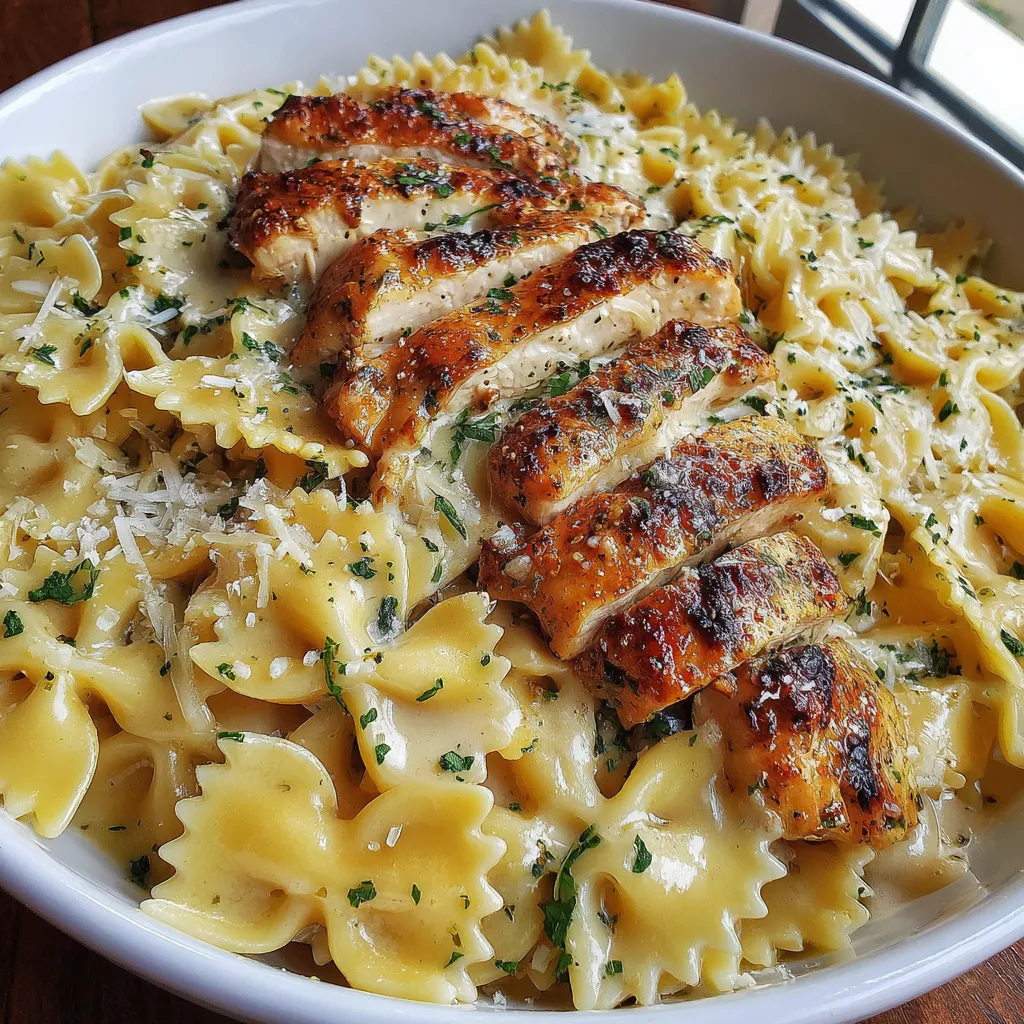
Bowtie Pasta with Lemon Garlic Chicken

A creamy, zesty pasta dish with tender lemon-garlic chicken, Parmesan sauce, and perfectly cooked bowtie pasta — an easy, elegant dinner ready in under 40 minutes.

Prep Time: 10 minutes
Cook Time: 25–30 minutes
Total Time: ~40 minutes
Servings: 4
Dietary: Comfort food, Family-friendly

Ingredients

For the chicken:

  • Boneless, skinless chicken breasts – 1 lb, sliced into strips

  • Salt – 1 tsp

  • Pepper – ⅛ tsp

  • Garlic powder – 1 tsp

  • Onion powder – 1 tsp

  • Italian seasoning – 1 tsp

  • Olive oil – 2 tbsp

  • Garlic – 3 cloves, minced

  • Lemon – zest & juice of 1

  • Butter – 1 tbsp

For the pasta & sauce:

  • Bowtie pasta – 8 oz

  • Butter – 2 tbsp

  • Heavy cream – ½ cup

  • Parmesan cheese – grated (½ cup)

  • Chicken broth – ½ cup

  • Salt – ½ tsp

  • Pepper – pinch, to taste

  • Fresh parsley – chopped (for garnish)

Instructions

  1. Cook the pasta: Bring a large pot of salted water to a boil. Cook bowtie pasta until al dente, drain, and set aside. Reserve ½ cup pasta water to loosen sauce later if needed.

  2. Season & cook the chicken: Season chicken strips with salt, pepper, garlic powder, onion powder, and Italian seasoning. Heat olive oil in a large skillet over medium-high and cook chicken 6–7 minutes per side until golden brown and cooked through.

  3. Add garlic & lemon: Stir in minced garlic and cook for 1 minute. Add lemon zest, lemon juice, and 1 tbsp butter. Let butter melt and coat chicken. Remove chicken and set aside.

  4. Make the sauce: In the same skillet, melt remaining 2 tbsp butter. Stir in heavy cream and chicken broth, simmering for 2–3 minutes until slightly thickened.

  5. Add Parmesan: Whisk Parmesan into the sauce until melted and smooth. Season with salt and pepper.

  6. Combine: Add pasta to the skillet, tossing to coat. Stir in the lemon-garlic chicken. Add reserved pasta water if needed to loosen the sauce.

  7. Garnish & serve: Plate pasta, top with chopped parsley and extra Parmesan. Serve immediately.

Quick Notes & Pro Tips

  • Reserve pasta water: It’s perfect for adjusting the sauce consistency.

  • Zest first, then juice: It’s easier to zest a whole lemon before cutting it.

  • Use freshly grated Parmesan: It melts better than pre-shredded.

Why You’ll Love It

This dish is bright, creamy, and comforting — a perfect balance of tangy lemon, savory Parmesan, and tender chicken. It’s easy enough for a weeknight yet elegant enough for entertaining.

Ingredient Details & Substitutions

  • Pasta: Swap bowtie for penne, spaghetti, or fettuccine.

  • Cream: Use half-and-half for a lighter version or mascarpone for extra richness.

  • Chicken: Substitute with shrimp or salmon for a seafood twist.

Variations & Serving Suggestions

  • Add veggies: Toss in spinach, asparagus, or sun-dried tomatoes.

  • Make it spicy: Add a pinch of red pepper flakes to the sauce.

  • Serve with: Garlic bread and a crisp side salad for a complete meal.

Storage & Make-Ahead

  • Refrigerate: Store leftovers in an airtight container for up to 3 days.

  • Reheat: Warm gently in a skillet with a splash of chicken broth or cream to loosen the sauce.

  • Make-ahead: Cook chicken ahead and refrigerate. Assemble and heat when ready to serve.

FAQs

Q: Can I make this without cream?
A: Yes — use extra broth and a bit of cream cheese for creaminess.

Q: Can I meal prep this?
A: Absolutely — keep chicken, pasta, and sauce separate and combine when reheating.

Q: How do I prevent the sauce from breaking?
A: Keep the heat low when adding cream and cheese, and stir continuously.

Personal Note

This recipe is one of my favorite quick pasta dinners — the lemon brightens the creamy sauce, and the chicken makes it hearty enough for a full meal. It’s a weeknight win that feels restaurant-worthy!

Your turn!
Tried this Bowtie Pasta with Lemon Garlic Chicken? Leave a comment or tag me on social media — I’d love to see how yours turned out!

Would you like me to create a “one-pan version” (everything cooked in one skillet) or a “veggie-loaded version” with greens and roasted vegetables?