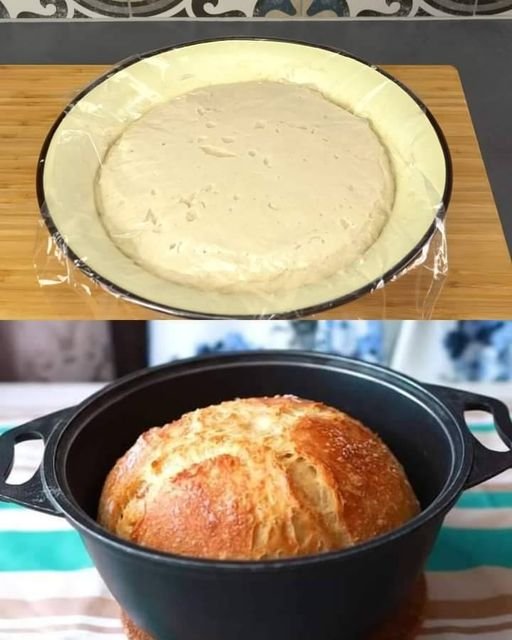
Crusty 4-Ingredient Artisan Bread

Crusty 4-Ingredient Artisan Bread

Prep Time: 10 minutes
Rest Time: 1½–2 hours
Bake Time: 45 minutes
Serves: 1 round loaf

This simple bread uses only four ingredients to create a loaf with a crisp outside and soft inside, perfect for everyday meals.


🧺 Ingredients

  • 4 cups (500 g) all-purpose flour or bread flour

  • 1½ cups (370 ml) warm water (about 100°F / 38°C)

  • 2 tablespoons (10 g) dry yeast

  • 1 teaspoon salt


👩‍🍳 Instructions

1️⃣ Prepare the Dough

Mix Dry Ingredients
In a large mixing bowl, combine the flour, dry yeast, and salt. Stir gently to blend.

Add Water
Pour in the warm water.
Stir with a spoon or spatula until all the flour is moistened and a soft, slightly sticky dough forms.

Rest the Dough
Cover the bowl with a cloth or plastic wrap.
Place it in a warm, comfortable spot for 1½ to 2 hours, until the dough has grown in size and the surface looks airy and bubbly.


2️⃣ Prepare the Baking Pot

About 30 minutes before baking, place a heavy oven-safe pot with a lid (such as a Dutch oven) inside your oven.

Preheat the oven to 450°F (230°C).
Warming the pot helps create a nicely textured crust.


3️⃣ Shape the Loaf

Lightly dust your work surface and hands with flour.

Carefully transfer the dough onto the surface.

Fold the edges gently toward the center a few times to form a loose round shape.
Try to keep the air inside the dough for a light interior.

Place the dough on a piece of parchment paper.

With a small knife, make a shallow line or “X” on top so the bread can expand evenly while baking.


4️⃣ Bake the Bread

Carefully take the warm pot out of the oven.

Lift the dough using the parchment paper and place it into the pot.

Cover with the lid and bake for 30 minutes.

Remove the lid and continue baking for 10–15 minutes, until the bread turns a rich golden color.


5️⃣ Cool the Bread

Remove the bread from the pot and place it on a rack or plate.

Let it cool for at least 30 minutes before slicing.
This helps the inside finish setting and improves texture.


💡 Helpful Tip (No Dutch Oven)

If you do not have a heavy pot, bake the bread on a regular baking tray.
Place a shallow dish of water on the oven rack below the bread to create gentle steam, which helps form a crisp outer layer.


🍽️ Serving Ideas

  • Enjoy with butter or olive oil

  • Serve with soup or salad

  • Use for sandwiches or toast

Soft Cheesy Garlic Flatbreads

Soft Cheesy Garlic Flatbreads

Yields: 4 flatbreads
Prep Time: 15 minutes
Rest Time: 1 hour 20 minutes
Bake Time: 15–18 minutes

These flatbreads are soft, fluffy, and filled with warm melted cheese. Finished with a golden top and optional seeds, they are wonderful for meals, snacks, or sharing.


🥖 Ingredients

For the Dough

  • 400 ml warm milk (about 110°F / 45°C)

  • 480 g wheat flour (plus extra for dusting)

  • 10 g dry yeast (about 1 tablespoon)

  • 15 g sugar (about 1 tablespoon)

  • 8 g salt (about 1½ teaspoons)

  • 20 g olive oil (about 1½ tablespoons)

  • Vegetable oil (for greasing the bowl and hands)

For the Filling & Topping

  • 200 g mozzarella or cheddar cheese, shredded

  • 1 egg yolk (for brushing the tops)

  • Optional: sesame seeds or nigella seeds


👩‍🍳 Instructions

1️⃣ Activate the Yeast

In a large bowl, combine the warm milk, sugar, and dry yeast.
Stir gently and allow it to rest for 5–10 minutes, until the mixture looks foamy and bubbly.


2️⃣ Prepare the Dough

Add the olive oil and salt to the yeast mixture and stir gently.

Gradually add the flour, mixing as you go.
The dough will be very soft and slightly sticky—this helps create tender flatbreads.

Mix in the bowl for about 5 minutes using a spatula or lightly oiled hands until the dough looks smooth and well blended.

Lightly coat the dough with vegetable oil, cover the bowl with a cloth, and let it rest in a warm place for 1 hour, until it has grown in size.


3️⃣ Shape and Fill

Lightly flour your work surface and place the dough on it.
Divide the dough into 4 equal portions.

Gently flatten each portion with your hands to form a small round.

Place a generous amount of shredded cheese in the center of each piece.

Fold the edges of the dough over the cheese and bring them together at the top, forming a neat bundle.

Turn each bundle seam-side down.
Carefully press with your palm to form a round disc about 6–7 inches wide.


4️⃣ Final Rest & Baking

Place the shaped flatbreads on a parchment-lined baking tray.
Cover lightly and let them rest for 20 minutes.

Using your fingertips, press small dips across the surface of each flatbread to create a decorative pattern.

Mix the egg yolk with a teaspoon of milk if desired, and gently brush over the tops.

Sprinkle with sesame seeds or nigella seeds if using.


5️⃣ Bake

Preheat the oven to 400°F (200°C).

Bake the flatbreads for 15–18 minutes, until the tops are beautifully golden and the bread feels light when lifted.


🍽️ Serving Idea

As soon as the flatbreads come out of the oven, brush lightly with melted garlic butter and sprinkle with fresh parsley for extra aroma and flavor.

Serve warm with:

  • Soup or salad

  • Yogurt or dips

  • Grilled vegetables

  • Breakfast or tea-time spreads


💡 Helpful Tips

✔ Use pizza cheese for extra stretch
✔ Add dried oregano or chili flakes for flavor
✔ Store leftovers in an airtight container for up to 2 days
✔ Reheat gently in a pan or oven

Beetroot Basil Seed Infused Water (Refreshing & Naturally Colored)

🥤 Beetroot Basil Seed Infused Water (Refreshing & Naturally Colored)

This infused water combines vegetables, citrus, and basil seeds to create a lightly flavored, cooling drink with a beautiful natural color and pleasant texture.


📝 Ingredients

  • 6 cups filtered drinking water

  • 1 small beetroot, peeled and thinly sliced

  • 1 small cucumber, sliced

  • ½ lemon, sliced

  • 1 tablespoon basil seeds (sabja)

  • A handful of fresh mint leaves


👩‍🍳 Step-by-Step Preparation

1️⃣ Prepare the Basil Seeds

Place the basil seeds in a small bowl.
Add about ½ cup clean water and let them soak for 15 to 30 minutes.

They are ready when they swell and form a soft, jelly-like coating around each seed.
Once soaked, strain off any extra water and set aside.


2️⃣ Prepare the Fruits and Vegetables

  • Wash the beetroot, cucumber, lemon, and mint thoroughly.

  • Peel the beetroot and slice it thinly so it releases color and flavor more easily.

  • Slice the cucumber and lemon into thin rounds.


3️⃣ Assemble the Infused Water

Pour 6 cups of water into a large glass pitcher or jar.

Add ingredients in this order for best appearance and flavor:

  1. Beetroot slices (for natural color)

  2. Cucumber slices

  3. Lemon slices

  4. Mint leaves

Gently stir to mix.


4️⃣ Add the Basil Seeds

Add the soaked basil seeds to the pitcher.
Stir gently so they spread evenly through the water.

These seeds give the drink a pleasant texture and make it more enjoyable to sip.


5️⃣ Chill and Infuse

Cover the pitcher and place it in the refrigerator for at least 2 hours.

For deeper color and fuller flavor, allow it to infuse overnight.


6️⃣ Serve

Stir gently before serving.
Pour into glasses, making sure each serving includes some basil seeds and fruit slices.
Serve cold for best taste.


🌿 Ingredient Purpose (Simple & Safe Explanation)

  • Beetroot: Adds natural color and mild sweetness

  • Cucumber: Provides freshness and light flavor

  • Lemon: Adds gentle citrus taste

  • Mint: Gives a cooling and clean aroma

  • Basil seeds: Add texture and make the drink more satisfying


⭐ Helpful Tips

  • Use glass containers instead of plastic for better flavor

  • Thin slices release flavor faster

  • Drink within 24 hours for best freshness

  • You can refill the pitcher once with water before discarding the ingredients

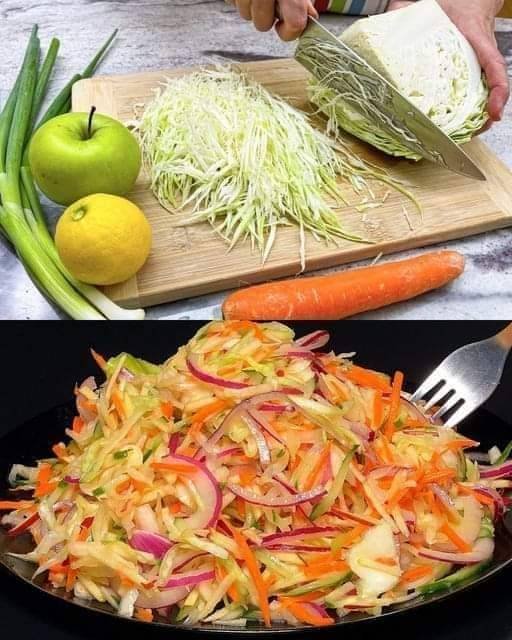
Crunchy Cabbage, Carrot & Apple Salad

Crunchy Cabbage, Carrot & Apple Salad

Prep Time: 10 minutes
Servings: 4


Ingredients

  • 200–400 g cabbage, finely shredded

  • 1 carrot, peeled and grated

  • 1 green apple, cored and thinly sliced or julienned

  • 1–2 spring onions, chopped

  • Fresh dill or parsley, chopped (optional, to taste)

  • Lemon juice, to taste

  • Olive oil, to taste

  • Salt, to taste

  • Optional toppings: sunflower seeds, chopped walnuts, or pumpkin seeds


Instructions

Step 1: Prepare the Cabbage

  1. Remove the outer leaves of the cabbage.

  2. Shred the cabbage as finely as possible using a sharp knife or a mandoline.

  3. Place the shredded cabbage in a large bowl and sprinkle with a pinch of salt.

  4. Lightly massage the cabbage with your hands for 1–2 minutes. This softens the texture and releases some moisture, making it easier to eat.


Step 2: Add the Crunch

  1. Grate the peeled carrot directly into the bowl with the cabbage.

  2. Slice the green apple into thin matchsticks (julienne) or thin slices.

  3. To prevent the apple from browning, toss the slices in a little lemon juice immediately after cutting.


Step 3: Incorporate Herbs and Aromatics

  1. Add the chopped spring onions for a mild onion flavor.

  2. Mix in fresh dill or parsley if using. This adds a bright herbal note to the salad.


Step 4: Dress the Salad

  1. Drizzle olive oil and fresh lemon juice over the vegetables and apple.

  2. Season with additional salt to taste.


Step 5: Toss and Serve

  1. Toss all ingredients thoroughly so the dressing coats every piece of vegetable and fruit.

  2. Let the salad sit for 5–10 minutes before serving. This allows the flavors to meld and the cabbage to soften slightly while retaining crunch.

  3. Optional: Sprinkle sunflower seeds, chopped walnuts, or pumpkin seeds on top for extra texture and a nutty flavor.


Tips for a Perfect Salad

  • Apple Choice: A Granny Smith apple works best due to its tartness, which balances the sweetness of the carrot.

  • Add Protein: For a more filling meal, top the salad with grilled chicken, tofu, or chickpeas.

  • Extra Crunch: Adding seeds or nuts just before serving gives the salad a satisfying texture.

  • Make Ahead: The salad can be prepared 30–60 minutes in advance, but add apples last to prevent browning if storing.

Fluffy Custard-Filled Braid Buns

🥐 Fluffy Custard-Filled Braid Buns

Soft, lightly sweet yeast buns filled with smooth vanilla custard and finished with a light dusting of powdered sugar.


📝 Ingredients

For the Dough

  • 180 ml lukewarm milk

  • 1 egg (room temperature)

  • 3 tablespoons sugar

  • 1 teaspoon instant dry yeast

  • ½ teaspoon salt

  • 40 g (2 tablespoons) unsalted butter, melted and cooled

  • 400 g all-purpose flour (about 2½ cups)

For the Custard Filling

  • 250 ml milk

  • 1 egg yolk

  • 2 tablespoons sugar

  • 1 tablespoon cornstarch

  • ½ teaspoon vanilla extract

For Brushing & Finishing

  • 1 egg yolk

  • 1 teaspoon milk

  • Powdered sugar (for dusting)


👩‍🍳 Instructions

1️⃣ Prepare the Dough

  1. In a large bowl, mix:

    • Lukewarm milk

    • Sugar

    • Yeast

  2. Let sit for 5 minutes until slightly foamy.

  3. Add:

    • Egg

    • Melted butter

  4. Mix well.

  5. Gradually add flour and salt and mix until a dough forms.

  6. Knead for 8–10 minutes until smooth and elastic.

  7. Place dough in a lightly greased bowl, cover, and let rise for 1 hour or until doubled in size.


2️⃣ Make the Custard Filling

  1. In a saucepan, whisk together:

    • Egg yolk

    • Sugar

    • Cornstarch

  2. Slowly add milk while whisking.

  3. Cook over medium heat, stirring constantly, until thick and smooth.

  4. Remove from heat and stir in vanilla.

  5. Cover the custard with plastic wrap touching the surface and allow to cool completely.


3️⃣ Shape the Buns

  1. Gently deflate the risen dough.

  2. Divide into 8–10 equal pieces.

  3. Roll each piece into a rope about 25–30 cm (10–12 inches) long.

  4. Fold rope in half and twist the strands together.

  5. Join the ends to form a braided loop or figure-eight shape.

  6. Place on parchment-lined baking tray.

  7. Cover and let rise for 20 minutes.


4️⃣ Fill and Bake

  1. Preheat oven to 180°C (350°F).

  2. Mix egg yolk with milk.

  3. Brush dough lightly with egg wash.

  4. Transfer cooled custard to a piping bag.

  5. Pipe custard into the open centers or loops of each braid.

  6. Bake for 20–25 minutes until golden brown.


5️⃣ Finish

  1. Cool slightly.

  2. Dust edges lightly with powdered sugar (avoid custard centers).


🧁 Tips

✔️ Custard must be fully cooled before piping
✔️ Do not overfill
✔️ Keep buns covered while resting
✔️ Best eaten fresh
✔️ Store in airtight container up to 2 days

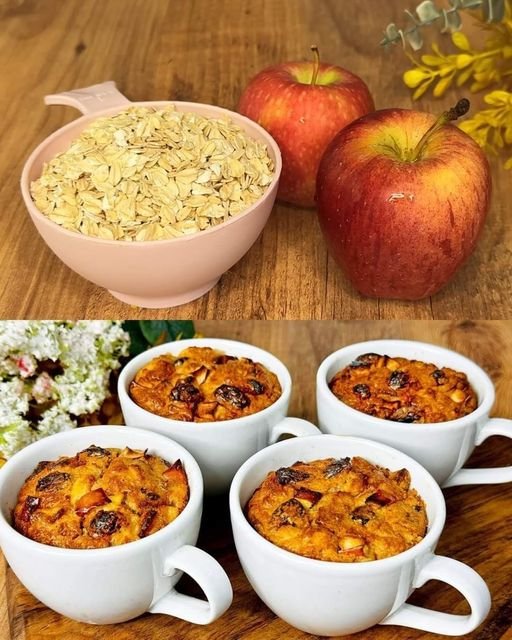
Sugar-Free Apple & Oat Mug Cakes

🍎 Sugar-Free Apple & Oat Mug Cakes

Soft, naturally sweet mug cakes made with oats, apple, and dried fruit. These are quick to prepare and suitable for microwave or oven baking.


📝 Ingredients

  • 1 cup (100 g) oatmeal (rolled oats or quick oats)

  • 1 large egg

  • ½ teaspoon ground cinnamon

  • 1 teaspoon baking powder

  • 1 pinch salt

  • 3 tablespoons raisins

  • 10–12 dried apricots

  • 1 medium apple, grated or finely diced

  • ¼ cup milk (optional, use only if batter is too dry)

  • Small amount of butter or oil for greasing mugs


👩‍🍳 Instructions

1️⃣ Prepare the Fruit

  1. Place raisins and dried apricots in hot water for 5 minutes to soften.

  2. Drain well.

  3. Finely chop the apricots.

  4. Core the apple and grate it or cut into very small cubes.


2️⃣ Mix the Batter

  1. In a mixing bowl, combine:

    • Oats

    • Cinnamon

    • Baking powder

    • Salt

  2. Add:

    • Egg

    • Grated apple

  3. Stir until well mixed.

  4. Fold in:

    • Raisins

    • Chopped apricots

  5. If batter seems too thick or dry, add milk a little at a time until you get a thick, spoonable batter.


3️⃣ Fill the Mugs

  1. Lightly grease 2–3 microwave-safe mugs or ramekins.

  2. Divide batter evenly between mugs.

  3. Fill only up to ¾ full to allow rising.


4️⃣ Cook

Microwave Method

  • Cook each mug on high power for 1½ to 2 minutes.

  • The top should look set and spring back lightly when touched.

Oven Method

  • Preheat oven to 180°C (350°F).

  • Bake for 15–20 minutes until lightly golden and firm in the center.


🍽 Serving Ideas

  • Serve warm

  • Top with yogurt

  • Sprinkle with extra cinnamon

  • Add sliced apples


🧁 Tips

✔️ Finely chopped fruit gives better texture
✔️ Do not overcook or cakes will dry out
✔️ Best eaten fresh
✔️ Can be made with pears instead of apples
✔️ Use almond or oat milk if desired