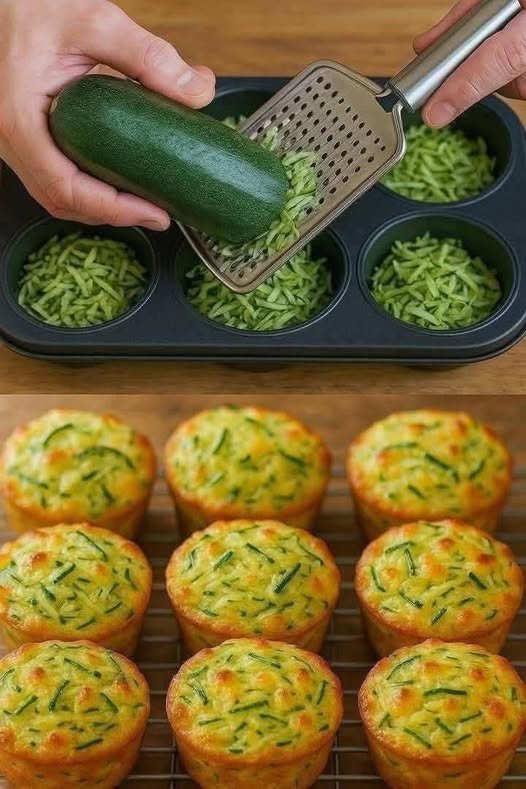
Zucchini, Potato & Carrot Cheese Muffins

Zucchini, Potato & Carrot Cheese Muffins

Soft, savory vegetable muffins with melted cheese – perfect for breakfast, lunchboxes, or a healthy snack.

Prep Time: 15 minutes
Bake Time: 20–25 minutes
Yield: 10–12 muffins


Ingredients

  • 1 medium zucchini, grated

  • 1 medium potato, grated

  • 1 medium carrot, grated

  • 2 large eggs

  • 1 cup shredded cheese (mozzarella or parmesan)

  • 1 cup all-purpose flour

  • ½ cup vegetable oil

  • 1 tablespoon baking powder

  • Salt, to taste

  • Black pepper, to taste

  • Fine herbs (oregano, parsley, or Italian herbs), optional


Instructions

1. Prepare the Vegetables

  1. Grate the zucchini, potato, and carrot using a coarse grater.

  2. Place the grated vegetables in a clean kitchen towel and gently squeeze out excess moisture. This prevents soggy muffins.


2. Mix the Wet Ingredients

  1. In a large bowl, whisk the eggs until smooth.

  2. Add the vegetable oil and mix well.

  3. Stir in the grated zucchini, potato, and carrot until evenly combined.


3. Add the Dry Ingredients

  1. Add the shredded cheese to the vegetable mixture and mix well.

  2. Add the flour, baking powder, salt, black pepper, and herbs (if using).

  3. Stir until a thick batter forms. Do not overmix.


4. Fill the Muffin Pan

  1. Preheat the oven to 180°C (350°F).

  2. Grease a muffin tin or line with paper cups.

  3. Spoon the batter into the muffin cups, filling each about ⅔ full.


5. Bake

  1. Bake for 20–25 minutes, or until the tops are golden and a toothpick inserted in the center comes out clean.

  2. Remove from the oven and allow muffins to cool in the pan for 5 minutes before transferring to a rack.


Serving Suggestions

  • Serve warm or at room temperature.

  • Delicious with yogurt, soup, or salad.

  • Store in an airtight container in the refrigerator for up to 3 days.


Tips for Best Results

✔ Squeeze moisture from vegetables for firm muffins
✔ Add garlic powder or paprika for extra flavor
✔ Use cheddar for a richer taste
✔ Can be baked in a loaf pan (bake 35–40 minutes)
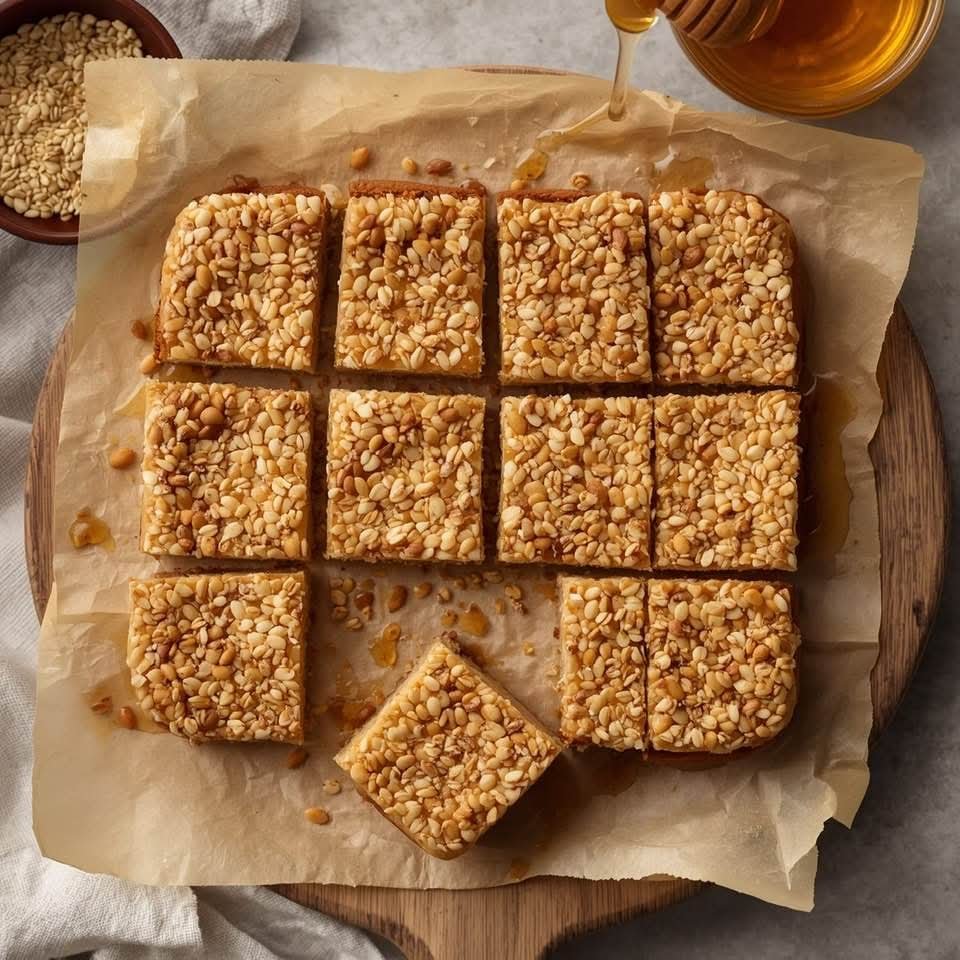
Sesame & Honey Bars

Sesame & Honey Bars

“Crunchy, wholesome, and naturally sweet — simple ingredients, powerful goodness.”

If you love snacks that are sweet but not sinful, crunchy but still nutritious, and made with ingredients your grandmother would recognize — then today’s recipe is for you!

These Sesame & Honey Bars are a classic treat enjoyed across cultures, and they perfectly fit our Palmarius Cakes & Pastries philosophy:

Delicious, wholesome, and inspired by natural African goodness. 🌿✨

Made with only a handful of ingredients — sesame seeds, honey, and a hint of natural flavor — this recipe delivers energy, sweetness, and nourishment in every bite.

🌿 Why Sesame & Honey Bars Are So Good for You

1. Rich in Healthy Fats (Good for Your Heart)

Sesame seeds contain natural oils that help support heart health, brain function, and long-lasting energy.

2. Packed With Minerals

Every bite is loaded with:

Calcium — supports strong bones

Iron — boosts energy and helps reduce tiredness

Zinc — supports immunity

Magnesium — helps with relaxation and muscle function

3. High in Natural Antioxidants

Both sesame seeds and honey contain antioxidants that support overall wellness and help the body handle stress.

4. Natural Sweetness (No Refined Sugar)

Honey gives the bars a delicious sweetness without the empty calories of processed sugar.

5. Great for Digestion

Sesame seeds are high in fiber, which helps keep your digestive system happy and balanced.

6. Quick Energy Boost

Perfect for:

✔️ Busy mornings

✔️ School snacks

✔️ Pre-workout energy

✔️ Healthy mid-day cravings

@everyone

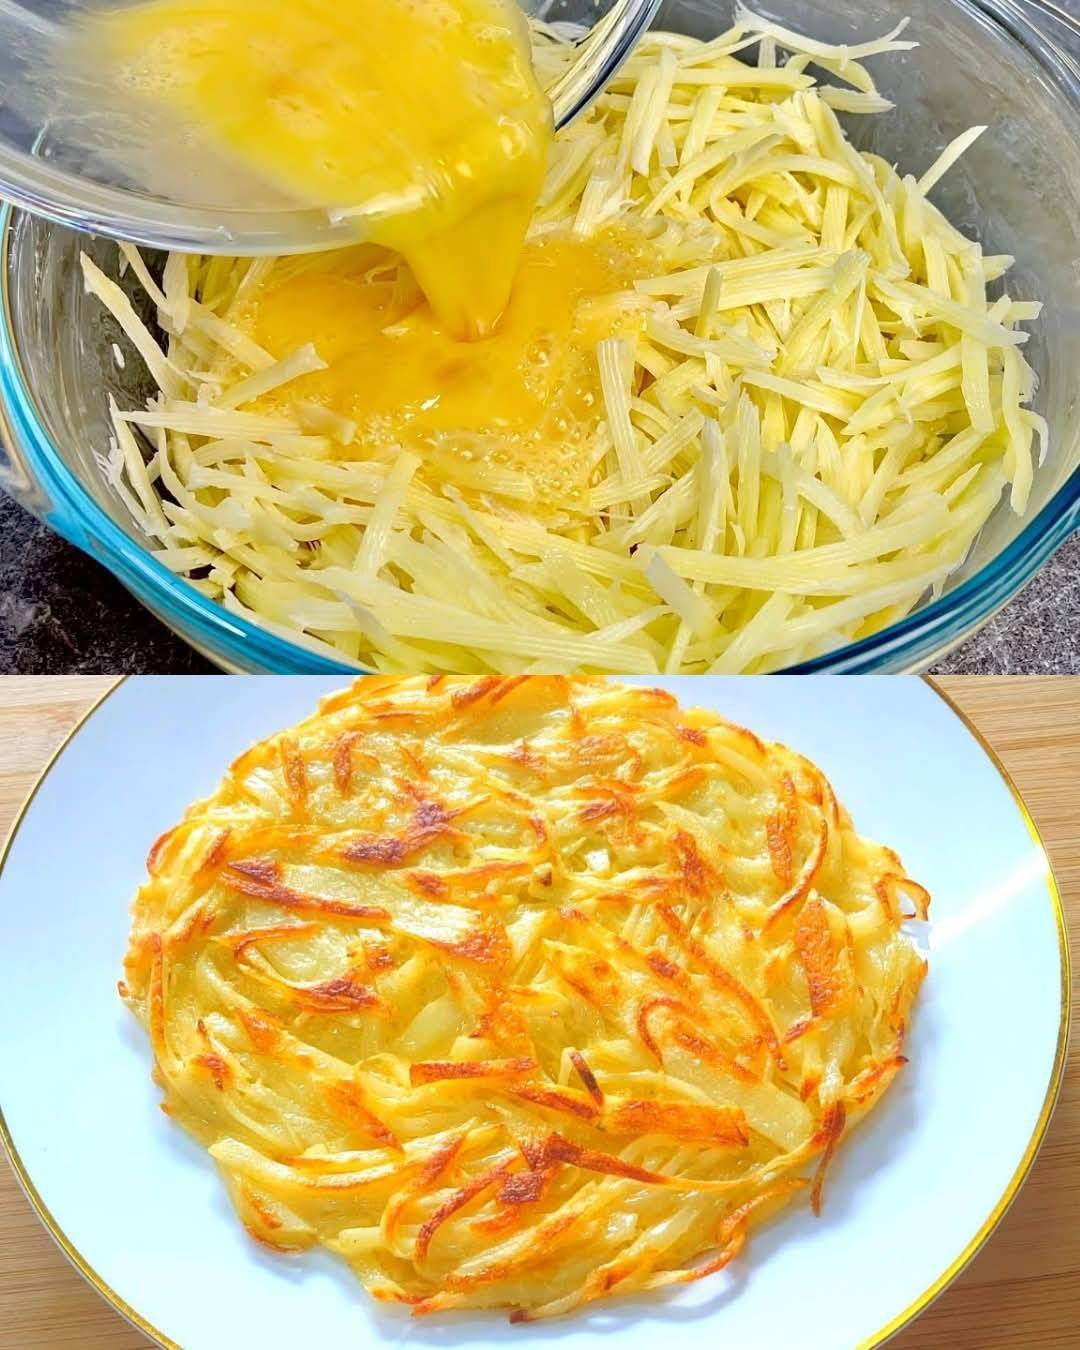
Crispy Potato Pancakes

Crispy Potato Pancakes

Ingredients

  • 1 medium potato (about 150g), peeled and grated

  • 1 large egg

  • 2 tbsp all-purpose flour (16g)

  • 2 tbsp water (30ml)

  • 1 tbsp vegetable oil (15ml), for frying

  • Optional: A pinch of salt and black pepper to taste


Instructions

1. Prepare the Potato

  • Peel the potato and grate it using the large holes of a box grater.

  • Important: To ensure the pancakes are truly crispy, place the grated potato in a clean kitchen towel or cheesecloth and squeeze out as much excess liquid as possible.

2. Mix the Batter

  • In a medium mixing bowl, whisk the egg, water, and all-purpose flour together until you have a smooth, thin batter without any flour lumps.

  • Stir the grated potato into the batter until every strand is evenly coated. Add your salt and pepper at this stage if desired.

3. Fry the Pancake

  • Heat the vegetable oil in a non-stick skillet over medium-high heat.

  • Once the oil is shimmering, pour the potato mixture into the pan. Use a spatula to spread it out into a thin, even circle (about 1/2 inch thick).

4. Cook Until Golden

  • Fry for about 3–5 minutes on the first side. You want the edges to look golden brown and crispy.

  • Carefully flip the pancake over.

  • Cook the second side for another 3–4 minutes until the potato is tender in the middle and the outside is deeply golden and crunchy.

5. Drain and Serve

  • Slide the pancake onto a plate lined with a paper towel to remove any excess oil.

  • Serve immediately while hot and crispy.


Quick Tip

For extra flavor, you can stir in a tablespoon of finely chopped green onions or a sprinkle of garlic powder into the batter before frying!

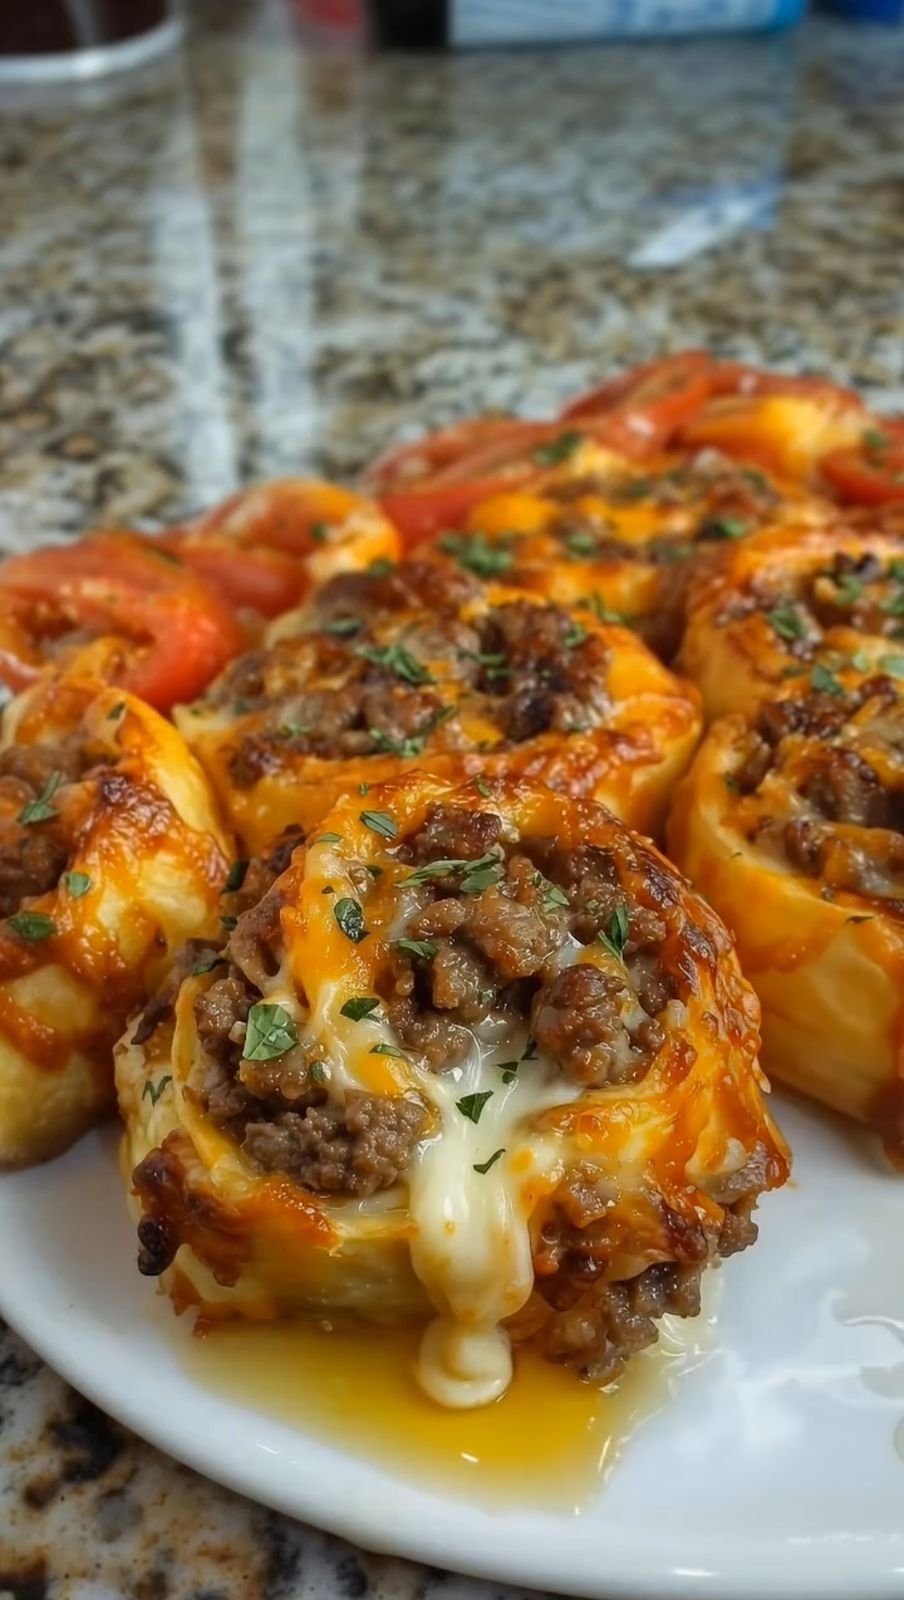
Garlic Butter Cheeseburger Rollups

🧄🧀 Garlic Butter Cheeseburger Rollups

Soft dough filled with seasoned beef and melted cheese

⏱ Prep Time: 15 minutes

🔥 Bake Time: 20–25 minutes

🍽 Servings: 6–8 rollups


🛒 Ingredients

For the Filling:

  • 1 pound (450 g) ground beef

  • 1 teaspoon garlic powder

  • 1 teaspoon onion powder

  • Salt, to taste

  • Black pepper, to taste

  • 1 cup shredded cheddar cheese

  • 1 cup shredded mozzarella cheese

For the Dough:

  • 1 package refrigerated pizza dough

For Brushing:

  • 2 tablespoons butter, melted


👩‍🍳 Instructions

Step 1: Cook the Beef

Heat a skillet over medium heat.
Add the ground beef and cook, stirring often, until fully cooked and evenly browned.
Season with garlic powder, onion powder, salt, and pepper.
Remove from heat and allow the beef to cool slightly.


Step 2: Prepare the Oven

Preheat your oven to the temperature listed on the pizza dough package (usually about 375°F / 190°C).
Line a baking tray with parchment paper or lightly grease it.


Step 3: Roll the Dough

Lightly dust your work surface with flour.
Roll out the pizza dough into a large rectangle, about ¼ inch thick.


Step 4: Add Cheese

Sprinkle the shredded cheddar cheese evenly over the dough, leaving about 1 inch around the edges.


Step 5: Add Beef

Spread the cooked beef evenly over the cheese layer.


Step 6: Add More Cheese

Sprinkle the mozzarella cheese evenly over the beef.


Step 7: Roll It Up

Starting from the long side, gently roll the dough into a tight log, keeping the filling inside.


Step 8: Brush with Butter

Brush the melted butter over the outside of the roll.

(Optional: sprinkle a little garlic powder or dried parsley on top.)


Step 9: Bake

Place the roll on the prepared baking tray.
Bake for 20–25 minutes, or until the dough is golden and the cheese inside is fully melted.


Step 10: Slice and Serve

Remove from the oven and let rest for 5 minutes.
Slice into rolls and serve warm.


🍽 Serving Suggestions

  • Serve with ketchup, mustard, or garlic sauce

  • Add pickles or onions to the beef for a cheeseburger-style flavor

  • Pair with a fresh salad or fries


🧊 Storage

  • Store leftovers in an airtight container in the refrigerator for up to 2 days

  • Reheat in oven or air fryer for best texture

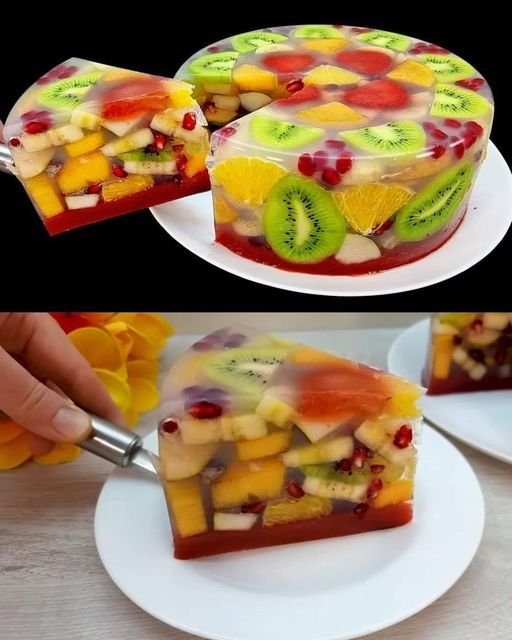
Fresh and Fruity Jelly Cake

Fresh and Fruity Jelly Cake

A colorful, multi-layered jelly cake filled with fresh fruit, perfect for a light dessert or celebratory treat.

Prep Time: 30 minutes
Chill Time: 4–6 hours (or overnight)
Servings: 6–8


🧺 Ingredients

Jelly Base

  • 3 cups water

  • 1 cup sugar (adjust to taste depending on the sweetness of your fruit)

  • 4 tablespoons (approx. 40 g) unflavored gelatin powder (or use clear agar-agar for a vegan version)

  • 1 tablespoon lemon juice

Fruit Selection

  • 2 kiwis, peeled and sliced into rounds

  • 1 cup strawberries, hulled and sliced

  • 2 bananas, sliced

  • 1 orange or 1 mango, peeled and cut into segments

  • ½ cup pomegranate seeds


👩‍🍳 Instructions

1️⃣ Prepare the Fruit

  1. Wash all fruit thoroughly.

  2. Slice the kiwis, strawberries, bananas, and oranges/mangoes into uniform pieces.

  3. For an attractive presentation, place the visually appealing slices (like kiwi and strawberries) against the sides and bottom of your mold or silicone pan first.


2️⃣ Make the Jelly Mixture

  1. Bloom the Gelatin: In a small bowl, mix the gelatin with ½ cup cold water. Let it sit for 5 minutes until soft.

  2. Dissolve the Sugar: In a saucepan, combine the remaining 3 cups of water and sugar. Heat gently over medium heat until the sugar fully dissolves.

  3. Combine: Remove from heat and stir in the bloomed gelatin until the mixture is fully clear.

  4. Add the lemon juice for brightness.

  5. Cool: Let the mixture reach room temperature. Avoid pouring hot jelly directly over the fruit to prevent softening or cloudiness.


3️⃣ Assemble the Cake

  1. Arrange the prepared fruit in your mold, layering carefully to fill any gaps.

  2. Pour the cooled jelly mixture gently over the fruit until fully covered.

  3. Lightly tap the mold on the counter to release any trapped air bubbles.


4️⃣ Chill and Set

Place the mold in the refrigerator for at least 4–6 hours, or ideally overnight, until the jelly is firm and set.


5️⃣ Unmold and Serve

  1. Briefly dip the bottom of the mold into warm water for 5–10 seconds to loosen the edges.

  2. Place a serving plate over the mold and gently flip it to release the jelly cake.

  3. Slice into wedges with a sharp, warm knife for clean edges.


💡 Tips for Success

  • For a sparkling “jeweled” look, add the pomegranate seeds last so they settle into the smaller gaps between the fruit.

  • Use fruits that are firm and fresh for best results.

  • Serve chilled for a refreshing dessert.

Soft and Cheesy Stuffed Bread Rolls

Soft and Cheesy Stuffed Bread Rolls

Yields: 8–10 large rolls
Prep Time: 20 minutes
Rest Time: 1 hour 20 minutes
Bake Time: 20–25 minutes

These rolls are soft, fluffy, and filled with melted cheese and colorful vegetables. They are perfect for sharing at meals or serving as a warm snack.


🧺 Ingredients

For the Dough

  • 1 cup warm milk

  • 1 cup warm water

  • 2 tablespoons sugar

  • 1 tablespoon instant yeast

  • 4–5 cups all-purpose flour (added gradually)

  • 1 teaspoon salt

  • ¼ cup vegetable oil

For the Filling

  • 2 cups shredded cheese (mozzarella or cheddar blend)

  • 1 red bell pepper, finely diced

  • 1 yellow bell pepper, finely diced

  • 2 tablespoons fresh parsley or green onions, finely chopped

For the Glaze

  • 1 egg yolk

  • 1 tablespoon milk


👩‍🍳 Instructions

1️⃣ Prepare the Dough

Activate the Yeast
In a large bowl, combine the warm milk, warm water, sugar, and yeast.
Stir gently and let the mixture rest for 5 minutes, until it becomes foamy.

Mix the Dough
Add the vegetable oil and salt to the yeast mixture.
Gradually add the flour, one cup at a time, mixing gently until a soft dough forms.

Work the Dough
Continue mixing and gently shaping the dough for about 8 minutes, until it becomes smooth and flexible.

First Rest
Place the dough in a lightly oiled bowl.
Cover and let it rest in a warm place for about 1 hour, until it has increased in size.


2️⃣ Shape and Fill the Rolls

Lightly dust your work surface with flour and place the dough on it.

Roll the dough into a large, thin rectangle.

Spread the shredded cheese evenly over the surface.
Sprinkle the diced red and yellow peppers and chopped parsley on top of the cheese.

Starting from the long side, gently roll the dough into a long log.

Using a knife or plain dental floss, slice the log into rounds about 1½ to 2 inches thick.


3️⃣ Final Rest and Baking

Arrange the rolls, cut side up, in a greased baking dish or on a parchment-lined tray.

Cover lightly and let them rest for 20 minutes.
While they rest, preheat the oven to 375°F (190°C).

Mix the egg yolk with the milk and gently brush it over the tops and sides of the rolls.

Bake for 20–25 minutes, until the rolls are golden on top and the cheese inside is melted.


🍽️ Serving Ideas

Serve warm so the cheese stays soft and stretchy.
These rolls are delicious with:

  • Marinara sauce

  • Garlic butter

  • Soup or salad

  • As a party or lunch bread


💡 Helpful Tips

✔ Add olives or corn for extra flavor
✔ Use pizza cheese for extra melt
✔ Store leftovers in an airtight container for up to 2 days
✔ Reheat gently in the oven or pan