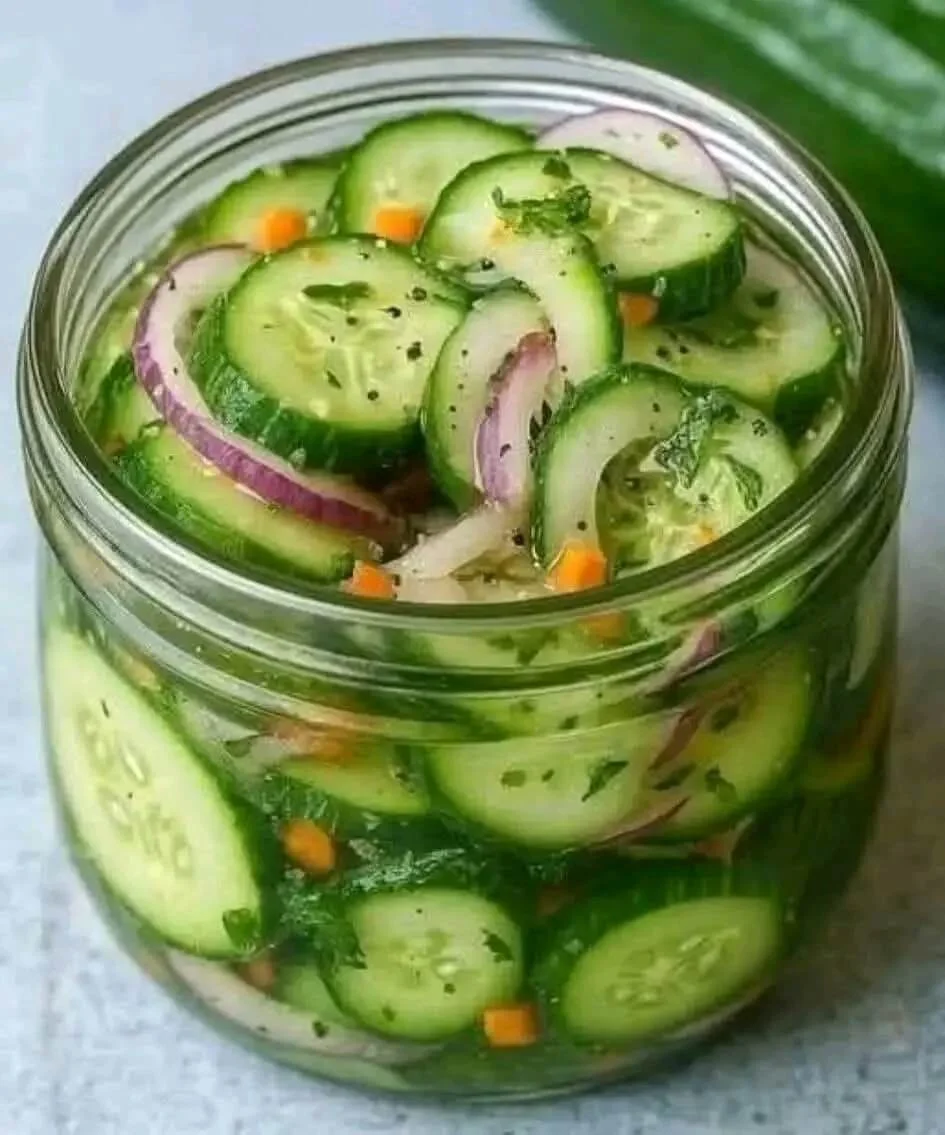
Fresh Pickled Cucumber Salad

Fresh Pickled Cucumber Salad 

Table of Contents

Description:
Fresh Pickled Cucumber Salad is a tangy, crunchy, and refreshing side dish that’s perfect for summer BBQs, family dinners, or as a healthy snack. The best part? It gets even better as it sits in the refrigerator. This easy recipe lasts up to two months in the fridge, but trust us—it’ll be gone long before that!

Servings: Makes about 2 quarts
Prep Time: 15 minutes
Marinating Time: Minimum 24 hours
Total Time: 24 hours 15 minutes

Ingredients

  • 4 medium cucumbers, thinly sliced

  • 1 small onion, thinly sliced

  • 1 cup white vinegar

  • 1 cup granulated sugar

  • 1 tablespoon salt

  • ½ teaspoon black pepper

  • ½ teaspoon celery seed (optional for extra flavor)

  • ½ teaspoon mustard seed (optional)

  • 1 cup water

Instructions

  1. Prepare the Cucumbers & Onion:
    Wash and thinly slice the cucumbers. Slice the onion into thin rings.

  2. Mix the Brine:
    In a medium saucepan, combine vinegar, sugar, salt, water, pepper, and optional spices (celery & mustard seeds). Heat over medium heat until the sugar and salt dissolve completely (do not boil).

  3. Assemble the Pickles:
    In two clean quart-sized jars, layer cucumbers and onion slices.

  4. Pour the Brine:
    Carefully pour the warm brine over the cucumber and onion mixture, ensuring they are fully submerged.

  5. Seal and Chill:
    Seal the jars tightly and refrigerate for at least 24 hours before serving for the best flavor.

Serving Suggestions

  • Perfect with grilled meats (BBQ chicken, burgers, hot dogs)

  • Adds crunch to sandwiches & wraps

  • Great as a healthy snack straight from the jar

See also  Sweet and Spicy Zucchini Relish Recipe

Storage

  • Refrigerate up to 2 months (but it usually disappears in a few days!)

Nutritional Info (per ½ cup serving)

  • Calories: 35 kcal

  • Carbs: 8g

  • Protein: 0.5g

  • Fat: 0g

  • Fiber: 1g

Benefits of Fresh Pickled Cucumber Salad

  • Low in calories – great for weight management

  • Hydrating – cucumbers are 95% water

  • Rich in antioxidants – onion & cucumber provide vitamin C

  • Probiotic potential (if using natural fermentation)

Q&A Section

Q1: Can I use apple cider vinegar instead of white vinegar?
Yes! Apple cider vinegar adds a slightly sweet and fruity flavor to your pickles.

Q2: Do I have to heat the brine?
Heating helps dissolve sugar and salt properly and enhances flavor, but you can also do a cold brine for a crunchier texture.

Q3: How soon can I eat them?
You can taste them after 4–6 hours, but for best flavor, wait 24–48 hours.

Q4: Can I reduce the sugar?
Yes, you can cut it in half for a more tangy taste, or substitute with honey or a sugar substitute.

Q5: How long will they last?
Up to 2 months in the refrigerator, as long as they stay submerged in the brine.

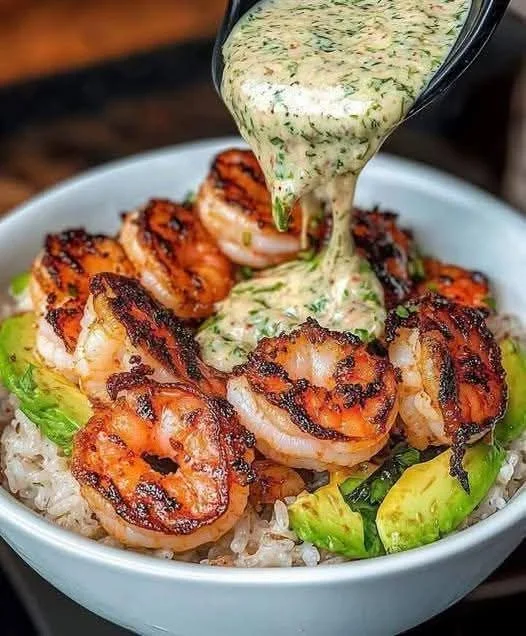
Shrimp & Avocado Rice Bowls with Lemon-Herb Tahini Sauce

Shrimp & Avocado Rice Bowls with Lemon-Herb Tahini Sauce
Table of Contents
These Mediterranean Shrimp & Avocado Rice Bowls are a vibrant, nourishing meal packed with lean protein, healthy fats, and bold flavors. Juicy shrimp are seasoned and pan-seared, then served over fluffy rice with creamy avocado, crisp veggies, and a tangy lemon-herb tahini sauce. This bowl combines the heart-healthy benefits of the Mediterranean diet with the comfort of a warm rice bowl.

It’s a gluten-free, protein-rich meal that’s quick to prepare and easy to customize for meal prep or weeknight dinners.

Prep & Cook Time:
Prep Time: 15 minutes

Cook Time: 10 minutes

Total Time: 25 minutes

Yield: 4 servings

Ingredients:
For the Shrimp:
1 lb large shrimp, peeled and deveined

1 tbsp olive oil

1 tsp smoked paprika

½ tsp garlic powder

½ tsp dried oregano

Salt and black pepper to taste

Juice of ½ lemon

For the Lemon-Herb Tahini Sauce:
¼ cup tahini

2 tbsp fresh lemon juice

1 tbsp olive oil

2 tbsp water (more if needed for thinning)

1 clove garlic, minced

1 tbsp fresh parsley, chopped

1 tbsp fresh dill or mint, chopped (optional)

Salt and black pepper to taste

See also Italian drunken noodle recipe
For the Bowls:
2 cups cooked basmati or jasmine rice (use brown rice or cauliflower rice for variation)

1 avocado, sliced

½ cup cherry tomatoes, halved

½ cup cucumber, diced

¼ cup red onion, thinly sliced

¼ cup Kalamata olives, sliced (optional)

2 tbsp fresh parsley, chopped

Lemon wedges for serving

Instructions:
Prepare the Lemon-Herb Tahini Sauce:
In a small bowl, whisk together tahini, lemon juice, olive oil, garlic, and herbs.

Add water gradually until the sauce reaches a drizzly consistency.

Season with salt and pepper to taste. Set aside.

Cook the Shrimp:
Toss shrimp with olive oil, smoked paprika, garlic powder, oregano, salt, pepper, and lemon juice.

Heat a skillet over medium-high heat.

Sear shrimp for 2-3 minutes per side, or until pink and cooked through. Remove from heat.

Assemble the Bowls:
Divide rice among 4 bowls.

Top each bowl with shrimp, avocado, tomatoes, cucumber, red onion, olives, and fresh parsley.

Drizzle & Serve:
Drizzle the lemon-herb tahini sauce over each bowl.

Serve with lemon wedges on the side for extra zing.

Serving Suggestions:
Serve warm for a cozy meal or cold as a refreshing salad-style bowl.

Pair with pita bread or naan for a more filling meal.

Great for meal prep—store shrimp, rice, and sauce separately for best texture.

Tips:
Don’t Overcook the Shrimp:
Shrimp cook quickly! 2-3 minutes per side is usually enough. Overcooking will make them rubbery.

Make Sauce Ahead:
The lemon-herb tahini sauce can be prepared up to 3 days in advance. Store it in the fridge and stir before using.

Rice Options:
Use warm rice for a comfort food-style bowl, or chilled rice for a refreshing meal prep bowl.

See also Baked Spinach and Sun-Dried Tomato Rigatoni
Thin the Sauce Gradually:
Tahini thickens as you stir, so add water slowly until it’s pourable but not runny.

Use Pre-Cooked Rice for Speed:
Microwaveable rice packets or leftover rice make this meal even faster.

Variations:
Protein Swaps:
Chicken:
Use grilled chicken breast or thighs in place of shrimp for a different protein.

Salmon:
Top with seared or baked salmon for a heart-healthy omega-3 boost.

Plant-Based:
Swap shrimp for chickpeas, falafel, or grilled tofu for a vegetarian or vegan version.

Grain Alternatives:
Quinoa or Farro:
Use quinoa, farro, or bulgur for added fiber and protein.

Low-Carb:
Use cauliflower rice or riced broccoli for a lighter, low-carb bowl.

Toppings & Extras:
Feta Cheese:
Sprinkle with crumbled feta (or vegan feta) for creaminess and saltiness.

Pickled Onions:
Swap raw red onions for quick-pickled onions for extra tang.

Hummus or Baba Ghanoush:
Add a dollop of hummus or baba ghanoush for extra Mediterranean flair.

Herb Variations:
Use mint, cilantro, or basil in the tahini sauce for different flavor profiles.

Q&A:
Can I meal prep this recipe?
Yes! For best results, store the components separately:

Keep the shrimp and rice together in meal containers.

Store the vegetables and avocado separately to keep them fresh.

Keep the lemon-herb tahini sauce in a small container and drizzle just before eating.

What can I use instead of tahini?

If you don’t have tahini, you can substitute with:

Greek yogurt (for a creamy, tangy dressing)

Almond butter or cashew butter (for a mild nutty taste)

Hummus thinned with lemon juice and water

Is this recipe gluten-free?

Yes! This recipe is naturally gluten-free, especially when served with rice or cauliflower rice.

See also Crispy Garlic Herb Rice Balls
Can I serve this bowl cold?

Absolutely. This dish is delicious warm or cold, making it perfect for packed lunches or summer meals.

Can I use frozen shrimp?

Yes! Just thaw the shrimp completely before cooking. Pat them dry to prevent excess moisture in the pan.

Nutrition Facts (Per Serving – Based on 4 Servings):
Nutrient Amount
Calories 420 kcal
Protein 28 g
Carbohydrates 28 g
Fiber 5 g
Sugar 3 g
Fat 23 g
Saturated Fat 3 g
Sodium 520 mg
Note: Nutrition may vary based on rice type and toppings.

Conclusion:
The Mediterranean Shrimp & Avocado Rice Bowls with Lemon-Herb Tahini Sauce are a balanced, vibrant meal that’s packed with fresh flavors and nourishing ingredients. From the juicy shrimp to the creamy avocado and zesty tahini drizzle, this dish checks all the boxes for a healthy, satisfying Mediterranean-style bowl.

It’s perfect for quick weeknight dinners, meal prep, or lunch on-the-go. Plus, it’s highly customizable—adapt it with different proteins, grains, or veggies to suit your taste or dietary needs.
Carrot Apple Zucchini Muffins with Cream Cheese Frosting

Carrot Apple Zucchini Muffins with Cream Cheese Frosting
Ingredients:
For the Muffins:
1 cup all-purpose flour
1 cup whole wheat flour
1 teaspoon baking soda
1/2 teaspoon baking powder
1/2 teaspoon salt
1 teaspoon ground cinnamon
1/2 teaspoon ground nutmeg
1/2 teaspoon ground ginger
1/2 cup granulated sugar
1/2 cup brown sugar
1/2 cup vegetable oil
1/4 cup applesauce
3 large eggs
1 teaspoon vanilla extract
1 cup grated carrots
1 cup grated zucchini
1 cup grated apple (peeled and cored)
For the Cream Cheese Frosting:
8 oz cream cheese, softened
1/4 cup unsalted butter, softened
1/2 cup powdered sugar
1 teaspoon vanilla extract
Instructions:
Prepare the Muffins:
Preheat your oven to 350°F (175°C). Line a muffin tin with paper liners or lightly grease it.
In a large bowl, whisk together the flours, baking soda, baking powder, salt, cinnamon, nutmeg, and ginger.
In another bowl, combine the granulated sugar, brown sugar, vegetable oil, applesauce, eggs, and vanilla extract until well mixed.
Gradually add the dry ingredients to the wet ingredients, stirring until just combined.
Fold in the grated carrots, zucchini, and apple.
Divide the batter evenly among the muffin cups, filling each about 2/3 full.
Bake for 20-25 minutes, or until a toothpick inserted into the center comes out clean.
Allow the muffins to cool in the tin for 5 minutes, then transfer to a wire rack to cool completely.
Prepare the Cream Cheese Frosting:
In a medium bowl, beat the softened cream cheese and butter until creamy and smooth.
Gradually add the powdered sugar and vanilla extract, beating until smooth and well combined.
Assemble the Muffins:
Once the muffins are completely cool, spread or pipe the cream cheese frosting over the top of each muffin.
Optionally, garnish with additional grated carrots, zucchini, and apple for a decorative touch.

Ginger Water Recipe

🥤 Description

Ginger water is a wonderfully refreshing and detoxifying drink made by simmering fresh ginger root in water. It’s known for its zesty flavor and numerous wellness benefits — from aiding digestion to boosting immunity. Enjoy it warm or chilled, on its own or with a squeeze of lemon or drizzle of honey.

🍽️ Servings

Makes 4 cups (about 1 liter) — serves 2–4

🛒 Ingredients for Ginger Water

  • 4 cups (1 liter) water

  • 2–3 inches fresh ginger root (peeled and thinly sliced)

  • Optional:

    • 1–2 tbsp honey or maple syrup (for sweetness)

    • 1 tbsp lemon juice (for brightness)

    • A few mint leaves (for freshness)

🔪 Instructions

  1. Prep Ginger: Peel the ginger root using the edge of a spoon. Slice it thinly to maximize flavor release.

  2. Simmer: Add sliced ginger and water to a small saucepan. Bring to a gentle boil over medium heat.

  3. Infuse: Reduce heat and simmer for 10–15 minutes (longer for a stronger flavor).

  4. Strain: Remove from heat. Strain the liquid into a jar or jug to remove ginger pieces.

  5. Finish: Stir in sweetener and/or lemon juice if using.

  6. Serve: Enjoy hot immediately — or refrigerate and serve chilled over ice.

📝 Notes

  • The more thinly you slice the ginger, the stronger the infusion.

  • If you prefer an extra-strong flavor, simmer up to 30 minutes.

  • Store leftovers in the refrigerator for up to 3 days.

  • Great served warm in winter or iced in summer.

💡 Tips

  • Add a cinnamon stick or turmeric slice while simmering for a spice boost.

  • Use sparkling water after cooling for a homemade ginger soda.

  • Drink first thing in the morning to help wake up digestion.

⚖️ Approximate Nutritional Info (per 1 cup without sweetener)

Nutrient Amount
Calories 2
Carbohydrates 0.5 g
Sugars 0 g
Fat 0 g
Protein 0 g
Sodium 5 mg

(Add ~60 calories per tablespoon of honey.)

🌟 Health Benefits

  • Digestive Aid: Ginger stimulates digestion and reduces bloating/nausea.

  • Anti-inflammatory: Gingerol compounds in ginger help reduce inflammation.

  • Immunity Boost: Antioxidants in ginger support immune function.

  • Hydration: Helps you stay hydrated while giving plain water a flavorful twist.

❓ Q & A

Q: Can I drink ginger water every day?
A: Yes — 1–2 cups per day is generally safe and beneficial for most people.

Q: Can I reuse the ginger slices?
A: You can reuse once for a lighter second batch, though flavor will be milder.

Q: Is it safe during pregnancy?
A: Ginger can help with nausea, but stick to moderate amounts and consult your doctor.

Q: Can I sweeten it with sugar instead of honey?
A: Absolutely — use any sweetener you prefer, or leave it unsweetened.

Healthy Tomato Zucchini Pasta

Ingredients:
1 lb (450 g) whole wheat spaghetti
2 tablespoons olive oil
3 cloves garlic, minced
2 medium zucchinis, sliced into thin half-moons
2 cups cherry tomatoes, halved (or 1 can diced tomatoes, drained)
Salt and black pepper, to taste
1/2 teaspoon red pepper flakes (optional, for a kick)
1/4 cup grated Parmesan cheese (optional)
Fresh basil or parsley, chopped (for garnish)
Juice of 1/2 lemon (optional but adds brightness)
Instructions:
1. Cook the Pasta
Bring a large pot of salted water to a boil.
Cook the whole wheat spaghetti according to package instructions until al dente.
Drain, reserving about 1/2 cup of pasta water, and set aside.
2. Sauté the Garlic and Veggies
In a large skillet, heat olive oil over medium heat.
Add the minced garlic and sauté for about 30 seconds until fragrant.
Add the sliced zucchini and cook for 4–5 minutes, stirring occasionally, until just tender.
Toss in the cherry tomatoes and cook for another 2–3 minutes until they start to soften and release their juices.
Season with salt, pepper, and red pepper flakes (if using).
3. Combine with Pasta
Add the cooked pasta to the skillet with the veggies.
Toss everything together, adding a splash of reserved pasta water to loosen the sauce if needed.
Drizzle with lemon juice and adjust seasoning to taste.
4. Serve
Serve warm, topped with freshly grated Parmesan and chopped herbs.
Add a drizzle of olive oil or a few toasted pine nuts for extra richness and crunch, if desired.

Chicken Bacon Ranch Taquitos

🥓 Chicken Bacon Ranch Taquitos

Yield: ~12 taquitos
Prep Time: 15 minutes
Cook Time: 20 minutes
Total Time: 35 minutes


🧾 Ingredients:

Filling:

  • 2 cups cooked chicken, shredded (rotisserie works great)

  • 6 slices bacon, cooked and crumbled

  • 1 cup shredded cheddar cheese (or cheese blend)

  • 4 oz cream cheese, softened

  • ¼ cup ranch dressing

  • 1 tsp garlic powder

  • ½ tsp onion powder

  • Salt & pepper to taste

  • 2 green onions, thinly sliced (optional)

For Assembly:

  • 10–12 small flour tortillas (or corn if you prefer)

  • Cooking spray or a bit of oil for brushing

Optional for Serving:

  • Extra ranch dressing

  • Salsa or pico de gallo

  • Sour cream


🍳 Instructions:

1. Preheat Oven:

  • Preheat oven to 425°F (220°C).

  • Line a baking sheet with parchment paper or lightly grease it.

2. Make the Filling:

In a large bowl, mix together:

  • Shredded chicken

  • Crumbled bacon

  • Cheddar cheese

  • Cream cheese

  • Ranch dressing

  • Garlic powder

  • Onion powder

  • Salt, pepper

  • Green onions (if using)

Mix until well combined and creamy.

3. Assemble Taquitos:

  • Warm tortillas slightly (in the microwave wrapped in a damp paper towel for ~20 seconds) to make them more pliable.

  • Place 2–3 tablespoons of filling on the lower third of each tortilla.

  • Roll tightly and place seam-side down on the baking sheet.

4. Bake:

  • Lightly spray or brush the tops with oil.

  • Bake for 15–20 minutes, or until golden brown and crispy.

Optional: For extra crispiness, broil for 1–2 minutes at the end — watch closely!

5. Serve:

  • Serve warm with ranch, sour cream, or your favorite dip.


🔄 Variations & Tips:

  • Air Fryer Option: Cook at 375°F for 6–8 minutes, flipping halfway through.

  • Add Heat: Mix in diced jalapeños or a bit of hot sauce.

  • Make Ahead: Assemble and freeze unbaked taquitos. Bake from frozen at 400°F for 20–25 minutes.