Layered Zucchini & Spinach Gratin

Layered Zucchini & Spinach Gratin

Prep Time: 15 minutes
Bake Time: 25–30 minutes
Servings: 4–6


Ingredients

  • 4 zucchini, sliced lengthwise into thin strips

  • 4 tomatoes, sliced into rounds

  • 150 g spinach, chopped

  • Fresh basil leaves (to taste)

  • 1 liter water (for blanching)

  • Olive oil, as needed

  • Salt, to taste

Optional (for topping):

  • 1 cup shredded mozzarella or parmesan cheese


Instructions

Step 1: Prepare the Zucchini

  1. Bring 1 liter of water with a small pinch of salt to a boil.

  2. Add the zucchini strips and blanch for 2–3 minutes, just until slightly tender but still firm.

  3. Drain immediately and pat dry with a clean kitchen towel or paper towel to remove excess moisture.


Step 2: Cook the Spinach

  1. Heat a small drizzle of olive oil in a pan over medium heat.

  2. Add the chopped spinach and basil leaves.

  3. Cook just until the spinach wilts (about 1–2 minutes).

  4. Season lightly with salt and remove from heat.


Step 3: Assemble the Layers

  1. Lightly grease a baking dish with olive oil.

  2. Arrange a layer of zucchini strips at the bottom.

  3. Add a layer of tomato slices.

  4. Add a layer of the spinach and basil mixture.

  5. Repeat layers until all ingredients are used, finishing with zucchini on top.


Step 4: Add the Topping

  1. Drizzle a little olive oil over the top.

  2. If using cheese, sprinkle it evenly over the top layer.


Step 5: Bake

  1. Preheat oven to 200°C (400°F).

  2. Bake for 25–30 minutes, until vegetables are tender and the top is lightly golden.


Step 6: Serve

  1. Let the dish rest for 5 minutes after baking.

  2. Slice and serve warm.


Tips for Best Results

  • Reduce moisture: Lightly salt zucchini and tomatoes and let them sit for 10 minutes, then pat dry before layering.

  • Extra flavor: Add garlic powder or black pepper to the spinach while sautéing.

  • Herb choice: Basil, parsley, or oregano work well.

  • Make it filling: Add cooked chicken, mushrooms, or lentils between layers if desired.

Sugar-Free Apple & Oat Mug Cakes

🍎 Sugar-Free Apple & Oat Mug Cakes

Soft, naturally sweet mug cakes made with oats, apple, and dried fruit. These are quick to prepare and suitable for microwave or oven baking.


📝 Ingredients

  • 1 cup (100 g) oatmeal (rolled oats or quick oats)

  • 1 large egg

  • ½ teaspoon ground cinnamon

  • 1 teaspoon baking powder

  • 1 pinch salt

  • 3 tablespoons raisins

  • 10–12 dried apricots

  • 1 medium apple, grated or finely diced

  • ¼ cup milk (optional, use only if batter is too dry)

  • Small amount of butter or oil for greasing mugs


👩‍🍳 Instructions

1️⃣ Prepare the Fruit

  1. Place raisins and dried apricots in hot water for 5 minutes to soften.

  2. Drain well.

  3. Finely chop the apricots.

  4. Core the apple and grate it or cut into very small cubes.


2️⃣ Mix the Batter

  1. In a mixing bowl, combine:

    • Oats

    • Cinnamon

    • Baking powder

    • Salt

  2. Add:

    • Egg

    • Grated apple

  3. Stir until well mixed.

  4. Fold in:

    • Raisins

    • Chopped apricots

  5. If batter seems too thick or dry, add milk a little at a time until you get a thick, spoonable batter.


3️⃣ Fill the Mugs

  1. Lightly grease 2–3 microwave-safe mugs or ramekins.

  2. Divide batter evenly between mugs.

  3. Fill only up to ¾ full to allow rising.


4️⃣ Cook

Microwave Method

  • Cook each mug on high power for 1½ to 2 minutes.

  • The top should look set and spring back lightly when touched.

Oven Method

  • Preheat oven to 180°C (350°F).

  • Bake for 15–20 minutes until lightly golden and firm in the center.


🍽 Serving Ideas

  • Serve warm

  • Top with yogurt

  • Sprinkle with extra cinnamon

  • Add sliced apples


🧁 Tips

✔️ Finely chopped fruit gives better texture
✔️ Do not overcook or cakes will dry out
✔️ Best eaten fresh
✔️ Can be made with pears instead of apples
✔️ Use almond or oat milk if desired

Easy Vegetable Egg Muffins (Omelette Muffins)

Easy Vegetable Egg Muffins (Omelette Muffins)

Soft, savory egg muffins loaded with vegetables and cheese. These are easy to prepare, kid-friendly, and perfect for breakfast or a light snack.


Ingredients

(Makes 8–10 muffins)

  • Eggs: 4 large

  • Onion: 1 small, finely chopped

  • Green chili: 1, finely chopped (optional; adjust or skip for kids)

  • Carrot: 1 medium, finely grated or finely chopped

  • Sweetcorn: ¼ cup, boiled or canned (drained)

  • Mozzarella cheese: ½ cup, grated

  • Fresh coriander leaves: 2 tablespoons, finely chopped

  • Black pepper: to taste

  • Salt: to taste

  • Oil or butter: for greasing the muffin tray


Instructions

1. Prepare the Oven and Tray

  • Preheat the oven to 180°C (350°F).

  • Lightly grease a muffin tin with oil or butter, or line with silicone or paper liners.


2. Prepare the Egg Mixture

  • Crack the eggs into a large mixing bowl.

  • Add salt and black pepper.

  • Whisk well until the eggs are fully combined and slightly frothy.


3. Add Vegetables and Cheese

  • Add chopped onion, green chili (if using), carrot, sweetcorn, and coriander leaves to the egg mixture.

  • Stir gently to distribute the vegetables evenly.

  • Fold in the grated mozzarella cheese.


4. Fill the Muffin Tray

  • Pour the mixture evenly into the prepared muffin cups, filling each about ¾ full to allow space for rising.


5. Bake

  • Place the tray in the preheated oven.

  • Bake for 18–22 minutes, or until the muffins are set in the center and lightly golden on top.

  • A toothpick inserted in the middle should come out clean.


6. Cool and Serve

  • Remove from the oven and allow the muffins to rest in the tray for 5 minutes.

  • Carefully remove and serve warm.


Serving Suggestions

  • Serve with toast, fruit, or yogurt for a balanced breakfast.

  • These muffins also work well in lunchboxes or as an evening snack.


Storage Tips

  • Store leftovers in an airtight container in the refrigerator for up to 3 days.

  • Reheat gently in a microwave or oven before serving.

Cheesy Baked Cauliflower

Cheesy Baked Cauliflower

A creamy oven-baked cauliflower dish with a golden cheese topping

Yield

Serves 4–6

Oven Temperature

200°C (400°F)


Ingredients

Cauliflower

  • 1 large head cauliflower

  • 3 lemon slices

  • Fresh dill sprigs

  • Salt, to taste

Cheese Sauce

  • 2 cups shredded cheese (mozzarella or a blend of cheddar and Monterey Jack)

  • 1½ cups heavy cream or prepared thick béchamel sauce

  • 2 garlic cloves, finely minced

  • ½ teaspoon dried oregano or thyme

  • Black pepper, to taste


Instructions

1. Prepare the Cauliflower

  1. Remove the outer leaves from the cauliflower and trim the stem.

  2. Cut the cauliflower into evenly sized florets to ensure uniform cooking.


2. Cook the Cauliflower

  1. Fill a large pot with water and add the lemon slices, dill sprigs, and salt.

  2. Bring the water to a steady boil.

  3. Add the cauliflower florets and cook for 5–7 minutes, until just tender when pierced with a fork. The cauliflower should remain firm and not soft.

  4. Drain thoroughly and allow excess moisture to evaporate.


3. Arrange for Baking

  1. Transfer the drained cauliflower to a lightly greased oven-safe baking dish.

  2. Spread the florets evenly in a single layer.


4. Prepare the Sauce

  1. In a mixing bowl, combine the heavy cream, minced garlic, dried herbs, and black pepper.

  2. Stir until evenly blended.


5. Assemble the Dish

  1. Pour the cream mixture evenly over the cauliflower.

  2. Sprinkle the shredded cheese evenly across the surface, fully covering the cauliflower.


6. Bake

  1. Place the dish in the preheated oven.

  2. Bake for 15–20 minutes, until the cheese has melted completely and developed a lightly browned surface.


7. Serve

  • Garnish with fresh dill if desired.

  • Serve warm as a side dish or light main course.


Storage

  • Refrigerate leftovers in a covered container for up to 2 days

  • Reheat gently in the oven until warmed through

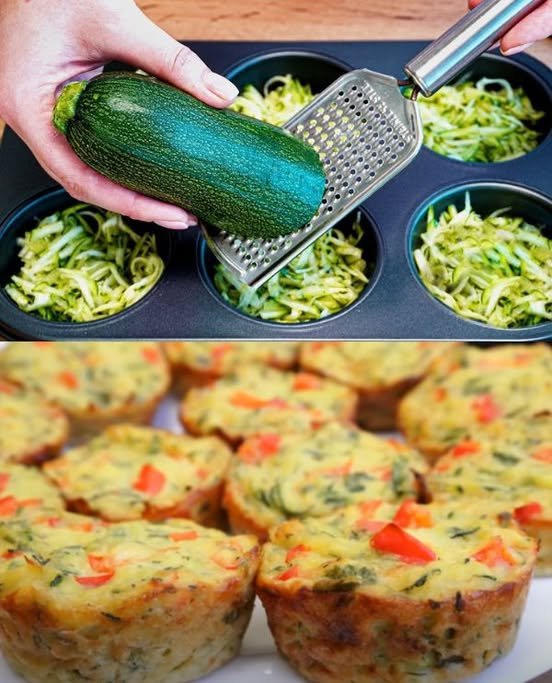
Savory Zucchini & Potato Bites

Savory Zucchini & Potato Bites

Soft Inside • Lightly Crisp Outside • Perfect for Any Meal

These baked zucchini and potato bites are flavorful, tender, and satisfying. They work beautifully as a snack, breakfast option, or side dish and pair wonderfully with a cool yogurt dip.


Ingredients

Main Vegetable Mixture

  • 2 medium zucchini (courgettes)

  • 1 medium potato, peeled

  • 2 large eggs, at room temperature

  • 1 red pepper, finely diced

  • 50 ml milk (about 3 tablespoons)

  • 2 tablespoons olive oil

  • 3 tablespoons semolina

  • 70 g all-purpose flour (about ½ cup)

  • 1 teaspoon baking powder

  • 50 g hard cheese, finely grated

  • Fresh parsley and dill, finely chopped

  • Salt and black pepper, to taste


Refreshing Yogurt Dip

  • Greek yogurt, plain and thick

  • 2 cucumbers, grated

  • 3 olives, finely chopped

  • 1 garlic clove, finely minced


Step-by-Step Instructions


1. Prepare the Vegetables

  • Grate the zucchini and potato into a large bowl

  • Sprinkle lightly with salt

  • Let them rest for about 5 minutes

  • Gently press or wrap the vegetables in a clean kitchen towel to remove excess moisture

    • This helps create a light, well-balanced texture


2. Prepare the Batter

  • In a separate bowl, whisk together the eggs, milk, and olive oil until smooth

  • Add the semolina, flour, and baking powder, mixing gently

  • Stir in the prepared zucchini and potato

  • Add the diced red pepper, grated cheese, and chopped herbs

  • Season with black pepper and adjust salt if needed

  • Mix until evenly combined


3. Fill and Bake

  • Heat the oven to 180°C (350°F)

  • Lightly grease a muffin tin or use silicone molds

  • Spoon the mixture evenly into each cup, filling nearly to the top

  • Bake for 25–30 minutes, until the tops are lightly golden and the bites feel set


4. Prepare the Yogurt Dip

  • Grate the cucumbers and gently press out excess liquid

  • In a bowl, combine:

    • Greek yogurt

    • Grated cucumbers

    • Minced garlic

    • Chopped olives

  • Stir until smooth and well blended

  • Chill until ready to serve


5. Serve

  • Allow the baked bites to rest in the pan for a few minutes

  • Carefully remove and serve warm

  • Add a spoon of the yogurt dip on the side for a refreshing contrast


Helpful Notes

  • Texture Tip: Removing extra moisture from vegetables helps maintain a soft, pleasant crumb

  • Flavor Option: Swap herbs or cheese to suit your taste

  • Make Ahead: These bites store well in the refrigerator and reheat gently in the oven


Optional Finishing Touch

For a lightly crisp surface, sprinkle a small amount of extra grated cheese on top during the final few minutes of baking.

Fresh & Vibrant Coleslaw (No Added Sweeteners)

Fresh & Vibrant Coleslaw (No Added Sweeteners)

Crisp • Creamy • Refreshing

This colorful coleslaw is made with fresh vegetables and a smooth, well-balanced dressing. The natural flavors of the ingredients shine, making it a wonderful side dish for everyday meals or gatherings.


Ingredients

Vegetable Base

  • ½ small green cabbage, finely shredded

  • ½ small red cabbage, finely shredded

  • 2 large carrots, peeled and grated

  • ¼ cup fresh parsley or cilantro, finely chopped

  • Optional: 2 green onions, thinly sliced


Creamy Dressing

  • ½ cup mayonnaise (avocado-oil or olive-oil based if preferred)

  • 2 tablespoons apple cider vinegar or fresh lemon juice

  • 1 tablespoon Dijon mustard

  • ½ teaspoon celery seed

  • ¼ teaspoon sea salt, or to taste

  • ¼ teaspoon freshly ground black pepper, or to taste


Step-by-Step Instructions

1. Prepare the Vegetables

  • Remove any tough outer leaves from the cabbages

  • Slice the cabbages thinly using a sharp knife or food processor

  • Grate the carrots finely

  • Chop the fresh herbs

  • Add all prepared vegetables to a large mixing bowl


2. Make the Dressing

  • In a small bowl, add the mayonnaise, vinegar or lemon juice, Dijon mustard, celery seed, salt, and pepper

  • Whisk until the dressing becomes smooth and well blended


3. Combine

  • Pour the dressing over the vegetables

  • Use two large spoons or tongs to gently toss until everything is evenly coated

  • Take care to keep the vegetables light and crisp


4. Rest for Best Flavor

  • Cover the bowl and place it in the refrigerator for 30–60 minutes

  • This resting time allows the vegetables to soften slightly and the flavors to blend naturally


5. Serve

  • Give the coleslaw a gentle toss before serving

  • Adjust seasoning if needed

  • Serve chilled as a refreshing side dish


Helpful Notes

  • Texture Tip: Finely shredded cabbage creates a smoother, more balanced bite

  • Flavor Balance: The acidity brightens the dressing while keeping it light and refreshing

  • Make-Ahead Friendly: This coleslaw can be prepared a few hours in advance and stays fresh and crisp


Serving Suggestions

  • Pair with grilled dishes, sandwiches, or wraps

  • Serve alongside roasted vegetables or baked meals

  • Enjoy as a fresh addition to everyday lunches