5 smoothie recipes

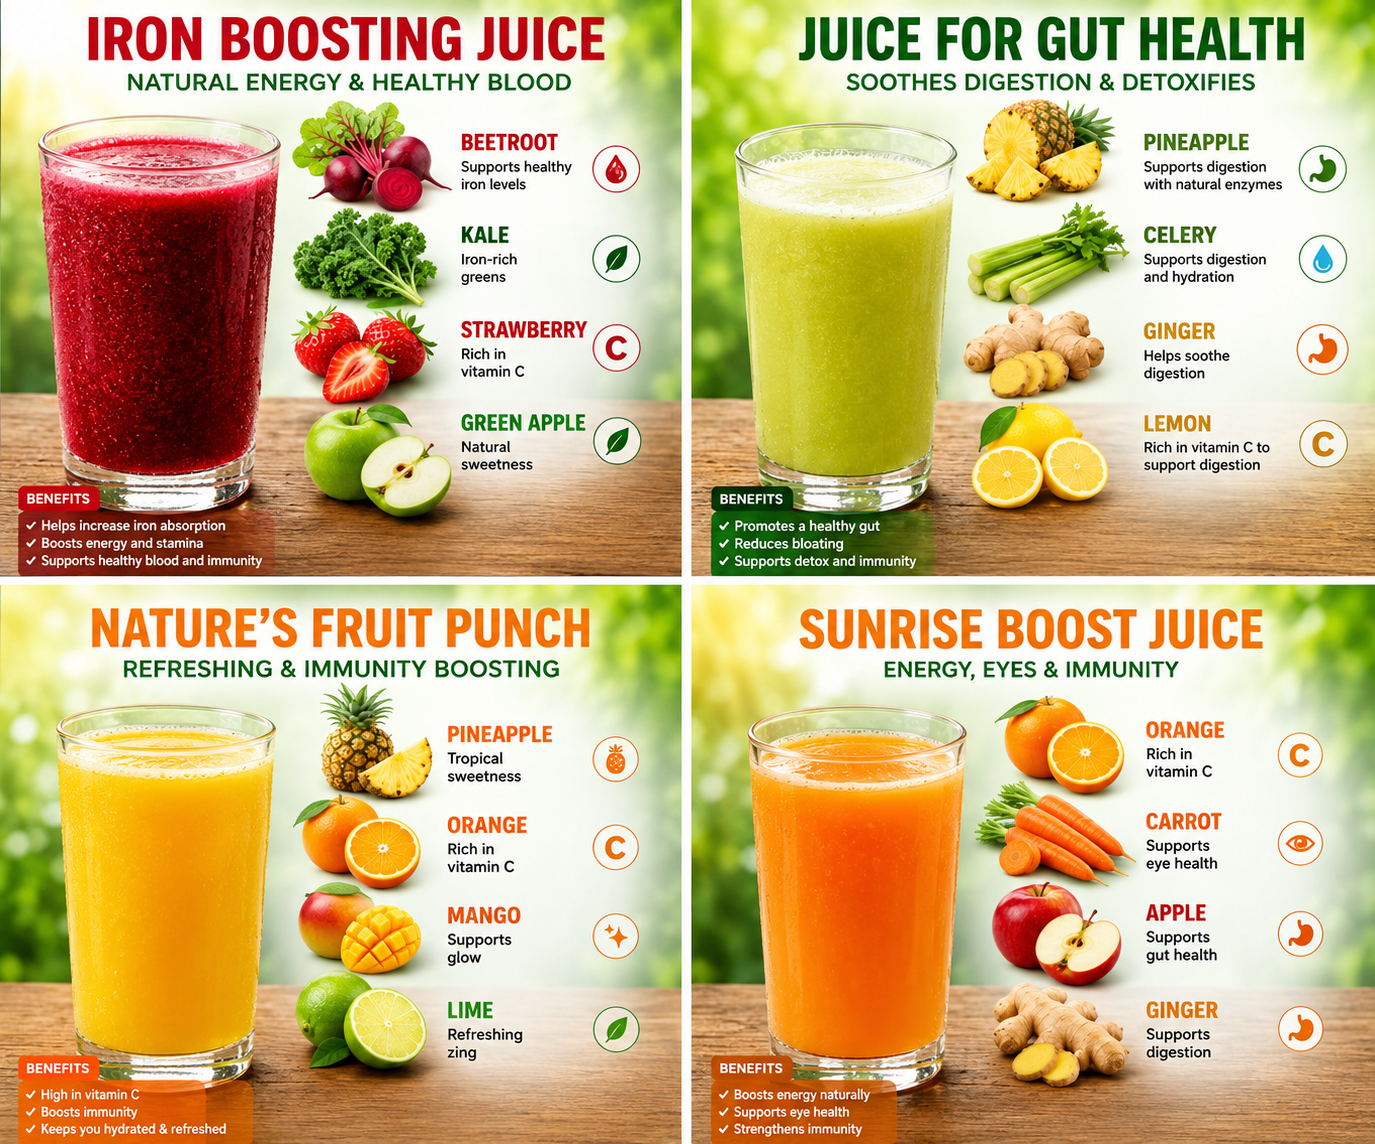
Iron Boosting Juice

Ingredients

  • 1 small beetroot, peeled and chopped
  • 1 cup kale
  • 4 strawberries
  • 1 green apple, chopped
  • 1 cup cold water

Instructions

Step 1

Wash all ingredients thoroughly.

Step 2

Add beetroot, kale, strawberries, apple, and water to a blender.

Step 3

Blend until smooth.

Step 4

Strain if desired.

Step 5

Serve immediately.

Nutritional Benefits

  • Rich in iron-supporting nutrients.
  • High in vitamin C.
  • Contains antioxidants and fiber.
  • Helps support energy levels.

Juice for Gut Health

Ingredients

  • 1 cup pineapple chunks
  • 2 celery stalks
  • 1-inch piece ginger
  • Juice of 1 lemon
  • 1 cup water

Instructions

Step 1

Wash and chop the pineapple, celery, and ginger.

Step 2

Add all ingredients to a blender.

Step 3

Blend until smooth.

Step 4

Strain if preferred.

Step 5

Pour into a glass and enjoy fresh.

Nutritional Benefits

  • Supports healthy digestion.
  • Rich in vitamin C.
  • Provides hydration.
  • Contains natural enzymes from pineapple.

Nature’s Fruit Punch

Ingredients

  • 1 cup pineapple chunks
  • 1 orange, peeled
  • 1 mango, peeled and diced
  • Juice of 1 lime
  • 1/2 cup cold water

Instructions

Step 1

Place pineapple, orange, mango, lime juice, and water in a blender.

Step 2

Blend until smooth.

Step 3

Strain if desired.

Step 4

Chill for 10 minutes.

Step 5

Serve cold.

Nutritional Benefits

  • High in vitamin C.
  • Rich in antioxidants.
  • Naturally sweet with no refined sugar.
  • Refreshing and hydrating.

Sunrise Boost Juice

Ingredients

  • 2 oranges, peeled
  • 2 carrots, chopped
  • 1 apple, chopped
  • 1-inch piece ginger
  • 1/2 cup water

Instructions

Step 1

Wash and prepare all ingredients.

Step 2

Add oranges, carrots, apple, ginger, and water to a blender.

Step 3

Blend until smooth.

Step 4

Strain for a smoother juice.

Step 5

Serve immediately.

Nutritional Benefits

  • Rich in vitamin A and vitamin C.
  • Supports immune health.
  • Contains antioxidants.
  • Naturally energizing.

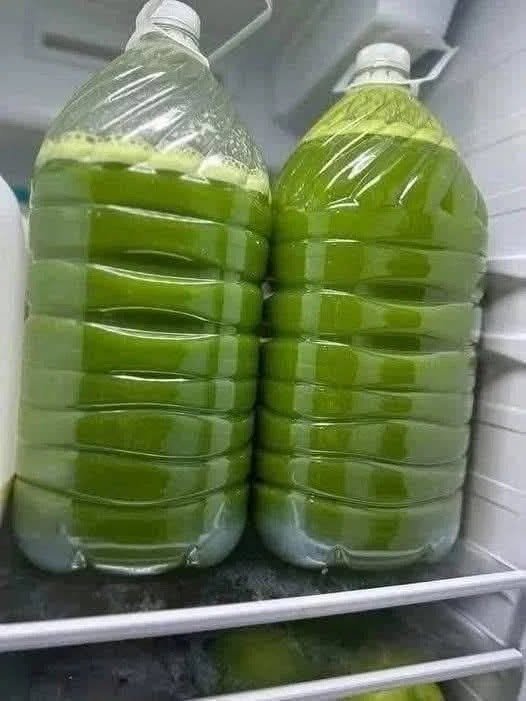
Anti-Inflammatory Liquid Gold (Green Juice)

A Refreshing Green Juice That Became My Weekend Wellness Ritual
Last weekend, I made this Anti-Inflammatory Liquid Gold Green Juice for my family, and honestly, I wasn’t expecting everyone to love it as much as they did. A close friend first recommended this recipe to me a few months ago when I was looking for healthier ways to start my mornings. She kept calling it her “liquid gold,” and after trying it myself, I completely understood why. Juice

There are certain recipes that become part of your routine, and this one has definitely earned its place in mine. Whether I’m feeling energized and happy, a little stressed after a busy week, or simply trying to give my body some extra nourishment, this green juice is one of the first things I reach for. It feels like a small act of self-care in a glass.

The first time I served it to my family, everyone was a little skeptical because of the bright green color. But after the first sip, the reactions changed completely. The juice was fresh, slightly sweet, and incredibly refreshing. By the end of breakfast, everyone was asking for another glass.

What I love most about this recipe is that it’s packed with ingredients known for their anti-inflammatory properties while still tasting delicious. It’s simple, nutritious, and perfect for busy mornings or relaxing weekends.

Why You’ll Love This Green Juice
Packed with nutrient-rich vegetables and fruits
Naturally refreshing and hydrating
Quick and easy to prepare
Great for busy mornings
Supports overall wellness
Naturally vibrant and delicious
Family-approved and beginner-friendly
Ingredients
2 cups kale leaves, washed
1 cucumber, chopped
2 green apples, cored and sliced
1-inch fresh ginger root
1 lemon, peeled
2 celery stalks
1 cup cold water
Ice cubes (optional)
Optional Add-Ins
Fresh mint leaves
A pinch of turmeric powder
Chia seeds
Coconut water instead of plain water
A small piece of fresh pineapple for extra sweetness
How to Make Anti-Inflammatory Liquid Gold Green JuiceStep 1: Prepare the Ingredients
Wash all the fruits and vegetables thoroughly. Chop them into smaller pieces to make blending or juicing easier. Fruits& Vegetables

Step 2: Blend Everything Together
Add kale, cucumber, green apples, ginger, lemon, and water to a high-powered blender.

Blend until smooth and fully combined.

Step 3: Strain (Optional)
For a smoother juice, pour the mixture through a fine-mesh strainer or nut milk bag. If you enjoy extra fiber, you can skip this step.

Step 4: Serve
Pour into glasses over ice and serve immediately for maximum freshness and flavor.

My Favorite Way to Enjoy It
I usually make this juice on Saturday mornings when the house is still quiet. There’s something incredibly satisfying about starting the day with a glass full of fresh ingredients. Sometimes I enjoy it alongside a light breakfast, and other times I sip it while planning the week ahead.

When life feels especially busy, making this juice helps me slow down for a few minutes and focus on doing something good for myself. It’s a simple habit, but one that always leaves me feeling refreshed.

Health Benefits of the Main IngredientsKale
Kale is loaded with vitamins A, C, and K and contains powerful antioxidants that help support overall health.

Ginger
Ginger has long been appreciated for its natural anti-inflammatory properties and its ability to support digestion.

Cucumber
Cucumbers are highly hydrating and provide a refreshing base for the juice. Juice

Green Apples
Green apples add natural sweetness while contributing fiber and vitamin C.

Lemon
Lemon provides brightness, freshness, and an extra boost of vitamin C.

Celery
Celery adds minerals, hydration, and a subtle savory flavor that balances the sweetness of the apples.

Tips for the Best Green Juice
Use fresh ingredients for maximum flavor.
Chill the ingredients beforehand for a colder juice.
Adjust the ginger according to your spice preference.
Drink immediately after preparation for the best nutritional value.
Add a small piece of pineapple if you prefer a sweeter taste.
Serving Suggestions
This green juice pairs wonderfully with:

Avocado toast
Oatmeal
Greek yogurt with fruit
Whole-grain breakfast bowls
Light salads and sandwiches
Nutritional Information
The following values are approximate and may vary depending on ingredient sizes and serving portions.

Nutrient Amount Per Serving
Calories 110 kcal
Carbohydrates 24 g
Protein 3 g
Fat 0.8 g
Fiber 5 g
Sugar 15 g
Vitamin C 70% DV
Vitamin K 180% DV
Potassium 450 mg
Calcium 120 mg
Iron 1.8 mg
Sodium 85 mg
Frequently Asked QuestionsCan I make this juice ahead of time?
Yes, but it’s best enjoyed fresh. If needed, store it in an airtight container in the refrigerator for up to 24 hours.

Can I use spinach instead of kale?
Absolutely. Spinach works wonderfully and creates a milder flavor.

Is this juice suitable for beginners?
Yes. The green apple and cucumber help balance the stronger flavors, making it approachable even if you’re new to green juices. Fruits& Vegetables

Can I make it without a juicer?
Definitely. A blender works perfectly. Simply strain the mixture afterward if desired.

Final Thoughts
This Anti-Inflammatory Liquid Gold Green Juice has become one of those recipes I return to again and again. It’s simple, nourishing, and surprisingly delicious. What started as a recommendation from a friend has turned into a family favorite that now appears regularly in our kitchen.

Every time I make it, I’m reminded that healthy recipes don’t have to be complicated. Sometimes the best recipes are the simplest ones—the kind that bring everyone together around the table and leave you feeling your best.
 

Fresh Guava Smoothie

Fresh Guava Smoothie

Ingredients

  • 3 ripe guavas, chopped
  • 1 cup cold milk (or almond milk)
  • 2 tbsp honey
  • ½ tsp vanilla extract (optional)
  • 1 cup ice cubes

Instructions

Step 1

Wash the guavas thoroughly and cut them into pieces.

Step 2

Add guava, milk, honey, vanilla, and ice cubes to a blender.

Step 3

Blend until smooth and creamy.

Step 4

Strain if you prefer a smoother texture.

Step 5

Pour into glasses and serve immediately.

Q&A

Can I use frozen guava?
Yes, frozen guava works great and makes the smoothie colder.

Can I make it dairy-free?
Yes, use almond, oat, or coconut milk.

Nutritional Benefits

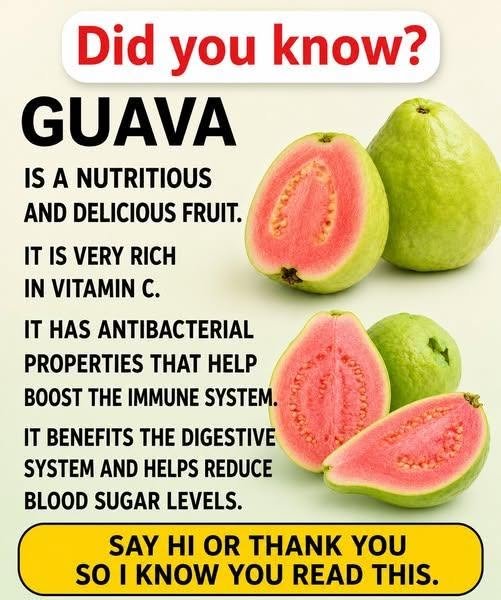
  • Extremely rich in Vitamin C.
  • Supports immune health.
  • High in fiber for better digestion.
  • Contains antioxidants that help protect cells.
  • May help support healthy blood sugar levels.

Easy Guava Fruit Salad

Ingredients

  • 4 guavas, diced
  • 1 apple, diced
  • Juice of 1 lime
  • 1 tbsp honey
  • A pinch of chaat masala (optional)

Instructions

Step 1

Cut the guavas and apple into bite-sized pieces.

Step 2

Place them in a large bowl.

Step 3

Mix lime juice and honey together.

Step 4

Pour the dressing over the fruit and toss gently.

Step 5

Sprinkle with chaat masala if desired and serve fresh.

Nutritional Benefits

  • High in fiber and Vitamin C.
  • Supports digestion and gut health.
  • Naturally sweet with no refined sugar.
  • Great as a healthy snack or breakfast.

Mason Jar Chocolate Ice Cream

Mason Jar Chocolate Ice Cream

Ingredients

  • 1 cup heavy whipping cream
  • 2 tbsp sweetener
  • 1 tbsp cocoa powder
  • 1 tsp vanilla extract

Instructions

🥣 Step 1: Add Ingredients

  • Pour the heavy whipping cream into a mason jar.
  • Add the sweetener, cocoa powder, and vanilla extract.

🫙 Step 2: Shake

  • Tightly secure the lid.
  • Shake vigorously for 2–3 minutes until the mixture thickens slightly.

❄️ Step 3: Freeze

  • Place the jar in the freezer.
  • Freeze for 4–6 hours or until firm.

🍨 Step 4: Serve

  • Remove from the freezer.
  • Let sit for 5 minutes to soften slightly.
  • Scoop and enjoy!

Q & A

Q: Can I use a different sweetener?
A: Yes, any granulated sweetener works well.

Q: How long can I store it?
A: Store in the freezer for up to 2 weeks in a sealed jar.

Mixed Berry Coconut Ice Cream

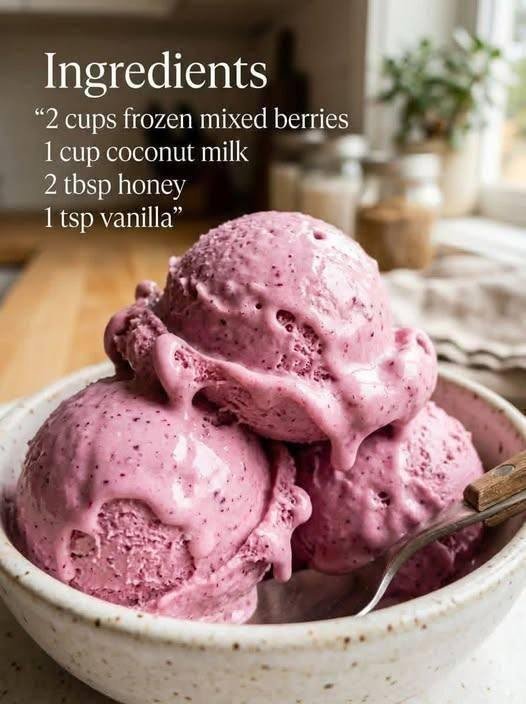
This mixed berry coconut ice cream is a simple, creamy frozen dessert made with just a few ingredients. Blended frozen berries create a naturally vibrant colour and fruity flavour, while coconut milk adds richness without the need for dairy. It’s easy to prepare, requires no flour, and can be enjoyed as a refreshing treat any time of year.

Note: The image claims “zero carbs” and suggests you can eat unlimited amounts. That’s not accurate. Berries, honey, and coconut milk all contain carbohydrates and calories. While this recipe can fit into many healthy eating plans, portion size still matters.

Servings

Makes 4 servings

Ingredients

  • 2 cups frozen mixed berries
  • 1 cup full-fat coconut milk
  • 2 tablespoons honey
  • 1 teaspoon vanilla extract

Optional Add-Ins

  • 1 tablespoon lemon juice
  • Fresh berries for garnish
  • Unsweetened shredded coconut

Instructions

  1. Add the frozen mixed berries to a high-speed blender or food processor.
  2. Pour in the coconut milk, honey, and vanilla extract.
  3. Blend until smooth and creamy, stopping to scrape down the sides as needed.
  4. For a soft-serve consistency, serve immediately.
  5. For scoopable ice cream, transfer the mixture to a freezer-safe container.
  6. Freeze for 2–3 hours until firm.
  7. Let it sit at room temperature for 5–10 minutes before scooping.
  8. Garnish with fresh berries or coconut if desired.

Description

This naturally sweet frozen dessert combines the bright flavour of mixed berries with the creamy richness of coconut milk. The result is a smooth, refreshing treat that’s simple to make and packed with fruity goodness. Whether served as a quick soft-serve or frozen into traditional scoops, it’s a delicious alternative to many store-bought ice creams.

Recipe Notes

  • Full-fat coconut milk produces the creamiest texture.
  • Frozen berries eliminate the need for ice cubes.
  • Adjust honey according to the sweetness of your berries.
  • A splash of lemon juice enhances the berry flavour.

Tips for Success

  • Use very cold ingredients for the best texture.
  • Blend in short pulses to avoid overheating the mixture.
  • Freeze in a shallow container for faster chilling.
  • Cover the surface with parchment paper to reduce ice crystals.
  • If frozen solid, allow the ice cream to soften before serving.

Nutritional Information

Approximate per serving

  • Calories: 150
  • Protein: 1 g
  • Carbohydrates: 18 g
  • Fiber: 3 g
  • Sugars: 13 g
  • Fat: 9 g
  • Saturated Fat: 7 g
  • Sodium: 10 mg

Health Benefits

  • Berries are rich in antioxidants that help protect cells from oxidative stress.
  • Coconut milk provides healthy fats that contribute to satiety.
  • Berries contain fibre that supports digestive health.
  • This recipe contains fewer ingredients than many commercial ice creams.
  • Naturally gluten-free and dairy-free.

Frequently Asked Questions

Q: Is this recipe really zero carbs?

A: No. Berries, honey, and coconut milk all contain carbohydrates. This recipe is lower in processed ingredients but not carb-free.

Q: Can I make it without honey?

A: Yes. You can omit the honey or use a sugar-free sweetener if preferred.

Q: Can I use fresh berries?

A: Yes, but you’ll need to freeze them first or add ice for a frozen texture.

Q: How long does it keep?

A: Store in an airtight container in the freezer for up to 2 weeks.

Q: Can I use only one type of berry?

A: Absolutely. Strawberries, blueberries, raspberries, or blackberries all work well.

Q: Is this recipe vegan?

A: To make it vegan, replace honey with maple syrup or another plant-based sweetener.

Variations

  • Strawberry Coconut Ice Cream: Use only frozen strawberries.
  • Blueberry Vanilla Ice Cream: Add extra vanilla for a richer flavour.
  • Berry Lemon Ice Cream: Mix in 1 tablespoon lemon zest.
  • Chocolate Berry Ice Cream: Add 1 tablespoon unsweetened cocoa powder.

This mixed berry coconut ice cream is a quick, wholesome dessert that delivers creamy texture and bright berry flavour with minimal effort. Perfect for warm days, healthy snacking, or satisfying a sweet craving without relying on heavily processed ingredients.

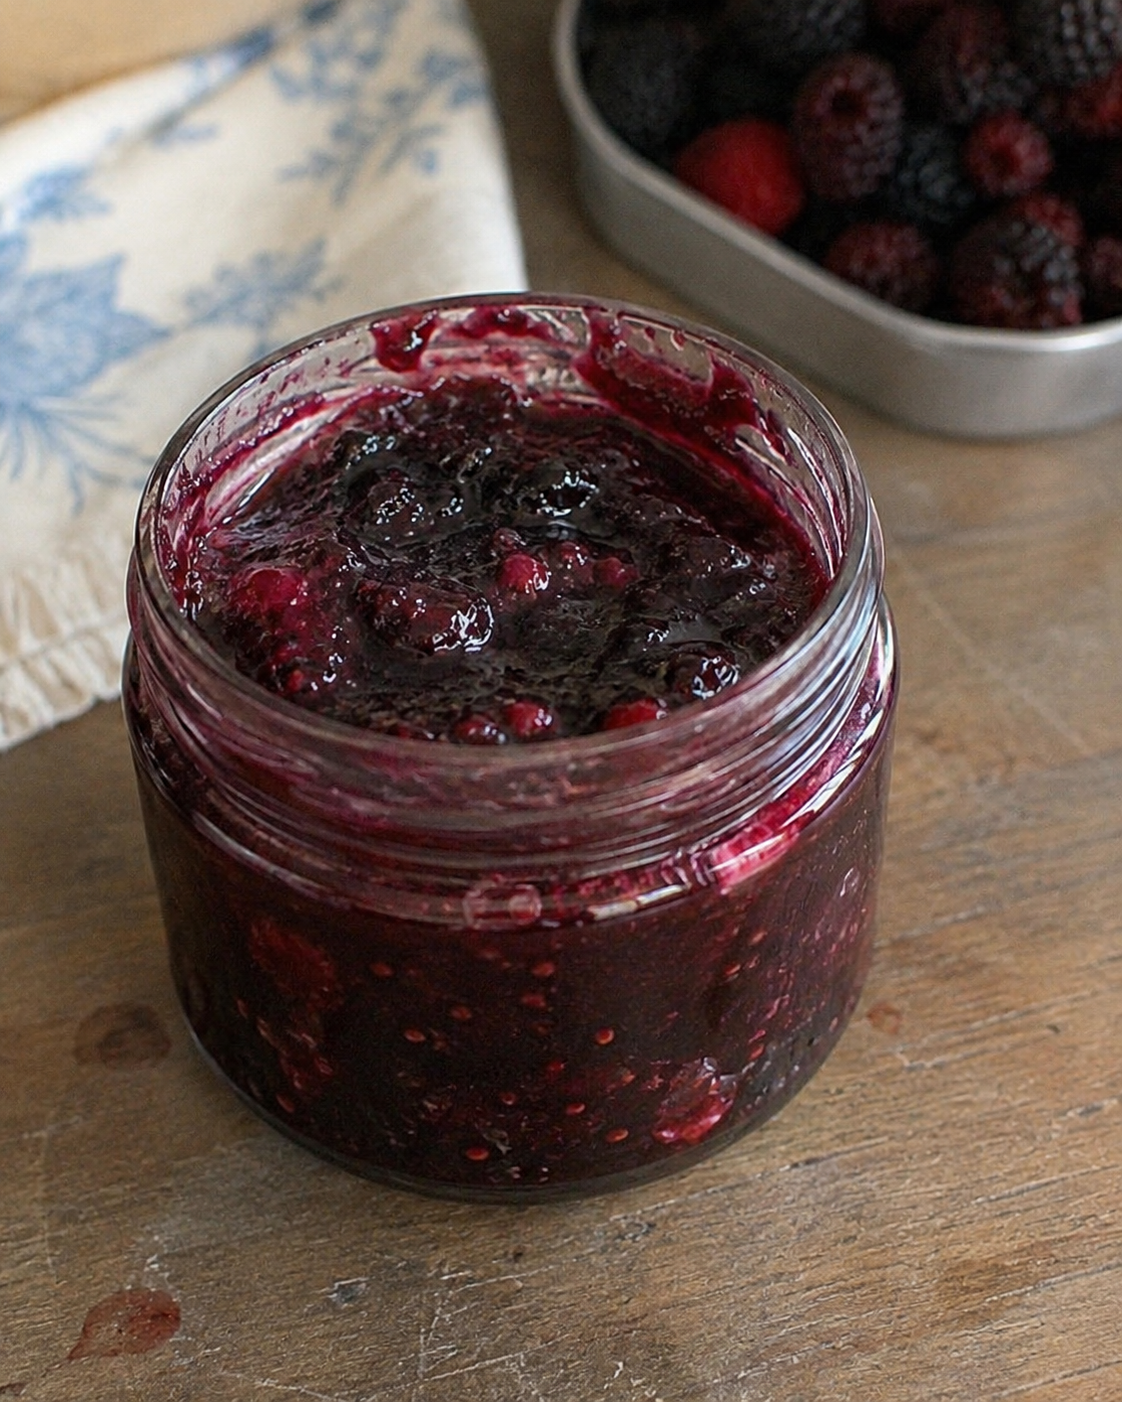
Mixed Berry Jam

Mixed Berry Jam

Ingredients

  • 2 cups mixed berries (strawberries, blueberries, raspberries, or blackberries)
  • ¾ cup granulated sugar
  • 1 tbsp lemon juice

Instructions

Step 1

  • Wash the berries thoroughly.
  • Remove stems from strawberries and cut larger berries into smaller pieces.

Step 2

  • Add the berries, sugar, and lemon juice to a saucepan.

Step 3

  • Cook over medium heat, stirring occasionally until the berries begin to soften and release their juices.

Step 4

  • Use a potato masher or spoon to gently mash the berries to your desired texture.

Step 5

  • Continue cooking for 15–20 minutes, stirring often, until the mixture thickens.

Step 6

  • Remove from heat and allow the jam to cool for 10 minutes.

Step 7

  • Transfer the jam to a clean glass jar.

Step 8

  • Let cool completely before sealing and refrigerating.

Q & A

Q: How long does homemade jam last?
A: Store in the refrigerator for up to 2 weeks.

Q: Can I use frozen berries?
A: Yes, frozen berries work just as well as fresh berries.

Q: How do I make the jam thicker?
A: Cook it a little longer until more liquid evaporates.