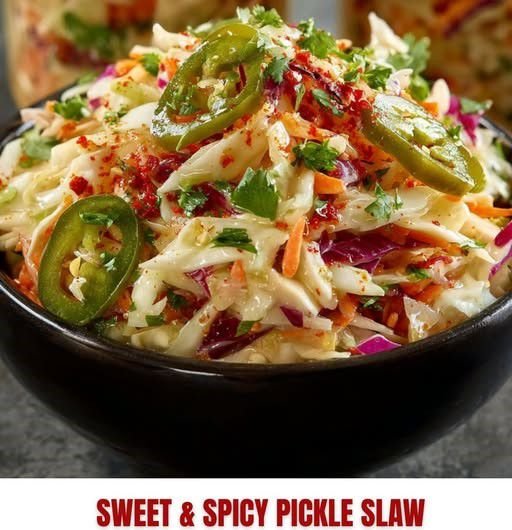
Sweet & Spicy Pickle Slaw

Sweet & Spicy Pickle Slaw

Table of Contents

If you like your coleslaw with bold personality, this Sweet and Spicy Pickle Slaw delivers. It is creamy, tangy, slightly sweet, and finished with just enough heat to keep things interesting. The pickle juice adds a punchy twist that cuts through the richness of mayonnaise and balances the natural sweetness of cabbage and carrots.

This slaw works beautifully alongside grilled meats, fried chicken, burgers, pulled beef sandwiches, or even tucked into wraps. It is simple to prepare and tastes even better after chilling, making it ideal for gatherings and meal prep.

Prep Time: 20 minutes
Chill Time: 30–60 minutes (recommended)
Total Time: About 1 hour
Servings: 6

Ingredients

1 small shallot, minced (no more than 2 tablespoons)

½ cup mayonnaise

⅓ cup granulated sugar

¼ cup pickle juice

1 to 2 teaspoons hot sauce (adjust to taste)

1 teaspoon kosher salt

½ teaspoon freshly ground black pepper

½ small head green cabbage, roughly chopped (about 3 cups)

½ small head red cabbage, roughly chopped (about 3 cups)

1 cup shredded carrots

Instructions

Prepare the vegetables. Roughly chop green and red cabbage into bite-sized pieces. Place in a large mixing bowl. Add shredded carrots.

Salt lightly (optional step for texture). If you prefer softer slaw, sprinkle a pinch of salt over the cabbage and let it sit for 10 minutes, then drain excess moisture.

Mince the shallot. Finely mince the shallot so it blends evenly into the dressing without overpowering bites.

See also  Mediterranean Garlic Butter Zucchini Grilled Cheese

Make the dressing. In a medium bowl, whisk together mayonnaise, sugar, pickle juice, hot sauce, kosher salt, and black pepper until smooth.

Adjust seasoning. Taste and adjust heat, sweetness, or tanginess by adding more hot sauce or pickle juice as desired.

Combine. Add minced shallot to the dressing and stir to incorporate.

Dress the slaw. Pour the dressing over the cabbage and carrots. Toss thoroughly until everything is evenly coated.

Chill. Cover and refrigerate for at least 30 minutes to allow flavors to meld.

Stir before serving. Give the slaw a good toss before serving to redistribute dressing.

Serve cold. Enjoy as a side dish or topping for sandwiches and tacos.

Tips

Slice cabbage evenly for consistent texture.

Do not over-mince cabbage into tiny pieces; some crunch is key.

Use fresh, crisp cabbage for best results.

Adjust sugar depending on how sweet your pickle juice is.

Start with 1 teaspoon of hot sauce, then increase gradually.

Chill at least 30 minutes for deeper flavor.

For extra crunch, add carrots just before serving.

Use full-fat mayonnaise for a creamier texture.

If slaw seems watery, drain excess liquid before serving.

Make it a few hours ahead for gatherings.

Variations

Dill Pickle Boost: Add chopped dill pickles for extra crunch.

Mustard Kick: Stir in 1 teaspoon of Dijon mustard.

Apple Addition: Add thinly sliced green apple for sweetness.

Jalapeño Heat: Mix in finely diced fresh jalapeño.

Vinegar Tang: Add 1 tablespoon of apple cider vinegar for sharper acidity.

Low-Sugar Option: Reduce sugar by half for a tangier slaw.

Creamy Upgrade: Add 1 tablespoon of sour cream for richness.

See also  Mediterranean Easy Stuffed Cabbage Soup

BBQ Style: Stir in a tablespoon of barbecue sauce.

Herb Freshness: Add chopped fresh dill or parsley.

Purple-Forward Slaw: Use more red cabbage for deeper color.

Q&A

Can I make this ahead of time?

Yes, it tastes even better after chilling for a few hours.

How long does it last?

Up to 3 days in the refrigerator.

Can I use bagged coleslaw mix?

Yes, substitute about 6 cups total.

Is it very spicy?

The heat is adjustable depending on the hot sauce amount.

Can I use sweet pickle juice?

Yes, but reduce added sugar.

Why is my slaw watery?

Cabbage releases moisture; drain excess liquid before serving.

Can I make it dairy-free?

It already is, as long as your mayo is dairy-free.

Can I substitute red onion for shallot?

Yes, but use slightly less, as it is stronger.

What dishes pair well?

Burgers, grilled chicken, pulled beef, or fried fish.

Can I freeze it?

No, mayonnaise-based slaw does not freeze well.

Nutrition

(Approximate per serving)

Calories: 210

Protein: 2 g

Fat: 15 g

Carbohydrates: 18 g

Sugar: 14 g

Fiber: 3 g

Sodium: 420 mg

Values may vary depending on exact brands and measurements used.

Conclusion

Sweet and Spicy Pickle Slaw is not your average coleslaw. The combination of creamy mayonnaise, bright pickle juice, gentle sweetness, and a touch of heat creates a bold and balanced side dish that stands out on any table.

It is crunchy, colorful, and versatile enough to serve alongside grilled meats or piled high on sandwiches. Once you try this pickle-forward twist, it may quickly replace your usual coleslaw recipe.
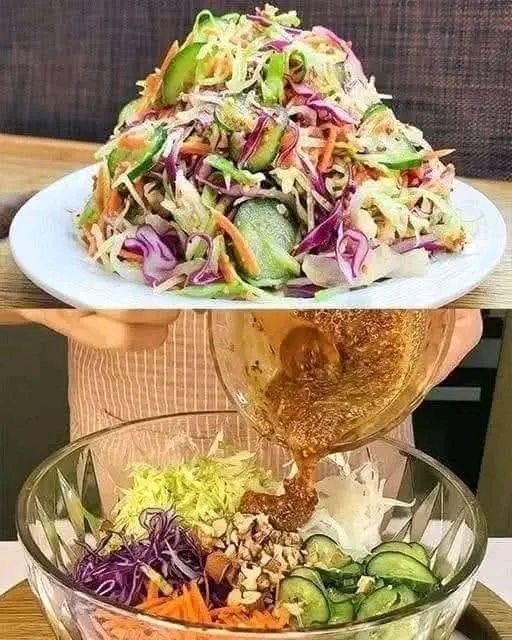
Crunchy Asian Cabbage Slaw (WW Low-Point)

Crunchy Asian Cabbage Slaw (WW Low-Point)
**Fresh • Flavor-Packed • Meal-Prep Friendly**
**Ingredients**
**Salad**
* 2 cups **green cabbage**, thinly shredded
* 1 cup **red cabbage**, shredded
* 1 cup **cucumber**, sliced
* 1 cup **carrots**, julienned or shredded
* 2 tbsp **green onions**, sliced
* Optional crunch (pictured):
* 1 tbsp **chopped almonds or peanuts** *(optional – adds points)*
**Low-Point Sesame Dressing**
* 2 tbsp **rice vinegar**
* 1 tbsp **low-sodium soy sauce**
* 1 tsp **sesame oil**
* 1 tsp **honey or sugar-free sweetener**
* 1 tsp **fresh grated ginger** or ginger paste
* 1 clove **garlic**, minced
* Black pepper or chili flakes (to taste)
**Instructions**
1. Add all salad vegetables to a large bowl.
2. Whisk dressing ingredients in a separate bowl or jar.
3. Pour dressing over salad and toss until well coated.
4. Chill 10–15 minutes for best flavor.
5. Sprinkle nuts on top *only if using*.
**Weight Watchers Points (Per Serving)**
* **Without nuts:** **0–1 WW Point**
* **With 1 tbsp nuts:** **2–3 WW Points**

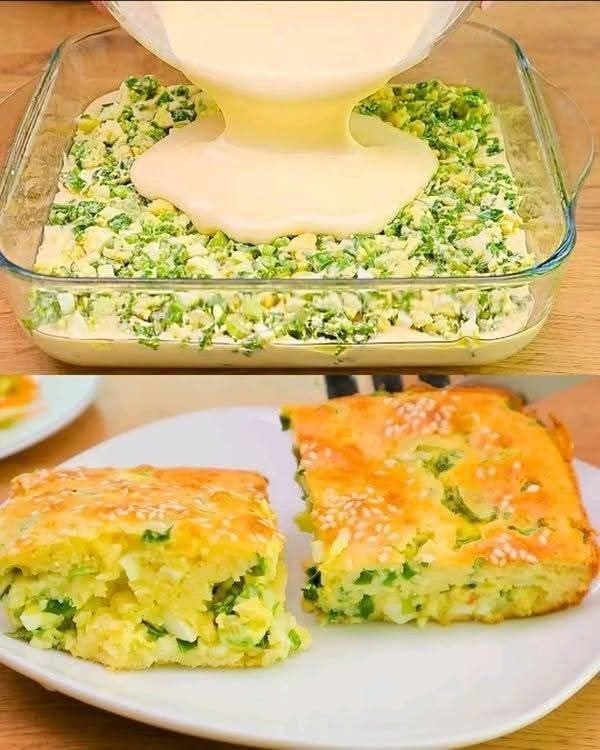
Savory Green Onion & Egg Casserole

Savory Green Onion & Egg Casserole

Prep time: 15 mins | Bake time: 30-35 mins | Servings: 4-6

Ingredients

For the Filling (Inside):

  • 4 Hard-boiled eggs, chopped

  • 150g Green onions, finely chopped

  • 100g Cheese (Mozzarella or Cheddar), grated

  • 1 tbsp Greek yogurt

  • Salt, to taste

For the Batter (Pour-over):

  • 3 Raw eggs

  • 1 cup Greek yogurt or Sour cream

  • ½ cup Mayonnaise (optional, for extra richness)

  • 1 ½ cups All-purpose flour

  • 1 tsp Baking powder

  • Pinch of Salt

  • Sesame seeds (for topping)


Step-by-Step Instructions

1. Prepare the Filling

  • In a medium bowl, combine the 4 chopped hard-boiled eggs, the 150g of chopped green onions, and the 100g of grated cheese.

  • Stir in 1 tablespoon of Greek yogurt and salt. This yogurt acts as a binder to keep the filling moist.

2. Make the Batter

  • In a separate large bowl, whisk together the 3 raw eggs and the 1 cup of Greek yogurt (and mayonnaise if using).

  • Gradually sift in the flour, baking powder, and a pinch of salt. Whisk until you have a smooth, thick batter that is pourable but not watery.

3. Layer the Casserole

  • Preheat your oven to 180°C (350°F). Grease a glass baking dish (roughly 8×8 or 9×9 inch) with butter or oil.

  • Pour half of your batter into the bottom of the dish and spread it evenly.

  • Spread the green onion and egg filling mixture in an even layer over the batter.

  • Pour the remaining half of the batter over the filling, ensuring all the green onions are covered.

4. Add the Finishing Touch

  • Sprinkle a generous amount of sesame seeds over the top of the batter. This provides the crunch and visual detail seen in your photo.

5. Bake

  • Place in the oven and bake for 30–35 minutes.

  • The casserole is done when the top is a deep golden brown and a toothpick inserted into the center comes out clean.

6. Serve

  • Allow it to cool for about 10 minutes before slicing into squares. This ensures the layers stay intact when served.


Tips for Success

  • Don’t Overbake: Keep an eye on the edges; you want them golden, not dark brown, to maintain that “melt-in-your-mouth” texture.

  • Cheese Choice: Using a cheese with good melting properties, like Gruyère or a mild white Cheddar, will improve the flavor of the center.

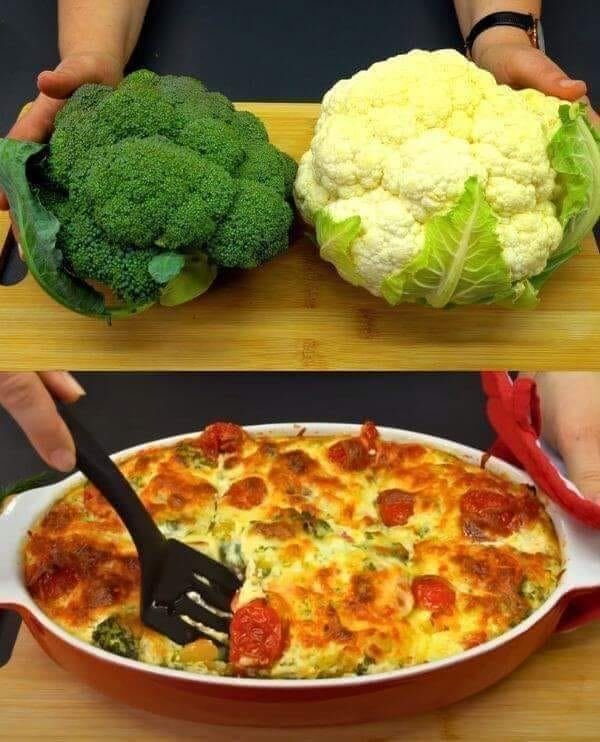
Creamy Broccoli & Cauliflower Bake

Creamy Broccoli & Cauliflower Bake

Prep time: 15 mins | Cook time: 30 mins | Servings: 6-8

Ingredients

  • Vegetables: 900g broccoli, 450g cauliflower.

  • Aromatics: 1 onion, 1 carrot, 1 bell pepper, 1 garlic clove.

  • Liquid & Seasoning: 5 cups milk, salt to taste, 2 tablespoons olive oil, parsley to taste.

  • Topping: 200g red cherry tomatoes.

  • Note: For the cheesy topping seen in the photo, you will also need about 1-2 cups of shredded mozzarella or cheddar cheese.


Step-by-Step Instructions

1. Prepare the Vegetables

  • Wash the broccoli and cauliflower thoroughly.

  • Cut them into bite-sized florets.

  • Steam or boil the florets in lightly salted water for about 5 minutes until they are tender-crisp. Drain well and place them into a large baking dish.

2. Sauté the Aromatics

  • Finely dice the onion, carrot, and bell pepper. Mince the garlic.

  • Heat the olive oil in a pan over medium heat. Add the onion and sauté until translucent.

  • Add the carrot, bell pepper, and garlic. Cook for another 3–4 minutes until softened.

3. Create the Creamy Base

  • In a large bowl, whisk the 5 cups of milk with salt and parsley.

  • If you prefer a thicker sauce, you can whisk 3 tablespoons of flour into the milk before heating it gently in a saucepan until it slightly thickens.

  • Stir your sautéed vegetables into this milk mixture.

4. Assemble the Bake

  • Pour the creamy mixture over the broccoli and cauliflower in the baking dish.

  • Arrange the 200g of cherry tomatoes on top.

  • Sprinkle a generous layer of shredded cheese over the entire surface to achieve the golden crust shown in the picture.

5. Bake

  • Preheat your oven to 200°C (400°F).

  • Bake for 20–25 minutes, or until the sauce is bubbling and the cheese is melted and browned into a beautiful crust.

6. Serve

  • Let the dish rest for 5 minutes before serving to allow the sauce to set.


Pro-Tip

To make it even more “melt-in-your-mouth,” ensure the broccoli and cauliflower are drained very well after boiling so the extra water doesn’t thin out your creamy milk sauce.

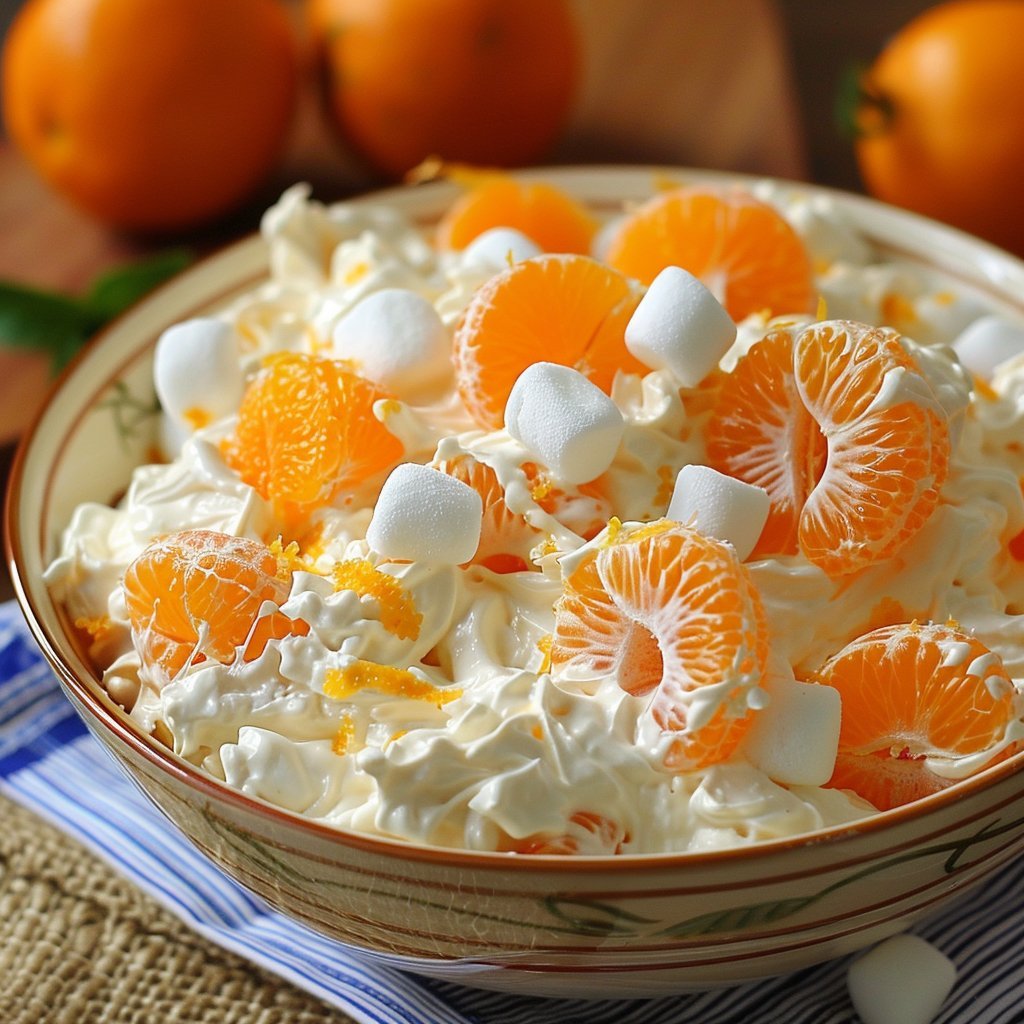
🍊 Orange Dreamsicle Salad

🍊 Orange Dreamsicle Salad

A sweet, creamy, no-bake dessert with bright orange flavor

⏱ Prep Time: 10 minutes

❄ Chill Time: 2–3 hours

🍽 Serves: 6–8


🧾 Ingredients

  • 1 package orange gelatin (such as Jell-O)

  • 1 package instant vanilla pudding mix

  • 1 cup hot water

  • ½ cup cold water

  • 1 (8 oz) container whipped topping (such as Cool Whip)

  • 1 (14 oz) can mandarin oranges, drained

  • 1 cup mini marshmallows


👩‍🍳 Step-by-Step Instructions

✅ Step 1: Dissolve the Gelatin

  1. Put the orange gelatin powder into a large mixing bowl.

  2. Add 1 cup hot water.

  3. Stir until the gelatin is fully dissolved.


✅ Step 2: Add Cold Water

  1. Pour in ½ cup cold water.

  2. Mix well.

  3. Place the bowl in the refrigerator for 15 minutes.


✅ Step 3: Add the Pudding Mix

  1. Remove the bowl from the fridge.

  2. Slowly sprinkle in the vanilla pudding mix while stirring.

  3. Mix until smooth with no lumps.

  4. Return to the fridge for 15–20 minutes, until it begins to thicken.


✅ Step 4: Fold in the Rest

  1. Gently fold in:

    • Whipped topping

    • Drained mandarin oranges

    • Mini marshmallows

  2. Mix carefully so it stays light and fluffy.


✅ Step 5: Chill

  1. Cover the bowl.

  2. Refrigerate for 2 to 3 hours before serving.


🍽 Serving Tips

  • Serve cold

  • Garnish with extra mandarin oranges if desired

  • Great for potlucks, holidays, and family gatherings


⭐ Why This Recipe Works

  • No baking required

  • Takes only minutes to prepare

  • Sweet, creamy, and fruity

  • Kid-friendly

  • Perfect make-ahead dessert


This dessert really does taste like an orange creamsicle in salad form — creamy vanilla, juicy oranges, and soft marshmallows in every bite. It looks simple, but everyone thinks you worked hard on it.

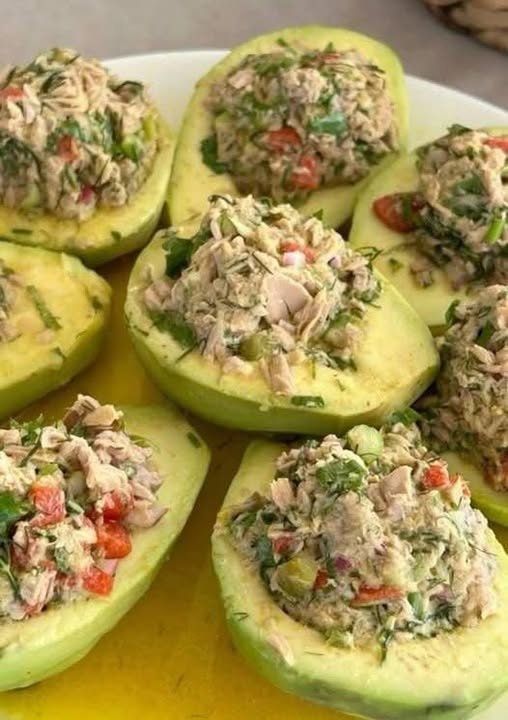
Tuna‑filled avocado boats

Tuna-Filled Avocado Boats

Table of Contents

Tuna-filled avocado boats are a quick, nutritious, and satisfying meal that combines creamy avocados with protein-packed tuna. This recipe is perfect for lunch, a light dinner, or even a healthy snack. The natural richness of avocado pairs beautifully with the tangy, savory tuna filling, creating a balanced dish that is low in carbs and high in healthy fats. It’s also highly customizable—you can keep it simple or add your favorite herbs, vegetables, or spices for extra flavor. Best of all, it requires minimal cooking, making it ideal for busy days when you want something wholesome without spending hours in the kitchen.

Preparation Time: 10 minutes

Cooking Time: 0 minutes

Total Time: 10 minutes

Servings: 2

Ingredients

2 ripe avocados

1 can (150–170g) tuna, drained

2 tbsp mayonnaise or Greek yogurt

1 tbsp lemon juice

1 tbsp finely chopped onion

1 tbsp chopped fresh parsley or cilantro

Salt and black pepper to taste

½ tsp mustard (optional)

1 tbsp chopped celery or cucumber (optional for crunch)

Instructions

Cut the avocados in half and remove the pits.

Scoop out a small portion of the flesh to create a larger cavity; set aside.

In a bowl, mash the scooped avocado lightly.

Add drained tuna to the bowl.

Mix in mayonnaise or yogurt and lemon juice.

Add chopped onion, herbs, and optional celery or cucumber.

Season with salt, pepper, and mustard if using.

Stir until well combined but still slightly chunky.

Spoon the tuna mixture evenly into the avocado halves.

See also  Mediterranean Melt-in-Your-Mouth Garlic Parmesan Chicken Meatloaf

Serve immediately, garnished with extra herbs or a squeeze of lemon.

Tips

Use ripe but firm avocados to hold the filling.

Drain tuna well to avoid a watery mixture.

Add lemon juice to prevent avocado browning.

Use Greek yogurt for a lighter option.

Chill the filling for 10 minutes for better flavor.

Add chili flakes for a spicy kick.

Use fresh herbs for maximum freshness.

Serve on lettuce leaves for presentation.

Avoid over-mixing to keep the texture appealing.

Eat immediately for best taste and color.

Variations

Add boiled eggs for extra protein.

Mix in sweet corn for sweetness.

Use canned salmon instead of tuna.

Add diced tomatoes for freshness.

Include avocado chunks instead of mashing fully.

Add cheese like feta or cheddar.

Make it spicy with hot sauce or jalapeños.

Replace mayo with hummus.

Add olives for a Mediterranean twist.

Use curry powder for a unique flavor.

Q&A

Can I make this ahead?

Best fresh, but filling can be made 1 day ahead.

How to store leftovers?

Keep in an airtight container; refrigerate for up to 1 day.

Can I skip mayo?

Yes, use yogurt or olive oil.

Is it keto-friendly?

Yes, very low in carbs.

Can I use fresh tuna?

Yes, cooked and flaked.

How to keep avocado from browning?

Add lemon juice.

Is it gluten-free?

Yes.

Can kids eat it?

Yes, mild and nutritious.

What to serve with it?

Salad, toast, or crackers.

Can I freeze it?

Not recommended due to avocado texture.

Nutrition (per serving approx.)

Calories: 300–350

Protein: 18–22g

Fat: 22–26g

Carbohydrates: 6–8g

Fiber: 5–7g

Conclusion

Tuna-filled avocado boats are a perfect blend of simplicity, nutrition, and flavor. With minimal prep time and endless variations, this recipe fits into almost any diet—from low-carb to high-protein lifestyles. Whether you’re looking for a quick meal or a healthy snack, these avocado boats deliver both taste and nourishment in every bite. Try experimenting with different add-ins to make it your own and enjoy a wholesome dish that’s as easy as it is delicious!