Preserved Tomatoes with Garlic & Cabbage 🍅🧄

Preserved Tomatoes with Garlic & Cabbage 🍅🧄

Ingredients

  • 2 kg small tomatoes
  • 1 medium cabbage, shredded
  • 6 garlic cloves
  • 2 tbsp salt
  • 1 tbsp sugar
  • 1 liter water
  • Black peppercorns (optional)
  • Bay leaves (optional)

Full Process

1. Prepare the Tomatoes

  • Wash tomatoes well.
  • Make a small X cut on the bottom of each tomato.

2. Prepare the Jars

  • Sterilize large glass jars with hot water.
  • Let them dry completely.

3. Layer the Ingredients

  • Add some shredded cabbage to the bottom.
  • Add tomatoes and garlic cloves.
  • Continue layering cabbage and tomatoes until jars are full.

4. Make the Brine

  • Mix water, salt, and sugar until dissolved.
  • Pour into jars until tomatoes are fully covered.

5. Seal & Store

  • Close jars tightly with lids.
  • Keep in a cool dark place for 7–10 days.

6. Ready to Enjoy

  • After fermentation, store in the refrigerator.
  • Serve chilled with meals or salads.

Fresh, tangy, and delicious all winter long! 😋🍅

Zucchini Fritters

These crispy zucchini fritters are golden on the outside, soft and  cheesy on the inside, and packed with fresh flavor. Made with grated zucchini, eggs, herbs, garlic, and melted mozzarella  cheese, they’re perfect for breakfast, lunch, dinner, or a quick savory snack. Serve them with yogurt sauce, sour cream, or a fresh salad for an easy and satisfying meal.

Cheese

Ingredients

  • 2 medium zucchinis, grated
  • 1 tsp salt
  • 2 large eggs
  • 1 cup shredded mozzarella cheese
  • 1/3 cup all-purpose flour
  • 2 tbsp chopped fresh dill or parsley
  • 2 garlic cloves, minced
  • 1/2 tsp black pepper
  • 2–3 tbsp oil for frying

Optional Add-Ins

  • Green onions
  • Parmesan cheese
  • Crumbled feta
  • Red pepper flakes

Instructions

Step 1: Prepare the Zucchini

Grate the zucchini into a bowl and sprinkle with salt. Let sit for 10 minutes to release excess moisture.

Dairy & Eggs

Step 2: Remove Moisture

Place the zucchini in a clean kitchen towel or cheesecloth and squeeze out as much liquid as possible. This helps make the fritters crispy.

Step 3: Make the Batter

In a large bowl, combine the squeezed zucchini, eggs, mozzarella cheese, flour, herbs, garlic, and black pepper. Mix until fully combined.

Cheese

Step 4: Cook the Fritters

Heat oil in a skillet over medium heat. Scoop about 2 tablespoons of batter for each fritter and flatten slightly.

Cook for 3–4 minutes per side until golden brown and cooked through.

Step 5: Serve

Serve warm with sour cream, garlic yogurt sauce, ranch dip, or fresh herbs.

Discover more
Slow Cookers
Crockpot
CrockPot

Tips

  • Drain zucchini well to avoid soggy fritters.
  • Add extra flour if the batter feels too wet.
  • Air fry at 375°F for 10–12 minutes for a lighter version.

Nutrition (Per Serving)

  • Calories: 220
  • Protein: 11g
  • Carbs: 10g
  • Fat: 15g
  • Fiber: 2g

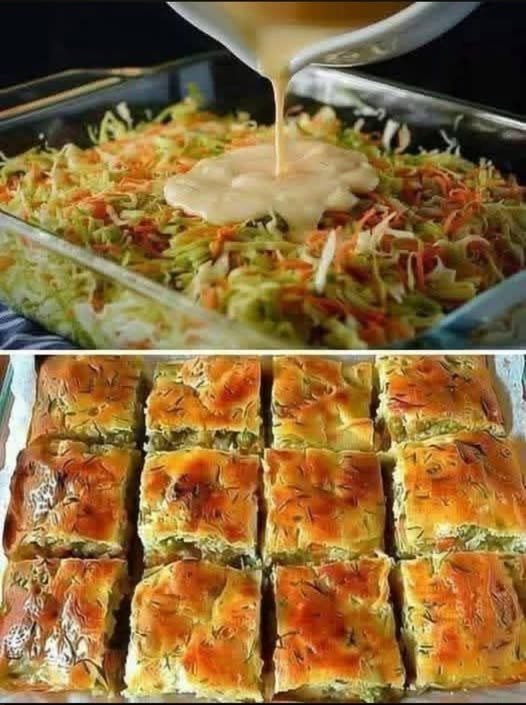
Golden Cabbage & Veggie Bake

Golden Cabbage & Veggie Bake

Description

Golden Cabbage & Veggie Bake is a warm, wholesome casserole filled with tender cabbage, colorful vegetables, creamy cheese, and a perfectly golden baked topping. This comforting dish is packed with flavor, texture, and nourishing ingredients, making it perfect as a vegetarian main course or hearty side dish. With its crispy top and soft savory center, this easy bake is ideal for family dinners, meal prep, or cozy comfort meals.

Ingredients For the Vegetable Bake

  • 4 cups cabbage, chopped
  • 1 cup carrots, shredded
  • 1 zucchini, diced
  • 1 bell pepper, chopped
  • 1 small onion, diced
  • 2 garlic cloves, minced
  • 2 tbsp olive oil
  • 1 tsp Italian seasoning
  • ½ tsp paprika
  • Salt and black pepper to taste

For the Creamy Mixture

  • 2 eggs
  • ½ cup milk
  • 1 cup shredded cheddar cheese
  • ¼ cup grated Parmesan cheese

Optional Topping

  • ½ cup breadcrumbs
  • Fresh parsley

Instructions

Step 1: Preheat Oven

Preheat oven to 375°F (190°C). Grease a baking dish.

Step 2: Sauté Vegetables

Heat olive oil in a skillet over medium heat. Cook onion and garlic for 2 minutes. Add cabbage, carrots, zucchini, and bell pepper. Sauté for 5–7 minutes until slightly softened.

Step 3: Season

Stir in Italian seasoning, paprika, salt, and black pepper.

Step 4: Make Cream Mixture

In a bowl, whisk eggs and milk together. Stir in cheddar cheese and Parmesan cheese.

Step 5: Assemble

Transfer vegetables into the prepared baking dish. Pour cheese mixture evenly over the vegetables. Sprinkle breadcrumbs on top if using.

Step 6: Bake

Bake for 30–35 minutes until golden brown and set.

Step 7: Serve

Garnish with parsley and serve warm.

Recipe Notes

  • Cabbage becomes tender and naturally sweet after baking.
  • Cheese creates a rich and creamy texture.
  • Breadcrumbs add delicious crunch on top.
  • Fresh vegetables give the best flavor and texture.

Tips for Best Results

  • Do not overcook vegetables before baking.
  • Drain excess moisture from zucchini if needed.
  • Use freshly shredded cheese for smoother melting.
  • Let the casserole rest for 5 minutes before slicing.

Servings

Serves: 6

Nutritional Information (Approx. Per Serving)

  • Calories: 220
  • Protein: 10g
  • Carbohydrates: 14g
  • Fat: 14g
  • Fiber: 4g
  • Sodium: 340mg

(Nutritional values may vary depending on ingredients used.)

Health Benefits

  • Cabbage is rich in fiber, vitamin C, and antioxidants.
  • Mixed vegetables provide important vitamins and minerals.
  • Homemade veggie bakes are filling and nutrient-dense.
  • Great vegetarian option with balanced nutrients.
  • Supports healthy digestion thanks to fiber-rich vegetables.

Q&A About Golden Cabbage & Veggie Bake

Q: Can I make this recipe vegan?

Yes, use plant-based cheese, milk, and egg substitutes.

Q: Can I add protein?

Absolutely. Chicken, turkey, or beans work well.

Q: What cheese works best?

Cheddar, mozzarella, Monterey Jack, or feta are great options.

Q: Can I prepare this ahead of time?

Yes, assemble the bake ahead and refrigerate until ready to cook.

Q: How long do leftovers last?

Store in the refrigerator for up to 4 days.

Q: Can I freeze this casserole?

Yes, freeze tightly wrapped portions for up to 2 months.

Q: What can I serve with this dish?

Soup, salad, roasted meat, or crusty bread pair beautifully.

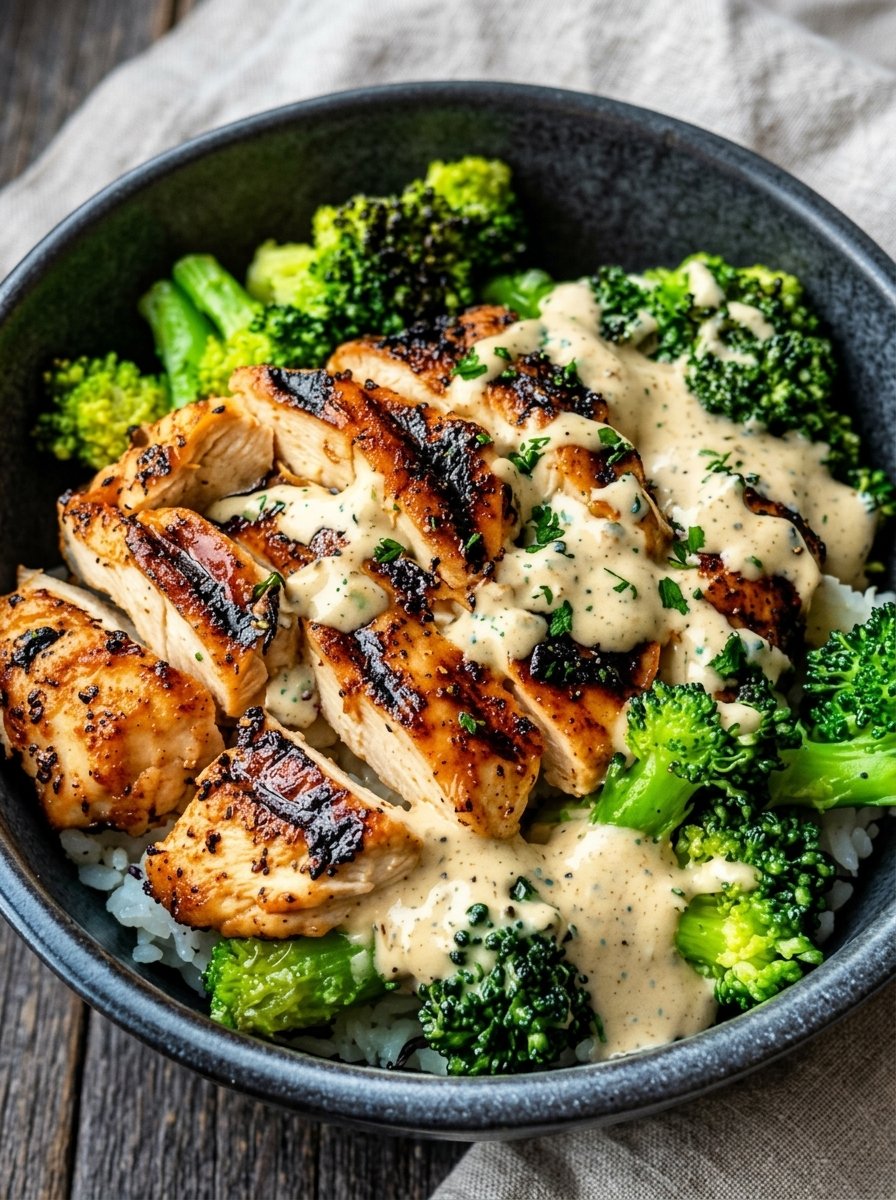
Creamy Garlic Grilled Chicken & Broccoli Bowl

Creamy Garlic Grilled Chicken & Broccoli Bowl 🥗🍗

This recipe is a wholesome, high-protein meal that is perfect for a quick dinner or healthy meal prep. It’s light, flavorful, and easy to customize!

  • Servings: 2 people 👥

  • Prep time: 10 minutes 🔪

  • Cook time: 15 minutes 🍳


Ingredients 🛒

The Base:

  • 2 Chicken breasts (sliced into thin strips) 🐔

  • 2 cups Broccoli florets (fresh or frozen) 🥦

  • 1 cup Cooked rice (Choose white, brown, or cauliflower rice for a lighter meal) 🍚

  • 1 tbsp Olive oil 🫒

  • Seasoning: ½ tsp garlic powder, ½ tsp paprika, salt, and black pepper to taste. 🧂

The Creamy Sauce:

  • ¼ cup Plain Greek yogurt (a great high-protein base) 🥣

  • 1 tbsp Dijon mustard 🍯

  • 1 tsp Lemon juice (freshly squeezed) 🍋

  • 1 clove Garlic (finced finely) 🧄

  • 1–2 tsp Water (to adjust the thickness) 💧


Step-by-Step Instructions 📝

  1. Season the Chicken ➡️ Place your chicken strips in a bowl and toss with olive oil, garlic powder, paprika, salt, and pepper. Ensure every piece is evenly coated for maximum flavor.

  2. Grill to Perfection ➡️ Heat a grill pan or heavy skillet over medium-high heat. Place the chicken strips in the pan. Pro-Tip: Let them sear undisturbed for about 4 minutes to get those beautiful golden char marks. Flip and cook for another 4–5 minutes until fully cooked through. Set aside to rest.

  3. Steam the Broccoli ➡️ While the chicken is cooking, steam your broccoli florets for about 4–5 minutes. You want them to be vibrant green and fork-tender, not soft or mushy.

  4. Whisk the Sauce ➡️ In a small bowl, combine the Greek yogurt, mustard, lemon juice, and minced garlic. Whisk thoroughly, adding a teaspoon of water at a time until it reaches a smooth “drizzling” consistency.

  5. Assemble the Bowl ➡️ Scoop the cooked rice into two bowls. Arrange the steamed broccoli around the sides and lay the warm grilled chicken strips right in the center.

  6. The Final Touch ➡️ Drizzle the creamy garlic sauce generously over the chicken and broccoli. 🌟 Garnish with a little fresh parsley or red pepper flakes if you like a tiny kick of heat!


Common Questions & Answers ❓

Q: Can I use different vegetables? A: Absolutely! 🥕 Asparagus, green beans, or sliced bell peppers are wonderful alternatives if you want to switch things up.

Q: How do I store leftovers? A: Keep the chicken, rice, and broccoli in an airtight container in the fridge for up to 3 days. 🧊 It is best to keep the sauce in a separate small jar and add it after you’ve reheated your meal.

Q: Is there a substitute for Greek yogurt? A: If you prefer, you can use sour cream or a dairy-free plain yogurt alternative for a similar creamy texture. 🥣

Q: What if I don’t have a grill pan? A: A regular non-stick skillet works perfectly fine! You will still get a delicious sear on the chicken. 🥘


Success Tips ✨

  • Don’t Overcrowd: When grilling the chicken, give the pieces some space so they sear properly instead of steaming.

  • Bright Broccoli: To stop the cooking process and keep the broccoli bright green, you can give it a quick rinse under cold water after steaming.

  • Flavor Boost: Grating a little lemon zest into the sauce adds an extra punch of freshness! 🍋

Golden Crispy Cheesy Potato Cakes

🥔 Golden Crispy Cheesy Potato Cakes

This recipe makes about 8–10 cakes and is perfect as a side dish or a light snack.

🛒 Ingredients

  • 2 cups Cold mashed potatoes (plain or seasoned)

  • 1 cup Shredded cheddar or mozzarella cheese 🧀

  • 1 Large egg (lightly beaten) 🥚

  • ¼ cup All-purpose flour (plus extra for coating)

  • 2 tablespoons Fresh parsley or green onions, finely chopped 🌿

  • ½ teaspoon Garlic powder

  • Salt and Black pepper to taste 🧂

  • 2-3 tablespoons Olive oil or butter for pan-frying 🍳


👩‍🍳 Step-by-Step Instructions

  1. Mix the Base ➡️ In a large bowl, combine the cold mashed potatoes, shredded cheese, chopped parsley (or green onions), garlic powder, and the beaten egg. 🥣

  2. Bind it Together ➡️ Stir in the flour. The mixture should be firm enough to hold its shape. ➡️ Tip: If the mixture feels too sticky, add another tablespoon of flour. 🥄

  3. Shape the Cakes ➡️ Scoop about ¼ cup of the mixture and roll it into a ball. Flatten it gently with your palms to form a patty about ½ inch thick. ✋

  4. Light Coating ➡️ Lightly dredge each patty in a little bit of extra flour. This is the secret to getting that extra crispy crust! ✨

  5. Heat the Pan ➡️ Heat the oil or butter in a large non-stick skillet over medium heat. 🍳

  6. Fry until Golden ➡️ Place the cakes in the pan (don’t crowd them!). Fry for 3–4 minutes per side until they are deep golden brown and crispy. ➡️ 🔃

  7. Drain & Garnish ➡️ Remove the cakes and place them on a plate lined with a paper towel to remove excess oil. Sprinkle with a little extra fresh parsley. 🌿


❓ Common Questions & Answers

Q: Can I make these in the air fryer? A: Yes! Lightly spray the cakes with oil and air fry at 400°F (200°C) for about 10–12 minutes, flipping halfway through until crispy. 💨

Q: My potato cakes are falling apart in the pan. Why? A: This usually happens if the potatoes are too warm or the mixture is too wet. Make sure to use cold mashed potatoes and add enough flour to create a dough-like consistency. 💡

Q: Can I add other ingredients? A: Definitely! Finely diced cooked turkey or small pieces of steamed broccoli work great inside these cakes for extra flavor. 🥦

Q: What should I serve these with? A: They are delicious with a dollop of sour cream, Greek yogurt, or even a little bit of spicy ranch dip on the side! 🍯


✨ Pro Tip

If you have leftover mashed potatoes from dinner, store them in the fridge overnight. Cold potatoes contain more starch, which helps these cakes stay together perfectly without needing too much flour! 🥔🔥

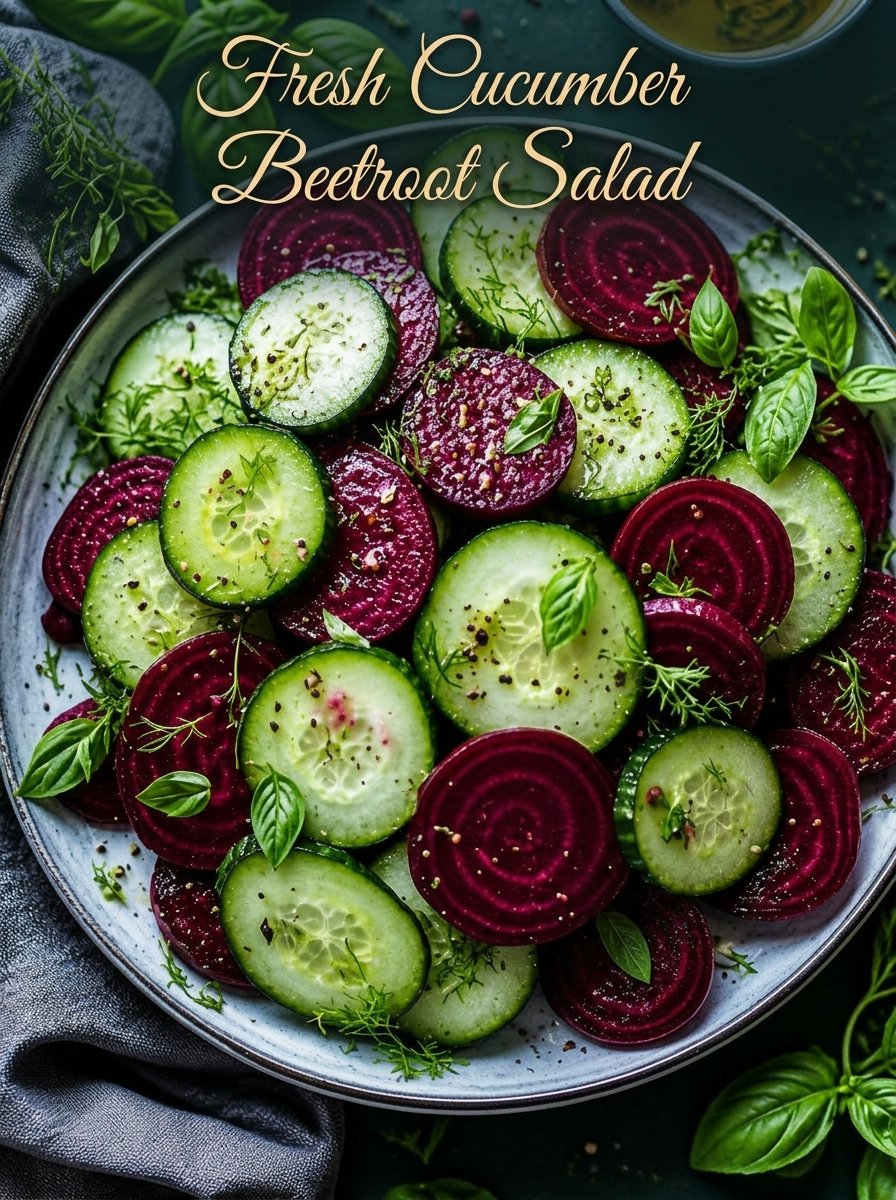
Fresh Cucumber Beetroot Salad 

Fresh Cucumber Beetroot Salad

🛒 Ingredients

  • Cucumber (thinly sliced)
  • Beetroot (thinly sliced, raw or cooked)
  • Olive oil
  • Lemon juice
  • Salt
  • Black pepper
  • Fresh dill or basil leaves

👩‍🍳 Step-by-Step Instructions

  • 🥒 Prepare the cucumber
    → Wash thoroughly and slice into thin, even rounds
    → If seeds are too watery, lightly pat slices dry
  • ❤️ Prepare the beetroot
    → If using raw beetroot: peel and slice very thin (use a sharp knife or slicer)
    → If using cooked beetroot: boil until tender, cool, then slice thinly
    → Keep slices uniform for a beautiful look and balanced taste
  • 🥗 Combine the base
    → In a large bowl, add cucumber and beetroot slices
    → Gently toss to mix the colors evenly
  • 🍋 Make the dressing
    → In a small bowl, mix olive oil with fresh lemon juice
    → Add a pinch of salt and black pepper
    → Stir well until slightly combined
  • 🫒 Dress the salad
    → Pour the dressing over the vegetables
    → Toss gently so every slice is lightly coated
  • 🌿 Add fresh herbs
    → Chop dill or basil leaves finely
    → Sprinkle on top for freshness and aroma
  • ⏳ Let it rest (optional but recommended)
    → Leave the salad for 5–10 minutes
    → This allows flavors to blend and enhances taste
  • 🍽️ Serve fresh
    → Serve immediately for a crisp texture
    → Or chill slightly for a refreshing cold salad

❓ Q&A

Q1: Can I use cooked beetroot instead of raw?
✔️ Yes! Cooked beetroot gives a softer texture and sweeter taste.

Q2: How do I keep the salad from getting watery?
✔️ Pat cucumber slices dry and avoid over-mixing after adding dressing.

Q3: Can I store this salad?
✔️ Best eaten fresh, but you can refrigerate for up to 1 day.

Q4: Can I add extra ingredients?
✔️ Yes! Feta cheese, nuts, or onions can enhance flavor and texture.


✨ Light, refreshing, and packed with natural goodness!