Apple & Banana Oat Breakfast Pancakes

Apple & Banana Oat Breakfast Pancakes

This flourless recipe is a wonderful way to enjoy a hearty, satisfying breakfast made with whole-food ingredients. The combination of oats, fresh fruit, and protein-rich egg creates a balanced meal that provides lasting energy throughout your morning.

Ingredients

  • 1 cup Oatmeal (rolled or quick oats)

  • 1 Ripe banana, mashed

  • 1 Apple, grated

  • 1 Large egg

  • 200 ml Water

  • 1 tsp Vanilla extract

  • Small amount of oil for frying (such as olive or coconut oil)


Step-by-Step Instructions

  1. Prepare the Base: In a medium mixing bowl, combine the 1 cup of oatmeal with 200 ml of water. Let it sit for about 5 minutes to allow the oats to soften and absorb the liquid.

  2. Fruit Prep: While the oats soak, mash 1 ripe banana until smooth and grate 1 fresh apple.

  3. Mix the Batter: Add the mashed banana, grated apple, 1 egg, and 1 teaspoon of vanilla extract into the bowl with the oats. Stir everything together until you have a thick, consistent batter.

  4. Heat the Pan: Place a non-stick skillet over medium-low heat and add a small amount of your preferred cooking oil.

  5. Cook the Pancakes: Spoon small portions of the batter onto the skillet, pressing them down slightly with the back of the spoon to form rounds.

  6. Golden Finish: Cook for about 3–4 minutes on the first side until the bottom is golden brown and the edges feel stable. Carefully flip and cook for another 2–3 minutes on the other side.

  7. Serve: These are delicious served warm exactly as they are, or with a sprinkle of cinnamon on top for extra flavor.


Why this works

  • No Flour: By using oats instead of traditional flour, you increase the fiber content, which helps with digestion and keeps you feeling full longer.

  • Naturally Sweet: The combination of ripe banana and grated apple provides plenty of natural sweetness without the need for added refined sugars.

🍞 Crusty Air Fryer Artisan Bread

:


🍞 Crusty Air Fryer Artisan Bread

A light, fluffy loaf with a chewy crust. Perfect for dipping in olive oil or serving with soup.

🛒 Ingredients

  • All-Purpose Flour: $1\frac{1}{2}$ cups

  • Instant Yeast: $1\frac{1}{4}$ tsp

  • Salt: $1$ tsp

  • Granulated Sugar: $\frac{1}{2}$ tsp

  • Warm Water: $\frac{3}{4}$ cup (approx. $105^\circ\text{F}$ to $115^\circ\text{F}$)

  • Olive Oil: $1$ tsp

🥣 Step-by-Step Instructions

1. Mix and First Rise

  • In a large bowl, whisk the flour, yeast, salt, and sugar.

  • Add the warm water and olive oil. Stir until a very sticky dough forms.

  • Cover the bowl and let it rise in a warm, draft-free spot for 1 hour.

2. Shape and Second Rise

  • Turn the sticky dough onto a lightly floured surface.

  • The Technique: Gently pull the edges of the dough up toward the center to create a tension-filled round ball.

  • Flip the loaf over so the smooth side is up.

  • Place the loaf on a piece of parchment paper inside a 6” or 8” round pan.

  • Let it rise again in the pan for 1 hour. Just before baking, use a sharp knife to cut 2–3 shallow slits (scores) across the top.

3. The Air Fryer “Steam” Bake

  • Preheat your air fryer to 400°F for 10 minutes.

  • Place the pan into the basket.

  • The Pro Secret: Toss a few ice cubes into the bottom of the air fryer basket (outside of the bread pan). This creates steam for a crispier crust.

  • Bake at 400°F for 20–25 minutes until golden.

  • Carefully flip the bread over and bake for an additional 5 minutes to crisp the bottom.


💡 Baker’s Success Tips

  • The Sticky Factor: Don’t be tempted to add too much extra flour. High hydration (sticky dough) is what creates those beautiful air bubbles inside the bread.

  • Parchment Safety: Ensure the parchment paper doesn’t stick up too high, or it might hit the heating element and burn. Trim it to the height of your pan.

  • The Tap Test: Not sure if it’s done? Tap the bottom of the loaf; if it sounds hollow, it’s ready!


🧊 Storage

  • Room Temp: Up to 3 days in a bread box.

  • Fridge: Up to 5 days in an airtight container.

  • Freezer: Wrap tightly in foil and plastic for up to 3 months.

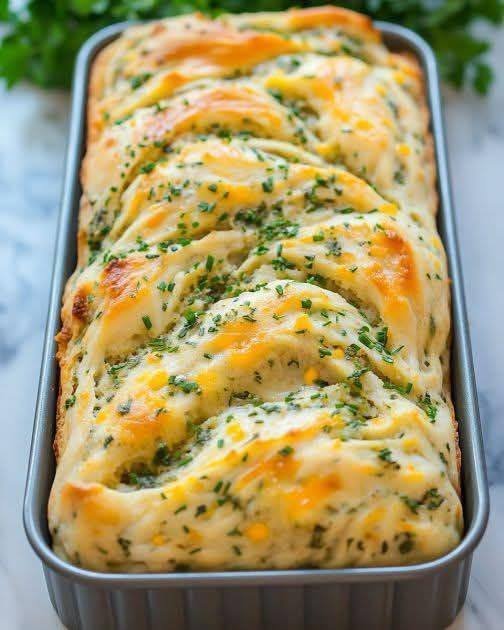
Mediterranean Swirled Garlic & Herb Cheese Bread

Mediterranean Swirled Garlic & Herb Cheese Bread

Prep Time: 25 minutes
Rise Time: 1 hour
Bake Time: 25–30 minutes
Total Time: About 2 hours
Serves: 8–10 slices

This Mediterranean Swirled Garlic & Herb Cheese Bread is a golden, buttery loaf packed with layers of melted cheese, fragrant herbs, and rich garlic flavor. It’s soft inside with a slightly crisp crust, making it perfect as a side for soups, pasta, or even as a stand-alone snack. The Mediterranean twist comes from aromatic herbs like oregano and parsley, paired with a touch of garlic and creamy cheese for that irresistible pull-apart texture.

Ingredients

For the Dough:

3 cups all-purpose flour

1 packet (2 ¼ tsp) instant yeast

1 tbsp sugar

1 tsp salt

¾ cup warm milk (about 110°F / 43°C)

2 tbsp olive oil

1 egg

For the Garlic Herb Cheese Filling:

1 ½ cups shredded cheddar cheese (or mozzarella, or a mix)

3 tbsp unsalted butter, melted

3 garlic cloves, minced

1 tsp dried oregano

½ tsp dried parsley

Instructions

Prepare the dough:
In a large mixing bowl, combine the flour, yeast, sugar, and salt. Stir to mix evenly.

Add wet ingredients:
Pour in the warm milk, olive oil, and egg. Mix until a soft dough forms. Knead for 7–8 minutes (by hand or mixer) until smooth and elastic. If the dough feels too sticky, add 1–2 tablespoons of flour.

First rise:
Place the dough in a lightly oiled bowl, cover it with a damp towel or plastic wrap, and let it rise for about 1 hour or until doubled in size.

See also  Crispy Cauliflower Fritters with Lemon Tahini Sauce

Make the filling:
In a small bowl, mix melted butter, minced garlic, oregano, and parsley. Set aside.

Shape the dough:
Once risen, punch down the dough and roll it out on a floured surface into a large rectangle (about 12×16 inches). Brush the garlic herb butter evenly over the dough, then sprinkle the shredded cheese on top.

Form the swirl:
Roll the dough tightly from the long side into a log. Slice the log lengthwise down the middle (leaving one end attached if you want a braid-style loaf). Twist or braid the two halves together, keeping the cut sides facing up to show the layers.

Second rise:
Transfer the shaped dough into a greased loaf pan or line it on parchment paper for a free-form loaf. Cover and let it rise again for 20–30 minutes.

Bake:
Preheat the oven to 180°C (350°F). Bake for 25–30 minutes, or until golden brown and the cheese is bubbling.

Finish:
Brush with a little melted butter after baking for extra softness and shine. Let cool for at least 10 minutes before slicing.

Tips:

Check your yeast: Make sure your yeast is active and not expired. If in doubt, dissolve it in warm milk with a pinch of sugar before adding it to the flour.

Warm milk temperature: The milk should be warm to the touch but not hot (about 110°F / 43°C). Too hot will kill the yeast.

Proper kneading: Knead the dough until it’s smooth and elastic. This helps the bread rise evenly and stay soft.

Don’t overload with cheese: Use the listed amount or slightly less. Too much cheese can make the bread heavy and affect rising.

See also  VEGAN BBQ PULLED CARROTS

Braid neatly: When twisting or braiding the dough, keep the cut layers facing up for that beautiful cheesy swirl on top.

Avoid overbaking: Once golden brown and firm on top, remove the bread from the oven. Overbaking can dry it out.

Variations:

Cheese options: Swap cheddar for mozzarella, feta, provolone, or a Mediterranean cheese blend.

Add herbs: Mix in fresh basil, thyme, or rosemary for more aroma.

Garlic lovers: Add roasted garlic to the filling for a sweeter, mellow flavor.

Spicy version: Sprinkle chili flakes or add a bit of harissa paste to the garlic butter for a Mediterranean heat.

Stuffed loaf twist: Add chopped sun-dried tomatoes or olives between the layers for extra Mediterranean flair.

Mini rolls: Roll the dough into smaller pieces before baking for individual servings — great for parties or side baskets.

Serving Suggestions:

Serve warm with olive oil for dipping or alongside soups and stews.

Pair with pasta dishes like creamy Alfredo or tomato-based sauces.

Toast leftovers and top them with avocado or poached eggs for a flavorful breakfast.

Q&A

Q: Can I make this bread ahead of time?
A: Yes. You can prepare the dough, shape it, and refrigerate it overnight before baking. Let it come to room temperature and rise for about 30 minutes before putting it in the oven.

Q: Can I use whole wheat flour instead of all-purpose flour?
A: You can substitute up to half the flour with whole wheat. The texture will be slightly denser but still soft and flavorful.

Q: What’s the best way to store it?
A: Keep the bread wrapped in foil or an airtight container at room temperature for up to 2 days. For longer storage, freeze it for up to 2 months and reheat in the oven before serving.

See also  Mediterranean Baked Orzo and Meatballs

Q: Can I make it without eggs?
A: Yes. Replace the egg with 3 tablespoons of milk or plain yogurt. The texture will still be soft, though slightly less rich.

Q: How do I make it extra cheesy?
A: Mix a bit of grated parmesan into the dough or sprinkle extra cheese on top before baking for an extra golden crust.

Nutrition

(per slice, based on 10 servings)

Calories: 265

Protein: 9g

Fat: 12g

Carbohydrates: 29g

Fiber: 1g

Sugar: 3g

Sodium: 340mg

(Values are approximate and may vary depending on cheese type and butter amount.)

Conclusion

This Mediterranean Swirled Garlic & Herb Cheese Bread is the perfect balance of soft, cheesy comfort and Mediterranean charm. The warm layers of garlic, herbs, and melted cheese make every slice rich and aromatic. It’s versatile enough to pair with your favorite pasta, soups, or salads — or to simply enjoy on its own, fresh from the oven.

Whether you bake it for a family dinner or a weekend treat, this bread is sure to impress with its beautiful swirled design, golden crust, and irresistible aroma. It’s the kind of recipe that turns simple ingredients into something truly special.

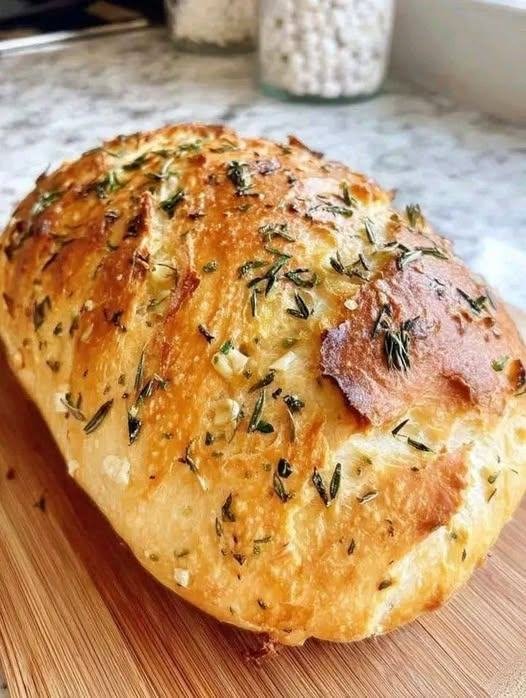
Cheesy Egg Flatbreads

Cheesy Egg Flatbreads

Cheesy Egg Flatbreads are soft, savory, and satisfying, combining simple pantry ingredients into a versatile meal that works for breakfast, lunch, or a quick dinner. These flatbreads are made from a light flour batter enriched with eggs and cheese, then cooked in a skillet until golden and slightly crisp on the outside while remaining tender inside. Fresh herbs add brightness and aroma, while different cheeses allow you to customize flavor from mild and creamy to bold and tangy. They are easy to prepare, require no yeast or long rising time, and can be enjoyed on their own or served with yogurt, chutney, or a fresh salad. Whether you prefer thin crepe-like flatbreads or thicker, fluffy rounds, this recipe adapts easily to your taste and cooking style.

Prep Time: 10 minutes
Cook Time: 15 minutes
Total Time: About 25 minutes
Servings: 6 small flatbreads

Ingredients

For the Dough/Batter

1 cup all-purpose flour or whole wheat flour

3/4 cup warm water or milk

2 large eggs

1/2 tsp salt

1/2 tsp baking powder or baking soda (optional, for fluffiness)

2 tbsp oil or ghee for cooking

For the Cheesy Egg Additions

3/4 cup grated cheese (cheddar, parmesan, feta, or cottage cheese)

1/4 cup chopped fresh herbs such as parsley, spring onions, or dill

Instructions

In a mixing bowl, whisk together eggs, warm water or milk, and salt until smooth.

Gradually add flour while whisking to form a lump-free batter or soft dough.

Mix in baking powder if using for a lighter texture.

Stir in grated cheese and chopped herbs evenly throughout the mixture.

Let the batter rest for about 5 minutes to hydrate the flour.

Heat a nonstick skillet over medium heat and add a small amount of oil or ghee.

Pour a ladle of batter into the pan and spread gently into a round shape.

Cook for about 2 to 3 minutes until bubbles form and the bottom turns golden.

Flip carefully and cook another 1 to 2 minutes until cooked through.

Repeat with remaining batter, adding oil as needed. Serve warm.

Tips

Adjust batter thickness depending on whether you want thin or thick flatbreads.

Use freshly grated cheese for better melting and flavor.

Letting the batter rest improves texture and consistency.

Cook on medium heat to prevent burning before the inside cooks.

Use a nonstick or well-seasoned pan for easy flipping.

Add herbs just before cooking to maintain fresh flavor.

If batter thickens too much, add a tablespoon of water or milk.

For extra crisp edges, cook with a little extra ghee.

Try mixing different cheeses for deeper flavor.

Serve immediately for the best texture and taste.

Variations

Spicy Chili Flatbread: Add chopped green chilies or chili flakes.

Garlic Herb Version: Include minced garlic and extra fresh herbs.

Mediterranean Style: Add olives, feta, and oregano.

Protein Boost: Add shredded chicken or turkey pieces.

Veggie Loaded Flatbread: Mix in grated zucchini or carrots.

Low-Carb Option: Replace part of the flour with almond flour.

Paneer Flatbread: Substitute cheese with crumbled paneer.

Sweet Savory Twist: Add a touch of honey and mild cheese.

Breakfast Wrap Style: Cook thin and fill with eggs and vegetables.

Crispy Cheese Crust: Sprinkle extra cheese on the pan before adding batter.

Q&A

Can I make the batter ahead of time?
Yes, refrigerate for up to 12 hours and stir before cooking.

Can I bake instead of pan-cooking?
Yes, bake small rounds at 375°F (190°C) for about 10 to 12 minutes.

What flour works best?
All-purpose flour creates softer flatbreads, while whole wheat gives a heartier texture.

Can I make them gluten-free?
Use a gluten-free flour blend designed for flatbreads.

How do I store leftovers?
Refrigerate in an airtight container for up to 2 days.

How do I reheat them?
Warm in a skillet or toaster oven to restore texture.

Can I freeze flatbreads?
Yes, freeze between parchment sheets for up to one month.

Are they kid-friendly?
Yes, mild cheese versions are usually very popular with kids.

What can I serve with them?
Yogurt dips, salads, chutneys, or soups pair well.

Can I use non-dairy cheese?
Yes, plant-based cheeses can work with slight texture changes.

Nutrition

(Approximate per Flatbread)

Calories: 170 to 200

Protein: 7 g

Fat: 8 g

Carbohydrates: 18 g

Fiber: 1 to 2 g

Sodium: Moderate depending on cheese

Calcium: Good source due to cheese and eggs

Conclusion

Cheesy Egg Flatbreads are a quick, flexible recipe that transforms everyday ingredients into a warm, comforting meal. The combination of eggs, cheese, and herbs creates a savory flavor that pairs well with countless sides and toppings. Easy preparation and customizable ingredients make these flatbreads suitable for busy weeknights, relaxed breakfasts, or casual gatherings. Whether you prefer them thin and crispy or soft and fluffy, they deliver satisfying texture and rich taste without complicated steps. With endless variations and simple cooking methods, this recipe is a reliable addition to any home cook’s collection.

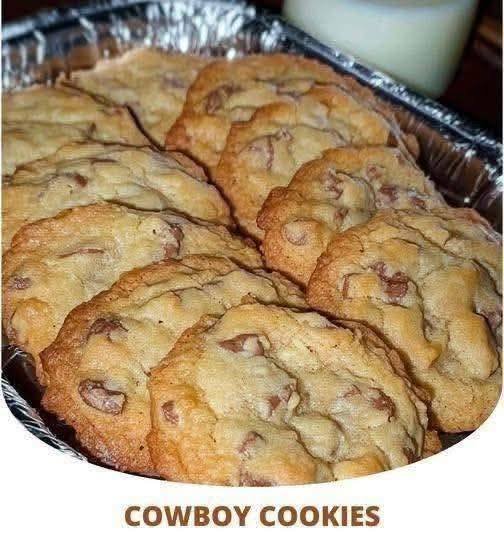
Sugar-Free 3-Ingredient Cowboy Cookies

Sugar-Free 3-Ingredient Cowboy Cookies

These are naturally sweetened and packed with fiber, making them a great diabetic-friendly option.


What You Need:

  • 2 Large Ripe Bananas (The riper they are, the sweeter the cookies will be).

  • 1 ½ Cups Rolled Oats (Use certified gluten-free oats if needed).

  • ⅓ Cup Sugar-Free Chocolate Chips (Sweetened with stevia or erythritol).


How to Make Them:

  1. Preheat & Prep: Preheat your oven to 350°F (180°C) and line a baking sheet with parchment paper or a silicone mat.

  2. Mash: In a medium bowl, mash the bananas with a fork until they are mostly smooth with few lumps.

  3. Mix: Stir in the rolled oats and the sugar-free chocolate chips until well combined.

  4. Scoop: Use a spoon or cookie scoop to place mounds of the dough onto the baking sheet. Flatten them slightly with the back of the spoon, as these cookies won’t spread much while baking.

  5. Bake: Bake for 12–15 minutes or until the cookies feel firm to the touch and are slightly golden.

  6. Cool: Let them cool on the pan for 5 minutes before moving them to a wire rack.


Tips for “Cowboy” Flair:

If you want to get closer to the traditional “Cowboy” style while staying low-calorie, you can add a pinch of cinnamon or a tablespoon of crushed walnuts to the mix!

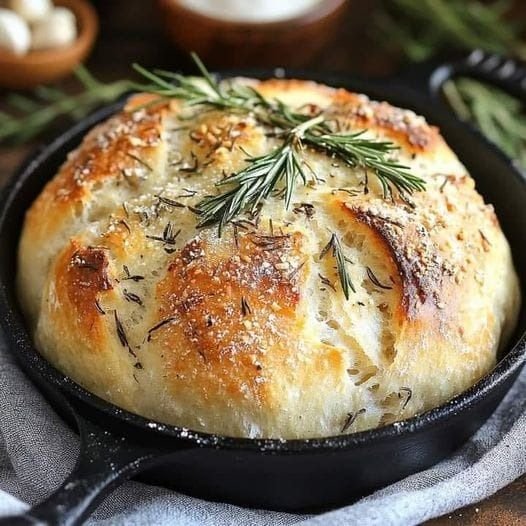
Rustic No Knead Rosemary Garlic Bread

Rustic No Knead Rosemary Garlic Bread

Table of Contents

This rustic no-knead rosemary garlic bread is warm, crusty, and flavorful the type of home-cooked comfort food that fills your house with a heady scent. Without the need for kneading or laborious procedures, this loaf, infused with aromatic rosemary and roasted garlic, has a golden, crackly top and a delightfully chewy centre. It’s the perfect addition to stews and soups, or it may be spread with butter for a delicious bite.

Ingredients:

3 cups all-purpose flour

3 cloves garlic, minced

1 tablespoon finely chopped fresh rosemary, or more, to taste

1 ¼ teaspoons kosher salt

¾ teaspoon freshly ground black pepper

½ teaspoon instant yeast

1 ½ cups water, at room temperature

2 tablespoons cornmeal

Directions:

In a large bowl, combine flour, garlic, rosemary, salt, pepper, and yeast.

Using a wooden spoon or your hand, add water and mix until a wet, sticky dough forms, about 30 seconds.

Cover the bowl tightly with plastic wrap and let stand at room temperature until the surface is dotted with bubbles, about 18 to 24 hours.

Lightly oil a 10-inch cast iron skillet or coat with nonstick spray; sprinkle with cornmeal.

Working on a lightly floured surface, gently shape the dough into a round.

Place the dough into the prepared skillet.

Cover with a clean dishtowel and let stand at room temperature until the dough has doubled in size and does not readily spring back when poked with a finger, about 2 hours.

Preheat oven to 450 degrees F. Place into oven and bake until golden brown, about 30-40 minutes.

See also  Easy Crispy Air Fryer Cod Recipe

Air Fryer Method:

Preheat air fryer to 375°F (190°C).

Punch down dough and shape into a round or oblong loaf.

Place loaf in air fryer basket, lined with parchment paper.

Drizzle olive oil over loaf and sprinkle with garlic, rosemary, and Parmesan cheese (if using).

Cook for 15-20 minutes or until bread is golden brown and sounds hollow when tapped.

Let cool on wire rack for 10-15 minutes before slicing.

Air Fryer Tips:

– Use parchment paper to prevent sticking.

– Rotate loaf halfway through cooking.

– Adjust cooking time based on air fryer model.

Servings: 8 servings Enjoy!