Ultimate Crock Pot Chicken and Dumplings

This Best Ever Crock Pot Chicken and Dumplings is the definition of a true “set it and forget it” comfort meal. Chicken thighs stay juicy and tender during the slow cook, and refrigerated biscuits make an easy shortcut for soft, fluffy dumplings—no homemade dough required.

Best Ever Crock-Pot Chicken and Dumplings

Ingredients

INGREDIENT AMOUNT
Boneless, skinless chicken thighs 6
Buttermilk refrigerated biscuits 1 can
Frozen mixed vegetables, thawed 2 cups
Chicken broth 2 cups
Cream of chicken soup 1 can
Cream of celery soup 1 can
Onion, diced 1
Fresh parsley, chopped (divided) 2 tablespoons
Poultry seasoning 1 teaspoon
Black pepper To taste

How to Make Best Ever Crock-Pot Chicken and Dumplings

Step 1: Build the Base
Scatter the diced onion evenly across the bottom of the crock pot. Arrange the chicken thighs in a single layer on top of the onions.

Step 2: Mix the Sauce
In a medium bowl, whisk together the cream of chicken soup, cream of celery soup, poultry seasoning, fresh parsley, and black pepper until smooth. Pour the mixture evenly over the chicken.

Discover more
Buttermilk
stuffed
Bread
Beef
Dressing
buttermilk
bread
gravy
Sunscreen
Meatloaf recipes cookbook

Step 3: Slow Cook
Pour the chicken broth over the contents of the crock pot. Cover and cook on high for 5 hours.
Important: Keep the lid closed for the first 4 hours to retain steam and ensure the chicken cooks properly.

Step 4: Shred the Chicken & Add Vegetables
With 1 hour remaining, remove the lid and add the thawed mixed vegetables. Shred the chicken directly in the crock pot using two forks, stirring to combine.

Step 5: Add the Dumplings
Lightly flatten each biscuit and cut into 4 long strips. Place the biscuit strips evenly over the top of the chicken mixture.

Discover more
gravy
Dressing
Buttermilk
buttermilk
bread
Beef
Bread
stuffed
Sunscreen
Vegetable

Step 6: Finish and Serve
Cover and continue cooking for the final hour. Once the dumplings are cooked through and fluffy, gently stir to distribute them throughout the dish. Serve hot, topped with additional fresh parsley if desired.
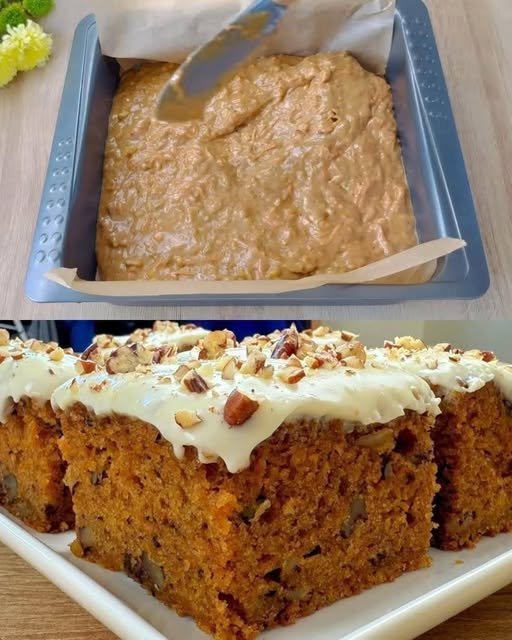
🥕 Moist Carrot Cake with Cream Cheese Frosting

🥕 Moist Carrot Cake with Cream Cheese Frosting

Soft • Spiced • Rich • Perfectly Balanced

This classic carrot cake is incredibly moist and tender, made with freshly grated carrots, warm spices, and a smooth cream cheese frosting. It bakes evenly, slices beautifully, and tastes even better the next day as the flavors deepen.


Recipe Overview

  • Prep Time: 20 minutes

  • Bake Time: 35–40 minutes

  • Cooling Time: 1 hour

  • Total Time: About 2 hours

  • Yield: 1 square cake (9–12 servings)


Why This Recipe Works

  • Oil keeps the cake moist for days

  • Fresh carrots add natural sweetness and texture

  • Balanced spices enhance flavor without overpowering

  • Cream cheese frosting adds gentle tang and richness

  • Simple mixing method prevents a dense crumb


Ingredients

For the Cake

  • 2 cups (250 g) all-purpose flour

  • 2 teaspoons baking powder

  • ½ teaspoon baking soda

  • ½ teaspoon salt

  • 1 teaspoon ground cinnamon

  • ½ teaspoon ground nutmeg

  • 1 cup (200 g) granulated sugar

  • 4 large eggs, room temperature

  • 1 cup (240 ml) vegetable oil

  • 2 cups (240 g) finely grated carrots

  • ½ cup (120 g) chopped walnuts or pecans (optional)


For the Cream Cheese Frosting

  • 8 oz (225 g) cream cheese, softened

  • ½ cup (115 g) unsalted butter, softened

  • 2 cups (250 g) powdered sugar, sifted

  • 1 teaspoon vanilla extract


Optional Garnish

  • Chopped nuts

  • Light dusting of cinnamon


Equipment Needed

  • 8×8-inch or 9×9-inch square baking pan

  • Mixing bowls

  • Whisk

  • Hand mixer or spatula

  • Parchment paper

  • Cooling rack


Step-by-Step Instructions

1. Prepare the Oven and Pan

  • Preheat oven to 350°F (180°C)

  • Line a square baking pan with parchment paper or grease well

  • Set aside


2. Mix the Dry Ingredients

  • In a medium bowl, whisk together:

    • Flour

    • Baking powder

    • Baking soda

    • Salt

    • Cinnamon

    • Nutmeg

This ensures even spice distribution.


3. Mix the Wet Ingredients

  • In a large bowl, whisk sugar and vegetable oil until smooth

  • Add eggs one at a time, mixing well after each addition

  • The mixture should look glossy and well blended


4. Combine and Fold

  • Gradually add the dry ingredients to the wet mixture

  • Fold gently until just combined

⚠️ Do not overmix to keep the cake tender.

  • Fold in grated carrots

  • Stir in chopped nuts if using


5. Bake

  • Pour batter into the prepared pan

  • Spread evenly

  • Bake for 35–40 minutes, or until a toothpick inserted in the center comes out clean


6. Cool Completely

  • Let the cake cool in the pan for 15 minutes

  • Transfer to a wire rack

  • Cool completely before frosting


Cream Cheese Frosting Instructions

7. Prepare the Frosting

  • In a bowl, beat softened cream cheese and butter until smooth

  • Gradually add powdered sugar, mixing slowly

  • Add vanilla extract

  • Beat until creamy, fluffy, and spreadable


8. Frost and Serve

  • Spread frosting evenly over the cooled cake

  • Garnish with chopped nuts if desired

  • Slice into squares and serve


Texture & Flavor Notes

  • Cake: soft, moist, and lightly spiced

  • Frosting: creamy, smooth, and gently tangy

  • Flavor improves after resting overnight


Storage Tips

  • Room temperature: Up to 1 day (covered)

  • Refrigerator: Up to 5 days

  • Freezer: Unfrosted cake freezes well up to 2 months


Optional Variations

  • Add ½ cup crushed pineapple, well drained

  • Mix in raisins or shredded coconut

  • Use brown sugar for deeper flavor

  • Make as cupcakes (bake 18–22 minutes)

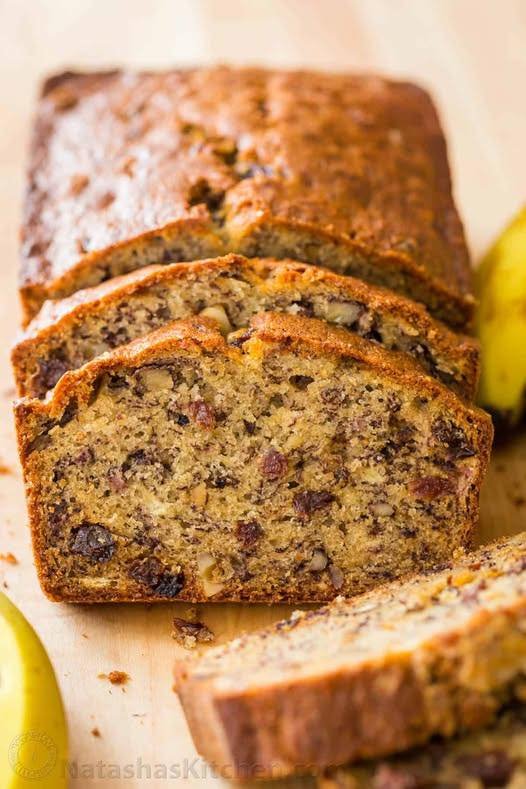
Moist Banana Nut Bread

Moist Banana Nut Bread

Soft • Rich • Nutty • Stays Fresh for Days

This classic Banana Nut Bread is perfectly moist with a tender crumb and a rich banana flavor. Made with very ripe bananas and toasted walnuts, it’s ideal for breakfast, tea time, or sharing as a homemade gift. The loaf slices cleanly and tastes even better the next day.


Recipe Overview

  • Prep Time: 10 minutes

  • Bake Time: 55–60 minutes

  • Total Time: About 1 hour 10 minutes

  • Yield: 1 loaf (about 10 slices)


Why This Recipe Works

  • Very ripe bananas add natural sweetness and moisture

  • Butter provides rich flavor and soft texture

  • Toasted walnuts enhance aroma and crunch

  • Gentle mixing keeps the loaf tender

  • Balanced ingredients prevent dryness or heaviness


Ingredients

Wet Ingredients

  • 3 very ripe bananas (medium to large)

  • ½ cup (8 tablespoons) unsalted butter, room temperature

  • ¾ cup granulated sugar
    (Honey may be used as a substitute for deeper flavor)

  • 2 large eggs, lightly beaten

  • ½ teaspoon vanilla extract


Dry Ingredients

  • 1½ cups all-purpose flour

  • 1 teaspoon baking soda

  • ½ teaspoon salt


Mix-Ins

  • 1 cup walnuts, toasted and coarsely chopped

  • ½ cup raisins
    (or chocolate chips, if preferred)


Equipment Needed

  • 9×5-inch loaf pan

  • Mixing bowls

  • Whisk

  • Rubber spatula

  • Wire cooling rack


Step-by-Step Instructions

1. Prepare the Oven and Pan

  • Preheat oven to 350°F (175°C)

  • Grease a 9×5-inch loaf pan with butter

  • Lightly dust with flour or line with parchment paper


2. Toast the Walnuts

  • Place walnuts in a dry skillet over medium heat

  • Stir continuously for 3–5 minutes, until fragrant

  • Remove from heat, let cool, then chop coarsely

Tip: Toasting brings out the natural oils and flavor of the nuts.


3. Cream Butter and Sugar

  • In a large bowl, beat the softened butter and sugar together

  • Mix until smooth, creamy, and pale

This step helps create a soft, even crumb.


4. Prepare the Banana Mixture

  • Mash bananas with a fork until they resemble chunky applesauce

  • Add mashed bananas to the butter mixture

  • Stir in the beaten eggs and vanilla extract

  • Mix until fully combined


5. Combine Dry Ingredients

  • In a separate bowl, whisk together:

    • Flour

    • Baking soda

    • Salt


6. Make the Batter

  • Add dry ingredients to the wet mixture

  • Gently fold until just combined

⚠️ Do not overmix — stop as soon as no dry flour remains.

  • Fold in the toasted walnuts and raisins evenly


7. Bake

  • Pour batter into the prepared loaf pan

  • Smooth the top gently

  • Bake for 55–60 minutes


8. Test for Doneness

  • Insert a toothpick into the center

  • It should come out clean or with a few moist crumbs

If needed, bake an additional 5 minutes and check again.


9. Cool Properly

  • Let the bread cool in the pan for 10 minutes

  • Transfer carefully to a wire rack

  • Cool completely before slicing


Texture & Flavor Notes

  • Inside: moist, soft, and banana-rich

  • Top: lightly golden with nutty crunch

  • Flavor deepens after resting overnight


Storage Tips

  • Room temperature: Wrap tightly, keeps fresh for 2–3 days

  • Refrigerator: Up to 5 days

  • Freezer: Slice and freeze up to 3 months


Optional Variations

  • Add ½ teaspoon cinnamon for warmth

  • Replace half the flour with whole wheat flour

  • Use pecans instead of walnuts

  • Add banana slices on top before baking for decoration

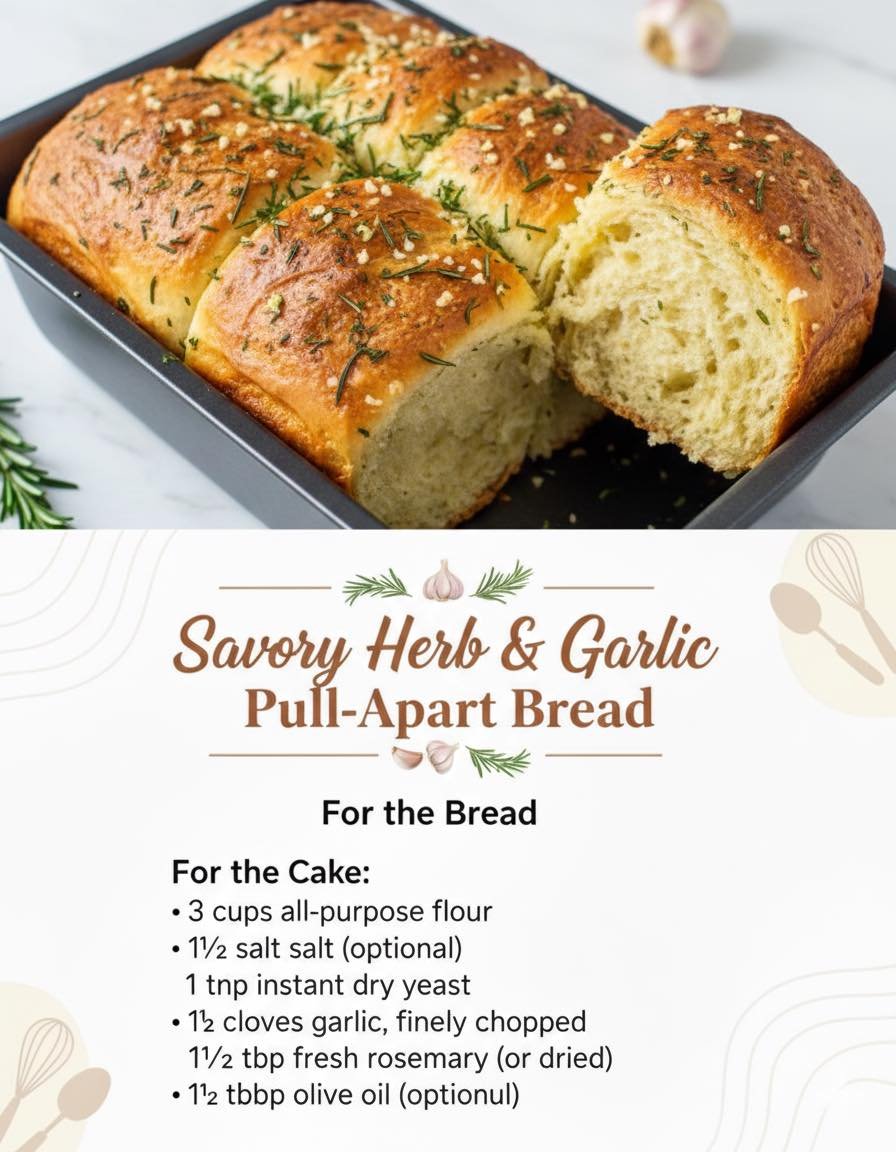
🧀 Savory Herb & Garlic Pull-Apart Bread

🧀 Savory Herb & Garlic Pull-Apart Bread

Soft • Aromatic • Golden • Perfect for Sharing

This Savory Herb & Garlic Bread is fluffy on the inside with a lightly crisp, golden top. Fresh garlic and herbs infuse every bite, while olive oil keeps the crumb tender and flavorful. Designed as a pull-apart loaf, it’s ideal for serving warm at the table.


Why This Recipe Works

  • Proper yeast activation ensures a light, airy texture

  • Olive oil adds softness and rich flavor

  • Fresh garlic and herbs create deep aroma

  • Two rises give excellent structure and fluffiness

  • Pull-apart shaping makes it easy to serve


Ingredients

For the Dough

  • 3 cups all-purpose flour, plus extra for dusting

  • 1 teaspoon salt

  • 2 teaspoons sugar

  • 2¼ teaspoons instant dry yeast (1 standard packet)

  • 1 cup warm water (about 105–110°F / 40–43°C)

  • 3 tablespoons olive oil

Flavor Add-Ins

  • 3 cloves garlic, finely minced

  • 1½ tablespoons fresh rosemary, finely chopped
    (or 1 teaspoon dried rosemary)

For the Top (Optional but Recommended)

  • 1–2 tablespoons olive oil or melted butter

  • Optional: pinch of salt or grated cheese


Step-by-Step Instructions

1. Activate the Yeast

  • In a small bowl, combine:

    • Warm water

    • Sugar

    • Yeast

  • Stir gently and let sit for 5–10 minutes

  • The mixture should become slightly foamy

Tip: If it doesn’t foam, the yeast may be inactive—start again for best results.


2. Mix the Dough

  • In a large bowl, whisk together:

    • Flour

    • Salt

    • Minced garlic

    • Chopped rosemary

  • Make a well in the center

  • Pour in:

    • Yeast mixture

    • Olive oil

  • Mix with a spoon or your hands until a shaggy dough forms


3. Knead the Dough

  • Transfer dough to a lightly floured surface

  • Knead for 5–8 minutes until:

    • Smooth

    • Elastic

    • Slightly tacky but not sticky

Adjustment Tip:
If the dough sticks, add flour 1 tablespoon at a time.


4. First Rise

  • Lightly oil a clean bowl

  • Place dough inside and turn once to coat

  • Cover with a damp cloth or plastic wrap

  • Let rise in a warm place for about 1 hour, or until doubled in size


5. Shape the Pull-Apart Pieces

  • Gently punch down the dough to release air

  • Divide into 8–10 equal portions

  • Roll each portion into a smooth ball

  • Arrange balls snugly in a greased loaf pan


6. Second Rise

  • Cover the pan loosely

  • Let rise again for 30 minutes

This step ensures a light, fluffy final texture.


7. Bake

  • Preheat oven to 375°F (190°C)

  • Brush the top with olive oil or melted butter

  • Bake for 25–30 minutes, until:

    • Top is golden brown

    • Bread sounds hollow when tapped


8. Cool and Serve

  • Let bread cool in the pan for 10 minutes

  • Remove gently and serve warm

  • Pull apart and enjoy the soft, herbed layers


Texture & Flavor Notes

  • Interior: soft, fluffy, and aromatic

  • Exterior: lightly crisp and golden

  • Flavor: savory garlic with fresh herb warmth


Storage Tips

  • Room temperature: Wrap and store up to 2 days

  • Refrigerator: Up to 4 days (reheat before serving)

  • Freezer: Freeze baked bread up to 2 months


Optional Variations

  • Add grated cheese between dough balls

  • Mix in parsley or thyme

  • Sprinkle sesame or herb seasoning on top

  • Brush with garlic-infused butter after baking

Crispy Turkish-Style Fried Eggplant

Crispy Turkish-Style Fried Eggplant

Yields: 4 Servings | Prep time: 15 mins | Cook time: 10–12 mins

Ingredients

The Base:

  • 2 Large eggplants

  • Salt (to taste, used for sweating and seasoning)

  • Water (for soaking)

The Coating:

  • 3 Eggs

  • 1/2 cup All-purpose flour

  • 1/2 cup Breadcrumbs (optional, for extra crunch)

  • 1/2 tsp Red pepper flakes (Pul Biber) or Paprika

  • 1/2 tsp Garlic powder

  • Vegetable oil (for frying)


Detailed Instructions

1. Prepare the Eggplants

  • Wash the 2 large eggplants.

  • You can peel them in a “zebra” pattern (strips of skin removed) or leave the skin on for texture.

  • Slice the eggplants into rounds or long strips about 1/2 inch thick.

2. Remove Bitterness (Sweating)

  • Place the eggplant slices in a large bowl and sprinkle generously with salt.

  • Let them sit for 10–15 minutes. This process draws out any bitter juices.

  • Rinse the slices under cold water and pat them completely dry with paper towels. Drying is key to ensuring the coating sticks and they don’t steam in the pan.

3. Set Up the Breading Station

  • In one shallow bowl, place the flour mixed with a pinch of salt, pepper flakes, and garlic powder.

  • In a second bowl, beat the 3 eggs thoroughly.

  • Optional: Place breadcrumbs in a third bowl if you prefer a thicker, crunchier crust.

4. Coat the Slices

  • Dredge each eggplant slice first in the flour, shaking off the excess.

  • Dip the floured slice into the beaten eggs, ensuring it is fully submerged.

  • If using breadcrumbs, press the egg-washed slice into the crumbs last.

5. Fry to Golden Perfection

  • Heat about 1 inch of vegetable oil in a large skillet over medium-high heat.

  • Once the oil is shimmering, add the eggplant slices in a single layer (do not overcrowd the pan).

  • Fry for 3–5 minutes per side until they are deep golden brown and the centers are tender when pierced with a fork.

6. Drain and Serve

  • Transfer the fried eggplants to a plate lined with paper towels to drain excess oil.

  • Serve immediately while hot and crispy.


Serving Suggestion

In Turkey, these are often served with a side of garlic yogurt sauce (plain yogurt mixed with minced garlic and a pinch of salt) and a drizzle of tomato sauce.

Classic Homemade Fluffy Doughnuts

Classic Homemade Fluffy Doughnuts

Soft, light doughnuts with a tender interior and a lightly crisp exterior. These are made with simple pantry ingredients and are best enjoyed fresh.


Yield

12–15 doughnuts

Time

  • Preparation: 20 minutes

  • Rising: 1½ hours

  • Cooking: 15 minutes


Ingredients

Dough

  • 3 cups all-purpose flour

  • 1 cup whole milk, warm (not hot)

  • 7 g active dry yeast

  • 5 tablespoons granulated sugar

  • 2 tablespoons unsalted butter, softened

  • 1 large egg, room temperature

  • ½ teaspoon salt

Frying and Coating

  • Vegetable oil, for frying

  • Granulated sugar or powdered sugar, for coating


Instructions

1. Prepare the Yeast

Pour the warm milk into a small bowl. Add 1 tablespoon of the sugar and stir to dissolve. Sprinkle the yeast over the milk and stir gently. Let it rest for 5–10 minutes until the mixture looks foamy. This shows the yeast is ready.


2. Mix the Dough

In a large bowl, combine the flour, remaining sugar, and salt. Make a well in the center. Add the egg, softened butter, and the yeast mixture. Stir with a spoon until a soft, rough dough forms.


3. Knead the Dough

Transfer the dough to a lightly floured surface.

  • Knead by hand for 8–10 minutes until smooth and elastic

  • Or knead with a mixer and dough hook for about 5 minutes

The dough should feel soft and slightly tacky but not sticky.


4. First Rise

Place the dough in a lightly greased bowl. Cover and let it rest in a warm place for about 1 hour, or until doubled in size.


5. Shape the Doughnuts

Gently press the dough to release air. Roll it out to about ½-inch thickness on a floured surface.

Cut doughnut shapes using a cutter or a large glass with a smaller cutter for the center. Place each doughnut on a small piece of parchment paper. Cover and let rest for 30 minutes.


6. Fry the Doughnuts

Heat about 2 inches of oil in a heavy pot to 350°F (175°C).

Carefully lower the doughnuts into the oil. Remove the parchment paper once it releases.

Fry for 1–2 minutes per side until evenly golden.

Transfer to paper towels to drain excess oil.


7. Coat and Serve

While still warm, roll the doughnuts in granulated sugar or dust with powdered sugar.

Serve fresh.


Helpful Notes

  • Keep oil temperature steady for even cooking

  • Do not overcrowd the pot

  • Best enjoyed the same day