Cloves: Nutritional Value and Gentle Ways to Use Them

Cloves: Nutritional Value and Gentle Ways to Use Them

Cloves are dried flower buds from the Syzygium aromaticum tree. They are widely used in cooking and traditional food preparations because of their strong aroma and naturally occurring plant compounds, including eugenol.

Nutritional Highlights

  • Naturally occurring antioxidants: Cloves contain plant compounds that help protect foods and the body from everyday environmental stress.

  • Manganese content: A small amount of ground cloves contributes to daily manganese needs, a mineral that supports normal bone structure and overall metabolism.

  • Digestive tradition: Cloves have long been included in meals and drinks to support comfortable digestion and reduce heaviness after eating.


Gentle Daily Use (Up to 2 Cloves)

Cloves have a strong flavor and should be used in small amounts. These methods allow you to enjoy them comfortably.

1. Clove-Infused Warm Drink

This is one of the mildest and most pleasant ways to use cloves.

Ingredients

  • 2 whole cloves

  • 1 cup hot water

  • Optional: a slice of lemon or a teaspoon of honey

Method

  • Place the cloves in hot water

  • Let steep for 5–10 minutes

  • Remove the cloves before drinking


2. Small Amounts in Breakfast Foods

Ground cloves can be blended easily into everyday meals.

How to use

  • Add a very small pinch (about the amount from 2 cloves) to oatmeal, yogurt, or smoothies

  • Pairs well with cinnamon, ginger, apples, or bananas


3. Flavoring Savory Dishes

Whole cloves can gently enhance cooked foods.

How to use

  • Add 1–2 whole cloves to rice water, soups, or stews while cooking

  • Remove the cloves before serving to keep the flavor balanced


Important Usage Notes

  • Use whole cloves or ground spice only: Concentrated clove extracts are much stronger than culinary cloves and are not intended for everyday food use.

  • Moderation matters: Small amounts are sufficient due to their strong natural oils.

  • Mouth comfort: Chewing raw cloves may feel intense for some people, so using them infused or cooked is usually more comfortable.


A Helpful Reminder

Spices like cloves are best enjoyed as part of a varied, balanced diet. They are commonly used to enhance flavor and support everyday wellness routines, but they are not substitutes for professional care when dealing with serious health concerns.

Mediterranean Swirled Garlic & Herb Cheese Bread

Mediterranean Swirled Garlic & Herb Cheese Bread

This soft pull-apart cheese bread is layered with fragrant garlic, herbs, and melted cheese. Each slice reveals beautiful swirls and delivers a comforting Mediterranean-inspired flavor. It is perfect for sharing with meals, soups, or enjoyed warm on its own.


Ingredients

For the Dough

  • 3 cups all-purpose flour

  • 1 packet (2¼ teaspoons) instant yeast

  • 1 tablespoon sugar

  • 1 teaspoon salt

  • 1 cup warm water (about 110°F / warm to the touch)

  • 2 tablespoons olive oil

For the Filling

  • 4 tablespoons unsalted butter, softened

  • 3 cloves garlic, finely minced

  • 1½ cups shredded cheese (mozzarella and cheddar combination works well)

  • 2 tablespoons fresh parsley, finely chopped

  • 1 teaspoon dried oregano or Italian seasoning

  • ¼ teaspoon red pepper flakes (optional)


Instructions

1. Prepare the Dough
In a large bowl, combine the flour, yeast, sugar, and salt. Add the warm water and olive oil. Mix until a soft dough forms.

2. Knead and Rest
Transfer the dough to a lightly floured surface and work it gently for about 5–7 minutes until smooth and elastic. Place it into a lightly greased bowl, cover, and allow it to rest in a warm area for 1 hour, or until it increases in size.

3. Make the Garlic Herb Butter
In a small bowl, mix together the softened butter, garlic, parsley, and dried herbs until evenly blended.

4. Shape the Dough
Roll the rested dough into a large rectangle, about 12 x 18 inches. Spread the garlic herb butter evenly over the surface, then sprinkle the shredded cheese across the top.

5. Create the Layers
Cut the dough into squares about 3–4 inches wide. Stack several squares together, keeping the layers aligned.

6. Arrange in the Pan
Lightly grease a loaf pan. Place the stacked dough pieces upright inside the pan, arranging them side by side so the layers are visible from the top. Cover and allow to rest for 20–30 minutes.

7. Bake
Preheat the oven to 350°F (175°C). Bake for 30–35 minutes, until the top is golden and the cheese is fully melted.

Tip: If the top colors too quickly, loosely cover with foil during the final minutes.

8. Serve
Let the bread rest in the pan for 10 minutes, then remove and serve warm.


Flavor Ideas

  • Add finely chopped sun-dried tomatoes for extra richness

  • Mix in sliced olives for a Mediterranean touch

  • Sprinkle a little extra parsley on top before serving

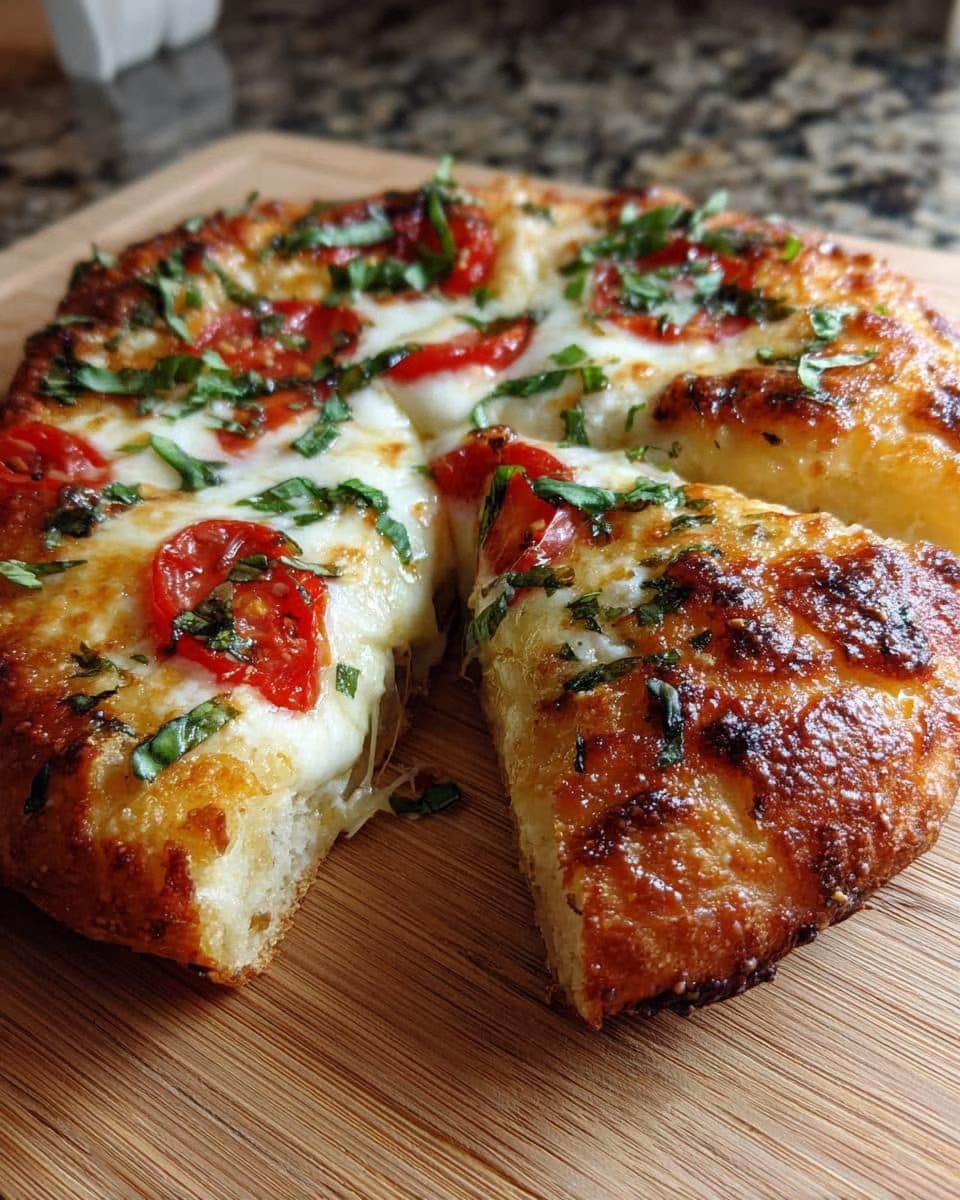
30-Minute Homemade Margherita Pizza (Detailed & Gentle Recipe) ✨🍕

30-Minute Homemade Margherita Pizza (Detailed & Gentle Recipe) ✨🍕

This classic Margherita pizza is all about simple ingredients and fresh flavor. With a soft crust, rich tomato sauce, creamy mozzarella, and fragrant basil, it comes together quickly and delivers bakery-style results at home. Perfect for busy days when you still want something special.


⏱️ Time & Yield

  • Total Time: 30 minutes

  • Servings: 2–3

  • Style: Simple, fresh, and comforting


🧾 Ingredients

For the Pizza Base

  • 1 prepared pizza dough (store-bought or homemade, room temperature)

  • 1 tablespoon olive oil (for brushing)

For the Sauce

  • ½ cup crushed tomatoes or pizza sauce

  • 1 tablespoon olive oil

  • 1 small garlic clove, finely minced

  • ¼ teaspoon salt

  • ¼ teaspoon dried oregano (optional)

Toppings

  • 200 g (about 7 oz) fresh mozzarella cheese, sliced or torn

  • 1 small tomato, thinly sliced (optional but lovely 🍅)

  • Fresh basil leaves, torn 🌿

  • Freshly ground black pepper (optional)


👩‍🍳 Step-by-Step Instructions

1️⃣ Preheat the Oven

Preheat your oven to 475°F (245°C).
If using a pizza stone or steel, place it in the oven while it heats for best results.


2️⃣ Prepare the Sauce

In a small bowl, mix together:

  • Crushed tomatoes

  • Olive oil

  • Garlic

  • Salt

  • Oregano (if using)

Stir until smooth and set aside.


3️⃣ Shape the Dough

Lightly flour your work surface.
Stretch or roll the dough into a round or oval shape, about 10–12 inches wide.
Transfer it to a parchment-lined baking tray or pizza peel.

Brush the edges lightly with olive oil for a golden finish.


4️⃣ Add Sauce and Toppings

Spread a thin, even layer of sauce over the dough, leaving a small border around the edges.
Arrange the mozzarella evenly on top, then add tomato slices if using.


5️⃣ Bake

Bake for 10–14 minutes, or until:

  • The crust is golden

  • The cheese is melted and lightly bubbling


6️⃣ Finish and Serve

Remove from the oven and immediately scatter fresh basil over the top 🌿.
Add a light sprinkle of black pepper if you like.

Let rest for 1–2 minutes, then slice and enjoy warm 🍕


🍽️ Serving Ideas

  • Serve with a simple green salad 🥗

  • Pair with roasted vegetables

  • Enjoy as-is for a classic, comforting meal


💡 Helpful Tips

  • Less sauce keeps the crust crisp

  • Fresh mozzarella gives the best texture

  • Tear basil by hand to keep its aroma bright

My daughter enjoys making these to give as presents. I’ve tried it, and it’s excellent.

Slow Cooker Golden Honey-Glazed Chicken

This recipe yields tender chicken with a rich, amber glaze. The slow cooking process allows the honey and garlic to infuse deeply into the meat.

  • Prep time: 10 minutes

  • Cook time: 3–7 hours (depending on heat setting)

  • Servings: 4

Ingredients

  • Chicken: 4 boneless, skinless chicken breasts (or thighs for extra juiciness)

  • Honey: 1 cup

  • Soy Sauce: 1/2 cup (or Tamari for gluten-free)

  • Ketchup: 1/4 cup

  • Oil: 2 tablespoons vegetable oil

  • Aromatics: 2 cloves garlic, minced

  • Spice: 1/4 teaspoon red pepper flakes (adjust to taste)

  • Seasoning: Salt and pepper to taste

Instructions

  1. Prep the Chicken: Place the chicken breasts in the bottom of your slow cooker.

  2. Whisk the Glaze: In a medium bowl, whisk together the honey, soy sauce, ketchup, vegetable oil, minced garlic, red pepper flakes, salt, and pepper until smooth.

  3. Combine: Pour the honey mixture evenly over the chicken.

  4. Slow Cook: Cover and cook on low for 6–7 hours or on high for 3–4 hours, until the chicken is tender and reaches an internal temperature of 165°F (74°C).

  5. Thicken the Sauce: Once cooked, remove the chicken and set aside. Pour the liquid from the slow cooker into a saucepan.

  6. Simmer: Bring the sauce to a simmer over medium heat for 5–10 minutes until it reduces and thickens into a glossy glaze.

  7. Serve: Drizzle the thickened glaze generously over the chicken.

Serving Suggestions

  • Grains: Serve over fluffy white rice or creamy mashed potatoes to catch the extra sauce.

  • Vegetables: Pairs perfectly with steamed broccoli, green beans, or a crisp green salad.

  • Additions: A crusty baguette is excellent for mopping up the remaining glaze.


Tips for Success

  • Tangy Twist: Add 1 tablespoon of apple cider vinegar to the sauce before cooking to cut through the sweetness.

  • Kid-Friendly: Omit the red pepper flakes and serve with sweet corn or glazed carrots.

  • Meal Prep: This chicken shreds beautifully, making it great for leftovers in wraps or salads the next day.

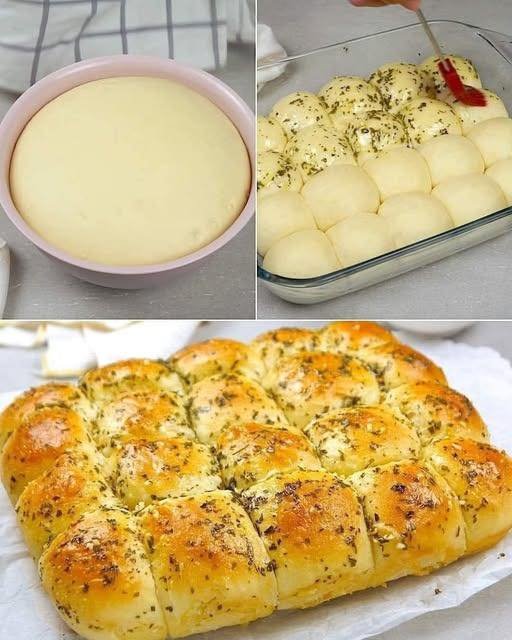
Homemade Garlic Buns

Homemade Garlic Buns

Soft, fluffy buns brushed with aromatic garlic butter

These homemade garlic buns are tender on the inside with a lightly golden top and a rich garlic aroma. They are perfect as a side for soups, pasta, or enjoyed on their own while warm.


Ingredients

Dough

  • All-purpose flour — 400 g (about 3¼ cups)

  • Sugar — 50 g (¼ cup)

  • Salt — 1 teaspoon

  • Instant dry yeast — 7 g (1 packet)

  • Lukewarm milk — 250 ml (1 cup)

  • Egg — 1 large, room temperature

  • Butter — 55 g (¼ cup), softened

  • Minced garlic — 1 tablespoon


Garlic Butter Topping

  • Minced garlic — 1 tablespoon

  • Dried parsley — 2 teaspoons

  • Salted butter — 55 g (¼ cup), melted


Step-by-Step Method

1. Prepare the Dough

  • In a large bowl, combine the flour, sugar, salt, and instant yeast.

  • Add the lukewarm milk and egg.

  • Mix until a rough dough forms.


2. Knead the Dough

  • Knead using a stand mixer or by hand for 5 minutes, until smooth.

  • Cover the dough with a clean towel and let it rest for 20 minutes.


3. Add Butter and Garlic

  • Add the softened butter and minced garlic to the dough.

  • Continue kneading for 5–7 minutes until the dough becomes elastic and slightly glossy.


4. First Rise

  • Lightly grease a bowl with oil.

  • Place the dough inside, cover, and let rise in a warm place for 1 hour, or until doubled in size.


5. Shape the Buns

  • Gently press the dough to release excess air.

  • Shape into a square and divide into 25 equal pieces.

  • Roll each piece into a smooth ball.

  • Cover and let rest for 15 minutes.


6. Second Rise

  • Lightly flatten each dough ball and tuck the edges underneath to create a smooth top.

  • Place in a greased baking pan.

  • Cover and let rise again for 30 minutes, until puffy.


7. Prepare Garlic Butter

  • In a small bowl, combine:

    • Melted butter

    • Minced garlic

    • Dried parsley

  • Mix well.


8. Bake

  • Preheat the oven to 180°C (350°F).

  • Brush the tops of the buns generously with garlic butter.

  • Bake for 15–17 minutes, until lightly golden.


9. Finish and Serve

  • Remove from the oven.

  • While still warm, brush with more garlic butter for extra flavor.

  • Serve warm.


Serving Suggestions

  • Pair with soups or pasta dishes

  • Serve as a dinner roll or party bread

  • Enjoy plain or with cheese spread


Storage Tips

  • Store at room temperature for 1 day

  • Refrigerate for up to 3 days

  • Reheat gently before serving

Honey Fruit Cake Loaf

Honey Fruit Cake Loaf

A soft, fragrant loaf filled with sweet dried fruits and natural honey

This Honey Fruit Cake Loaf is gently sweet, beautifully moist, and perfect for tea time or breakfast. Honey and brown sugar give it depth, while orange zest adds a fresh aroma. The loaf keeps well and tastes even better the next day.


Ingredients

Dry Ingredients

  • All-purpose flour — 2 cups (250 g)

  • Baking powder — 1 teaspoon

  • Baking soda — ½ teaspoon

  • Mixed spice or ground nutmeg — 1 teaspoon

  • Salt — a small pinch


Wet Ingredients

  • Melted butter or vegetable oil — ½ cup
    (113 g butter or 120 ml oil)

  • Honey — ½ cup

  • Brown sugar — ½ cup (100 g)

  • Eggs — 3 large, room temperature

  • Vanilla extract — 1 teaspoon

  • Orange zest — 1 teaspoon (optional)

  • Fresh orange juice — ¼ cup (60 ml)


Fruits

  • Mixed dried fruits — 1½ cups (200–220 g)
    (raisins, sultanas, cherries, pawpaw, pineapple, cranberries — choose any mix)

  • All-purpose flour — 2 tablespoons (for coating fruits)


Step-by-Step Instructions

1. Prepare the Pan and Oven

  • Preheat the oven to 170°C (340°F).

  • Line a standard loaf pan with parchment paper or lightly grease it.


2. Prepare the Fruits

  • Place the dried fruits in a bowl.

  • Toss with 2 tablespoons of flour to help them stay evenly distributed in the cake.

  • Set aside.


3. Mix the Wet Ingredients

  • In a large mixing bowl, combine:

    • Melted butter or oil

    • Honey

    • Brown sugar

  • Mix until smooth.

  • Add the eggs one at a time, mixing well after each addition.

  • Stir in vanilla, orange zest (if using), and orange juice.


4. Mix the Dry Ingredients

  • In a separate bowl, sift together:

    • Flour

    • Baking powder

    • Baking soda

    • Mixed spice or nutmeg

    • Salt


5. Combine the Batter

  • Add the dry ingredients to the wet mixture.

  • Gently fold using a spatula until just combined.

  • Do not overmix; the batter should be smooth but thick.


6. Add the Fruits

  • Fold the floured fruits into the batter gently until evenly distributed.


7. Bake the Cake

  • Pour the batter into the prepared loaf pan.

  • Smooth the top evenly.

  • Bake for 45–55 minutes, or until a skewer inserted into the center comes out clean.


8. Finish and Cool

  • Remove the loaf from the oven.

  • While still warm, brush the top with 1 tablespoon of warm honey for extra moisture and shine.

  • Let the cake cool in the pan for 10–15 minutes, then transfer to a wire rack to cool completely.


Serving & Storage

  • Slice and serve plain or with butter

  • Keeps well at room temperature for 3 days

  • Refrigerate for up to 1 week in an airtight container


Helpful Tips

  • Room-temperature eggs help create a smooth batter

  • You can replace orange juice with apple juice if desired

  • For extra texture, add chopped nuts (optional)