🥣 Quick & Hearty Vegetarian Cabbage and Tomato Soup

🥣 Quick & Hearty Vegetarian Cabbage and Tomato Soup

A nourishing, budget-friendly soup that transforms humble cabbage into a savory, tangy meal in just 30 minutes.

  • Prep time: 5 minutes

  • Cook time: 25 minutes

  • Yields: 6–8 servings

Ingredients

  • 3 tbsp Pure olive oil

  • 1/2 Yellow onion, chopped

  • 2 cloves Garlic, minced

  • 2 quarts (8 cups) Water

  • 4 tsp Powdered bouillon (use Vegetable bouillon to keep it strictly vegetarian/vegan)

  • 1 tsp Salt (or to taste)

  • 1/2 tsp Ground black pepper

  • 1/2 large head Green cabbage (core removed, roughly sliced)

  • 1 can (14.5 oz) Italian-style stewed tomatoes (drained and diced)


Instructions

  1. Sauté the Aromatics: In a large, heavy-bottomed stockpot, heat the olive oil over medium heat. Add the chopped onion and garlic. Sauté for about 5 minutes, stirring occasionally, until the onions are translucent and fragrant.

  2. Create the Broth: Pour in the 2 quarts of water. Stir in the bouillon powder, salt, and pepper. Turn the heat to high and bring the liquid to a rolling boil.

  3. Softened Cabbage: Once boiling, add the sliced cabbage to the pot. Reduce the heat to medium-low and let it simmer for 10 minutes. This allows the cabbage to wilt and begin tenderizing.

  4. The Tomato Finish: Stir in the diced stewed tomatoes. Bring the soup back up to a gentle boil, then lower the heat and simmer for another 15–30 minutes. Stir frequently to ensure the flavors meld perfectly.

  5. Serve: Ladle into deep bowls and serve piping hot.


Tips for the Perfect Bowl

  • For Extra Softness: If you prefer your cabbage “melt-in-your-mouth” soft, soak the raw cabbage slices in cold water for 15 minutes before adding them to the pot.

  • Boost the Protein: To make this even heartier, follow the “Add-ins” tip and stir in some ground turkey or pre-cooked white beans (like Cannellini) during the final simmer.

  • The “Day Two” Rule: As you noted, this soup is actually better the next day! It’s the perfect recipe for meal prepping Sunday lunch.
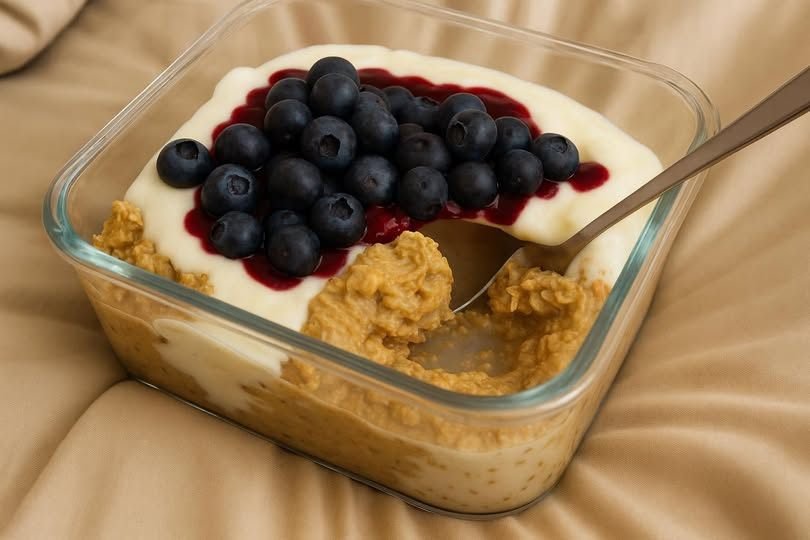

Peanut Butter & Blueberry Yogurt Oat Bowl

Peanut Butter & Blueberry Yogurt Oat Bowl

A high-protein, fiber-rich breakfast that tastes like a peanut butter and jelly sandwich but keeps you full for hours.

  • Prep time: 5 minutes

  • Chill time: 20 minutes (optional)

  • Yields: 1–2 servings

  • WW Points: 8 (or 3 for the lower-point version)

Ingredients

The Creamy Oat Layer:

  • 1 cup Oats, cooked or soaked overnight

  • 2 tbsp Natural peanut butter

  • 1 tbsp Honey or maple syrup (optional)

  • 2 tbsp Milk or almond milk

  • 1/4 tsp Cinnamon

The Protein Yogurt Layer:

  • 3/4 cup Plain Greek yogurt (low-fat or zero-fat)

  • 1–2 tsp Honey or zero-calorie sweetener

  • 1/4 tsp Vanilla extract

The Fresh Topping:

  • 1/2 cup Fresh blueberries

  • 1 tbsp Berry compote or jam (optional drizzle)


Instructions

  1. Prepare the Base: In a small mixing bowl, combine your warm oats with the peanut butter, milk, cinnamon, and sweetener. Stir vigorously until the peanut butter is fully incorporated and the oats are creamy.

  2. Prep the Yogurt: In a separate bowl, whisk together the Greek yogurt, vanilla, and your choice of sweetener until smooth.

  3. Assemble the Bowl: In a glass jar or breakfast bowl, layer the peanut butter oats at the bottom. Spread the sweetened yogurt layer directly over the oats.

  4. Add the Fruit: Top the yogurt with the fresh blueberries and a drizzle of berry compote or jam if you’re using it.

  5. Serve or Set: You can enjoy this immediately while the oats are still warm, or let it sit in the refrigerator for 20–30 minutes to let the flavors meld into a chilled treat.


💡 Flavor Variations & Tips

  • The Nut Swap: This is equally delicious with almond butter or cashew butter if you want a milder flavor.

  • Make it Overnight: If you’re in a rush in the mornings, prep the oat layer the night before with cold milk and let it soften in the fridge. Layer the yogurt and berries on top just before you leave the house.

  • Sugar-Free Note: To keep this in line with your Sugar-Free Strawberry Cheesecake goals, stick to the zero-calorie sweetener and ensure your peanut butter has no added sugar or oils.


Quick Nutrition Guide (Approx. per serving)

  • Calories: ~320

  • Protein: 18g

  • Fiber: 6 g

Homemade Chocolate Hazelnut Truffles


Homemade Chocolate Hazelnut Truffles

Prep time: 30 minutes | Chill time: 1 hour | Yields: Approx. 20–24 truffles

Ingredients

The Filling:

  • 1 cup Chocolate hazelnut spread (like Nutella)

  • 1 cup Toasted hazelnuts, finely chopped (plus 20–24 whole toasted hazelnuts for the centers)

  • 1 cup Crushed wafer cookies (vanilla or hazelnut flavored work best)

The Coating:

  • 1 ½ cups Semi-sweet or milk chocolate chips

  • 1 tsp Coconut oil (helps the chocolate flow smoothly)

  • ½ cup Hazelnuts, very finely chopped (for that signature bumpy texture)


Detailed Instructions

  1. Prepare the Base: In a medium mixing bowl, combine the chocolate hazelnut spread, the 1 cup of finely chopped hazelnuts, and the crushed wafer cookies. Stir until the mixture is uniform and holds its shape when pressed.

  2. Chill to Set: Place the mixture in the refrigerator for about 20–30 minutes. This makes it much easier to roll into balls without it sticking to your hands.

  3. Form the Truffles: Scoop about a tablespoon of the chilled mixture. Press one whole toasted hazelnut into the center, then roll the mixture between your palms to form a smooth ball.

  4. Second Chill: Place the rolled balls on a parchment-lined tray and freeze for 15 minutes. This ensures they don’t melt when you dip them in the warm chocolate.

  5. Melt the Coating: In a microwave-safe bowl, combine the chocolate chips and coconut oil. Microwave in 30-second intervals, stirring in between, until completely smooth. Stir in the remaining ½ cup of finely chopped hazelnuts.

  6. The Dip: Using a fork or a dipping tool, submerge each chilled truffle into the chocolate-nut mixture. Tap the fork against the side of the bowl to let excess chocolate drip off.

  7. Final Set: Place the truffles back on the parchment paper. Let them sit at room temperature until firm, or pop them in the fridge for 10 minutes for a quick set.


Tips for Success

  • Toast Your Nuts: Even if you buy pre-roasted hazelnuts, giving them a quick 5-minute toast in a dry pan over medium heat brings out the oils and makes them much more fragrant.

  • Wafer Texture: Don’t pulverize the wafers into a powder; leave some tiny shards for that authentic “crunch” when you bite into the center.

Bay Leaf & Clove Herbal Tea

Bay Leaf & Clove Herbal Tea

A warm, aromatic, caffeine-free beverage

Bay Leaf and Clove Herbal Tea is a simple, comforting drink made by gently simmering dried bay leaves and whole cloves in water. The result is a lightly golden infusion with a warm, earthy aroma and subtle spice. This tea is appreciated for its soothing character, pleasant fragrance, and ease of preparation.

Bay leaves bring a mild herbal depth with hints of eucalyptus and mint, while cloves add a gentle warmth and soft spice. Together, they create a balanced cup that can be enjoyed plain or customized with natural flavor additions like lemon, honey, ginger, or cinnamon.

This herbal tea contains no caffeine and can be enjoyed at any time of day. It is especially comforting during cool weather or quiet moments when a warm, aromatic drink is desired.


🧺 Ingredients

Base Ingredients

  • 3 dried bay leaves (whole)

  • 5–6 whole cloves

  • 2 cups water

Optional Flavor Add-Ins (choose as desired)

  • 1 teaspoon honey (for gentle sweetness)

  • 1 slice fresh ginger

  • 1 small cinnamon stick

  • 1 teaspoon lemon juice or a lemon wedge

  • 1 mint leaf


🧑‍🍳 Instructions

Step 1: Prepare Ingredients

Ensure the bay leaves and cloves are clean and free of dust.
If using ginger or cinnamon, prepare them by slicing or breaking them into small pieces.

Step 2: Heat the Water

Pour 2 cups of water into a small saucepan.
Place over medium heat and bring to a gentle boil.

Step 3: Add Spices

Once the water begins to boil, add the bay leaves and cloves.
Add any optional ingredients at this stage if using.

Step 4: Simmer

Reduce the heat to low and allow the mixture to simmer gently for 7–10 minutes.
The liquid will gradually take on a light golden color and release a pleasant aroma.

Step 5: Strain

Remove the saucepan from heat and let it rest for 1–2 minutes.
Strain the tea into a cup using a fine mesh strainer, removing all solids.

Step 6: Serve

Serve warm. Stir in honey or lemon juice if desired.
Garnish with a mint leaf or lemon slice for presentation.


🍽️ Servings

Makes 1 large mug or 2 small cups.
The recipe can be doubled or tripled as needed.


📝 Helpful Notes

  • Bay Leaves: Dried whole bay leaves are best. Avoid crushed or powdered leaves, which are difficult to strain.

  • Cloves: Use whole, aromatic cloves for best flavor.

  • Simmering: Gentle simmering preserves aroma and prevents bitterness.

  • Flavor Strength: Adjust steeping time to taste—shorter for mild, longer for stronger flavor.

  • Sweeteners: Honey complements the spice naturally without overpowering.

  • Serving: Best enjoyed warm, but may also be served chilled.

  • Storage: Prepared tea can be refrigerated for up to 24 hours and reheated gently.


🌿 Serving Ideas

  • Enjoy on its own as a calming beverage

  • Pair with light snacks or fruit

  • Serve in a clear glass mug to highlight the golden color

  • Add cinnamon and ginger for a richer, spiced version


Bay Leaf and Clove Herbal Tea is a simple drink made with care and intention. Its warm aroma, gentle flavor, and minimal ingredients make it a pleasant addition to any daily routine. Whether enjoyed alone or shared, this tea celebrates simplicity, tradition, and mindful preparation.

Egg Muffins – Quick & Nutritious Breakfast

Egg Muffins – Quick & Nutritious Breakfast

High in protein, low in carbs, and fully customizable

Prep Time: 10 minutes
Cook Time: 18–22 minutes
Total Time: 30 minutes
Yield: 6 muffins

Egg muffins are a versatile breakfast or snack option. You can add your favorite vegetables, meats, or cheeses, making them ideal for low-carb, keto, or meal-prep-friendly diets.


Ingredients

  • 6 large eggs

  • ¼ cup (60 ml) milk (or unsweetened almond/oat milk for dairy-free)

  • ½ cup shredded cheese (cheddar, feta, or your choice; optional for dairy-free)

  • ½ cup chopped vegetables (bell peppers, spinach, green onions, mushrooms, zucchini, etc.)

  • ¼ cup cooked bacon or ham (optional)

  • Salt and pepper to taste

  • ½ teaspoon garlic powder (optional)

  • ½ teaspoon paprika (optional)


Step-by-Step Instructions

1. Preheat the Oven

Preheat your oven to 375°F (190°C).
Lightly grease a 6-cup muffin tin with cooking spray, oil, or butter. Silicone muffin cups can also be used.


2. Prepare Ingredients

  • Chop your vegetables into small pieces.

  • Dice cooked bacon or ham if using.

  • Pre-sauté watery vegetables (like mushrooms or spinach) for 2–3 minutes to prevent soggy muffins.


3. Whisk the Eggs

In a large bowl, whisk together the eggs, milk, salt, pepper, garlic powder, and paprika until smooth and slightly frothy.
This ensures fluffy muffins with evenly distributed seasoning.


4. Assemble the Muffins

  • Divide the chopped vegetables and cooked meat evenly among the muffin cups.

  • Pour the egg mixture over the fillings, filling each cup about ¾ full.

  • Top each with shredded cheese, if using.


5. Bake

Place the muffin tin in the preheated oven.
Bake for 18–22 minutes, or until the egg muffins are set and lightly golden on top.
A toothpick inserted in the center should come out clean.


6. Cool and Serve

  • Allow the muffins to cool for a few minutes before removing them from the tin.

  • Serve warm, or store for meal prep.


Tips for Perfect Egg Muffins

  • Grease Well: Prevents sticking; silicone cups work best.

  • Whisk Thoroughly: Ensures light, fluffy muffins.

  • Do Not Overfill: Fill ¾ full to prevent overflow.

  • Cool Slightly Before Removing: Prevents breaking.

  • Storage & Reheating: Refrigerate in an airtight container for up to 5 days; microwave for 30–45 seconds to reheat.

  • Freezing: Let muffins cool completely, then freeze in airtight containers or freezer bags for up to 3 months. Reheat 1–2 minutes in the microwave.

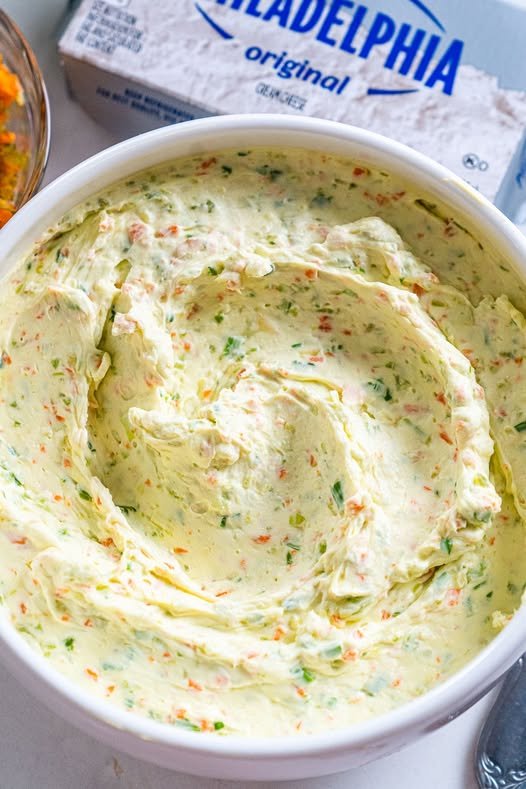
Homemade Garden Vegetable Spread

Homemade Garden Vegetable Spread

This creamy, tangy spread is packed with crunchy carrots, celery, and zesty green onions. It’s the perfect companion for toasted bagels, crackers, or even as a dip for fresh bell pepper strips.

  • Prep time: 15 minutes

  • Inactive time: 1–2 hours (chilling)

  • Yields: Serves 8

  • Dietary Info: Vegetarian, Contains Milk

Ingredients

  • 2 (8 oz) packages cream cheese, softened to room temperature

  • ¼ cup carrots, chopped

  • ½ cup celery, chopped

  • 2 green onions, chopped

  • ½ tsp salt

  • ½ tsp garlic powder

  • ¼ tsp onion powder

Preparation

  1. Prep the Veggies: Place the chopped carrots, celery, and green onions into a food processor. Pulse several times until the vegetables are broken down into very small bits.

    Tip: Be careful not to over-process; you want distinct texture, not a watery paste.

  2. Mix: In a medium-sized mixing bowl, combine the softened cream cheese, the pulsed vegetable mixture, salt, garlic powder, and onion powder. Stir vigorously until the vegetables and seasonings are evenly distributed throughout the cream cheese.

  3. Chill: Spoon the spread into an airtight container or a glass jar. Place it in the refrigerator for at least 1 to 2 hours. This allows the cream cheese to firm back up and the flavors from the onion and garlic to meld.

  4. Serve: Spread generously on toasted bagels or crusty bread.

Storage

Keep the spread refrigerated in an airtight container. It will stay fresh and delicious for 7–10 days.