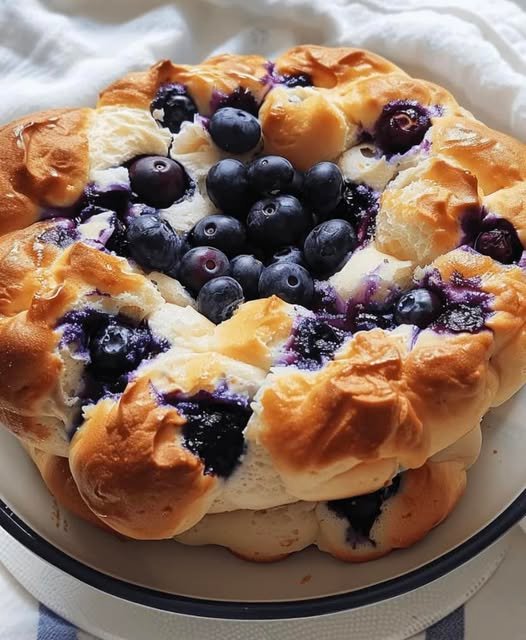
☁️ Blueberry Cottage Cheese Cloud Bread

☁️ Blueberry Cottage Cheese Cloud Bread

A light, airy, and protein-packed treat.

  • Prep time: 15 minutes

  • Cook time: 25–30 minutes

  • Yields: 6–8 rounds

Organic Ingredients

  • 3 large eggs, separated (ensure no yolk gets in the whites)

  • ½ cup cottage cheese, blended until completely smooth

  • ¼ tsp cream of tartar (essential for stabilizing the egg whites)

  • ½ tsp salt

  • 1 tbsp cornstarch or arrowroot powder (optional, but highly recommended for a “bread-like” texture)

  • 1 tsp honey (or preferred sweetener)

  • ¼ cup fresh or frozen blueberries


Instructions

  1. Prep: Preheat your oven to 300°F (150°C). Line a large baking sheet with parchment paper or a high-quality silicone mat.

  2. Whip the Whites: In a clean, grease-free glass or metal bowl, beat the egg whites and cream of tartar. Start slow, then move to medium-high until stiff peaks form (the peaks should stand straight up when you lift the beaters).

  3. Mix the Base: In a separate medium bowl, whisk the egg yolks, smooth cottage cheese, salt, cornstarch, and honey until the color is uniform and the texture is creamy.

  4. The Fold: Gently add the yolk mixture to the egg whites. Using a spatula, use a “cut and fold” motion—cut through the middle and fold over the side. Do not stir, or you will pop the air bubbles and the bread will be flat.

  5. Shape: Scoop the airy batter into 6–8 rounds on the baking sheet. They should be about 3 inches wide and 1 inch thick.

  6. Top: Press 3–5 blueberries into the top of each mound.

  7. Bake: Bake for 25–30 minutes. They are done when they are golden brown on top and feel firm (not jiggly) to the touch.

  8. Cool: Let them rest on the pan for 5 minutes, then move to a wire rack. They will “settle” slightly as they cool—this is normal!


Pro-Tips for Success

  • Temperature Matters: Eggs separate more easily when cold, but whites whip to a higher volume when they are at room temperature. Separate them early and let the whites sit for 20 minutes before whipping.

  • Avoid Humidity: Cloud bread is sensitive to moisture. If it’s a very rainy/humid day, they may turn out a bit more “rubbery” than “cloud-like.”

  • The “Smooth” Secret: If you don’t have a blender, you can push the cottage cheese through a fine-mesh sieve with a spoon to get that creamy consistency.

Storage & Enjoyment

  • Refrigerator: Store in an airtight container for up to 3 days. Use parchment paper between layers to prevent sticking.

  • Serving Idea: These are excellent toasted lightly and topped with a little extra Greek yogurt or a smear of almond butter.
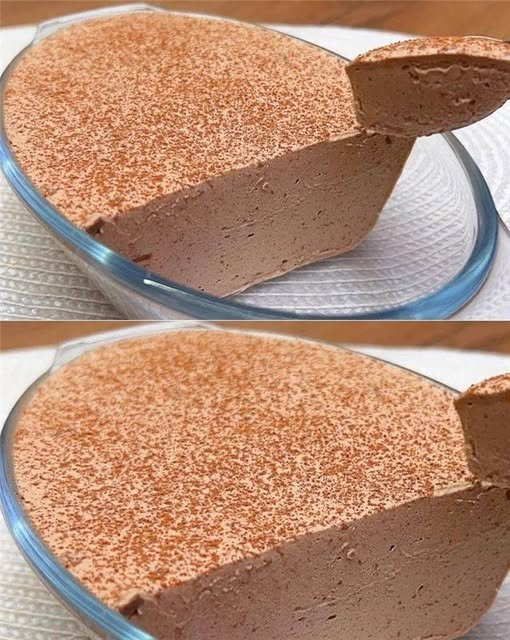

5 MINUTE CHOCOLATE MILK DESSERT

Low-Carb | Keto | Gluten-Free | WW-Friendly

Craving a rich, chocolatey treat that fits your keto lifestyle and stays low in SmartPoints? This Keto 5-Minute Chocolate Milk Dessert is quick, comforting, and deeply satisfying—perfect for late-night cravings, busy days, or when you want something sweet without excess sugar or carbs.

Unlike traditional chocolate milk desserts that rely on sugar and starches, this keto-friendly version uses simple pantry ingredients, healthy fats, and zero added sugar—making it ideal for keto, low-carb, and Weight Watchers plans.


🧾 Ingredients (1 Serving)

  • 1 cup unsweetened almond milk (240 ml)

  • 2 tbsp heavy cream (optional, for richness)

  • 2 tbsp unsweetened cocoa powder

  • 2 tsp powdered erythritol or monk fruit sweetener (to taste)

  • 1/4 tsp pure vanilla extract

  • 1/4 tsp xanthan gum (optional, for thickening)

  • Pinch of sea salt

Optional Toppings:

  • Sugar-free dark chocolate chips

  • Sugar-free whipped cream


🍫 Instructions

  1. Heat the Base:
    In a small saucepan, combine almond milk and heavy cream (if using). Heat over medium heat until warm but not boiling.

  2. Add Cocoa:
    Whisk in cocoa powder until completely smooth.

  3. Sweeten:
    Add sweetener and stir until dissolved.

  4. Flavor Boost:
    Stir in vanilla extract and sea salt.

  5. Thicken (Optional):
    Sprinkle in xanthan gum while whisking continuously. The mixture will thicken slightly as it cools.

  6. Rest:
    Remove from heat and let cool for 2–3 minutes.

  7. Serve:
    Pour into a mug or dessert glass. Add toppings if desired.

  8. Enjoy:
    Serve warm or refrigerate for a chilled pudding-style dessert.


🥄 Texture & Taste

Creamy, smooth, and deeply chocolatey. The cocoa and salt balance beautifully, while optional cream adds richness. Xanthan gum gives it a silky, pudding-like consistency.


🍽️ Nutritional Information (Approx.)

  • Calories: 140–170 kcal

  • Fat: 13–15 g

  • Carbs: 4–5 g

  • Fiber: 2 g

  • Net Carbs: 2–3 g

  • Protein: 2 g

  • Sugar: 0 g

Values vary by brand and toppings.


🧠 WW SmartPoints (Approx.)

  • Blue Plan: 3–4

  • Green Plan: 3–4

  • Purple Plan: 3–4

Lower Points Tip:

  • Skip heavy cream

  • Use 1 tbsp cocoa powder

  • Avoid chocolate toppings


💡 Pro Tips & Variations

  • Dairy-Free: Use full-fat coconut milk

  • Protein Boost: Add 1/2 scoop keto protein powder

  • Mocha Version: Add a pinch of espresso powder

  • Spiced Chocolate: Add cinnamon

  • Mint Version: Add peppermint extract

  • Thicker Texture: Chill 10–15 minutes after cooking


❄️ Storage

  • Store in an airtight container in the fridge for up to 3 days

  • Reheat gently or thin with almond milk if needed


🔁 Ingredient Swaps

  • Sweetener: Stevia, monk fruit, allulose

  • Milk: Coconut milk or macadamia milk

  • Cream: Skip for lower fat version


🔍 FAQ

Can I skip xanthan gum?
Yes. It will be drinkable like chocolate milk instead of pudding.

Can kids eat this?
Yes, using mild sweeteners like monk fruit.

Can it be served cold?
Yes. Chill for 1 hour for a cold dessert.


✨ Final Thoughts

This Keto 5-Minute Chocolate Milk Dessert is fast, affordable, and incredibly satisfying. It fits keto macros, stays low in carbs, and can be adapted for many lifestyles. Whether warm or chilled, it delivers rich chocolate flavor without added sugar.

Add this to your weekly rotation—you’ll be surprised how indulgent something this simple can taste.

Apple Fritter Bites

These Apple Fritter Bites are really a life-changing autumn treat that I had to share with you today.

These are true apple-flavored, doughnut-like fritters that are light as air and covered with the most delectable apple cider glaze.

You may feel somewhat better about coming back for seconds—or thirds—because they are baked rather than fried!

I first sampled these little morsels of perfection when Baker Mama’s clever friend Courtney sent me a copy of her new cookbook, Brilliant Bites.

I had to make them as soon as I saw the recipe title.

Could you possibly come up with an autumn snack that is better? Crisp cider glaze over warm, doughy apple fritters that pop? Indeed, do!

These, let me just say, are every bit as good as apple fritters could possibly be.

Soft pieces of fresh apple abound in these very moist treats.

The glaze is sweet and sour, and it gives you that distinctive crackly crust that is just too good.

Finally, the nicest thing? You may feel comfortable about nibbling on a couple since they are baked rather than fried. If you’re anything like me, the whole batch!

Components Cooking spray nonstick
One and a half cups total flour
Two tsp baking powder
A teaspoon each of ground cinnamon and kosher salt
Melt one-fourth cup unsalted butter
3/4 cup sugar, granulated
Just one big egg
A half teaspoon of vanilla essence
1/2 cup applesauce, unsweet
About two medium-sized neatly chopped Honeycrisp or Gala apples
Apple cider and two cups powdered sugar for the glaze
1/3 cup plus two tablespoons apple juice or cider


Arrange an oven rack to 400°F and mist a baking sheet with nonstick cooking spray.

Stir together the flour, baking powder, salt, and cinnamon in a medium-sized basin.

Beat the sugar and melted butter together well in a big basin. Whisk in the applesauce, vanilla, and egg until smooth.

Stirring just until mixed, add the dry ingredients to the wet ones. Fold in the diced apples rather gently.

To the prepared baking sheet, scoop out 1 tablespoon quantities of batter and place them a few inches apart.

After ten minutes of baking, take it out of the oven and set the broiler to high.

To make the glaze, beat the powdered sugar and apple juice or cider until it is pourable.

Let some of the glaze run down the edges of the heated fritter bits as you brush over them. Broil, turning the pan often, for two to four minutes, or until the glaze begins to boil and caramelize.

Take them out of the oven and liberally coat the fritters’ tops with the remaining glaze.

Give the glaze fifteen minutes to set before serving.

Enjoy!

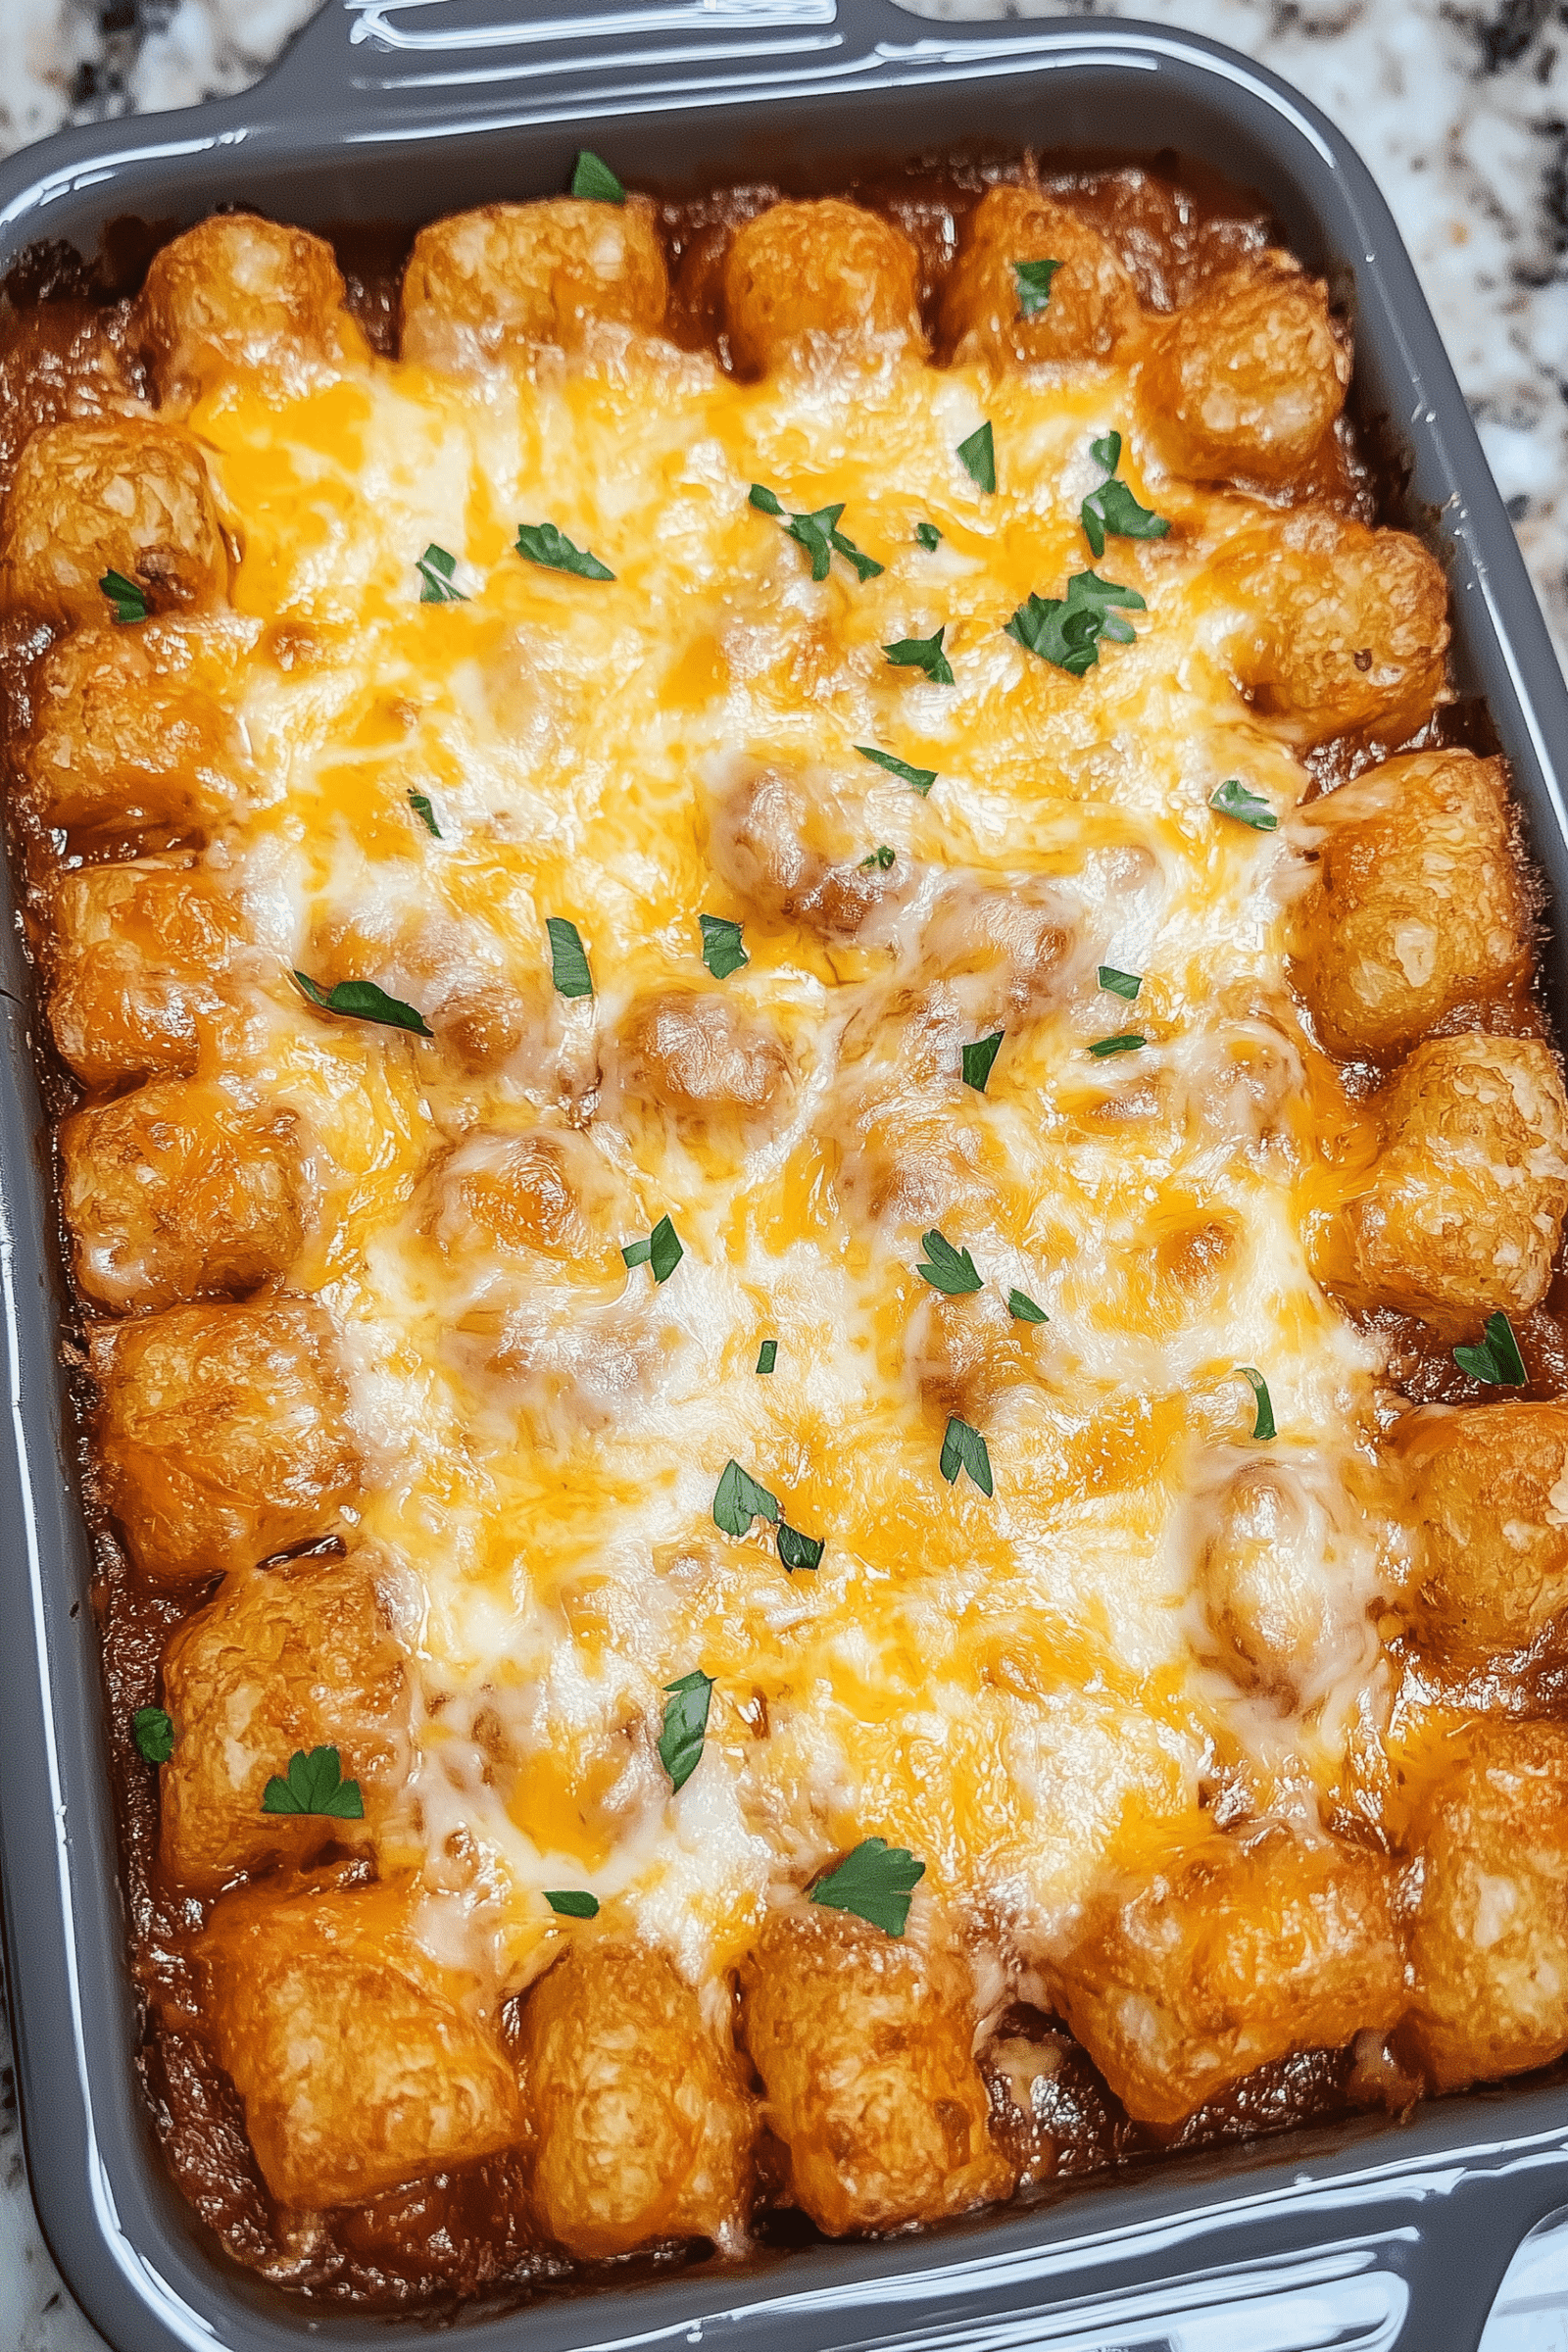
Mexican-Style Potato Puff Casserole

Mexican-Style Potato Puff Casserole

A crunchy, cheesy, taco-inspired twist on the classic tater tot casserole. Perfectly sized to feed a hungry family of eight.

  • Prep time: 10 minutes

  • Cook time: 50 minutes

  • Total time: 1 hour

  • Yields: 8 servings

Ingredients

The Filling

  • 2 lbs Ground beef (lean works best to minimize grease)

  • 1 packet Taco seasoning (your favorite brand)

  • 1 can (15 oz) Whole kernel corn, fully drained

  • 1 can (10.5 oz) Condensed nacho cheese soup

The Topping

  • 32 oz bag Frozen tater tots (cylindrical potato puffs)

  • 1 ½ cups Sharp cheddar cheese, shredded


Instructions

  1. Preheat and Prep: Preheat your oven to 350°F (175°C). Lightly grease a 9×13 inch baking dish with non-stick cooking spray.

  2. Brown the Beef: In a large skillet over medium-high heat, brown the ground beef until it is completely cooked through and no pink remains. Drain the excess grease thoroughly to prevent a soggy casserole.

  3. Season: Turn the heat down to low. Sprinkle the taco seasoning over the beef and stir for 2–3 minutes to let the spices bloom and coat the meat.

  4. Create the Sauce: Add the drained corn and the can of nacho cheese soup to the skillet. Stir constantly for about 2 minutes until the mixture is creamy and well combined.

  5. Layer the Base: Pour the warm meat and cheese mixture into the prepared 9×13 dish. Use a spatula to spread it into an even layer.

  6. The “Crust”: Arrange the frozen tater tots in a single, even layer over the top of the meat. Pro tip: For maximum crunch, don’t overlap them too much!

  7. The First Bake: Place the dish in the oven and bake for 45 minutes. The filling should be bubbly, and the tots should be starting to turn golden.

  8. Add the Cheese: Carefully remove the pan and sprinkle the shredded cheddar cheese evenly over the tots.

  9. The Final Melt: Return to the oven for 5 more minutes, or until the cheese is completely melted and gooey.

  10. Serve: Let it sit for 5 minutes before serving to let the sauce set.


Serving Suggestions

To really lean into the “Taco Night” vibe, set out bowls of these fresh toppings so the kids can customize their plates:

  • Cold sour cream or Greek yogurt

  • Diced tomatoes or pico de gallo

  • Sliced jalapeños (for the brave ones!)

  • Shredded lettuce for a bit of crunch

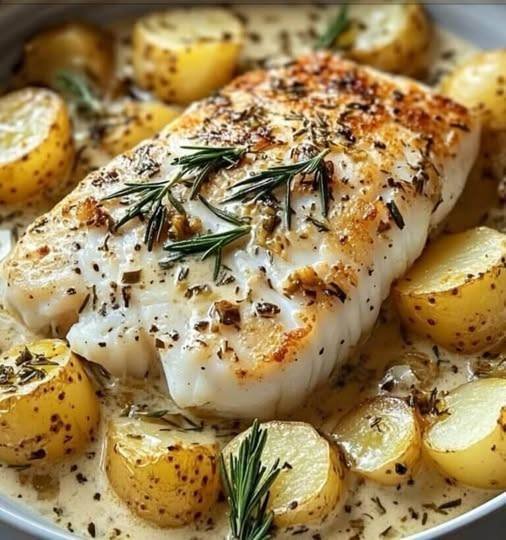
Cod and Potatoes in Rosemary Cream Sauce

Tender, flaky cod and golden baby potatoes come together in a luxurious rosemary cream sauce that feels restaurant-worthy but is easy enough for a weeknight. Infused with garlic, herbs, and a touch of Dijon, this one-pan-style dish is rich, comforting, and perfect for cooler evenings or an elevated family dinner.


Ingredients

For the Cod & Potatoes

  • 2 cod fillets (about 6 oz each)

  • 4–5 baby potatoes, halved

  • 2 tbsp olive oil

  • 1 tsp dried thyme

  • ½ tsp paprika

  • Salt & black pepper, to taste

For the Rosemary Cream Sauce

  • 2 tbsp butter

  • 2 cloves garlic, minced

  • ½ cup chicken or vegetable broth

  • 1 cup heavy cream

  • 1–2 tsp fresh rosemary, finely chopped

  • 1 tsp Dijon mustard (optional but recommended)


Instructions

  1. Prep the Potatoes
    Preheat oven to 400°F (200°C). Toss halved potatoes with olive oil, thyme, paprika, salt, and pepper. Arrange cut-side down on a baking dish or oven-safe skillet.

  2. Roast
    Roast potatoes for 20–25 minutes, until lightly golden and fork-tender.

  3. Season the Cod
    Pat cod fillets dry and season both sides with salt and pepper.

  4. Make the Sauce
    In a skillet over medium heat, melt butter. Add garlic and sauté for 30 seconds until fragrant.
    Stir in broth, cream, rosemary, and Dijon. Simmer 3–4 minutes until slightly thickened.

  5. Combine & Bake
    Nestle cod fillets among the potatoes. Pour rosemary cream sauce over everything.

  6. Finish Cooking
    Return to the oven and bake for 12–15 minutes, until the cod flakes easily and the sauce is bubbling.

  7. Serve
    Spoon sauce generously over the fish and potatoes. Garnish with extra rosemary if desired.


Notes

  • Cod is done when it reaches 145°F (63°C) internally.

  • Fresh rosemary gives the best flavor, but dried works in a pinch (use ½ tsp).

  • Sauce will thicken more as it rests.


Tips for Best Results

  • Dry the cod well before seasoning for better texture.

  • Don’t overbake—cod cooks fast.

  • For extra richness, finish with a squeeze of lemon or a sprinkle of Parmesan.


Servings

  • 2 hearty servings

  • Easily doubled for 4 people


Estimated Nutritional Information (Per Serving)

  • Calories: ~520

  • Protein: ~38g

  • Fat: ~36g

  • Carbohydrates: ~18g

  • Fiber: ~3g

  • Sodium: ~480mg

(Estimates vary by ingredient brands.)


Benefits

  • ✔️ High-protein, nutrient-rich cod

  • ✔️ One-pan-style comfort meal

  • ✔️ Elegant yet easy

  • ✔️ Naturally gluten-free


Recipe Q & A

Q: Can I use another fish?
A: Yes! Halibut, haddock, or sea bass work beautifully.

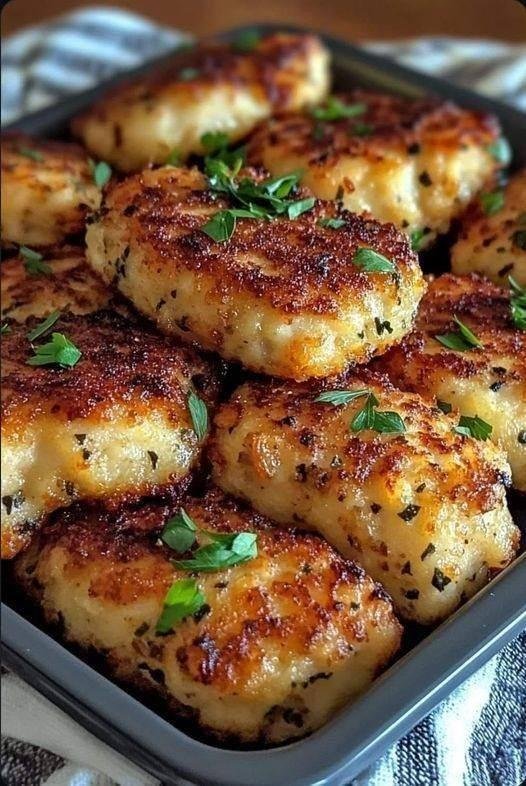
Keto Chicken Patties

🥩 Keto Chicken Patties (Low-Carb & High-Protein)

📝 Introduction

Keto chicken patties are a delicious and nutritious option for anyone following a ketogenic lifestyle. These patties are low in carbohydrates and rich in protein and healthy fats, making them perfect for maintaining energy while enjoying flavorful meals. This complete guide covers ingredients, step-by-step instructions, nutrition facts, storage tips, and success tips to help you make perfectly juicy chicken patties every time.


🛒 Ingredients

For the Chicken Patties:

  • 1 lb (450g) ground chicken (dark meat preferred for juiciness)

  • ½ cup (50g) almond flour

  • ¼ cup (30g) grated Parmesan cheese

  • 1 large egg

  • ½ tsp garlic powder

  • ½ tsp onion powder

  • 1 tsp Italian seasoning

  • Salt and pepper to taste

  • 2 tbsp fresh parsley, chopped (optional)

  • 2 tbsp olive oil or coconut oil (for frying)

Optional for Serving:

  • Lettuce leaves (for low-carb wraps)

  • Sliced avocado

  • Sugar-free mayonnaise or Greek yogurt

  • Sliced tomatoes (optional, within carb limits)


📊 Nutritional Information (per serving – 4 servings)

  • Calories: 260

  • Fat: 17g

  • Saturated Fat: 3g

  • Cholesterol: 120mg

  • Sodium: 250mg

  • Total Carbs: 3g

  • Fiber: 1g

  • Net Carbs: 2g

  • Protein: 24g

  • WW SmartPoints: 4


👩‍🍳 Instructions

Step 1: Prepare Ingredients

Measure and gather all ingredients to make the cooking process smooth and efficient.

Step 2: Mix the Patty Mixture

In a large bowl, combine ground chicken, almond flour, Parmesan cheese, egg, garlic powder, onion powder, Italian seasoning, salt, and pepper. Mix until well combined. The mixture should be moist but firm enough to shape.

Step 3: Shape the Patties

Divide mixture into equal portions (about ¼ cup each). Shape into round patties approximately 1 inch thick.

Step 4: Heat the Oil

Heat olive oil or coconut oil in a skillet over medium heat until hot but not smoking.

Step 5: Cook the Patties

Place patties in the skillet without overcrowding.
Cook 5–7 minutes per side until golden brown and fully cooked (internal temperature should reach 165°F / 75°C).

Step 6: Drain and Rest

Transfer patties to a paper towel-lined plate and rest for a few minutes to retain juiciness.


🍽 Serving Suggestions

  • Serve in lettuce wraps with avocado and sugar-free mayo

  • Pair with garden salad or steamed vegetables

  • Enjoy as a burger substitute or protein snack


🧊 Storage Instructions

  • Refrigerate cooked patties in an airtight container for up to 3 days

  • Freeze uncooked patties between parchment paper for up to 3 months

  • Thaw overnight in refrigerator before cooking


💡 Tips for Best Results

✔ Use high-quality chicken for better flavor
✔ Customize seasoning (paprika, cumin, chili powder)
✔ Avoid overcrowding the pan
✔ Always check doneness with a thermometer


✅ Conclusion

Keto chicken patties are a versatile, flavorful, and satisfying option for low-carb meal planning. With simple ingredients and easy preparation, they fit perfectly into a ketogenic lifestyle and can be enjoyed in multiple ways.


🌱 Nutritional Benefits

These patties provide high-quality protein for muscle maintenance while almond flour and Parmesan contribute healthy fats and texture. They are naturally gluten-free and keto-friendly.


⭐ Final Thoughts

Homemade keto chicken patties are a practical and tasty way to stay on track with your health goals. Whether for lunch, dinner, or meal prep, this recipe delivers flavor, nutrition, and convenience in every bite.