🥩 Slow Cooker Cubed Beef Stew (Rich & Tender)

🥩 Slow Cooker Cubed Beef Stew (Rich & Tender)

Ingredients

  • 2½–3 lbs beef stew meat (chuck, cubed)

  • 1 large onion, diced

  • 3 cloves garlic, minced

  • 3 carrots, sliced

  • 2–3 potatoes, cubed

  • 2 cups beef broth

  • ¼ cup soy sauce

  • 2 tbsp Worcestershire sauce

  • 1 tbsp tomato paste

  • 1 tsp dried thyme

  • 1 tsp paprika

  • ½ tsp black pepper

  • ½ tsp salt (adjust at end)

  • 2 tbsp olive oil

  • 1 tbsp cornstarch + 2 tbsp water (optional)


Instructions

1️⃣ Base layer
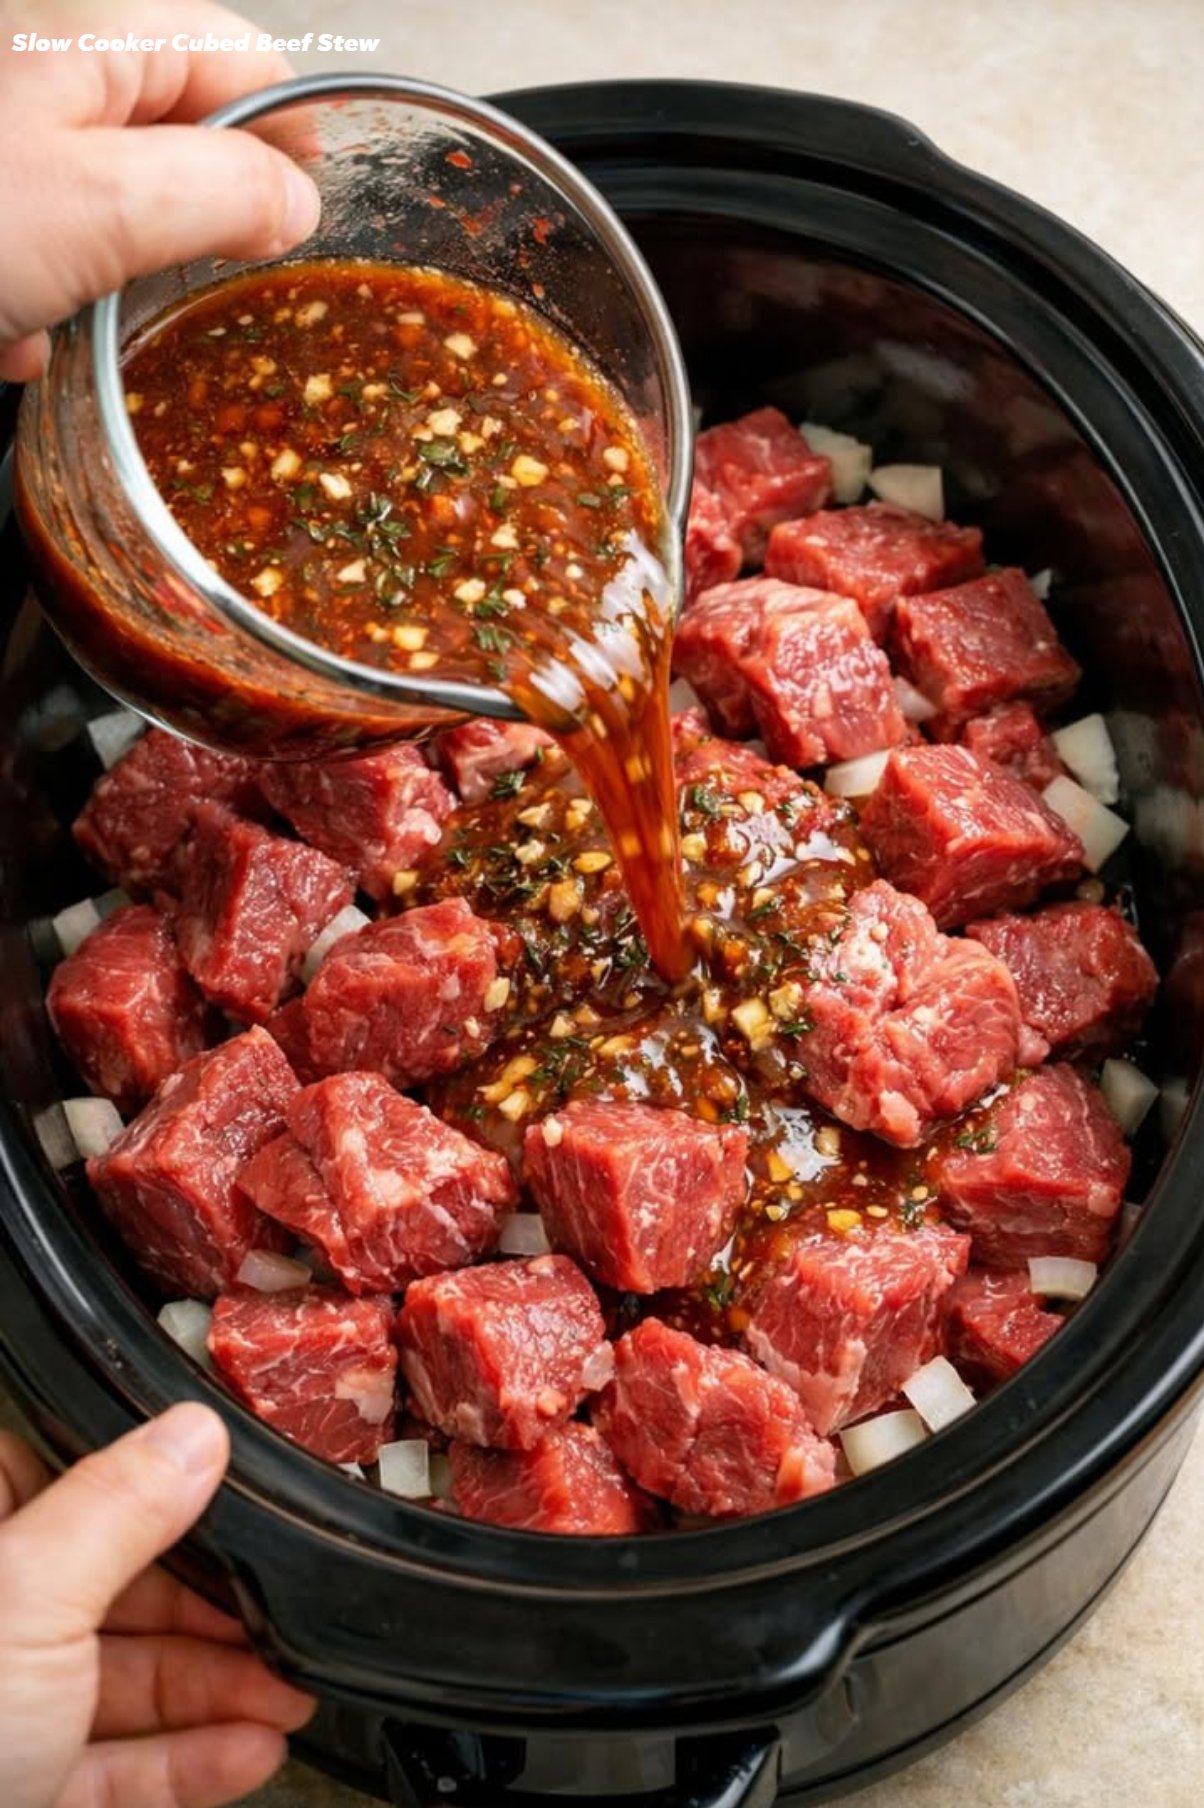
Add diced onion to the bottom of the slow cooker.
Place cubed beef on top.

(Optional but powerful upgrade: brown the beef in olive oil first for deeper flavor.)

2️⃣ Sauce mix
Whisk together:

  • Beef broth

  • Soy sauce

  • Worcestershire

  • Tomato paste

  • Garlic

  • Thyme

  • Paprika

  • Black pepper

Pour evenly over beef.

3️⃣ Add vegetables
Top with carrots and potatoes.

4️⃣ Cook

  • LOW: 8 hours

  • HIGH: 4–5 hours
    Cook until beef is fork-tender.

5️⃣ Thicken (optional)
Mix cornstarch + water.
Stir into stew during last 30 minutes on HIGH.


🔥 Flavor Boost Options

  • 1 bay leaf while cooking

  • Splash of balsamic vinegar or apple cider vinegar at the end

  • Fresh parsley before serving

  • Pinch of red pepper flakes for gentle heat

  • ½ tsp sugar or honey if broth tastes too salty


🍞 Serve With

  • Crusty bread

  • Mashed potatoes

  • Buttered rice

  • Warm dinner rolls

Southern Sweet Onion Casserole

Southern Sweet Onion Casserole

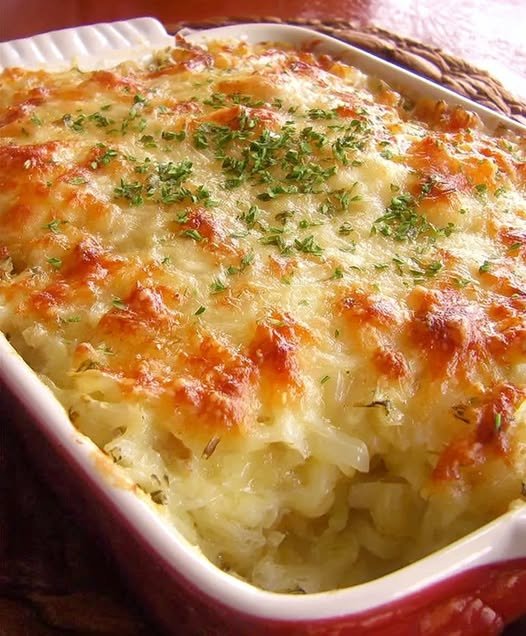
There’s something irresistibly comforting about a casserole — especially when it stars sweet Vidalia onions in a rich, creamy base topped with buttery cracker crumbs. Sweet Onion Casserole is one of those simple Southern dishes that feels like home in every bite. It’s easy to prepare, wonderfully indulgent, and pairs beautifully with almost any main dish. Better yet, it often steals the spotlight all on its own.

The Quintessential Southern Ingredient

Vidalia onions are prized for their natural sweetness, making them the perfect foundation for this casserole. Unlike typical onion recipes that rely on caramelizing, this dish uses a surprising technique — boiling. This method softens the onions and removes any sharpness, leaving behind a mellow, sweet flavor that blends perfectly into the creamy mixture.

A Perfect Blend of Textures

Cracker crumbs and sharp cheddar cheese do more than fill space — they create balance. The crackers absorb the flavorful liquid while adding occasional crunch, and the cheese contributes richness and tang. Together, they elevate humble onions into a comforting, crowd-pleasing casserole.

That Buttery Crumb Topping

The finishing touch is a golden topping made from melted butter and crushed crackers. As it bakes, it forms a crispy crust that contrasts beautifully with the soft onion filling underneath.

Perfect Pairings

Serve this casserole alongside grilled chicken, roast turkey, steak, or baked ham. It works just as well for weeknight dinners as it does for holidays and potlucks.


🧅 Southern Sweet Onion Casserole

Prep Time: 15 minutes
Cook Time: 45 minutes
Total Time: 1 hour
Servings: 6

Ingredients

  • 3 large eggs

  • 2 tablespoons unsalted butter

  • 1 teaspoon salt

  • ¼ teaspoon black pepper

  • 4 large Vidalia onions, halved and sliced ¼-inch thick

  • 1 (5 oz) can evaporated milk

  • 1½ cups grated cheddar cheese

  • 1 cup crushed Ritz crackers

For the Topping:

  • 3 tablespoons melted butter

  • 1 cup crushed Ritz crackers


Instructions

  1. Preheat oven to 375°F (190°C). Grease a 9×13-inch baking dish.

  2. Place sliced onions in a saucepan and add enough water to cover them. Bring to a boil, then reduce heat and simmer for 8 minutes. Drain well and toss onions with 2 tablespoons butter.

  3. In a large bowl, whisk together eggs and evaporated milk.

  4. Add buttered onions, 1 cup cracker crumbs, cheddar cheese, salt, and pepper. Mix well.

  5. Pour mixture into prepared baking dish.

  6. Combine melted butter and 1 cup crushed crackers for the topping. Sprinkle evenly over casserole.

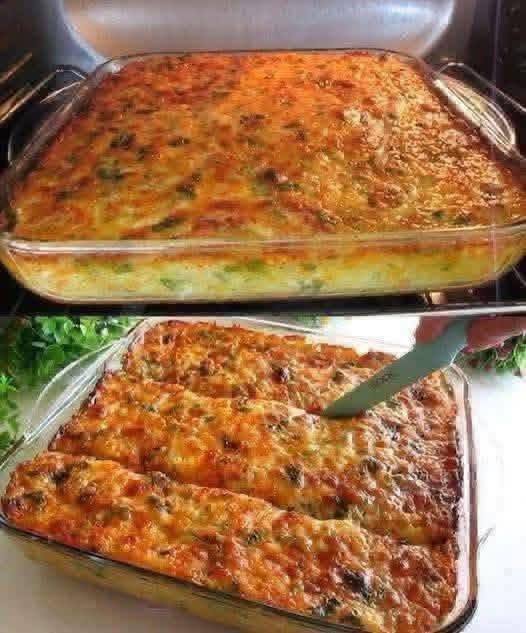
  7. Bake for 45 minutes, or until set in the center and golden brown on top.

Savory Golden Rounds


Savory Golden Rounds

Prep time: 10 mins | Bake time: 15–20 mins | Yields: 6–8 rounds

Ingredients

  • 3 large Eggs (separated into whites and yolks)

  • 3 tbsp Cream cheese (softened to room temperature)

  • 1/4 tsp Cream of tartar (this provides the essential lift and structure)

  • 1/2 tsp Garlic powder

  • A pinch of sea salt

  • Optional: 1 tbsp melted butter and a sprinkle of fresh parsley for a bakery-style finish.


Step-by-Step Instructions

  1. Preparation: Preheat your oven to 300°F (150°C). Line a large baking sheet with parchment paper. This step is vital because the batter is delicate and requires a non-stick surface to rise and release perfectly.

  2. Mix the Savory Base: In a medium bowl, whisk together the egg yolks, softened cream cheese, garlic powder, and salt. Continue whisking until the mixture is silky smooth with no visible lumps of cheese.

  3. Whip the Whites: In a separate, scrupulously clean glass or metal bowl, combine the egg whites and the cream of tartar. Using a hand mixer on high speed, whip the whites until stiff peaks form. They are ready when the foam stands straight up and doesn’t move when you tilt the bowl.

  4. The Gentle Fold: Carefully fold the egg yolk mixture into the whipped whites using a spatula. Use a slow “under-and-over” motion. Do not stir or whisk, as the goal is to keep the air bubbles intact so the rounds stay fluffy.

  5. Form the Rounds: Spoon the mixture onto your prepared baking sheet to form 6 to 8 even circles. You can use the back of the spoon to gently shape them into rounds.

  6. Bake to Perfection: Bake for 15–20 minutes. They are done when they have reached a beautiful golden-brown color and feel firm but springy to the touch.

  7. The Final Touch: While still warm, you can lightly brush the tops with melted butter and a sprinkle of fresh parsley. Allow them to cool for about 5 minutes to let the texture set before serving.


Why You’ll Love This Recipe:

  • Soft & Fluffy: The texture is uniquely light, making it a wonderful base for any meal.

  • Simple Ingredients: Using mainly eggs and cream cheese makes this a satisfying, protein-focused snack.

  • Endless Options: These make excellent “buns” for sandwiches or can be served alongside a bowl of soup.

4-Ingredient Cheesy Garlic Pull-Apart Loaf

4-Ingredient Cheesy Garlic Pull-Apart Loaf

Prep time: 5 mins | Bake time: 15 mins | Serves: 4-6

Ingredients

  • 1 Loaf of crusty bread (like Sourdough or a French baguette)

  • 1/2 cup Unsalted butter, melted

  • 3-4 cloves Garlic, finely minced

  • 1 1/2 cups Shredded cheese (Mozzarella or Monterey Jack work best for the pull)

  • Optional: Fresh parsley or chives for a pop of color.


Detailed Instructions

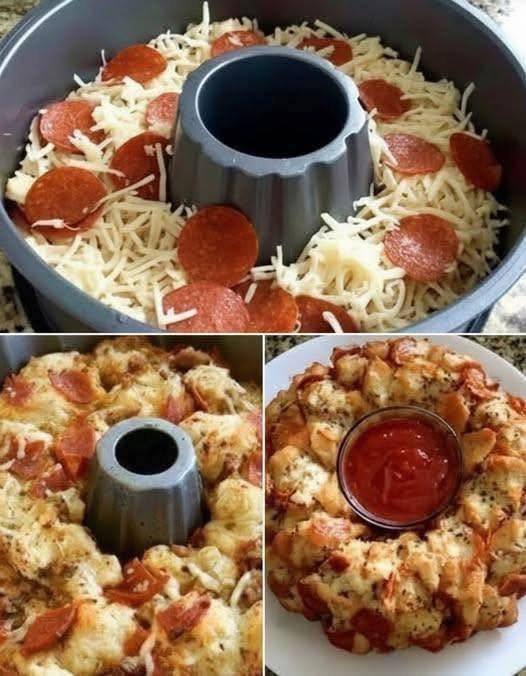
  1. Prep and Slice: Preheat your oven to 375°F (190°C). Using a serrated knife, cut the bread in a grid pattern (lengthwise and crosswise) about 1 inch apart. Be sure to cut deep, but do not cut through the bottom crust, as the base needs to hold everything together.

  2. Infuse with Flavor: In a small bowl, mix your minced garlic into the melted butter. Use a pastry brush or a spoon to drizzle this golden mixture into all the cracks of the bread, ensuring the garlic is evenly distributed.

  3. Stuff and Bake: Generously stuff the shredded cheese into the crevices. Wrap the loaf loosely in foil and bake for 10 minutes. Then, open the foil and bake for another 5 minutes (or until the cheese is melted, bubbly, and slightly golden).


Why this recipe is a favorite:

  • Speed: It takes only a few minutes to assemble but looks like it came from a professional bakery.

  • Customization: You can easily swap the garlic for Italian seasoning or add red pepper flakes for a little warmth.

  • Texture: The combination of the crunchy crust and the soft, cheesy interior makes it the perfect side dish for any meal.

Golden Cloud Bread Rounds

Golden Cloud Bread Rounds

Prep time: 10 mins | Cook time: 15–20 mins | Yields: 6–8 rounds

Ingredients

  • 3 large Eggs (separated into whites and yolks)

  • 3 tbsp Cream cheese (softened to room temperature)

  • 1/4 tsp Cream of tartar (essential for holding the “cloud” shape)

  • 1/2 tsp Garlic powder or onion powder

  • 1 pinch Sea salt

  • Optional: 1 tbsp melted butter and fresh parsley for brushing on top (as seen in your photo)


Detailed Instructions

  1. Preparation: Preheat your oven to 300°F (150°C). Line a large baking sheet with parchment paper. This is a very delicate batter, so the parchment paper is a must to prevent sticking!

  2. The Egg Yolks: In a medium bowl, whisk together the 3 egg yolks, the softened cream cheese, the garlic powder, and the salt until the mixture is completely smooth and creamy.

  3. The Egg Whites: In a separate, very clean glass or metal bowl, whip the 3 egg whites and the cream of tartar using a hand mixer or stand mixer. Whip on high speed until stiff peaks form (this means when you lift the beaters, the points of the foam stand straight up).

  4. The Folding Process: This is the most important step! Gently fold the yolk mixture into the whipped whites using a spatula. Do not stir. Use a slow “under-and-over” motion so you don’t deflate the air bubbles you just created.

  5. Form the Rounds: Spoon the mixture onto the prepared baking sheet into 6 to 8 even circles. Use the back of the spoon to lightly flatten them into a pancake shape.

  6. Bake: Place in the oven for 15–20 minutes. They are done when the edges are golden brown and the tops feel firm to the touch.

  7. The Finishing Touch: If you want that beautiful golden glow from your photo, brush the warm rounds with a tiny bit of melted butter and a sprinkle of fresh herbs. Let them cool for at least 5 minutes to allow the texture to firm up.


Why this recipe is a keeper:

  • Light & Airy: It has a unique, melt-in-your-mouth texture that is totally different from traditional bread.

  • Perfect for Sandwiches: You can use two rounds to make a gluten-free breakfast sandwich or a mini-burger.

  • Protein-Focused: Since it’s made primarily of eggs and cheese, it’s a very satisfying way to fuel your body.

Small-Batch Pumpkin Protein Muffins

Small-Batch Pumpkin Protein Muffins

Prep time: 10 mins | Bake time: 20–23 mins | Yields: 4 Muffins

Ingredients

The Wet Base

  • 1/2 cup Pumpkin purée (ensure it is 100% pure pumpkin, not pie filling)

  • 1/2 cup Low-fat cottage cheese (blended for a smoother texture, or leave as-is for moisture)

  • 1 large Egg

  • 2 tbsp Your preferred sweetener (monk fruit, stevia, or maple syrup)

  • 1 tsp Pure vanilla extract

The Dry Ingredients

  • 1/3 cup Vanilla whey protein powder

  • 1/4 cup Blanched almond flour

  • 1 tsp Baking powder

  • 1 tsp Pumpkin pie spice (or a mix of cinnamon, nutmeg, and ginger)

  • 1 pinch Sea salt

The Topping (Optional)

  • 1 tbsp Chopped pecans or pumpkin seeds


Detailed Instructions

  1. Prep the Oven: Preheat your oven to 350°F (175°C). Line 4 cups of a standard muffin tin with paper liners or lightly grease them with non-stick cooking spray.

  2. Mix the Wet Ingredients: In a medium mixing bowl, whisk together the pumpkin purée, cottage cheese, egg, sweetener, and vanilla extract. Whisk until the mixture is well-combined and bright orange.

    • Pro Tip: If you prefer a completely smooth muffin texture, pulse the wet ingredients in a blender for 30 seconds.

  3. Add the Dry Ingredients: Gradually stir in the vanilla whey protein, almond flour, baking powder, pumpkin spice, and salt. Fold the mixture gently with a spatula until the flour streaks disappear. Avoid over-mixing, as this can make protein-based muffins a bit rubbery.

  4. Fill the Cups: Divide the batter evenly among the 4 prepared muffin cups. They should be filled about 3/4 of the way full to allow for rising.

  5. Add Texture: Sprinkle the chopped pecans on top of each muffin for a satisfying crunch.

  6. Bake: Place in the center rack of the oven and bake for 20–23 minutes. To check for doneness, insert a toothpick into the center; it should come out clean or with just a few dry crumbs.

  7. Cooling: Allow the muffins to cool in the tin for 10 minutes. This is a crucial step for protein muffins, as they “set” while cooling.


Nutritional Profile (Per Muffin)

Calories Protein Carbs Fat
~128 kcal ~12 g ~6 g ~6 g

Storage Tip

Because of the high moisture content from the cottage cheese and pumpkin, these muffins stay incredibly soft. Store them in an airtight container in the refrigerator for up to 5 days, or freeze them for a quick grab-and-go breakfast later!