Spinach and Cheese Puff Pastry Triangles πŸ₯ŸπŸŒΏ

Spinach and Cheese Puff Pastry Triangles πŸ₯ŸπŸŒΏ

These golden, flaky triangles are a wonderful treat, featuring a buttery crust and a warm, gooey center. They are perfect for sharing at a gathering or enjoying as a wholesome snack!

  • Yields: 6–8 Large Triangles πŸ‘₯

  • Prep time: 15 minutes πŸ”ͺ

  • Cook time: 20 minutes ⏲️


Ingredients πŸ›’

  • 1 sheet Puff Pastry (thawed but cold) πŸ₯

  • 2 cups Fresh Spinach (chopped and sautΓ©ed) or 10oz frozen spinach (thawed and squeezed very dry) 🌿

  • 1 cup Shredded Cheese (Mozzarella, Feta, or a blend) πŸ§€

  • ΒΌ cup Cream cheese or Ricotta (for a smooth texture) πŸ₯£

  • 1 Egg (beaten, for the egg wash) πŸ₯š

  • 1 clove Garlic (minced) πŸ§„

  • Seasoning: Β½ tsp Onion powder, a pinch of salt, and black pepper. πŸ§‚

  • Topping: Sesame seeds or poppy seeds. πŸ₯―


Step-by-Step Instructions πŸ“

  1. Prepare the Filling ➑️ In a bowl, mix your dry spinach, shredded cheese, cream cheese, garlic, and seasonings. Stir until everything is well combined and creamy.

  2. Prep the Pastry ➑️ Preheat your oven to 200°C (400°F). Roll out the puff pastry sheet and cut it into equal-sized squares.

  3. Fill the Squares ➑️ Place a spoonful of the spinach and cheese mixture onto the center of each square.

  4. Fold and Seal ➑️ Fold one corner over to the opposite corner to form a triangle. ➑️ Use the tines of a fork to press the edges together firmly to seal the filling inside. 🍴

  5. The Final Glaze ➑️ Place the triangles on a baking sheet with parchment paper. Brush the tops with the beaten egg. ➑️ Sprinkle with sesame seeds.

  6. Bake ➑️ Bake for 18–22 minutes until the pastry is puffed up and has a gorgeous golden-brown color.

  7. Cool and Enjoy ➑️ Let them sit for a few minutes before serving so the cheese stays perfectly inside. πŸ˜‹


Common Questions & Answers ❓

Q: Can I use different fillings? A: Definitely! ➑️ You can add finely chopped mushrooms or bell peppers to the spinach for more variety.

Q: Why didn’t my pastry puff up? A: Make sure your oven is fully preheated before putting them in! ➑️ Also, try to keep the pastry dough as cold as possible until it’s time to bake.

Q: How do I reheat these? A: To keep them crispy, reheat them in an oven or air fryer at 180Β°C for 3–5 minutes. ♨️


Success Tips ✨

  • Dry the Spinach: The most important step is to make sure the spinach has no liquid left in itβ€”this prevents a soggy bottom! 🧺

  • Don’t Overfill: A little filling goes a long way. Leaving a border around the edges helps the pastry seal properly.

  • Golden Glow: The egg wash is what gives the triangles that beautiful shine, so don’t skip it! 🌟
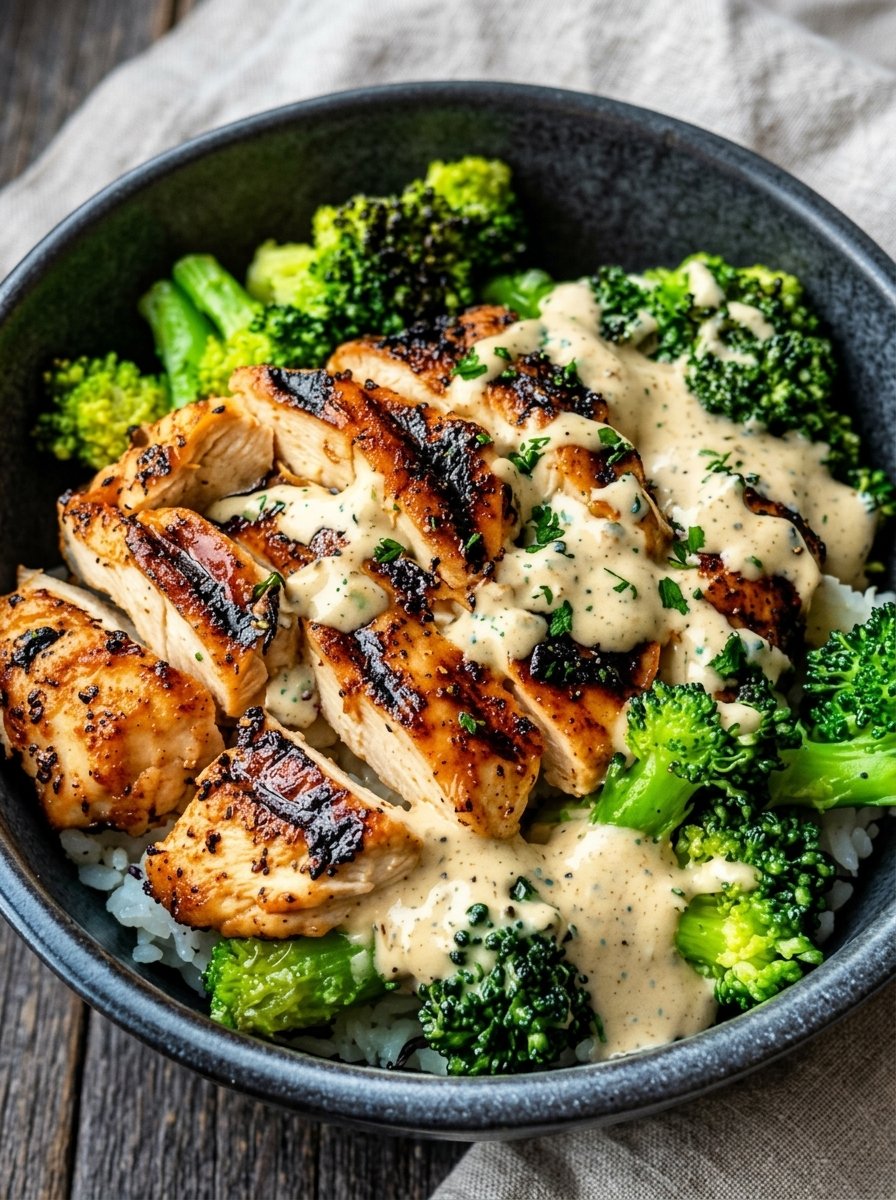
Creamy Garlic Grilled Chicken & Broccoli Bowl

Creamy Garlic Grilled Chicken & Broccoli Bowl πŸ₯—πŸ—

This recipe is a wholesome, high-protein meal that is perfect for a quick dinner or healthy meal prep. It’s light, flavorful, and easy to customize!

  • Servings: 2 people πŸ‘₯

  • Prep time: 10 minutes πŸ”ͺ

  • Cook time: 15 minutes 🍳


Ingredients πŸ›’

The Base:

  • 2 Chicken breasts (sliced into thin strips) πŸ”

  • 2 cups Broccoli florets (fresh or frozen) πŸ₯¦

  • 1 cup Cooked rice (Choose white, brown, or cauliflower rice for a lighter meal) 🍚

  • 1 tbsp Olive oil πŸ«’

  • Seasoning: Β½ tsp garlic powder, Β½ tsp paprika, salt, and black pepper to taste. πŸ§‚

The Creamy Sauce:

  • ΒΌ cup Plain Greek yogurt (a great high-protein base) πŸ₯£

  • 1 tbsp Dijon mustard 🍯

  • 1 tsp Lemon juice (freshly squeezed) πŸ‹

  • 1 clove Garlic (finced finely) πŸ§„

  • 1–2 tsp Water (to adjust the thickness) πŸ’§


Step-by-Step Instructions πŸ“

  1. Season the Chicken ➑️ Place your chicken strips in a bowl and toss with olive oil, garlic powder, paprika, salt, and pepper. Ensure every piece is evenly coated for maximum flavor.

  2. Grill to Perfection ➑️ Heat a grill pan or heavy skillet over medium-high heat. Place the chicken strips in the pan. Pro-Tip: Let them sear undisturbed for about 4 minutes to get those beautiful golden char marks. Flip and cook for another 4–5 minutes until fully cooked through. Set aside to rest.

  3. Steam the Broccoli ➑️ While the chicken is cooking, steam your broccoli florets for about 4–5 minutes. You want them to be vibrant green and fork-tender, not soft or mushy.

  4. Whisk the Sauce ➑️ In a small bowl, combine the Greek yogurt, mustard, lemon juice, and minced garlic. Whisk thoroughly, adding a teaspoon of water at a time until it reaches a smooth “drizzling” consistency.

  5. Assemble the Bowl ➑️ Scoop the cooked rice into two bowls. Arrange the steamed broccoli around the sides and lay the warm grilled chicken strips right in the center.

  6. The Final Touch ➑️ Drizzle the creamy garlic sauce generously over the chicken and broccoli. 🌟 Garnish with a little fresh parsley or red pepper flakes if you like a tiny kick of heat!


Common Questions & Answers ❓

Q: Can I use different vegetables? A: Absolutely! πŸ₯• Asparagus, green beans, or sliced bell peppers are wonderful alternatives if you want to switch things up.

Q: How do I store leftovers? A: Keep the chicken, rice, and broccoli in an airtight container in the fridge for up to 3 days. 🧊 It is best to keep the sauce in a separate small jar and add it after you’ve reheated your meal.

Q: Is there a substitute for Greek yogurt? A: If you prefer, you can use sour cream or a dairy-free plain yogurt alternative for a similar creamy texture. πŸ₯£

Q: What if I don’t have a grill pan? A: A regular non-stick skillet works perfectly fine! You will still get a delicious sear on the chicken. πŸ₯˜


Success Tips ✨

  • Don’t Overcrowd: When grilling the chicken, give the pieces some space so they sear properly instead of steaming.

  • Bright Broccoli: To stop the cooking process and keep the broccoli bright green, you can give it a quick rinse under cold water after steaming.

  • Flavor Boost: Grating a little lemon zest into the sauce adds an extra punch of freshness! πŸ‹

Classic Meal-Prep Chicken Salad

πŸ₯ͺ Classic Meal-Prep Chicken Salad

πŸ›’ Ingredients

The Protein:

  • 1 kg (approx. 2.2 lbs) Chicken breast (poached, roasted, or rotisserie)

  • Water or chicken broth for poaching

The Creamy Base:

  • 1.5 cups Mayonnaise (or a mix of mayo and Greek yogurt for a lighter version)

  • 2 tbsp Dijon mustard

  • 1 tbsp Lemon juice πŸ‹

  • 1 tsp Garlic powder

  • Salt and cracked black pepper to taste

The Mix-ins (The Crunch):

  • 1 cup Celery (finely diced)

  • 1/2 cup Red onion (finely minced)

  • 1/4 cup Fresh parsley or chives (chopped) 🌿

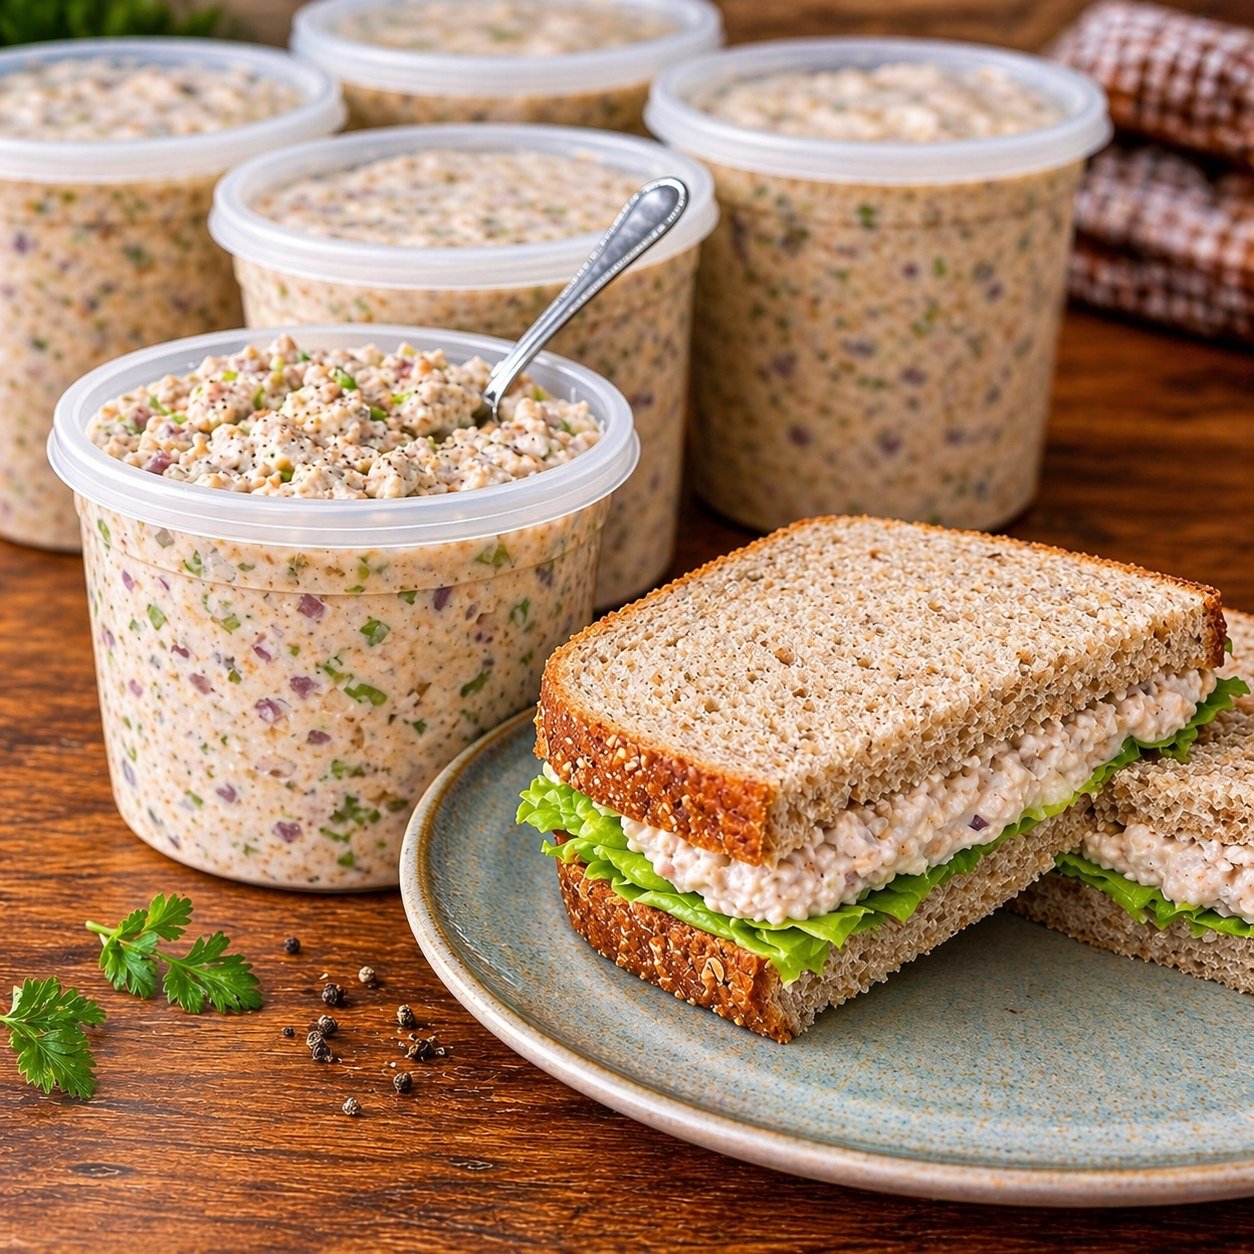
  • Optional: 1 cup halved red grapes or diced apples (for a hint of sweetness like in the image)

For Serving:

  • Whole grain or sourdough bread 🍞

  • Fresh lettuce leaves πŸ₯¬


πŸ‘©β€πŸ³ Step-by-Step Instructions

1. Prepare the Chicken πŸ—

  • If using raw chicken, poach it in simmering water or broth for 12–15 minutes until fully cooked.

  • ➑️ Pro Tip: Let the chicken cool completely before cutting. This keeps the juices inside!

  • Dice the cooled chicken into small, uniform cubes (about 1cm) to match the texture in the photo.

2. Whisk the Dressing πŸ₯£

  • In a very large mixing bowl, combine the mayonnaise, Dijon mustard, lemon juice, garlic powder, salt, and pepper.

  • ➑️ Whisk until smooth and creamy. Taste and adjust seasoning if necessary.

3. Add the Crunch πŸ₯—

  • Add the diced celery, minced onion, and herbs to the dressing bowl.

  • ➑️ If you are adding grapes or apples, toss them in now. Stir well to ensure the aromatics are coated in the dressing.

4. The Big Mix πŸ”„

  • Fold the diced chicken into the dressing mixture.

  • ➑️ Use a large spatula to turn the chicken over until every piece is generously coated.

5. Portion & Chill ❄️

  • Transfer the salad into airtight containers (like the round ones in the photo).

  • ➑️ Crucial Step: Refrigerate for at least 1 hour before serving. This allows the flavors to meld together and the dressing to thicken.

6. Assemble the Sandwich πŸ₯ͺ

  • Lay out your bread. Place a fresh, crisp lettuce leaf on the bottom slice (this acts as a barrier to keep the bread from getting soggy!).

  • ➑️ Add a thick layer of chicken salad, top with the second slice of bread, and slice diagonally.


❓ Common Questions (Q&A)

Q: How long can I keep this in the fridge? A: This chicken salad stays fresh for 3 to 4 days when stored in an airtight container in the refrigerator. 🧊⏳

Q: Can I freeze chicken salad? A: It is not recommended. Mayonnaise-based dressings tend to separate and become oily/watery once thawed, changing the texture significantly. πŸš«β„οΈ

Q: My salad is a bit dry the next day, what should I do? A: The chicken and celery often absorb some of the dressing overnight. Simply stir in an extra tablespoon of mayo or a splash of lemon juice to revive the creaminess! πŸ₯£βœ¨


✨ Pro-Tips for Success:

  • Texture Balance: Finely dicing the celery and onion ensures you get a bit of “crunch” in every bite without any single flavor being too overpowering. πŸ§…πŸ”ͺ

  • The “Bread Barrier”: Always put the lettuce against the bread to keep your sandwich fresh and firm if you are packing it for lunch later! πŸ₯¬πŸ₯ͺ

  • Herb Freshness: Add the fresh parsley right before serving for the brightest green color and best aroma. 🌿

Enjoy your meal prep! πŸ˜‹βœ¨

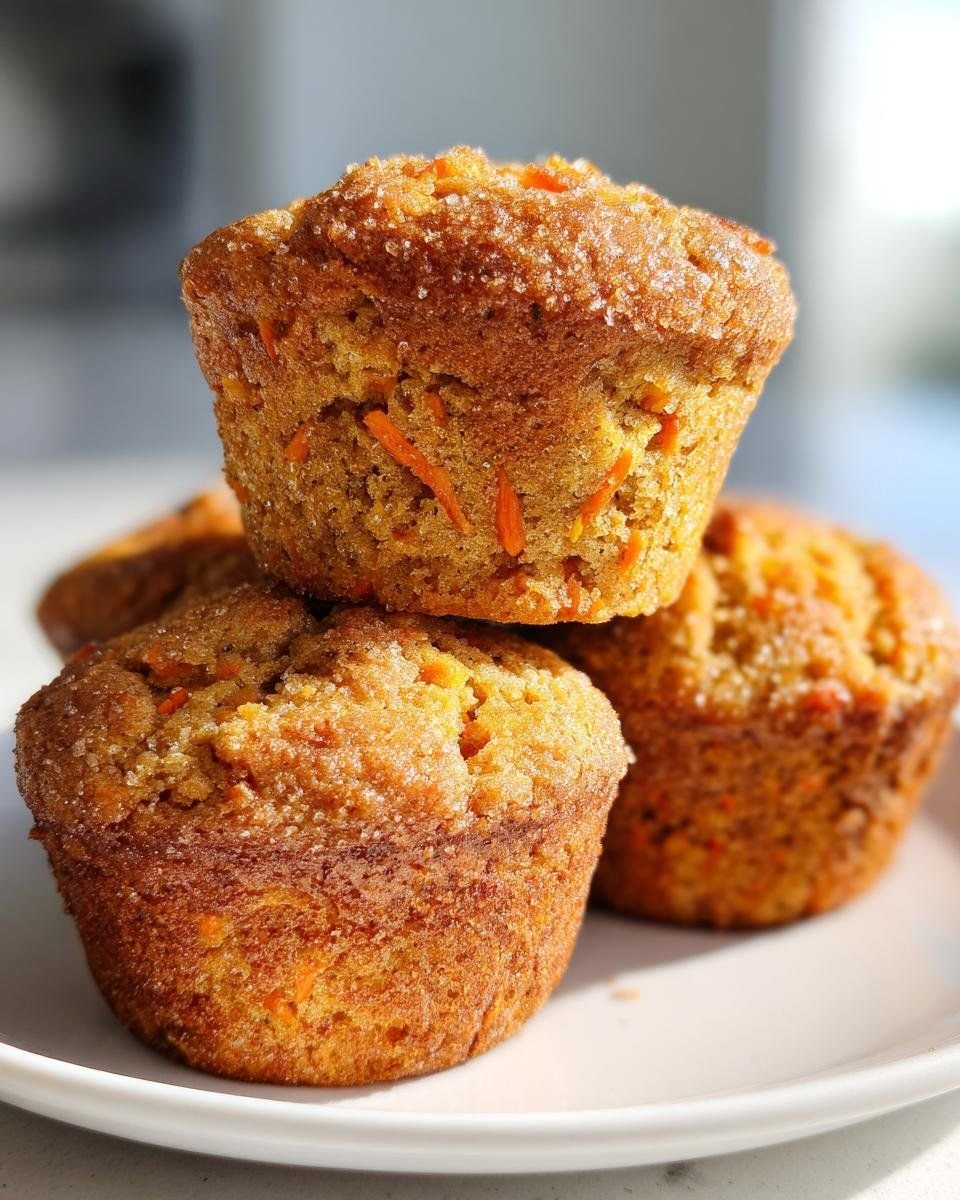
Carrot Cinnamon Muffins

πŸ₯• Carrot Cinnamon Muffins

✨ Soft, moist, and perfectly spiced muffins packed with fresh carrots!

πŸ›’ Ingredients

  • 1 Β½ cups (190g) all-purpose flour
  • 1 tsp baking powder
  • 1 tsp baking soda
  • 1 Β½ tsp ground cinnamon
  • ΒΌ tsp nutmeg (optional)
  • Β½ tsp salt
  • 1 Β½ cups grated carrots πŸ₯•
  • Β½ cup brown sugar
  • β…“ cup oil or melted butter 🧈
  • 2 eggs πŸ₯š
  • 1 tsp vanilla extract
  • Β½ cup milk πŸ₯›

πŸ‘©β€πŸ³ Step-by-Step Recipe

➑️ Step 1: Preheat the Oven

πŸ”₯ Preheat oven to 350Β°F (175Β°C).
🧁 Line a muffin tray with paper liners or lightly grease it.


➑️ Step 2: Mix the Dry Ingredients

πŸ₯£ In a large bowl, combine:

  • Flour
  • Baking powder
  • Baking soda
  • Cinnamon
  • Nutmeg
  • Salt

✨ Whisk well so the spices spread evenly.


➑️ Step 3: Prepare the Wet Ingredients

πŸ₯„ In another bowl:

  • Add brown sugar and oil
  • Mix until smooth

πŸ₯š Add eggs one at a time and whisk well.
🍦 Stir in vanilla extract and milk.


➑️ Step 4: Add the Carrots

πŸ₯• Fold the grated carrots into the wet mixture.

✨ This keeps the muffins moist and flavorful!


➑️ Step 5: Combine Wet & Dry Mixtures

➑️ Pour the wet ingredients into the dry ingredients.
πŸ₯„ Gently fold together until just combined.

⚠️ Avoid overmixing so the muffins stay soft.


➑️ Step 6: Fill the Muffin Tray

🧁 Spoon batter into muffin cups until about ¾ full.

✨ Optional: Sprinkle a little cinnamon sugar on top.


➑️ Step 7: Bake

πŸ”₯ Bake for 18–22 minutes until:
βœ”οΈ Muffins are golden on top
βœ”οΈ A toothpick inserted in the center comes out clean


➑️ Step 8: Cool & Enjoy

🌬️ Let muffins cool for 5 minutes in the tray.
➑️ Transfer to a rack to cool completely.

β˜• Enjoy warm with tea or coffee!


❓Q/A

❓Can I add walnuts or raisins?

βœ… Yes! They add extra texture and flavor.

❓Can I make these muffins healthier?

πŸ₯• You can use whole wheat flour and reduce the sugar slightly.

❓How should I store them?

πŸ“¦ Keep in an airtight container for up to 3 days.

Creamy Egg Salad Sandwich with Fresh Dill

Creamy Egg Salad Sandwich with Fresh Dill

Ingredients

For the Egg Salad:

  • 6 large eggs, hard-boiled and peeled

  • 1/4 cup mayonnaise

  • 1 tbsp Dijon mustard

  • 2 tbsp fresh dill, finely chopped (plus extra for garnish)

  • 1 stalk celery, finely diced (for crunch)

  • 1/2 tsp paprika

  • Salt and black pepper to taste

For the Sandwich:

  • 4 slices whole-grain or sourdough bread, lightly toasted

  • Optional: A handful of fresh arugula or lettuce for the base


Instructions

1. Prepare the Eggs

  1. Place the eggs in a saucepan and cover with cold water. Bring to a boil, then remove from heat, cover, and let sit for 12 minutes.

  2. Transfer the eggs to an ice bath for 5 minutes before peeling.

  3. Once peeled, chop the eggs into bite-sized cubes.

2. Mix the Salad

  1. In a medium bowl, whisk together the mayonnaise, Dijon mustard, paprika, salt, and pepper.

  2. Gently fold in the chopped eggs, diced celery, and fresh dill until the eggs are well-coated but still hold their shape.

3. Assemble the Sandwich

  1. Lay out your toasted bread slices.

  2. If using, place a small layer of arugula on the bottom slice.

  3. Generously scoop the egg salad onto the bread, spreading it evenly to the edges.

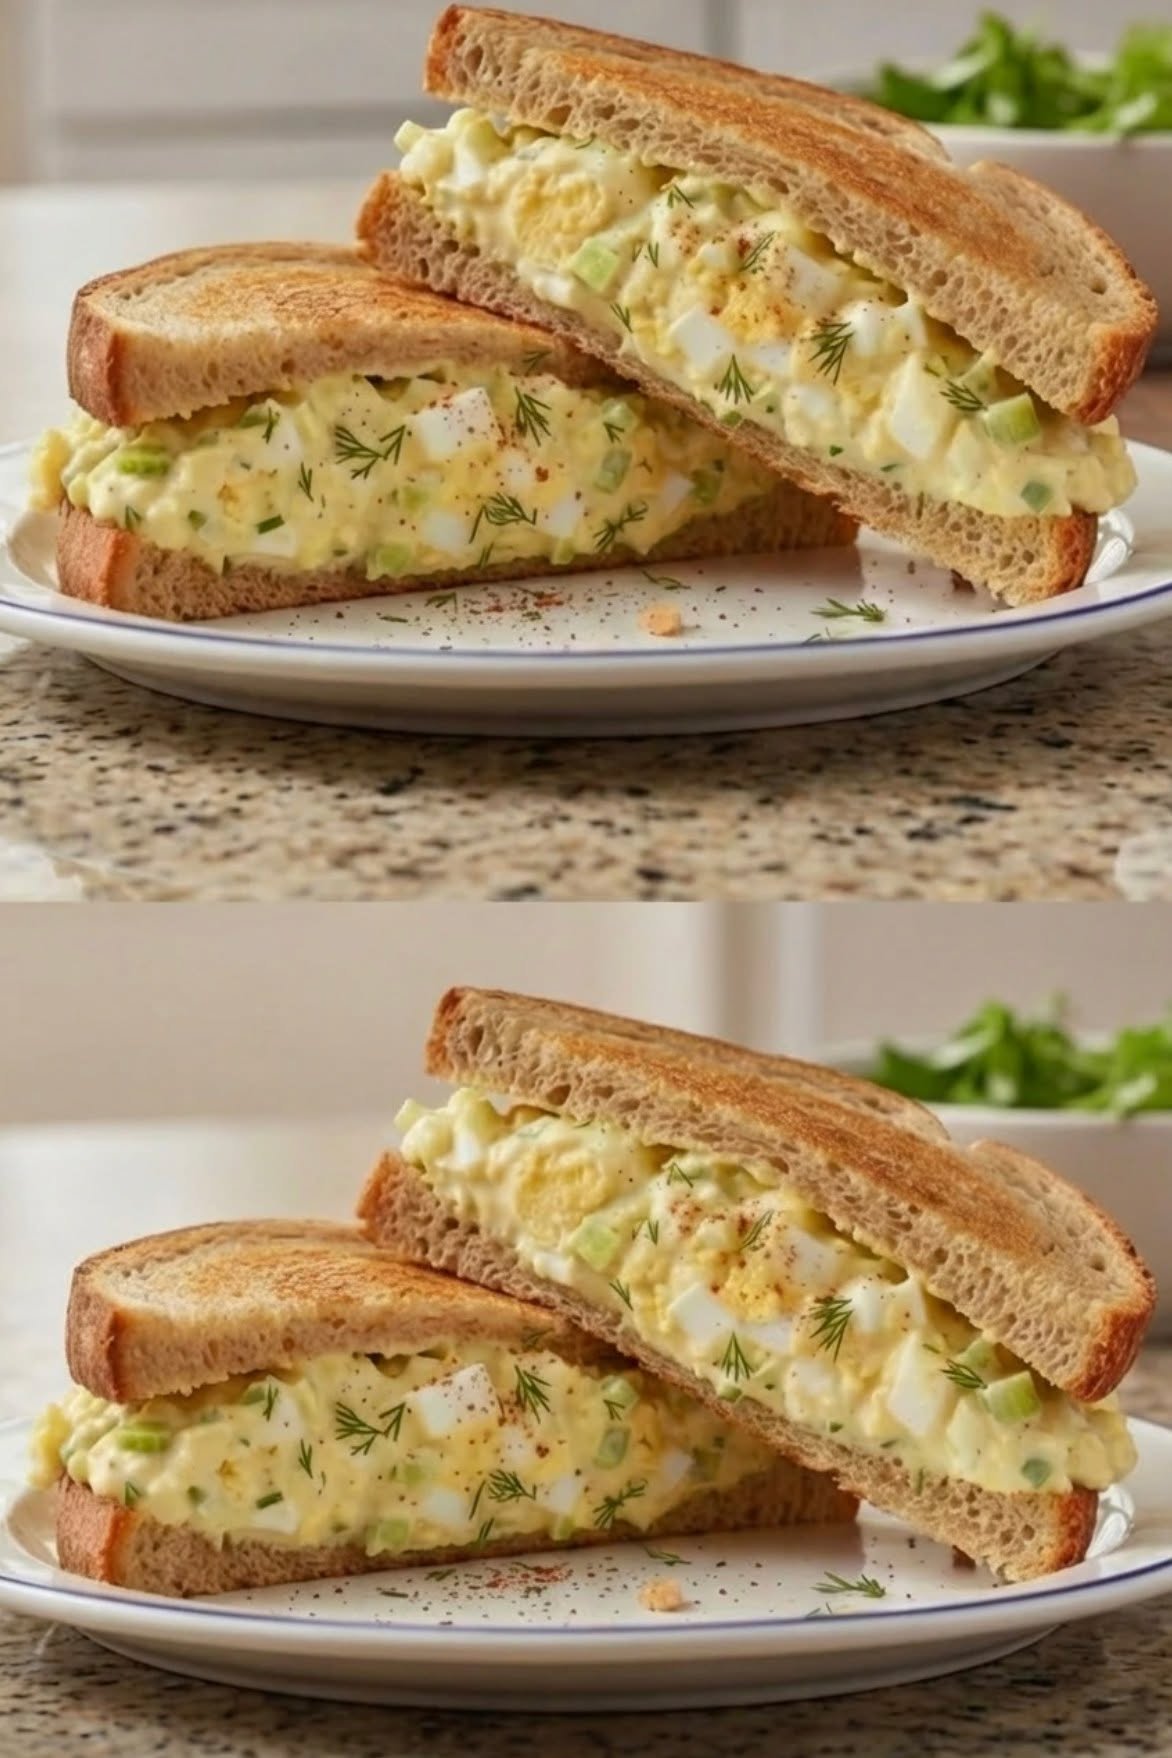
  4. Top with extra fresh dill and a pinch of paprika as shown in the image.

  5. Place the second slice of bread on top and slice diagonally.


Quick Tips for Your Social Media Page:

  • The Perfect Boil: Mention that an ice bath is the secret to easy-peeling eggs and preventing that “green ring” around the yolk.

  • Texture Matters: Remind your audience that hand-chopping the eggs rather than mashing them provides the beautiful, chunky texture seen in the photo.

Low Carb Creamy Bacon Cheddar Celery Boats

Crunchy celery filled with a creamy bacon-cheddar mixture β€” perfect for parties, meal prep, or a quick low-carb snack!

πŸ›’ Ingredients

  • 8–10 large celery stalks
  • 8 oz cream cheese, softened
  • 1/3 cup sour cream
  • 1 cup shredded sharp cheddar cheese
  • 4 slices bacon, cooked crispy and crumbled
  • 2 tbsp chopped green onion or chives
  • 1/4 tsp garlic powder
  • 1/4 tsp onion powder
  • 1/4 tsp smoked paprika (optional)
  • Salt & black pepper to taste

πŸ‘©β€πŸ³ Step-by-Step Recipe

πŸ₯¬ 1. Prep the Celery

  • Wash and dry the celery well.
  • Trim the ends and cut into 3-inch sticks.
  • If stalks are very wide, slice them lengthwise.
  • Arrange them hollow-side up on a tray or dish.

πŸ₯£ 2. Make the Creamy Filling

  • In a bowl, mix:
    • softened cream cheese
    • sour cream
  • Stir until smooth and creamy.

πŸ₯“ 3. Add Flavor

Mix in:

  • cheddar cheese
  • crumbled bacon
  • green onion
  • garlic powder
  • onion powder
  • smoked paprika
  • salt & pepper

Stir until everything is evenly combined.


πŸ‘Œ 4. Fill the Celery Boats

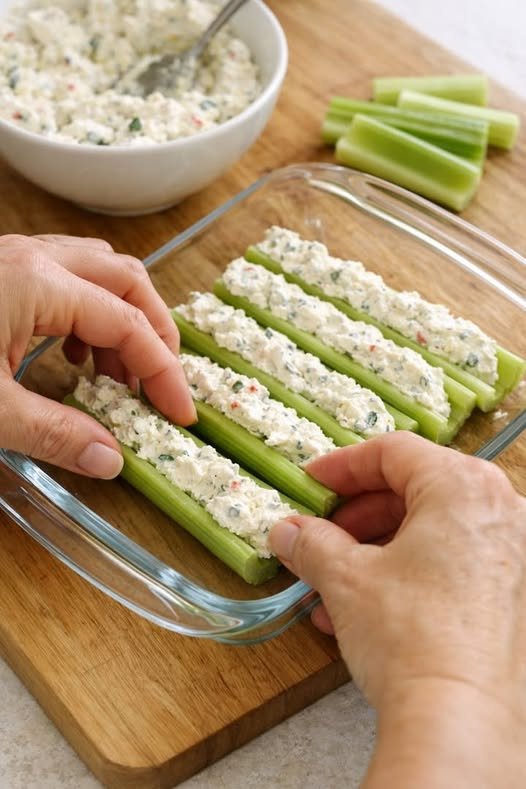
  • Spoon the creamy mixture into each celery stick.
  • Smooth the tops with a spoon or butter knife.

❄️ 5. Chill & Serve

  • Refrigerate for 20–30 minutes before serving.
  • Serve cold for the best crunchy texture.

πŸ’‘ Tips & Variations

  • 🌢️ Add cayenne or hot sauce for spice.
  • πŸ₯› Use Greek yogurt instead of sour cream for extra protein.
  • πŸ«’ Skip bacon and add olives or jalapeΓ±os for a vegetarian version.
  • πŸ₯’ The filling also works great in cucumber boats or mini peppers.

❓Q&A

Can I make these ahead of time?

Yes! Make the filling up to 2 days early and store in the fridge. Stuff celery on the serving day for maximum crunch.

How do I keep celery crisp?

Dry the celery well after washing and keep refrigerated until serving.

Can I use turkey bacon?

Absolutely β€” turkey bacon works great for a lighter option.