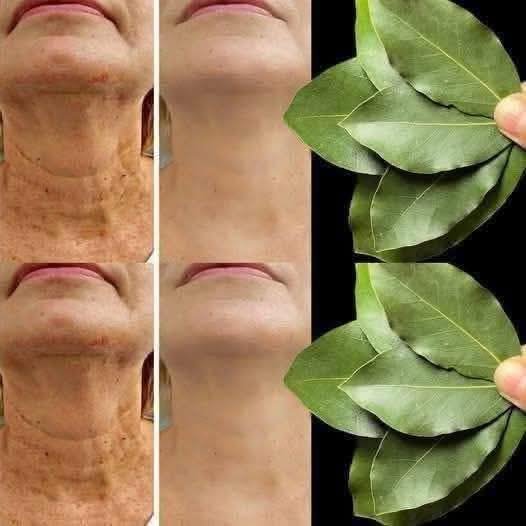
Bay Leaf Herbal Skin-Toning Water

Bay Leaf Herbal Skin-Toning Water

A natural, antioxidant-rich botanical mist for a refreshed complexion.

Ingredients

  • 5–7 Dried bay leaves

  • 2 cups Distilled or filtered water

Instructions

  1. Combine: Place the dried bay leaves into a small pot with the 2 cups of water.

  2. Infuse: Bring the mixture to a gentle boil, then reduce heat.

  3. Simmer: Let the leaves simmer for 10–15 minutes to extract the beneficial tannins and antioxidants.

  4. Cool: Turn off the heat and allow the infusion to cool completely to room temperature.

  5. Store: Strain the liquid into a clean glass bottle or spray mister.


Application & Usage

  • As a Rinse: Splash onto your face after your regular cleansing routine.

  • As a Toner: Apply to a cotton pad and gently sweep over the face and neck.

  • Frequency: Use once daily, preferably during your evening routine.

Pro-Tip: Store your toning water in the refrigerator. The cold temperature enhances the temporary skin-tightening effect and feels incredibly soothing on tired skin.

Important Notes

  • Patch Test: Always test a small amount on your inner wrist before full facial application.

  • Avoid Eyes: Keep away from the delicate eye area.

  • Shelf Life: Use within 5 days for maximum freshness.

The Realistic Outlook

While this herbal water provides excellent antioxidant support and reduces the appearance of excess oil, it is a topical botanical treatment. It will offer a lovely temporary “glow” and mild tightening, but it is not a replacement for clinical dermatological procedures for deep wrinkles.

🌼 Perfect Chamomile Tea (No Bitterness, Maximum Calm)

🌼 Perfect Chamomile Tea (No Bitterness, Maximum Calm)

https://images.openai.com/static-rsc-4/vNW5CYoRLuyjRCdhpjbNbuHwy1XgyxGlZhWbF5ivdQwW0Ot8YGPfM11Jx34FPRM5L-_ZhUJsltZeD241RePx0PcVo-uz48iiGf2F8Ryipxq470ynsKGA2mqATvoz1rP0mnFzsR--6qSLz56Us489dsLuvj_wwvpj2PP7hBq_bsF7uaTiVLfwAWbRwQb2QG1T?purpose=fullsize
https://images.openai.com/static-rsc-4/dWe6mDgxAsH0fbILB5HHb8zTS_TpK24V33iISq6_b5AYonDroSJ4algqAsA0J9phCcTP9cDXXuQvRldlY5PV8zfhmz7trS4ufNEuuzJJPmBV2NbibWBkcLhVGDOuZgGRZlyEFaGm0XvUUMR5xLKrPoKbJCX1LS4p1r3b190GGliWux2T_ToLJitxooEkXXaN?purpose=fullsize
https://images.openai.com/static-rsc-4/FZ87u7tDLVNOoGk1WkGC_82MPOn0b9Cr6UB5W_TqlE4YzqHE_liGmhHmk2GLBGY0JkYnc3ChQHkU7rjzpEpYxBd8uW3M9p5LWe49_z1JBNueFjd5LC8DGyQS5UC8oWpg5vSi1UTgE1FTHACMfvtFQuKzKAlY-LpIn44XlzXmkhSg0vxuUBzNrjAP1wfUXEz5?purpose=fullsize
https://images.openai.com/static-rsc-4/UTLXWTVdy6UbRllmyooBebYj2MfpHfKQTyfMPR0ivnTlC92f-pG-mTvl9ACS-ZJJ1oFb6jKy0mmmXBdIfRzc_yy4daw36APGxIwlsYM76azhH4Wy6_TiIHLE4JKT7asFrc8vxfscF0ymDgHDHRmOT2UK-CCCjFe23Fq0ZhRZNMxJniaDJ1D54ymrhWM2r2Vt?purpose=fullsize
https://images.openai.com/static-rsc-4/jEc8vVeNcQafxBQ5o8CCSdN2WYv2IfLiBeOv6lHB9rt_iP5e6LgrIrMU_w0jP500wFEyGbKuXGrJwSkNuLqL1LFvcB23PLEsolD6L3douEc5c4flNMoISw1reSQZ8kZ9pg7_4F-eRz42TNHT90U7eGGaXMVUvJzZTWMgUP0elqFCu62jt4Pneo4yXGd39-CY?purpose=fullsize

πŸ“ Ingredients

  • 1 Β½ cups filtered water (clean water = clean flavor)
  • 2 tbsp dried chamomile flowers (or 2 premium tea bags)
  • 1 tsp raw honey (optional, low-carb sweetness)
  • 1 thin slice lemon or fresh mint sprig (optional)

β˜• Instructions (The Right Way)

1. Heat the Water
Bring water to about 90Β°C (not boiling).
πŸ‘‰ No thermometer? Let it rest 2 minutes after boiling.

2. The β€œTrap the Calm” Method
Add chamomile to your mug and pour hot water over it.
πŸ‘‰ Immediately cover with a lid or saucer.

3. Deep Steep (Don’t Rush This)
Let it steep for 5–7 minutes.
Chamomile needs time to release its full soothing compounds.

4. Strain & Finish
Remove flowers or tea bag gently.
Add honey and lemon/mint if desired.


πŸ”¬ Why This Method is Superior

βœ” The Lid = Maximum Relaxation
Chamomile contains bisabolol, a delicate essential oil.
Without a lid β†’ it evaporates β†’ weaker tea.
With a lid β†’ you keep the calming magic.

βœ” Perfect Temperature = No Bitterness
Boiling water burns delicate floral notes β†’ bitter taste.
90Β°C keeps it smooth, sweet, and apple-like.

βœ” No Squeezing Rule
Squeezing tea bags releases tannins β†’
🚫 bitter
🚫 grassy (β€œwet hay” taste)
βœ” smooth if left alone


πŸ’‘ Pro Tips (Next-Level Upgrade)

  • Use a glass or ceramic cup (keeps flavor pure)
  • Add a tiny pinch of cinnamon for warmth
  • Drink before bed for best calming effect 😴
  • Try double steeping (reuse flowers once for lighter second cup)

🌿 What It Tastes Like (When Done Right)

  • Lightly sweet
  • Soft apple-like notes
  • Smooth, buttery floral finish
  • Zero bitterness

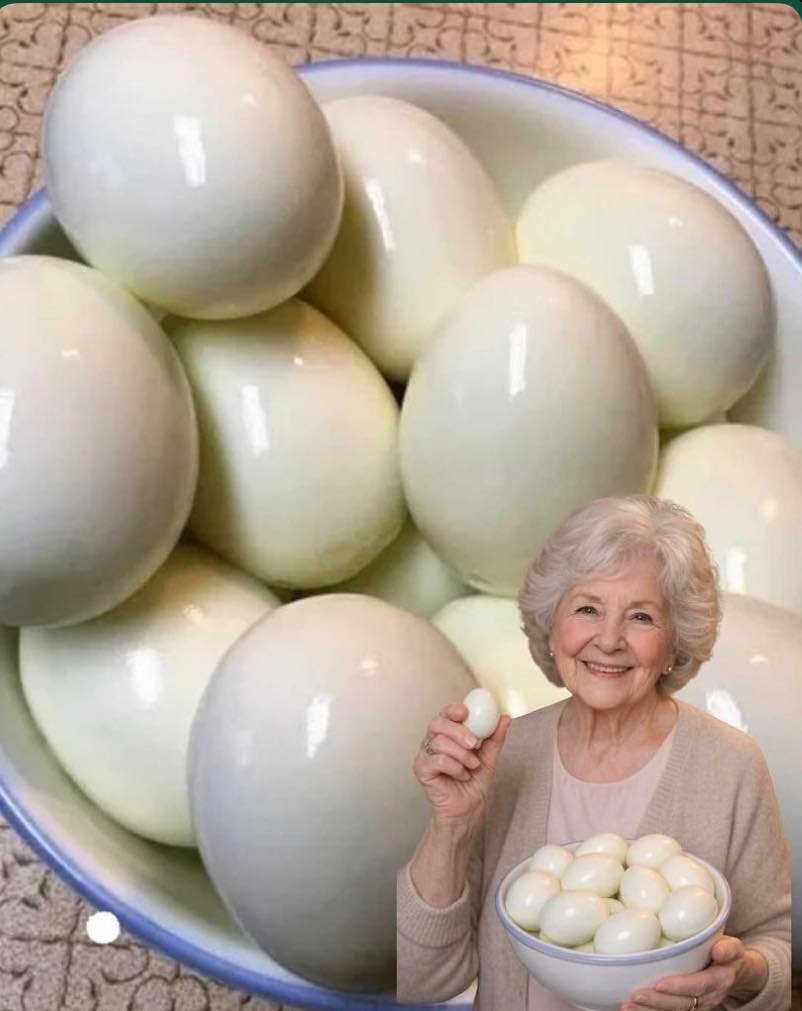
The Perfect Easy-Peel Hard-Boiled Egg

The Perfect Easy-Peel Hard-Boiled Egg

Prep time: 1 min | Cook time: 9–12 mins | Servings: Flexible

Ingredients

  • Large Eggs: Fresh or a few days old (older eggs actually peel better!)

  • Water: Enough to cover eggs by at least 1 inch

  • Ice Cubes: For the “shock” bath

  • Salt or Vinegar: 1 teaspoon (optional, helps prevent cracking)

Instructions

  1. The Boil: Fill a medium saucepan with enough water to submerge your eggs. Bring the water to a rolling boil over high heat.

  2. The Gentle Lower: Once boiling, reduce heat to low. Use a slotted spoon to gently lower the eggs into the water to prevent the shells from cracking against the bottom of the pot.

  3. The Simmer: Turn the heat back up slightly to maintain a gentle simmer. Set your timer based on your preference:

    • 9 Minutes: Slightly creamy, bright yellow yolk.

    • 12 Minutes: Fully set, light yellow yolk (best for salads).

  4. The Ice Bath: While the eggs cook, prepare a bowl with cold water and plenty of ice.

  5. The Shock: Immediately transfer the eggs from the boiling water to the ice bath. Let them sit for at least 10 minutes. This stops the cooking process and causes the egg to contract slightly away from the shell.

  6. The Peel: Gently tap the egg on a hard surface to crack the shell all over. Peel under cool running water or submerged in the water bowlβ€”the water helps the shell slide right off.


Nutritional Benefits

  • Complete Protein: Eggs contain all nine essential amino acids needed for muscle repair and immune function.

  • Choline for Brain Health: Eggs are one of the best dietary sources of choline, which is vital for memory and mood regulation.

  • Eye Health: The yolks contain lutein and zeaxanthin, antioxidants that help protect eyes from age-related decline.

  • Satiety: The high protein and healthy fat content help you feel full longer, which can naturally assist with healthy weight management.


Q&A

Q: Why do some yolks have a green ring? A: That green ring is a harmless reaction between sulfur and iron. It usually happens when eggs are overcooked or not cooled quickly enough in an ice bath.

Q: How long can I keep boiled eggs in the fridge? A: Hard-boiled eggs (in the shell) stay fresh for up to 7 days when refrigerated. Once peeled, they should be eaten within a day.

Q: Are eggs okay for heart health? A: For most people, the cholesterol in eggs has a minimal impact on blood cholesterol. Most health organizations suggest that 1–2 eggs a day can be part of a healthy, balanced diet.

Q: Why are fresh eggs harder to peel? A: As eggs age, the pH level rises and the membrane loses some of its “stickiness” to the shell. If you have very fresh farm eggs, try steaming them for 12 minutes instead of boiling for an easier peel.

Crispy 3-Ingredient Savory Rolls

Crispy 3-Ingredient Savory Rolls

Prep time: 15 mins | Bake time: 25–30 mins | Servings: 4–6 rolls

Ingredients

  • Vegetable Base: 2 large Zucchini (or 2 large Potatoes for a heartier, non-keto version)

  • Cheese: 1 Β½ cups shredded Mozzarella or Cheddar (divided)

  • Eggs: 2 large

  • Optional Seasonings: Β½ tsp garlic powder, ΒΌ tsp black pepper, and a pinch of salt

  • Topping (Optional): 1 tsp poppy seeds or sesame seeds

Instructions

  1. Extract the Moisture: Grate the zucchini (or potatoes) using the large holes of a box grater. This is the most important step: place the shreds in a clean kitchen towel and squeeze as hard as you can over the sink. You want the vegetable shreds to be as dry as possible to ensure a crispy result.

  2. Mix the Base: In a medium bowl, combine the squeezed shreds, 1 cup of the shredded cheese, the two eggs, and your seasonings. Mix thoroughly until the egg is fully incorporated and the cheese is evenly distributed.

  3. The First Bake: Preheat your oven to 400Β°F (200Β°C). Line a large baking sheet with parchment paper. Spread the mixture onto the sheet, pressing it down into a thin, even rectangle (about ΒΌ inch thick).

  4. Set the “Dough”: Bake for 15–20 minutes. You are looking for the edges to turn golden brown and the center to feel firm to the touch.

  5. Fill and Roll: Remove from the oven. Sprinkle the remaining Β½ cup of cheese evenly over the hot baked sheet. While it is still warm and pliable, carefully roll the sheet up tightly from one long end to the other, using the parchment paper to help you lift it if needed.

  6. The Final Crisp: Slice the long roll into individual smaller portions. Place them back on the baking sheet (seam side down). If desired, sprinkle with poppy or sesame seeds.

  7. Brown to Perfection: Return to the oven for another 5–10 minutes until the cheese inside is melted and the exterior is deep golden and crunchy.

  8. Serve: Let them rest for 2 minutes before serving so the cheese sets slightly.


Nutritional Benefits

  • High Protein: The combination of eggs and cheese provides a substantial amount of protein, making these very filling.

  • Low Carb & Gluten-Free: Perfect for those avoiding flour or grains, as the structure comes entirely from whole ingredients.

  • Vitamin Rich: Zucchini is high in Vitamin A and antioxidants, while potatoes provide potassium and Vitamin C.

  • Healthy Fats: Provides fat-soluble vitamins and keeps you satisfied longer than processed snacks.


Q&A

Q: Can I use other vegetables? A: Yes! Finely shredded carrots or even riced cauliflower (thoroughly squeezed) work well with this method.

Q: How do I keep them from sticking to the paper? A: Use high-quality parchment paper. If you find they stick, a very light spray of olive oil on the paper before spreading the mixture can help.

Q: Can I make these ahead of time? A: These are best served fresh for the ultimate crunch. However, you can store leftovers in the fridge for up to 3 days and crisp them back up in an air fryer or oven at 350Β°F for a few minutes.

Q: What should I serve these with? A: They are delicious on their own, but they also pair perfectly with a side of warm marinara sauce or a creamy Greek yogurt dip.

The Perfect Easy-Peel Hard-Boiled Egg

The Perfect Easy-Peel Hard-Boiled Egg

Prep time: 1 min | Cook time: 9–12 mins | Servings: Flexible

Ingredients

  • Large Eggs: Fresh or a few days old (older eggs actually peel better!)

  • Water: Enough to cover eggs by at least 1 inch

  • Ice Cubes: For the “shock” bath

  • Salt or Vinegar: 1 teaspoon (optional, helps prevent cracking)

Instructions

  1. The Boil: Fill a medium saucepan with enough water to submerge your eggs. Bring the water to a rolling boil over high heat.

  2. The Gentle Lower: Once boiling, reduce heat to low. Use a slotted spoon to gently lower the eggs into the water to prevent the shells from cracking against the bottom of the pot.

  3. The Simmer: Turn the heat back up slightly to maintain a gentle simmer. Set your timer based on your preference:

    • 9 Minutes: Slightly creamy, bright yellow yolk.

    • 12 Minutes: Fully set, light yellow yolk (best for salads).

  4. The Ice Bath: While the eggs cook, prepare a bowl with cold water and plenty of ice.

  5. The Shock: Immediately transfer the eggs from the boiling water to the ice bath. Let them sit for at least 10 minutes. This stops the cooking process and causes the egg to contract slightly away from the shell.

  6. The Peel: Gently tap the egg on a hard surface to crack the shell all over. Peel under cool running water or submerged in the water bowlβ€”the water helps the shell slide right off.


Nutritional Benefits

  • Complete Protein: Eggs contain all nine essential amino acids needed for muscle repair and immune function.

  • Choline for Brain Health: Eggs are one of the best dietary sources of choline, which is vital for memory and mood regulation.

  • Eye Health: The yolks contain lutein and zeaxanthin, antioxidants that help protect eyes from age-related decline.

  • Satiety: The high protein and healthy fat content help you feel full longer, which can naturally assist with healthy weight management.


Q&A

Q: Why do some yolks have a green ring? A: That green ring is a harmless reaction between sulfur and iron. It usually happens when eggs are overcooked or not cooled quickly enough in an ice bath.

Q: How long can I keep boiled eggs in the fridge? A: Hard-boiled eggs (in the shell) stay fresh for up to 7 days when refrigerated. Once peeled, they should be eaten within a day.

Q: Are eggs okay for heart health? A: For most people, the cholesterol in eggs has a minimal impact on blood cholesterol. Most health organizations suggest that 1–2 eggs a day can be part of a healthy, balanced diet.

Q: Why are fresh eggs harder to peel? A: As eggs age, the pH level rises and the membrane loses some of its “stickiness” to the shell. If you have very fresh farm eggs, try steaming them for 12 minutes instead of boiling for an easier peel.

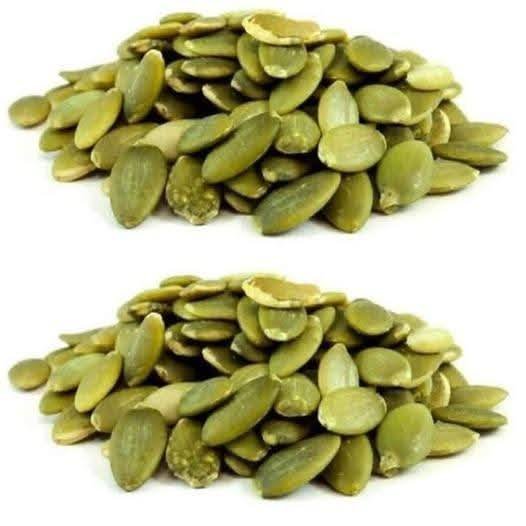
Perfectly Toasted Sea Salt Pumpkin Seeds

Perfectly Toasted Sea Salt Pumpkin Seeds

Prep time: 5 mins | Cook time: 10–15 mins | Servings: Multiple

Ingredients

  • Pumpkin Seeds: 1 cup raw, hulled (green pepitas)

  • Olive Oil: 1 teaspoon (or avocado oil)

  • Sea Salt: Β½ teaspoon

  • Optional Seasoning: A pinch of cinnamon or smoked paprika for extra flavor

Instructions

  1. Prep the Pan: Place a wide skillet over medium-low heat. You can also use an oven preheated to 325Β°F (165Β°C) for a more even toast.

  2. Coat the Seeds: In a small bowl, toss the raw pumpkin seeds with the oil and sea salt until every seed is lightly coated.

  3. Toast: * Stovetop: Add the seeds to the warm skillet in a single layer. Stir frequently for 5–7 minutes. Listen for a slight “popping” sound and look for them to turn a light golden brown and become fragrant.

    • Oven: Spread seeds on a parchment-lined baking sheet and bake for 10–15 minutes, tossing halfway through.

  4. Cool: Immediately remove the seeds from the heat and spread them out on a plate or paper towel to cool. They will continue to crisp up as they reach room temperature.

  5. Store: Keep in an airtight glass jar for up to 2 weeks to maintain crunch.


Nutritional Benefits

  • Rich in Magnesium: One serving contains a significant amount of magnesium, a mineral that helps the body relax and supports over 300 biochemical reactions.

  • Natural Source of Tryptophan: Pumpkin seeds contain tryptophan, an amino acid that the body converts into serotonin and then into melatonin, the hormone that regulates sleep cycles.

  • High in Zinc: Zinc is vital for immune function and cell growth.

  • Heart-Healthy Fats: They are packed with omega-3 and omega-6 fatty acids, which are excellent for brain health and reducing inflammation.


Q&A

Q: How many seeds should I eat before bed? A: A small handful (about 1 to 2 tablespoons) is usually enough to reap the benefits without feeling too full before sleep.

Q: Are raw seeds better than toasted ones? A: Both are healthy. Raw seeds preserve more of the natural oils, while toasted seeds are often easier to digest and have a more pleasant, nutty flavor.

Q: Can these help with weight management? A: Yes. Because they are high in protein and fiber, they help you feel satisfied, which can prevent late-night cravings for sugary snacks.

Q: Do I need to soak them first? A: While not necessary, soaking seeds (sprouting) for a few hours before toasting can help reduce phytic acid, making the nutrients even easier for your body to absorb.