Refreshing Lemon & Ginger Tonic

Refreshing Lemon & Ginger Tonic πŸ‹πŸ«šβ˜•

This tonic is a powerhouse of natural wellness! It is completely sugar-free (if omitting honey), flourless, and packed with antioxidants. Whether you need a morning boost or a soothing evening drink, this simple recipe is a perfect addition to your daily routine.


πŸ›’ Ingredients (Serves 2 Cups)

  • 2 cups Water (Filtered) πŸ’§

  • 1 inch Fresh Ginger Root (Peeled and sliced or grated) 🫚

  • 1 Whole Lemon (Half sliced into rounds, half juiced) πŸ‹

  • 1 tbsp Raw Honey (Optional/to taste) 🍯

  • Pinch of Cayenne Pepper (Optional, for a metabolic boost) 🌢️


πŸ‘¨β€πŸ³ Step-by-Step Instructions

  1. Prepare the Ginger πŸ”ͺ ➑️

    • Peel the fresh ginger root. Slice it into thin rounds for a mild tea, or grate it if you prefer an intense, spicy flavor.

  2. Boil the Water 🌑️ ➑️

    • Bring 2 cups of filtered water to a gentle boil in a small pot or kettle.

  3. Infuse the Ginger πŸ•’ ➑️

    • Add the ginger to the hot water.

    • For a mild tonic: Remove from heat and let it steep for 5 minutes.

    • For a stronger tonic: Let the ginger simmer in the water for 3 to 5 minutes before turning off the heat.

  4. Add the Lemon πŸ‹ ➑️

    • Stir in the fresh lemon juice and drop the lemon slices directly into the pot. The lemon adds bright acidity and a boost of vitamin C.

  5. Sweeten and Season ✨ ➑️

    • Allow the liquid to cool slightly. Once it is warm (not boiling), stir in the raw honey and a pinch of cayenne pepper if you enjoy a little heat.

  6. Serve 🍽️ ➑️

    • Pour into a mug to enjoy warm, or pour over ice for a chilled, refreshing version. 🧊 Drink one cup in the morning and one in the evening! 😊✨


❓ Q & A (Common Inquiries)

Q: Can I use ground ginger instead of fresh ginger root? A: Yes! If fresh is unavailable, use 1/4 to 1/2 teaspoon of ground ginger for 2 cups of water. However, fresh ginger provides a more vibrant flavor and higher levels of gingerol for digestion. πŸ«šβœ…

Q: Why should I wait for the water to cool before adding honey? A: Boiling water can neutralize the beneficial enzymes and antioxidants found in raw honey. Letting it cool to a warm temperature preserves these natural properties. 🍯🌑️

Q: Is it okay to leave the lemon peels in the drink? A: Absolutely. The peel contains healthy lemon oils. Just ensure you wash the lemon thoroughly before slicing to remove any wax or residue. πŸ‹πŸšΏ

Q: Can I make a large batch to keep in the fridge? A: Yes! You can triple or quadruple the recipe and store it in a glass jar in the refrigerator for up to 3 days. It is a delicious, healthy replacement for sugary sodas. 🍱🧊

Q: What are the benefits of adding cayenne pepper? A: Cayenne contains capsaicin, which can help support a healthy metabolism and adds a warming sensation that complements the spice of the ginger. πŸŒΆοΈπŸ“ˆ


πŸ’‘ Quick Tips

  • Freshness Hack: Store your fresh ginger in the freezer; it stays fresh longer and is much easier to grate when frozen! 🧊🫚

  • Morning Ritual: Drinking this on an empty stomach in the morning is a great way to “wake up” your digestive system. β˜€οΈπŸ§˜β€β™€οΈ

Homemade Lung Revival Herbal Tea Blend

Homemade Lung Revival Herbal Tea Blend πŸŒΏπŸ«β˜•

This herbal infusion is designed to support respiratory wellness using natural, soothing ingredients. It is a traditional wellness tonic that is caffeine-free, flourless, and sugar-free, making it a gentle addition to your daily routine.


πŸ›’ Ingredients (Dry Blend)

  • 2 parts Mullein Leaf: Known for its soothing effect on the respiratory tract. πŸƒ

  • 1 part Peppermint Leaf: Helps open up airways and provides a refreshing taste. 🌱

  • 1 part Ginger Root (dried or fresh): Supports a healthy inflammatory response. 🫚

  • Β½ part Licorice Root: Adds a natural sweetness and coats the throat. 🍬

  • Β½ part Thyme: A traditional herb used for chest comfort. 🌿

  • Optional: A slice of fresh lemon or a teaspoon of raw honey (after brewing). πŸ‹πŸ―


πŸ‘¨β€πŸ³ Step-by-Step Instructions

  1. Prepare the Herb Blend πŸ₯£ ➑️

    • In a large clean jar (like the one in the photo), mix all your dried herbs together.

    • Shake the jar well so the smaller pieces of ginger and licorice are evenly distributed.

  2. Boil the Water 🌑️ ➑️

    • Bring fresh, filtered water to a boil.

    • Tip: Let the water sit for 1 minute after boiling so it doesn’t “scorch” the delicate leaves.

  3. Measure and Steep πŸ₯„ ➑️

    • Add 1 to 2 teaspoons of the herbal blend into a tea infuser or directly into a mug.

    • Pour 8 oz (1 cup) of hot water over the herbs. ➑️

    • Cover the mug with a small plate to keep the beneficial essential oils from escaping in the steam.

  4. The Waiting Game ⏳ ➑️

    • Let the tea steep for 10 to 15 minutes. Herbal teas require a longer steeping time than green or black tea to release their full properties.

  5. Strain and Sip β˜• ➑️

    • Remove the infuser or strain the tea into a fresh cup. ➑️

    • Add a squeeze of lemon if desired. Enjoy it warm for the best results! ✨


❓ Q & A (Common Inquiries)

Q: How often can I drink this tea? A: Most people enjoy 1 to 2 cups a day. However, it is always a good idea to listen to your body and consult with a healthcare professional if you are taking specific medications. πŸ΅βœ…

Q: Can I use fresh herbs instead of dried? A: Yes! If using fresh herbs, triple the amount (use 3 teaspoons instead of 1) because dried herbs are more concentrated. 🌿➑️🌿

Q: Is this safe for children? A: While these herbs are generally mild, it is best to check with a pediatrician first, especially for ingredients like licorice root. πŸ‘ΆπŸ₯


πŸ’‘ Quick Tips

  • Deep Breathing: While sipping your tea, try taking slow, deep breaths. The warm steam from the cup also helps to moisturize the nasal passages and throat. πŸ’¨πŸ§˜β€β™€οΈ

  • Storage: Keep your jar in a cool, dark place (like a pantry) to keep the herbs potent for up to 6 months. πŸ“¦πŸŒ‘

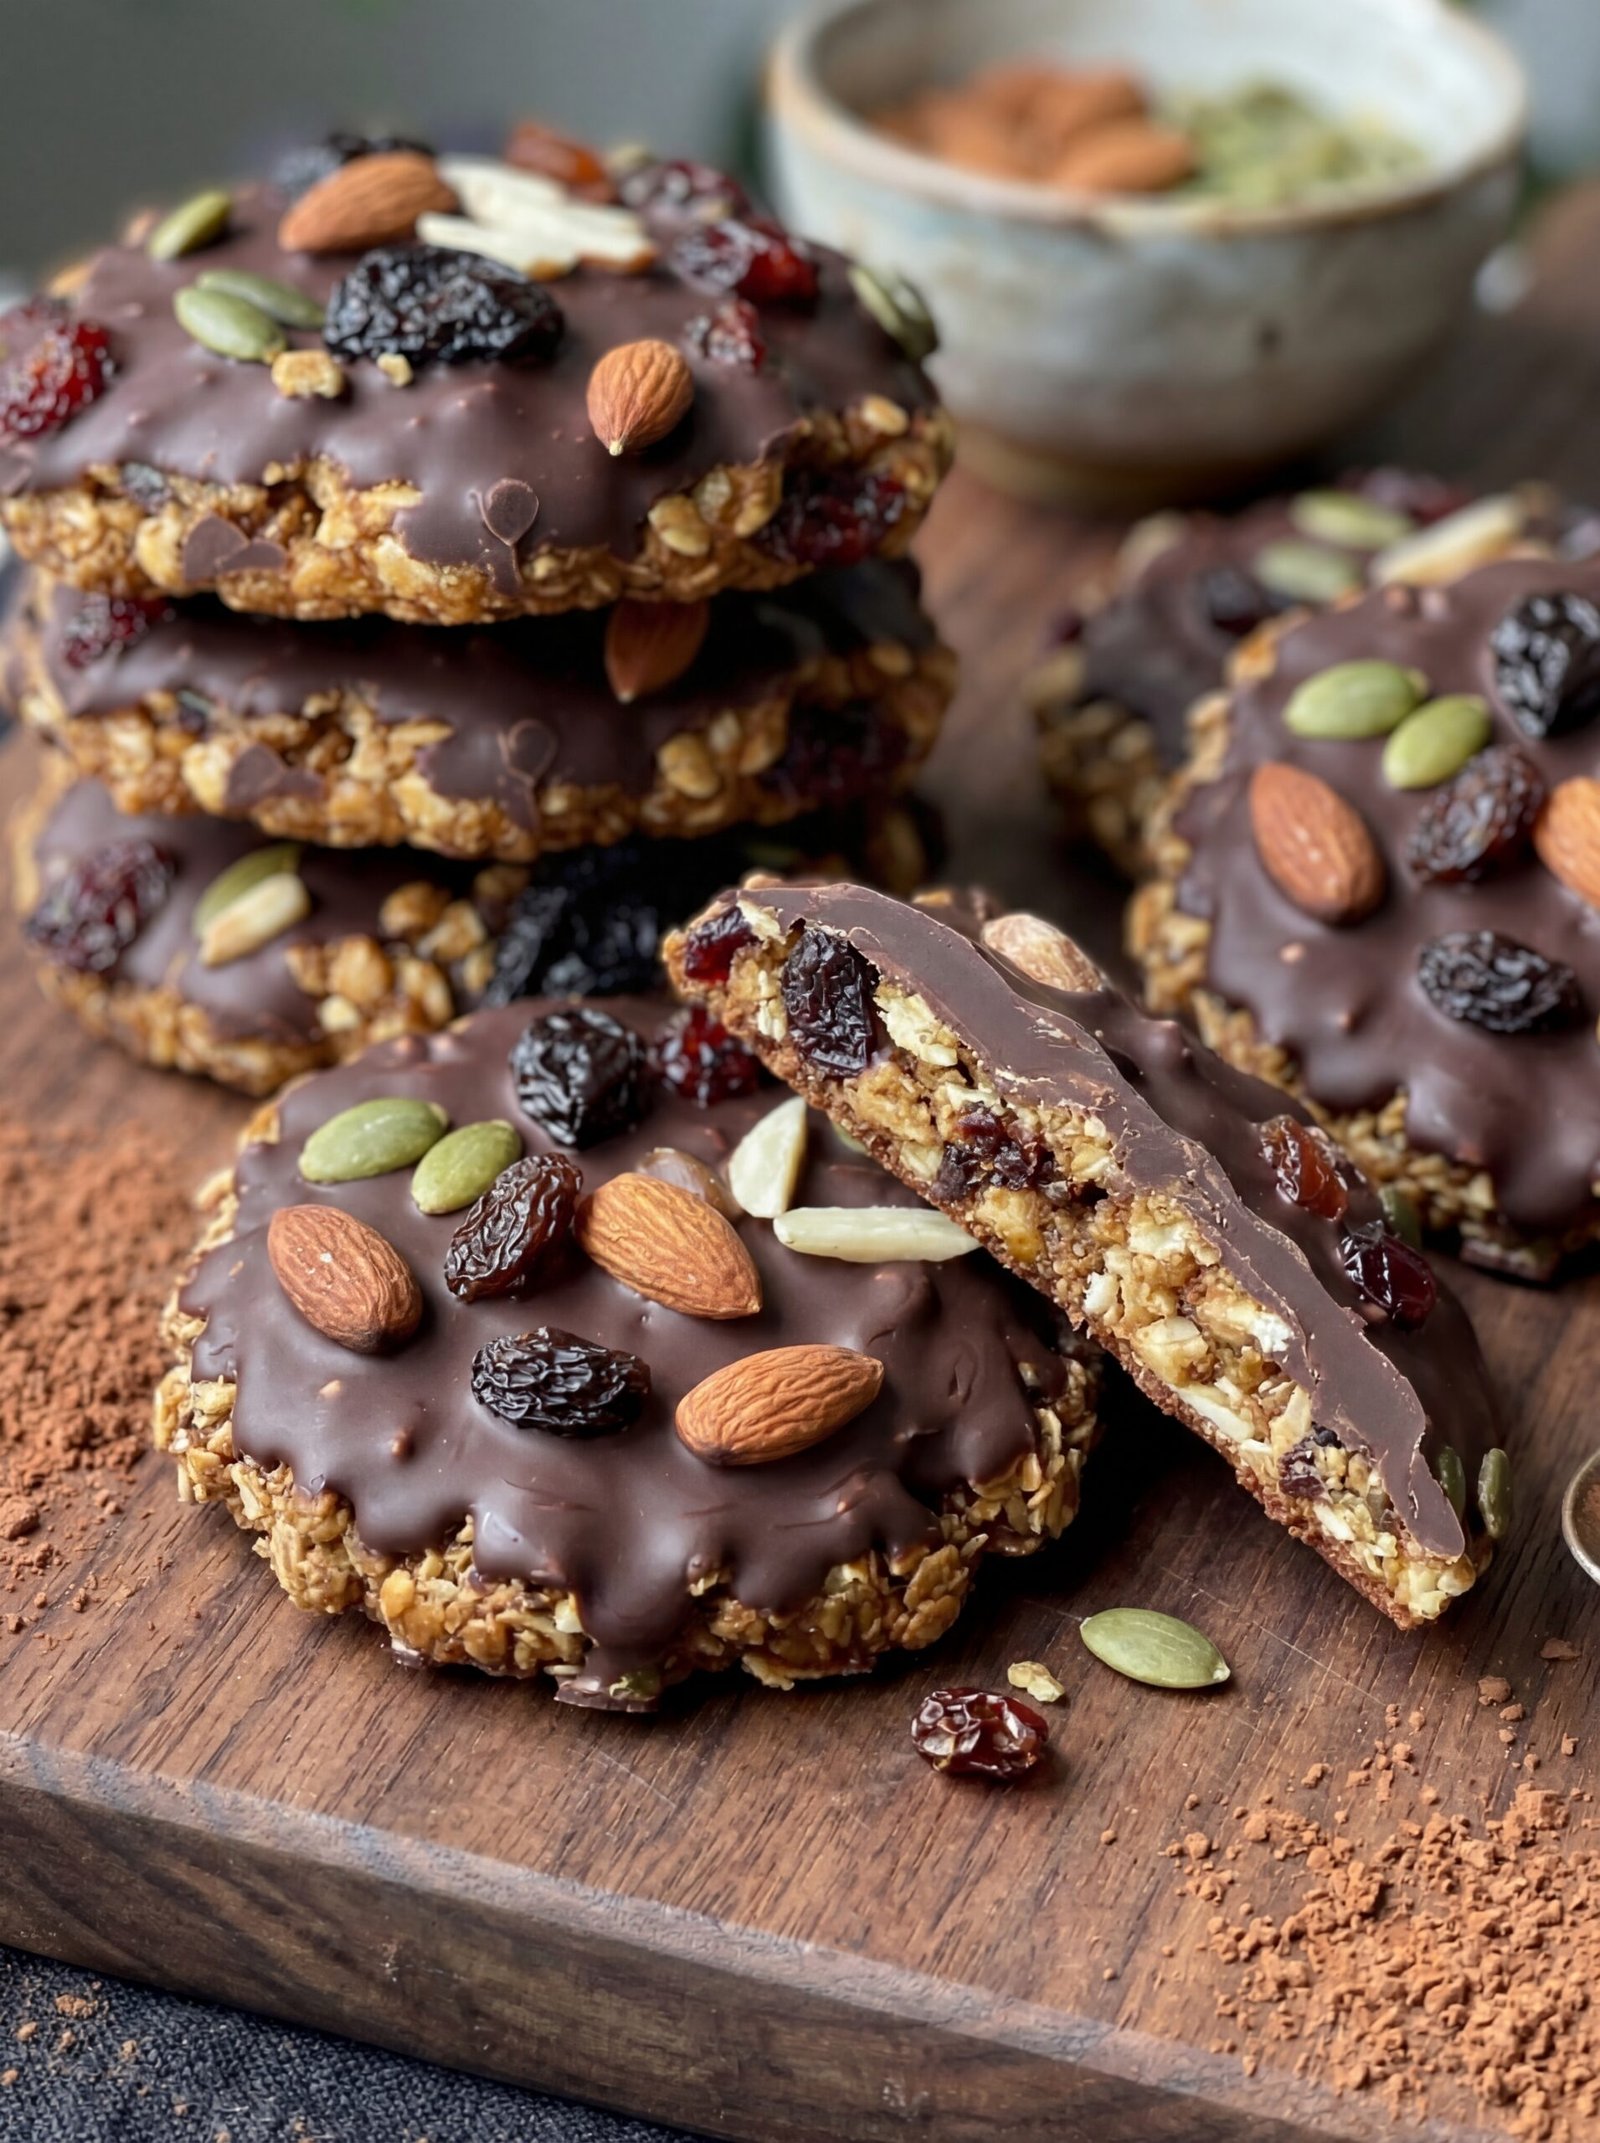
Chocolate-Dipped Oat & Nut Power Cookies.

Chocolate-Dipped Oat & Nut Power Cookies.


πŸͺ Ingredients

The Cookie Base:

  • 2 cups Rolled oats (slightly pulsed in a blender for a better bind) 🌾

  • Β½ cup Almond flour or finely ground nuts

  • 1 tsp Cinnamon powder

  • Β½ cup Natural almond butter or peanut butter (no added sugar) πŸ₯œ

  • β…“ cup Honey or maple syrup 🍯

  • 1 tsp Vanilla extract

  • ΒΌ cup Raisins or dried cranberries πŸ‡

The Topping & Crunch:

  • 100g Dark chocolate (70% cocoa or higher for a rich flavor) 🍫

  • 1 tbsp Coconut oil (helps the chocolate melt smoothly)

  • Handful of Whole almonds, pumpkin seeds (pepitas), and raisins for decoration πŸ₯œπŸŽƒ


πŸ‘¨β€πŸ³ Step-by-Step Instructions

1. Mix the Base πŸ₯£ ➑️

  • In a large bowl, combine the oats, almond flour, cinnamon, and dried fruit.

  • Add the nut butter, honey, and vanilla. Mix until a thick, sticky dough forms. If it feels too dry, add a teaspoon of water or more honey.

2. Shape the Cookies πŸͺ ➑️

  • Line a tray with parchment paper.

  • Take a golf-ball-sized portion of dough, roll it into a ball, and press it down firmly to create a flat, round cookie shape.

  • Place the tray in the fridge for 30 minutes to firm up.

3. Melt the Chocolate 🍫 ➑️

  • Use a double boiler or a microwave (30-second intervals) to melt the dark chocolate with the coconut oil until glossy and smooth.

4. Dip and Decorate ✨ ➑️

  • Dip the top of each chilled cookie into the melted chocolate. ➑️

  • While the chocolate is still wet, carefully press whole almonds, pumpkin seeds, and raisins onto the top as shown in the picture. ➑️

5. Final Chill ❄️ ➑️

  • Place the cookies back in the fridge for another 20 minutes until the chocolate shell is completely set. Enjoy your treat! ➑️ πŸ˜‹


❓ Q & A (Common Inquiries)

Q: Do I need to bake these? A: This is a “no-bake” version which keeps the nuts and oats very crunchy! However, if you prefer a toasted flavor, you can bake the oat base at 180Β°C for 10 minutes before adding the chocolate. 🌑️

Q: Can I make these nut-free? A: Yes! Swap the almond butter for sunflower seed butter and replace the whole almonds on top with extra pumpkin seeds or sunflower seeds. 🌻

Q: How should I store these? A: Because of the chocolate coating, these stay best in an airtight container in the fridge. They will stay fresh and crunchy for up to 7 days. 🍱


πŸ’‘ Quick Tips

  • Firm Press: When shaping the cookies, press them down tightly so they don’t crumble when you dip them in chocolate. ➑️ πŸ‘Š

  • Darker is Better: Using dark chocolate with a high cocoa percentage keeps the sugar content low and the antioxidant levels high! πŸ«βœ…

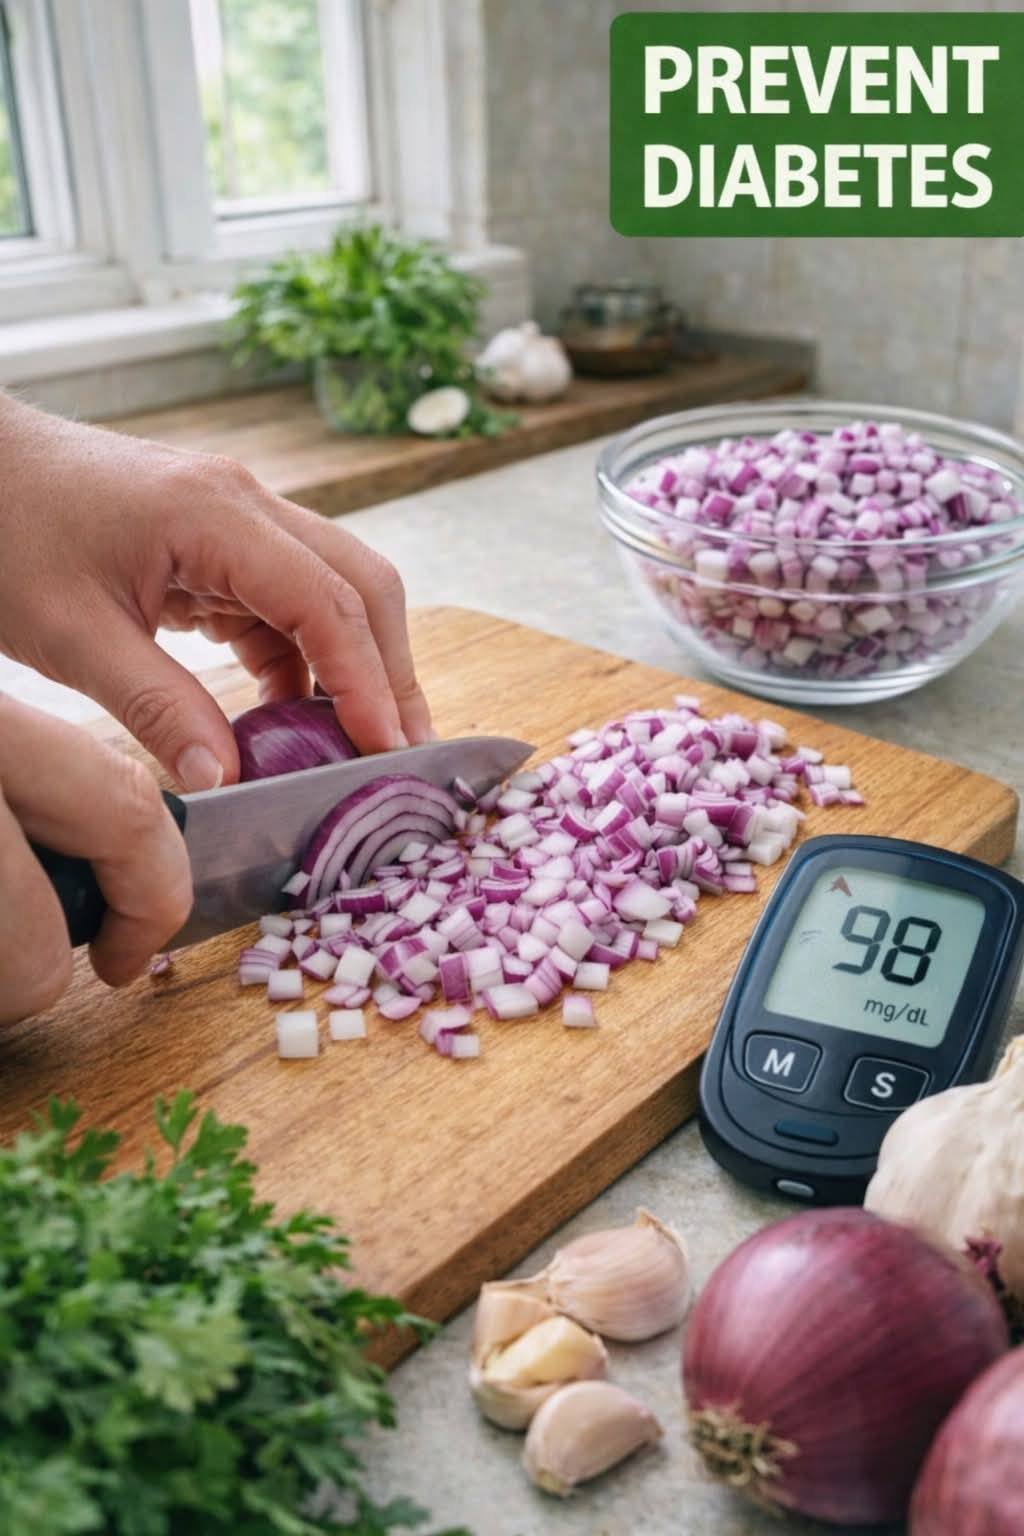
Mediterranean Red Onion & Black Bean Skillet

Mediterranean Red Onion & Black Bean Skillet

A Fiber-Rich, Plant-Based Savory Dish

πŸ›’ Ingredients (Serves 4)

  • 1 large red onion, thinly sliced πŸ§…

  • 2 medium sweet potatoes, diced small 🍠

  • 1 cup cooked black beans (rinsed and drained) 🫘

  • 1 red bell pepper, diced πŸ«‘

  • Β½ cup corn kernels (optional) 🌽

  • 2 cloves garlic, minced πŸ§„

  • 2 tablespoons olive oil πŸ«’

  • 1 teaspoon ground cumin

  • Β½ teaspoon smoked paprika

  • Β½ teaspoon oregano

  • Salt & pepper to taste πŸ§‚

  • 1 tablespoon lemon juice πŸ‹

  • Fresh parsley or cilantro for garnish 🌿

  • Optional: Β½ avocado, diced πŸ₯‘


πŸ‘¨β€πŸ³ Step-by-Step Instructions

  1. Sauté the Onion ➑️

    • Heat the olive oil in a large skillet over medium heat.

    • Add the sliced red onion and cook for 5–7 minutes.

    • Tip: Stir frequently until they are softened and have a light golden caramelization.

  2. Cook the Sweet Potatoes ➑️

    • Add the diced sweet potatoes to the pan.

    • Cover with a lid and cook for 8–10 minutes.

    • Stir occasionally until the potatoes are fork-tender but not mushy.

  3. Incorporate Beans & Spices ➑️

    • Stir in the minced garlic, black beans, diced bell pepper, corn, cumin, paprika, and oregano.

    • Cook for another 5 minutes to allow the flavors to meld and the peppers to soften.

  4. The Finishing Touch ➑️

    • Drizzle with lemon juice and season with salt and pepper to your preference.

    • Remove from heat and garnish with fresh herbs and avocado.

    • Serve warm! 🍽️


❓ Q & A (Common Inquiries)

Q: Can this cure chronic blood sugar conditions? A: No. While healthy eating is vital, there is currently no cure for Type 1 diabetes, and Type 2 requires comprehensive management. This dish is a supportive part of a balanced diet, not a replacement for medical care.

Q: Do red onions specifically lower glucose? A: Some studies suggest onions contain antioxidants like quercetin that may have mild effects, but they are a culinary ingredient, not a substitute for prescribed medication. πŸ’Š

Q: How can I make this even lower in carbohydrates? A: You can swap the sweet potatoes and corn for non-starchy vegetables like zucchini, spinach, or cauliflower florets. This keeps the volume high while reducing the carb count. πŸ₯—

Q: What is the best way to serve this? A: To further slow down glucose absorption, pair this skillet with a lean protein like grilled chicken, tofu, or a dollop of Greek yogurt. πŸ—


πŸ“Š Estimated Nutritional Info (Per Serving)

  • Calories: 280–320 kcal

  • Carbohydrates: 40–45g

  • Fiber: 9–11g (High Fiber!)

  • Protein: 8–10g

  • Fat: 10–14g

  • Glycemic Impact: Moderate (Balanced by healthy fats and high fiber content)


πŸ’‘ Notes & Tips

  • Thin Slicing: Slicing the onions thinly helps them caramelize faster, bringing out a natural sweetness without needing any added sugar. πŸ”ͺ

  • Portion Control: Even healthy carbs like beans and sweet potatoes should be enjoyed in moderate portionsβ€”aim for about 1 to 1ΒΌ cups per serving. πŸ“

  • Stay Consistent: Everyone’s body responds differently to ingredients, so it is always a good idea to monitor your personal levels after trying new recipes. πŸ“ˆ

🍍 Why It’s Great for Your Skin

🍍 Why It’s Great for Your Skin

  • Cucumber: Made up of about 95% water, cucumbers are the ultimate hydrator. They also contain silica, a trace mineral that helps maintain skin elasticity and strength, and antioxidants that help soothe inflammation.

  • Pineapple: Packed with Vitamin C, which is essential for collagen production (the protein that keeps your skin firm). It also contains an enzyme called bromelain, known for its anti-inflammatory properties that can help reduce redness and swelling.

  • Mint: Besides adding a cool, refreshing flavor, mint has slight antibacterial properties and aids in digestion. A healthy gut often translates to a clearer complexion!


πŸ₯’ How to Make Your Own Skin-Hydrating Juice

Ingredients:

  • 1 cup fresh pineapple chunks

  • 1/2 large cucumber (peeled if you prefer, but keeping the skin adds extra nutrients)

  • A small handful of fresh mint leaves

  • 1/2 cup water or coconut water (for an extra electrolyte boost)

  • Ice cubes

Instructions:

  1. Prep: Chop the pineapple and cucumber into manageable pieces for your blender or juicer.

  2. Blend/Juice: * If using a juicer: Run the pineapple, cucumber, and mint leaves through the juicer.

    • If using a blender: Add the pineapple, cucumber, mint, and water/coconut water to the blender. Blend until completely smooth. You can strain it through a fine-mesh sieve if you prefer a pulp-free juice, or drink it as a smoothie to keep the healthy fiber.

  3. Serve: Pour the juice into a glass over ice.

  4. Garnish: Top with a sprig of fresh mint, a few thin cucumber slices, and a piece of pineapple on the rim, just like in the picture!

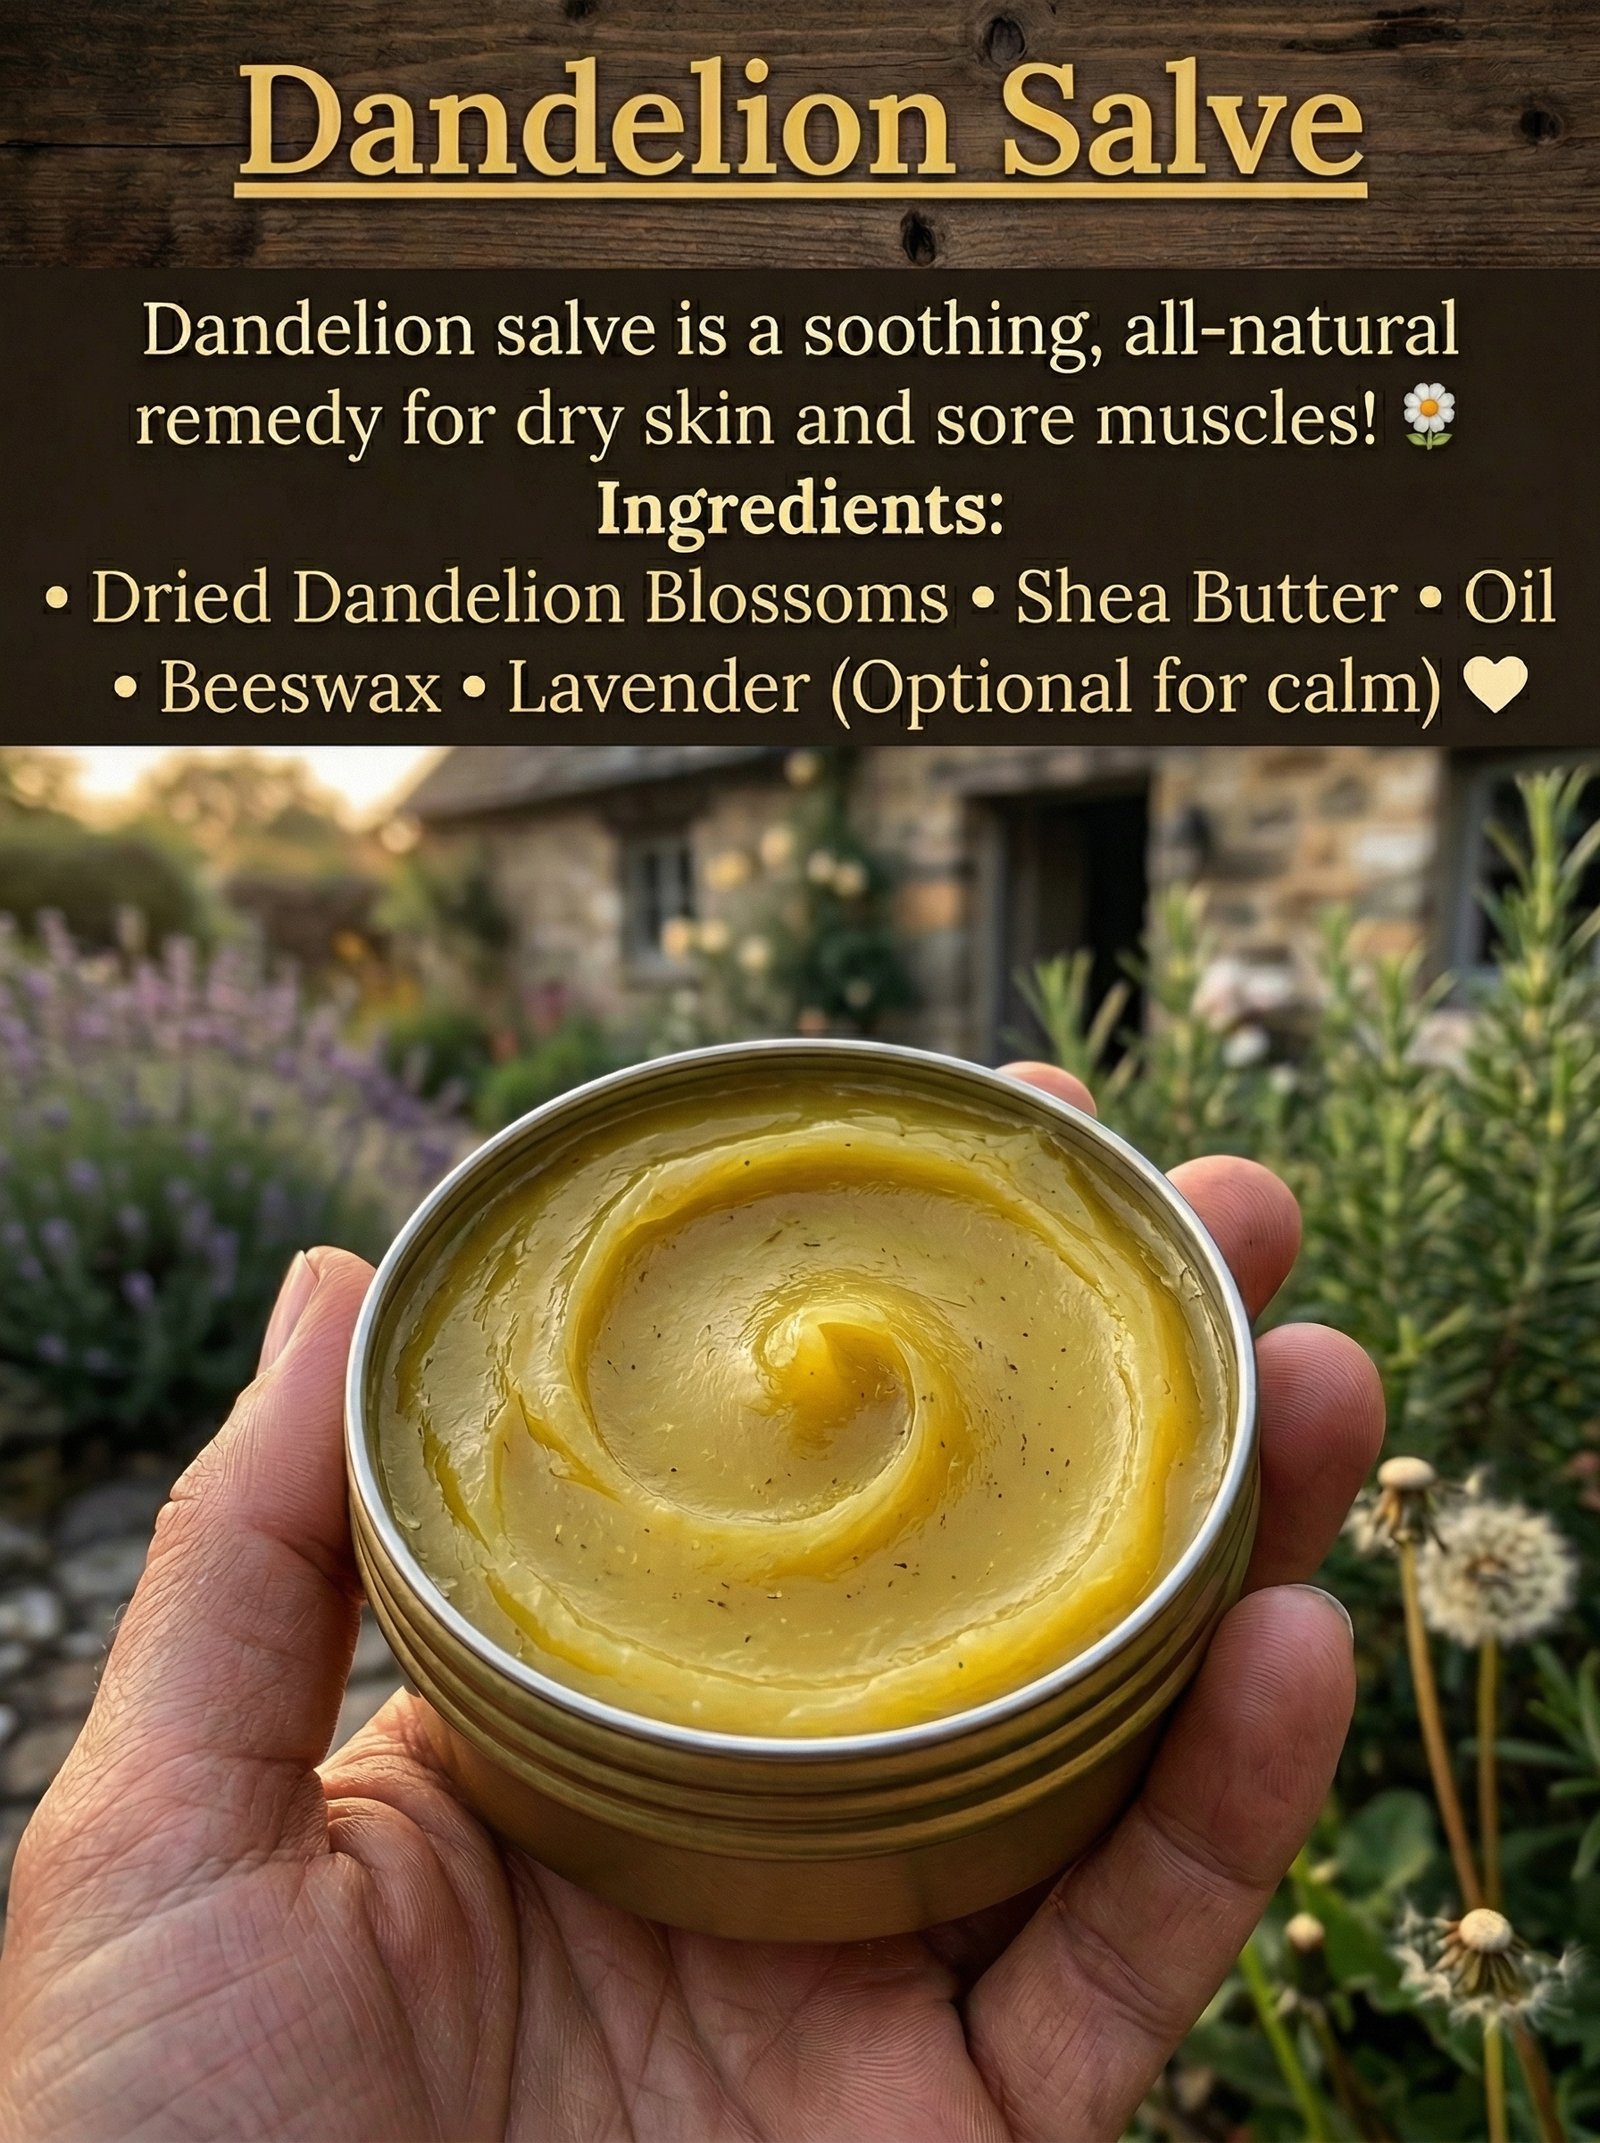
Soothing Dandelion Salve

Soothing Dandelion Salve

Ingredients

  • Dried Dandelion Blossoms: The core medicinal herb.

  • Carrier Oil: Such as olive, almond, or jojoba oil.

  • Shea Butter: For deep moisturization and a creamy texture.

  • Beeswax: To provide structure and create a protective barrier on the skin.

  • Lavender (Optional): Added for a calming scent and additional skin-soothing properties.


Instructions

Step 1: Infuse the Oil

Place your dried dandelion blossoms into a clean glass jar and cover them completely with your chosen carrier oil. You can use the “solar method” by letting it sit in a sunny window for 2–4 weeks, or the “quick method” by heating the jar in a water bath (double boiler) on very low heat for 3–4 hours.

Step 2: Strain the Herbs

Once the oil has taken on the properties of the dandelions, strain the mixture through a cheesecloth or fine-mesh sieve into a clean bowl. Squeeze the cloth well to get every drop of infused oil.

Step 3: Melt the Base

In a double boiler over medium-low heat, combine your infused dandelion oil with the shea butter and beeswax. A common ratio is 1 cup of infused oil to 1 ounce of beeswax and 1/4 cup of shea butter, depending on how firm you want the final salve.

Step 4: Add Aromatics

Once the beeswax and shea butter have completely melted into the oil, remove the mixture from the heat. If you are using lavender, stir in a few drops of lavender essential oil or dried lavender buds at this stage.

Step 5: Pour and Set

Carefully pour the liquid mixture into clean metal tins or glass jars. Let the salve sit undisturbed at room temperature until it has completely cooled and solidified.


Questions & Answers

Q: Why do the dandelion blossoms need to be dried first? A: Using fresh flowers can introduce moisture into your salve, which can lead to mold growth. Drying the blossoms ensures your salve has a long, stable shelf life.

Q: Is this salve safe for sensitive skin? A: Dandelion and shea butter are generally very gentle; however, it is always recommended to perform a small patch test on a small area of skin before applying it more broadly.

Q: How long does the salve last? A: If stored in a cool, dark place, a dandelion salve typically remains effective for 6 to 12 months.

Q: Can I use this on my face? A: While it is excellent for dry patches, shea butter and beeswax can be heavy. If you have oily or acne-prone skin, it is best used on the body, hands, and feet rather than the face.