![]()
Healthy Tips
Apple Salad with Honeycrisp Apples, Celery, Grapes, Pecans, and Dried Cranberrie
Introduction: A Fresh, Flavorful, and Nutrient-Dense Salad
Salads are a cornerstone of healthy eating, and when prepared thoughtfully, they can serve as both a satisfying and nutrient-packed meal. This WW Apple Salad with Honeycrisp Apples, Celery, Grapes, Pecans, and Dried Cranberries brings together the best of fresh fruits, crunchy vegetables, and healthy fats for a refreshing dish that’s perfect for any occasion. Whether you’re seeking a light lunch, an energizing snack, or a flavorful side dish, this salad delivers on both taste and health benefits while keeping SmartPoints low.
Made with the crisp sweetness of Honeycrisp apples, the freshness of celery, and the sweetness of grapes and dried cranberries, this salad is bursting with vibrant flavors and textures. Pecans add a delightful crunch while also providing healthy fats and protein, making the dish more filling. It’s the perfect balance of sweet, savory, and satisfying, without being too heavy.
by TaboolaSponsored Links
You May Like
Play War Thunder now for free
War Thunder
War Thunder – Register now for free and play against over 75 Million real Players
War Thunder
Villas For Sale in Dubai Might Surprise You
Villas In Dubai | Search Ads
In this comprehensive guide, we’ll take you through the step-by-step process of creating this Apple Salad, providing the exact measurements, detailed instructions, and nutritional information. Whether you’re following the WW program, a Keto lifestyle, or simply want to enjoy a refreshing and delicious salad, this recipe will suit all your needs.
Ingredients for WW Apple Salad with Honeycrisp Apples, Celery, Grapes, Pecans, and Dried Cranberries
The key to making this WW Apple Salad both tasty and nutritious is the careful selection of fresh ingredients. Each component adds its own unique texture, flavor, and nutritional value, resulting in a delightful mix of sweetness, crunch, and tang.
For the Salad:
2 medium Honeycrisp apples (or any other variety you prefer) – Honeycrisp apples are known for their crisp texture and perfect balance of sweetness and tartness. This variety of apple is ideal for a fresh salad, providing a refreshing crunch and natural sweetness.
2 stalks celery, finely chopped – Celery adds a refreshing, crunchy texture and is low in calories, which makes it the perfect low-carb ingredient. It’s also packed with fiber and antioxidants.
1 cup red or green grapes, halved – Grapes are naturally sweet, which complements the apples and dried cranberries in this salad, adding a burst of juiciness.
1/2 cup pecans, roughly chopped – Pecans provide healthy fats, fiber, and protein, making them a great addition to balance the sweetness of the fruit and offer some crunch.
1/4 cup dried cranberries, unsweetened or lightly sweetened – Dried cranberries provide a chewy texture and a pop of color, while also contributing some natural sweetness and antioxidants.
1/4 cup crumbled feta cheese (optional) – Feta cheese adds a salty, tangy flavor that enhances the sweetness of the fruit, though you can omit it if you’re looking for a dairy-free version.
For the Dressing:
1/4 cup plain Greek yogurt – The creamy base of this dressing, Greek yogurt, is rich in protein and provides a tangy, smooth texture. For a lighter version, you can substitute it with non-fat yogurt.
1 tablespoon honey or maple syrup – A touch of honey or maple syrup adds a natural sweetness to balance the tartness of the apples and cranberries.
1 tablespoon apple cider vinegar – Apple cider vinegar is a great addition to the dressing for a tangy kick that balances out the sweetness of the honey and fruits.
1 tablespoon fresh lemon juice – Lemon juice adds a fresh and zesty flavor that brightens up the dressing and helps tie all the flavors together.
1 teaspoon Dijon mustard – Adds a mild kick and depth of flavor to the dressing, perfectly complementing the sweetness and creaminess.
Salt and pepper, to taste – Season the dressing to taste with salt and black pepper to enhance the overall flavor.
1 teaspoon olive oil (optional) – For a little extra creaminess and smooth texture, you can add a small amount of olive oil to the dressing.
Step-by-Step Instructions
Now that we’ve gathered all the ingredients for the WW Apple Salad, let’s walk through the process of making this delicious, healthy dish. The steps are simple and easy to follow, and the salad can be prepared in about 15-20 minutes. Let’s get started:
Step 1: Prepare the Ingredients
Start by prepping all your ingredients before assembling the salad. This ensures everything is ready to go when you’re ready to toss everything together.
Chop the apples: Core and slice the Honeycrisp apples into bite-sized pieces. You can choose to leave the skin on for added fiber, or peel them if you prefer a smoother texture. To prevent the apples from browning, you can toss them in a small amount of lemon juice or apple cider vinegar.
Chop the celery: Wash and chop the celery stalks into small pieces. Celery adds a wonderful crunch and is low in calories, so it’s a perfect base for the salad.
Prepare the grapes: Wash the grapes thoroughly, then slice them in half. Grapes add a sweet burst of flavor, so be sure to evenly distribute them throughout the salad.
Chop the pecans: Roughly chop the pecans. If you prefer, you can toast them for an added flavor boost, though this is optional.
Prepare the cranberries: If you’re using dried cranberries, make sure they’re unsweetened or lightly sweetened to keep the carb count low. If the cranberries are too sticky, you can lightly coat them with a dusting of cornstarch or arrowroot powder to keep them from clumping together.
Crumbled feta: If using, crumble the feta cheese into small pieces and set aside. It will be sprinkled on top at the end.
Step 2: Make the Dressing
While the salad ingredients are being prepped, make the creamy dressing.
In a small bowl, combine the Greek yogurt, honey, apple cider vinegar, lemon juice, and Dijon mustard. Whisk them together until smooth and well combined.
Taste the dressing and adjust the seasoning. Add salt and pepper as needed to enhance the flavors. If you prefer a slightly thinner dressing, you can add a small amount of water or additional lemon juice.
Step 3: Assemble the Salad
Once all the ingredients are ready, it’s time to assemble the salad.
In a large mixing bowl, add the prepared Honeycrisp apples, celery, grapes, pecans, and dried cranberries.
Pour the dressing over the salad and toss gently to combine. Be sure that each piece of fruit and vegetable is coated in the creamy dressing.
If using, sprinkle the crumbled feta cheese over the top and toss again lightly.
Step 4: Serve and Enjoy
Serve the salad immediately or refrigerate it for later use. This WW Apple Salad is a perfect side dish for grilled chicken or as a standalone meal. It’s perfect for meal prepping and can last for up to 2-3 days when stored in an airtight container in the fridge.
Tips for Making the Best WW Apple Salad
Use fresh ingredients: The key to a flavorful salad is using the freshest ingredients you can find, especially when it comes to the apples and grapes. Honeycrisp apples are sweet and crisp, which makes them ideal for this salad.
Dressing options: If you prefer a dairy-free version of this salad, you can swap the Greek yogurt for a plant-based yogurt (such as coconut or almond milk yogurt). Additionally, you can opt for agave syrup or stevia as a substitute for honey if you’re avoiding sugar.
Make it a meal: To turn this side salad into a more substantial meal, consider adding some grilled chicken, shrimp, or a scoop of your favorite protein. It will help balance out the macronutrients and keep you full for longer.
Keep it crunchy: If you plan to make the salad ahead of time, it’s a good idea to keep the dressing separate until just before serving to ensure the fruits and vegetables stay crisp.
Add extra texture: If you’re looking for additional crunch, try adding some chopped almonds, walnuts, or sunflower seeds for a boost of healthy fats.
Nutritional Breakdown
This WW Apple Salad is not only delicious but also a healthy choice, providing a good balance of vitamins, antioxidants, and fiber with low SmartPoints. Here’s the nutritional breakdown per serving:
Per Serving (1/4 of the recipe):
Calories: 140 kcal
Protein: 2g
Fat: 9g
Carbohydrates: 17g
Fiber: 3g
Net Carbs: 14g
Sugar: 12g
Sodium: 90mg
SmartPoints Breakdown (Weight Watchers):
Blue Plan: 4 SmartPoints per serving
Green Plan: 5 SmartPoints per serving
Purple Plan: 4 SmartPoints per serving
Conclusion
This WW Apple Salad is an ideal dish for anyone following the Weight Watchers program or anyone simply looking for a nutritious, low-carb salad option. It’s packed with fresh fruits, vegetables, healthy fats, and a creamy dressing that ties everything together in a delightful way. Whether served as a side dish or enjoyed as a standalone meal, this salad will keep you satisfied and on track with your dietary goals.
Enjoy it as a refreshing snack, a light lunch, or a side at your next gathering—this salad is sure to become a favorite in your meal prep rotation!
Sugar-Free Apple Cocoa Cake
Just Apples & Cocoa!
If you’ve been searching for a guilt-free dessert that’s naturally sweet, rich in flavor, and supports your health goals, this recipe is a game-changer. With only a few wholesome ingredients — apples, eggs, and cocoa — you can make a moist, chocolaty cake without a single grain of sugar. Perfect for breakfast, snacks, or dessert!
Ingredients
-
4 medium sweet apples (Fuji, Honeycrisp, Gala) – naturally sweet and juicy.
-
4 large eggs – for structure and protein.
-
5 tablespoons unsweetened cocoa powder – deep chocolate flavor without sugar.
-
1 teaspoon baking powder – for a light rise.
-
Olive oil – for greasing the baking mold.
Instructions
-
Prepare the apples
Wash, peel, and core the apples. Cut them into chunks and blend into a smooth purée. -
Make the batter
In a large mixing bowl, combine the apple purée, eggs, cocoa powder, and baking powder. Whisk or blend until the mixture is lump-free and silky. -
Get the pan ready
Lightly grease a baking pan with olive oil. Pour in the batter and smooth the top. -
Bake
Preheat the oven to 180°C (350°F). Bake for 35–40 minutes, or until a toothpick inserted in the center comes out clean. -
Cool & enjoy
Let the cake cool completely before slicing. Serve plain, or with a sprinkle of extra cocoa powder.
Why it’s great for weight loss
This cake is naturally sweet from apples, high in fiber, rich in protein, and low in calories. Cocoa adds flavor and antioxidants without sugar.
Q&A
Q: Can I use green apples?
A: Yes, but they’re tart — the cake will be less sweet.
Q: How long does it keep?
A: Store in an airtight container in the fridge for up to 4 days, or freeze for 1 month.
Q: Can I make it vegan?
A: Replace each egg with 1 tbsp ground flaxseed + 3 tbsp water.
Q: Is it sweet like regular cake?
A: No, it’s mildly sweet — think of it as a healthy chocolate loaf.
Keto Chicken Parmesan Cups
Keto Chicken Parmesan Cups are a keto dish and they also contain of low no of carbs. This dish is very flavorful and tasty, so everyone will enjoy it whether they are on a diet or not. This dish is made with a combination of mozzarella and parmesan cheese, keto marinara sauce, egg, almond flour, and seasoned with Italian seasoning, black pepper & salt. We can serve this as a side salad, zucchini noodles, or solo. This dish has lots of protein and healthy fats, so it is good to have this dish in a keto diet. These cups contain 3g net carbs so we can easily serve this dish on a keto diet. This dish stores well, so we would prepare this in advance. We can easily customize these cups and add the favorite cheese, sauce, and herbs for a different flavor profile.
STATS:
- Cook time: 20 mints.
- Total time: 35 mints.
- Serving size: 2 cups
- Calories: 220 kcal
- Cuisine: Italian-American
- Prep time: 15 mints.
- Course: Appetizer
- Diet: Keto, Low-Carb
- Servings: 6
EQUIPMENT:
- Muffin tin
- Mixing bowls
- Spoon or scoop
- Grater
- Oven
INGREDIENTS:
- 2 cups of chicken
- 1 cup mozzarella cheese
- ½ cup Parmesan cheese
- ½ cup marinara sauce
- 1 egg
- ¼ cup almond flour
- 1 tsp. Italian seasoning
- Salt and pepper
- Fresh basil
INGREDIENT NOTES:
CHICKEN:
- We have to utilize the cooked and shredded chicken to prepare these cups to save time.
PARMESAN CHEESE:
- We utilize the parmesan cheese to salt the sharp and savory taste in this bake.
EGGS:
- Eggs help bind the ingredients and they help to hold the chicken mix together.
KETO MARINARA SAUCE:
- We have to utilize the keto-friendly marinara sauce to prepare these cups without the additional carbs.
MOZZARELLA CHEESE:
- This cheese should be made with full-fat milk and it should be fresh when you make these cups.
ALMOND FLOUR:
- It is low-carb flour, and it is utilized to provide the structure.
ITALIAN SEASONING:
- It is included in these parmesan cups to provide the taste in these cups.
SALT & PEPPER:
- It is used to provide the flavor in this dish.
BASIL LEAVES:
- It is used to garnish the dish for the burst of color.
INSTRUCTIONS:
- We can pre-heat the oven to three-seventy-five degrees F.
- Then we can apply the oil in a muffin tin and place the cups.
- Take a big dish and add the chicken, egg, almond flour, Parmesan, Italian seasoning, salt, & black pepper.
- We can add the chicken mixture, press properly, and form a well in the middle.
- Then we can add one spoonful of keto marinara sauce in every cup and then sprinkle mozzarella cheese.
- Bake these cups for eighteen to twenty minutes.
- We can slightly cool these cups, garnish with the basil, and serve warm.
SERVING SUGGESTIONS:
- Serve these parmesan cups with a fresh salad with balsamic vinaigrette.
- We can pair these cups with roasted zucchini or asparagus.
- You can dip these cups in additional marinara sauce or garlic aioli
- We can also serve these parmesan cups with zoodles for whole dinner.
- You can also give these cups in the school lunchbox.
- We can also add a full spoonful of pesto sauce for additional flavor.
TIPS:
- We would utilize the silicone muffin cups to remove the cups easily.
- You would also prepare these cups in double the amount for meal prep purposes.
- We would also sprinkle some chili flakes for the additional spice.
- We would also add some turkey or beef in place of chicken to make it more flavorful.
STORAGE INFORMATION:
FRIDGE:
- Put these cups in the sealed box and preserve them for around four days.
FREEZER:
- We can place these cups in a bag and preserve them for two months.
FAQs:
Can I use a can of chicken to prepare these cups?
- We will use the can of chicken to prepare these cups, but we have to drain and shred the chicken.
Are these Parmesan cups gluten-free?
- These parmesan cups are gluten-free, but check the label of keto marinara and seasoning to ensure they are gluten-free also.
Can I make these parmesan cups before the time?
- We can easily prepare and store these parmesan cups in advance and utilize them when required.
Is there any alternative to almond flour?
- We would utilize the keto bread crumbs, or coconut flour, in place of almond flour to provide the structure in these cups.
NUTRITIONAL INFORMATION:
Fiber: 1g
Net Carbs: 3g
Protein: 22g
Calories: 220 kcal
Fat: 13g
Calcium: 180mg
Iron: 1.2mg
Vitamin A: 450 IU
Total carbs: 4g
Sodium: 430mg
Potassium: 300mg
Keto Grilled Chicken & Broccoli Bowl
This Keto Grilled Chicken & Broccoli Bowl with creamy garlic sauce is a flavorful dish of American cuisine. This dish contains proteins and fat, and it is also low in carbs, so this dish is good for the keto diet, and it also satisfies the hunger for dinner. This saucy chicken and broccoli bowl is prepared quickly in only thirty minutes, so it is easy to prepare for busy weeknights. This saucy chicken and broccoli bowl is perfect to have for those with a gluten allergy or on a low-carb or high-protein diet. This Keto Grilled Chicken & Broccoli Bowl with creamy garlic sauce goes well along with salad, bacon, or keto rice.
STATS:
- Total time: 30 mints.
- Cuisine: American
- Calories: 450 kcal
- Course: Dinner
- Diet: Low carb & Keto
- Time of preparation: Ten (10) mints.
- Serving size: 1 bowl
- Cook time: 20 mints.
- Servings: 4
EQUIPMENT:
- Grill
- Saucepan
- Mixing bowl
- Whisk
- Tongs
- Cutting board
- Knife
INGREDIENTS:
CHICKEN BOWL:
- 1.5 lbs. chicken breasts (no bone & skin)
- Black pepper
- Four cups florets of broccoli
- Two tablespoon olive oil
- Salt
- One teaspoon smoked paprika
- ½ tsp. garlic powder
GARLIC SAUCE:
- 2 tbsp. butter
- 3 cloves of garlic
- 1 cup heavy cream
- ½ cup Parmesan cheese
- Salt and pepper
- Nutmeg
INGREDIENT NOTES:
CHICKEN:
- We have to use boneless and skinless chicken breast or thigh fillet to prepare this dish.
BROCCOLI:
- It is best to use fresh broccoli florets to prepare this dish for the nice taste, but we can also use frozen florets if required.
OLIVE OIL:
- It is used to season the chicken and to prepare the dish, and it also helps to add healthy fats to the dish.
BUTTER:
- Butter is used to form the base of the creamy sauce, and it should be unsalted so we can include the salt as we like.
GARLIC:
- We use fresh garlic to add a fresh aroma to the dish, and it also increases the depth of the sauce.
HEAVY CREAM:
- It is used to form the creamy texture of the sauce or to utilize coconut cream for the dairy-free version of this dish.
PARMESAN CHEESE:
- We have to use the parmesan cheese to provide a strong and classic taste in the sauce.
SALT & PEPPER:
- This is used to season the dish to make the tasty dish.
NUTMEG:
- It is used to add slight warmth to the sauce.
INSTRUCTIONS:
- We have to warm up the grill before time on moderate settings.
- Then we can apply paprika, olive oil, black pepper, salt, and garlic seasoning on the chicken fillet.
- We can grill the chicken 5–7 minutes on each side or until its temperature reaches 165 degrees F, and then slice the chicken after some time.
- We can grill broccoli for around 5–6 minutes until tender & crisp.
- Then we can liquefy the butter in a pan and add garlic to toss for two minutes.
- We can add cream and simmer till the sauce gets thick.
- Then we can add parmesan cheese along with black pepper, nutmeg, and salt, and mix the cheese.
- We can add the broccoli and chicken slices to 4 bowls and drizzle the garlic sauce into the bowls.
- Decorate the Grilled Chicken & Broccoli Bowl with parsley and serve.
SERVING SUGGESTIONS:
- We can include cauliflower rice for the additional fiber content.
- You can also add some bacon crumble for the additional crunch.
- These bowls greatly pairs with vinaigrette or green salad.
- You can also include avocado slices for the additional healthy fats.
- We can sprinkle red pepper flakes to make the spicy dish.
- Serve this bowl with keto breadsticks.
TIPS:
- We can also infuse the chicken for thirty minutes to prepare the tastier chicken.
- You don’t have to overcook the broccoli, and keep it slightly crisp.
- We would also utilize the meat thermometer so that the chicken would not get overcooked.
- You can also add some broth to thin the consistency of this sauce.
- We can add fresh herbs like basil or thyme to the sauce for different flavors.
STORAGE INFORMATION:
FRIDGE:
- Put this dish in a sealed box and store it for four days, and store the sauce in a different container for good consistency.
FREEZER:
- Put the chicken and sauce in different boxes and preserve the dish for two months, but the sauce’s texture might change.
FAQs:
Can you make this dish with rotisserie chicken?
- We can easily make this dish with rotisserie chicken to save time and to add flavor.
Is this dish dairy-free?
- This dish is not dairy-free as it contains heavy cream and cheese, but we can use coconut cream and dairy-free cheese or nutritional yeast to prepare a dairy-free dish.
NUTRITIONAL INFORMATION:
Total Carbs: 8g
Fiber: 2g
Protein: 40g
Calories: 450 kcal
Fat: 30g
Sodium: 480mg
Potassium: 750mg
Calcium: 180mg
Iron: 1.5mg
Vitamin A: 900 IU
Net Carbs: 6g
Serving Size: 1 bowl
Two Ingredient Cupcakes
Loaded Bacon Cheeseburger Burrito
All the juicy, cheesy, bacon-packed flavors of your favorite cheeseburger… wrapped in a warm flour tortilla. This hearty burrito is a handheld meal that’s just as satisfying as it sounds!
🕒 Time & Servings
-
Prep Time: 15 minutes
-
Cook Time: 15 minutes
-
Total Time: 30 minutes
-
Servings: 2 burritos (can easily be doubled)
🛒 Ingredients
🔹 Main Components
-
2 large flour tortillas
-
10.6 oz ground beef
-
4 slices bacon, cooked and crumbled
-
1 cup shredded cheddar cheese
-
½ cup shredded mozzarella cheese
-
¼ cup mayonnaise
-
2 tbsp ketchup
-
1 tbsp yellow mustard
-
¼ cup prepared creamy cheese sauce
-
1 small onion, sautéed
-
Lettuce leaves
-
Tomato slices
-
Salt and freshly ground black pepper, to taste
👨🍳 Instructions
1. Cook the Ground Beef
In a skillet over medium-high heat, cook the ground beef, breaking it up with a spoon until fully browned.
Season with salt and pepper, then transfer to a bowl and set aside.
2. Cook the Bacon
In a separate pan, cook bacon slices until crisp.
Drain on paper towels, then crumble into small pieces.
3. Make the Burger Sauce
In a small bowl, whisk together:
-
¼ cup mayonnaise
-
2 tbsp ketchup
-
1 tbsp yellow mustard
Set aside for drizzling.
4. Warm the Tortillas
Heat flour tortillas in a dry skillet for about 20–30 seconds per side, or until soft and pliable.
5. Assemble the Burritos
On each tortilla, layer:
-
Cooked ground beef
-
Crumbled bacon
-
Shredded cheddar and mozzarella
-
Sautéed onions
-
Lettuce leaves
-
Tomato slices
Drizzle with:
-
Prepared cheese sauce
-
Your homemade burger sauce
6. Roll the Burritos
Fold in the sides, then roll tightly from the bottom to fully enclose the filling.
If desired, toast in a skillet seam-side down for a crisp finish.
7. Serve
Slice in half or serve whole. Garnish with extra cheese sauce or crumbled bacon if you’re feeling fancy.
💡 Tips & Variations
-
Spicy twist? Add jalapeños or sriracha to your burger sauce.
-
Crunch factor: Toss in a few pickle chips or crispy fried onions.
-
Low-carb option: Wrap in lettuce or use a low-carb tortilla.
-
Make-ahead: Prep the components ahead and assemble fresh for meals on the go.
Would you like a printable PDF or recipe card version of this?
2 Point Frozen Chocolate Peanut Butter Bark
Keto Spinach Cheese Melt Recipe
The Keto Spinach Cheese Melt is a classic, delicious Mediterranean. It features a combination of feta cheese, spinach, mozzarella cheese, cream cheese, or parmesan cheese, along with garlic and oregano, which helps in making the aromatic dish. You would effortlessly cook this dish if you happened to be a vegetarian or you have a gluten allergy. We can also have this dish along with flatbread and fresh veggies, and with some grilled protein like chicken or beef. This dish stores well, so we can easily prepare it in time and use it when required. We would also utilize plant-based cream cheese and dairy-free cheese to prepare the non-dairy Keto Spinach Cheese Melt.
STATS:
- Calories: 310 kcal
- Prep time: 10 mints.
- Serving size: 1 portion
- Cook time: 15 mints.
- Cuisine: Mediterranean
- Total time: 25 mints.
- Course: Main dish
- Diet: Keto
- Serving: 4
EQUIPMENT:
- Skillet
- Mixing bowl
- Spatula
- Oven
- Knife
- Cutting board
INGREDIENTS:
- 2 cups fresh spinach
- ½ cup feta cheese
- Half cup mozzarella cheese
- 2 tbsp. olive oil
- 2 garlic cloves
- ½ tsp. dried oregano
- One-fourth cup Parmesan cheese
- Salt
- Two tbsp. cream cheese
- Sun-dried tomatoes or olives
- Black pepper
INGREDIENT NOTES:
SPINACH:
- We would make use of the fresh spinach to make this dish for the best taste, but we would also consume freezed spinach for this purpose.
FETA CHEESE:
- Feta cheese is used to prepare this dish, and it adds the tangy and salty flavors to the dish, and it also complements spinach in a good way.
MOZZARELLA CHEESE:
- This cheese is used to create the melty texture because it melts well.
PARMESAN CHEESE:
- We use the parmesan cheese to add the sharp, salty, and nutty flavor to the dish.
CREAM CHEESE:
- We have to use full-fat cream cheese, which should be soft and help to create the creamy dish.
OLIVE OIL:
- It is used to prepare the dish, and it also helps to boost the Mediterranean taste in the dish.
GARLIC:
- It is used to make the dish aromatic, and it also provides a savory warmth in the dish.
DRIED OREGANO:
- Oregano is a Mediterranean herb used to add its flavor and also provides an earthy flavor in the dish.
SALT & PEPPER:
- It is used to season the dish and add taste.
INSTRUCTIONS:
- We can warm up the oil on a moderate flame.
- After that we would include garlic and toss the garlic.
- Now we can add spinach and sauté to wilt spinach.
- We can sprinkle salt, oregano, & pepper powder to season the dish.
- Then we can place the pan on the surface and add the cream cheese and mix to melt.
- We can add feta and half the quantity of mozzarella cheese to the pan.
- Then we can add the mixture to the oven dish and sprinkle the remaining Parmesan & mozzarella cheese on it.
- We can broil the dish for 2 to 4 minutes to melt down cheese.
- Now we can cool down the dish slightly; garnish with olives and sundried tomatoes and serve warm.
SERVING SUGGESTIONS:
- Have this dish with almond flour crackers or keto pita.
- We can pair this dish with a Greek salad for a filling dinner.
- You would also stuff this as a filing in lettuce wraps.
- We can also add this with grilled chicken or fish.
- You could have this spinach cheese melt as a warm dip with vegetable sticks.
- We can also put this dish on the flat bread and roll it to create a delicious wrap.
TIPS:
- We have to drain frozen spinach well to prevent the melted form from getting soggy.
- You have to keep an eye on the broiling process to avoid the cheese from getting burned.
- We would include some pepper flakes so that dish will get some spice.
- You can make this dish in double the amount for meal prep purposes.
STORAGE INFORMATION:
FRIDGE:
- Put the dish in a close container and stock it for 4 days.
FREEZER:
- We can create the portions and store the dish for more than two months.
FAQs:
Can I prepare the dairy-free spinach melt?
- We can make the spinach melt dairy-free, and for this purpose, we have to use dairy-free cheese and plant-based cream cheese.
Will we include some protein in the dish?
- We can include some chicken, beef, or lamb in this dish for the protein source.
Can we include kale in this dish?
- We can include kale in this dish with or without spinach; it doesn’t affect the flavor.
NUTRITIONAL INFORMATION
Caloric content: 310 calories
Serving size: ¼ of recipe
Overall carbs: 6g
Sodium: 570mg
Fiber: 1g
Potassium: 370mg
Net Carbs: 5g
Calcium: 280mg
Protein: 13g
Iron: 2mg
Fat: 26g
Vitamin A: 4100 IU
Heavenly Whipped Dessert Recipe
The key to this delightful dessert lies in its simple, wholesome ingredients. Fat-free whipped topping forms the base, providing a light and airy texture. Unsweetened cocoa powder adds a rich chocolate flavor without the extra calories, while powdered peanut butter (optional) gives a subtle nutty taste. Stevia or another zero-calorie sweetener rounds out the ingredients, allowing you to customize the sweetness to your liking.
Step-by-Step Preparation
- Gathering Your Ingredients: Start by ensuring you have all the ingredients ready and measured. This preparation step is crucial for a smooth cooking process.
- Chilling the Mixing Bowl: Place your mixing bowl in the refrigerator for about 15 minutes before you start. A chilled bowl helps keep the whipped topping at the right consistency.
- Measuring the Whipped Topping: Use a measuring cup to scoop out 1 cup of fat-free whipped topping, ensuring you level off the top for accuracy.
- Sifting Cocoa Powder: Sift 1 tablespoon of unsweetened cocoa powder to remove any lumps, ensuring a smooth texture.
- Folding the Ingredients: Gently fold the cocoa powder into the whipped topping, maintaining a light hand to preserve the airy consistency.
- Adding Powdered Peanut Butter: If desired, add 1 tablespoon of powdered peanut butter, folding it into the mixture with the same gentle technique.
- Sweetening the Mixture: Gradually add Stevia or your preferred sweetener, adjusting to taste. Start with a small amount and increase as needed.
- Transferring to Serving Bowls: Transfer the mixture to individual dessert cups or a larger serving bowl for easier serving.
- Chilling the Dessert: Cover the dessert with plastic wrap and chill for at least 30 minutes to enhance the flavors and texture.
Nutrition Information
Each serving of this Heavenly Whipped Dessert contains approximately:
- Calories: 40
- Total Fat: 1g
- Saturated Fat: 0g
- Cholesterol: 0mg
- Sodium: 45mg
- Total Carbohydrates: 7g
- Dietary Fiber: 2g
- Sugars: 2g
- Protein: 2g
Tips for Success
- Use Quality Ingredients: Opt for high-quality fat-free whipped
Weight Watchers Burrito Casserole Recipe
I have the most DELICIOUS recipe for you all today. The weather seems to have taken a turn to dreadful winter frigid but this recipe will warm you from the inside. Comfort food is what everyone wants to eat this time of the year but I will let you in on a little secret….This recipe is HEALTHY! I have been doing weight watchers for about 2 months now and I was getting tired of the same old recipes. I was looking for some new stuff when I came across this little gem.
8 SERVINGS AT 6 POINTS PLUS EACH
1 lb Lean Ground Beef1 package Taco Seasoning Mix10 ounce can Fat Free Refried Beans1 cup Reduced Fat Bisquick1/4 cup Water1 cup Shredded, 2% Mexican Cheese (I used WW Brand)1 cup Shredded, Reduced Fat Mozzarella Cheese Brown ground beef and drain, add taco seasoning and let simmer. Mix Bisquick, water and refried beans in a small bowl. Place been mixture into a greased 9×13 pan. Sprinkle taco meat on top, then add both cheeses. Bake for 30 minutes at 350 degrees.
I forgot to take a picture before cutting. oops! I was so excited to try it! If you are working on portion control cut pan into 8 equal parts. Each serving is 5 points
Top with Fat-Free Sour Cream (optional). If you are doing Weight Watchers don’t forget to add the points for the sour cream! This is one of my new favorite recipes and I have given it to everyone I know! Give it a try and let me know what you think!
Keto Lemon Pound Cake
Ingredients
- 1 cup cream cheese,
- 6 tablespoons melted butter
- 3/4 cup Joy Filled Eats sweetener
- 6 eggs
- 1/4 cup lemon juice
- 2 1/2 cups almond flour
- 1/2 cups coconut flour
- 1 tablespoon baking powder
- 1 tablespoon lemon zest
Citrus Glaze:
- 1/2 cup erythritol powder
- 1 tablespoon room temperature butter
- 1 teaspoon lemon extract or zest
- 2 teaspoons of water
Instructions
-
The oven to 350 degrees. Using parchment paper, line a normal loaf pan.
-
In a food processor, mash together the cream cheese, butter, and sweetener. till smooth, pulse. Eggs, lemon juice, flours, baking powder, and zest should be added. Once everything is thoroughly blended, pulse.
-
Place the batter in the loaf pan that has been prepared. It will be a thick batter.
-
Bake for 60 to 70 minutes, or until the sides are very dark golden brown and the middle feels firm to the touch. (Check after 45 minutes; if going too brown, cover with foil.)
-
In the pan, cool for 10 minutes. Lift the parchment from the pan after running a knife along the edges. Complete cooling.
-
As you combine the icing ingredients, add the water one teaspoon at a time. Over the top of the cooled cake, spread the glaze.
Notes
Alternate citrus fruits, such as limes or oranges, can be used in place of the lemon.Storage: You can place the airtight lemon keto cake container. To Freeze, either divide the recipe into servings or place it all in a big freezer-safe container. Before eating, let it defrost on the counter.
Nutrition
Serving size: 1 slice; calories: 322; carbs: 10; protein: 10; fat: 28; saturated fat: 10; cholesterol: 120; sodium: 168; potassium: 188; fibre: 5; sugar: 2; vitamins: 580IU for vitamin A; 2mg for vitamin C; 136 mg for calcium; and 2mg for iron;
2-INGREDIENT WEIGHT WATCHERS PINEAPPLE ANGEL FOOD CAKE
INGREDIENTS
-
▢ 1 box (1-step) angel food cake mix (I used Betty Crocker)
-
▢ 1 large can (about 20 ounces) crushed pineapple, undrained
INSTRUCTIONS
-
Preheat oven to 350F degrees.
-
In a large bowl, stir together the dry cake and the entire can of crushed pineapple with its juice. Stir well until all the dry mix is incorporated. (The mixture will get really foamy.)
-
Pour the batter into a 9×13 pan which has been lightly greased with nonstick cooking spray.
-
Bake at 350F degrees for time specified on the box for size pan. When the sides pull away from pan and toothpick inserted in the center comes out clean, the cake is done. This should take somewhere between 30 and 40 minutes.
-
Remove from the oven and place on a wire rack to cool.
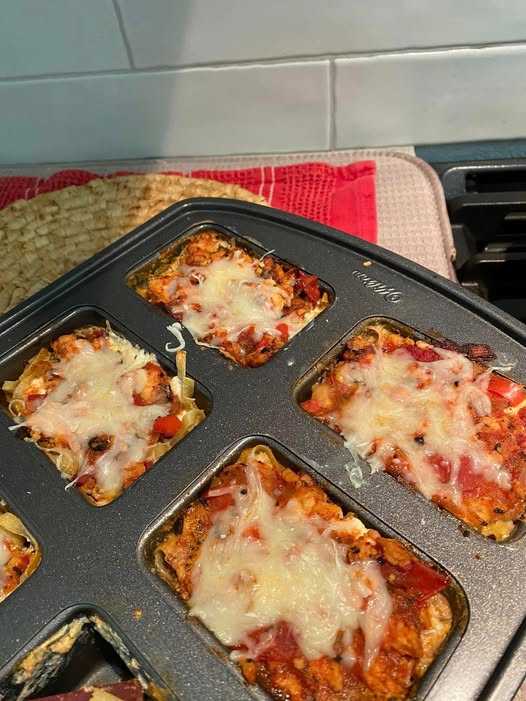
Weight Watchers Pizza Muffins
Kids’ favorite lunch meal
Low in calories. It contains only 33 calories.
Will not affect your weight,,
Ingredients
Flour 3/4 cup
Baking Powder 1tsp
Garlic powder 1/4tsp
Black pepper 1/4tsp, add according to taste
Salt 1/4tsp, add according to taste
Milk 3/4 cup
Grated cheese 1 tbsp, use parmesan cheese, or cheddar cheese
Mozzarella cheese 1/3cup used fat-free cheese
Asiago cheese 1/4 cup, grated
Low Point Bacon 3 slices
Pepperoni 20 slices
Dried oregano 2tsp
Eggs 8
Instructions
To make Weight Watchers Pizza Muffins, follow some steps.
First, adjust the oven temperature to 375 degrees.
Next, spray the baking tray with oil. Set aside the muffin tray.
Now, take a bowl. Add milk, and egg together. Whisk it until it combines.
Set aside this bowl.
Add flour, garlic, salt, pepper, baking powder, oregano, and Italian seasoning in the second bowl.
Combine all ingredients.
Now, mix the dry ingredients with the egg and milk mixture.
Add all cheese to this mixture. Combine it well.
Next, cut the pepperoni and cooked bacon into small bite sizes.
Mix into the batter mixture.
Now, add pizza muffin batter to a baking tray.
To enhance the flavor, top it with Italian seasoning.
Bake pizza muffins for 20- 25 minutes, or until the muffins are crunchy and brown.
The Weight Watchers Pizza Muffins are ready to eat and serve.
Serve mini muffins with marinara sauce, and ketchup.
Tips
To enhance the flavors, add any kind of seasoning.
Don’t over-whisk the ingredients.
For baking, measure all ingredients through a measuring cup. fulfilling and also satisfies your cravings. It’s perfect for lunches or parties/..
Vanilla Cheesecake Ice Cream Recipe
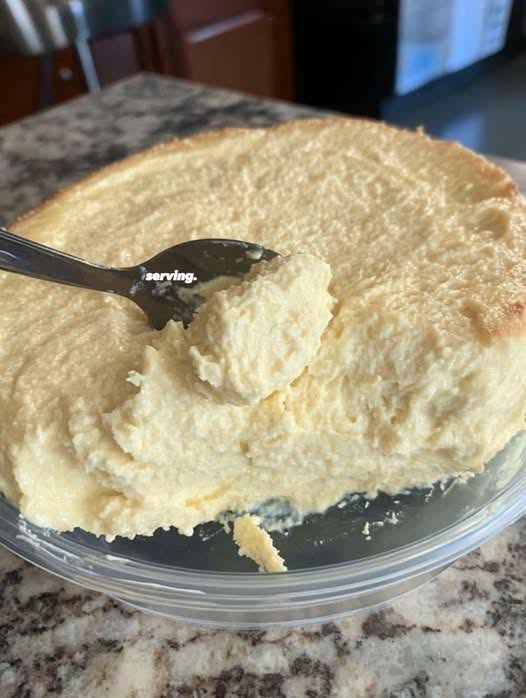
Crustless Coconut Pie Recipe
This Crustless Coconut Pie is a simple, fuss-free custard dessert brimming with sweet shredded coconut and creamy vanilla flavor. Perfect for coconut lovers, this easy recipe creates its own light crust while baking.
Ingredients
- ½ cup all-purpose flour
- ½ cup sugar
- ½ teaspoon kosher salt
- 2 cups milk
- 4 eggs
- 2 teaspoons vanilla extract
- 2 cups shredded sweetened coconut
Instructions
- Preheat the oven to 350°F. Lightly grease a pie plate and set aside.
- In a mixing bowl, combine the flour, sugar, and salt. Whisk to blend.
- Slowly add the milk, whisking until smooth.
- Add the eggs and vanilla extract, then whisk again until fully incorporated.
- Stir in the shredded coconut.
- Pour the mixture into the prepared pie plate.
- Bake for 55–60 minutes, or until the top is golden brown and a knife inserted in the center comes out clean.
Notes
- This pie forms its own light crust while baking—no crust needed!
- Let cool slightly before serving for best texture.
- Great served warm or chilled.
- Prep Time: 10 minutes
- Cook Time: 55 minutes
- Category: Dessert
- Method: Baking
- Cuisine: American
Nutrition
- Serving Size: 1 slice
- Calories: 302
- Sugar: 17g
- Sodium: 212mg
- Fat: 19g
- Saturated Fat: 15g
- Unsaturated Fat: 3g
- Trans Fat: 1g
- Carbohydrates: 27g
- Fiber: 4g
- Protein: 7g
- Cholesterol: 88mg
Keto Mozzarella Sticks Recipe
Ingredients
- 200g each of six mozzarella sticks, cut in half
- 1 big, beaten egg
- 2 teaspoons of seasoning mix
- Garlic powder, 1/4 teaspoon
- 1/4 teaspoon of sea salt, fine
- 1 to 2 teaspoons (7–14g) of coconut flour
- grated parmesan cheese, 1/2 cup (45g)
- almond flour, 1/2 cup (56g)
Instructions
-
One little egg should be beaten in a bowl until the whites and yolk are blended.
-
Take another bowl and mix sea salt, garlic powder, Italian seasoning, parmesan cheese, and almond flour.
-
After that, add only the coconut flour to a third bowl.
-
If you haven’t done so before, divide your six mozzarella sticks in half to create 12 smaller sticks.
-
A piece of mozzarella should first be dusted with coconut flour, then dipped in beaten egg, and last rolled in the almond flour mixture to coat. Continue until each of the 12 mozzarella sticks is completely covered.
-
Put sticks on a parchment-lined baking sheet. Freeze an hour.
-
Then, fill the frying pan with oil until it is at least half an inch above the bottom.
-
It will only take a few minutes to cook the mozzarella sticks after the oil reaches 350°F and is golden brown on all sides.
-
To drain the extra oil from the fried mozzarella sticks, place them on a wire rack or dish lined with paper towels.
Notes
Size of Serving: One mozzarella stick 83 calories Fat: 23 Protein: 4 Carbohydrates: 1.5 Fiber:.7
Carnivore Casserole Recipe
Carnivore diet Chili recipe
Table of Contents
Carnivore diet Chili recipe (Beanless, No Tomato)
Ingredients:
-
2 lbs ground beef (80/20 works great)
-
1/2 lb ground pork or beef heart/liver (optional, for nutrient density)
-
4–6 strips bacon, chopped
-
1 tbsp beef tallow or butter
-
1 tsp salt (or to taste)
-
1/2 tsp black pepper (optional if you’re relaxed carnivore)
-
1/2 tsp smoked paprika or chili powder (optional for keto/carnivore crossover)
-
1/4 cup bone broth or water (for moisture)
Instructions:
-
Fry the bacon in a large pot or Dutch oven over medium heat until crispy. Remove and set aside, leaving the fat.
-
Add the ground beef and pork to the pot. Brown the meat well, breaking it up with a spatula.
-
Add beef tallow or butter if needed for extra fat and flavor.
-
Stir in salt, and if using, pepper and spices. Add bone broth to keep it moist and let it simmer gently for 20–30 minutes, stirring occasionally.
-
Add the crispy bacon back into the pot. Simmer 5 more minutes.
-
Taste, adjust salt/fat levels, and serve hot.
Optional Carnivore Add-ins:
-
Shredded beef, brisket, or short ribs (for texture and slow-cooked flavor)
-
Beef liver or heart, finely chopped (nutrient boost)
-
Heavy cream (dash added at the end for richness)
-
Egg yolks stirred in off heat for creaminess
Serving Ideas:
-
Top with a fried or poached egg
-
Serve with pork rind “chips” or carnivore bread
-
Add shredded cheese (if dairy is okay for you)
Keto Cheese Salami & Pickles
This Keto Cheese Salami & Pickles is the perfect low-carb marinated cheese appetizer for anyone following a ketogenic or gluten-free diet. Cubes of firm cheese are soaked in a flavorful marinade of olive oil, apple cider vinegar, garlic, and herbs, allowing them to absorb a tangy and savory punch. Paired with slices of rich, savory salami and crunchy dill pickles, this appetizer delivers a satisfying balance of textures and bold flavors. Keto Cheese Salami & Pickles is easy to assemble, store, and customize with your favorite cheeses or spices. Whether you’re hosting a gathering or craving a nutritious bite, this appetizer hits all the right notes — rich, tangy, savory, and perfectly keto.
STATS:
- Serving: 4
- Total time: Ten mints.
- Calories: 250 kcal
- Serving size: 1 appetizer portion
- Prep time: Ten mints.
- Cuisine: American-Italian fusion
- Cook time: Nil
- Course: Appetizer
- Diet: Keto & Gluten-free
EQUIPMENT:
- Mixing bowl
- Airtight container or jar for marinating
- Knife and cutting board
- Serving platter
INGREDIENTS:
- Pickles slices: ½ cup
- Olive oil: ¼ cup
- Cheese cubes: 1 cup
- Apple cider vinegar: 2 tbsp.
- Salami slices: ½ cup
- Garlic powder: ½ tsp.
- Black pepper
- Dried oregano: 1 tsp.
- Red pepper flakes: ¼ tsp.
- Salt
- Fresh parsley: 1 tbsp.
INGREDIENT NOTES:
CHEESE:
- We use Gouda or Cheddar cheese to prepare this dish and it is firm and also holds its shape properly.
SALAMI:
- We have to use best quality salami slices, which should be nitrate-free and keto-friendly.
PICKLES:
- We have to use dill or gherkin pickles to add the tangy and crunchy taste to the appetizer.
OILVE OIL:
- We have to use olive oil in this dish to include the rich flavors and healthy fats.
APPLE CIDER VINEGAR:
- It is used in this dish to provide the tangy and mild acidity in the marinade.
GARLIC POWDER:
- It is used in this appetizer to provide a subtle taste and make it more flavorful.
OREGANO:
- We use dried oregano to add the flavor and aroma of herbs in the marinade.
RED PEPPER FLAKES:
- It is used to add spice to this appetizer.
PARSLEY:
- We use parsley to garnish this appetizer.
SALT & PEPPER:
- It is added in this appetizer as it is necessary to develop the taste of the dish.
INSTRUCTIONS:
- Take a mixing dish and add apple cider vinegar, garlic powder, salt, red pepper flakes, black pepper, olive oil, and oregano.
- Mix all these components.
- Now we can add cubes of cheese to the marinade.
- Softly coat the cheese cubes in the marinade.
- We can add the marinated cheese cubes to a jar.
- Put them in the fridge for around two hours or for the whole night.
- Then we can place the marinated cheese cubes on the plate along with pickles and salami slices inside.
- We can garnish the platter with parsley and red pepper flakes and serve.
SERVING SUGGESTIONS:
- We can pair this platter with a glass of keto dry white wine or cocktail
- Serve this platter with keto crackers or celery sticks
- We can also add olives or cherry tomatoes on the side of the plate for variation.
- You can also utilize this appetizer platter as a topping on keto flatbread or crackers.
- We can serve this platter chilled at a party.
TIPS:
- We can marinate he cheese cubes for the whole night for the best taste.
- You can also use the combination of two or three different cheeses for the taste variation.
- We can add pickles in last so that the pickles stay crispy.
- You can alter the spice level as you can tolerate.
STORAGE INFORMATION:
Fridge:
- We would store marinated cheese in a closed box for five days.
Freezer:
- The texture of marinated cheese will get ruined, so we wouldn’t have to freeze the marinated cheese.
FAQs:
Can I use any other meat in this appetizer?
- We can use some prosciutto or pepperoni in this appetizer for the best taste.
Will the vegetarian have this appetizer?
- No, it includes salami, so if we use marinated vegetables or exclude the meat from this appetizer, vegetarians will have this appetizer.
How long is it required to marinate the cheese cubes?
- We can soak the cheese cubes for 2 to 12 hours to make them flavorful.
NUTRITIONAL INFORMATION:
Calories: 250 kcal
Total Carbs: 2 g
Net Carbs: 1.5 g
Fiber: 0.5 g
Protein: 15 g
Fat: 20 g
Calcium: 200 mg
Iron: 0.5 mg
Vitamin A: 150 IU
Sodium: 600 mg
Potassium: 150 mg
INSTANT POT CHICKEN TACO SOUP
Ingredients
- 1 Vidalia sweet onion diced
- 3 cups chicken broth
- 2-3 chicken breasts
- 1 can black beans drained (14.5 oz)
- 1 can pinto beans drained (14.5 oz)
- 1 can corn drained (14.5 oz)
- 1 can tomato sauce 15 oz
- 1 can diced tomatoes with green chilies AKA Rotel (14.5 oz)
- 1 packet taco seasoning
- 1 teaspoon cumin
- 1/2 teaspoon garlic powder
- sea salt and pepper to taste
- Fresh parsley roughly chopped (garnish)
Instructions
-
Add all ingredients in this order: broth, chicken breasts, corn, tomato sauce, diced tomatoes, taco seasoning, garlic powder, cumin, sea salt, pepper, pinto beans, and black beans.
-
Close lid in sealing position, and lock vent. Cook on high manual pressure for 8 minutes, and then 10 minutes NPR. Once done with NPR, you can Quick Release the remaining pressure.
-
Remove chicken, and shred with forks. Replace back to pot and stir. Serve and garnish with fresh parsley.