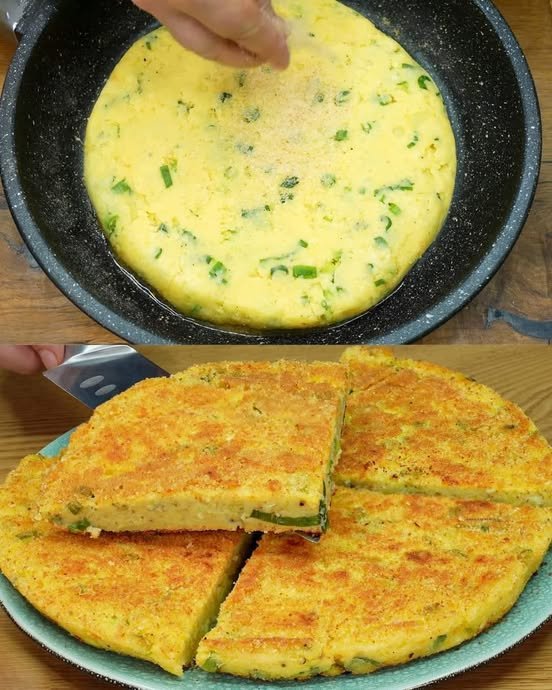
Fried Vegetable and Cheese Bread Bites

Fried Vegetable and Cheese Bread Bites

Light, airy, vegetable-filled bread bites with a crisp golden exterior

Yield

Approximately 20–24 small bites, depending on size

Equipment

  • Deep frying pan or skillet

  • Slotted spoon

  • Mixing bowls

  • Parchment paper or paper towels for draining


Ingredients

Dough

  • 1 large egg

  • 200 ml warm milk

  • 200 ml warm water

  • 10 g dry yeast

  • 20 g granulated sugar

  • 8 g salt

  • 540 g all-purpose flour

Vegetable and Cheese Mix-ins

  • 1 medium potato, peeled and finely diced

  • 1 red bell pepper, finely diced

  • 2 green bell peppers, finely diced

  • 1 medium onion, finely chopped

  • A handful of fresh parsley, finely chopped

  • 80 g Tulum cheese (or a crumbly cheese such as feta), crumbled

For Frying

  • 400 ml vegetable oil


Instructions


1. Prepare the Yeast Base

  1. In a large mixing bowl, combine the warm milk, warm water, sugar, and dry yeast.

  2. Whisk gently to dissolve and let the mixture stand for 5 minutes, until slightly frothy.


2. Mix the Dough

  1. Add the egg and salt to the yeast mixture and mix until fully combined.

  2. Gradually incorporate the flour, stirring with a spatula until a soft, sticky dough forms.

    • Do not add extra flour beyond the recipe unless absolutely necessary; the dough should remain soft and hydrated to ensure a light, airy texture.


3. Add Vegetables and Cheese

  1. Fold the finely diced potato, red pepper, green peppers, onion, and parsley into the dough.

  2. Gently mix in the crumbled cheese until evenly distributed.

  3. Ensure all ingredients are well combined, but avoid overmixing, which could deflate the dough.


4. Allow the Dough to Rise

  1. Cover the bowl with plastic wrap or a clean, damp cloth.

  2. Let the dough rise in a warm, draft-free environment for 45–60 minutes, until it has roughly doubled in volume and shows a light, web-like structure when gently pulled.


5. Shape and Fry the Bites

  1. Heat the vegetable oil in a deep frying pan over medium heat. The oil should reach approximately 170–180°C (340–355°F).

  2. Shape the dough into small portions using two lightly oiled spoons or a piping bag with a large tip.

  3. Carefully drop the dough portions into the hot oil, frying in small batches to prevent overcrowding.

  4. Fry, turning occasionally, until each bite is evenly golden brown and crispy on all sides, approximately 3–5 minutes per batch.

  5. Remove the bites with a slotted spoon and place them on a plate lined with paper towels to drain excess oil.


6. Serve

  • Serve warm as a snack or side dish.

  • Suggested accompaniments: yogurt-garlic dip, spicy tomato chutney, or a simple herb sauce.


Storage

  • Best consumed on the day of frying for maximum crispness.

  • Store any leftovers in an airtight container in the refrigerator for up to 1 day; reheat in a preheated oven to restore crispness.

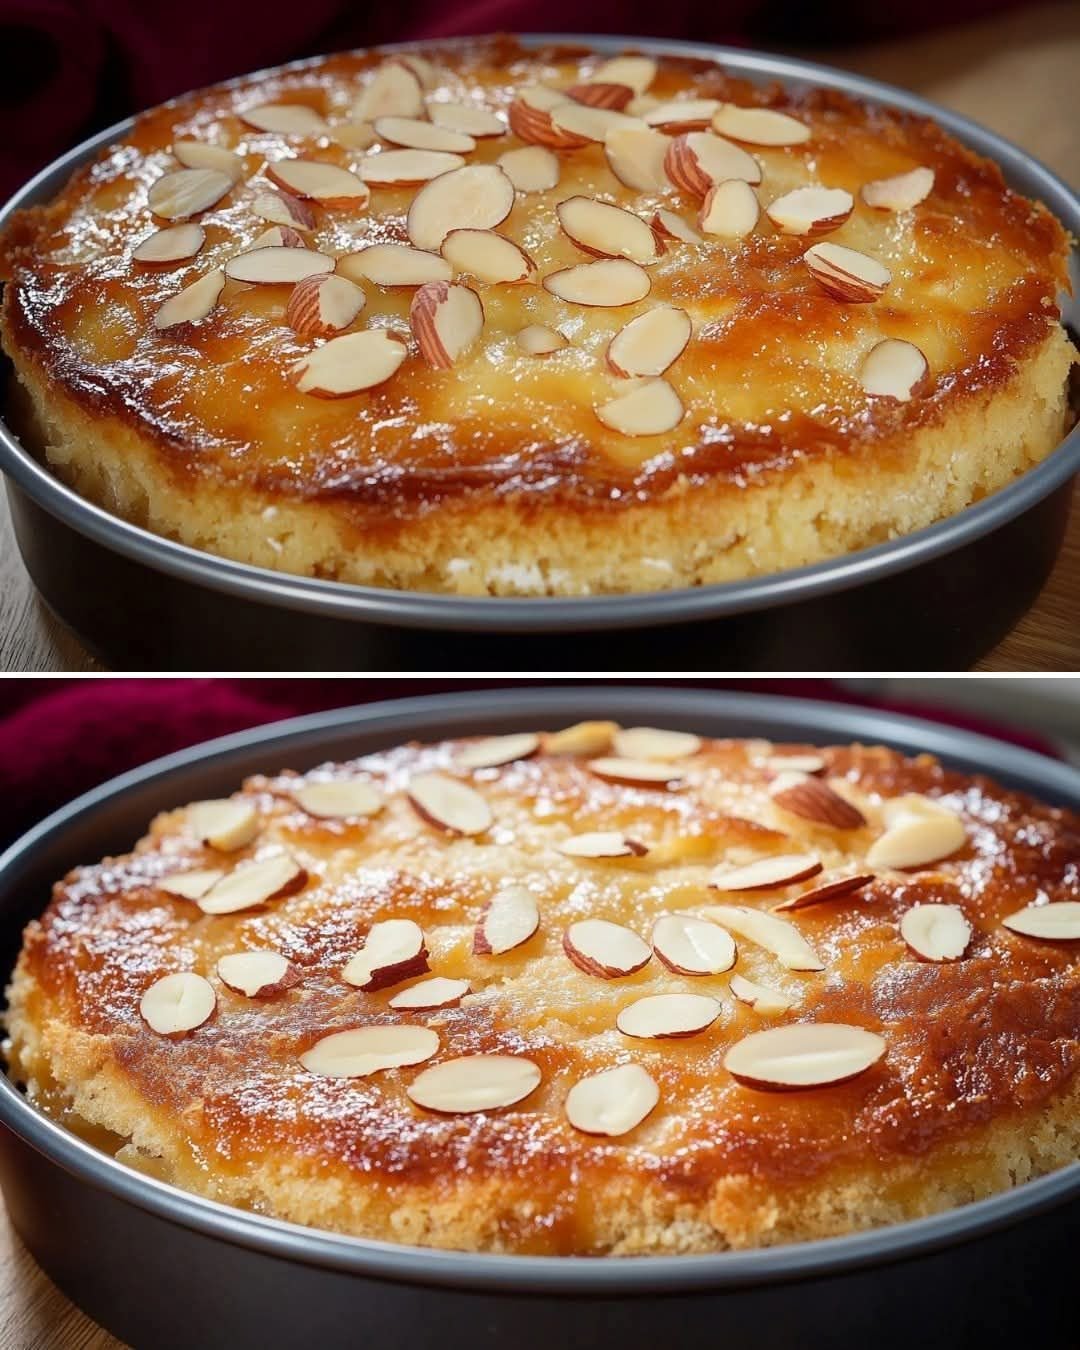
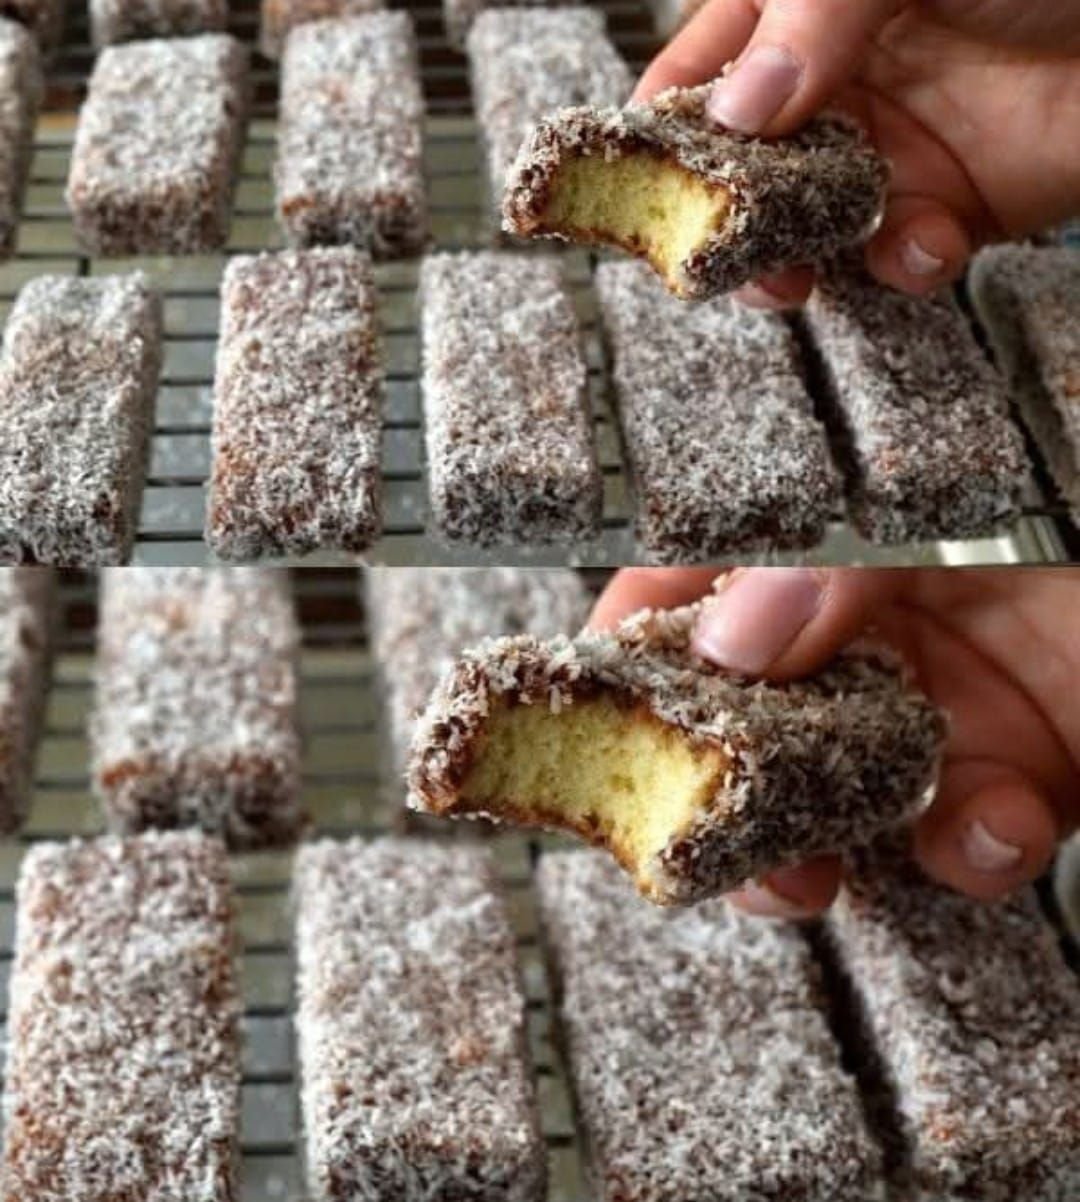
Lemon Jam Cake with Coconut Topping

Lemon Jam Cake with Coconut Topping

A soft lemon-flavored cake with a fruit jam center and coconut finish

Yield

1 round cake (20–22 cm / 8–9 inches)
Serves 8–10

Oven Temperature

180°C (350°F)


Ingredients

Cake Batter

  • 2 large eggs, at room temperature

  • 100 g (½ cup) granulated sugar

  • 1 packet vanilla sugar (or 1 teaspoon vanilla extract)

  • Juice of 1 lemon

  • 50 ml (¼ cup) vegetable oil

  • 50 ml (¼ cup) milk

  • 200 g (1⅓ cups) all-purpose flour

  • 10 g (2 teaspoons) baking powder

Filling and Topping

  • Fruit jam (apricot, strawberry, or preferred variety)

  • Shredded coconut, for topping


Instructions


1. Prepare the Batter

  1. In a large mixing bowl, combine the eggs, granulated sugar, and vanilla sugar.

  2. Whisk for 2–3 minutes, until the mixture becomes pale and slightly thickened.

  3. Add the lemon juice, vegetable oil, and milk. Mix until fully combined.

  4. Sift the flour and baking powder together.

  5. Gradually fold the dry ingredients into the wet mixture using a spatula, mixing just until smooth and free of lumps.


2. Assemble the Cake

  1. Preheat the oven to 180°C (350°F).

  2. Lightly grease a round baking pan and line the base with parchment paper if desired.

  3. Pour half of the batter into the prepared pan and spread evenly.

  4. Spoon the jam over the batter in small portions, keeping a slight margin from the edges of the pan.

  5. Carefully pour the remaining batter over the jam layer and smooth the surface gently.


3. Bake

  1. Place the pan in the preheated oven.

  2. Bake for 25–30 minutes, until the cake is evenly golden and a skewer inserted into the cake portion comes out clean.

  3. Remove from the oven and allow the cake to rest in the pan for 10 minutes.


4. Finish the Cake

  1. While the cake is still warm, spread a thin, even layer of jam over the surface.

  2. Sprinkle shredded coconut evenly across the top.

  3. Allow the cake to cool further before slicing.


Storage

  • Store at room temperature in a covered container for up to 2 days

  • Refrigerate for longer storage if preferred


Serving Notes

This cake can be served warm or at room temperature. The lemon flavor provides balance to the sweetness of the jam, while the coconut topping adds texture.

Chocolate Banana Oat Cookies

Chocolate Banana Oat Cookies

Soft baked cookies made with oats, banana, cocoa, and nuts

Yield

Approximately 10–12 cookies

Oven Temperature

180°C (350°F)


Ingredients

  • 1 ripe banana, mashed until smooth

  • 1 cup oatmeal (quick or rolled oats)

  • 30 g oat flakes (additional, for texture)

  • 160 ml water

  • 1 tablespoon unsweetened cocoa powder

  • 30 g walnuts, finely chopped

  • 30 g ground almonds

Optional Flavor Additions

  • A small pinch of ground cinnamon

  • A small amount of sugar-free chocolate chips


Instructions


1. Prepare the Oat Base

  1. Place the oatmeal and water into a mixing bowl.

  2. Stir to combine, then allow the mixture to stand for 5–10 minutes, until the oats absorb the liquid and soften.


2. Prepare the Banana

  1. Peel the banana and place it in a separate bowl.

  2. Mash thoroughly with a fork until smooth and evenly textured.


3. Combine the Ingredients

  1. Add the mashed banana to the softened oats and mix until evenly combined.

  2. Stir in the cocoa powder until the mixture takes on a uniform color.

  3. Add the ground almonds, chopped walnuts, and the additional oat flakes.

  4. Mix with a spatula until a thick, cohesive dough forms.

    • If the mixture is too loose, add a small amount of oats or ground almonds until the dough holds its shape.


4. Shape the Cookies

  1. Preheat the oven to 180°C (350°F).

  2. Line a baking tray with parchment paper.

  3. Portion the dough using approximately 2 tablespoons per cookie.

  4. Shape each portion into a ball, then gently flatten into a thick round shape.

  5. Arrange the cookies on the prepared baking tray, leaving space between them.


5. Bake

  1. Place the tray in the preheated oven.

  2. Bake for 15–20 minutes, until the cookies are set on the outside and hold their shape.

  3. Remove from the oven and allow the cookies to rest on the tray for 10 minutes before transferring.


6. Finish and Serve

  • Allow the cookies to cool further before serving.

  • If desired, lightly dust the tops with a small amount of coconut flour or powdered sweetener for decoration.


Storage

  • Store in an airtight container in the refrigerator

  • Best consumed within 5 days

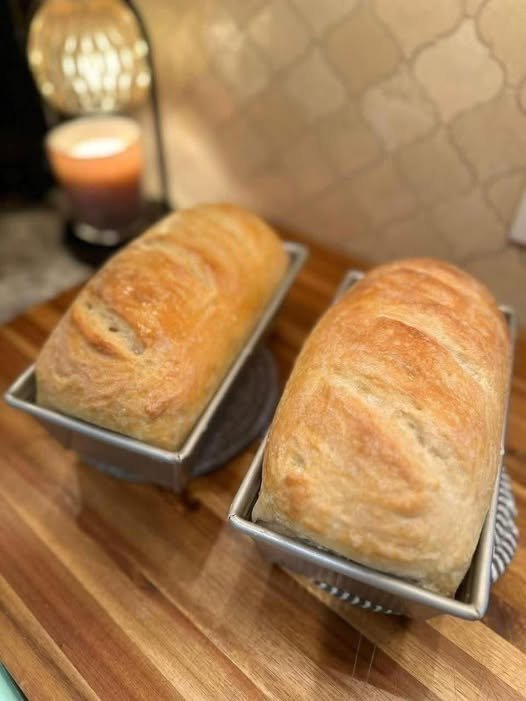
No-Knead Italian High-Hydration Bread

No-Knead Italian High-Hydration Bread

A rustic Italian-style bread with an open crumb and crisp, lightly floured crust

Yield

2 large loaves or 4–6 small loaves

Total Time

Approximately 60–70 minutes (excluding cooling)

Oven Temperature

220°C (430°F)


Ingredients

Yeast Starter

  • 100 ml water, lukewarm

  • 1 teaspoon granulated sugar

  • 8 g dry yeast

  • 3 tablespoons wheat flour (all-purpose or bread flour)

Main Dough

  • 500 g wheat flour, sifted

  • 1½ teaspoons salt

  • 350 ml water, lukewarm

  • 30 ml vegetable oil


Instructions


1. Prepare the Yeast Starter

  1. In a small bowl, combine the lukewarm water, sugar, and dry yeast.

  2. Add the flour and whisk until a smooth mixture forms.

  3. Cover the bowl and allow it to stand at room temperature for 10–15 minutes, until the mixture becomes foamy and visibly active.


2. Mix the Dough

  1. Place the sifted flour and salt into a large mixing bowl and stir to distribute evenly.

  2. Create a well in the center of the flour.

  3. Pour in the prepared yeast starter, the remaining lukewarm water, and the vegetable oil.

  4. Mix using a sturdy spoon or spatula until all ingredients are combined and a very soft, sticky dough forms.

  5. The dough should be fluid and elastic rather than firm; this high moisture content is essential for an open internal structure.

  6. Cover the bowl and allow the dough to rise in a warm, draft-free environment for 30–40 minutes, until it has doubled in volume and shows visible air bubbles on the surface.


3. Shape the Bread

  1. Generously flour a clean work surface.

  2. Carefully transfer the risen dough onto the floured surface, handling it gently to preserve the air inside.

  3. Lightly dust the top of the dough with additional flour.

  4. Using a dough scraper or lightly floured hands, divide the dough into 2 large portions or 4–6 smaller rectangular portions.

  5. Place the shaped pieces onto a baking tray lined with parchment paper, leaving space between each loaf to allow for expansion.


4. Bake

  1. Preheat the oven to 220°C (430°F).

  2. Place the baking tray on the center rack of the oven.

  3. Bake for 20–25 minutes, until the bread is evenly golden and the crust is firm.

  4. Remove from the oven and transfer the loaves to a wire rack.

  5. Allow the bread to cool for at least 15 minutes before slicing to allow the crumb to stabilize.


Storage

  • Best consumed on the day of baking

  • Can be stored at room temperature for up to 24 hours

  • Freeze once fully cooled for longer storage

Strawberry Jam Swirl Yogurt Cake

Strawberry Jam Swirl Yogurt Cake

A soft, moist cake with a delicate strawberry swirl and coconut topping

Yield

1 rectangular cake (20 × 30 cm)
Serves 10–12

Oven Temperature

180°C (350°F)


Ingredients

  • 3 medium eggs, at room temperature

  • 150 g granulated sugar

  • 8 g vanilla sugar (or 1 teaspoon vanilla extract)

  • 150 g vanilla yogurt

  • 120 ml sunflower oil

  • 290 g all-purpose flour (or type 00)

  • 15 g baking powder

  • 1 small pinch of salt

  • Approximately 120 g (½ cup) strawberry jam

  • Grated coconut, for topping


Instructions


1. Prepare the Batter

  1. Place the eggs, granulated sugar, vanilla sugar, and salt in a large mixing bowl.

  2. Whisk using a hand mixer or balloon whisk for 3–5 minutes, until the mixture becomes pale, slightly thickened, and airy.

  3. Add the sunflower oil and vanilla yogurt. Mix gently until fully blended.

  4. Sift the flour and baking powder into the bowl.

  5. Fold the dry ingredients into the batter using a spatula or whisk, mixing just until smooth and free of lumps. Avoid overmixing.


2. Prepare the Baking Pan

  1. Lightly grease a rectangular baking pan measuring approximately 20 × 30 cm.

  2. Dust the pan lightly with flour and remove any excess.


3. Create the Strawberry Swirl

  1. Pour approximately two-thirds of the batter into the prepared pan and spread it evenly.

  2. Spoon the strawberry jam over the surface in small portions.

  3. Using a knife or skewer, gently draw through the batter to distribute the jam and create a marbled pattern.

  4. Carefully pour the remaining batter over the top and spread gently to cover the jam layer.


4. Bake the Cake

  1. Place the pan in the preheated oven.

  2. Bake at 180°C (350°F) for 30–35 minutes, until the cake is fully baked and a skewer inserted into the center comes out clean.

  3. Remove from the oven and allow the cake to rest in the pan for 10 minutes.

  4. Transfer to a wire rack to cool further.


5. Finish and Serve

  1. While the cake is still slightly warm, lightly brush the surface with a small amount of warmed strawberry jam or honey, if desired.

  2. Sprinkle grated coconut evenly over the top.

  3. Allow the cake to cool completely before slicing.


Storage

  • Store in an airtight container at room temperature for up to 3 days

  • Refrigerate for longer storage if preferred


Serving Notes

This cake is well suited for serving at room temperature alongside tea or coffee. The yogurt contributes to a soft texture that remains moist over time.

Homemade Ciabatta Bread

Homemade Ciabatta Bread

A high-hydration Italian bread with an open crumb and crisp crust

Yield

Makes approximately 8 small ciabatta rolls

Oven Temperature

220°C (430°F)


Ingredients

  • 500 g bread flour (approximately 3⅓ cups)

  • 375–400 ml water, lukewarm

  • 5 g active dry yeast (about 2 teaspoons)

  • 5 g salt (about 1 teaspoon)

  • Olive oil, for lightly coating the bowl (optional)


Instructions


1. Prepare the Dough

  1. In a large mixing bowl, combine the bread flour, yeast, and salt. Mix evenly.

  2. Gradually add 375 ml of the water while mixing with a spatula or wooden spoon.

  3. Continue mixing until all the flour is hydrated and a soft, highly elastic dough forms.

    • If dry flour remains, add the remaining water a small amount at a time.

  4. The dough should be very soft and elastic, which is essential for developing the characteristic open structure of ciabatta.

  5. Lightly coat the bowl with olive oil if desired, place the dough inside, and cover with a clean cloth or food-safe cover.


2. Resting and Dough Development

  1. Allow the dough to rest at room temperature for 30 minutes.

  2. To strengthen the dough structure, perform a series of folds:

    • Lightly moisten your hands.

    • Lift one side of the dough upward and fold it toward the center.

    • Rotate the bowl and repeat until all sides have been folded inward.

  3. Cover the dough and allow it to rest for another 30 minutes.

  4. Repeat this folding process 3 to 4 times over a total period of about 2 hours.

    • This gradual method replaces traditional kneading and helps maintain air within the dough.


3. Shape the Ciabatta

  1. Generously dust the work surface with flour.

  2. Carefully transfer the dough onto the floured surface, handling it gently to preserve internal air pockets.

  3. Lightly dust the surface of the dough with flour and shape it into a loose rectangle without pressing firmly.

  4. Using a sharp knife or dough scraper, divide the dough into 8 rectangular portions.

  5. Place the pieces onto a baking tray lined with parchment paper, spacing them slightly apart.

  6. Cover lightly and allow the dough to rest and rise for 30–45 minutes, until slightly expanded.


4. Bake the Bread

  1. Preheat the oven to 220°C (430°F).

  2. For improved crust development, place a shallow oven-safe pan with water on the lower rack to create steam during baking.

  3. Bake the ciabatta for 18–22 minutes, until evenly golden and firm on the outside.

  4. Remove from the oven and transfer the bread to a wire rack.

  5. Allow the bread to cool completely before slicing to ensure the interior crumb sets properly.


Storage

  • Best enjoyed on the day of baking

  • Can be stored at room temperature for 24 hours

  • Freeze once cooled for longer storage

Apricot Custard Napoleon Cake

Apricot Custard Napoleon Cake

A layered dessert made with crisp puff pastry, smooth vanilla custard, and apricot fruit filling

Yield

1 cake (20–22 cm / 8–9 inches)
Serves 8–10

Oven Temperature

200°C (400°F)


Ingredients

Puff Pastry Layers

  • 250 g ready-to-use puff pastry, thawed if frozen

  • Water, for light brushing

  • 2 teaspoons granulated sugar


Apricot Layer

  • 300 g apricot jam or apricot fruit spread

  • 1 tablespoon water (optional, for adjusting consistency)


Vanilla Custard Cream

  • 400 ml whole milk

  • 80 g granulated sugar

  • 30 g cornstarch

  • 2 large egg yolks

  • 10 g vanilla sugar (or 1 teaspoon vanilla extract)

  • 50 g unsalted butter, softened


Finishing

  • Powdered sugar, for dusting

  • 50 g almond flakes or finely crushed baked pastry crumbs


Instructions


1. Prepare and Bake the Pastry

  1. Preheat the oven to 200°C (400°F).

  2. Roll out the puff pastry if needed and divide it into two equal circles (20–22 cm).

  3. Place both circles on a parchment-lined baking tray.

  4. Lightly brush the surface of each pastry with water and sprinkle evenly with sugar.

  5. Using a sharp knife, gently mark the top pastry circle into 8–10 equal wedges without cutting fully through. This will help maintain clean portions after assembly.

  6. Bake for 15–20 minutes, until the pastry is fully puffed and evenly golden.

  7. Remove from the oven and allow both layers to cool completely before assembly.


2. Prepare the Custard Cream

  1. In a saucepan, combine the egg yolks, sugar, vanilla sugar, and cornstarch.

  2. Add a small portion of the milk and whisk until smooth and free of lumps.

  3. Gradually pour in the remaining milk while whisking continuously.

  4. Place the saucepan over medium heat and cook, stirring constantly, until the mixture thickens into a smooth, stable custard.

  5. Remove from heat and stir in the butter until fully incorporated.

  6. Transfer the custard to a bowl and cover the surface directly with parchment paper or a food-safe cover to prevent drying.

  7. Allow the custard to cool to room temperature before assembling the cake.


3. Assemble the Cake

  1. Place a pastry ring or the rim of a springform pan on a serving plate.

  2. Position the unscored pastry layer at the base.

  3. If the apricot jam is very thick, warm it slightly with the water and stir until smooth.

  4. Spread the apricot layer evenly over the pastry base.

  5. Spoon the cooled custard cream over the apricot layer and smooth the surface.

  6. Arrange the pre-marked pastry wedges on top, aligning them to form a complete circle.


4. Chill and Finish

  1. Refrigerate the assembled cake for at least 4 hours, preferably overnight, to allow the custard to fully set.

  2. Carefully remove the pastry ring.

  3. Gently press almond flakes or pastry crumbs onto the sides of the cake.

  4. Dust the top evenly with powdered sugar.

  5. For decoration, place a small amount of apricot jam at the center if desired.


Storage

  • Keep refrigerated

  • Best enjoyed within 24–48 hours

Cheesy Baked Cauliflower

Cheesy Baked Cauliflower

A creamy oven-baked cauliflower dish with a golden cheese topping

Yield

Serves 4–6

Oven Temperature

200°C (400°F)


Ingredients

Cauliflower

  • 1 large head cauliflower

  • 3 lemon slices

  • Fresh dill sprigs

  • Salt, to taste

Cheese Sauce

  • 2 cups shredded cheese (mozzarella or a blend of cheddar and Monterey Jack)

  • 1½ cups heavy cream or prepared thick béchamel sauce

  • 2 garlic cloves, finely minced

  • ½ teaspoon dried oregano or thyme

  • Black pepper, to taste


Instructions

1. Prepare the Cauliflower

  1. Remove the outer leaves from the cauliflower and trim the stem.

  2. Cut the cauliflower into evenly sized florets to ensure uniform cooking.


2. Cook the Cauliflower

  1. Fill a large pot with water and add the lemon slices, dill sprigs, and salt.

  2. Bring the water to a steady boil.

  3. Add the cauliflower florets and cook for 5–7 minutes, until just tender when pierced with a fork. The cauliflower should remain firm and not soft.

  4. Drain thoroughly and allow excess moisture to evaporate.


3. Arrange for Baking

  1. Transfer the drained cauliflower to a lightly greased oven-safe baking dish.

  2. Spread the florets evenly in a single layer.


4. Prepare the Sauce

  1. In a mixing bowl, combine the heavy cream, minced garlic, dried herbs, and black pepper.

  2. Stir until evenly blended.


5. Assemble the Dish

  1. Pour the cream mixture evenly over the cauliflower.

  2. Sprinkle the shredded cheese evenly across the surface, fully covering the cauliflower.


6. Bake

  1. Place the dish in the preheated oven.

  2. Bake for 15–20 minutes, until the cheese has melted completely and developed a lightly browned surface.


7. Serve

  • Garnish with fresh dill if desired.

  • Serve warm as a side dish or light main course.


Storage

  • Refrigerate leftovers in a covered container for up to 2 days

  • Reheat gently in the oven until warmed through

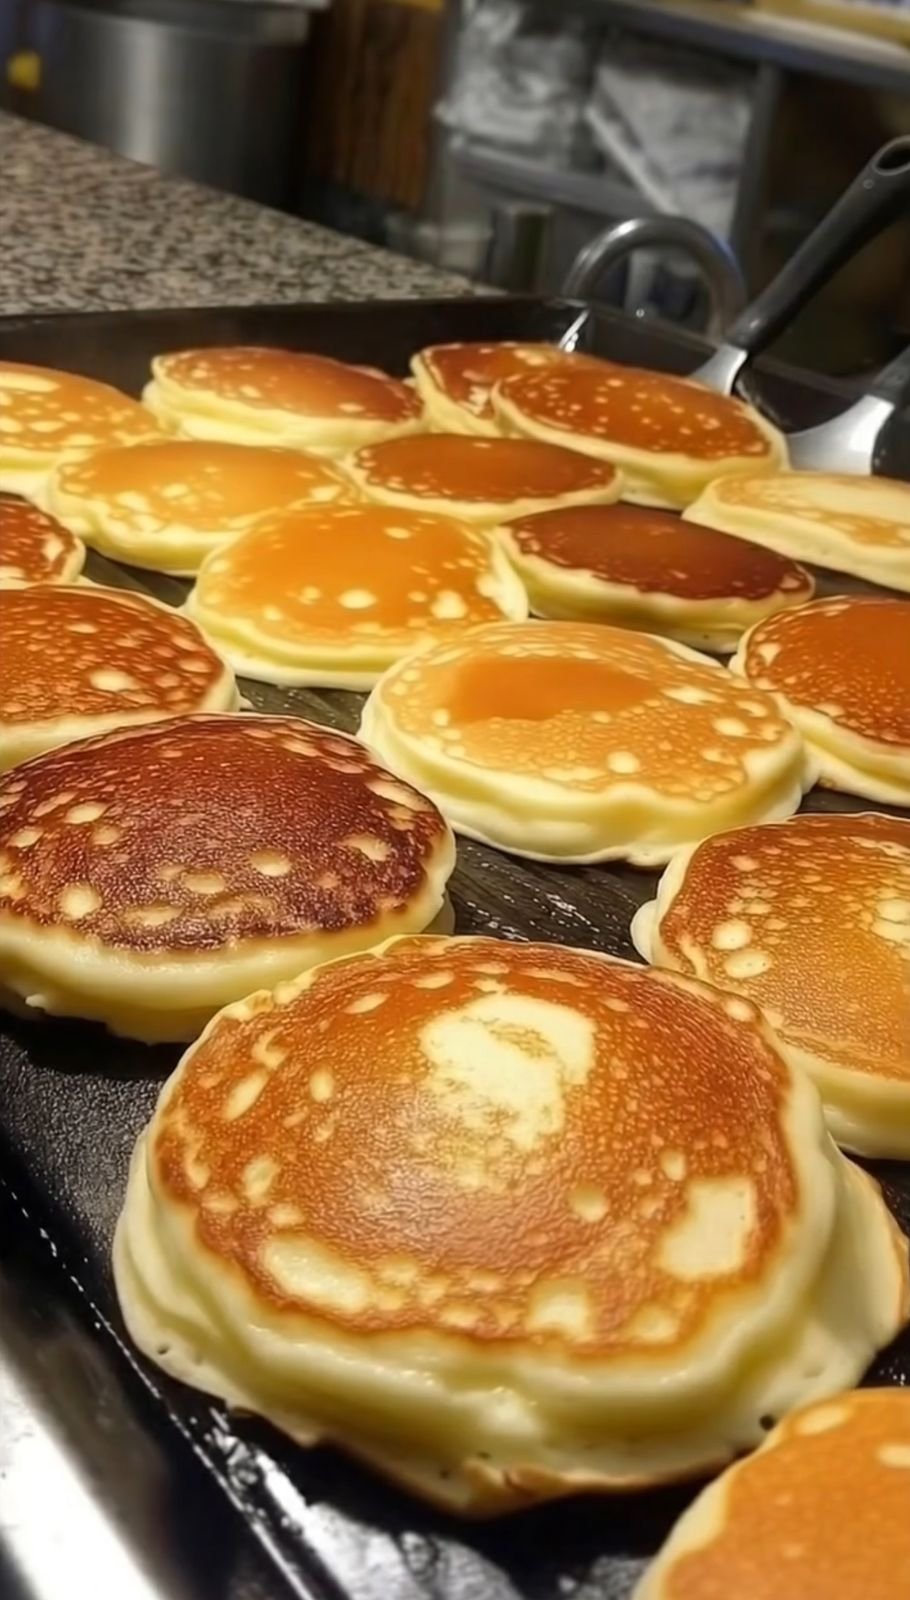
Classic Easy Crêpes

Classic Easy Crêpes

Thin, tender crêpes suitable for both sweet and savory fillings

Yield

Makes approximately 10–12 crêpes (22–24 cm / 9–10 inch)

Cooking Temperature

Medium heat


Ingredients

  • 1 cup (125 g) all-purpose flour

  • 2 large eggs, at room temperature

  • ½ cup (120 ml) whole milk

  • ½ cup (120 ml) water

  • 2 tablespoons unsalted butter, melted and cooled

  • ¼ teaspoon salt

Optional (for sweet crêpes)

  • 1 tablespoon granulated sugar

  • 1 teaspoon vanilla extract


Instructions


1. Prepare the Batter

  1. Place the flour into a large mixing bowl.

  2. Add the eggs and whisk until a thick, smooth mixture forms. This step helps prevent lumps later.

  3. Gradually pour in the milk and water while whisking continuously. Continue mixing until the batter becomes smooth and fluid.

  4. Add the salt and melted butter. If preparing sweet crêpes, also add the sugar and vanilla extract. Whisk until fully combined.

  5. The finished batter should have the consistency of light cream and pour easily.

  6. Cover the bowl and allow the batter to rest in the refrigerator for 30 minutes. This resting period improves texture and results in softer crêpes.


2. Cook the Crêpes

  1. Heat a non-stick pan or crêpe pan over medium heat.

  2. Lightly coat the surface with a small amount of butter or neutral oil, wiping away any excess.

  3. Pour approximately ¼ cup of batter into the center of the pan.

  4. Immediately lift and rotate the pan so the batter spreads evenly into a thin layer covering the entire surface.

  5. Cook for 1–2 minutes, until the underside is lightly golden and the edges begin to loosen from the pan.

  6. Gently turn the crêpe using a spatula and cook the second side for 30–45 seconds, just until set.

  7. Transfer the cooked crêpe to a plate and repeat with the remaining batter, lightly greasing the pan as needed.


3. Serving Suggestions

Sweet Fillings

  • Fresh berries or sliced fruit

  • Chocolate or hazelnut spread

  • Lemon juice with a light sprinkle of sugar

  • Whipped cream or custard

Savory Fillings

  • Ham and cheese

  • Sautéed mushrooms

  • Spinach with cream or cheese

  • Eggs and herbs

Finishing

  • Dust lightly with powdered sugar

  • Serve with honey, syrup, or fruit sauce


Storage

  • Cooked crêpes can be stacked, covered, and refrigerated for up to 2 days

  • Reheat gently in a dry pan before serving

Apricot Custard Puff Cake

Apricot Custard Puff Cake

A layered pastry dessert with flaky dough, bright apricot fruit, and smooth vanilla custard

Yield

1 cake (20–22 cm / 8–9 inch)
Serves 8–10

Oven Temperature

180°C (350°F), conventional oven


Ingredients

Quick Puff-Style Yeasted Pastry

  • 250 g all-purpose flour

  • 150 g cold unsalted butter, cut into small cubes or coarsely grated

  • 100 ml milk, lukewarm (not hot)

  • 25 g granulated sugar

  • 4 g instant yeast

  • 1 large egg (room temperature)

  • 10 g vanilla sugar (or 1 teaspoon vanilla extract)

  • 20 ml melted butter (cooled)


Apricot Layer

  • 300 g apricot jam or thick apricot compote

  • Optional: 1–2 teaspoons fresh lemon juice (for balance)


Vanilla Custard Cream

  • 400 ml whole milk

  • 2 large egg yolks

  • 80 g granulated sugar

  • 30 g cornstarch

  • 50 g unsalted butter, softened


Decoration

  • 50 g sliced almonds

  • Powdered sugar, for dusting


Instructions


1. Prepare the Dough

  1. In a small bowl, combine the lukewarm milk, sugar, and instant yeast. Stir gently and let stand for 5 minutes until slightly foamy.

  2. Add the egg, vanilla sugar, and melted butter to the yeast mixture. Whisk until smooth.

  3. In a large mixing bowl, add the flour and cold butter. Using your fingertips or a pastry cutter, gently combine until the mixture resembles coarse crumbs.

    • Important: The butter pieces should remain visible. This creates flakiness.

  4. Pour the liquid ingredients into the flour mixture. Mix just until a soft dough forms.

    • Do not knead excessively.

  5. Shape the dough into a flat disc, cover with a clean cloth, and allow it to rest in a warm, draft-free place for 30 minutes, until slightly puffed.


2. Shape and Bake the Pastry Layers

  1. Divide the rested dough into two equal portions.

  2. Roll each portion into a circle approximately 20–22 cm (8–9 inches) in diameter.

  3. Place both circles on parchment-lined baking trays.

  4. Lightly score the top pastry circle into wedges using a sharp knife (do not cut all the way through). This will help with slicing after assembly.

  5. Bake both layers at 180°C (350°F) for 15–20 minutes, until lightly golden and fully baked.

  6. Remove from the oven and allow to cool completely.


3. Prepare the Custard Cream

  1. In a bowl, whisk the egg yolks, sugar, and cornstarch with 3–4 tablespoons of the milk until smooth and lump-free.

  2. Heat the remaining milk in a saucepan over medium heat until hot but not boiling.

  3. Slowly pour the hot milk into the egg mixture while whisking continuously.

  4. Return the mixture to the saucepan. Cook over medium heat, stirring constantly, until thick and smooth.

  5. Remove from heat and immediately stir in the butter until fully incorporated.

  6. Transfer the custard to a bowl, cover the surface directly with parchment or food-safe wrap to prevent a skin from forming, and allow to cool completely.


4. Assemble the Cake

  1. Place the first pastry layer on a serving plate. Position a cake ring or springform ring around it.

  2. Spread the apricot jam evenly over the pastry base.

  3. Spoon the cooled custard over the apricot layer and smooth the surface.

  4. Carefully place the second pastry layer (scored side up) on top.

  5. Refrigerate for at least 4 hours, preferably overnight, to allow the custard to fully set.


5. Final Decoration

  1. Remove the cake ring carefully.

  2. Gently press almond slices onto the sides of the cake.

  3. Dust the top generously with powdered sugar.

  4. Optional: add a small spoon of apricot jam in the center for a polished finish.


Storage

  • Keep refrigerated

  • Best enjoyed within 48 hours

🍳 The Perfect “Doctor-Approved” Morning Scramble

🍳 The Perfect “Doctor-Approved” Morning Scramble

This recipe focuses on maintaining the integrity of the nutrients (like choline and lutein) by not overcooking the eggs while adding healthy fats and antioxidants.

Prep time: 5 mins | Cook time: 5 mins | Yield: 1 serving

Ingredients

  • The Base:

    • 2 to 3 large organic, pasture-raised eggs (higher in Vitamin D and Omega-3s)

    • 1 tbsp grass-fed butter or avocado oil

  • The “Booster” Add-ins:

    • 1/4 cup fresh spinach (for extra Vitamin K and Folate)

    • 1 tbsp nutritional yeast (optional, for a B-vitamin and cheesy flavor boost)

    • A pinch of sea salt and cracked black pepper

    • 1/4 avocado (served on the side for healthy monounsaturated fats)

Instructions

  1. Whisk with Intention: Crack the eggs into a bowl. Whisk vigorously for about 30 seconds. This incorporates air, making them fluffier without needing to add milk or cream.

  2. Low and Slow: Heat your skillet over medium-low heat. Add the butter. Once melted and bubbling slightly, pour in the eggs.

  3. The Gentle Fold: Let the eggs sit for 20 seconds until the edges set. Use a silicone spatula to gently push the cooked eggs toward the center, letting the raw eggs flow to the edges.

  4. Add Greens: When the eggs are halfway cooked (still looking wet), fold in the spinach and nutritional yeast. The residual heat will wilt the spinach perfectly without destroying its nutrients.

  5. Finish Early: Remove the pan from the heat while the eggs still look slightly underdone. They will continue to cook on the plate (carry-over cooking), ensuring they stay “jammy” and nutrient-dense rather than rubbery.

  6. Serve: Top with sliced avocado and a dash of black pepper.


How to Maximize the Benefits

  • Don’t Fear the Yolk: About 90% of an egg’s calcium, iron, and nearly all its fat-soluble vitamins (A, D, E, and K) are in the yolk. Eating only the whites means missing the brain-boosting choline.

  • Pair with Vitamin C: To help your body absorb the non-heme iron found in the egg and spinach, pair your breakfast with a few berries or a squeeze of lemon juice in your water.

  • Avoid High Heat: Cooking eggs at extremely high temperatures can oxidize the cholesterol in the yolk. Stick to medium or low heat for poaching, soft-boiling, or gentle scrambling.

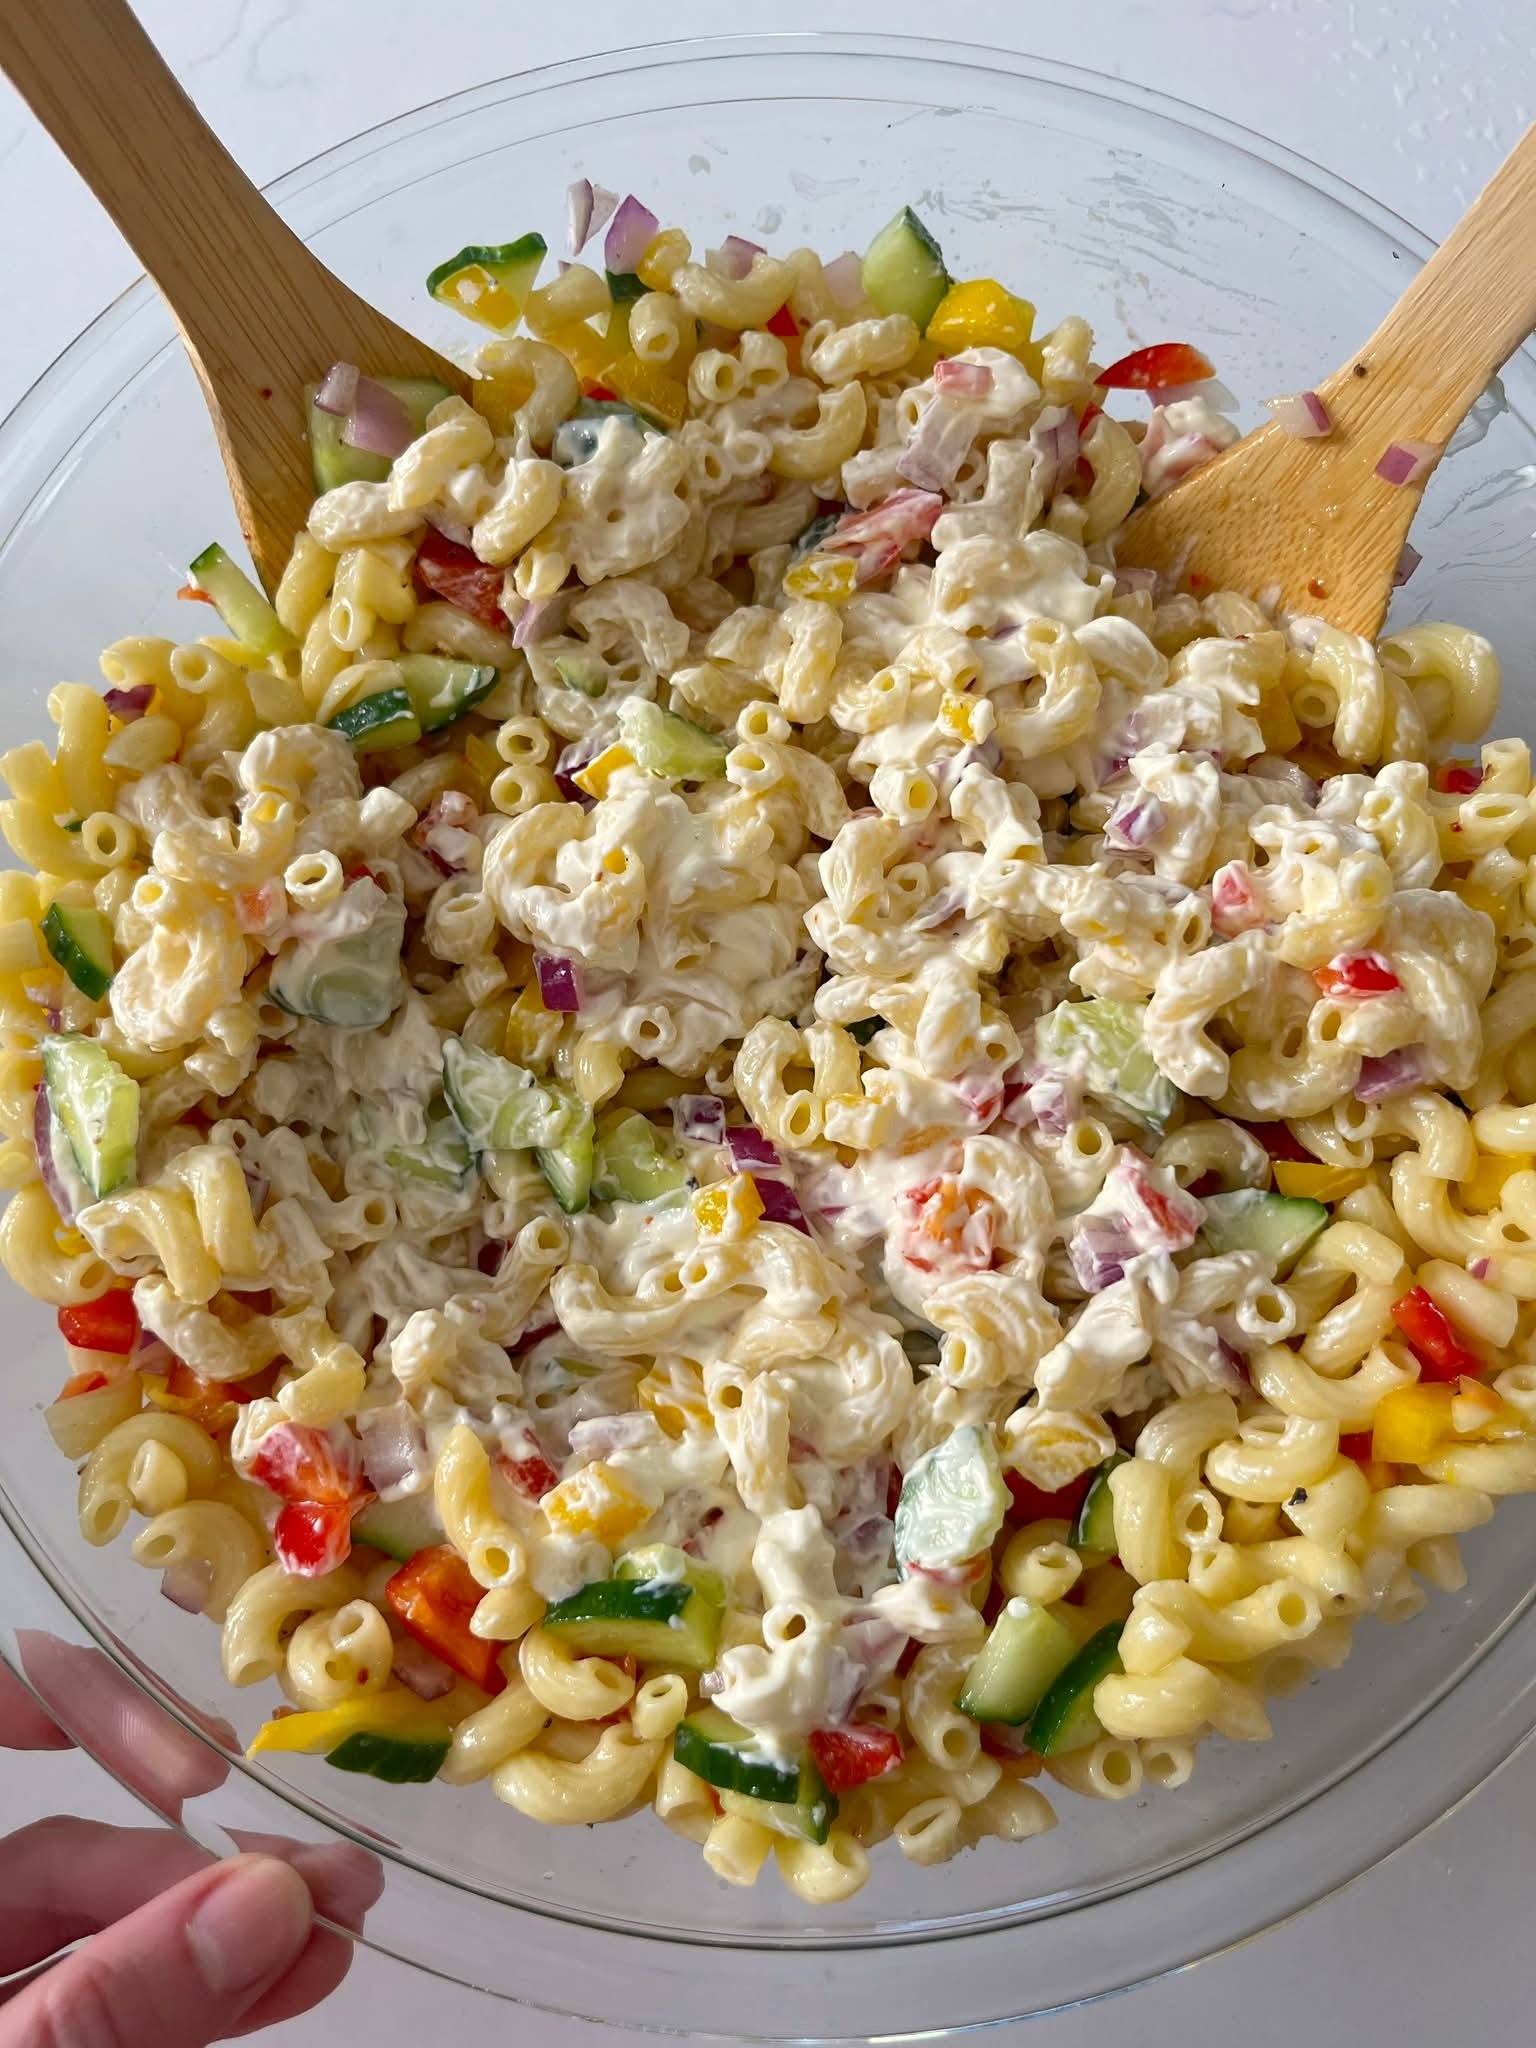
Keto Hawaiian Macaroni Salad

Keto Hawaiian Macaroni Salad

Prep time: 15 mins | Cook time: 7 mins | Total time: 22 mins (plus chilling) Yield: 6 servings | Net Carbs: ~3g per serving

Ingredients

  • The Base:

    • 8 oz low-carb elbow macaroni (e.g., Great Low Carb Bread Co., Immi, or konjac-based)

  • The Dressing:

    • 1 cup sugar-free mayonnaise (Avocado oil-based like Primal Kitchen is best)

    • 2 tbsp apple cider vinegar

    • 1 tbsp heavy cream (optional, for extra richness)

    • 1 tbsp sugar-free Dijon mustard

    • 1 tsp erythritol or monk fruit sweetener (optional)

    • 1/2 tsp garlic powder

    • 1/2 tsp onion powder

    • Salt and black pepper to taste

  • The Add-ins:

    • 1/2 cup celery, finely chopped

    • 1/4 cup red onion, finely chopped

    • 1/4 cup carrots, shredded (omit or swap for jicama to further reduce carbs)

    • 1 tbsp green onions, chopped

    • Optional: 1/2 tsp paprika for color

Instructions

  1. Boil the Pasta: Bring a large pot of salted water to a boil. Cook the low-carb pasta according to package directions (usually 5–7 minutes). Do not overcook, as low-carb pasta can become mushy. Drain and immediately rinse with cold water to stop the cooking process.

  2. Whisk the Dressing: In a large mixing bowl, combine the mayonnaise, apple cider vinegar, heavy cream, Dijon mustard, sweetener, garlic powder, and onion powder. Whisk until the mixture is smooth, creamy, and fully emulsified.

  3. Prep the Veggies: Finely chop your celery and onions. Add them to the dressing bowl along with the shredded carrots.

  4. Fold Together: Add the cooled, drained pasta to the dressing mixture. Using a spatula, gently fold the pasta until every piece is evenly coated. Be careful not to break the noodles.

  5. The Chill Factor (Crucial): Cover the bowl and refrigerate for at least 1 hour. For the most authentic “island style” flavor, let it sit overnight; this allows the pasta to absorb the tang of the vinegar and the sweetness of the dressing.

  6. Final Touch: Before serving, give it a quick stir. If it seems too dry (pasta absorbs moisture as it sits), fold in an extra tablespoon of mayo. Garnish with green onions or a dash of paprika.


Pro Tips for the Best Mac Salad

  • The “Double Dressing” Rule: Low-carb noodles are notorious for soaking up sauce. If you are making this a day ahead, consider making 1.5x the dressing recipe so it stays creamy until serving.

  • Texture Trick: If you find konjac-based pasta too “rubbery,” try a lupin-flour or almond-flour based elbow macaroni for a more traditional bite.

  • Plate Lunch Pairing: Serve this alongside Keto Kalua Pork or Grilled Teriyaki Chicken (using a sugar-free glaze) for a complete Hawaiian experience.

  • Storage: This keeps beautifully in an airtight container for up to 5 days in the fridge. Do not freeze, as the emulsion in the mayo will break and the pasta texture will degrade.


Nutritional Profile (Per Serving)

  • Calories: 210

  • Fat: 18g

  • Net Carbs: 3g

  • Protein: 6g

Baked Cheesy Chicken Bread Rolls

Baked Cheesy Chicken Bread Rolls

A savory, melt-in-your-mouth snack featuring seasoned shredded chicken and bubbly melted cheese nestled in soft dinner rolls.

  • Prep time: 15 minutes

  • Cook time: 15 minutes

  • Total time: 30 minutes

Ingredients

For the Chicken Filling

  • Chicken: 1 cup boiled and shredded chicken (rotisserie chicken works great here)

  • Onion: 1 small, finely chopped

  • Capsicum (Bell Pepper): ½ cup, finely chopped

  • Garlic: 1 tsp garlic paste

  • Condiments: 2 tbsp ketchup (or pizza sauce) and 2 tbsp mayonnaise

  • Seasoning: Salt (to taste), ½ tsp black pepper, ½ tsp red chili powder, and ½ tsp chili flakes (optional for heat)

For the Rolls & Topping

  • Bread: 1 pack of dinner rolls or slider buns

  • Cheese: 1½ cups mozzarella or cheddar cheese, grated

  • Butter Mixture: 2 tbsp butter (melted) mixed with 1 tsp garlic powder

  • Garnish: Freshly chopped parsley or coriander


Detailed Instructions

1. Sauté the Savory Filling

Heat 1 tablespoon of oil in a non-stick pan over medium heat. Add the finely chopped onion and garlic paste, sautéing for about 2 minutes until the onion becomes translucent and soft. Add the shredded chicken and chopped capsicum.

2. Season and Combine

Stir in the salt, black pepper, red chili powder, and chili flakes. Mix thoroughly and cook for 3–4 minutes to allow the flavors to meld and the capsicum to soften slightly. Remove the pan from the heat. Once the mixture has cooled for a minute, stir in the ketchup (or pizza sauce) and mayonnaise until the chicken is evenly coated and creamy.

3. Prepare and Stuff the Rolls

Preheat your oven to 180°C (350°F). Take your dinner rolls and make a deep slit down the center of each, being careful not to cut all the way through to the bottom. Gently pull the bread apart and stuff each roll generously with the prepared chicken filling.

4. Add Cheese and Butter

Place the stuffed rolls side-by-side on a baking tray lined with parchment paper. Sprinkle the grated mozzarella or cheddar cheese over the top of the filling in each roll. Using a pastry brush, coat the tops and sides of the bread with the melted garlic butter.

5. Bake to Perfection

Place the tray in the center rack of the oven. Bake for 12–15 minutes, or until the cheese is completely melted and bubbling, and the edges of the rolls have turned a beautiful golden brown.

6. Garnish and Serve

Remove from the oven and immediately sprinkle with fresh parsley or coriander. Serve these rolls while hot, ideally paired with extra ketchup or a creamy garlic dipping sauce.


Tips for the Best Rolls

  • Don’t Overfill: While it’s tempting to pile the chicken high, keep the filling level with the top of the bread to ensure the cheese stays on the roll rather than sliding off onto the tray.

  • Soft vs. Crusty: If you prefer a softer roll, cover the tray loosely with aluminum foil for the first 8 minutes of baking, then remove it for the final 5 minutes to melt the cheese.

Grandmother’s Italian Apple & Lemon Cake

Grandmother’s Italian Apple & Lemon Cake

Prep Time: 15 minutes
Bake Time: 35–40 minutes
Cooling Time: 10–15 minutes
Servings: 8–10


Ingredients

  • 3 large eggs

  • 150 g (¾ cup) granulated sugar

  • 200 ml (¾ cup + 1 tbsp) milk

  • 370 g (3 cups) all-purpose flour

  • 20 g (4 tsp) baking powder

  • 1 large apple, peeled and sliced into thin wedges

  • 1 lemon, juiced (zest optional for extra flavor)

  • 50 g (¼ cup) raisins

  • Butter (for greasing the cake mold)

  • Optional: Powdered sugar for dusting


Instructions

1. Prepare the Fruit

  • Peel and slice the apple into thin wedges.

  • Place the slices in a small bowl and toss them with the lemon juice.

    • Tip: The lemon juice prevents the apples from browning and adds a gentle, fresh citrus flavor.

  • If using raisins that seem dry, soak them in warm water or a bit of lemon juice for 5 minutes to plump them up. Drain before using.


2. Mix the Batter

  • In a large mixing bowl, whisk the eggs and sugar together using a hand whisk or electric mixer until the mixture is pale and frothy.

    • This step traps air in the batter, making the cake light.

  • Gradually stir in the milk until fully combined.


3. Sift and Combine Dry Ingredients

  • Sift together the all-purpose flour and baking powder.

  • Gently fold the dry ingredients into the wet mixture using a spatula or whisk.

    • Tip: Fold carefully to avoid overmixing, which can make the cake dense. The batter should be smooth, slightly thick, and airy.

  • Optional: Grate the lemon zest into the batter for an extra layer of citrus aroma.


4. Assemble the Cake

  • Preheat your oven to 180°C (350°F).

  • Generously grease a bundt or ring cake mold with butter, making sure to coat the inner crevices.

  • Pour the prepared batter into the mold, spreading it evenly.

  • Arrange the apple wedges in a circular or spiral pattern on top of the batter. Press them lightly so they stay partially embedded during baking.

  • Sprinkle the raisins evenly over the top.


5. Bake the Cake

  • Place the cake in the center of the preheated oven.

  • Bake for 35–40 minutes, or until the top is golden brown and a toothpick inserted in the thickest part comes out clean.

    • Tip: If the top browns too quickly, cover loosely with aluminum foil for the last 5–10 minutes.


6. Cool and Serve

  • Let the cake cool in the pan for 10 minutes.

  • Carefully turn it out onto a plate or cooling rack.

  • Once fully cooled, dust generously with powdered sugar for a classic Italian finish.


Helpful Tips

  1. Apple Texture: Use a firm variety like Granny Smith or Gala to hold their shape while baking.

  2. Even Baking: Make sure the apple wedges are similar in size so they bake evenly.

  3. Flavor Boost: Adding ½ tsp cinnamon or a pinch of nutmeg to the batter pairs beautifully with apple and lemon.

  4. Storage: Keep the cake covered at room temperature for 2 days or in the fridge for up to 5 days.

Fluffy Cherry Yogurt Cake

Fluffy Cherry Yogurt Cake

Prep Time: 15 minutes
Bake Time: 35–40 minutes
Cooling Time: 15–20 minutes
Servings: 8–10


Ingredients

The Batter

  • 3 large eggs

  • 150 g (4/5 cup) granulated sugar

  • A pinch of salt

  • 200 g plain Greek yogurt (full-fat preferred for extra moisture)

  • 100 ml neutral vegetable oil (sunflower, canola, or light olive oil)

  • 250 g (2 cups) all-purpose flour

  • 12 g (2 ½ tsp) baking powder

  • 1 tsp vanilla extract

The Fruit

  • 300 g fresh or frozen pitted cherries (if using frozen, do not thaw)

Optional

  • Powdered sugar, for dusting


Instructions

1. Prepare for Success

  • Preheat the oven to 180°C (350°F).

  • Grease a 20×30 cm (8×12 inch) rectangular or square baking pan with butter or oil.

  • Line the bottom with parchment paper to make removing the cake easier and prevent sticking.


2. Whisk the Base

  • In a large mixing bowl, combine the eggs, sugar, vanilla extract, and salt.

  • Using a hand whisk or electric mixer on high speed, whisk for 3–5 minutes until the mixture becomes pale, thick, and slightly frothy.

    • Tip: This step helps trap air in the batter, making the cake light and fluffy.


3. Add Wet and Dry Ingredients

  • Reduce the whisk speed to low.

  • Stir in the Greek yogurt and vegetable oil until just combined. Avoid overmixing.

  • Sift together the flour and baking powder.

  • Gently fold the dry ingredients into the wet mixture with a spatula, using a “cut-and-fold” motion to keep the batter airy.

    • Tip: Folding gently prevents the batter from losing air and keeps the crumb tender.


4. Incorporate the Cherries

  • Reserve about one-third of the cherries for the top.

  • Gently fold the remaining two-thirds of the cherries into the batter, ensuring even distribution.

    • Tip: If using frozen cherries, fold them directly into the batter without thawing to prevent extra moisture from making the cake soggy.


5. Assemble and Bake

  • Pour the batter into the prepared pan and spread it evenly.

  • Scatter the remaining cherries over the top and press them lightly into the surface.

  • Bake in the preheated oven for 35–40 minutes, or until:

    • The top is golden brown

    • A toothpick inserted into the center comes out clean

  • Pro-Tip: If the top starts browning too quickly, cover loosely with aluminum foil for the last 5–10 minutes.


6. Cooling and Serving

  • Let the cake cool in the pan for 15 minutes before transferring it to a wire rack.

  • Once completely cooled, dust the top with powdered sugar for a pretty, snowy finish.

  • Slice into squares or rectangles and serve.


Why This Cake Works

  1. Yogurt Magic: The acidity in the Greek yogurt reacts with the baking powder to create a soft, moist, and tender crumb that lasts for days.

  2. Light and Fluffy: Whisking the eggs and sugar well traps air in the batter, giving the cake a delicate, cloud-like texture.

  3. Versatile Fruit Base: You can replace cherries with blueberries, raspberries, or sliced peaches for seasonal variations.

  4. Easy Storage: Keep covered at room temperature for 2 days or refrigerate for up to 5 days.


Optional Enhancements

  • Add 1 tsp lemon zest to the batter for a bright, citrusy flavor.

  • Drizzle a simple glaze made from powdered sugar and milk over the cooled cake.

Quick Nutty Chocolate Mini Cakes

Quick Nutty Chocolate Mini Cakes

Soft • Chocolate-Rich • Perfectly Portioned

Preparation Time

  • Prep: 5–7 minutes

  • Bake: 12–15 minutes

  • Yield: 8–10 mini cakes or muffins


Ingredients

For the Chocolate Batter

  • 1 large egg (room temperature)

  • 80 g granulated sugar

  • 8 g vanilla sugar (or 1 teaspoon vanilla extract)

  • A small pinch of salt

  • 50 ml vegetable oil

  • 100 ml milk

  • 20 g cocoa powder (unsweetened)

  • 120 g all-purpose flour

  • 8 g baking powder (about 2 teaspoons)

For the Nut & Chocolate Topping

  • A handful of sliced almonds

  • A handful of raisins

  • A handful of crushed walnuts

  • 20 g dark chocolate chunks or chips


Step-by-Step Instructions

1. Prepare the Baking Molds

Preheat your oven to 180°C (350°F).
Lightly grease 8–10 mini tart molds or a standard muffin pan with a little oil or butter.


2. Mix the Egg Base

In a medium mixing bowl, add:

  • Egg

  • Granulated sugar

  • Vanilla sugar

  • Salt

Whisk for 1–2 minutes until the mixture looks pale, smooth, and slightly fluffy.


3. Add Liquid Ingredients

Pour in the vegetable oil and milk.
Whisk gently until fully blended and smooth.


4. Add Dry Ingredients

Sift together:

  • Flour

  • Cocoa powder

  • Baking powder

Add them to the bowl and whisk just until the batter is smooth and glossy.
Avoid overmixing.


5. Fill the Molds

Pour the batter into the prepared molds, filling each about halfway to allow room for rising.


6. Add the Topping

Sprinkle the tops evenly with:

  • Almond slices

  • Raisins

  • Crushed walnuts

  • Dark chocolate pieces

Press them very lightly into the batter.


7. Bake

Place the molds on a baking tray and bake for 12–15 minutes, or until:

  • The tops are set

  • A toothpick inserted in the center comes out clean or with a few soft crumbs


8. Cool & Serve

Let the mini cakes cool in the pan for 5 minutes, then gently remove and place on a rack to cool slightly before serving.


Serving Tips

  • Enjoy warm or at room temperature

  • Perfect with tea, coffee, or milk

  • Store in an airtight container for up to 2 days at room temperature or 4 days refrigerated


Why This Recipe Is a Favorite

  • Balanced texture: Soft chocolate cake with lightly toasted nuts

  • Quick preparation: Simple steps, no mixer needed

  • Portion-friendly: Ideal for small treats or sharing

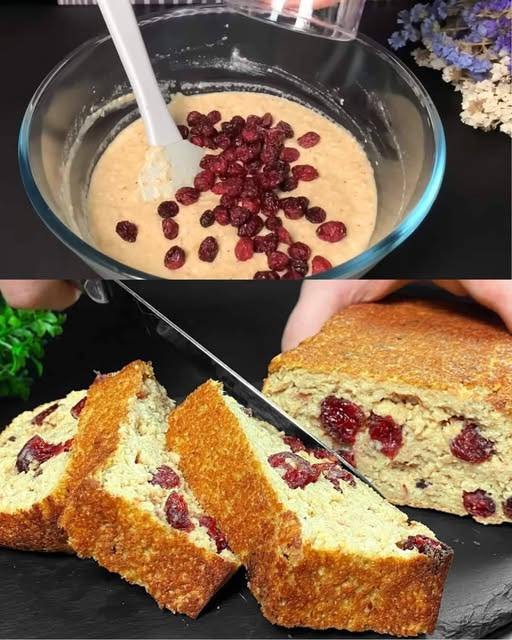
Quick Oatmeal Breakfast Bread with Pumpkin & Nuts

Quick Oatmeal Breakfast Bread with Pumpkin & Nuts

Soft • Nourishing • Naturally Flavorful

Preparation Time

  • Prep: 15 minutes

  • Bake: 40–45 minutes

  • Servings: 1 medium loaf (8–10 slices)


Ingredients

  • 1 cup oatmeal (rolled oats or quick oats)

  • 1 glass warm water (200–250 ml)

  • ½ pumpkin (about 400 g), peeled and grated or finely chopped

  • 1 tablespoon sweetener (optional, to taste)

  • 1 teaspoon cinnamon (optional)

  • A pinch of salt

  • 3 tablespoons vegetable oil (optional, for extra softness)

  • 1 tablespoon sesame seeds

  • 5–6 dried apricots, rinsed and soaked in hot water, then finely chopped

  • 1 tablespoon chia seeds

  • 1–2 tablespoons finely chopped nuts (walnuts, almonds, or pecans)

  • 2 tablespoons mixed nuts, seeds, and dried fruits (for topping or inside)

  • 1 teaspoon baking powder

  • Parchment paper for lining the pan


Step-by-Step Instructions

1. Prepare the Oats

Place the oatmeal in a mixing bowl.
Pour the warm water over the oats, stir well, and let them soak for 10 minutes until soft and slightly thick.


2. Prepare the Pumpkin

Grate or finely chop the pumpkin.
If it contains excess moisture, gently squeeze it with your hands to remove extra liquid.


3. Combine the Base

Add the pumpkin to the soaked oats.
Mix in:

  • Sweetener (if using)

  • Cinnamon (if using)

  • Salt

  • Vegetable oil (optional)

Stir until evenly combined.


4. Add Fruits, Nuts & Seeds

Fold in:

  • Chopped dried apricots

  • Chia seeds

  • Chopped nuts

  • Mixed nuts, seeds, and dried fruits

Mix gently so everything is evenly distributed.


5. Add the Leavening

Sprinkle in the baking powder and stir just until combined.
Do not overmix.


6. Prepare for Baking

Preheat oven to 180°C (350°F).
Line a loaf pan with parchment paper.

Pour the batter into the pan and smooth the top.
Sprinkle sesame seeds evenly over the surface.


7. Bake

Bake for 40–45 minutes, or until:

  • The top is golden

  • A toothpick inserted in the center comes out clean


8. Cool & Serve

Remove from oven and allow the bread to cool in the pan for 10–15 minutes.
Lift out using the parchment paper and cool completely before slicing.


Serving Suggestions

  • Enjoy warm with yogurt, honey, or nut butter

  • Perfect for breakfast, snack time, or lunchbox slices

  • Stores well in the refrigerator for up to 4 days

Apple Pie with Light Vanilla Cream

Apple Pie with Light Vanilla Cream

Tender Pastry • Fruity Layers • Smooth Creamy Finish

This delightful apple pie combines a soft, buttery pastry base, gently spiced apples, and a light vanilla cream topping that bakes into a beautifully set, airy layer. It’s a comforting dessert that’s perfect for sharing.


Ingredients

Pastry Dough

  • 250 g all-purpose flour

  • 1 teaspoon baking powder

  • 90 g butter, chilled and cut into small cubes

  • A small pinch of salt

  • 2 egg yolks

  • 40 g granulated sugar


Apple Layer

  • 3–4 large apples, peeled and thinly sliced

  • 1 teaspoon ground cinnamon

  • 1 tablespoon fresh lemon juice


Vanilla Cream Filling

  • 400 g sour cream or Greek yogurt

  • 2 egg whites (from the separated eggs)

  • 80 g granulated sugar

  • 1 packet vanilla pudding mix (about 40 g)
    or

  • 40 g cornstarch


Step-by-Step Instructions


1. Prepare the Pastry Dough

  • In a large bowl, mix the flour, baking powder, sugar, and salt

  • Add the chilled butter and gently rub it into the flour using your fingertips or a pastry cutter until the mixture looks crumbly

  • Add the egg yolks and mix until a soft dough forms

  • Divide the dough into two portions:

    • About ⅔ for the base

    • About ⅓ for the topping

  • Wrap both portions and place the smaller piece in the freezer for 30 minutes to make shaping easier later


2. Prepare the Base

  • Heat the oven to 180°C (350°F)

  • Lightly grease a 20 cm (8-inch) springform pan

  • Take the larger dough portion and gently press it into the bottom of the pan

  • Extend it slightly up the sides to form a neat border


3. Add the Apple Layer

  • In a bowl, combine the apple slices, cinnamon, and lemon juice

  • Arrange the apples evenly over the pastry base


4. Make the Vanilla Cream Filling

  • In a clean bowl, whisk the egg whites until they become light and foamy

  • Gradually add the sugar, whisking until soft, glossy peaks form

  • In another bowl, mix the sour cream (or yogurt) with the vanilla pudding mix or cornstarch until smooth

  • Gently fold the whipped egg whites into the cream mixture in batches, keeping the texture light

  • Pour the cream evenly over the apple layer


5. Add the Crumb Topping

  • Remove the smaller dough portion from the freezer

  • Using a coarse grater, grate the dough evenly over the cream layer until fully covered


6. Bake

  • Place the pie in the center of the oven

  • Bake for 40–45 minutes, until the top is lightly golden and the filling looks set


7. Cool and Serve

  • Let the pie cool completely in the pan

  • This resting time allows the layers to settle beautifully

  • Once cooled, remove from the pan

  • Lightly dust the top with powdered sugar before slicing


Helpful Notes

  • Texture Harmony: The combination of tender pastry, soft apples, and smooth cream creates a lovely balance

  • Best Serving: Chill slightly before slicing for clean, neat portions

  • Storage: Keeps well refrigerated for up to 3 days

Savory Zucchini & Potato Bites

Savory Zucchini & Potato Bites

Soft Inside • Lightly Crisp Outside • Perfect for Any Meal

These baked zucchini and potato bites are flavorful, tender, and satisfying. They work beautifully as a snack, breakfast option, or side dish and pair wonderfully with a cool yogurt dip.


Ingredients

Main Vegetable Mixture

  • 2 medium zucchini (courgettes)

  • 1 medium potato, peeled

  • 2 large eggs, at room temperature

  • 1 red pepper, finely diced

  • 50 ml milk (about 3 tablespoons)

  • 2 tablespoons olive oil

  • 3 tablespoons semolina

  • 70 g all-purpose flour (about ½ cup)

  • 1 teaspoon baking powder

  • 50 g hard cheese, finely grated

  • Fresh parsley and dill, finely chopped

  • Salt and black pepper, to taste


Refreshing Yogurt Dip

  • Greek yogurt, plain and thick

  • 2 cucumbers, grated

  • 3 olives, finely chopped

  • 1 garlic clove, finely minced


Step-by-Step Instructions


1. Prepare the Vegetables

  • Grate the zucchini and potato into a large bowl

  • Sprinkle lightly with salt

  • Let them rest for about 5 minutes

  • Gently press or wrap the vegetables in a clean kitchen towel to remove excess moisture

    • This helps create a light, well-balanced texture


2. Prepare the Batter

  • In a separate bowl, whisk together the eggs, milk, and olive oil until smooth

  • Add the semolina, flour, and baking powder, mixing gently

  • Stir in the prepared zucchini and potato

  • Add the diced red pepper, grated cheese, and chopped herbs

  • Season with black pepper and adjust salt if needed

  • Mix until evenly combined


3. Fill and Bake

  • Heat the oven to 180°C (350°F)

  • Lightly grease a muffin tin or use silicone molds

  • Spoon the mixture evenly into each cup, filling nearly to the top

  • Bake for 25–30 minutes, until the tops are lightly golden and the bites feel set


4. Prepare the Yogurt Dip

  • Grate the cucumbers and gently press out excess liquid

  • In a bowl, combine:

    • Greek yogurt

    • Grated cucumbers

    • Minced garlic

    • Chopped olives

  • Stir until smooth and well blended

  • Chill until ready to serve


5. Serve

  • Allow the baked bites to rest in the pan for a few minutes

  • Carefully remove and serve warm

  • Add a spoon of the yogurt dip on the side for a refreshing contrast


Helpful Notes

  • Texture Tip: Removing extra moisture from vegetables helps maintain a soft, pleasant crumb

  • Flavor Option: Swap herbs or cheese to suit your taste

  • Make Ahead: These bites store well in the refrigerator and reheat gently in the oven


Optional Finishing Touch

For a lightly crisp surface, sprinkle a small amount of extra grated cheese on top during the final few minutes of baking.

Classic Italian Creamy Lemon Cake

Classic Italian Creamy Lemon Cake

Smooth • Bright • Delicately Sweet

This traditional Italian-style lemon cake combines a tender pastry with a silky lemon cream filling. The fresh citrus flavor and soft texture make it perfect for serving chilled as a light dessert.


Ingredients

Silky Lemon Cream Filling

  • 500 ml milk (about 2 cups)

  • 2 large eggs, at room temperature

  • 6 tablespoons granulated sugar

  • 4 tablespoons cornstarch

  • 80 g mascarpone or cream cheese, softened

  • Zest of 1 lemon

  • Fresh juice of 1 lemon


Soft Shortcrust Pastry

  • 2 large eggs, at room temperature

  • 100 g granulated sugar (½ cup)

  • 100 ml vegetable oil or melted butter

  • 1 teaspoon vanilla extract

  • 350–380 g all-purpose flour, added gradually

  • 1 teaspoon baking powder


Step-by-Step Instructions


1. Prepare the Lemon Cream

  • In a medium saucepan, whisk together the eggs and sugar until smooth and pale

  • Add the cornstarch and whisk until fully blended

  • Slowly pour in the milk, whisking continuously to keep the mixture smooth

  • Place the saucepan over medium heat and stir gently until the cream thickens and becomes velvety

Once thickened:

  • Remove from heat

  • Stir in the mascarpone, lemon zest, and lemon juice until fully incorporated

  • Transfer the cream to a bowl

  • Cover the surface directly with wrap to maintain its smooth texture

  • Allow it to cool completely


2. Make the Pastry Dough

  • In a large bowl, whisk the eggs, sugar, oil (or butter), and vanilla until well combined

  • Add the flour and baking powder gradually

  • Mix gently until a soft, smooth dough forms

  • Divide the dough into two portions:

    • 2/3 for the base

    • 1/3 for the top decoration


3. Prepare the Base

  • Heat the oven to 180°C (350°F)

  • Lightly grease a tart pan or springform pan

  • Roll out the larger dough portion

  • Press it evenly into the base and up the sides of the pan

  • Pour the cooled lemon cream into the shell

  • Smooth the surface gently


4. Create the Decorative Top

  • Roll out the remaining dough

  • Cut small circles using a cookie cutter or glass rim

  • Arrange the circles slightly overlapping around the edges to form a decorative border

  • Leave the center open to showcase the lemon cream


5. Bake the Cake

  • Place the cake in the oven

  • Bake for 30–35 minutes, until the pastry turns lightly golden

  • Remove from the oven and allow it to cool at room temperature


6. Chill and Finish

  • Refrigerate the cake for at least 2 hours to allow the filling to set fully

  • Before serving, dust lightly with powdered sugar

  • Garnish with lemon slices or zest if desired


Serving Suggestions

  • Serve chilled for clean slices and best flavor

  • Pair with tea, espresso, or fresh berries

  • Ideal for special gatherings or relaxed family desserts


Helpful Notes

  • Smooth Filling: Mixing cornstarch thoroughly before heating keeps the cream silky

  • Flavor Balance: Fresh lemon zest enhances the aroma without overpowering

  • Storage: Keeps well refrigerated for up to 3 days

Chocolate Caramel Peanut Layer Cake

Chocolate Caramel Peanut Layer Cake

Soft • Creamy • Richly Flavored

This layered chocolate cake features tender cocoa sponge, a smooth caramel-peanut cream, and a glossy chocolate coating. The combination creates a balanced dessert with contrasting textures and deep, comforting flavors.


Ingredients

Chocolate Sponge Layers

  • 3 large eggs, at room temperature

  • 80 g granulated sugar (about ⅓ cup + 1 tbsp)

  • A small pinch of salt

  • 30 ml vegetable oil (2 tablespoons)

  • 50 ml milk (about 3½ tablespoons)

  • 80 g all-purpose flour (about ⅔ cup, sifted)

  • 20 g cocoa powder (about 2 tablespoons, sifted)

  • 1 teaspoon baking powder


Caramel Peanut Cream

  • 220 g granulated sugar (about 1 cup + 2 tbsp)

  • 100 g butter, cut into pieces

  • 160 g cream (30–36% fat, warmed slightly)

  • ½ teaspoon salt

  • 150 g roasted peanuts, roughly chopped


Optional Chocolate Coating (Recommended for Finish)

  • 200 g milk or semi-sweet chocolate

  • 1 tablespoon vegetable oil or butter

  • Optional: 2–3 tablespoons finely chopped peanuts


Step-by-Step Instructions


1. Prepare the Chocolate Sponge

Preheat & Prepare

  • Heat the oven to 170°C (340°F)

  • Line a 20–22 cm (8–9 inch) round pan with parchment paper

  • Lightly grease the sides


Mix the Batter

  • In a bowl, whisk the eggs, sugar, and salt for 3–4 minutes until pale and slightly fluffy

  • Add the oil and milk, whisking gently until smooth

In a separate bowl:

  • Combine flour, cocoa powder, and baking powder

  • Sift the dry ingredients into the egg mixture

  • Fold gently until just combined and smooth


Bake

  • Pour batter into the prepared pan

  • Smooth the top

  • Bake for 20–25 minutes, until the sponge springs back lightly when touched

  • Let cool completely, then slice horizontally into 2 or 3 even layers


2. Prepare the Caramel Peanut Cream

Make the Caramel

  • Place the sugar in a saucepan over medium heat

  • Allow it to melt gradually, swirling the pan gently until amber in color

Finish the Cream

  • Add the butter and stir until fully melted

  • Slowly pour in the warm cream, stirring continuously

  • Add the salt

  • Cook for 2–3 minutes until smooth and slightly thick

  • Remove from heat and stir in the roasted peanuts

Allow the caramel to cool until spreadable.


3. Assemble the Cake

  • Place one sponge layer on a serving plate

  • Spread an even layer of caramel peanut cream

  • Repeat with remaining layers

  • Lightly press to level the cake

  • Chill for 20–30 minutes to help it set


4. Add the Chocolate Coating (Optional)

  • Melt the chocolate and oil gently until smooth

  • Pour over the chilled cake

  • Smooth the sides and top

  • Sprinkle chopped peanuts if desired

  • Chill until the coating sets


5. Serve

  • Slice with a warm knife for clean layers

  • Serve slightly chilled or at room temperature

  • Enjoy with tea, coffee, or as a special dessert


Helpful Notes

  • Smooth Layers: Chill between steps for neat assembly

  • Flavor Balance: Salt enhances the caramel and chocolate beautifully

  • Storage: Keeps well refrigerated for up to 3 days

  • Texture Tip: Let the cake rest 10 minutes before slicing

Fresh & Vibrant Coleslaw (No Added Sweeteners)

Fresh & Vibrant Coleslaw (No Added Sweeteners)

Crisp • Creamy • Refreshing

This colorful coleslaw is made with fresh vegetables and a smooth, well-balanced dressing. The natural flavors of the ingredients shine, making it a wonderful side dish for everyday meals or gatherings.


Ingredients

Vegetable Base

  • ½ small green cabbage, finely shredded

  • ½ small red cabbage, finely shredded

  • 2 large carrots, peeled and grated

  • ¼ cup fresh parsley or cilantro, finely chopped

  • Optional: 2 green onions, thinly sliced


Creamy Dressing

  • ½ cup mayonnaise (avocado-oil or olive-oil based if preferred)

  • 2 tablespoons apple cider vinegar or fresh lemon juice

  • 1 tablespoon Dijon mustard

  • ½ teaspoon celery seed

  • ¼ teaspoon sea salt, or to taste

  • ¼ teaspoon freshly ground black pepper, or to taste


Step-by-Step Instructions

1. Prepare the Vegetables

  • Remove any tough outer leaves from the cabbages

  • Slice the cabbages thinly using a sharp knife or food processor

  • Grate the carrots finely

  • Chop the fresh herbs

  • Add all prepared vegetables to a large mixing bowl


2. Make the Dressing

  • In a small bowl, add the mayonnaise, vinegar or lemon juice, Dijon mustard, celery seed, salt, and pepper

  • Whisk until the dressing becomes smooth and well blended


3. Combine

  • Pour the dressing over the vegetables

  • Use two large spoons or tongs to gently toss until everything is evenly coated

  • Take care to keep the vegetables light and crisp


4. Rest for Best Flavor

  • Cover the bowl and place it in the refrigerator for 30–60 minutes

  • This resting time allows the vegetables to soften slightly and the flavors to blend naturally


5. Serve

  • Give the coleslaw a gentle toss before serving

  • Adjust seasoning if needed

  • Serve chilled as a refreshing side dish


Helpful Notes

  • Texture Tip: Finely shredded cabbage creates a smoother, more balanced bite

  • Flavor Balance: The acidity brightens the dressing while keeping it light and refreshing

  • Make-Ahead Friendly: This coleslaw can be prepared a few hours in advance and stays fresh and crisp


Serving Suggestions

  • Pair with grilled dishes, sandwiches, or wraps

  • Serve alongside roasted vegetables or baked meals

  • Enjoy as a fresh addition to everyday lunches

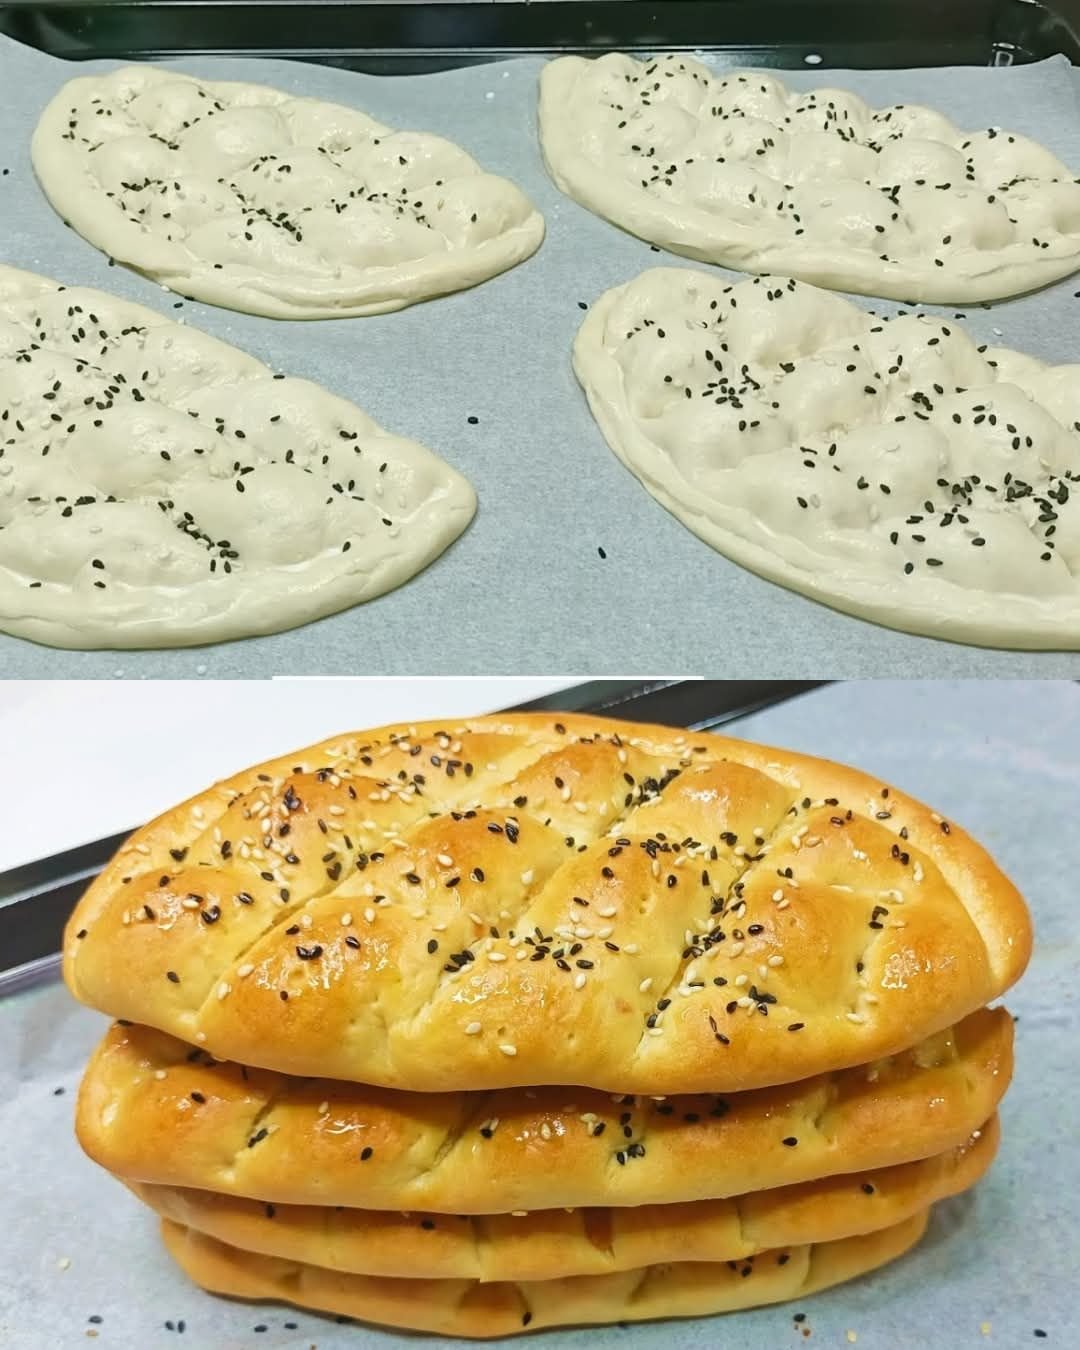
Classic Soft Bread Rolls (Pide-Style)

Classic Soft Bread Rolls (Pide-Style)

Light • Soft • Beautifully Layered

These bread rolls are wonderfully soft with delicate layers and a tender crumb. They are perfect for breakfast, alongside soups, or served warm at the table for any meal.


Ingredients

Liquid Base

  • 1½ cups (300 ml) warm water
    (Comfortably warm to the touch, not hot)

  • 1 tea glass vegetable oil (about 90 g / 100 ml)

  • 1 tea glass plain yogurt (about 100 ml, room temperature)

Dry Ingredients

  • 1 packet active dry yeast (7 g or 2¼ teaspoons)

  • 1 tablespoon granulated sugar

  • 1 teaspoon salt

  • 4½–5 cups all-purpose flour, added gradually

For Layering & Finishing

  • 50 g butter, melted (for brushing between layers)

  • 1 egg yolk (for brushing the tops)


Step-by-Step Instructions

1. Prepare the Yeast Mixture

  • In a large mixing bowl, add the warm water, sugar, and yeast

  • Stir gently until combined

  • Let the mixture rest for 5–10 minutes until it becomes foamy and active

This step ensures the dough rises beautifully.


2. Combine the Dough Ingredients

  • Add the vegetable oil and yogurt to the yeast mixture

  • Whisk until smooth and well blended

  • Gradually add flour and salt, mixing with a spoon or spatula

  • Continue until a soft dough forms


3. Knead and First Rise

  • Transfer the dough to a lightly floured surface

  • Knead gently for 8–10 minutes until smooth, elastic, and soft

  • Place the dough in a lightly oiled bowl

  • Cover with a clean cloth

  • Let it rest in a warm place for about 1 hour, or until it has expanded noticeably


4. Form the Layers

  • Gently press the dough to release excess air

  • Divide it into 4 equal portions

For each portion:

  • Roll into a thin rectangle

  • Brush evenly with melted butter

Once all pieces are brushed:

  • Stack them neatly on top of each other

  • Roll the stack into a firm log, starting from the long side


5. Shape the Rolls

  • Using a sharp knife or dough scraper, cut the log into triangle shapes by slicing in a gentle zig-zag pattern

  • This shaping helps create the beautiful layered texture once baked


6. Rest and Prepare for Baking

  • Place the shaped rolls on a baking tray lined with parchment paper

  • Leave a little space between each piece

  • Cover lightly and allow them to rest for 20 minutes

Meanwhile:

  • Preheat the oven to 190°C (375°F)


7. Bake to a Golden Finish

  • Brush the tops of the rolls with egg yolk for a glossy, golden surface

  • Bake for 20–25 minutes, until evenly golden and beautifully risen

The rolls should feel light and sound crisp on the outside while remaining soft inside.


Serving Suggestions

  • Serve warm with butter, honey, or jam

  • Pair with cheese, eggs, or soup

  • Excellent for sandwiches or as a dinner side


Helpful Tips

  • Yogurt Temperature: Use room-temperature yogurt to keep the dough comfortable for rising

  • Flour Amount: Add flour gradually; the dough should feel soft and slightly elastic

  • Extra Flavor: Sprinkle sesame or nigella seeds on top before baking if desired

Simple & Moist 5-Minute Chocolate Cake

Simple & Moist 5-Minute Chocolate Cake

Soft • Fluffy • Comforting Homemade Cake

This easy chocolate cake comes together quickly using everyday ingredients. It bakes into a tender, moist sponge with a rich cocoa taste and a smooth crumb, making it ideal for casual gatherings or a relaxed homemade treat.


Ingredients

Cake Batter

  • 2 large eggs, at room temperature

  • 160 g granulated sugar (about ¾ cup)

  • 10 g vanilla sugar (or 1 teaspoon pure vanilla extract)

  • 2 tablespoons unsweetened cocoa powder

  • 160 ml milk (⅔ cup)

  • 100 ml vegetable oil (about 7 tablespoons; any neutral oil works)

  • A small pinch of salt

  • 170 g all-purpose flour (about 1⅓ cups, sifted)

  • 1 teaspoon baking powder

Optional Add-Ins & Finish

  • Chocolate chips or chunks (for extra texture)

  • Powdered sugar for a light decorative dusting


Step-by-Step Instructions

1. Prepare the Oven and Baking Dish

  • Heat your oven to 180°C (360°F)

  • Lightly coat a 24 cm (9–10 inch) round, casserole, or bundt pan with oil or butter

  • If desired, lightly dust with flour and tap out the excess to help with easy release


2. Combine the Eggs and Sugar

  • In a large mixing bowl, add the eggs, granulated sugar, and vanilla sugar

  • Whisk for 1–2 minutes until the mixture becomes slightly lighter in color and looks smooth and glossy

    • This step helps create a soft, airy texture


3. Add the Liquid Ingredients

  • Pour in the milk and vegetable oil

  • Add the pinch of salt

  • Whisk gently until everything is fully blended and uniform


4. Incorporate the Dry Ingredients

  • Place a sieve over the bowl and add:

    • Flour

    • Cocoa powder

    • Baking powder

  • Sift directly into the wet mixture

  • Whisk gently just until the batter is smooth and lump-free

    • Avoid over-mixing to keep the cake tender

If using chocolate chips, fold them in gently at this stage.


5. Bake the Cake

  • Pour the batter evenly into the prepared baking dish

  • Smooth the top lightly with a spatula

  • Place in the center of the oven

  • Bake for 38–42 minutes

Doneness Check:
Insert a toothpick into the center. It should come out clean or with a few soft crumbs.


6. Cool and Finish

  • Remove from the oven and let the cake rest in the pan for 10 minutes

  • Carefully turn it out onto a serving plate or cooling rack

  • Once completely cooled, dust lightly with powdered sugar if desired


Serving Suggestions

  • Enjoy as is with tea or coffee

  • Serve with fresh fruit

  • Pair with yogurt, cream, or a light dessert topping for special occasions


Helpful Tips

  • Extra Moist Texture: Replace 2 tablespoons of milk with yogurt

  • Flavor Boost: Add a pinch of cinnamon or instant coffee powder

  • Smaller Pan: If using a loaf pan, bake slightly longer and check near the end

Healthy Chocolate Lava Baked Oats

Healthy Chocolate Lava Baked Oats

Naturally Sweet • Wholesome • Comforting
Serves: 2 generous portions (easily doubled)

This recipe turns simple pantry staples into a warm, chocolatey breakfast or dessert with a naturally soft center. It’s filling, balanced, and made with everyday ingredients.


Ingredients

Oat Base

  • 1 cup rolled oats (old-fashioned oats for best texture)

  • 1 medium ripe banana (naturally sweet and creamy)

  • ½ cup milk of choice (almond, oat, soy, or dairy)

  • 2 tablespoons unsweetened cocoa powder

  • 1–2 tablespoons natural liquid sweetener (maple syrup or honey, to taste)

  • 1 teaspoon baking powder

  • ½ teaspoon pure vanilla extract

  • A small pinch of sea salt (balances the chocolate flavor)

Soft Chocolate Center (Optional but Recommended)

  • 2 small pieces dark chocolate (70% cocoa or higher)
    or

  • 1 tablespoon dark chocolate chips


Step-by-Step Instructions

1. Prepare the Oven

  • Heat your oven to 180°C (350°F)

  • Lightly coat two oven-safe ramekins or ceramic mugs with a little oil or butter to prevent sticking

  • Place them on a baking tray for easy handling


2. Blend the Batter

Add the following to a blender:

  • Rolled oats

  • Banana

  • Milk

  • Cocoa powder

  • Natural sweetener

  • Baking powder

  • Vanilla extract

  • Sea salt

Blend for 30–45 seconds until the mixture is:

  • Completely smooth

  • Thick but pourable

  • Similar to cake or pancake batter

If the batter seems too thick, add 1–2 tablespoons of milk.


3. Fill the Cups

  • Pour the batter into the prepared mugs

  • Fill each about ¾ full to allow gentle rising


4. Add the Chocolate Center

  • Gently press one piece of dark chocolate into the center of each mug

  • Make sure it is fully covered with batter so it stays soft inside


5. Bake

  • Place the tray in the oven

  • Bake for 18–25 minutes, depending on your preferred texture:

    • 18–20 minutes: softer, richer texture

    • 22–25 minutes: more set and cake-like


6. Rest & Enjoy

  • Remove from the oven

  • Let sit for 5 minutes to settle

  • Enjoy warm, straight from the mug or turned out onto a plate


Optional Toppings (Wholesome Add-Ons)

  • Fresh berries or sliced banana

  • A spoon of yogurt or coconut yogurt

  • Chopped nuts or seeds

  • Light drizzle of nut butter


Helpful Notes

Air Fryer Method

  • Cook at 160°C (320°F) for 12–15 minutes

  • Check at 12 minutes and adjust as needed

No Blender Option

  • Use 1 cup oat flour instead of whole oats

  • Mash the banana very smoothly with a fork

  • Whisk all ingredients until well combined

Diet-Friendly

  • Naturally sweetened

  • Made with whole grains

  • Easily adaptable for dairy-free or gluten-free needs (use certified oats)