Baklava Bundt Cake 🍯🌰

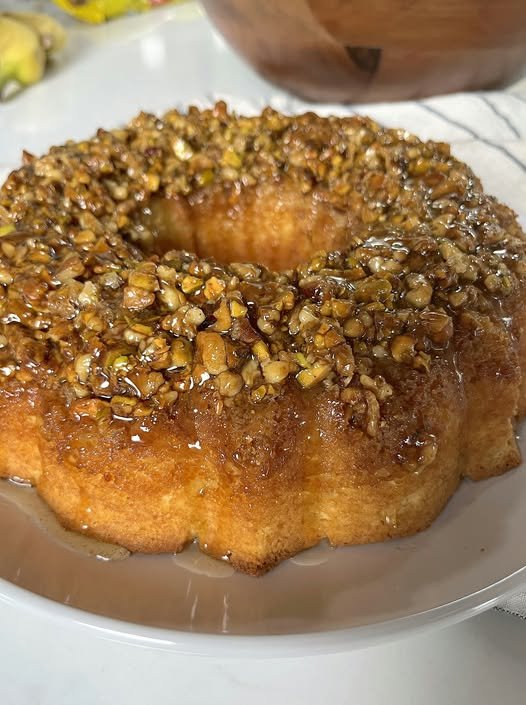
Baklava Bundt Cake 🍯🌰

Serves: 8–10
Prep Time: 20 minutes
Bake Time: 40 minutes

This Baklava Bundt Cake brings together the cozy flavors of classic baklava with the ease of a tender bundt cake. Don’t let the steps worry you—each part is simple, and the final result is absolutely worth it. A buttery pistachio-walnut layer bakes right into the cake, then gets finished with a glossy honey drizzle that soaks in beautifully.


🥜 Nut Topping

  • ¼ cup butter

  • ½ cup pistachios, roughly chopped

  • ½ cup walnuts, roughly chopped

  • ¼ cup brown sugar

  • 2 tablespoons corn syrup

  • Pinch of cinnamon


🍰 Cake Batter

  • 1 box (14.25 oz) white cake mix

  • 3 large eggs

  • ½ cup butter, melted

  • 1 cup buttermilk


🍯 Honey Sauce

  • ¾ cup sugar

  • 2 teaspoons lemon juice

  • 1 tablespoon water

  • ⅓ cup honey


🧁 Instructions

1. Prepare the Pan

Preheat your oven to 325°F (165°C). Generously grease a standard bundt pan, making sure to coat all the grooves well. Set aside.


2. Make the Nut Topping

In a small saucepan over medium heat, combine the butter, pistachios, walnuts, brown sugar, corn syrup, and cinnamon. Stir and cook for 2–3 minutes, just until the butter melts and the sugar dissolves.
Pour the mixture into the bottom of the prepared bundt pan and spread it evenly.


3. Mix the Cake Batter

In a large bowl, whisk together the cake mix, eggs, melted butter, and buttermilk until just smooth. Avoid overmixing.
Carefully pour the batter over the nut mixture in the bundt pan.


4. Bake

Bake for 38–42 minutes, or until a toothpick inserted into the cake comes out clean. Remove from the oven and let the cake rest.


5. Prepare the Honey Sauce

While the cake is baking, combine the sugar, lemon juice, and water in a small saucepan. Cook over medium heat for 4–5 minutes, stirring until the sugar dissolves.
Stir in the honey and cook for 1 more minute, then remove from heat and allow the sauce to cool slightly and thicken.


6. Finish & Serve

Let the cake cool in the pan for about 12 minutes, then carefully invert it onto a serving plate.
Drizzle the cooled honey sauce generously over the top, allowing it to soak into the cake.

🍗 Crack Chicken Pinwheels

🍗 Crack Chicken Pinwheels

Creamy, cheesy, and savory pinwheels loaded with bacon and ranch flavor.

  • Prep Time: 15 minutes

  • Cook Time: 25 minutes

  • Total Time: 40 minutes

  • Servings: 6

Ingredients

  • 2 cups cooked chicken, finely chopped or shredded (rotisserie works great)

  • 8 oz (225g) cream cheese, fully softened

  • 1 cup shredded cheddar cheese (sharp cheddar recommended)

  • ½ cup cooked bacon, finely chopped and crispy

  • 1 packet (1 oz / 28g) dry ranch seasoning mix

  • 2 large refrigerated crescent roll dough sheets (or crescent rolls with seams pressed together)

  • Optional: Chopped green onions for a pop of freshness

Instructions

1. Prep the Oven and Pan

Preheat your oven to 375°F (190°C). Line a large baking sheet with parchment paper or lightly grease it to ensure the cheese doesn’t stick.

2. Make the Filling

In a medium mixing bowl, beat the softened cream cheese until smooth and creamy. Add the ranch seasoning, shredded cheddar, chicken, and chopped bacon. Stir well until the chicken is evenly coated and the mixture is uniform.

3. Assemble the Rolls

Unroll the crescent dough sheets onto a flat, clean surface. If using standard crescent rolls, use your fingers to pinch the perforated seams together to create one solid rectangle. Spread the chicken mixture evenly over the dough, leaving about a half-inch border at the edges.

4. Roll and Slice

Starting from the long side, roll the dough tightly into a log. Using a sharp knife, slice the log into rounds roughly ½ to ¾ inch thick. Tip: Wipe your knife with a damp cloth between slices for cleaner edges.

5. Bake

Place the pinwheels cut-side up on the prepared baking sheet, leaving a little space between each one. Bake for 18–22 minutes, or until the dough is golden brown and the cheese is bubbly.

6. Rest and Serve

Allow the pinwheels to rest on the pan for 5 minutes. This helps the filling set so it doesn’t spill out when you pick them up. Serve warm.


Pro-Tips for Success

  • Tighter Rolls: If the dough is getting too soft to handle, pop the rolled log into the fridge for 10–15 minutes before slicing. This helps them keep their round shape.

  • Keto Option: To make these low-carb, swap the crescent dough for a “Fathead” dough (mozzarella and almond flour base) or spread the filling onto low-carb tortillas.

  • Storage: Leftovers can be stored in an airtight container in the fridge for up to 4 days. Reheat in the oven or air fryer at 325°F to maintain the flaky texture of the dough.

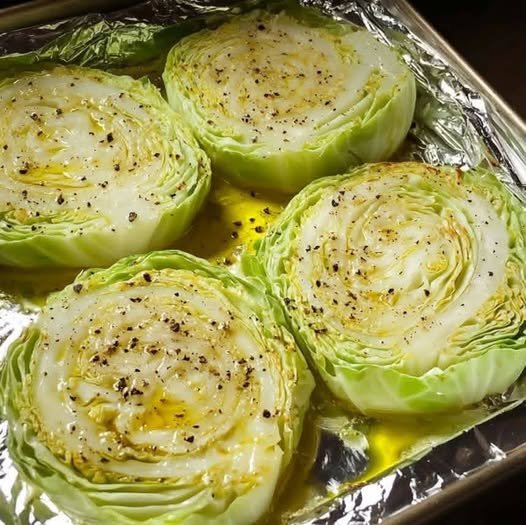
Crispy Baked Cabbage Steaks

Crispy Baked Cabbage Steaks are thick slices of fresh cabbage brushed with olive oil, seasoned simply, and oven-roasted until the edges are golden and caramelized while the centers stay tender. This easy, budget-friendly dish works beautifully as a healthy side, a vegetarian main, or a base for flavorful toppings.


⏱️ Prep & Cook Time

  • Prep Time: 10 minutes

  • Cook Time: 30–35 minutes

  • Total Time: 40–45 minutes


🍽️ Servings

Serves: 4 people
(1 cabbage yields 4 thick steaks)


🧾 Ingredients

  • 1 large green cabbage

  • 3–4 tablespoons olive oil

  • ½ teaspoon salt (or to taste)

  • ½ teaspoon black pepper

  • ½ teaspoon garlic powder (optional)

  • ½ teaspoon smoked paprika (optional)

  • Optional toppings:

    • Parmesan cheese

    • Lemon zest or juice

    • Red pepper flakes

    • Fresh herbs (parsley, thyme)


👩‍🍳 Instructions

  1. Preheat Oven
    Preheat oven to 425°F (220°C). Line a baking sheet with foil or parchment paper.

  2. Slice the Cabbage
    Remove loose outer leaves. Slice cabbage into ¾–1 inch thick steaks, keeping the core intact to hold them together.

  3. Season
    Arrange cabbage steaks on the baking sheet. Brush both sides generously with olive oil. Sprinkle with salt, pepper, and optional seasonings.

  4. Bake
    Roast for 30–35 minutes, flipping once halfway through, until edges are browned and crispy.

  5. Finish & Serve
    Add optional toppings and serve hot.


⭐ Recipe Notes

  • Thicker slices stay intact and develop better texture.

  • Don’t overcrowd the pan—space helps crisping.

  • Olive oil is key for caramelization.


🔥 Pro Tips for Extra Crispiness

  • Use high heat (425°F+)

  • Flip gently using a wide spatula

  • Add a final 2–3 minutes under the broiler

  • Sprinkle cheese during the last 5 minutes


🧮 Nutritional Information (Per Serving – Approximate)

  • Calories: 120

  • Carbohydrates: 10g

  • Protein: 2g

  • Fat: 9g

  • Fiber: 4g

  • Sodium: 230mg


💚 Health Benefits

  • Rich in fiber for digestion

  • High in vitamin C & K

  • Low-calorie and heart-healthy

  • Contains antioxidants that support immunity

  • Naturally gluten-free & vegan


❓ Q & A

Q: Can I use red cabbage?
Yes! Red cabbage works well but may need 5 extra minutes to soften.

Q: Can I make this in an air fryer?
Yes. Cook at 375°F for 12–15 minutes, flipping halfway.

Q: How do I store leftovers?
Store in an airtight container for up to 3 days in the fridge.

Q: Can I add protein?
Absolutely—top with chickpeas, tofu, or a fried egg.

Q: Why isn’t my cabbage crispy?
Likely overcrowding, low heat, or not enough oil.

The Ginger Bug

This acts like a sourdough starter, capturing wild yeast from the ginger skin.

Ingredients

  • 2 cups filtered or spring water (chlorine-free)

  • 1 inch fresh organic ginger, grated or finely chopped (keep skin on for more natural yeast)

  • 2 tbsp granulated sugar

Instructions

  1. Day 1: Mix the water, sugar, and ginger in a glass jar. Stir until sugar is dissolved. Cover with cheesecloth and a rubber band to let it breathe while keeping out dust.

  2. Days 2–5 (Feeding): Every 24 hours, add 1 tbsp of fresh ginger and 1 tbsp of sugar. Stir well.

  3. Check for Readiness: Around day 3 to 7, you should see small bubbles forming at the top and hear a light fizz when you stir it. It should smell yeasty and slightly sweet.


Part 2: Brewing the Ginger Beer

Once your bug is active, you can make the final beverage.

Ingredients

  • 1/2 cup strained ginger bug liquid

  • 2 liters (approx. 8 cups) filtered water

  • 150 g (3/4 cup) brown or cane sugar

  • 100 g (4-inch piece) fresh ginger, grated

  • Juice of 2–3 lemons

Instructions

  1. Make the Ginger Tea: Bring 500 ml of water, the 100 g of grated ginger, and the sugar to a boil in a pot. Simmer for 10–20 minutes to extract the spice.

  2. Cool Completely: Remove from heat and stir in the remaining 1.5 liters of cold water. Crucial: You must let this mixture reach room temperature before adding the bug, or the heat will kill your wild yeast.

  3. Combine: Strain the ginger solids out of your tea. Add the lemon juice and the 1/2 cup of strained liquid from your ginger bug.

  4. Bottle: Pour the mixture into clean flip-top (Grolsch-style) bottles, leaving at least 2 inches of headspace at the top.

  5. Secondary Fermentation: Leave bottles at room temperature in a dark place for 2 to 5 days.

    • Tip: Gently squeeze plastic bottles or briefly “burp” a glass bottle daily to check carbonation levels and prevent too much pressure from building up.

  6. Chill: Once it is as fizzy as you like, move it to the refrigerator. This slows down the fermentation and makes it ready to serve.

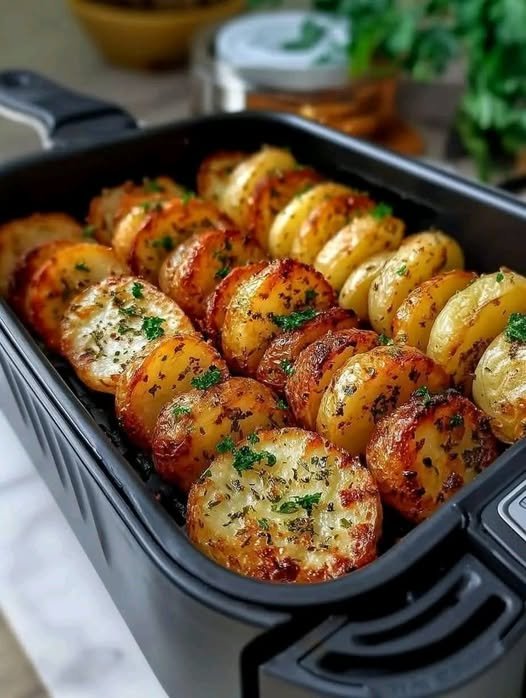
Cheesy Air Fryer Hasselback Potatoes

Cheesy Air Fryer Hasselback Potatoes

Prep time: 10 mins | Cook time: 45 mins | Servings: 2

Ingredients

  • 2 russet potatoes

  • 4 tbsp butter, melted

  • 1 tbsp garlic paste or minced garlic

  • 3 to 5 slices Colby Jack cheese (cut into fourths)

  • Kosher salt and black pepper to taste

  • Optional toppings: Sour cream and fresh chives


Instructions

  1. Prep the Potatoes: * Cut a thin slice from the bottom of each potato to create a flat, stable base.

    • Place the potato between two chopsticks. Use a sharp knife to cut 1/4-inch slices across the potato; the chopsticks will stop your knife from cutting all the way through.

  2. The “Lift” Trick: * Place the small slices you cut from the bottom into the air fryer basket.

    • Set the large sliced potatoes on top of these bottom slices. This helps the Hasselback layers fan open during cooking.

  3. Seasoning: * Mix the melted butter, garlic, salt, and pepper.

    • Gently fan out the potato slices and brush the garlic butter over the top, making sure it gets between the layers.

    • Sprinkle with a little extra salt and pepper.

  4. First Stage Air Fry: * Set your air fryer to 370°F and cook for 20 minutes.

  5. Second Stage Air Fry: * Brush any remaining garlic butter over the potatoes.

    • Cook for an additional 20 to 25 minutes at 370°F until the edges are crispy and golden.

  6. Add the Cheese: * Slide the small cheese pieces into the gaps between the potato slices (either every gap or every other gap depending on your preference).

    • Cook for 1 to 2 more minutes until the cheese is bubbling and melted.

  7. Serve: * Top with a dollop of sour cream and a sprinkle of fresh chives.


Pro Tips for the Best Hasselbacks

  • Butter is Key: Don’t be shy with the garlic butter; it’s what creates the “salty” and “cheesy” experience mentioned in your notes.

  • Potato Size: Try to choose russet potatoes of a similar size so they cook evenly at the same time.

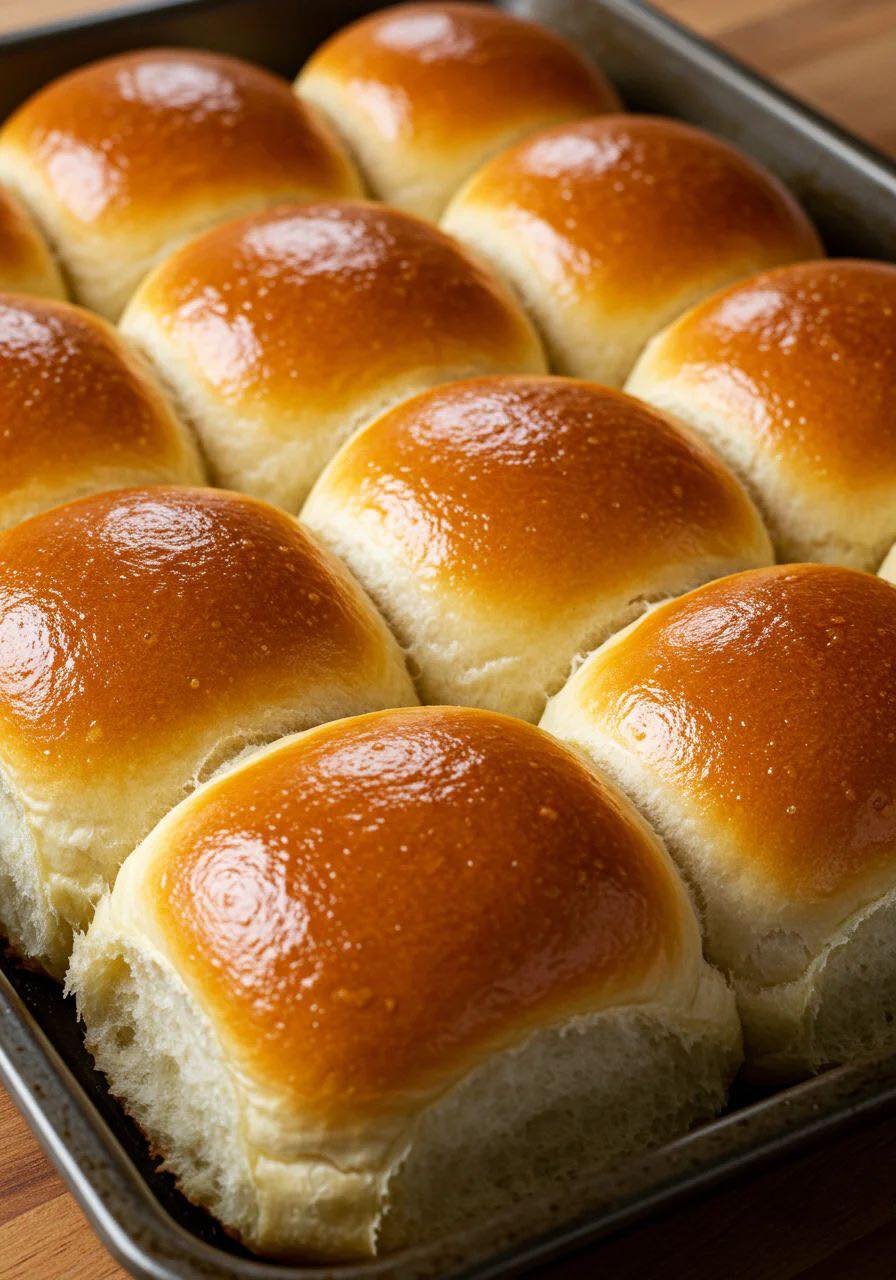
🍞 Soft Buttermilk Dinner Rolls

🍞 Soft Buttermilk Dinner Rolls

Pillowy • Tender • Lightly Sweet

These soft buttermilk rolls are fluffy on the inside with a golden, buttery top. The buttermilk adds a gentle tang and keeps the rolls moist for hours. Perfect for dinner, holidays, or breakfast with butter and jam.


Recipe Overview

  • Prep Time: 20 minutes

  • Rising Time: 1½–2 hours

  • Bake Time: 18–22 minutes

  • Oven Temperature: 180°C (350°F)

  • Yield: 12–15 rolls


Ingredients

  • 3½ cups (440 g) all-purpose flour

  • 1 cup warm buttermilk (lukewarm, not hot)

  • ¼ cup sugar

  • ¼ cup unsalted butter, melted and slightly cooled

  • 1 large egg, room temperature

  • 2¼ teaspoons instant yeast

  • 1 teaspoon salt

For Finishing

  • 2 tablespoons melted butter (for brushing after baking)


Equipment Needed

  • Large mixing bowl

  • Measuring cups and spoons

  • Wooden spoon or mixer

  • Clean kitchen towel

  • Baking pan (9×13 inch or similar)


Step-by-Step Instructions

1. Activate and Mix

  • In a large bowl, combine:

    • Warm buttermilk

    • Sugar

    • Yeast

  • Stir gently and let rest 5 minutes until slightly foamy

  • Add melted butter and egg

  • Mix until well combined


2. Form the Dough

  • Add flour and salt gradually

  • Mix until a soft, slightly sticky dough forms

  • Turn dough onto a lightly floured surface


3. Knead

  • Knead for 8–10 minutes until:

    • Smooth

    • Elastic

    • Soft but not sticky

  • Add small amounts of flour only if needed


4. First Rise

  • Place dough in a lightly greased bowl

  • Turn once to coat

  • Cover with a towel

  • Let rise in a warm place for 60–75 minutes, or until doubled


5. Shape the Rolls

  • Punch down the dough gently

  • Divide into equal portions (12–15 pieces)

  • Roll each piece into a smooth ball


6. Second Rise

  • Arrange rolls in a greased baking pan

  • Leave slight space between them

  • Cover and let rise 30–40 minutes until puffy


7. Bake

  • Preheat oven to 180°C (350°F)

  • Bake for 18–22 minutes, until tops are golden brown

  • Rolls should sound hollow when tapped lightly


8. Finish and Serve

  • Remove from oven

  • Brush immediately with melted butter

  • Let cool 10 minutes before serving


Texture & Flavor

  • Texture: Very soft, fluffy interior

  • Flavor: Mildly sweet with gentle tang from buttermilk

  • Crust: Lightly golden and buttery


Helpful Tips

  • Use warm, not hot, buttermilk

  • Do not over-flour the dough

  • Rolls rise best in a draft-free area

  • For extra softness, bake rolls close together


Storage

  • Store covered at room temperature for 2 days

  • Refrigerate up to 4 days

  • Reheat briefly before serving


Variations

  • Add garlic butter for savory rolls

  • Sprinkle sesame or poppy seeds before baking

  • Shape into slider buns

  • Make cloverleaf rolls using a muffin tin