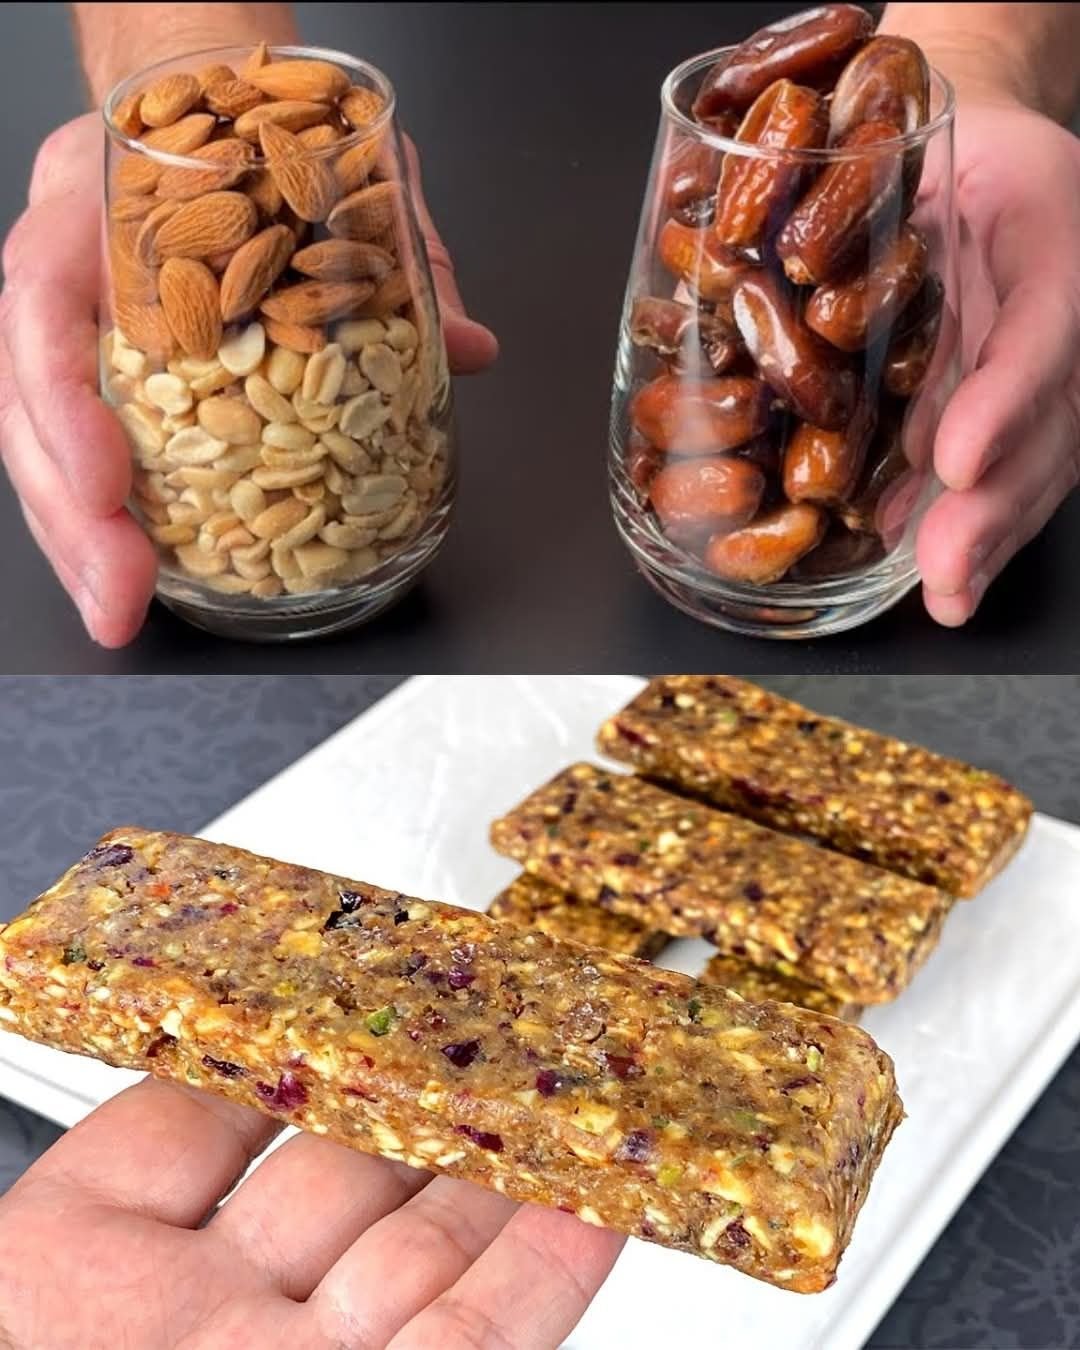
No-Bake Nut & Date Bars

No-Bake Nut & Date Bars

Prep Time: 15 minutes
Chilling Time: 1–2 hours
Yield: 8–10 bars

Naturally sweet, rich in texture, and packed with nuts and fruit, these no-bake bars are perfect for quick snacks or healthy treats. No oven needed and very easy to prepare.


🧾 Ingredients

  • 75 g (Β½ cup) almonds

  • 50 g (Β½ cup) walnuts

  • 50 g (Β½ cup) pumpkin seeds

  • 250 g (1β…” cups) dates, pitted

  • 100 g (β…“ cup) natural peanut butter (creamy or crunchy)

  • 40 g (ΒΌ cup) dried cranberries

  • Optional: a small pinch of sea salt (for flavor balance)


πŸ‘©β€πŸ³ Step-by-Step Instructions

πŸ₯œ Step 1: Prepare the Nuts & Seeds

  1. Add almonds, walnuts, and pumpkin seeds to a food processor.

  2. Pulse several times until they are chopped into small, chunky pieces.
    (Do not grind into powder β€” a little texture gives a better bite.)

  3. Transfer the chopped mixture to a large mixing bowl.


🍯 Step 2: Process the Dates

  1. Make sure all dates are pitted.

  2. If they are firm, soak them in warm water for 5 minutes, then drain well.

  3. Place the dates in the food processor and blend until they form a thick, sticky paste.


πŸ₯£ Step 3: Combine the Mixture

  1. Add the date paste to the bowl with the nuts and seeds.

  2. Add peanut butter and dried cranberries.

  3. Mix using a strong spoon or lightly oiled hands until:

    • All ingredients are evenly combined

    • The mixture holds together when pressed


πŸ“ Step 4: Press into the Pan

  1. Line a small rectangular or square pan (about 8 Γ— 4 inches) with parchment paper, leaving extra paper on the sides.

  2. Transfer the mixture into the pan.

  3. Press down firmly and evenly using:

    • A spatula

    • Or the bottom of a flat glass

This helps the bars hold their shape when sliced.


❄ Step 5: Chill to Set

  1. Place the pan in the refrigerator for 1–2 hours until firm.
    (For faster setting, you can freeze for 30 minutes.)


πŸ”ͺ Step 6: Slice and Store

  1. Lift the firm block out using the parchment paper.

  2. Cut into bars or small squares with a sharp knife.


🧊 Storage Tips

Refrigerator:
Store in an airtight container for up to 2 weeks.

Freezer:
Wrap bars individually in parchment paper and store in a freezer-safe bag for up to 3 months.
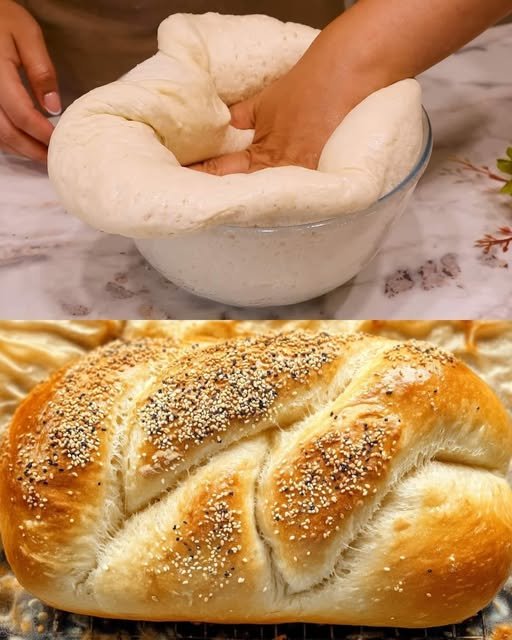
Golden Homemade Seeded Bread

Golden Homemade Seeded Bread

Prep Time: 20 minutes
Rising Time: 1Β½ – 2 hours
Bake Time: 30–35 minutes
Servings: 1 loaf (8–10 slices)

Soft inside, golden outside, and lightly crisp on top with beautiful seeds. This homemade bread is perfect for breakfast, sandwiches, or serving warm with butter.


🧾 Ingredients

  • 500 g all-purpose flour

  • 10 g salt

  • 10 g sugar

  • 10 g dry yeast

  • 300 ml warm water (about 110Β°F / 43Β°C – lukewarm)

  • 2 tablespoons olive oil or melted butter

  • 1 tablespoon milk (optional, for brushing)

Topping (optional)

  • Sesame seeds

  • Poppy seeds

  • Mixed seeds or β€œeverything” seasoning


πŸ‘©β€πŸ³ Step-by-Step Instructions

🌿 Step 1: Activate the Yeast

  1. In a small bowl, add warm water, sugar, and dry yeast.

  2. Stir gently and let it rest for 5–10 minutes.

  3. The mixture should become foamy and bubbly.
    This shows the yeast is active and ready.


πŸ₯£ Step 2: Mix the Dough

  1. In a large mixing bowl, combine the flour and salt.

  2. Make a well in the center.

  3. Pour in the yeast mixture and olive oil.

  4. Stir with a spoon or spatula until a soft dough forms and no dry flour remains.


βœ‹ Step 3: Knead the Dough

  1. Transfer the dough to a lightly floured surface.

  2. Knead for 8–10 minutes until:

    • Smooth

    • Elastic

    • Soft

  3. If the dough feels sticky, sprinkle in small amounts of flour as needed.

(You can also knead using a stand mixer with a dough hook for 5–7 minutes.)


πŸ•° Step 4: First Rise

  1. Lightly grease a clean bowl with oil.

  2. Place the dough inside and turn once to coat lightly.

  3. Cover with a cloth or plastic wrap.

  4. Let rise in a warm place for about 1 hour, until doubled in size.


πŸ₯– Step 5: Shape the Loaf

  1. Gently press the dough to remove excess air.

  2. Shape into an oval or round loaf.

  3. Place on a baking tray lined with parchment paper.

  4. Use a sharp knife to make diagonal cuts across the top for a decorative look.


🌀 Step 6: Second Rise

  1. Cover loosely.

  2. Let rise again for 30–45 minutes until slightly puffed.

This rise helps create a light, soft texture.


πŸ”₯ Step 7: Add Topping & Bake

  1. Preheat oven to 400Β°F (200Β°C).

  2. Brush the top of the loaf with milk (optional) for a golden finish.

  3. Sprinkle seeds or seasoning evenly over the top.

  4. Bake for 30–35 minutes until:

    • Top is golden

    • Bottom sounds hollow when tapped


❄ Step 8: Cool Before Slicing

  1. Transfer bread to a wire rack.

  2. Let cool for at least 20 minutes before slicing.

Cooling allows the bread to set properly and slice beautifully.


🌟 Tips for Best Bread

βœ” Use lukewarm water (not hot)
βœ” Add seeds inside dough for extra texture
βœ” Store covered for up to 2 days
βœ” Freeze slices for later use
βœ” Brush with butter after baking for extra softness

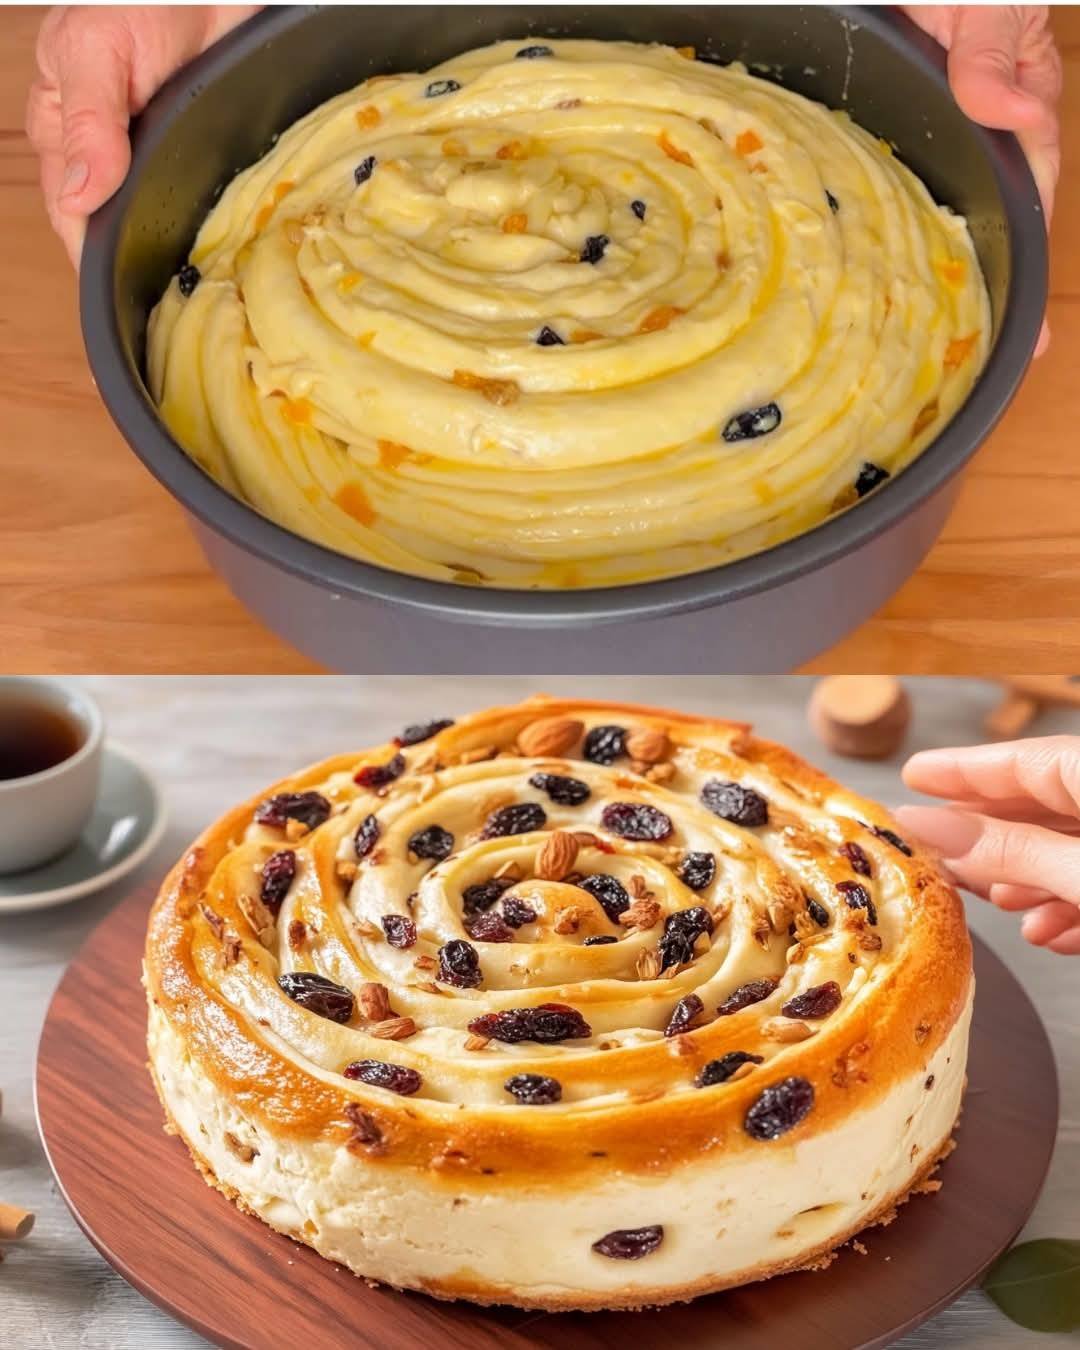
Sweet Spiral Dough Cake with Dried Fruits & Nuts

Sweet Spiral Dough Cake with Dried Fruits & Nuts

Prep Time: 25 minutes
Rising Time: 1½–2 hours
Bake Time: 30–35 minutes
Servings: 8–10 slices
Pan Size: 9-inch (22–24 cm) round pan

A soft, fluffy yeast cake shaped into a beautiful spiral and filled with dried fruits and crunchy nuts. Lightly sweet, golden on the outside, and tender inside.


πŸ₯š Dough Ingredients

  • 2 eggs (room temperature)

  • 4 tablespoons sugar

  • 400 ml warm milk (lukewarm, not hot)

  • 1 packet (7 g) dry yeast

  • 100 ml vegetable oil

  • 780 g all-purpose flour (add gradually)

  • Β½ teaspoon salt

  • 70 g butter (softened)


πŸ‡ Filling & Topping

  • Β½ cup raisins or dried cranberries

  • Β½ cup chopped nuts (almonds or walnuts)

  • 1 egg yolk + 1 tablespoon milk (for brushing)

  • Honey or apricot jam (for glazing)


πŸ₯£ Step 1: Activate the Yeast

  1. In a large mixing bowl, add warm milk, sugar, and dry yeast.

  2. Stir gently and leave for 5–10 minutes until the surface becomes foamy.
    This shows the yeast is active.


πŸ₯„ Step 2: Mix the Dough

  1. Add the eggs and vegetable oil to the yeast mixture.

  2. Mix well until smooth.

  3. Begin adding flour gradually along with salt.

  4. Stir using a wooden spoon or spatula until a soft dough forms.


βœ‹ Step 3: Knead the Dough

  1. Add the softened butter to the dough.

  2. Knead by hand or with a mixer for 8–10 minutes until:

    • Smooth

    • Elastic

    • Soft

    • No longer sticky

  3. Place the dough into a lightly oiled bowl.

  4. Cover with a clean cloth.

  5. Let rise in a warm place for 1 to 1Β½ hours, until doubled in size.


πŸŒ€ Step 4: Shape the Spiral

  1. Gently press the risen dough to remove air.

  2. Transfer to a lightly floured surface.

  3. Roll into a large rectangle (about Β½ cm thick).

  4. Sprinkle dried fruits and chopped nuts evenly over the surface.

  5. Roll tightly from one long side into a long log, like a roll cake.


🧁 Step 5: Arrange in the Pan

  1. Grease a round baking pan.

  2. Place the dough log into the pan, starting from the center and winding outward to form a spiral shape.

  3. Cover and let rise again for 30 minutes until slightly puffed.


πŸ”₯ Step 6: Bake

  1. Preheat oven to 350Β°F (180Β°C).

  2. Mix egg yolk and milk and brush over the dough.

  3. Bake for 30–35 minutes until:

    • Top is golden

    • The cake feels light

    • Bottom sounds hollow when tapped


✨ Step 7: Glaze & Finish

  1. While the cake is warm, brush the top with honey or warmed jam for shine.

  2. Sprinkle with extra chopped nuts if desired.

  3. Allow to cool slightly before slicing.


🌟 Tips for Best Results

βœ” Use lukewarm milk (not hot)
βœ” Add flour slowly for soft dough
βœ” You can add cinnamon or vanilla to the filling
βœ” Serve warm or at room temperature
βœ” Store covered up to 2 days at room temperature

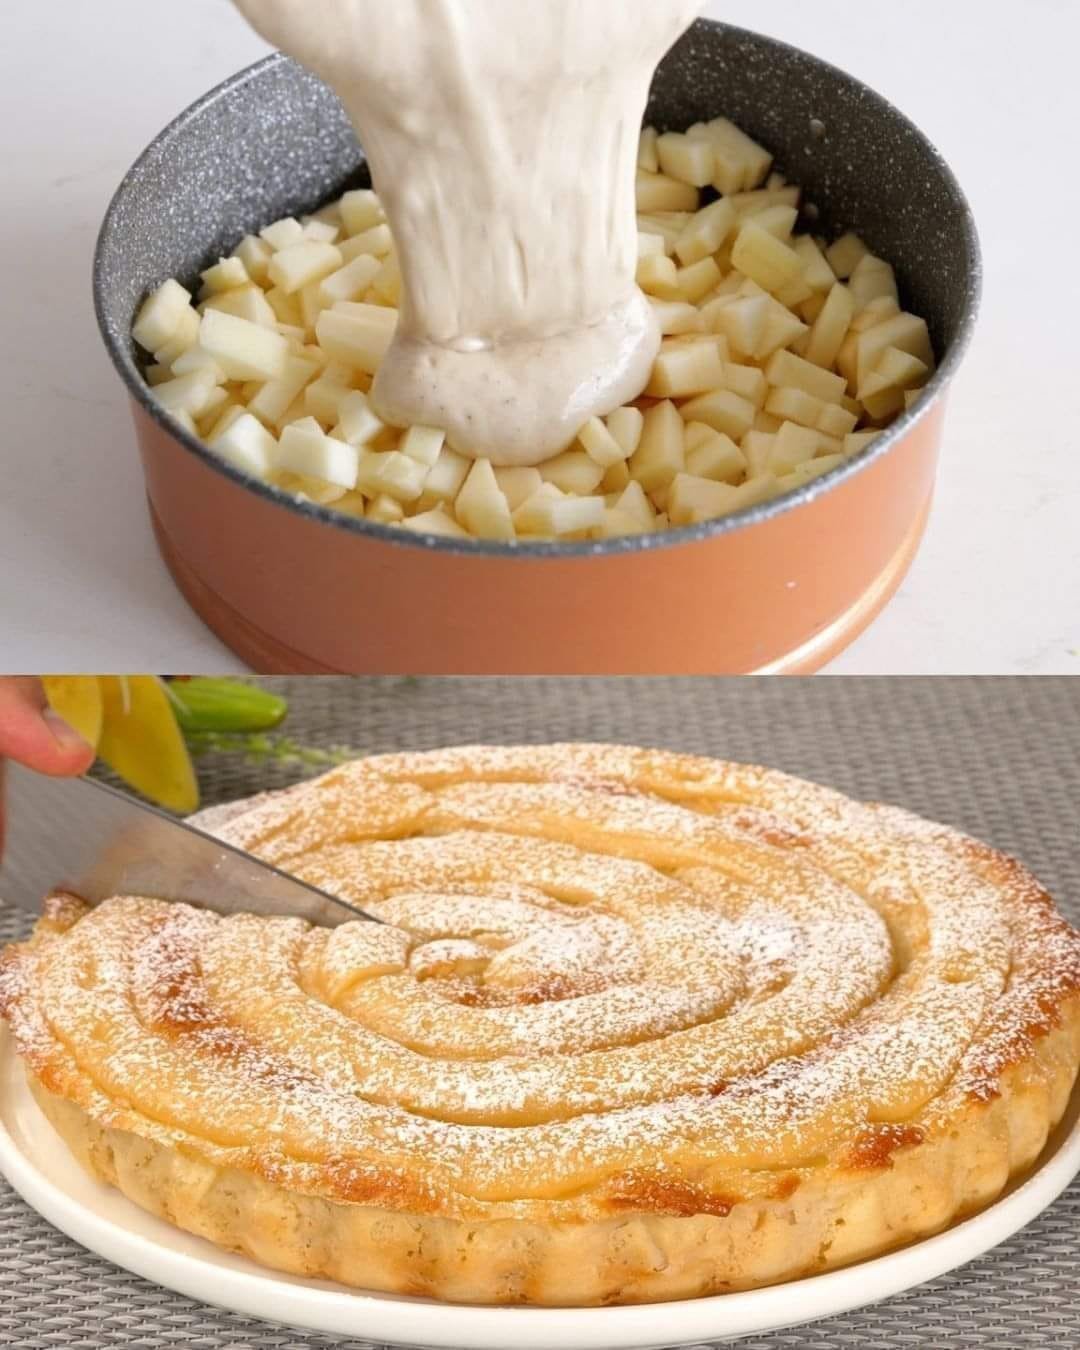
Apple Hurricane CakeΒ 

Apple Hurricane Cake

Prep Time: 20 minutes
Bake Time: 35–40 minutes
Servings: 8 slices
Pan Size: 8–9 inch (20–22 cm) round pan

A soft apple cake with a beautiful custard spiral baked right on top. Moist inside, lightly golden outside, and stunning when sliced.


πŸ₯š Cream Filling (Custard Spiral)

Ingredients

  • 2 egg yolks

  • ΒΌ cup (60 g) sugar

  • 1 tablespoon (15 g) cornstarch

  • 1 cup (240 ml) milk

  • 1 teaspoon vanilla essence

Method

  1. In a small saucepan, whisk together the egg yolks, sugar, and cornstarch until smooth.

  2. Slowly pour in the milk while whisking continuously to prevent lumps.

  3. Place the pan over medium heat and stir constantly using a whisk or spatula.

  4. Cook until the mixture thickens into a smooth, creamy custard.

  5. Remove from heat and stir in the vanilla essence.

  6. Transfer to a bowl and cover with plastic wrap touching the surface.

  7. Allow it to cool completely before using.


🍏 Apple Preparation

Ingredients

  • 3 medium apples (peeled and diced)

Method

  1. Peel, core, and cut the apples into small cubes (about 1 cm).

  2. Set aside for later use.


🍰 Cake Batter

Ingredients

  • 2 whole eggs

  • 2 egg whites (leftover from custard)

  • Β½ cup (100 g) sugar

  • Pinch of salt

  • Β½ cup (120 ml) milk

  • β…“ cup (80 ml) vegetable oil or melted butter

  • 2 cups (250 g) all-purpose flour

  • 1 tablespoon (12 g) baking powder

  • Prepared diced apples

Method

  1. In a large bowl, beat the whole eggs, egg whites, sugar, and salt until pale and frothy.

  2. Add the milk and oil and mix until smooth.

  3. Sift in the flour and baking powder.

  4. Fold gently until just combined. Do not overmix.

  5. Fold in the diced apples evenly.


πŸŒͺ Assembly (Hurricane Design)

  1. Preheat oven to 350Β°F (180Β°C).

  2. Grease and line an 8–9 inch round pan with parchment paper.

  3. Pour the apple batter into the pan and level the top.

  4. Transfer the cooled custard to a piping bag or plastic bag with the tip cut off.

  5. Starting from the center, pipe the custard in a spiral pattern moving outward to the edge.


πŸ”₯ Baking

  1. Place the pan in the center of the oven.

  2. Bake for 35–40 minutes.

  3. The cake is ready when:

    • The top is lightly golden

    • A toothpick inserted into the cake portion comes out clean


🍽 Cooling & Serving

  1. Let the cake cool in the pan for 10 minutes.

  2. Remove from the pan and cool completely on a rack.

  3. Dust generously with powdered sugar to highlight the spiral pattern.

  4. Slice and serve.


βœ… Tips

  • Use firm apples for best texture.

  • Custard must be fully cooled before piping.

  • Store covered at room temperature for 1 day or refrigerate up to 3 days.

  • Best served slightly warm or at room temperature.

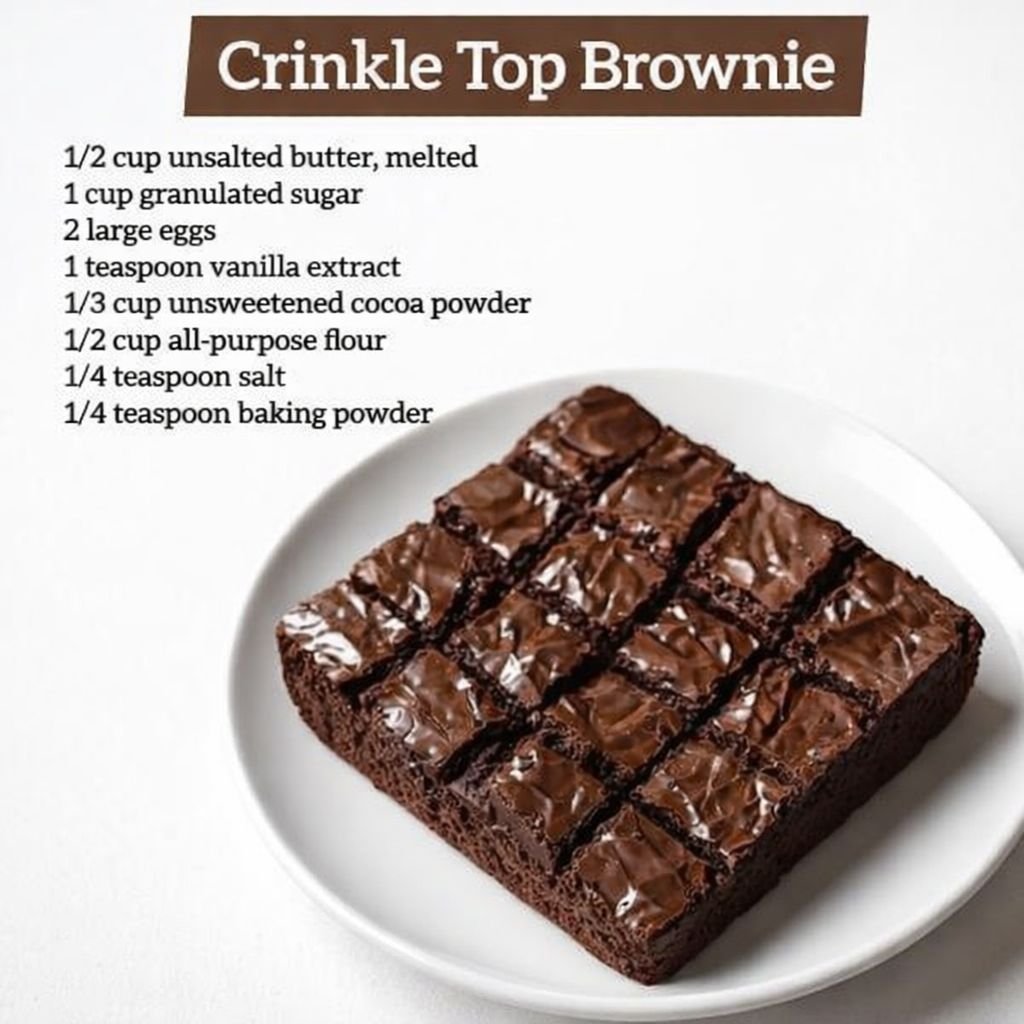
Perfect Crinkle Top Brownies

Perfect Crinkle Top Brownies

Rich, fudgy, and decadent, these brownies feature a dense, chewy center topped with the classic paper-thin, crackly crust that makes every bite irresistible.


Ingredients (8×8-inch pan, 16 squares)

  • 1/2 cup (115 g) unsalted butter, melted

  • 1 cup (200 g) granulated sugar

  • 2 large eggs

  • 1 teaspoon vanilla extract

  • 1/3 cup (35 g) unsweetened cocoa powder

  • 1/2 cup (60 g) all-purpose flour

  • 1/4 teaspoon salt

  • 1/4 teaspoon baking powder


Instructions

1. Preheat and Prep

  1. Preheat the oven to 175Β°C (350Β°F).

  2. Grease an 8×8-inch square baking pan or line it with parchment paper, leaving a slight overhang for easy removal of the brownies after baking.


2. Cream the Butter and Sugar

  1. In a large mixing bowl, combine the melted butter and granulated sugar.

  2. Whisk vigorously for 1–2 minutes until the mixture looks glossy and slightly thickened.

Tip for the Crinkle Top: Thoroughly whisking the sugar into the butter helps dissolve the sugar, which is key to forming that signature shiny, crackly crust.


3. Add Wet Ingredients

  1. Add the eggs and vanilla extract to the butter-sugar mixture.

  2. Whisk for another minute until the batter turns pale and smooth.


4. Incorporate Dry Ingredients

  1. Sift together the cocoa powder, flour, salt, and baking powder.

  2. Using a spatula, gently fold the dry ingredients into the wet mixture.

  3. Mix only until the streaks of flour disappear. Overmixing can make brownies tough instead of fudgy.


5. Bake

  1. Pour the batter into the prepared pan and smooth the top with a spatula.

  2. Bake in the preheated oven for 20–25 minutes.

Toothpick Test: Insert a toothpick in the center; it should come out with a few moist crumbs. A fully clean toothpick may indicate the brownies are slightly overbaked.


6. Cool and Slice

  1. Allow the brownies to cool completely in the pan. This ensures the fudgy interior sets and the crinkle top firms up.

  2. Lift the brownies out using the parchment paper and cut into 16 equal squares.


Why This Recipe Works

  • Cocoa Ratio: Using 1/3 cup of cocoa powder gives a deep chocolate flavor without drying out the brownies.

  • Fudgy Texture: The combination of 1/2 cup flour and 2 eggs creates a dense, chewy texture rather than a cake-like structure.

  • Shiny Crinkle Top: Thoroughly whisking the sugar into melted butter and eggs ensures that classic crackly surface.


Pro Tips for Perfect Brownies

  • Do not overbake: Even a minute too long can dry out the edges. Keep an eye on the toothpick test.

  • Let them cool fully: Cutting brownies too soon can result in crumbling and a less defined top.

  • Optional add-ins: Fold in chocolate chips, nuts, or a swirl of caramel for extra indulgence.

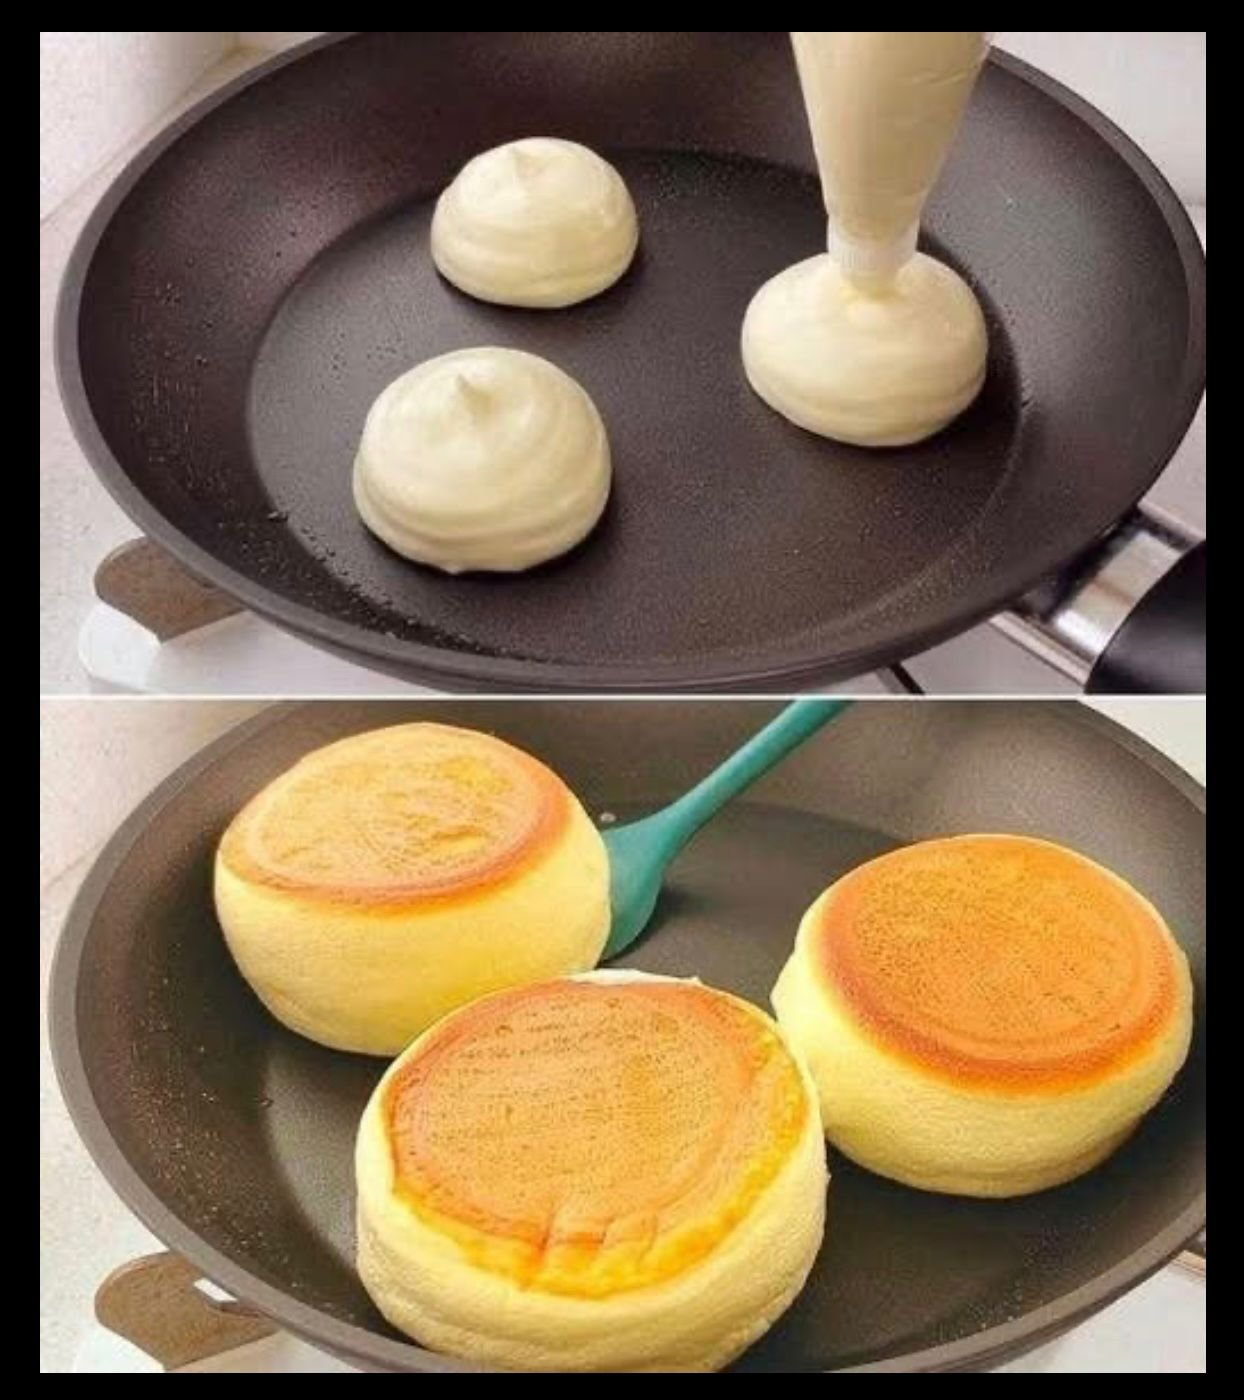
Japanese SoufflΓ© Pancakes

Japanese SoufflΓ© Pancakes

Fluffy, tall, and cloud-like, these Japanese soufflΓ© pancakes are a delightful treat for breakfast, brunch, or dessert. Serve with butter, syrup, or even a scoop of rich chocolate gelato for a luxurious twist.


Ingredients (Makes 2–3 pancakes)

For the Pancakes:

  • 2 large eggs, separated (yolks and whites)

  • 1 Β½ tablespoons whole milk

  • ΒΌ teaspoon vanilla extract

  • ΒΌ cup (30 g) all-purpose flour, sifted

  • 2 tablespoons granulated sugar

  • Β½ teaspoon baking powder

  • Optional: 1 teaspoon water (for steaming in the pan)

For Serving (Optional):

  • Butter

  • Maple syrup

  • Chocolate gelato


Instructions

1. Prepare the Yolk Base

  1. In a small bowl, whisk together the egg yolks, milk, and vanilla extract until thick and slightly frothy.

  2. Sift the flour and baking powder over the mixture.

  3. Gently fold with a whisk or spatula until just combined. Do not overmixβ€”overmixing will make the pancakes dense.


2. Make the Meringue

  1. In a clean metal or glass bowl, beat the egg whites on low speed until frothy.

  2. Gradually add the sugar, one tablespoon at a time, while increasing the mixer speed to medium-high.

  3. Beat until stiff peaks form. Peaks should stand straight when you lift the beaters.

Tip: Using cold eggs helps create a more stable meringue.


3. Fold the Batter

  1. Add about one-third of the meringue to the yolk mixture. Fold gently to lighten the batter.

  2. Add the remaining meringue in two additions. Fold carefully using a β€œcut and turn” motion to keep as much air as possible.


4. Pipe the Batter

  1. Transfer the batter into a piping bag or a large Ziploc bag with the corner cut off.

  2. Pipe tall mounds of batter onto a lightly greased non-stick pan.

  3. For extra height, pipe a small amount on top of each mound after a minute.


5. Cook β€œLow and Slow”

  1. Set the pan to the lowest possible heat.

  2. Add 1 teaspoon of water in empty spaces of the pan and cover with a lid. The steam will help the pancakes rise.

  3. Cook for 5–6 minutes on the first side until golden brown.


6. Flip Gently

  1. Carefully lift each pancake with a spatula and flip.

  2. Add another teaspoon of water, cover, and cook for another 4–5 minutes.

  3. Pancakes should be fluffy, golden, and fully set inside.


7. Serve Immediately

  • These pancakes are highest and fluffiest right after cooking. They may deflate slightly as they cool.

  • Serve with butter, maple syrup, or a scoop of chocolate gelato for a decadent treat.


Pro Tips for Perfect SoufflΓ© Pancakes

  • Patience is key: Low heat ensures the inside cooks without burning the outside.

  • Cold eggs: Helps stabilize the meringue for taller pancakes.

  • Steaming: Adding a little water to the pan creates gentle steam, aiding the rise.

  • Immediate service: Like soufflΓ©s, these are best enjoyed fresh for maximum fluffiness.