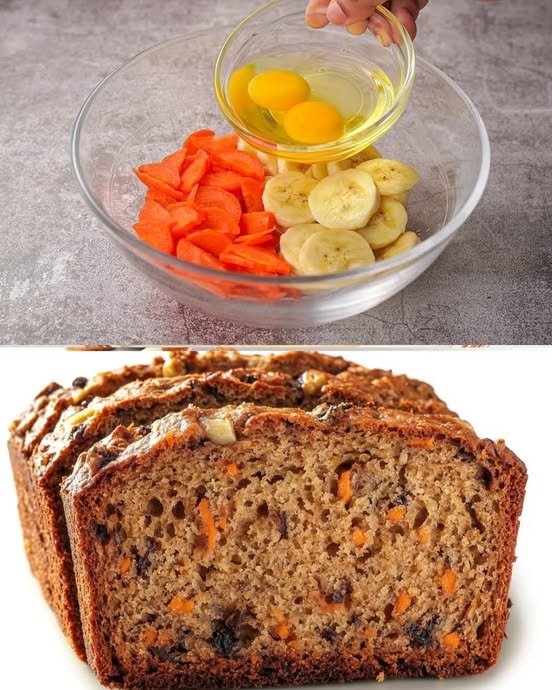
Banana Carrot Raisin Bread

Banana Carrot Raisin Bread

Prep Time: 15 minutes
Bake Time: 50–60 minutes
Yield: 1 standard loaf (9×5 inch pan)

This bread is soft, naturally sweet from bananas and carrots, and dotted with juicy raisins. It’s perfect for breakfast, tea time, or a light dessert.


📝 Ingredients

Wet Ingredients

  • 2 medium ripe bananas, mashed well

  • 1 cup grated carrots (about 2 medium carrots)

  • 2 large eggs, at room temperature

  • ½ cup (120 ml) vegetable oil

  • ½ cup (100 g) brown sugar, packed

  • 1 teaspoon vanilla extract

Dry Ingredients

  • 1½ cups (190 g) all-purpose flour

  • 1 teaspoon baking soda

  • 1 teaspoon baking powder

  • ½ teaspoon salt

  • 1 teaspoon ground cinnamon

Mix-ins

  • ½ cup (80 g) raisins


👩‍🍳 Instructions

Step 1: Prepare the Pan and Oven

Preheat your oven to 350°F (175°C).
Grease a 9×5 inch loaf pan with oil or butter, or line it with parchment paper so the bread can be removed easily after baking.


Step 2: Mix the Wet Ingredients

In a large mixing bowl:

  1. Mash the bananas until smooth.

  2. Add grated carrots.

  3. Add eggs, vegetable oil, brown sugar, and vanilla extract.

  4. Whisk everything together until well blended and smooth.


Step 3: Mix the Dry Ingredients

In a separate bowl:

  • Add flour, baking soda, baking powder, salt, and cinnamon.

  • Whisk or sift them together so the leavening agents and spices are evenly mixed.


Step 4: Combine Wet and Dry

  • Gradually add the dry ingredients into the wet mixture.

  • Stir gently using a spatula or spoon until just combined.

  • Do not overmix; overmixing can make the bread dense instead of soft.


Step 5: Add the Raisins

  • Fold in the raisins gently so they are evenly spread throughout the batter.


Step 6: Bake

  • Pour the batter into the prepared loaf pan.

  • Smooth the top with a spatula.

  • Bake for 50–60 minutes.

  • Check doneness by inserting a toothpick into the center:

    • It should come out clean or with a few moist crumbs.


Step 7: Cool

  • Let the bread cool in the pan for 10 minutes.

  • Remove it and place it on a wire rack to cool completely before slicing.


🌟 Tips for Best Results

  • Carrots: Use the fine side of a grater for a smoother texture.

  • Extra texture (optional): Add ½ cup chopped walnuts or pecans along with raisins.

  • Sweetness: You may reduce sugar slightly if your bananas are very ripe.

  • Storage:

    • Keep in an airtight container at room temperature for 3–4 days.

    • Refrigerate for up to 1 week.

    • Freeze slices for up to 2 months.

Simple Wonton Soup Recipe

It looks like there might be a slight error in your question. Did you mean “wonton soup”? If so, I’d be happy to provide you with a simple and delicious recipe for wonton soup. Wonton soup is a popular Chinese dish consisting of wontons (dumplings) served in a flavorful broth.

Simple Wonton Soup Recipe:

Table of Contents

Ingredients:

For Wontons:

  • 1/2 pound ground pork
  • 1/2 cup finely chopped shrimp
  • 2 green onions, finely chopped
  • 1 tablespoon soy sauce
  • 1 tablespoon oyster sauce
  • 1 teaspoon sesame oil
  • 1 teaspoon grated ginger
  • Wonton wrappers

For Soup:

  • 4 cups chicken broth
  • 2 cups water
  • 2 cups bok choy, chopped
  • 1 cup sliced mushrooms
  • 1-2 teaspoons soy sauce (adjust to taste)
  • 1 teaspoon sesame oil
  • Salt and pepper to taste

Instructions:

  1. Prepare the Wonton Filling: In a bowl, mix together ground pork, chopped shrimp, green onions, soy sauce, oyster sauce, sesame oil, and grated ginger.
  2. Assemble the wontons: Place a small amount of the filling in the center of each wonton wrapper. Moisten the edges with water, fold in half to form a triangle, and press the edges to seal.
  3. Prepare the Broth: In a pot, bring chicken broth and water to a simmer. Add soy sauce, sesame oil, salt, and pepper to taste.
  4. Cook the Wontons: Gently drop the wontons into the simmering broth and cook until they float to the surface, which should take about 3-5 minutes.
  5. Add Vegetables: Add bok choy and sliced mushrooms to the broth and cook for an additional 3-5 minutes or until the vegetables are tender.
  6. Serve: Ladle the soup into bowls, making sure to include a mix of wontons, vegetables, and broth.
  7. Garnish (Optional): Garnish with additional chopped green onions and a drizzle of sesame oil if desired.

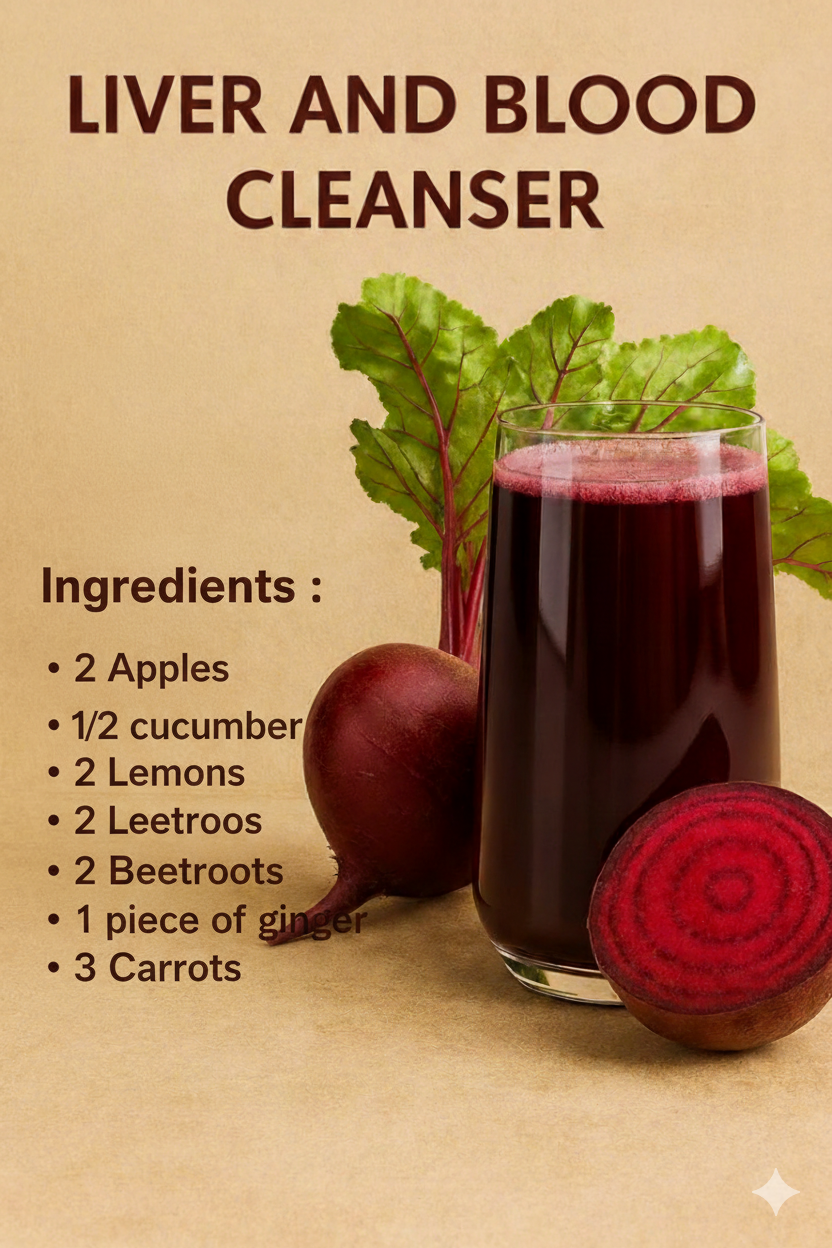
Liver and Blood Cleanser Juice

Liver and Blood Cleanser Juice

This vibrant juice is packed with antioxidants and nutrients known for supporting natural detoxification and boosting energy levels.

Ingredients

  • 2 Red Apples (cored)

  • 3 Medium Carrots (washed and trimmed)

  • 2 Small Beetroots (peeled)

  • 2 Whole Lemons (peeled)

  • 1/2 Large Cucumber

  • 1-inch Piece of Fresh Ginger

  • Optional: A handful of the beet greens (if fresh)


Instructions

  1. Prep your produce: Wash all fruits and vegetables thoroughly. Peel the lemons and beetroots to avoid a bitter taste.

  2. Chop: Cut the ingredients into sizes that fit your juicer or blender.

  3. Extract the juice: * If using a juicer: Run all ingredients through and stir the final juice to combine flavors.

    • If using a blender: Add a small splash of water or coconut water, blend until smooth, and then strain through a nut milk bag or fine-mesh sieve to remove the pulp.

  4. Serve: Pour over ice if desired and drink immediately for the maximum nutrient benefit.

Pro Tip: If this is your first time drinking beet juice, you might want to start with one beetroot and work your way up, as it is very potent!

🥤 Classic Blueberry Banana Oatmeal Smoothie

🥤 Classic Blueberry Banana Oatmeal Smoothie

A light, antioxidant-rich breakfast that tastes like blueberry pie.

Ingredients

  • Oats: $1/4$ cup rolled oats (old-fashioned)

  • Fruit: 1 ripe banana (frozen is best for creaminess)

  • Berries: $1/2$ cup fresh or frozen blueberries

  • Liquid: 1 cup unsweetened almond milk (or soy/skim milk)

  • Spice: $1/2$ teaspoon ground cinnamon

  • Sweetener (Optional): 1 teaspoon honey or 1 pitted date (only if your fruit isn’t ripe enough)


💪 Protein-Packed Weight Loss Version

Higher protein content to help preserve muscle and curb hunger longer.

Ingredients

  • Oats: $1/4$ cup rolled oats

  • Fruit: $1/2$ frozen banana

  • Berries: $1/2$ cup frozen blueberries

  • Liquid: $1/2$ cup unsweetened almond milk + $1/4$ cup water

  • Protein: $1/2$ cup plain Greek yogurt OR 1 scoop vanilla protein powder

  • Healthy Fat: 1 tablespoon chia seeds or ground flaxseed


📋 Instructions (For Both Recipes)

  1. Prep the Oats: For the smoothest texture, place the dry oats in the blender first and pulse until they become a fine flour. This prevents a “gritty” drink.

  2. Layer Ingredients: Add the liquid first, followed by the yogurt (if using), then the fruit and spices.

  3. Blend: Start on a low speed and gradually increase to high. Blend for 45–60 seconds until completely smooth.

  4. Adjust Consistency: If it’s too thick, add a splash more milk. If you prefer it colder/thicker, add a handful of ice cubes and blend again.

  5. Serve: Pour into a tall glass and top with a few extra blueberries or a sprinkle of dry oats for crunch.


💡 Pro-Tips for Weight Loss

  • Use Frozen Bananas: Peel and slice your overripe bananas before freezing. They act like “healthy ice cream” and give the smoothie a thick, milkshake-like texture.

  • Watch the Toppings: Granola and nut butters are delicious but high in calories. Stick to fresh berries or a dash of cinnamon if you are strictly tracking.

  • Don’t skip the Fiber: Using whole rolled oats instead of “instant” packets ensures you get the full benefit of the beta-glucan fiber, which is what actually helps with hunger control.

Golden Herbal Tea –

🌼 The “Stay Glowing” Golden Herbal Tea

A warm, anti-inflammatory tonic for daily wellness. Yields: 1 Cup | Prep time: 2 mins | Simmer time: 5 mins

Ingredients

  • 1 cup Water: Fresh, filtered water is best.

  • ½ tsp Turmeric Powder: The “golden” star of the show.

  • 1 small piece Fresh Ginger: About ½ inch, peeled and sliced or smashed.

  • 1 tiny pinch of black pepper: essential for activating the turmeric.

  • 1 tsp honey: Or to your preferred sweetness level.

  • 1 squeeze Fresh Lemon Juice: For brightness and Vitamin C.


Instructions

  1. Boil: Pour one cup of water into a small saucepan and bring it to a rolling boil over medium-high heat.

  2. Infuse: Add the turmeric powder, the fresh ginger pieces, and that tiny pinch of black pepper.

  3. Simmer: Turn the heat down to low and let the tea simmer gently for about 5 minutes. This slow “steep” allows the heat to extract the oils and nutrients from the ginger and turmeric.

  4. Strain: Place a fine-mesh strainer over your favorite mug and pour the tea through, discarding the ginger pieces.

  5. Brighten & Sweeten: Stir in your teaspoon of honey and a fresh squeeze of lemon juice.

  6. Enjoy: Sip while warm to feel that comforting, healthy glow!


Why You’ll Love It

  • Anti-Inflammatory: Both ginger and turmeric are famous for helping with joints and digestion.

  • Immune Support: The lemon and honey provide a soothing boost for the throat and immune system.

  • Caffeine-Free: Since there’s no actual tea leaf, this is a perfect “wind-down” drink for the evening that won’t keep you awake.

A “Bestie” Pro-Tip

If you want an even creamier version (like a Golden Milk Latte), you can swap the water for almond or coconut milk! Just be sure to whisk it constantly while simmering so the milk doesn’t scorch.

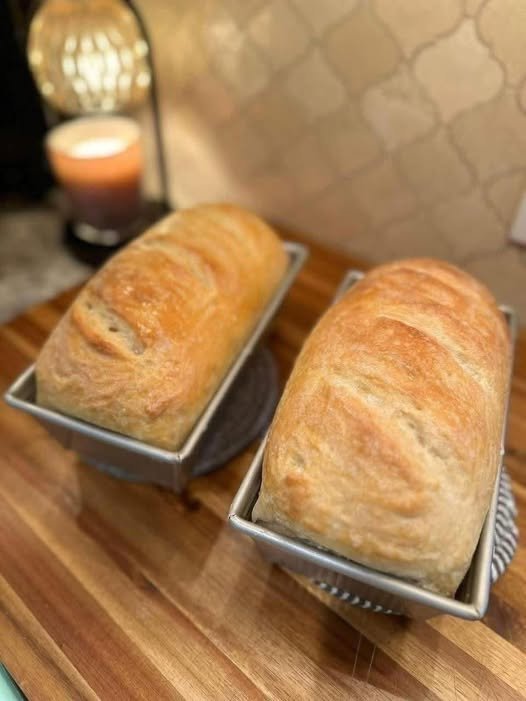
Sourdough Sandwich Bread

This soft sourdough sandwich bread recipe is made with all-purpose flour, olive oil, honey, salt, and sourdough starter in a stand mixer. It has a light, fluffy texture with a tight crumb, perfect for sandwiches and toast.

Are you searching for an easy sourdough sandwich bread recipe? Look no further because this is the only one you’ll ever need.

You don’t need to be a professional baker to make delicious sourdough bread for your family. Trust me, the kids will be begging for more.

INGREDIENTS

INGREDIENTS TO MAKE ¼ CUP (50 G) OF ACTIVE SOURDOUGH STARTER

  • 2 teaspoons (10 g) sourdough starter
  • 3 tablespoons (25 g) all-purpose flour
  • 5 teaspoons (25 g) water

DOUGH INGREDIENTS

  • ¼ cup (50 g) sourdough starter (active)
  • 1 cup + 2 ½ tablespoons (275 g) water
  • 4 tablespoons (60 g) olive oil
  • 1 tablespoon honey (maple syrup or sugar)
  • 4 cups + 2 tablespoons (500 g) all-purpose flour
  • 2 teaspoons (10 g) sea salt

INSTRUCTIONS

DAY 1

  • 7 AM – Feed your sourdough starter: 12 hours before you mix the dough, feed your sourdough starter. Add the ingredients to a clean jar, stir, cover loosely, and let rise at room temperature, 68-72°F (20-22°C), until doubled. 2 teaspoons (10 g) sourdough starter 3 tablespoons (25 g) all-purpose flour 5 teaspoons (25 g) water
  • 7 PM—Mix the dough: Add the dough ingredients to the bowl of a stand mixer. Use a dough whisk or a stiff spatula to get the dough started. Switch to your hands and mix the dough until it resembles a shaggy mess and there are no dry bits in the bowl. Cover the bowl and let the dough rest for 1 hour for the flour to fully absorb the water. ¼ cup (50 g) sourdough starter1 cup + 2 ½ tablespoons (275 g) water 4 tablespoons (60 g) olive oil1 tablespoon honey 4 cups + 2 tablespoons (500 g) all-purpose flour 2 teaspoons (10 g) sea salt
  • 8 PM – Knead and First Rise: Mix the dough on LOW speed (3) for 8-10 minutes, using the dough hook attachment. Remove the dough hook, cover the bowl, and allow the dough to rise at room temperature, 68-72°F (20-22°C), for 10-12 hours or until it has doubled in size.

DAY 2

  • 6 AM – Shape and second rise: Turn the dough out onto a lightly floured work surface and gently press it into a rectangle with the short end closest to you. Fold the left and right sides of the dough into the middle. Starting from the end farthest from you, roll the dough towards yourself into a log shape. Use your hands to gently cup the dough and pull it towards yourself to create tension on the outside. Pinch the ends to seal any edges. Transfer the dough, seam-side down, into a lightly greased bread pan. For easier removal, you can also line the pan with parchment paper. Allow the dough to rest at room temperature, uncovered until the dough has risen 1 inch above the rim of the pan, about 2-3 hours depending on the temperature of your kitchen.
  • 9 AM – Bake: Preheat the oven to 450°F (232°C). Transfer the pan to the oven and turn the oven down to 375°F (190°C). Bake for 45-50 minutes. Allow the bread to cool in the pan for 10-15 minutes before transferring the loaf to a cooling rack.

NOTES

Consider your kitchen’s temperature and humidity, especially in warm climates, as these factors can affect the final product.

Cooler kitchens (below 68°F / 20°C): The first and second rises will take longer than outlined in the sample timeline. If the dough takes too long to rise, you can adjust the recipe by using 100 g of active starter and 255 g of water. The extra starter will help the dough ferment faster.

Warmer kitchens (above 72°F / 22°C): The first and second rises will be shorter than outlined in the sample timeline. If the dough rises too quickly overnight, mix the dough in the morning and monitor it closely to avoid over-proofing.

If you wake up to a dough that’s over-proofed and too sticky to work with, don’t discard it. Use it to make sourdough focaccia bread.

Storage tips: Keep the bread in a bread bag, beeswax wrap, or kitchen towel at room temperature. It will stay fresh for a few days. To freeze, wrap individual loaves or slices in plastic wrap and place them in a freezer-safe container. Ensure they are fully cooled before wrapping to avoid condensation.