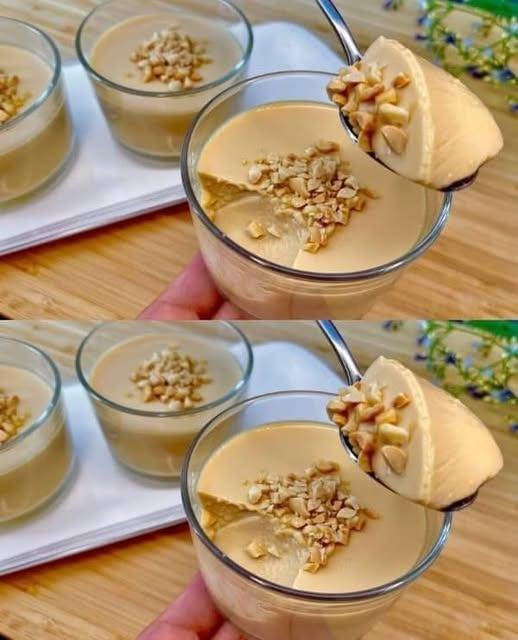
No-Bake 3-Ingredient Milk Pudding

No-Bake 3-Ingredient Milk Pudding

Smooth • Creamy • Simple Custard-Style Dessert

This easy milk pudding is a soft, creamy dessert made with just milk, sugar, and eggs. It sets gently in the refrigerator and has a smooth, comforting texture similar to classic custard. With careful low-heat cooking and constant stirring, you get a silky pudding without baking or complicated steps.


Recipe Overview

  • Prep Time: 5 minutes

  • Cook Time: 10–15 minutes

  • Chill Time: 2–3 hours

  • Servings: 4 small bowls


Ingredients

Main Ingredients

  • 2 cups (500 ml) milk

  • ⅓ cup (70 g) sugar

  • 2 large eggs

Optional (Recommended)

  • 1 teaspoon vanilla extract
    (adds aroma and smooth flavor)

Optional Toppings

  • Chopped peanuts or walnuts

  • Caramel drizzle

  • Fresh fruit


Equipment Needed

  • Medium saucepan

  • Whisk or silicone spatula

  • Fine-mesh strainer

  • Serving bowls or ramekins


Step-by-Step Instructions

1. Mix the Eggs and Sugar

  • Place the saucepan on the counter (do not heat yet)

  • Add eggs and sugar

  • Whisk until the sugar is mostly dissolved and the mixture looks slightly pale and smooth


2. Add the Milk

  • Slowly pour the milk into the egg mixture

  • Whisk continuously to keep everything smooth

  • Add vanilla extract if using


3. Cook Gently

  • Place the saucepan over low heat

  • Stir constantly using a whisk or spatula

  • Scrape the bottom and sides of the pan to prevent sticking

⚠️ Important: Keep the heat low. High heat can cause the eggs to cook unevenly.


4. Thicken the Pudding

  • Continue stirring for 10–12 minutes

  • The mixture will gradually thicken

  • It is ready when it:

    • Coats the back of a spoon

    • Looks creamy but still pours easily

(It will firm up more as it cools.)


5. Strain for Smoothness

  • Remove from heat

  • Pour the mixture through a fine strainer into a bowl or jug

  • This step ensures a silky, lump-free texture


6. Chill and Set

  • Pour the pudding into serving bowls or ramekins

  • Let cool at room temperature for about 20 minutes

  • Cover and refrigerate for 2–3 hours, until fully set


7. Serve

  • Serve chilled

  • Add nuts, caramel, or fruit just before serving if desired


Texture & Flavor

  • Texture: Smooth, soft, custard-like

  • Flavor: Lightly sweet, creamy, comforting


Helpful Tips

  • Stir continuously for best texture

  • Never let the mixture boil

  • Use room-temperature eggs for smoother blending

  • For extra richness, replace ¼ cup of milk with cream


Optional Variation (Firmer Texture)

If you prefer a firmer, pudding-style set:

  • Mix 1 tablespoon cornstarch into the cold milk before heating

  • Proceed with the recipe as written


Storage

  • Store covered in the refrigerator

  • Best enjoyed within 2 days

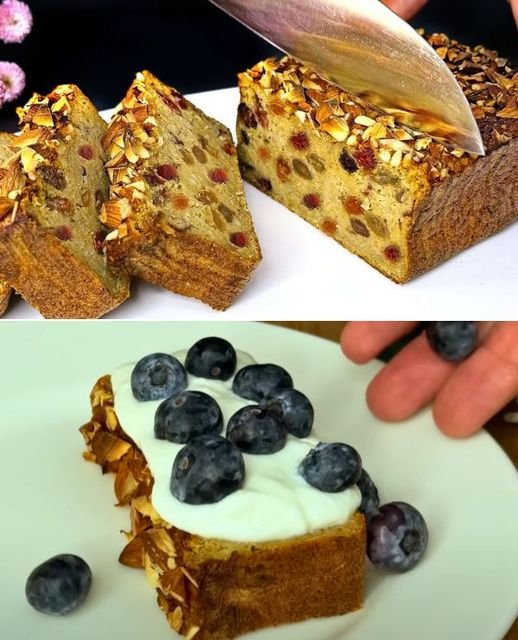
Easy & Healthy Oatmeal Apple Loaf

Easy & Healthy Oatmeal Apple Loaf

No Refined Sugar • No White Flour • Naturally Sweetened

This wholesome oatmeal apple loaf is soft, moist, and naturally sweet from fruits alone. It’s perfect for breakfast, tea time, or a healthy snack. Packed with oats, apples, bananas, dried fruits, and nuts, it’s both nourishing and satisfying.


🥧 Ingredients

  • 1 cup fine rolled oats (or oat flour)

  • 3 medium apples, peeled and grated or finely chopped

  • ½ cup water

  • 1 ripe banana, mashed

  • 3.5 oz (100 g) dried blueberries

  • 3.5 oz (100 g) raisins

  • 2 large eggs

  • 1 teaspoon baking powder

  • 1 teaspoon cinnamon powder (optional, for warmth and flavor)

  • ½ cup mixed nuts, chopped (almonds, walnuts, or your choice)


🥣 Instructions

  1. Prepare the Oats
    If using rolled oats, blend them into a fine flour using a blender or food processor. Set aside.

  2. Cook the Apples
    Add the grated apples and water to a saucepan. Cook on medium heat for 5–7 minutes until soft and slightly thick. Remove from heat and let cool slightly.

  3. Mix Wet Ingredients
    In a large bowl, mash the banana. Add the eggs and whisk well. Stir in the cooked apples.

  4. Combine Dry Ingredients
    Add oat flour, baking powder, cinnamon, dried blueberries, raisins, and chopped nuts to the wet mixture. Mix until fully combined.

  5. Prepare for Baking
    Line or lightly grease a loaf pan. Pour in the batter and smooth the top. Sprinkle extra nuts on top if desired.

  6. Bake
    Bake in a preheated oven at 180°C (350°F) for 40–45 minutes, or until a toothpick inserted in the center comes out clean.

  7. Cool & Serve
    Let the loaf cool in the pan for 10 minutes, then transfer to a wire rack. Slice and enjoy!


🍽 Serving Suggestions

  • Serve warm with yogurt and fresh blueberries

  • Enjoy plain with tea or coffee

  • Store in the refrigerator for up to 5 days

Air Fryer Poached Eggs

Air Fryer Poached Eggs

These “poached” eggs are technically steamed in the air fryer, resulting in a tender white and a perfectly runny yolk. It is a hands-off, mess-free alternative to the stovetop.

  • Prep time: 2 minutes

  • Cook time: 5–7 minutes

  • Total time: Under 10 minutes

Equipment

  • Air Fryer

  • Heat-proof ramekins or small ceramic bowls

Ingredients

  • Eggs: Large, fresh eggs (as many as your basket can fit)

  • Water: 3 tbsp hot water per ramekin

  • Oil Spray: Optional (non-stick spray or olive oil)

  • Seasoning: Salt and black pepper to taste

Instructions

  1. Preheat: Set your air fryer to 340°F (170°C) and let it preheat for about 3 minutes.

  2. Prep Ramekins: Lightly spray the inside of each ramekin with oil to prevent sticking. Add 3 tablespoons of hot water into each ramekin.

  3. Add Eggs: Carefully crack one egg into each ramekin, being careful not to break the yolk.

  4. Air Fry: Place the ramekins into the air fryer basket. Cook at 340°F (170°C) according to your preferred doneness:

    • 5 Minutes: Very runny yolk and soft whites.

    • 6 Minutes: Classic poached (jammy yolk, set whites).

    • 7 Minutes: Firm yolk and fully set whites.

  5. Serve: Using oven mitts, carefully remove the hot ramekins. Use a slotted spoon to lift the egg out of the water. Drain on a paper towel for a second if desired, then serve immediately

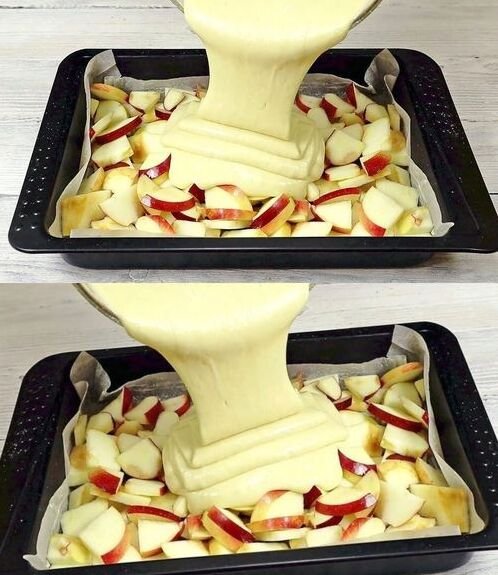
Simple 10-Minute Prep Apple Sponge Cake

Simple 10-Minute Prep Apple Sponge Cake

This recipe is prized for its “high rise” and the way the sugar creates a slightly crunchy meringue-like top.

Ingredients

  • Apples: 3–4 large (Tart varieties like Granny Smith or Honeycrisp work best)

  • Eggs: 3 large

  • Sugar: 200 g

  • Butter: 120 g (melted and slightly cooled)

  • All-Purpose Flour: 200 g

  • Baking Powder: 1 tsp

  • Vanilla Extract: 1 tsp

  • Cinnamon: 1 tsp (optional, for tossing with apples)

  • Pinch of salt


Instructions

  1. Prepare the Oven and Pan: Preheat your oven to 180°C (350°F). Line a baking pan (approx. 9×9 inch or similar) with parchment paper, just like in your photo.

  2. Prepare the Apples: Core and slice the apples into bite-sized chunks or thin wedges. Spread them evenly across the bottom of the lined baking pan. If you like extra flavor, toss them with a little cinnamon beforehand.

  3. Mix the Batter:

    • In a large bowl, beat the eggs and sugar together with a mixer for about 3–5 minutes until the mixture is pale, thick, and has doubled in volume. This is the secret to the “husband-approved” fluffiness!

    • Slowly pour in the melted butter and vanilla, whisking gently.

    • Sift in the flour, baking powder, and salt. Fold gently with a spatula until just combined so you don’t deflate the eggs.

  4. Bake: Pour the batter over the apples (as shown in your image), ensuring it seeps down into the gaps. Bake for 30–40 minutes, or until a toothpick inserted into the center comes out clean and the top is golden brown.

  5. Serve: Let it cool for at least 10 minutes before slicing. It is excellent served warm with a scoop of vanilla ice cream.

The Ginger Bug

The Ginger Bug

This acts like a sourdough starter, capturing wild yeast from the ginger skin.

Ingredients

  • 2 cups filtered or spring water (chlorine-free)

  • 1 inch fresh organic ginger, grated or finely chopped (keep skin on for more natural yeast)

  • 2 tbsp granulated sugar

Instructions

  1. Day 1: Mix the water, sugar, and ginger in a glass jar. Stir until sugar is dissolved. Cover with cheesecloth and a rubber band to let it breathe while keeping out dust.

  2. Days 2–5 (Feeding): Every 24 hours, add 1 tbsp of fresh ginger and 1 tbsp of sugar. Stir well.

  3. Check for Readiness: Around day 3 to 7, you should see small bubbles forming at the top and hear a light fizz when you stir it. It should smell yeasty and slightly sweet.


Part 2: Brewing the Ginger Beer

Once your bug is active, you can make the final beverage.

Ingredients

  • 1/2 cup strained ginger bug liquid

  • 2 liters (approx. 8 cups) filtered water

  • 150 g (3/4 cup) brown or cane sugar

  • 100 g (4-inch piece) fresh ginger, grated

  • Juice of 2–3 lemons

Instructions

  1. Make the Ginger Tea: Bring 500 ml of water, the 100 g of grated ginger, and the sugar to a boil in a pot. Simmer for 10–20 minutes to extract the spice.

  2. Cool Completely: Remove from heat and stir in the remaining 1.5 liters of cold water. Crucial: You must let this mixture reach room temperature before adding the bug, or the heat will kill your wild yeast.

  3. Combine: Strain the ginger solids out of your tea. Add the lemon juice and the 1/2 cup of strained liquid from your ginger bug.

  4. Bottle: Pour the mixture into clean flip-top (Grolsch-style) bottles, leaving at least 2 inches of headspace at the top.

  5. Secondary Fermentation: Leave bottles at room temperature in a dark place for 2 to 5 days.

    • Tip: Gently squeeze plastic bottles or briefly “burp” a glass bottle daily to check carbonation levels and prevent too much pressure from building up.

  6. Chill: Once it is as fizzy as you like, move it to the refrigerator. This slows down the fermentation and makes it ready to serve.

Healing Garden Vegetable Soup

Healing Garden Vegetable Soup

A nourishing, cozy vegetable soup packed with vitamins, minerals, and anti-inflammatory goodness. Light yet satisfying, this soup is perfect for daily meals, family dinners, and anyone looking to feel better from the inside out.

 Description

This Healing Garden Vegetable Soup is loaded with fresh vegetables simmered gently in a flavorful broth. It’s naturally low in calories, rich in fiber, and bursting with antioxidants. The flavors are clean, comforting, and deeply satisfying—making it a soup your body and your family will crave again and again.

 Ingredients

  • 1 tbsp olive oil

  • 1 medium onion, finely chopped

  • 2 cloves garlic, minced

  • 2 carrots, diced

  • 2 celery stalks, chopped

  • 1 medium potato, thinly sliced

  • 1½ cups broccoli florets

  • 1 zucchini, sliced

  • 1 cup green beans, chopped

  • 6 cups vegetable broth (low sodium)

  • 1 tsp dried thyme

  • ½ tsp turmeric (optional, for healing boost)

  • Salt and black pepper to taste

  • Fresh parsley or dill, chopped (for garnish)

  • Juice of ½ lemon (optional, for brightness)

 Instructions

  1. Heat olive oil in a large pot over medium heat.

  2. Add onion and sauté for 3–4 minutes until soft and translucent.

  3. Stir in garlic and cook for 30 seconds until fragrant.

  4. Add carrots, celery, and potato. Cook for 5 minutes, stirring occasionally.

  5. Pour in vegetable broth and bring to a gentle boil.

  6. Reduce heat and simmer for 10 minutes.

  7. Add broccoli, zucchini, and green beans.

  8. Season with thyme, turmeric, salt, and pepper.

  9. Simmer for another 8–10 minutes until vegetables are tender but vibrant.

  10. Finish with lemon juice if using.

  11. Serve hot, garnished with fresh herbs.

Notes

  • Keep vegetables slightly firm to preserve nutrients.

  • Chop vegetables evenly for consistent cooking.

  • This soup tastes even better the next day!

 Tips for Best Results

  • Use fresh, seasonal vegetables whenever possible

  • Don’t overcook—bright color means more nutrients

  • Add leafy greens (spinach or kale) at the end for extra benefits

  • A pinch of chili flakes adds gentle warmth

 Servings

  • Serves: 4–6 people

  • Prep Time: 15 minutes

  • Cook Time: 25 minutes

Nutritional Information (per serving, approx.)

  • Calories: 120

  • Protein: 4 g

  • Carbohydrates: 20g

  • Fiber: 6 g

  • Fat: 3 g

  • Sodium: varies by broth

Health Benefits

  • Supports digestion and gut health

  • Rich in antioxidants and vitamins A, C, and K

  • Anti-inflammatory and immune-boosting

  • Helps with hydration and detox support

  • Light, comforting, and easy on the stomach

 Q & A

Q: Can I eat this soup every day?
Absolutely! It’s balanced, light, and nutrient-dense.

Q: Can I freeze it?
Yes—store in airtight containers for up to 3 months.

Q: Can I add protein?
Of course! Add lentils, chickpeas, beans, or shredded chicken.

Q: Is this soup good for weight management?
Yes—low calorie, high fiber, and very filling.