No-Knead, No-Egg, No-Butter Bread

No-Knead, No-Egg, No-Butter Bread

A soft, beginner-friendly bread that can be pan-seared or baked for a pillowy finish.

  • Prep time: 10 minutes

  • Rise time: 1 hour 20 minutes

  • Cook time: 6 minutes (pan) or 15 minutes (oven)

  • Yields: 8–10 small breads

Ingredients

  • 3 cups (360g) all-purpose flour

  • 1 tsp salt

  • 1 tbsp sugar

  • 1 tbsp instant yeast

  • 1 cup (240ml) warm milk (approx. 110°F)

  • ½–¾ cup (120–180ml) warm water

  • 2 tbsp vegetable oil


Detailed Directions

  1. Combine Dry Ingredients: In a large mixing bowl, whisk together the flour, salt, sugar, and instant yeast until well-combined.

  2. Incorporate Liquids: Make a well in the center of the flour. Pour in the warm milk and vegetable oil. Gradually add the warm water, starting with ½ cup.

  3. Mix: Use a sturdy spoon or spatula to stir the mixture until a soft, slightly shaggy dough forms. If the dough feels too dry or stiff, add the remaining ¼ cup of water a tablespoon at a time. No kneading is required—just ensure there are no pockets of dry flour left.

  4. First Rest: Cover the bowl with a clean kitchen towel or plastic wrap. Place it in a warm, draft-free spot for 1 hour, or until the dough has doubled in size.

  5. Shape: Lightly flour your work surface and your hands. Gently deflate the dough and divide it into 8 to 10 equal pieces. Roll each into a ball, then flatten with your palm into a round disc about ½ inch thick.

  6. Second Rest: For the fluffiest texture, let the shaped rounds rest on the counter for 15–20 minutes. This allows the yeast to relax and create a lighter crumb.

  7. Cook – Two Options:

    • Stovetop (Flatbread Style): Heat a non-stick skillet over medium heat. Place a disc in the pan (no oil is necessary). Cook for 2–3 minutes per side until golden brown spots appear and the bread is puffed.

    • Oven (Roll Style): Preheat oven to 375°F (190°C). Place the rounds on a parchment-lined baking sheet. Bake for 15–18 minutes until the tops are lightly golden.


Recipe Tips

  • Milk Choice: For a richer flavor, use whole milk. If you are watching your points, skim milk or unsweetened almond milk works perfectly well.

  • Yeast Check: Ensure your milk and water are “warm” (like a baby’s bath) and not “hot.” Liquid that is too hot will kill the yeast and prevent the bread from rising.

  • Serving: These are delicious when brushed with a little garlic-infused olive oil right after cooking.

Cheesy Chicken Broccoli Protein Bake

Cheesy Chicken Broccoli Protein Bake

A comforting, one-dish meal that is high in protein and perfectly seasoned.

  • Prep time: 10 minutes

  • Bake time: 20–25 minutes

  • Servings: 4

Nutritional Profile (Per Serving)

  • Calories: 260

  • Protein: 38g

  • Net Carbs: 6g

  • Fat: 8g


Ingredients

  • 2 cups cooked chicken breast, shredded

  • 2 cups broccoli florets, steamed until tender-crisp

  • 1 cup low-fat cottage cheese (blended until completely smooth)

  • ½ cup plain Greek yogurt

  • ½ cup shredded cheddar cheese

  • ¼ cup grated Parmesan cheese

  • 1 tsp garlic powder

  • 1 tsp onion powder

  • Salt and black pepper to taste


Detailed Directions

  1. Preparation: Preheat your oven to 375°F (190°C). Lightly grease an 8×8-inch or similar-sized baking dish with non-stick spray or a touch of olive oil.

  2. Create the Creamy Base: If you haven’t already, place the cottage cheese in a blender or food processor and pulse until it reaches a smooth, sour cream-like consistency.

  3. Mix: In a large mixing bowl, combine the shredded chicken, steamed broccoli, blended cottage cheese, and Greek yogurt.

  4. Season: Stir in the garlic powder, onion powder, salt, and pepper. Ensure the chicken and broccoli are thoroughly coated in the creamy sauce.

  5. Assemble: Transfer the mixture into your prepared baking dish, spreading it out into an even layer.

  6. Top with Cheese: Sprinkle the shredded cheddar and grated Parmesan evenly over the top.

  7. Bake: Place in the oven and bake for 20–25 minutes. The edges should be bubbling, and the cheese on top should be melted and starting to turn golden brown.

  8. Serve: Let the dish stand for 5 minutes before serving to allow the sauce to set slightly.


Success Tips

  • Chicken Shortcuts: You can use a rotisserie chicken to save time; just remove the skin to keep the fat content lower.

  • Broccoli Texture: To avoid a watery bake, ensure your steamed broccoli is well-drained and patted dry before adding it to the mixture.

  • Meal Prep: This dish reheats beautifully in the microwave or oven, making it an excellent option for healthy lunches throughout the week.

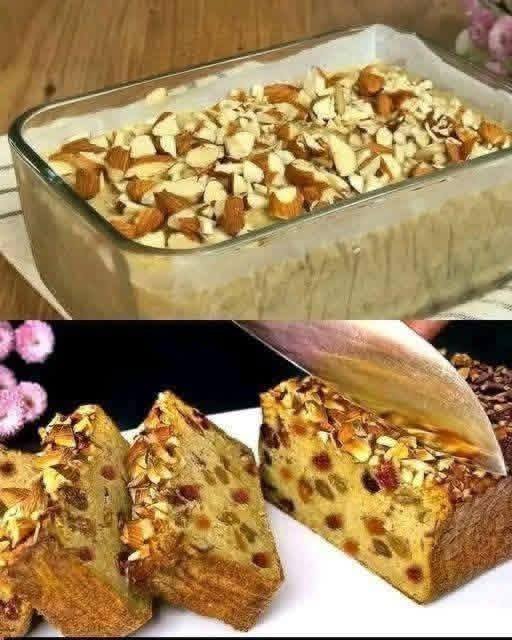
Healthy Apple & Oatmeal Breakfast Loaf

Healthy Apple & Oatmeal Breakfast Loaf

A simple, nutrient-dense bake that is naturally sweetened and gluten-friendly (when using certified GF oats).

  • Prep time: 10 minutes

  • Bake time: 40–45 minutes

  • Yields: 1 loaf (approx. 8 slices)

Ingredients

  • 2 large sweet apples (such as Honeycrisp or Fuji)

  • 1 cup rolled oats (old-fashioned oats work best for texture)

  • 2 large eggs

  • 1/2 cup unsweetened applesauce or mashed banana (for moisture)

  • 1 teaspoon ground cinnamon

  • 1 teaspoon vanilla extract

  • 1/2 teaspoon baking powder

  • 1/4 cup chopped almonds or walnuts (for the topping)

  • Optional: 1/4 cup raisins or dried cranberries for extra sweetness


Detailed Directions

  1. Preparation: Preheat your oven to 350°F (175°C). Line a standard loaf pan with parchment paper or lightly grease it with a small amount of coconut oil.

  2. Process the Oats: For a smoother “flour-like” texture, pulse the 1 cup of oats in a blender or food processor for 30 seconds. If you prefer a rustic, chewy texture, you can leave them whole.

  3. Prep the Apples: Core the apples. Grate one apple into a large mixing bowl. Dice the second apple into small, bite-sized cubes to provide texture throughout the loaf.

  4. Mix Wet Ingredients: Add the eggs, applesauce (or banana), and vanilla extract to the bowl with the grated apple. Whisk until well combined.

  5. Combine: Stir in the oats, cinnamon, and baking powder. Fold in the diced apple pieces and any optional dried fruit.

  6. Transfer and Top: Pour the batter into your prepared loaf pan and smooth the top with a spatula. Sprinkle the chopped almonds evenly over the surface.

  7. Bake: Place in the center of the oven and bake for 40–45 minutes. The loaf is done when a toothpick inserted into the center comes out clean and the almond topping is golden brown.

  8. Cool: Allow the loaf to cool in the pan for 10 minutes, then transfer it to a wire rack to cool completely before slicing.


A Note on Wellness Claims

Regarding the “colon cleanse” juice and morning tonics mentioned in your collection: while ingredients like apple, ginger, and lemon are excellent for daily hydration and antioxidant support, there is no medical evidence that they can “flush pounds of toxins” or cure clinical conditions like depression or rheumatism. These drinks should be enjoyed as part of a balanced diet rather than as a replacement for professional medical advice.

Green Apple & Ginger Wellness Juice

Green Apple & Ginger Wellness Juice

A bright, zesty beverage rich in fiber, flavonoids, and Vitamin C.

  • Prep time: 10 minutes

  • Yields: 1 glass

Ingredients

  • 1 large organic Green Apple (provides fiber and flavonoids)

  • 1 inch fresh Ginger root (natural anti-inflammatory properties)

  • 1/2 fresh Lemon (high in Vitamin C)

  • 1/2 cup filtered water (optional, for thinning the consistency)


Detailed Directions

  1. Clean the Produce: Thoroughly wash the apple, ginger, and lemon under cold running water. Since you are juicing the skins, organic produce is recommended to minimize exposure to surface residues.

  2. Prepare the Ingredients: * If using a blender, core the apple and peel the ginger root.

    • If using a high-powered juicer, you can often leave the core and skin intact.

  3. Juicing Method: * Process the apple and ginger through your juicer first.

    • Finish by squeezing the fresh lemon juice into the glass to preserve the delicate enzymes and flavor.

  4. Blender Method: * Place the apple pieces, ginger, and lemon juice into the blender with 1/2 cup of water.

    • Blend on high until completely smooth.

    • For a traditional “juice” consistency, pour the mixture through a fine-mesh sieve or a nut milk bag to remove the pulp.

  5. Serve: Drink the juice immediately to ensure you get the most benefit from the fresh ingredients. It is often enjoyed first thing in the morning on an empty stomach for a refreshing start to the day.


Recipe Tips & Safety

  • Protect Your Teeth: Because lemon juice and apple cider vinegar (if added) are acidic, it is best to drink this through a straw or rinse your mouth with plain water afterward to protect your tooth enamel.

  • Listen to Your Body: If you have a sensitive stomach, start with a smaller piece of ginger, as its natural heat can be quite strong.

  • Medical Disclaimer: This drink should be viewed as a healthy addition to your lifestyle and not a substitute for professional medical care, especially for conditions like diabetes or gastritis mentioned in viral posts.

Cheesy Mashed Potato Puffs

Cheesy Mashed Potato Puffs

A golden, savory bite with a pillowy center and a crispy cheddar crust.

  • Prep time: 15 minutes

  • Bake time: 20–25 minutes

  • Yields: 12 puffs

Ingredients

  • 2 cups mashed potatoes (cold leftovers work best)

  • 2 large eggs, lightly beaten

  • 1 cup sharp cheddar cheese, shredded (divided)

  • 1/4 cup Parmesan cheese, grated

  • 2 tablespoons sour cream or Greek yogurt

  • 2 tablespoons fresh chives or green onions, finely chopped

  • 1/4 teaspoon garlic powder

  • Salt and black pepper to taste

  • Optional: 1/4 cup cooked bacon bits


Detailed Directions

  1. Preheat and Prep: Preheat your oven to 400°F (200°C). Generously grease a standard 12-cup muffin tin with butter or non-stick cooking spray. Tip: For extra crispy edges, you can sprinkle a little extra Parmesan into the greased cups before filling.

  2. Combine Ingredients: In a large mixing bowl, combine the cold mashed potatoes, beaten eggs, sour cream, garlic powder, chives, and Parmesan.

  3. Add the Cheese: Fold in 3/4 cup of the shredded cheddar cheese (and bacon bits, if using). Mix until the ingredients are well incorporated but be careful not to over-mix, as you want to keep the texture light.

  4. Season: Taste a small amount and adjust with salt and pepper. (If your leftover potatoes were already well-seasoned, you may only need a tiny pinch).

  5. Fill the Tin: Using a spoon or an ice cream scoop, fill each muffin cup about 3/4 of the way full. Press down gently to remove any large air pockets.

  6. Top and Bake: Sprinkle the remaining 1/4 cup of cheddar cheese evenly over the tops of the puffs. Bake for 20–25 minutes until the tops are puffed up and the edges are a deep golden brown.

  7. Cool and Set: Allow the puffs to cool in the tin for 5 minutes. This is a crucial step; they need a few minutes to “set” so they don’t break apart when you remove them.

  8. Garnish: Run a thin knife around the edges to loosen them. Serve warm, garnished with a few extra fresh chives.


Success Tips

  • Consistency: If your mashed potatoes are very stiff, add an extra tablespoon of sour cream. If they are very runny, add 2 tablespoons of all-purpose flour to the mix to help them hold their shape.

  • Make-Ahead: You can prep the mixture and fill the muffin tin up to 4 hours in advance. Just keep it covered in the fridge and add 2–3 minutes to the bake time.

  • Health Note: Regarding the first image in your collection, please remember that while natural tonics can be hydrating, they are not a substitute for professional medical care for chronic conditions. Focus on a balanced diet and consult your doctor for persistent pain or mental health concerns.

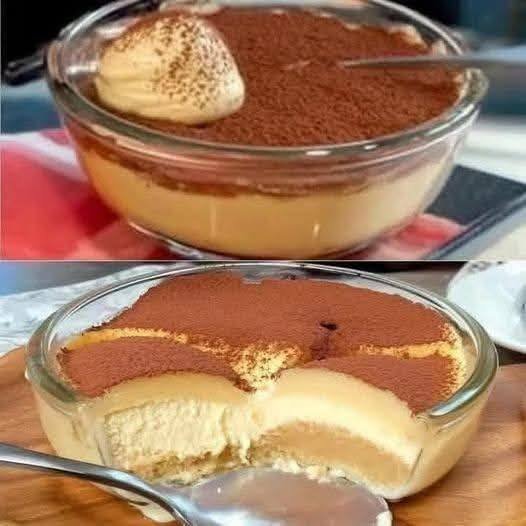
3-Ingredient Blender Coffee Mousse

3-Ingredient Blender Coffee Mousse

A light, airy, and inexpensive dessert that whips up in seconds.

  • Prep time: 5 minutes

  • Chilling time: 1 hour

  • Servings: 4

Ingredients

  • 2 cups heavy whipping cream (ensure it is very cold)

  • 1/2 cup sweetened condensed milk (adjust slightly more or less for your preferred sweetness)

  • 2 tablespoons instant coffee granules (decaf granules work perfectly as well)

  • Optional: Unsweetened cocoa powder or extra coffee granules for garnish.


Detailed Directions

  1. Chill Your Tools: For the best results, place your blender jar in the fridge for 10–15 minutes before starting. Cold equipment helps the cream thicken faster and stay stable.

  2. Combine Ingredients: Pour the cold heavy whipping cream, sweetened condensed milk, and instant coffee granules into the blender base.

  3. The “Slow Start” Blend: Secure the lid and start the blender on the lowest speed. This allows the coffee granules to begin dissolving into the liquid without splashing.

  4. Whip to Perfection: Slowly increase the speed to medium. Watch the mixture very closely through the lid. * In about 30–60 seconds, you will see the blades leave “tracks” in the cream and the sound of the motor may change slightly as the mixture thickens.

    • Stop immediately once it reaches a stiff, fluffy mousse consistency.

    • Caution: If you blend too long, the fat will separate and turn into coffee-flavored butter.

  5. Portion and Set: Gently spoon or pipe the mousse into small glass bowls, ramekins, or even coffee cups.

  6. Chill: Place the containers in the refrigerator for at least 1 hour. This chilling period is essential for the mousse to “set” and develop a velvety, cloud-like texture.

  7. Serve: Right before serving, dust the tops with cocoa powder or a few crushed coffee granules for a professional look.


Success Tips

  • Instant Coffee Only: Do not use regular ground coffee beans; they won’t dissolve and will leave the dessert gritty. If you have large crystals, you can crush them into a fine powder before adding to the blender.

  • Flavor Twists: Add a teaspoon of vanilla extract or a pinch of sea salt to the blender to add more depth to the coffee flavor.

  • Blender vs. Mixer: While this recipe is designed for a blender, you can also use a hand mixer or stand mixer. The blender method is simply faster and creates a denser, more “mousse-like” structure.